My approach to carving...LR4 mostly

This topic could be of interest to a wide variety of our users, but I decided to put it here because I guess it’s mostly a software issue rather than applicable to any specific machine. My plan is to add some additional links to some short videos as well as some screen shots of parts of the process.

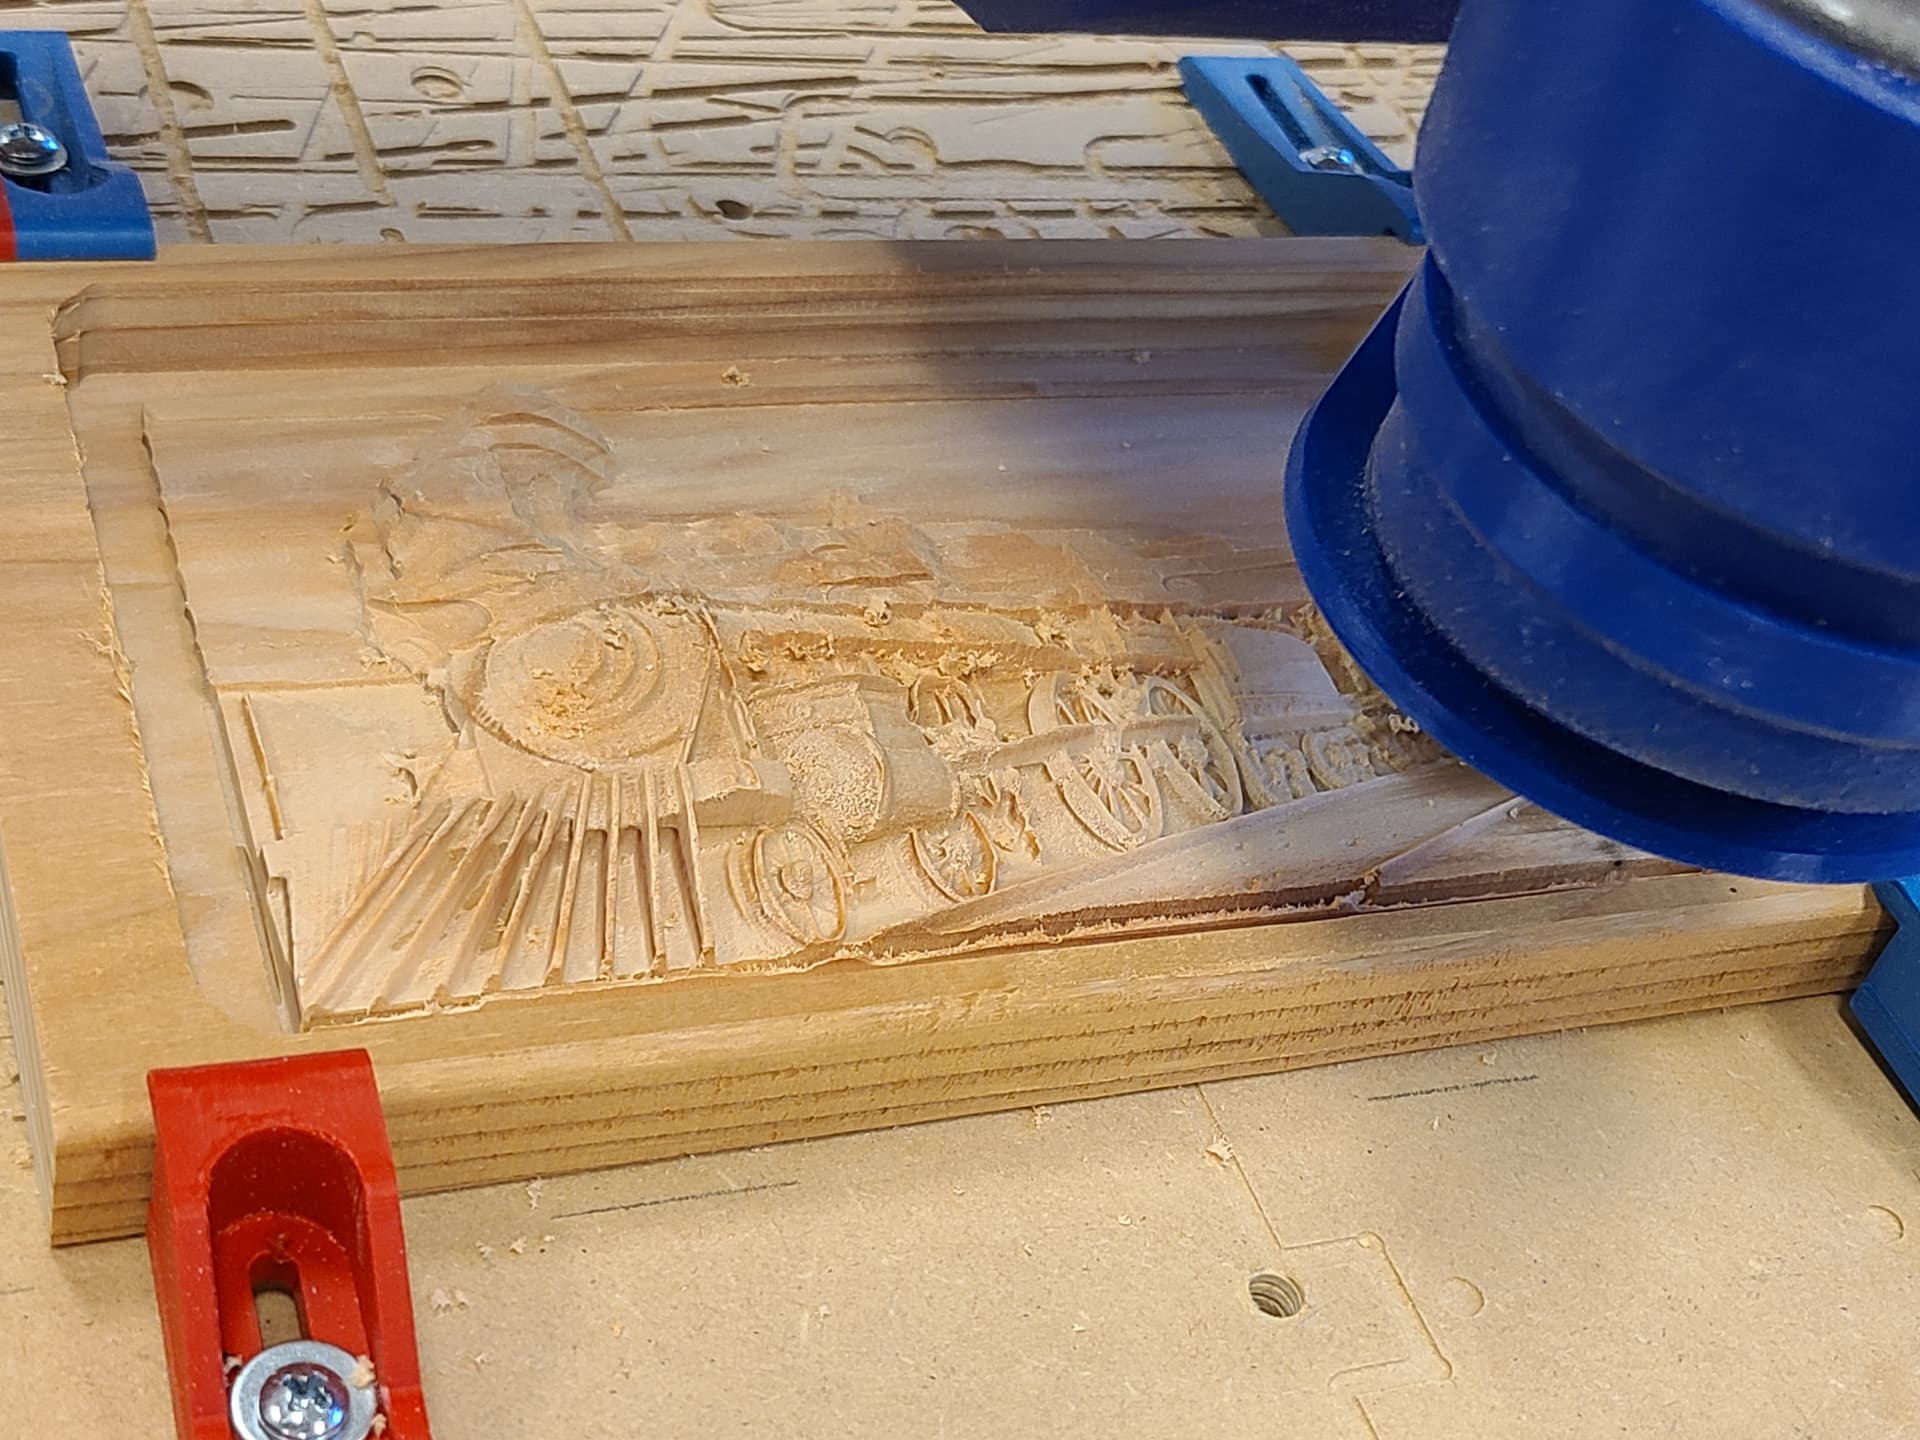
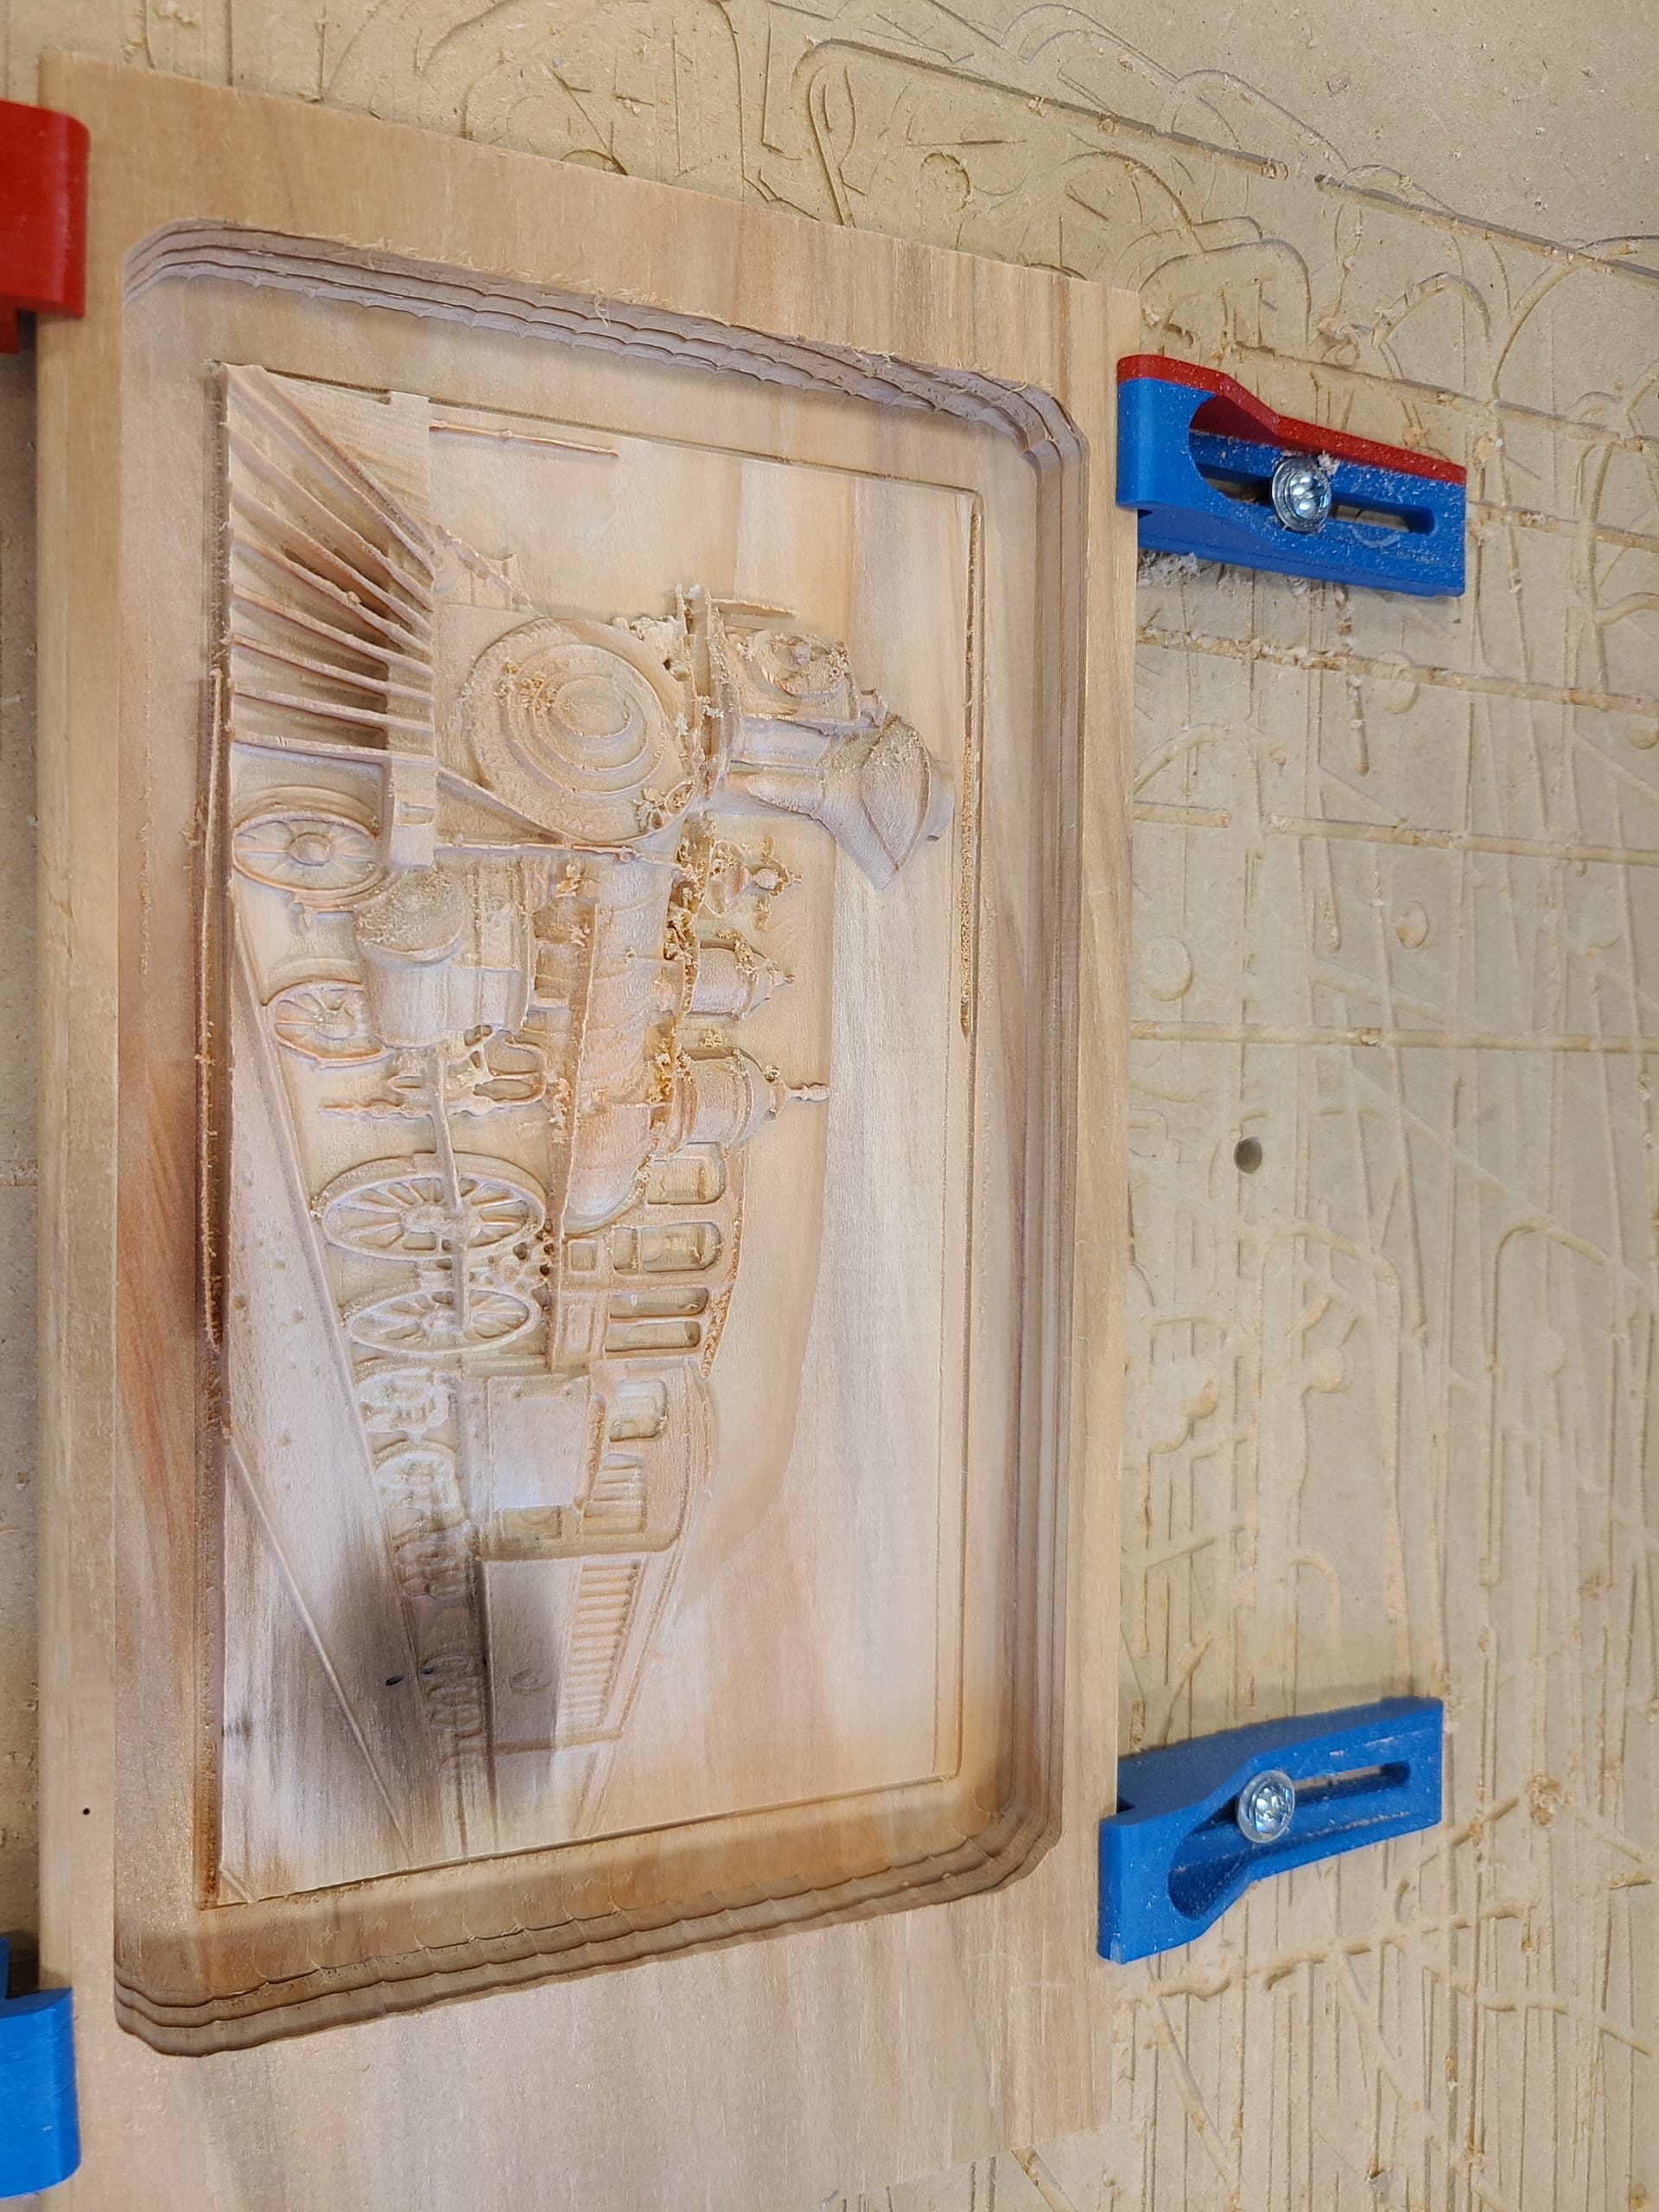
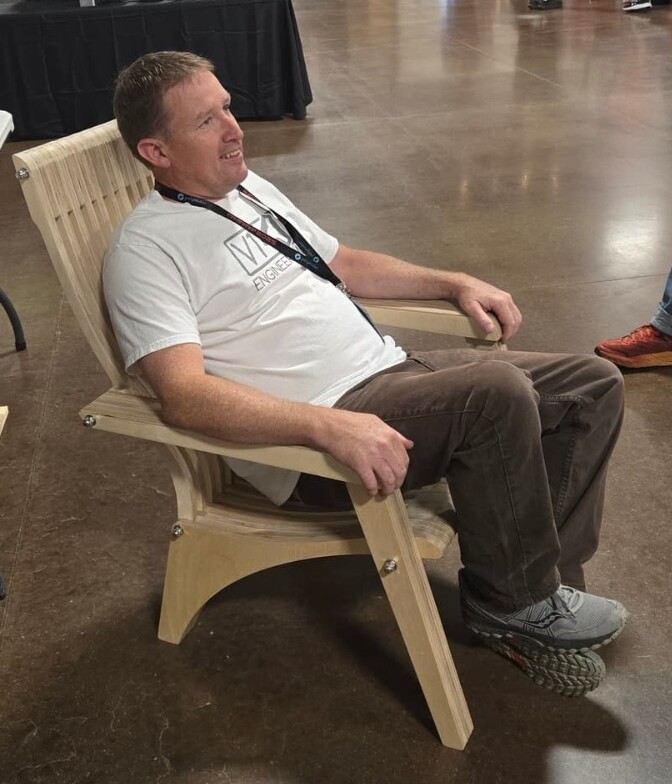
To begin with, some of you are aware that while I’ve used my LR4 to cut the parts for the SImba Chair, a lot of my work on both the LR4 and the MPCNC (Primo) have been bas relief carvings. For many years I’ve been interested in methods for enhancing other woodworking projects such as boxes and tables with things like carving, inlay and marquetry.

Since I’m not too artistic, my efforts at carving have largely been limited to using existing patterns from others to create this type of artwork. Some of it has given excellent results, and have been posted here in various places.

However, for a while now, I’ve been exploring the use of AI to assist in the creation of patterns that are useful for bas relief artwork that can be fabricated on the MPCNC class of machines.

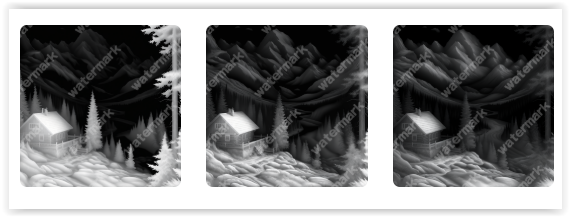
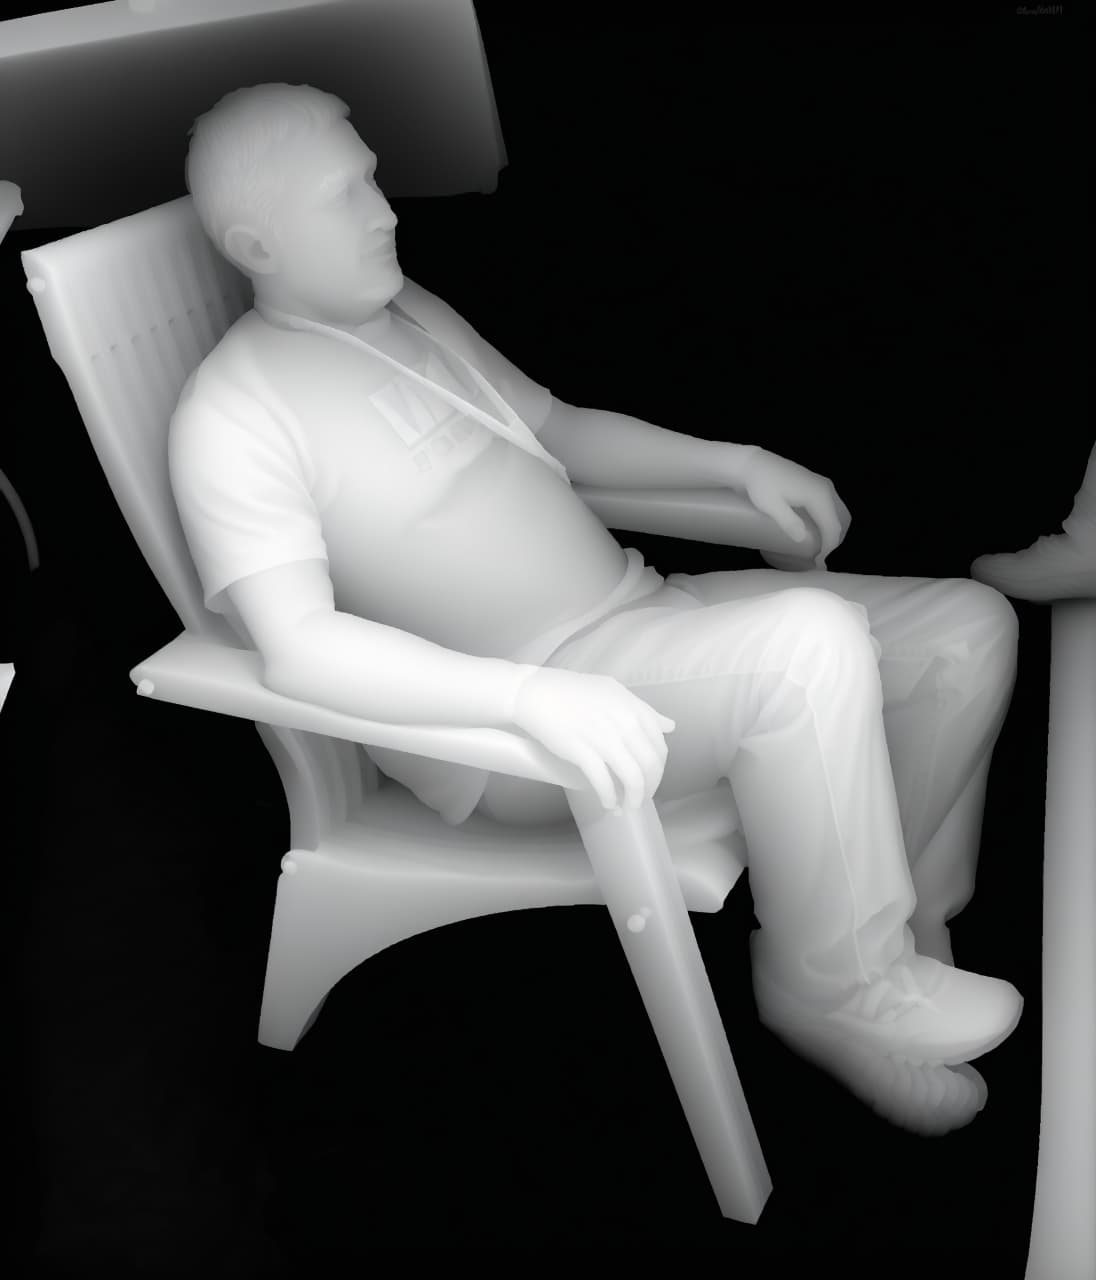
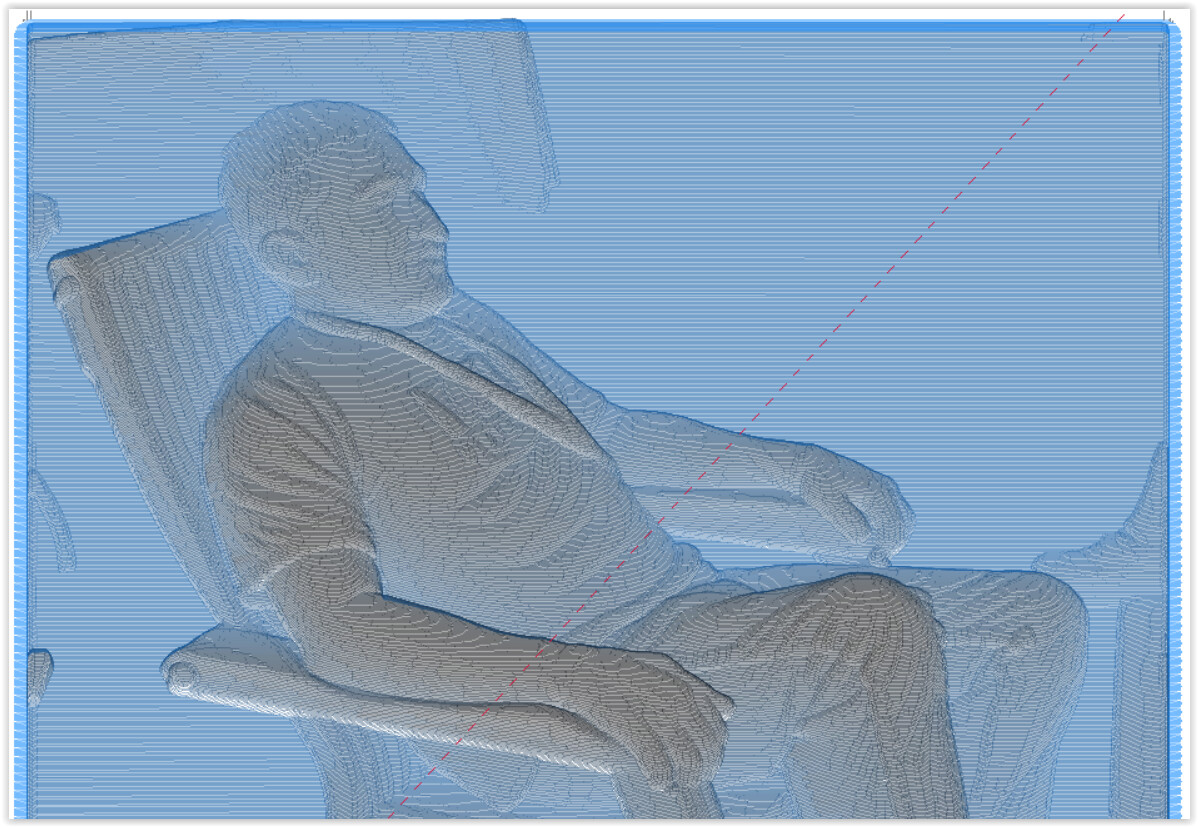
For this type of carving, the essential challenge is to create a grey scale depth map that the CAM software can use to generate the tool paths and g-code. I happen to use ESTLCAM, but I believe all of the available software tools have similar capabilities.

However, this process is more difficult than it would appear since in a typical image such as a photo, there is ZERO depth information. Even if the image is converted to greyscale, the depth info is missing. (Note that the common lithophane actually is not a depth image. The grey level is based entirely on the material thickness.)

Unlike a lithophane, a typical depth map has a relationship between grey level and image depth, with lighter tones being closer and darker being farther away. (Consider a white dog with a black nose looking at the camera. The nose is closest to the viewer so in a depth map it should be the lightest tone while in a lithophane, it’s the darkest. )

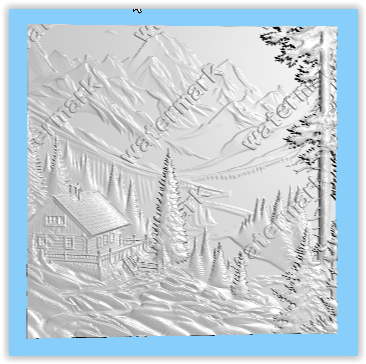
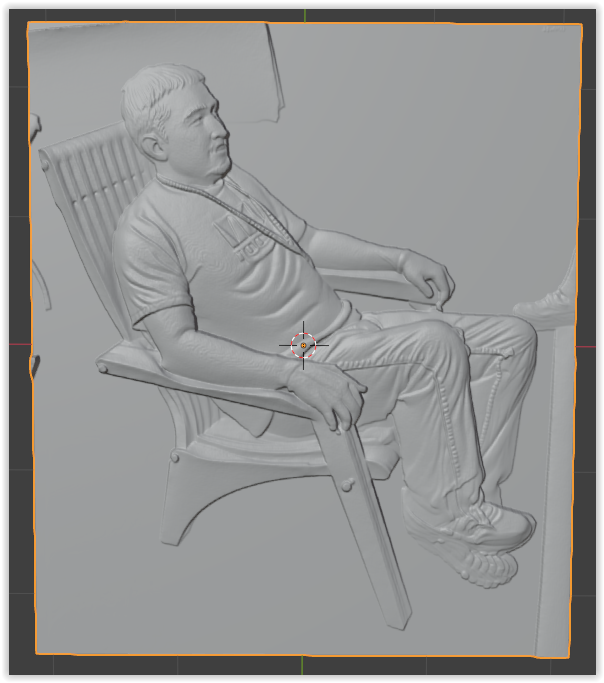
Until recently, there weren’t any very good tools to help generate a grey scale depth map. In reality, it required an extensive amount of editing using tools such as Blender or Photoshop to manually create a depth map suitable for CNC carving.

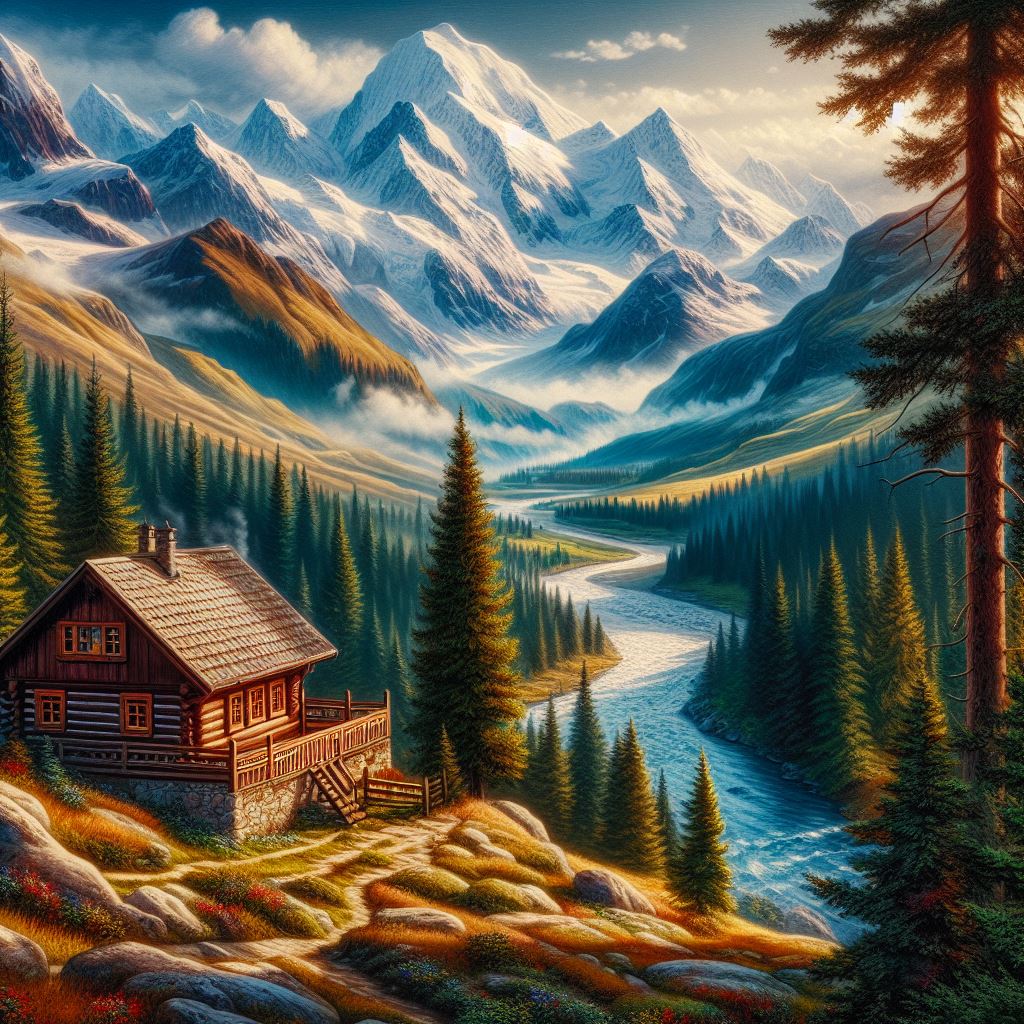
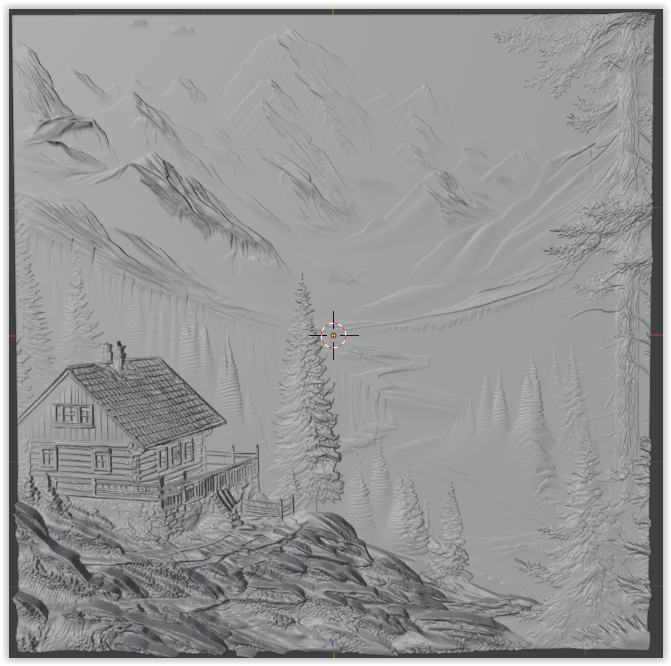
However, in the last year or so, there have been some interesting developments that promise to put the creation of original patterns for CNC carving at our fingertips. My approach to using these tools is based on using AI to assist with the creation of a depth map followed by using Blender to optimize the image for carving.

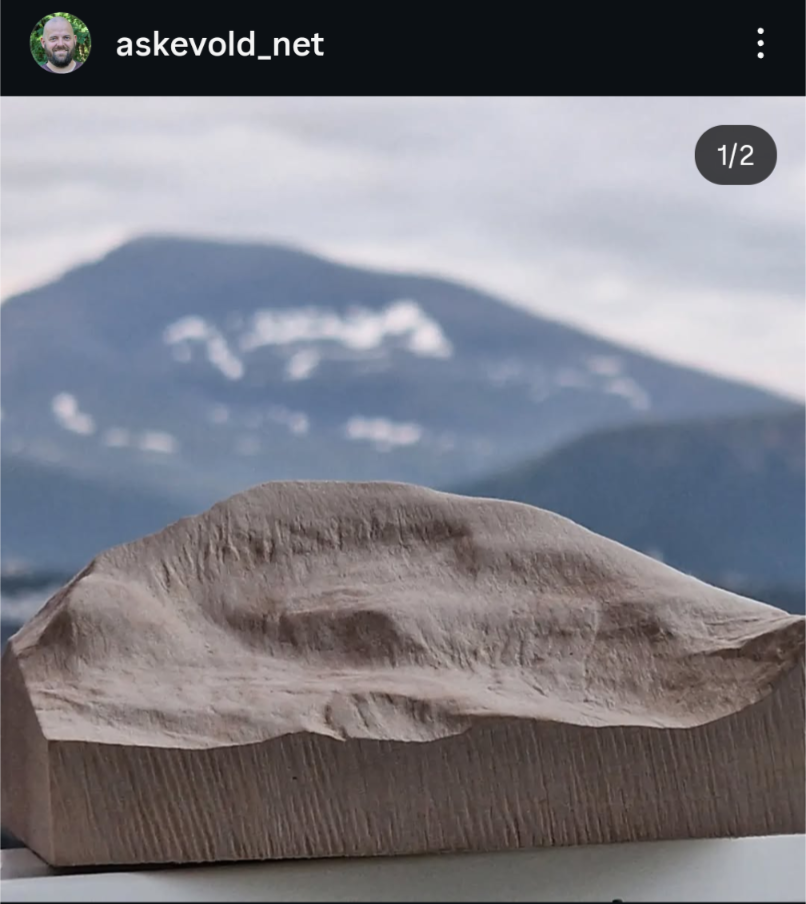
I’ll be creating several sections of this discussion to avoid excessive length, but, as a bit of a “teaser”, here’s an original creation that was carved on the LR4 of a cabin in the mountains.

17 Likes

You have my attention!

I’ve been playing a lot with how to vectorize photos for carving and penplotting. There’s a lot to say about this, I just want to say that it’s refreshing to see how you can use a photo and actually get depth from it. I’ll be paying close attention! :smiley:

5 Likes

I e been playing with engraving with the laser using depth maps created by https://depth-r.com/ and Sculptok depth map generator with mixed results so I’m really keen to learn a better way!

I honestly hadn’t thought about trying it in wood, which seems silly now.

1 Like

There are several steps that are needed to create a suitable STL file that can be imported into the CAM software such as ESTLCAM.

In summary, these steps are:

  1. Obtain or create a photograph of the desired subject. For convenience. I’ve been using mostly ChatGPT or other AI to do this. However, I’ve also been able to create carvable designs using photos.
  2. Convert the image to a grey scale depth map. This is one of the exciting recent developments. There are some choices, but one of the most interesting ones is “Sculptok.com" You can literally upload any photo and it will create a grey scale depth map at little to no cost. In fact, you get 100 credits just for signing up. The software will create 3 greyscale depth maps with various levels of detail (with watermarks) for only 2 credits. For 16 credits, you can then convert to a watermark-free STL file suitable for various purposes. You can purchase more credits or you can join at various levels and get an annual allocation. Or, you can “check-in” each day and get 10 credits at no cost.
  3. I have played around with Sculptok to a considerable extent. While it’s a very powerful tool, it seems to me to be better focused on creating STLs suitable for laser engraving or lithophanes. However, as it turns out, there is a plug in for Blender that is free (as is Blender). Once you get it set up, you can create the depth map from Sculptok for only 10 credits and import it into Blender where you can easily manipulate the image resolution, depth, etc. and export as an STL that is suitable for direct import into ESTLCAM.
  4. The final step is to use your CAM tools to create the tool paths and gcode and send that to the LR4.

It should be pointed out that the Carveco products have recently been significantly enhanced with a new AI-based tool that can be used specifically for creating 2.5D carvings. I’ve briefly evaluated this tool and it looks promising. However, in my case, Carveco includes far more functionality than I need since I use Onshape for most of my CAD work. And of course, the Carveco products do have subscription fees, which for many folks may be satisfactory.

A couple of examples of the files will be added shortly.

In the meantime, here’s an image in the midst of being carved on the LR4. This is the finish pass, and the top half of the roughing pass is visible.

And, finally the completed carving. Note that there are some AI artifacts which I plan to discuss. The dark spot is in the wood. This is a piece of redwoo scrap.

5 Likes

Yes. I’ve looked at depth-R and it’s a pretty good product. As you will see below, right now, Sculptok in combination with Blender is looking very promising for a cost-effective solution.

Crazy idea: What about doing drone based photogrammetry/3d landscape scanning and using the 3d models for a carve? With a little Blender voodoo of course.

Edit: Or these stereo-based photo techniques?

Definitely possible to create 2.5D images of the earth. I’ve not used them myself, but there are tools out there that will use the USGS topo info to create regional STLs for printing or engraving. Using drones on a much finer scale is going to have to be your task… :grinning_face:

Don’t ask me about topography to STL! That rabbit hole took many many GBs and days of my life :smiley: Norway has very high res laser scan off the whole country, openly available. I actually bought a resin printer, to print high res models to use for casting.

2 Likes

Printing with res resin printers, with high resolution and tilted model actually gives models totally free of lines. Quite impressive, coming from a hobbyist tool.

I can imagine! I’ve never done resin printing, but the process has inherent advantages for sure.

I have played around a little bit with the topo carving, but the tradeoffs between resolution and mapped area doesn’t lend itself to my own tooling. (Only so much time is available…)

10*10cm. Carve took 4 hours…

10 Likes

I am just a beginner here but I used Sculptok addon on blender this summer, worked well. Needed some touch up afterwards but it could also be fixed in blender

It is also possible to just continue with blender with the Fabex cnc (ex blendercam) therefore no need to switch programs. Here is a video which at least I found useful;

I had hours of fun looking at my carving slowly coming to existence!

4 Likes

Very interesting. This is a good example of the role that experience plays in getting a project like this done. In my case, I’m MUCH more familiar with Estlcam and how to use it for the actual CAM part of the program. My familiarity with Blender is quite limited so it would require learning a completely new platform.

Also, the ability to use a simple graphics file (e.g. jpg, prn, etc.) in the Sculptok plugin for Blender solves my major problem which is how to get an STL that is useful for the CAM software, in my case, Estlcam.

1 Like

Now, for a little more detail about this process.
The key assumption is that one starts with an image file and wishes to create an STL file which is suitable for carving with the LR4/MPCNC. The critical step is the conversion from the image file to a new image file that incorporates depth information using a grey scale. Typically, darker tones are further away from the viewer while lighter tones are nearer.

Note that this is usually NOT just a simple greyscale conversion since the starting image normally does not contain any depth information. While it is possible to adjust a greyscale image so that the tones relate to depth, doing this manually can be a very tedious and time consuming process.

Consider this photograph, created using AI (probably ChatGPT)

If it simply converted to greyscale, the problem becomes immediately apparent:

The lighter mountains are actually the furthest away and the dark foreground is actually the closest. So simply using this image as a depth map would give a completely wrong result.

This is where the latest developments using AI make this problem more approachable. I’m not going to address all the various options, but two such possible tools are Depth-R and SculptOK.

Both of these tools use AI to help generate the depth information, and there are many parameters that can be adjusted to obtain optimal results.

Considering Depth-R first, here is the results of processing our mountain cabin photo:

Now, the darkest regions are those that are further away from the viewer, while the cabin and other foreground components are lighter, which is consistent with the actual depth information. (I am not skilled enough to adjust the greyscale within Depth R). An STL file can also be directly downloaded from Depth-R, which can then be fed into EstlCam or other CAM tool.

The second software tool, also using AI, is Sculptok. With this software, the image is just directly uploaded and can then be process using an AI engine to determine the depth information. Although this software must be rented, one can obtain “tokens” to run this analysis in various ways at little or no cost. The first step of the process is to “Draw” the image, which costs 2 tokens and generates three greyscale depth maps with varying degrees of detail and include watermarks which can be eliminated with tokens:

Again, the depth information now accurately reflects the original photo.

From here, an STL can be generated and downloaded with subsequent fabrication being done using whatever CAM platform you are using:

Above: 3D image created by SculptOK ready to download as STL or other 3D format.

Although this method will often give suitable results, I personally prefer to use the Sculptok plugin for Blender. Here’s a link to a YouTube that explains how to do this:

In actual use, the procedure that is outlined in the video works quite well, even if one is unfamiliar with Blender. In this example, the original color photo was uploaded from Blender to Sculptok and the 3 grey scale images were then downloaded back to Blender, where the result can be manipulated by doing such things as changing the mesh size and smoothing some of the noise.

Below is the Blender file ready for download as STL:

An STL file can then be exported which can be used for the CAM. Here is a tool path for the finishing cut generated by Estlcam:

The result is similar to the one that was posted in the first message of this discussion. However, in that case, I didn’t use as much detail as in this version, but, they are both produced from the same image.

6 Likes

And now, just for fun, here’s another example.

Original photo:

Ryan at the RMRRF sitting in the Simba chair.

Sculptok image in Blender. Note that this is NOT the grey scale depth map. Rather, it is the actual 3D image that Blender has generated using the GSDM that was imported from SculptOK. The actual GSDM looks much different. Here is one of the three that was generated:

Partial finishing toolpath for the fearless leader at RMRRF

I haven’t carved this yet, but it will happen soon… :grin:

10 Likes

This is really cool. And I think this shows the most progress of any such process to date. It is really challenging to make any 3D image projected into 2D, with 3D texture. It isn’t pure science. Part of it is deciding what to make flat and what to exaggerate.

But I do have to point out there are some lighting artifacts still present in the greyscale images. The pine tree right in the middle shows a brighter side on the right side of the pine tree and the mountains in the background all have lighter sides on the right. In Ryan’s picture, the table cloth in the background has a dark intensity, and the ground behind it is lighter. His lanyard is also cut through his chest as it is much darker than his shirt. The landyard should disappear because it is about the same depth as his shirt.

In the end, these artifacts are minor and the focal points in the image are just about right. The cabin and Ryan look pretty good. But I wanted to point them out in case you can improve the process further. I hope you’ll forgive my criticism! I want it to be constructive.

2 Likes

Oh my, Jeff! No need to apologize at all! I started this discussion because over the last couple of years I’ve come to realize this is a REALLY HARD problem to automate. While the tools are getting better and better, there are still artifacts or down right errors that creep in.

In addition, I find it difficult to mentally anticipate exactly what the greyscale will result in when machined. The tablecloth is an interesting case, of course. Ideally, I would have just removed the background but didn’t take the time for this image.

There are also some AI artifacts on the locomotive in the other post if you look close. I think that part of the problem occurs when the depth of field is large. The AI seems to have problems with this, but I don’t yet know the limits.

I couldn’t show absolutely every possibility in this procedure, of course, but I’m becoming convinced that the AI capability is beginning to really impact this capability.

There are also commercial tools like the Carveco products that have just added AI enhancement to their 2.5D carving capability. Of course those tools are not free, but they may evolve faster for this specific application. I have a trial license but have not spent much time with it yet since I don’t need all the extra CAD capability of the Carveco platforms.

Thanks for your thoughts, Jeff.

3 Likes

Whew, I’m glad. I have spent a lot of time on transforms and looking at engineering displays with 2D representations of 3d data, so I am not sure how much other people notice this stuff.

It is closer than ever.

I wonder if coloring it on the matlab “jet” or flir red-blue heat map would help show the depth more.

Interesting for sure.

I saw an another new technique yesterday in my YouTube feed - they took 2 images, the one you want to make into a depth map and an already done depth map of something else, loaded them into an image editing LLM and used the prompt ‘generate a depth map for image 1 in the style of image 2’. I haven’t seen that done before.

Jeff, Your comments got me to thinking about this some more, and, I realized that my quick “Ryan” example was misleading at best. In fact, the grey scale image is NOT the Grey scale depth map, but rather the 3D rendering that Blender generated from the input from SculptOK. I have edited the previous posting and brought in the greyscale depth map. There you can see the lanyard nearly blending into Ryan’s shirt.

So many pieces to sort out.

1 Like