That looks really good.
I spent some time last spring 3d printing some holders for the tooling for my mill. I need to design/print some more.
That looks really good.
I spent some time last spring 3d printing some holders for the tooling for my mill. I need to design/print some more.
I found another flexible filament seat:
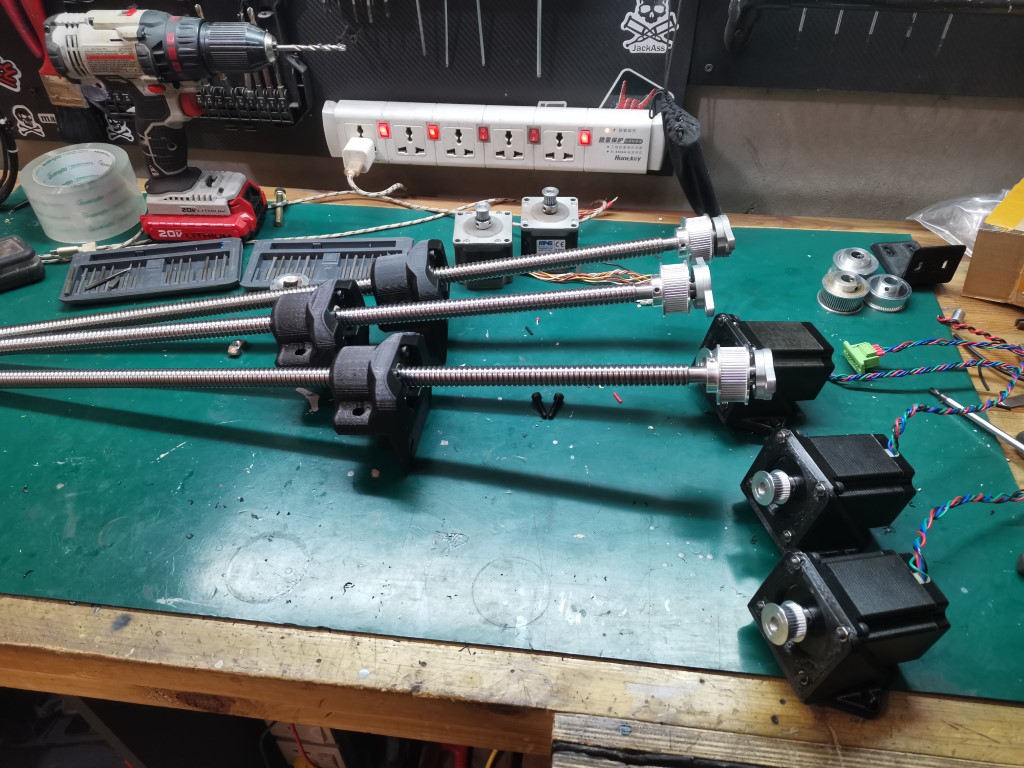
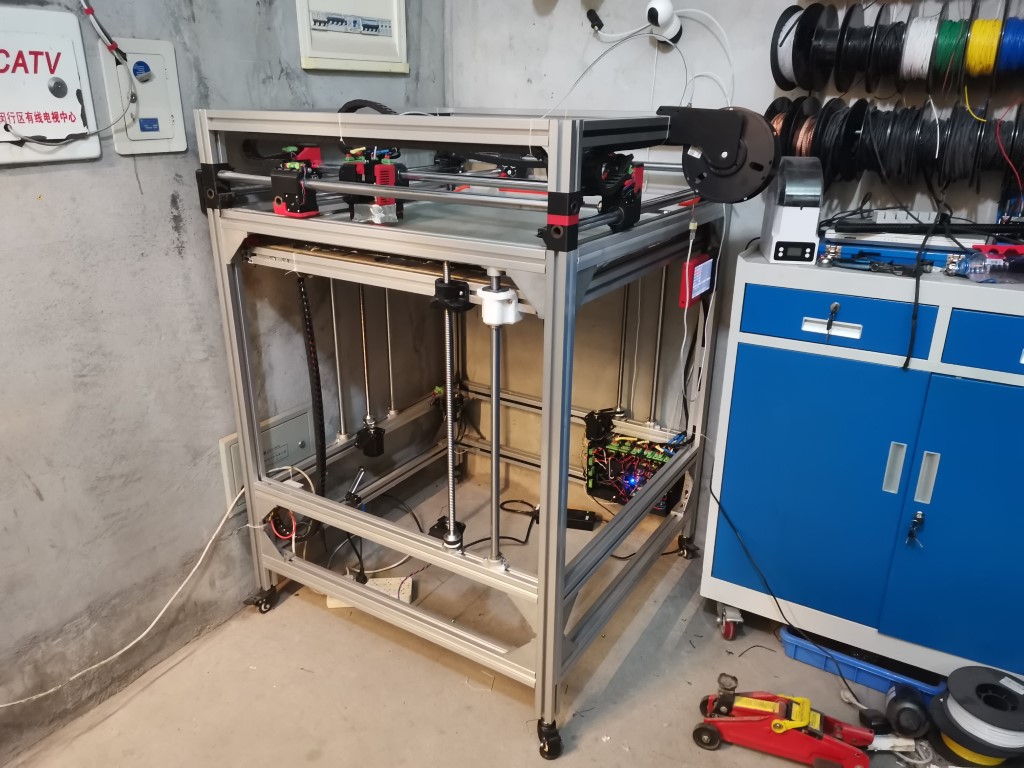
Some new mods on the BOx this weekend: I finally went to triple Z axis!
I had to get 3 new motors, I already had two but I was unable to find the exact same model for the 3rd one. Could have gone for a different one but I wanted to have 3 identical motors to rule out any potential issue. I also changed the belt reduction from 20/60 to 30/60, those motors are bigger and there are now 3 of them instead of two, so going for lower reduction allowed me to increase the bed speed.
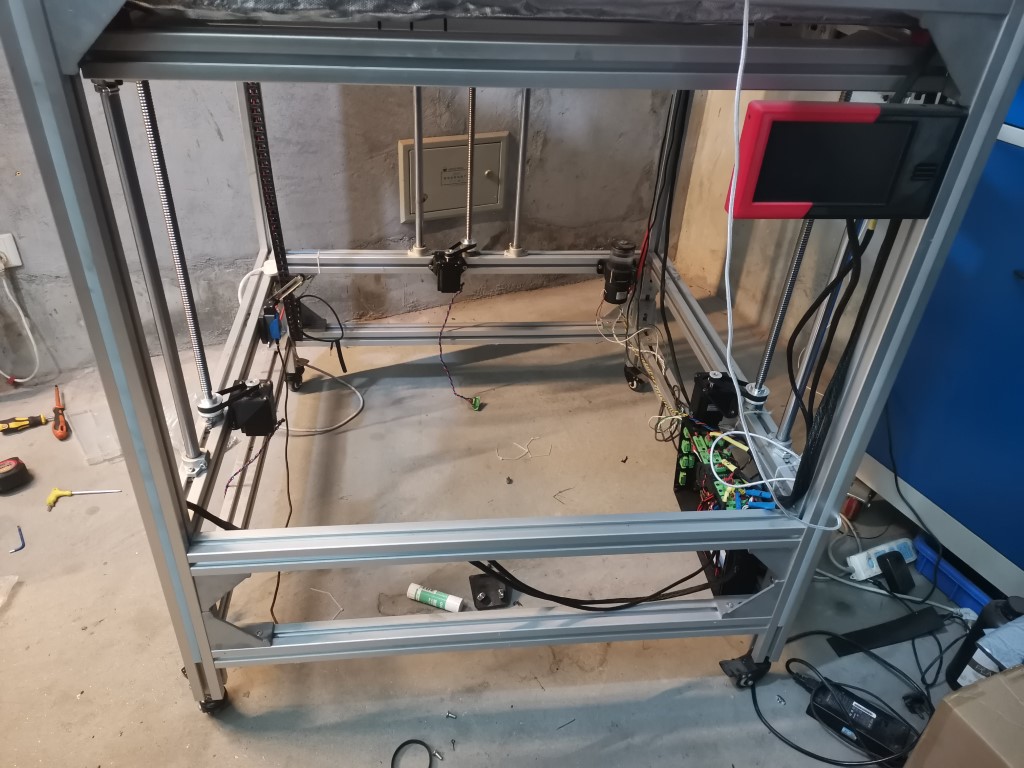
I had to move the existing ball screws towards the front to equalize the load, then I removed the rear linear guides to install them around the 3rd axis. I took extra care to get very precise spacing so that everything moves freely. It took a while, wasn’t very complicated but it’s a bit tedious to do.
Then I had to modify all my wiring and edit the firmware. It took a while and I had to redo everything a few times because for some reason the Duet board refused to have external drivers running at 4x microstepping. After changing my strategy and going for external drivers to control the extruder instead of Z it started working just fine.
Finally I had to set up the true leveling feature, which worked after a few failed attempts due to some wrong configuration.
Well so far everything works fine, I made two successful prints.
The goal of this mod was to solve one of the very few issues I had with the printer: sometimes after powering off the motors, the bed was slowly falling down on one side, due to the low friction resistance of the ball screws. In which case, sometimes the printer was unable to level the bed, because there was too much angle to correct. Also, the bed was inconsistently tilting from front to back from one print to another and I had to manually adjust it with a spirit level from time to time. This was the only annoying issue I still had sometimes with the machine. It wasn’t often, maybe one time out of ten prints, but it was still quite annoying when it happened.
Now I just hit print and it does its thing, I don’t have to care at all about the initial bed start position.
Also, it is now much more powerful, so the bed rises and lowers a lot faster. It wasn’t slow to begin with, but now raising the bed takes only around 15 seconds, it is actually faster than most regular printers I’ve seen, despite covering a much longer travel distance.
One other nice point is that now that the bed is truly leveled, the mesh leveling has to apply a lot less corrections during the print, making the printer a bit more silent. Most of the noise of this printer actually came from the Z axis, because it is running at 4x microstepping.
I’ll see on the long run but so far it seems like a really nice mod to increase the printer’s reliability and ease of use. Should have done it sooner.
Do you know how much angle you can correct for? I went with 10 degrees, there is room for more but it just makes the mesh leveling take to long from the excessive retracts. I just took a shot in the dark seems like plenty though. On the repeat I have it home to max and that corrects it to a few degrees first anyway.
I don’t know it in terms of degrees, only in terms of differences in mm. In my case I’ve set it up to a maximum deviation of 10mm so that would be something like 1 or 2 degree i guess. I don’t see any case where I would need more than that, it is already plenty.
10 degree sounds really excessive, in my opinion if your bed is tilted by that much it probably means that you have something seriously wrong with the mechanics that needs to be fixed.
In my case 10mm was a good compromize between correction range and time for the mesh leveling routine. But my bed is really huge so I would put a much lower height correction if I were to do that on a smaller printer, maybe something like 3-5mm. Realistically there is very little chance that your bed will be off by more than this amount.
Also, I’m running the true leveling 3 times in a row before every print, it doesn’t make a difference if the bed is close to level, but it does make a huge difference when the bed is far off to begin with. On my worst cases attempts two levelings weren’t enough to completely correct the misalignments.
Doesn’t take long anyway, since my bed is now quicker it takes me the same time as before to probe 3 times and then have the 25 point bilinear mesh leveling before every print.
I was keeping the options open non-planar printing… could be fun.
Is non planar print maximum angle linked somehow with the calibration maximum correction?
I never tried this, but I would assume they were independant, you could want to correct the bed tilt up to some small degree while wanting to get more freedom after the calibration has been successful. Technically it seems possible at least. Only case I see where it could be a problem is that if a print stops in the middle because of a power outage or emergency switch button press, then the bed could be out of the calibration correction limit.
But I really don’t know if the firmware allows for it, I never really digged into that subject. Sounds interesting though!
I don’t think marlin has it built-in at all. I just wanted to keep my options open hardware wise. I have curved bed contact points and bolt slots that limit it…besides the nozzle.
I figured you must have had tried it by now and could school me on it.
Now that I added new drivers it turned out I needed more cooling. Otherwise the extruder driver was getting too hot and stopped extruding due to thermal runaway.
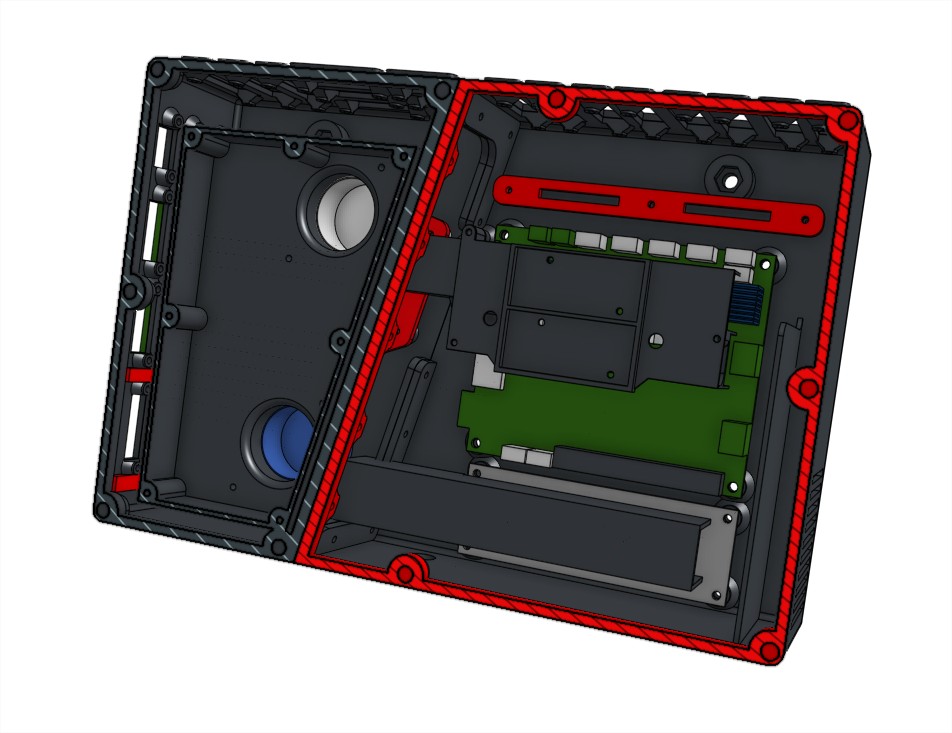
So I designed a new cooling channel system in the electronics box, this time I have two 24V blower fans pushing air on all the drivers, and a big empty space before the fans to put some air filters and noise dampers.
This is how it looks like :
It was a good opportunity to finally tidy up all the wiring, now it looks really nice and clean:
The fans are pretty quiet at idle and can be quite noisy once going full speed, but they do move A LOT of air. I tried a few prints and now the extruder doesnt’ throttle down anymore, everything works as it should.
Pretty satisfied with how this enclosure turned out so far!
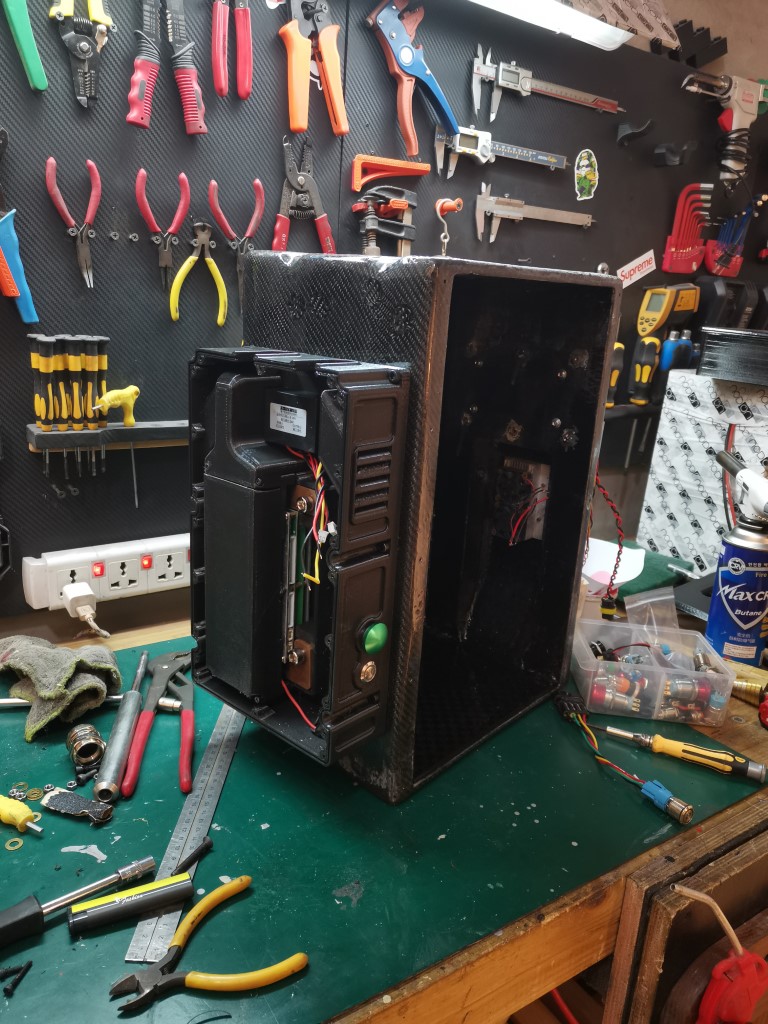
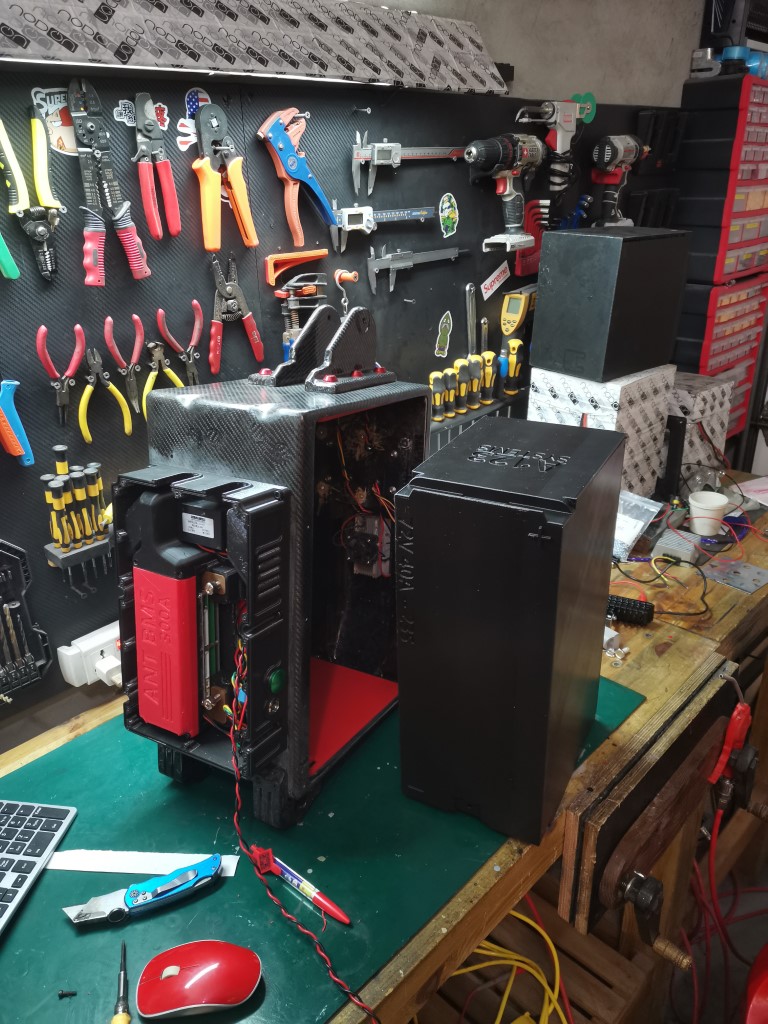
A nice little project using the BOx: working on my new battery power system.
I’ve printed this enclosure to house the battery monitoring system:
Super happy with the result, I’m so glad I have this tool in my shop, it’s super useful
The enclosure took around 13 hours to print, plus two more hours for the internal parts (air ducts, brackets and stuff).
Your designs are always neat to see!
One idea for hotend weight reduction could be to use tubing from an air compressor (I’m going to bet you have a big compressor in your shop). That would get rid of the fans/wiring, possibly no shrouds too if you focused the air blast with aluminum tubes on the hotend. The tradeoff being having a tube following around the head, and extra noise any time your compressor needs to kick on. I’m envisioning the tube to be in similar fashion to a bowden, so I wouldn’t think it would add much drag at all. For flow control, you could have a stationary modulating valve sitting off to the side.
You could also shrink the center of mass on the hotend by using an “aero style” bondtech extruder/heatsink. There would be no weight savings or addition since you remove the V6 heatsink but add a metal extruder. It just makes your whole hotend shorter.
Can’t wait to see the new printer in action!
Hi Brendan, thanks for the kind words and the suggestions!
I actually tried the idea of using a compressor instead of fans, I did that on my first MPCNC. It worked ok, but the noise from both the compressor and the air outlets was totally unbearable, I couldn’t stand it. Plus the compressor was working too hard and getting hot.
I think it could be a viable option in a large shop with a big air compressor/tank, with an enclosed printer for noise reduction.
The extruder you’re suggesting seems nice, I’ll keep that in mind, but I had some bad experiences with this kind of setup for several reasons:
-In my experiences (I have a similar extruder in the Qidi X-Plus I use at my workplace), the stepper motor was getting hot, and combined with the hot end itself I was getting high temperatures inside the extrusion system, which ended up in filament melting and clogs. But this one is entirely made of aluminum so hopefully it is easier to cool, mine was made of plastic. But that still kinda worries me, I hate heat creep, I had lots of bad experiences with this (reason why I built the watercooled print heads on my other printers)
-I like to use the volcano heating block, it allows for higher flows and a better heat uniformity. I’m not entirely sure I still could use a volcano heat block with this extruder.
Having the hotend shorter is indeed something I would like to achieve, that would help lower the lever effects, which should help getting higher accelerations without losing too much print quality. So I’ll keep thinking aout this suggestion and maybe use it if it turns out there’s a problem with my current desing 
Thanks again for the ideas, much appreciated.
Sounds good, I was wondering if you had tried the air compressor before. I use a similar setup for air assist for laser, and my tiny compressor doesn’t much like it but works well enough for those short jobs.
I think the volcano would still work, that extruder accepts standard V6 hotends. In terms of heat creep, I’m using a similar extruder; a titan aero knockoff with a volcano with no issues. Even the super volcano says it will work with an aero. The new hemera looks cool too; claiming it will do PEEK at 6600mm^3/min at 450C with the super volcano. Downside to that one being it uses a custom stepper and comes in heavier than your current setup.
If you’re still looking to shave weight, bondtech has a new extruder that’s almost half the weight as the BMG you’re using. They also have their own hotends that rival the volcano at (I believe) lower weight.
Thanks a lot for the suggestions mate!
I’m astonished by the prices I see on these pages… 290 usd for a mosquito ? 95 british pounds for a super volcano? I could get an entire 3D printer for those prices! Do you guys actually pay that kind of money?
Sounds totally insane to me. Good thing I’m in China, that kind of stuff costs almost nothing here.
We kinda do… we also don’t have the cool electric Motorcycles … 
US is just as bad as Europe
Yeah people pay retail prices for 1st party stuff if they’re really into it. I source what I can from Aliexpress, which tends to have the popular stuff. But even those prices are going up, sometimes not much more than Amazon with next day shipping, and I don’t know of anywhere better that will deliver to Canada!
And you do not have to wait weeks for shipping!
Extruders are one of those things I can’t believe have not fallen in price. They actually seem to be getting more expensive. I don’t need to print PEEK, I just want a lightweight, reliable extruder system.
I spent $100 or so twice for hemera extruders and I would do it again.
Most other parts are the cheapest I can find. I can justify the price, even though I am not selling anything. But I totally respect the work to build a machine from cheaper (more raw) parts.
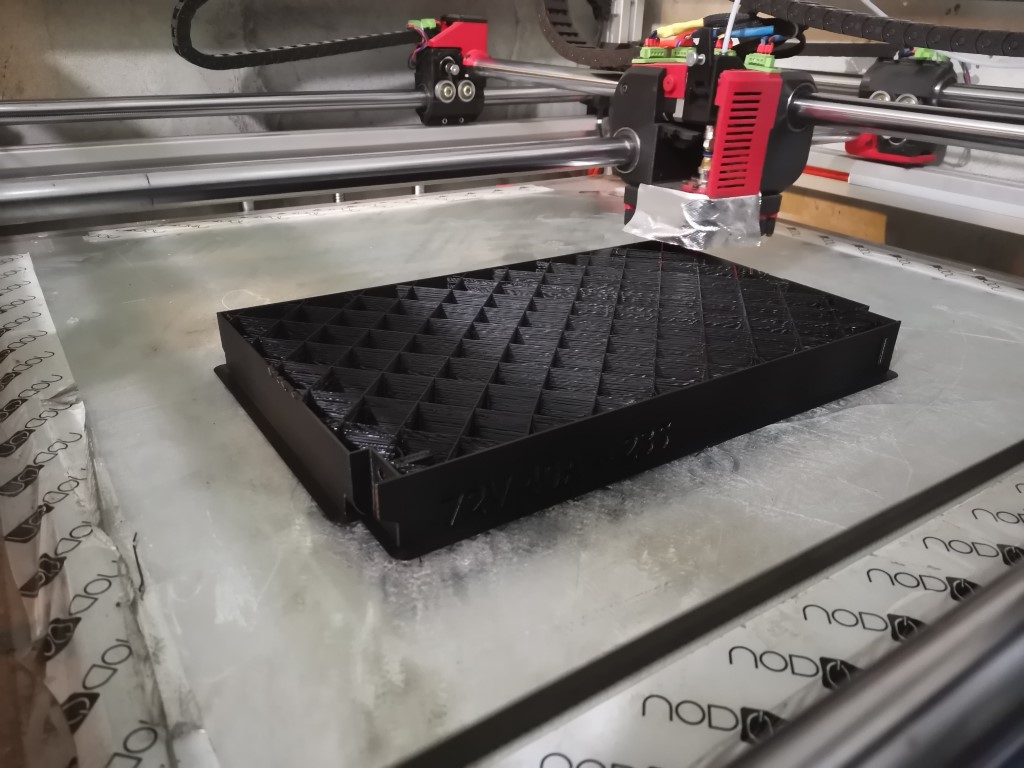
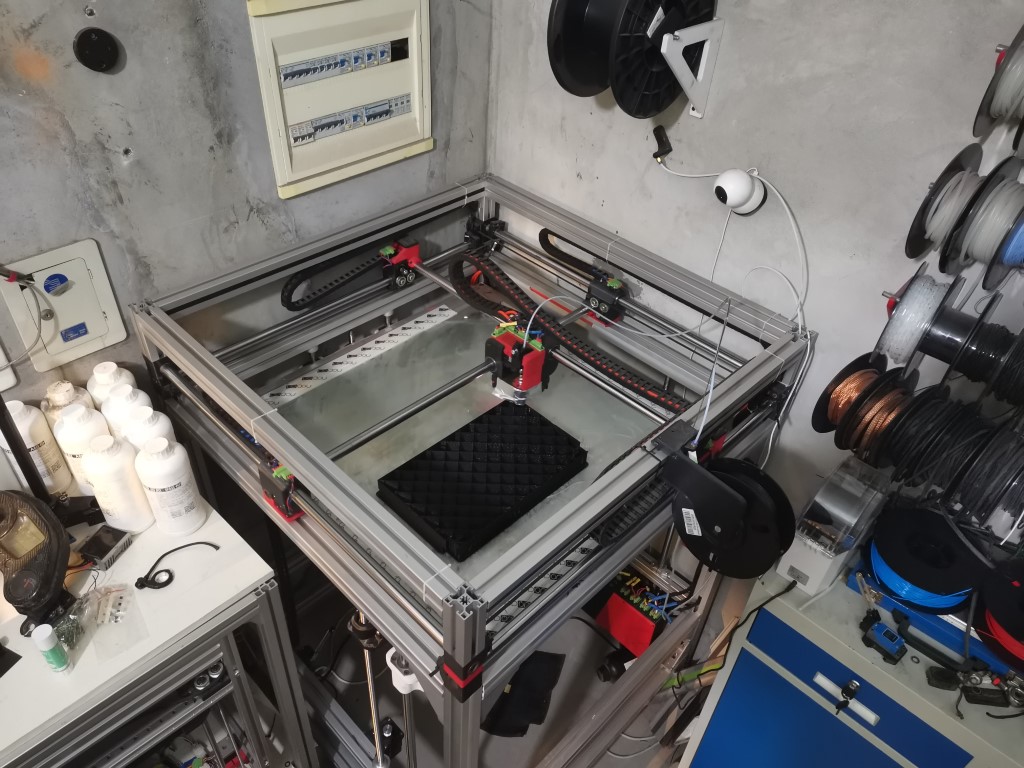
Made another big print yesterday: a mockup battery for my motorbike.
I’m currently working on my black electric sports motorcycle, basically rebuilding it entirely from scratch to improve its quality and make it very reliable, while tripling its power (should be around 50KW after I’m done hopefully, it will be a fun ride that’s for sure).
Anyway, I was working on my battery box and I need to make everything fit perfectly since there’s very little spare space. The real battery weights 25 kilos so that’s very unconvenient to have it go in and out dozens of times.
So I had two choices:
-Take a subscription to a gym club
-Make it lighter
I didn’t hesitate for one second. First opened a beer, then decided gym wasn’t for me.
Anyway, I designed the battery according to the real one, just added a couple mm here and there to make sure it would be a tad easier to fit the real battery than the mockup. Designed all the attaching points for the wiring and stuff, this way I can also build my power wiring accordingly.
Printed it with my 0.8mm nozzle, two perimeters and relatively low infill, just enough so it can print the top layers.
It took about 17 hours to complete and just about a kilo of plastic. I think it’s the fastest spool I’ve eaten yet, and it could have been much faster if I had been more aggressive on the perimeters speeds, I could probably gain an hour or two.
After cooling down it popped off the bed right away. That thing is fairly solid. Sure it’s only two perimeters, but each perimeter being 0.8mm it’s still a 1.6mm thick shell. So yeah, pretty tough.
Now I can keep working on my battery box, it should make things much easier.