And we all know Ryan needs an excuse to build one himself.
2 Likes
Had my first failed print in a while yesterday… I was attempting to print a giant Moai head (around 500mm height).
The root cause of the issue was a brittle filament who broke inside the bowden tube, so it wasn’t a mechanical failure from the machine, but the machine kept printing so I ended up with only 10% of the print (I was lucky, it failed after around an hour so I didn’t waste too much filament).
It’s the second time I’m having this issue and it starts to bother me. I do have a filament sensor, but since it is located close to the spool and quite far from the nozzle, it cannot monitor a filament breakage happening somewhere in the bowden tube.
So I’ll have to find a solution to that. I’d like to keep the sensor near the spool for cable management reasons, but I might have to move it up to the print head. Actually, the more I think about it, the more it seems to me that I have no valid reason to keep the sensor here, and that the “cable management reason” is actually just a cover because I’m lazy to build another long and complicated wire up to the print head. 
I also heard about some sensors capable of monitoring the filament movement precisely, but I can’t see to find good information on these. Has anyone here experienced with those filament monitoring devices?
Oh yeah absolutely, the BOx wouldn’t have existed without the MPCNC, that was my first CNC machine and my first cartesian printer, also I reused the tubes from my first MPCNC and it uses a similar motion principle. So yeah, the inspiration clearly came from it, I doubt I would have designed it this way if I hadn’t try it before.
As to should it be featured on V1’s lineup, well I’d sure like it but I’d totally understand if it wasn’t since I’m sure there are lots of good reasons for it not too. Actually I feel a bit awkward talking about that since I feel like it might give Ryan some kind of pressure to reply or comment, which he might not really want to (and I’d totally understand)
2 Likes
Well if people want to build it I think the best start is a BOM and some instructions for any hard parts. From there gotta see how many build one. It takes kind of a lot of work to go from a one off build to some sort of kit. If there are a few builds popping up though we could go from there.
3 Likes
I hope I haven’t over stepped any boundaries. Even if it never goes beyond the BOM it would be awesome to see it here!
2 Likes
Not at all, I would love to have a giant printer. Like others have pointed out though, shipping and options make things like this hard. Shipping that bed alone gives me the heebie jeebies. International mail takes a beating.
2 Likes
So don’t ship the bed, you don’t ship tubing for the mpcnc and no one seems to mind. I would stick with shipping the smaller parts and making good documentation on how to source the large ones (exact specs, good suppliers for different regions, etc).
1 Like
I’m still working on the firmware documentation (Heffe just published a new page in the Docs) and have not finished the Primo instructions yet (wiring). Like I said if the ball gets rolling, people start building them I can offer some of my resources. See if we can meet in the middle somewhere. I am sure that would include at least one round of designing for manufacture (distribution).
I almost built a different printer but the BOM is a nightmare of screw sizes and types. It really put me off. I do like it enough to maybe take a stab at the CAD myself to lower the unique part count. There is almost no cases in a design with printed parts you would need M3x10mm, 12mm, 14mm, button head and cap head specifically.
The LowRider is the same way if it does not get a total redesign soon it will at least get a DFM update to lower the unique part count. It has a lower profit margin than the Primo but takes a lot longer to kit up even in bulk, probably twice as long.
4 Likes
Sorry didn’t mean to say it should jump ahead in line or even be under the v1 name (though I think it would be awsome and I would love to build one). I only ment to give a possible work around to the shipping concerns that you and Dui mentioned.
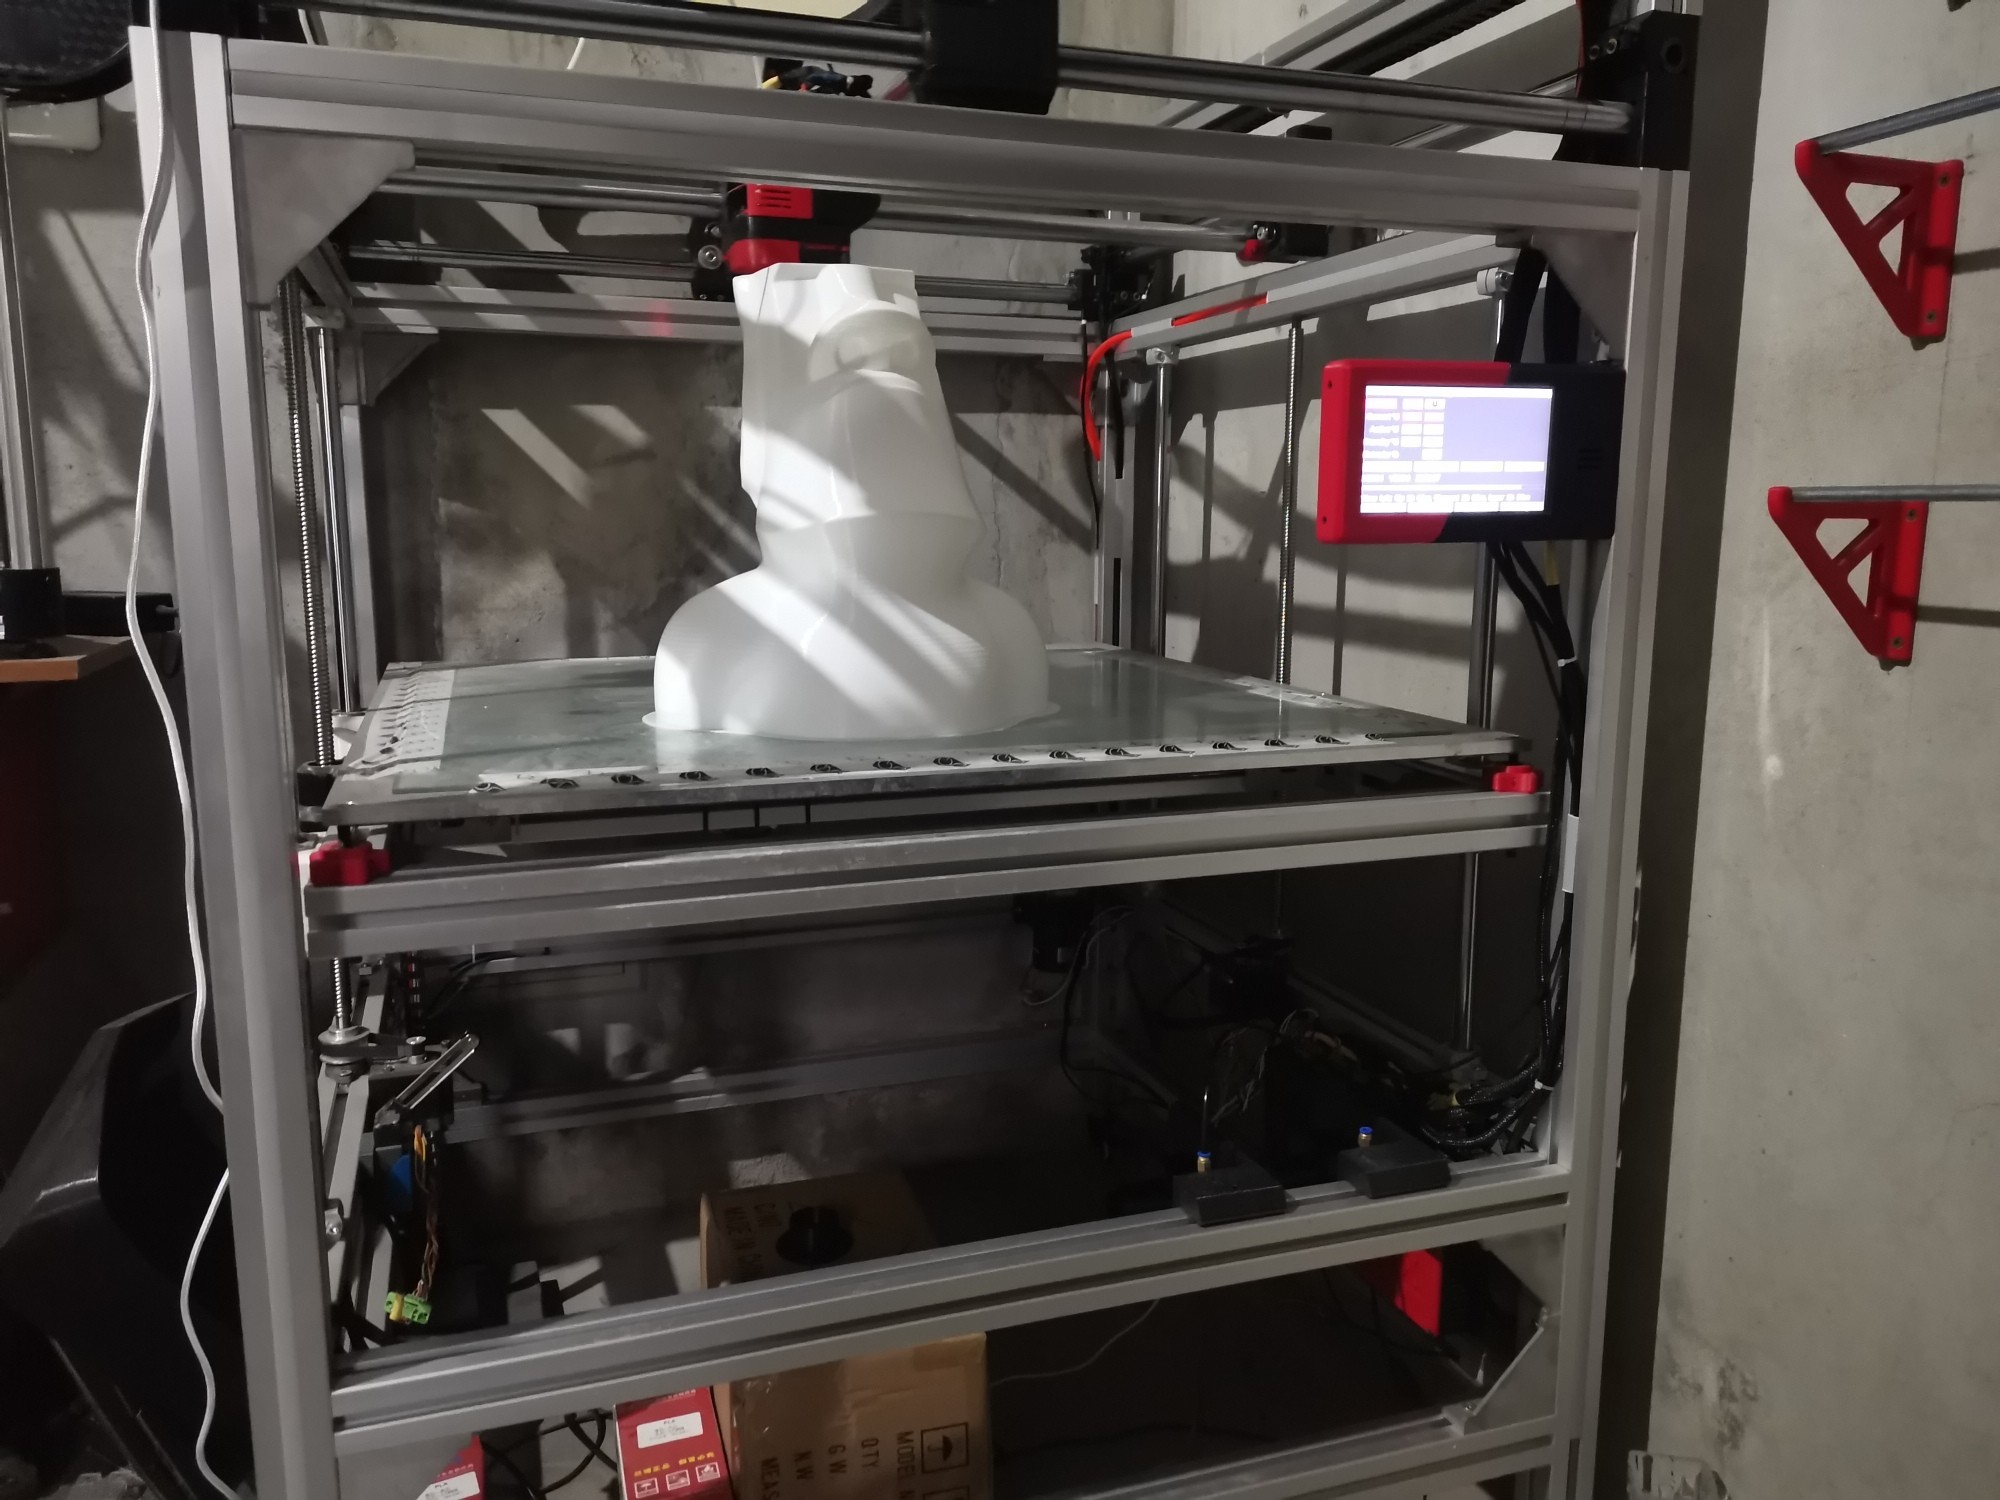
So I tried again the Moai head, and this time it was a success.
I still used the same brittle filament, but this time I fed it differently to the print head.
Since my spool system can be attached anywhere on the printer, I just clipped the spool holder to the top. And since my filament sensor is still using the USB wire system, I just had to switch to a longer cable! So all in all, it took me 3 minutes to solve the problem, thanks USB!
The print measures just under 450mm height, it is completely hollow and made of just two perimeters. retrospectively this was a mistake, I should have gone for at least 3 perimeters since I did not work very well on some overhangs (the top of the head and the top of the nose). Or maybe start with printing the ouside perimeter before he inside one. Well, live and learn.
It took around 10 hours, I slowed he printer down a bit to make sure here would be no issue during he night.
When I woke up this morning it looked like this:
And about 50 minutes later, it was completed!

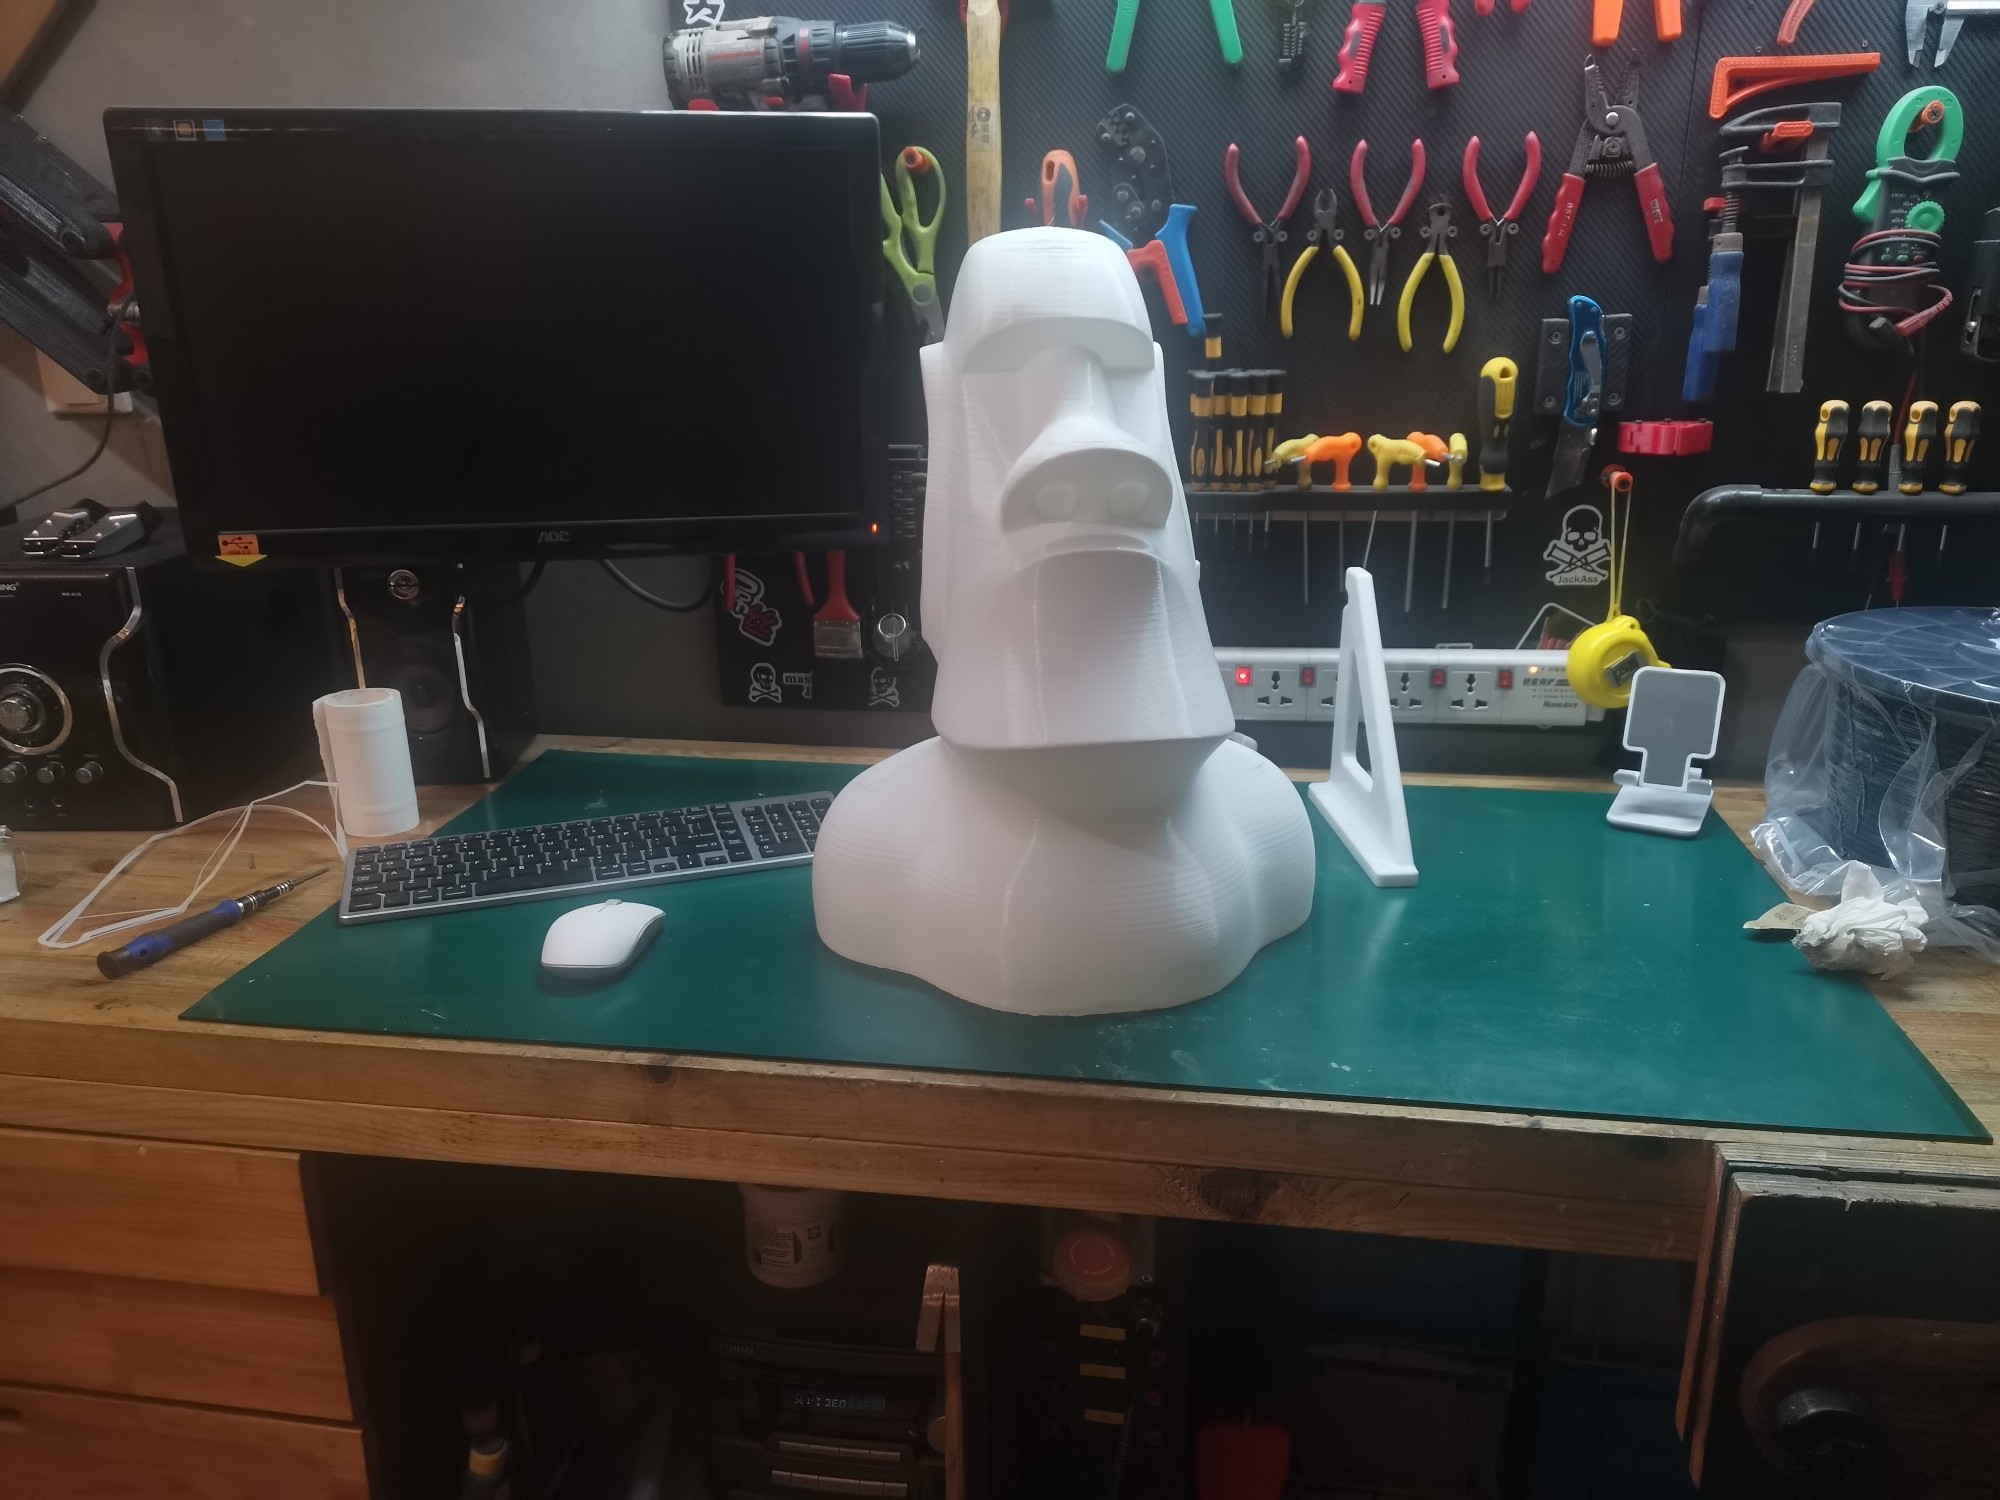
I think it looks great from a one or two meters distance, I consider it as a nice success.
Only thing I’m not entirely satisfied of is a bit of Z layer wobbling. Nothing really problematic but it could be improved. I think it might come from the ball screws, one of them is actually not very straight and tends to wobble around (can’t be too picky for the price I got them I guess)
10 Likes
A little bondo and a quick spray with a textured spray paint and that’d look just like a stone monument.
Nicely done.
2 Likes
плавный и более жеский
Routing the bowden tube through the drag chain definitely adds an opportunity for stress fracturing of the brittle filaments.
1 Like
Apparently, it is the year of the (B)Ox? I hope you are seeing lots of people celebrating your new printer 
2 Likes
One thing to think about with moving your filaments sensor up to your head and still using a boden tube is that you run into the problem of not being able to eject the remnant of your filament as it is too short to be ejected back through the length of the tube. That is why the Prusa mini has the filament sensor right next to the spool and on the very end of the tube. You lose a couple feet of filament but it’s better than having to remove the tube from the extruder to get at the filament.
1 Like
Well, yes and no.
In my case, yes, but that’s because my design makes the drag chains turn at a very tight radius. That would probably be something I’d change slightly if I had to redesign it, make it maybe 5cm taller to reduce the constraints on the chains.
But also no, because if you have proper turn radius, then it doesn’t really exceed the turn radius of the plastic spool itself, plus the bowden movement is very previsible and it is always protected, it cannot be tangled in anything like it sometimes can if allowed to run freely outside.
So I still believe it is really the best approach, it’s just that my design wasn’t accounting for that in the first place, I haven’t thought of running the filament through the drag chain at first, the idea came at the end of the build. Which means that if I added those 5 cm in hight, I’d had to rebuild most of my wiring again… which is something I was kind of tired to do as you can surely imagine XD
There’s also the fact that my bowden tube is a bit too small in diameter which, combined to the really long lenght (about 3 meters), creates lots of drag. So the motor pulls really hard on the wire, which doesn’t help. I need to make a few modifications later to solve this issue.
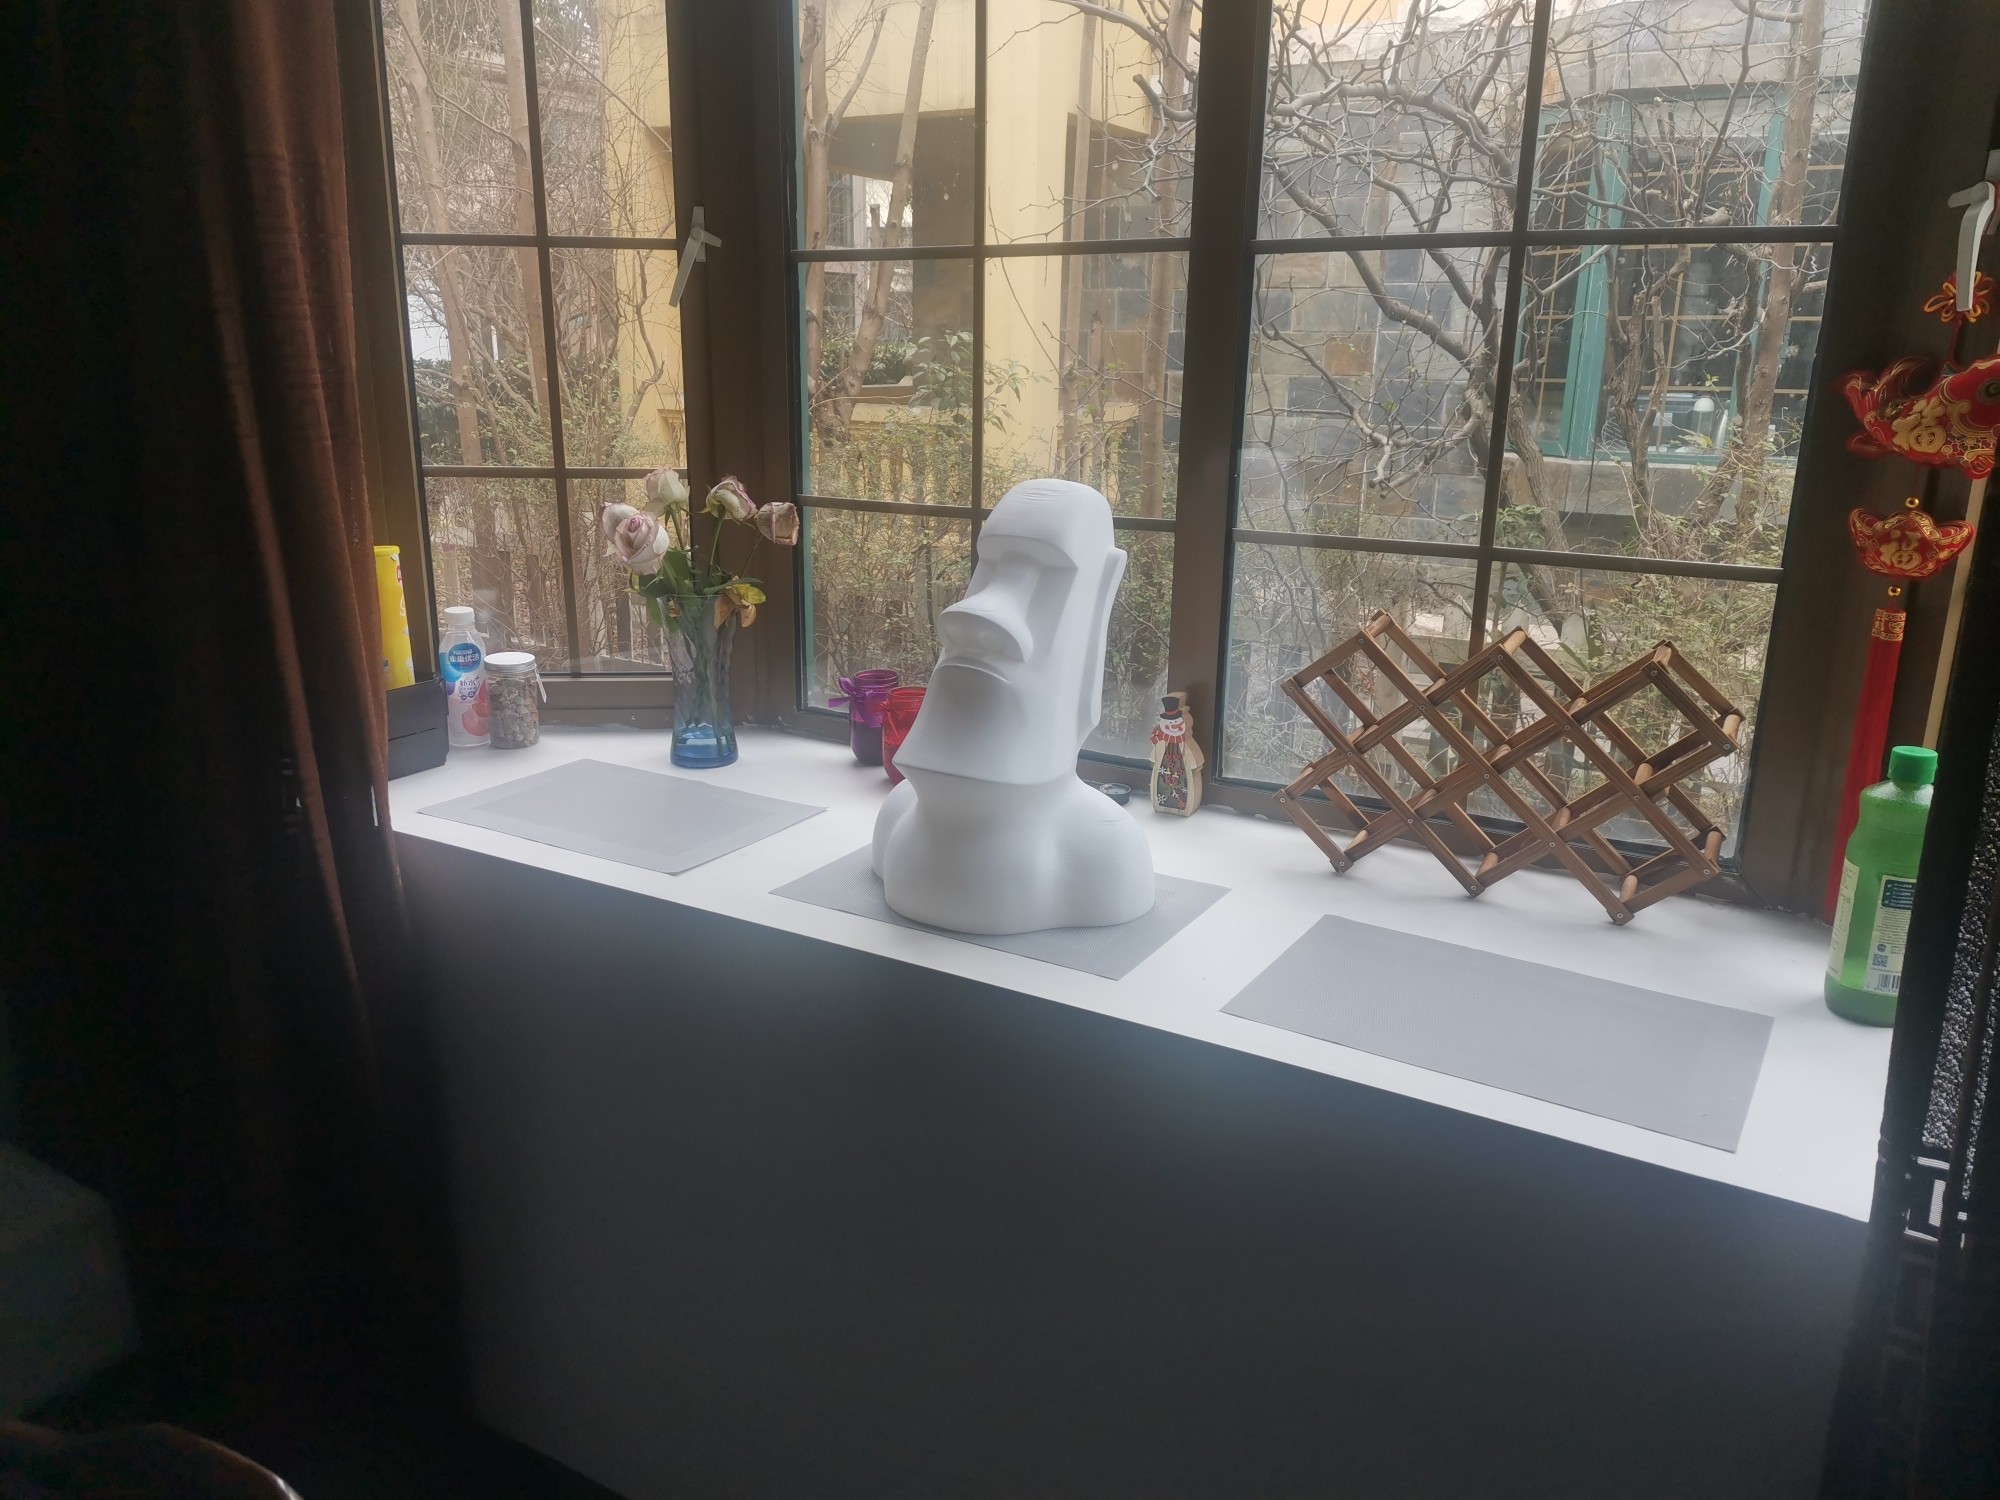
That being said, I’ve ran the printer with the spool attached to the side, and so far haven’t had any problem with the printer, all my prints were successful. Been through 3 spools already since the moai head, it’s running fine.
1 Like
Sometimes it is less about the printer design and more about the filament. Not long ago bought 4 spools of Solutech PLA that was so brittle that the slight vibration from my Ender 3 while in an idle state cause it to break randomly. I was in the middle of printing my redesigned Lowrider parts and anxious to see the results. I ended up trying all 4 spools and babysitting my printer to finally get my parts. Later I noticed that all 4 spools had the same lot number. I always had good results from Solutech PLA prior to that lot.
I get those breaks with old filament that has been opened for more than a few months. I got excited when I started and bought a lot of colors, but when they snap all the time and you have 75% off the spoil left… Grrr.
I also have problems with PLA that gets too cold in the shop. The filament gets really brittle. I’m thinking of adding a small gun safe warmer to the printer where the filament spools sit. I’m wondering if I bring them up to 75f or so before I start printing if it’ll help keep them from snapping.
I have found that using my filament dryer helps with the snapping. I also can print right out of it which is nice and the slightly warmed up filament seems to snap less and bend/flow through a turn better.
1 Like