MPCNC Made In China: New Build!

The 3mm ptfe tube has an ID of 1.75mm and it gets used in Bowden because it is a good fit. It is also slick. Metal might stick to the molten plastic (molten plastic sticks to everything but the bed, amiright?). PTFE breaks down at about 230-245C.

It would be really neat if you could just buy a cheap E3D clone hot end, drill out the nozzle path to 3mm (to fit the outside of the ptfe) and then hook up the heater and thermistor to your duet as an extra extruder. Preheat it for 10 mins and see if it welds the two together. I could see it being a bit of a blob. Maybe some kind of mechanical removal of the rest, like a pencil sharpener could fix it. Just enough to splice it once per spool? You would also need to find a way to hold it still, since attaching pliers or something would really increase the thermal mass.

I wonder if you made the hole for the ptfe a bit tight if you could squeeze just 10% smaller ID…

1 Like

What about taking a cheap hot end, and replacing the nozel with another screw in throat?

2 Likes

I think I can just use the throat of the E3D and a heating element or a just a coil of nichrome wire, that way I have much less thermal mass so it’s much faster to heat and to cool down.

Yeah, that’s what I was thinking too, but I worry a little about what will happen at the junction of both throats, there’s a good chance thant there will be a bulge and that it’ll get stuck there. :slight_smile:

Actually, if I had no manufacturing limit to deal with I’d like to have one hot side, melt the filament in there, and then keep pushing the melted filament towards a water cooled zone. I think in my case that this could only be a manual system or maybe semi automatized, I couldn’t have it work during the print to change colors like the mosaic palette because this implies lots of complex coding and firmware editing I’d be unable to do. I wish I could though.

If I could find some kind of metal tube coated with teflon in the correct diameter that I need it would be really easy to build, but I don’t think I’ll find that anytime soon. :sweat_smile:

2 Likes

New Duet board arrived yesterday and already installed.
I’ve installed the firmware and redone most of the basic configuration, but I’ll take the opportunity toredo it this weekend, this time installing reprap firmware 3 instead of 2.xx

Almost fried it right away: the endstop wire got caught between the bed and the frame, it got cut and shorted, so almost exactly the same thing that happened last week (but different root cause). :scream:

Luckily I realized what was going on quickly and disconnected the board, so no damage this time.

1 Like

Are you running powered endstops?

Yes, 3 wires endstops. I prefer the basic 2 wires ones, but that was all I got.

It turned out that the filament sensor came wrong from the factory. The geniuses who wired it decided that the normal way of having the switch closed was to do a direct short between the red and the black wires. So I guess I was not the only moron in the equation.

Anyway I finally installed it, it seems to work so far and the printer is now back to the way it was before all this drama. I received the new voltage regulator so I’ll try to get it replaced tomorrow, fingers crossed.

Great news guys: the blown up Duet is back from the dead!

Huge thanks to my amazing colleague!
It took him less than 5 minutes and he made it look soooo easy (but it’s actually really hard, the IC is tiny), kudos to him

I tested it briefly and it looks like the 5V and 3.3V are back and working!

13 Likes

Is he directly sitting in the factory? :smiley:
Well done!

2 Likes

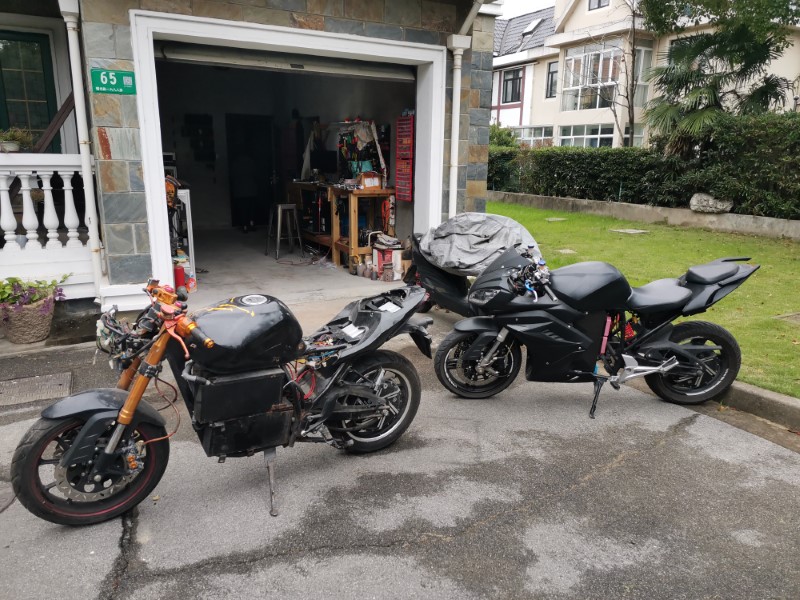
It’s been a while without updates, reason being that a new project dropped in my shop two weeks ago: a new electric motorbike to work on!

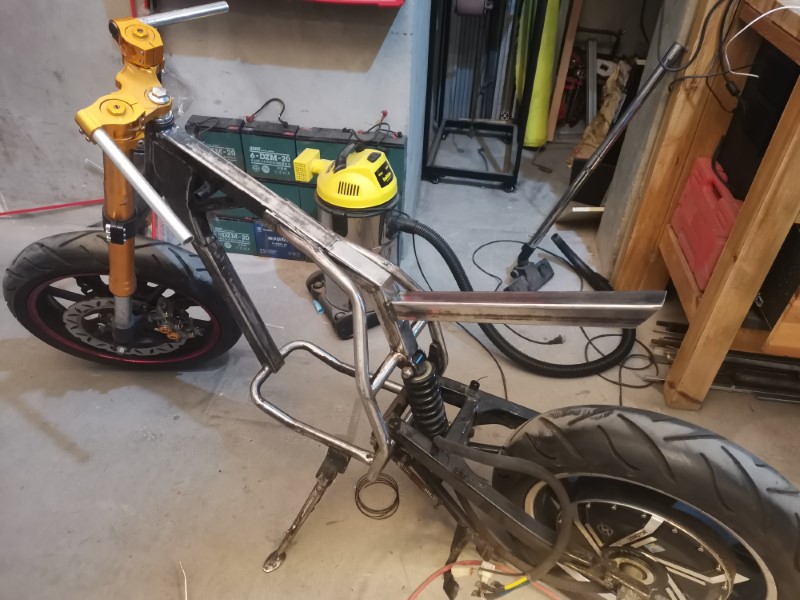
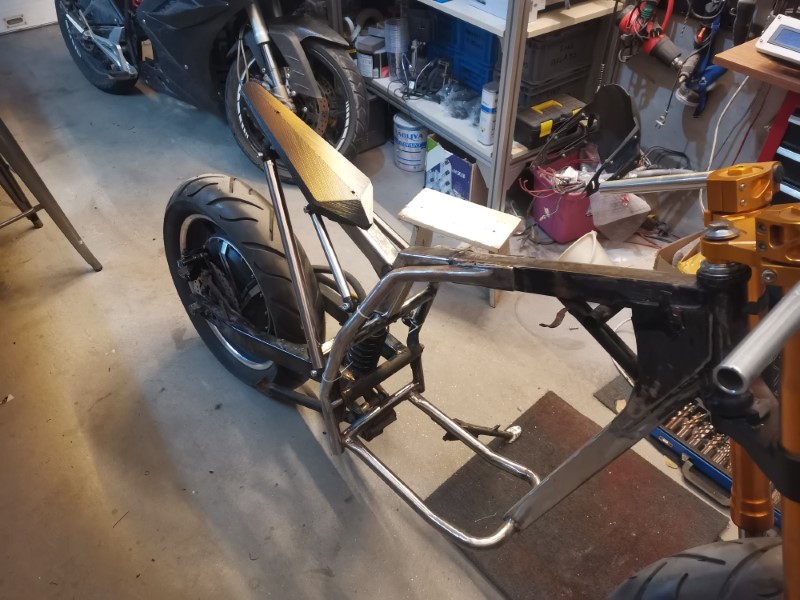
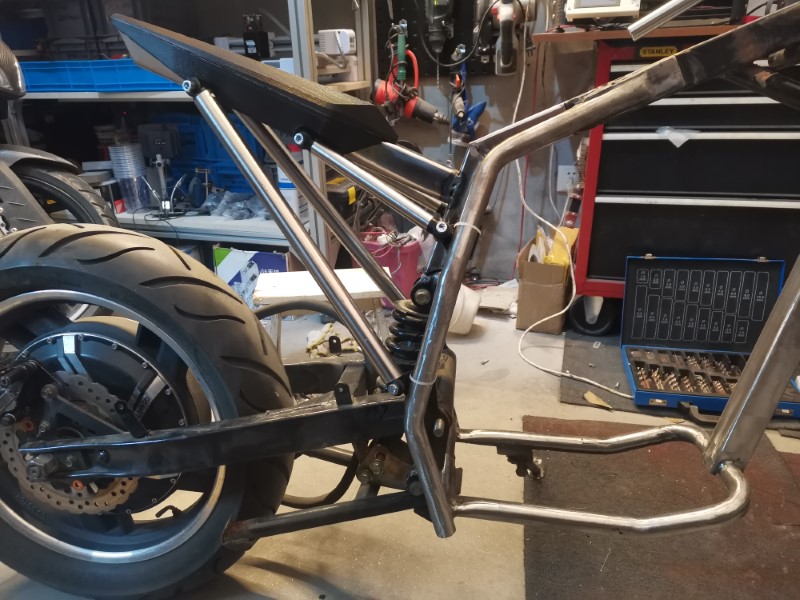
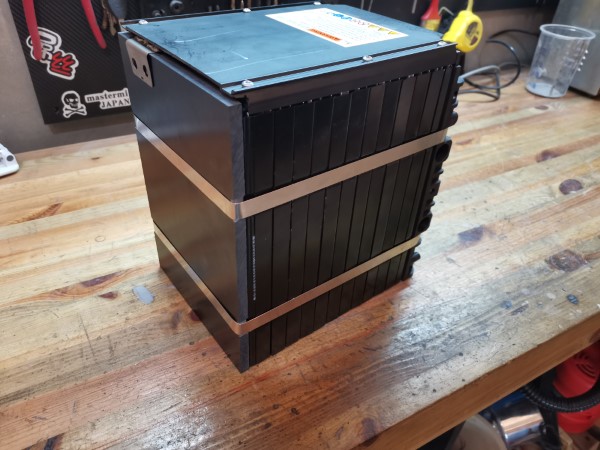
Got it for free, so that’s a pretty nice deal. Most of it is toast, but the important stuff is still there and can be reused: the frame, the suspension, the front fork, the brakes and the electric motor are all good. All the rest is either gone or crappy, so I’ll replace the entire wiring harness, the battery, throw away all the plastics, the lead acid batteries, the motor controller, etc.

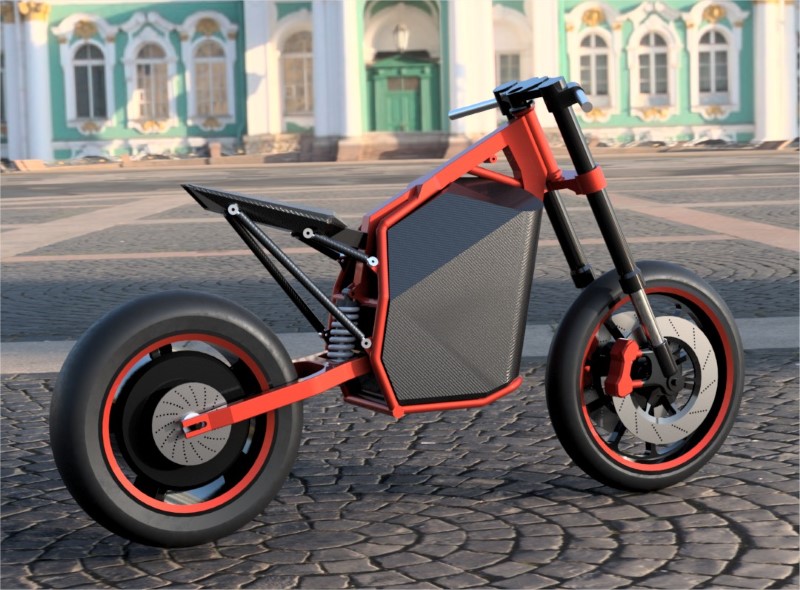
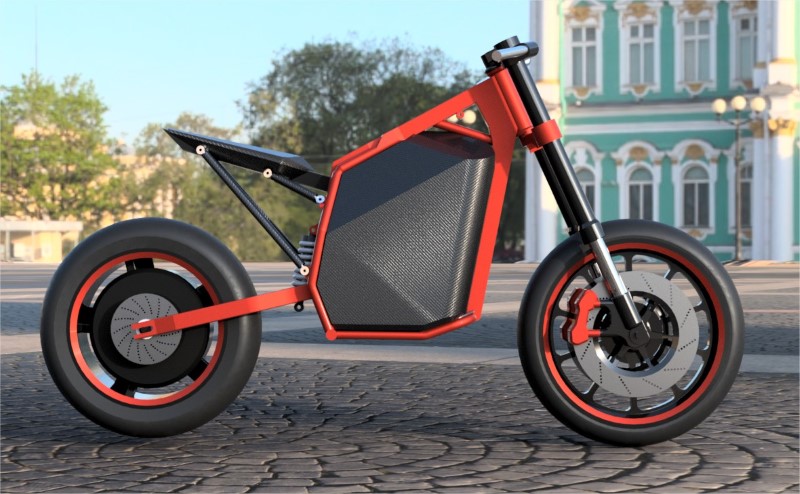
Anyway, as some of you guys know I already have an other electric motorbike (the black one you can see on previous pic), so my plan for this new one will be to make something a little bit weird and crazy looking. Basically the idea is to strip absolutely everything I can down to the absolutely necessary stuff. I spent some time 3D modelling everything to get a better idea of the final results, and hopefully if everything goes as planned, it should resemble something like this:

It’s a bit weird, I know, it will likely be uncomfortable, I know that too, but I quite like it and I’d like to give it a try and see if it actually works in real life. And I can always redo it differently if it turns out to be crap later.

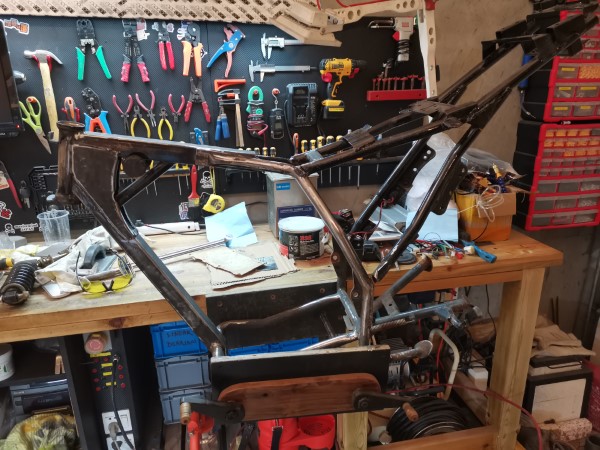
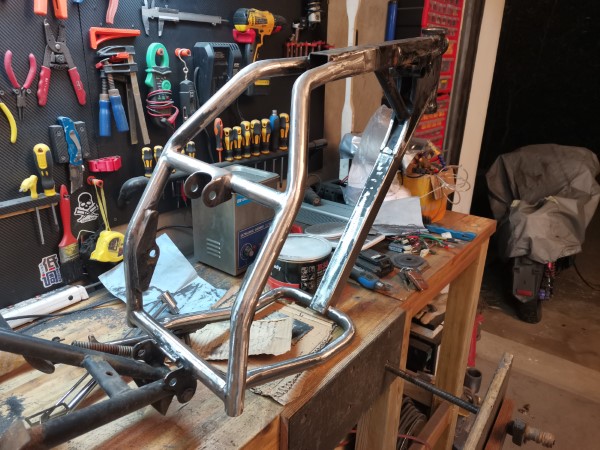
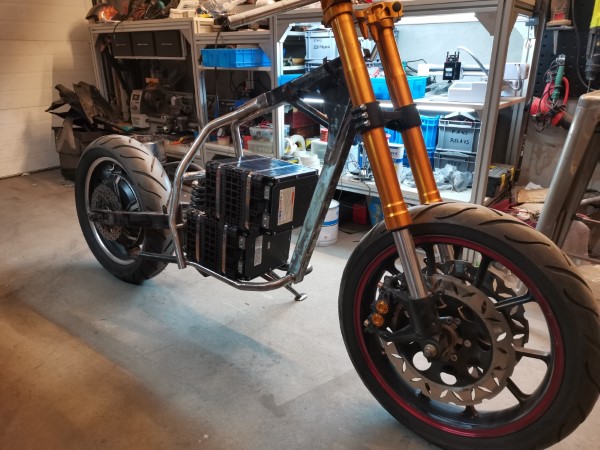
Anyway, I started to build the thing, stripped down the frame, made some cuts, tack welded some tubes, ordered and received a new battery…

IMG_20201128_161358

IMG_20201128_180637

IMG_20201128_191112

IMG_20201128_185656

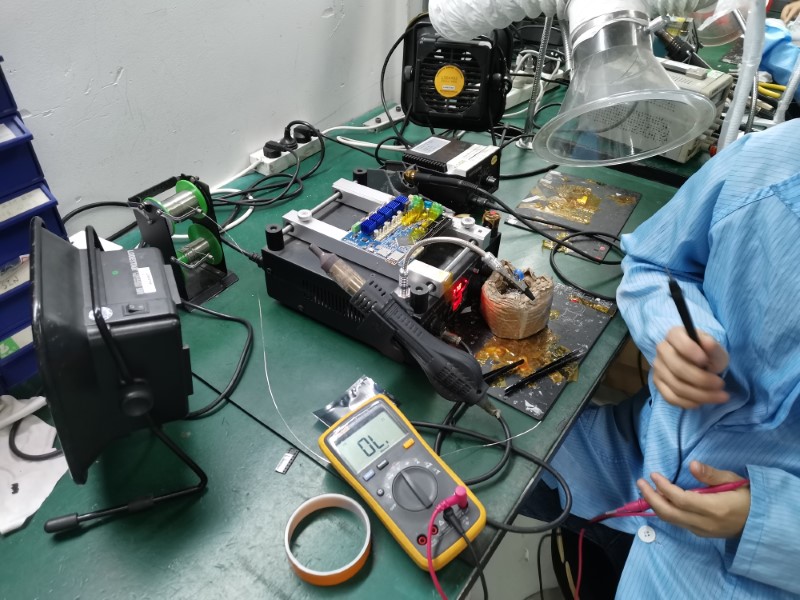
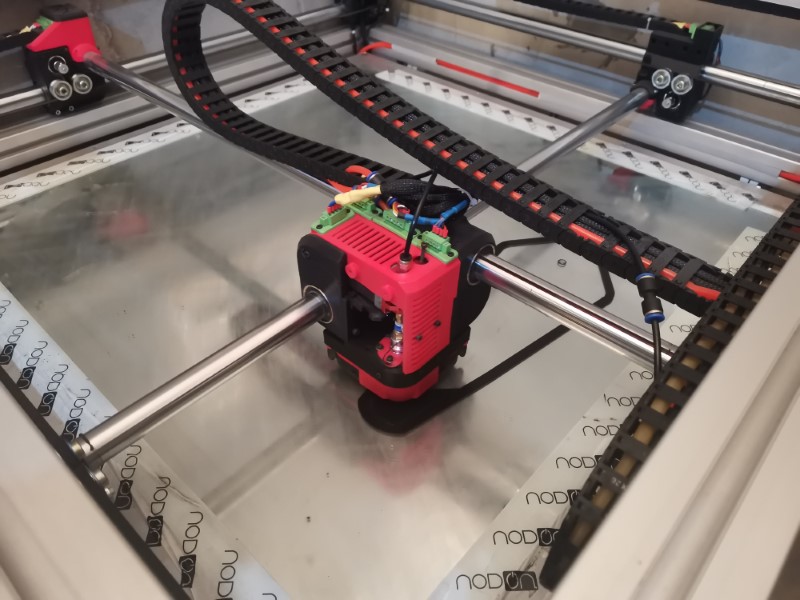
The BOx will be a very important tool for this build, I’ll use it to print mockups to decide on the final parts shapes, to print some molds in order to make a proper carbon fiber job later, to print some plugs I will use to make aluminum castings and also to print some parts that will remain on the bike.

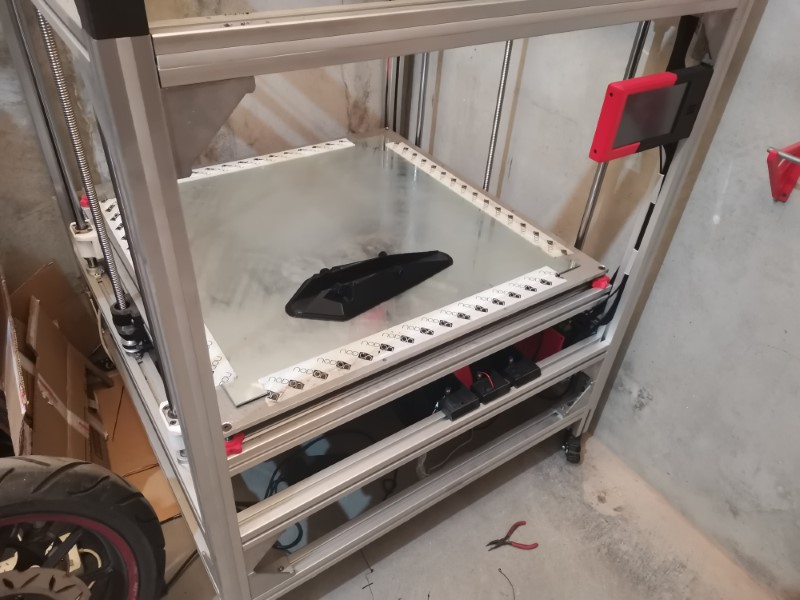
The two parts of the saddle as well as the little black connectors at the end of the tubes were 3D printed with the BOx. In the final version the connectors will be aluminum cast and the tubes will be carbon fiber. Also carbon fiber for the bottom part of the saddle and I plan to try making the top out of silicone covered with leather. Not sure if this is gonna work, usually people use foam so I wonder if there is a reason why silicone isn’t used there except for the fact that it is a little bit more expensive?

Currently printing a slightly wider version of the saddle that will be relocated a bit more towards the front. The printer works amazingly well so far, I just hit print and go do something else, I never had a first layer fail and basically every print I’ve done since I replaced my motherboard was a success. I now have enough confidence to let it run during the night, only issue I had was that the filament sensor didn’t work for some reason I need to investigate, probably some wrong configuration in my firmware, no biggie.

The only thing I need to work on is to make filament change easier, it is quite a pain to change it since there is still lots of resistance in the bowden tube. This is quite important since this printer is very hungry for filament, I can use a spool in less than a day, it is really fast.

Anyway, it should be a nice and fun project and my new printer will play a central role in it !
If some of you guys want to follow the build I’ll post updates here on the endelss-sphere forums: https://endless-sphere.com/forums/viewtopic.php?f=12&t=109246&sid=a06e8a104e42351d58649903a7a4575a

11 Likes

RE: Silicone

I think it’s because foam provides more cushion. I know some silicone is more flexible, but I think most of it solidifies too much.

2 Likes

Oh that looks like it is going to be so fun!

1 Like

You could print the cushion in tpu with a large gyroid infill. You’d have to play around with percentages to get the right cushon.

2 Likes

Oh that’s a great idea! I’ll try that, thanks Barry!

I thought you said only the absolutely necessary stuff? Do you really need a seat? Brakes on BOTH wheels? Steering left AND right?

That’s an awesome project.

2 Likes

Yeah next he is going to tell us he just have to have a clutch too xD

1 Like

Electric motorcycles have a clutch?

1 Like

It’s very rare, to my knowledge only a few trial bikes have that.
Mine can’t have one since the motor is the back wheel itself.

I know the Harley Davidson Livewire prototype bike I got to ride didn’t have one.

I know I’m late to the party, but I just read through this great build log!

If you’re still tinkering with your extruder, Trianglelabs makes the best quality clone stuff I’ve seen, although they’re pricier than the normal clones (but still much cheaper than 1st party). They have mirrored Bondtech (BMG) extruders.

They also have an 80W Brass “Super” Volcano (51.5mm long nozzles!) which this is one of the few builds it wouldn’t be absurd to use on.

1 Like

Since it doesn’t look like you have enclosed it yet, why not hang the spool above and go directly to the extruder, and only use the bottom feeder with the long tube when you do enclose?

1 Like