I broke a nozzle the same way.
the real issue was the garage cnc router needed to reboot. Second issue was to uncomment the z offset in the bltouch section. then it works again… not connecting to the network coincided with the z height calibration screwup so i thought one caused the other and that was not the case.
The advice I’ve seen is to heat it up, back it off 1/4 turn, and then cool it down before removing it the rest of the way. The heat expansion makes a cold nozzle too tight.
Not sure how to get it out now, short of cutting a slot in it or using one of those screw extractors.
1 Like
Luckily for him it looks like he was able to get it out. He must have gotten lucky and had the correct tools on hand LOL
1 Like
I panicked at first…then heated it up and loosened the block from the heat break which buts up to the nozzle so it loosened the nozzle and I pushed a small screwdriver into the nozzle remnant and backed it out.
Then I tried printing the large square again…
And again no way :
The print came off the bed, caught the side frame and yanked the heater wire in half, so it failed for an open heater.
EDIT: so with a dead heater in the heater block with a bolt/grub screw holding the heater cartridge along with some “excess” plastic, how would you go about getting the heater cartridge out? I have a spare, just need to get it out without being able to heat it up…
1 Like
I’d use a crappy old soldering iron I keep around for just such situations to heat up the excess plastic and scrape it clear of the screw until I could get that backed out.
Edit- used that more than once on my Taz and Solidoodle Workbench. The solidoodle loved to disentegrate its’ hotends and make big globs of impossible mess.
2 Likes
I’m in disbelief to the point of amusement now at the cascading mess this is becoming. I got the block and set screw hot, but it is tight, so it stripped.
4 Likes
Not to sound mean. But you are starting to help me not fee AS bad about my ![]() storm of a build LOL. But you still have a LONG way to go to catch up LOL
storm of a build LOL. But you still have a LONG way to go to catch up LOL
2 Likes
It gets better. Apparently the replacement heaters I got are 12V, not 24V. The smoke came out on that one.
3 Likes
Bummer. You can compare the resistance to tell for sure whether they were 12V heaters. I had a batch one time that had an internal short in every single one (lot of 5 - all bad).
40W 24V heater should be around 14.5 ohms.
1 Like
I have used 12V heaters on 24V before, but using an external MOSFET that could handle the 160W power draw, and limiting the duty cycle. I think I limited it to a max of 40%, but I may be misremembering. 25% would give it the same average dissipated wattage. I do remember that a PID tune didn’t like it much because it could get really hot if it stuck on.
The stock one that came in my hemera didn’t last long at all. I replaced it with one of these. Thing heats up crazy fast now lol
I had a set of heaters and sensors for another printer and now I remember it was running off an old computer power supply at 12 volts. So they are 12v. That was a couple years ago so it was an honest mistake, but in this I saw smoke from the heater as it was heating.
You can throttle a 12v heater to work with 24v?
1 Like
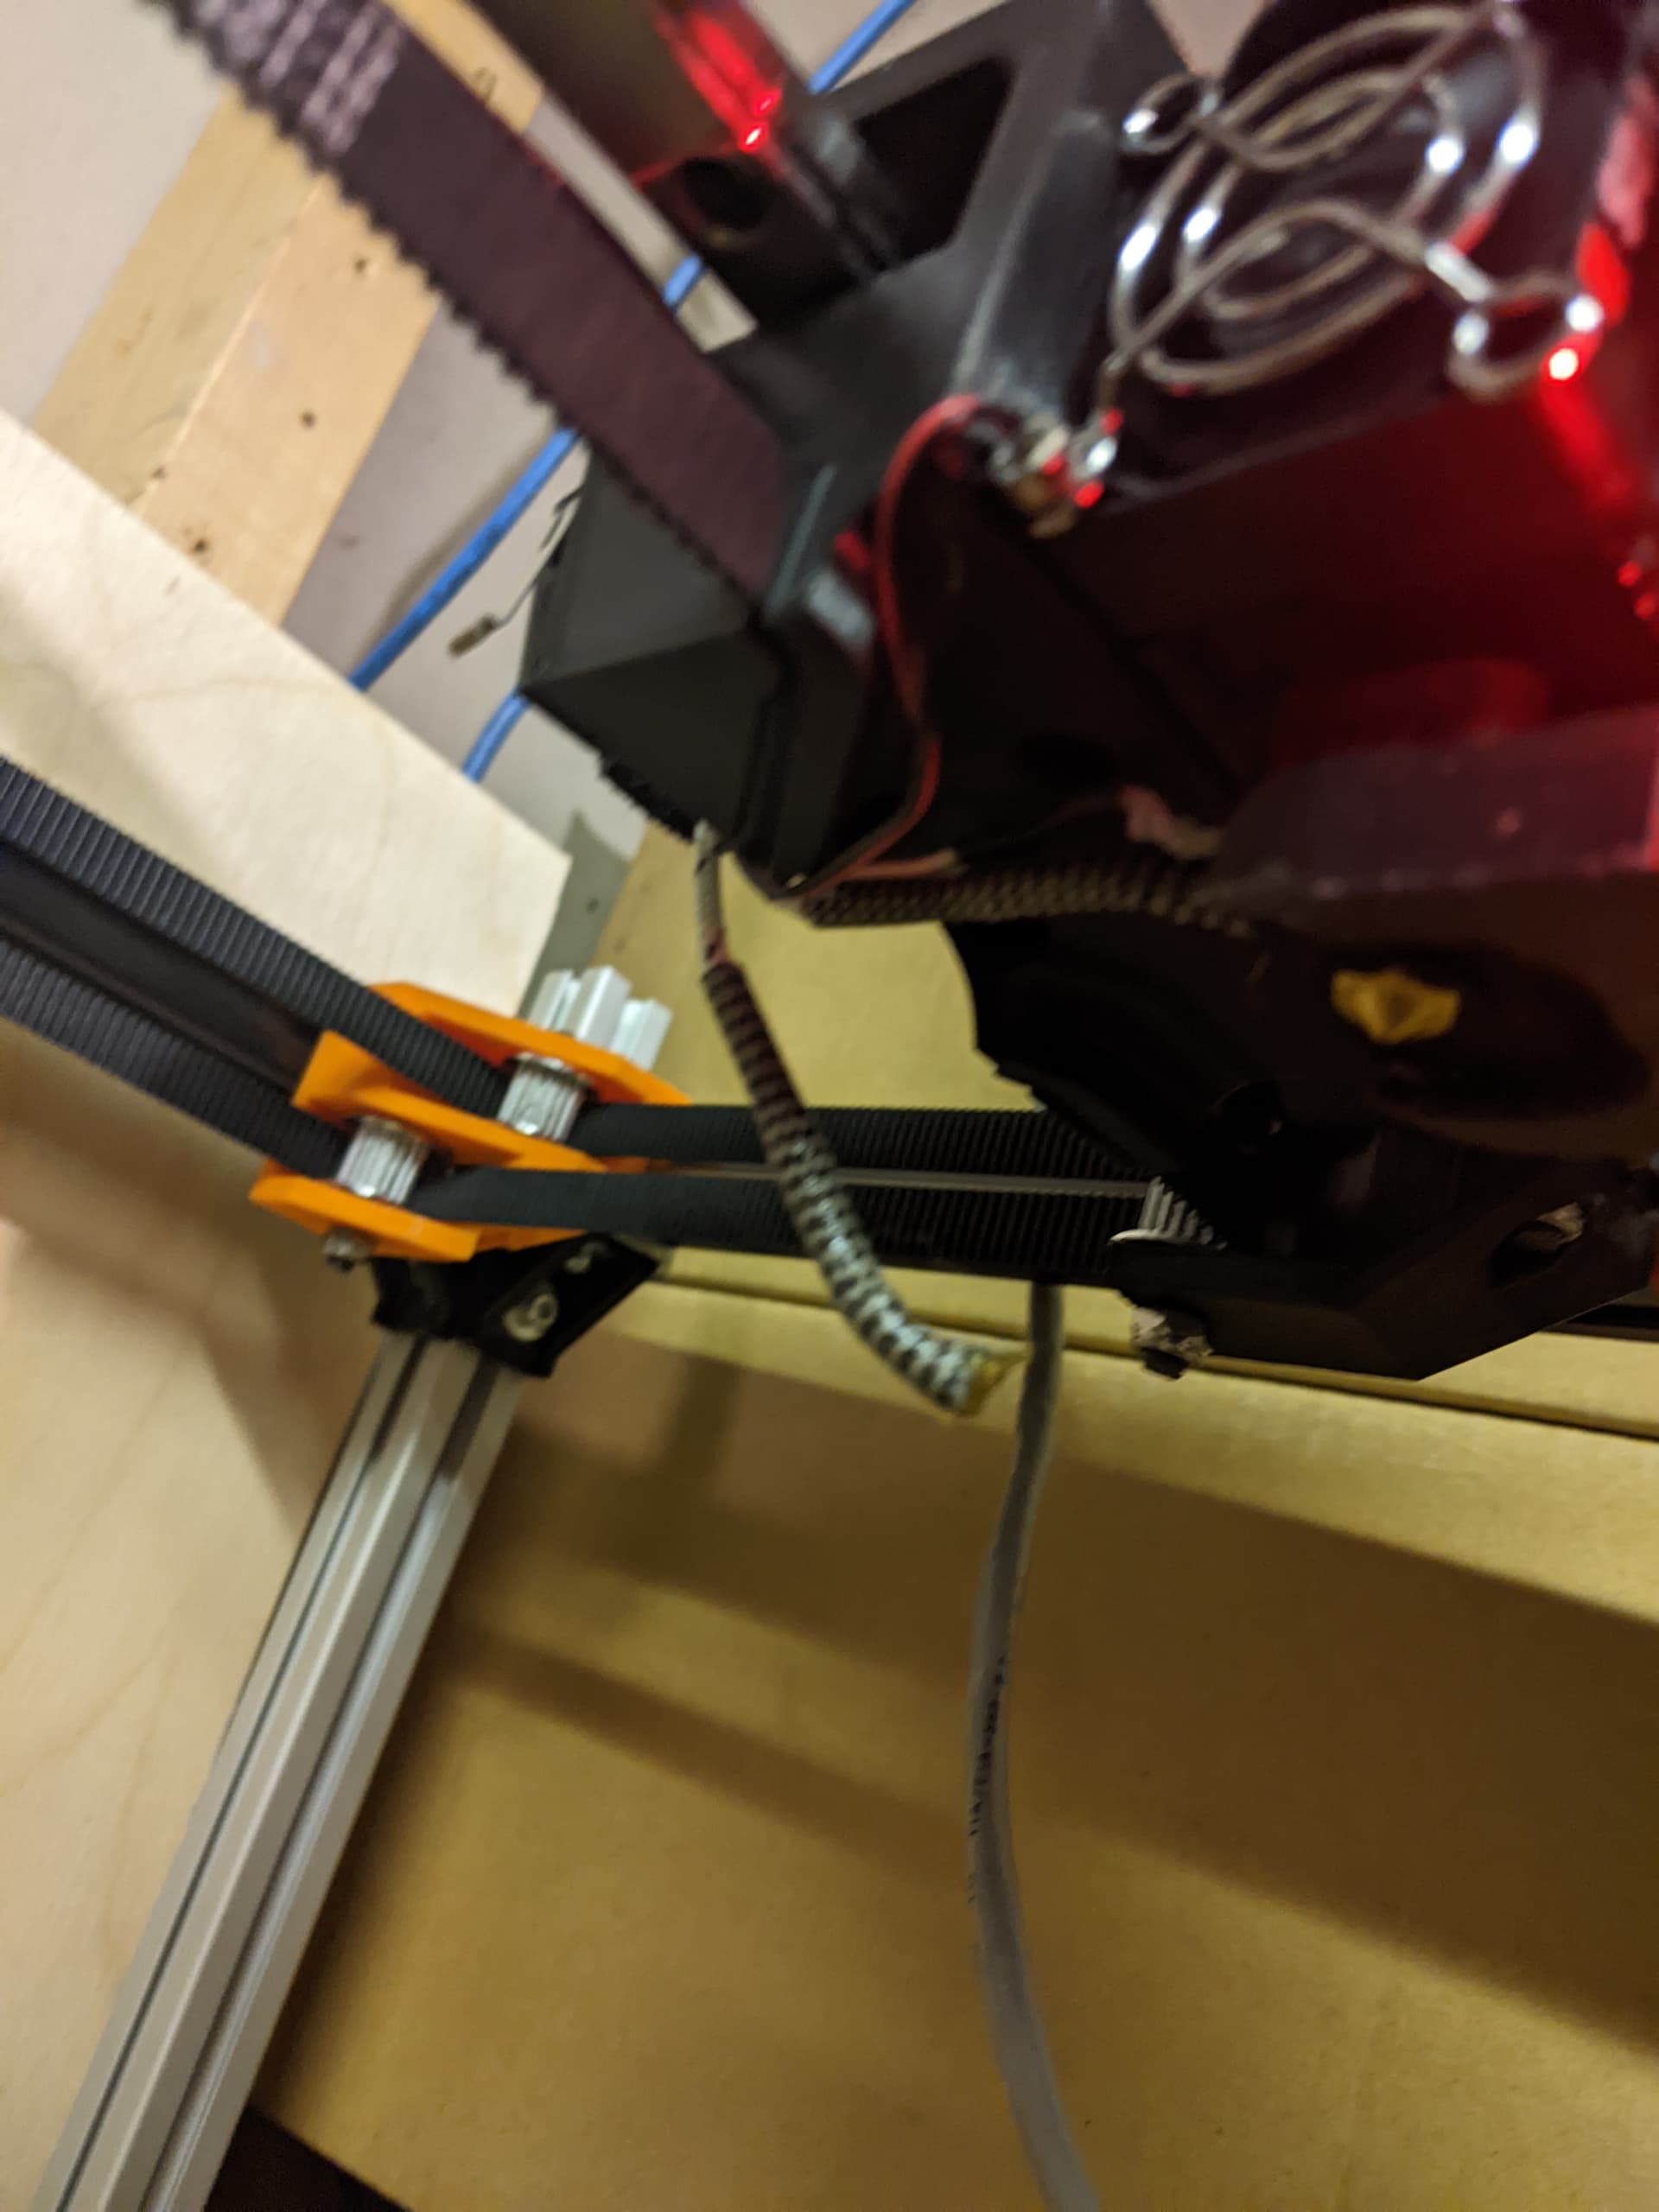
Got a new 24V heater installed, printed the part I wanted and dimensionally it was kinda close at 149 and some change over 150 mm. first attempt to print and it threw the belt off the carriage. Apparently you should be very careful where you point the heat gun when removing excess filament. The belt was not a difficult fix and it likely was due to a softening of the under side of the carriage during heating… one can hope, but my streak may prove otherwise. the print completed and it was not perfect, but it isn’t square. the base layer looks to be too thick so it isn’t squishing down like it should. Never having had autoleveling before, i’m not sure how best to adjust it and how much. I have a set of feeler gauges… should I get it to within some spec for absolute zero height?
Having never printed with a 0.6 mm nozzle before this, I put the base layer at 0.4. Recommended minimum is 0.35 mm. Does anyone have a preferred setting for good adhesion of PLA to PEI?
Additionally, the square wasn’t square exactly, so I’ll need to fix the frame a tiny bit. the X error scaled from -0.026 mm at 20 mm to -0.22 mm at 150 mm, so that is more like an 8x scaling problem. The Y error went from 0.296 to -0.78 so it was not a multiplier issue, but more severe in absolute offset. Probably should square it first and then requantify the accuracy.
1 Like
You’ll want to print a new core. I’ve discovered once the belt slips out once because of deformation, it’s going to keep doing it.
2 Likes
well that stinks. I need to get this thing to print right before I can print another one.
Ok, today’s info:
the change to the 0.6 mm nozzle was a change in height because the 0.6 was a touch longer. With that change in height, the base layer was messed up because I adjusted the BLtouch offset the wrong direction.
It is now much closer. What is a good base layer thickness for a 0.6 mm nozzle?
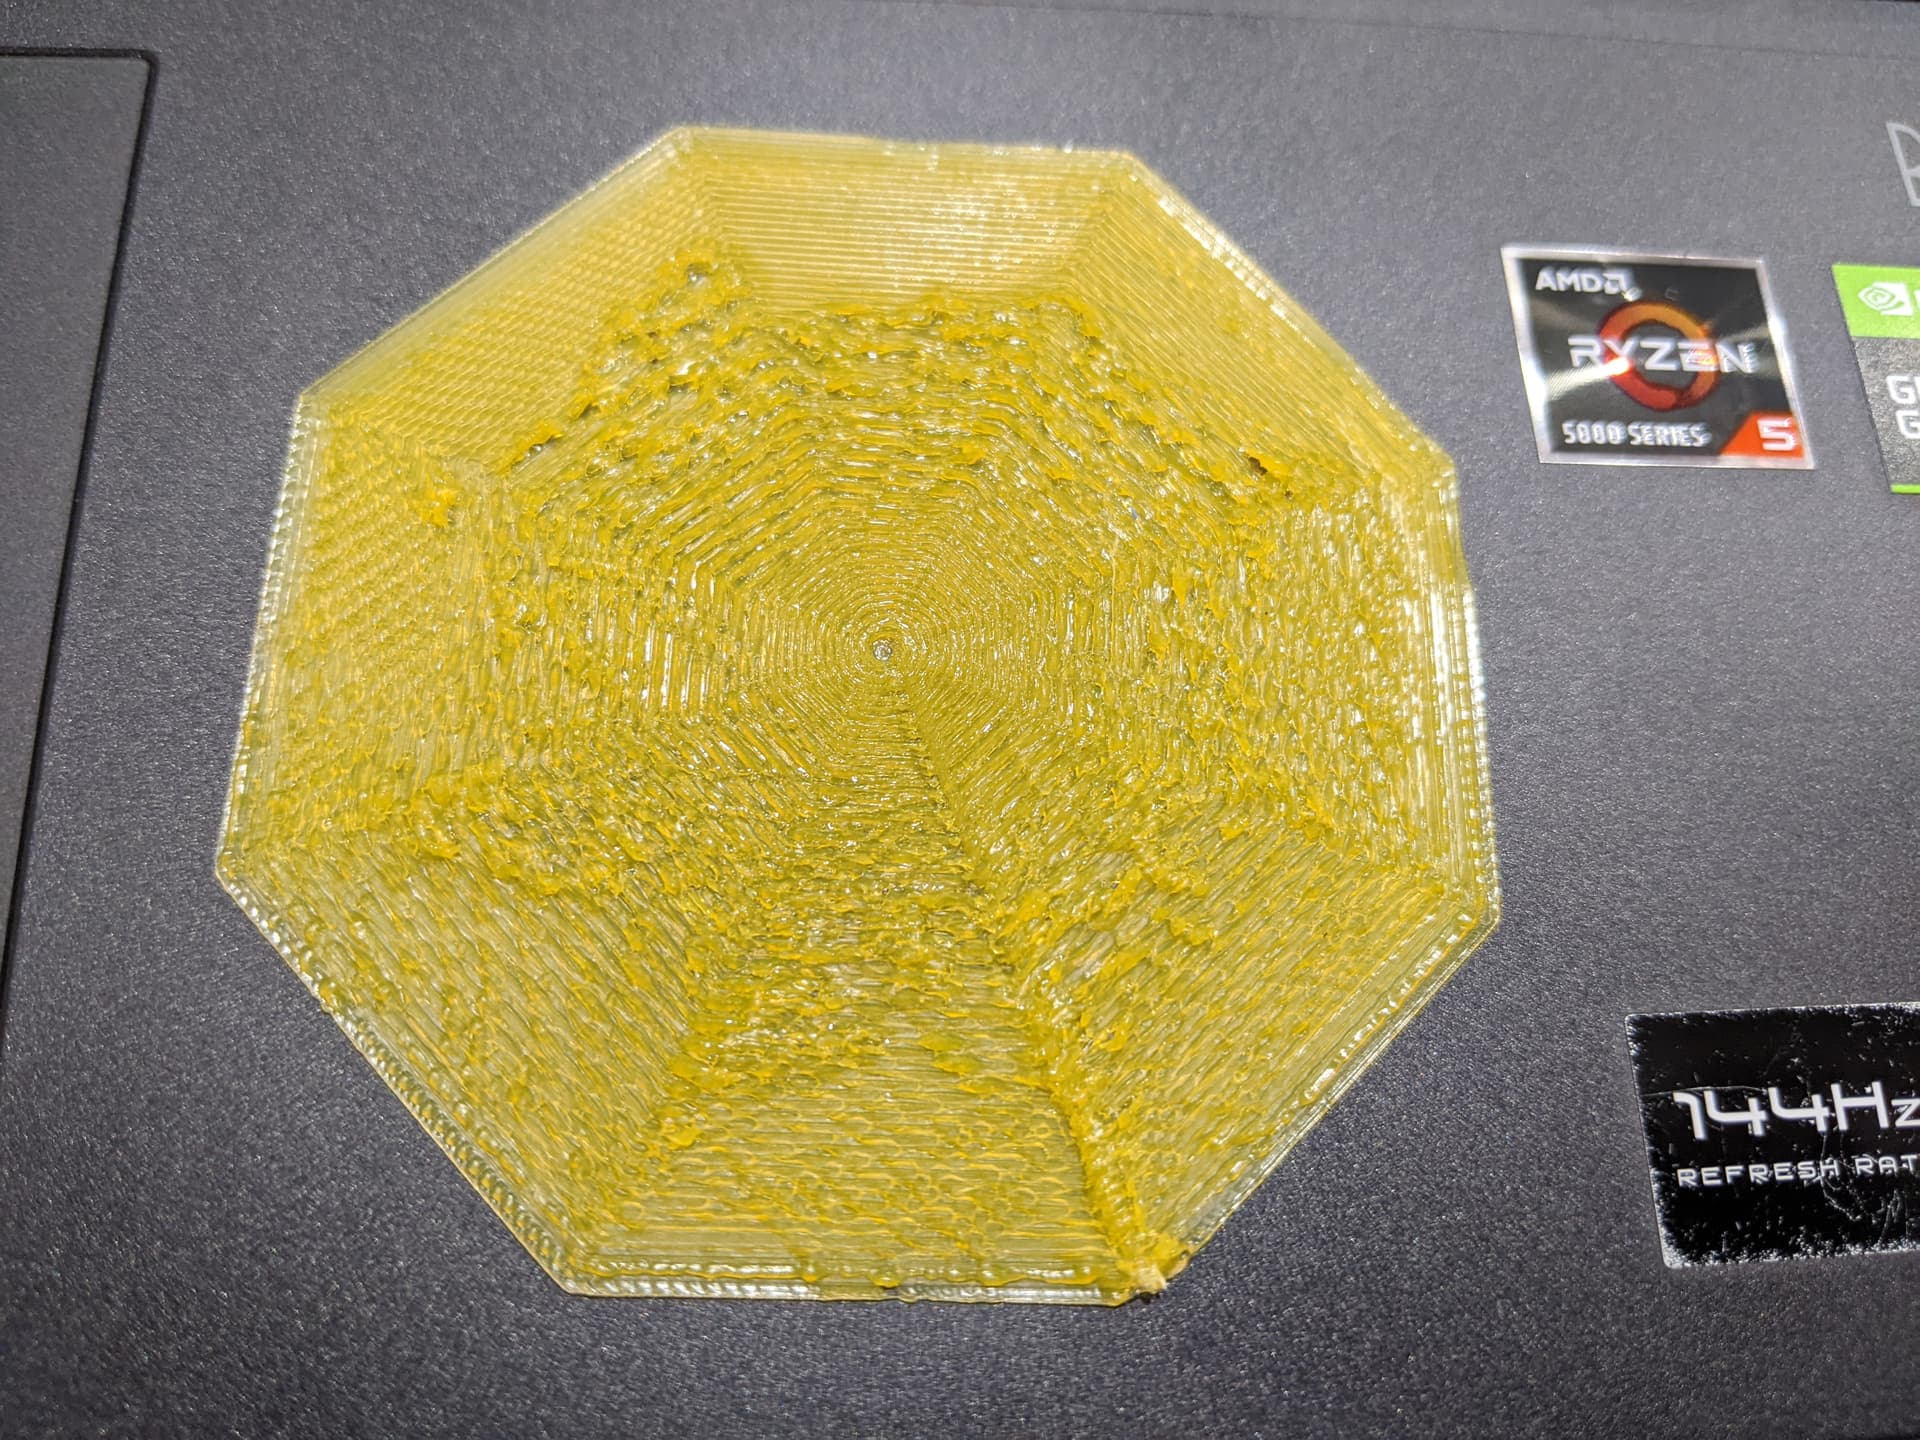
I was trying for 0.3, but have changed it to 0.4. I think there might be some over extrusion. I found a base layer test print of an 100 mm “diameter” octagon that is 0.2 mm thick. the printer made 3 attempts with each one having an adjusted offset for a different nozzle spacing from the bed. it is really hard to get a good measurement of what the bed offset is. I can’t tell if it is too close or just over extruding. It appears to be moving the amount of filament upon request. 60 mm extrude moves 60 mm. In the printer.cfg file there is one setting I found for rotation distance that BQ (for the H2V2S direct extruder I have) should be set at 3.433.

When you changed up from a smaller nozzle diameter to the .6, what slicer profile changes did you make? I’ve never had luck with just changing the nozzle size in any slicer, it’s always needed me to build new profiles after tuning to the different flow characteristics with the changed size. Even if the extruder is pushing the correct length of plastic, the pressures inside the nozzle as the plastic is flowing are different, and this probably needs adjustment in your slicer configuration.
You’re printing on textured PEI on a spring steel build plate, right?
For me at least, on wider nozzles and textured PEI needs a slow, thick, and well calibrated first layer. When I was using a .6 on my TAZ, I’d regularly use a .4 first layer with the spring steel PEI build plate. used a slightly higher first layer hotend temp in addition to moving slow.
I’d previously used borosilicate glass and hair spray, and it took me a while to get happy with the PEI.
I bet you’re still off in adjusting the BLTouch offset.
I changed the printer profile to have the 0.6 mm nozzle and the wall thicknesses and layer height to correspond with googled values for such sinc I had no basis of reference.
The printer has a smooth pei heated bed with pla
Yes, it is still off in adjusting the bed height, but getting closer:
To me the nozzle is still too close.
Agreed.
I also note that the back and back left edges look MUCH better than the rest of it (but still squished badly). Is the bed off-level mechanically and/or bowed in the middle?
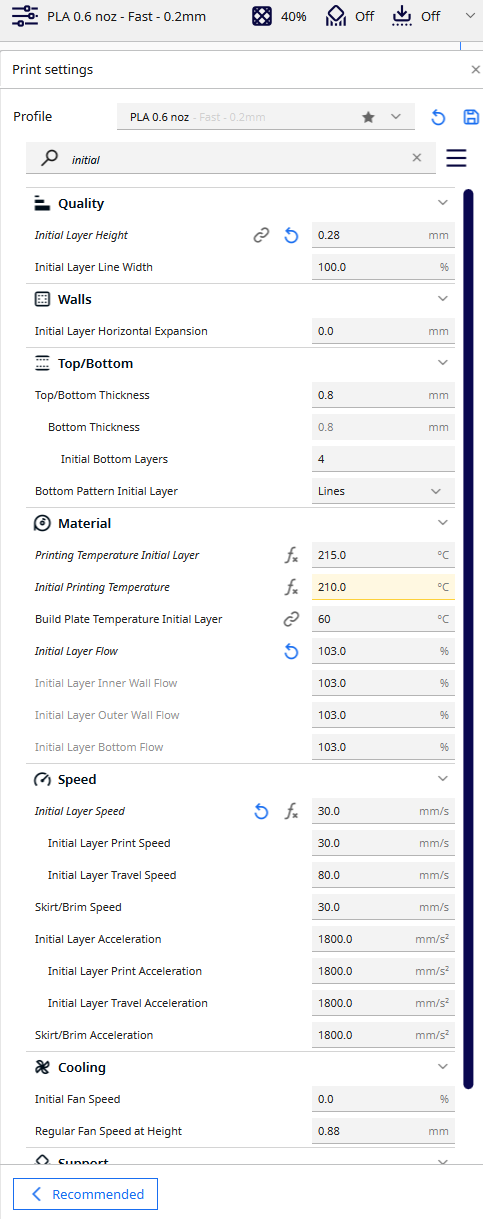
Rob, am still figuring out best settings for my MP3DP v4. Just uploaded a 3mf that includes the printer profile am using (250x250 bed) :
Am usually printing initial layer height ~0.28 for large models, ~0.2mm for smaller items, even if nozzle is 0.6mm. Regular layer height is usually 0.32mm unless finer detail needed. Printing on rough textured PEI bed.
Hope that helps!