There should NOT be a loop… use a small cut piece of belt sandwiched. If you are using my carriage then you may need to add a small piece of tape to the back of the belt to tighten it us as I apparently made the slots slightly big (it does make it easy to put the belt in though).
3 Likes
got it. and I did loop it anyway so no tape is required to get it to hold. had to tighten the left side more than might be ideal so the x rail stays true to the frame. I think it looks pretty good.
@azab2c your config file has this statement for the z axis:
endstop_pin: probe:z_virtual_endstop
when I load the printer.cfg, it states:
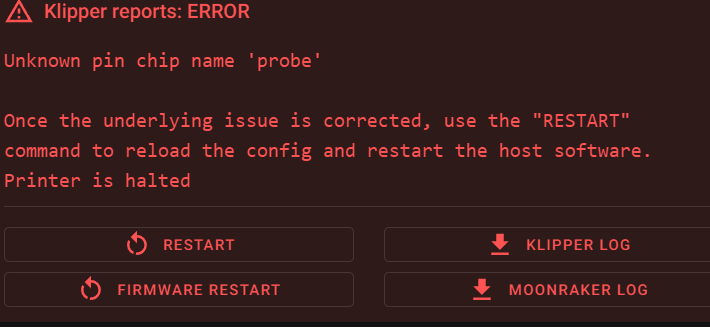
I don’t know where the “probe:” definition comes from. It is referenced in the z motor endstop. It is probably a call to the BLtouch, which right now is not enabled.
I’ve been poring over the BTT component drawings and schematic to get all the pin assignments correct in firmware before actually plugging them in again to try anything.
Without the can bus, this config is different than yours and though it is wired like a voron 2.4 with their pin assignments, the z axis is totally different, so that needs to be taken from your config.
What is shaping?
Got [bltouch] section configured ok?
Hey @orob, yeah, some of the syntax isn’t intuitive. I’d also have expected to see a “probe” entity explicitly declared somewhere. However…
Check out the [bltouch] probe section and
doc Configuration reference - Klipper documentation
Am using an “ANTCLABS BLTouch Auto Bed Leveling Sensor v3.1”
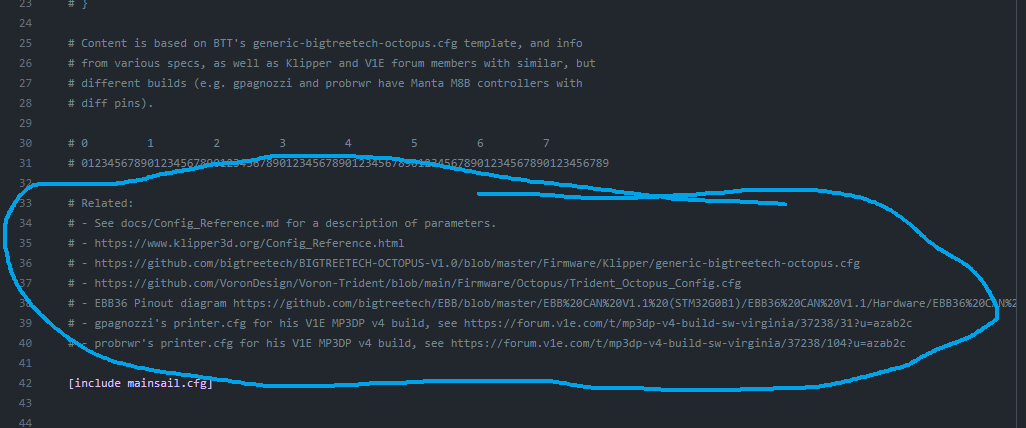
My Klipper printer.cfg config is for a BTT Octopus v1.1, I copied a snapshot of Mike’s Manta M8P too, a lot of my config was based on Mike’s to start with.
Yep, spent a bunch of time on this too… Tried hard to avoid killing another Controller board.
Yeah, my config was derived from a bunch of sources, including Voron. Included some comments with notes/breadcrumbs that might help folks cobbling their configs together…
Don’t think I’ve configured Input Shaping to improve print quality by compensating for machine resonance/vibrations. The BTT EBB36 and similar have accelerometers onboard that can be used to measure vibration signature unique to the build. Klipper can then compensate for this to improve print quality. I currently have more fundamental/basic things to tune first (e.g. extrusion) before worrying about resonance being a bottleneck to perf/quality. This is a new thing for me, hopefully someone that knows more will chime in and correct/confirm my understanding?
1 Like
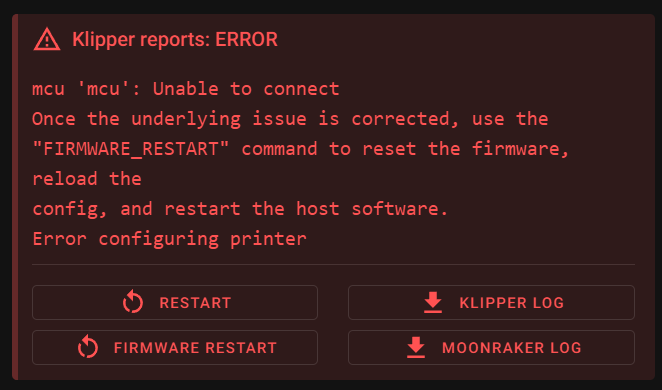
I just used your Bltouch profile because I have the same one. it isn’t plugged in yet and the offset needs to be measured… I wanted to see the board talk first with just temp sensors before plugging in motors and end stops, but all I get is:
EDIT:
I pulled the BQ voron usb boot firmware file from the bigtreetech repo, named it firmware.bin and it changed to FIRMWARE.CUR, but there is no USB enumeration that follows with USB whether powered by USB or 24 V. I cloned the klipper firmware repo and did the make tool setup with USB serial and compiled a new file and changed it to firmware.bin, and after SD card reboot, it changed to FIRMWARE.CUR and again there is no USB enumeration.
so now out of my 4 BQ boards only one of them works. There is nothing at all plugged into this octopus board. Any ideas on how to fix a bootloader for the BQ octopus board? This isn’t sorcery or some mystical art. I am beginning to think it is a quality issue and not (all) my doing.
EDIT2: pulled all connections, did some consultation with my friend google and came up with this link:
This link to the mcu connection error
This link to fix the bullseye bug
Then did a clean, reconfigured the menuconfiguration, recompiled with make, reformatted the sd card, copied the klipper.bin over and renamed a copy of it firmware.bin and it showed up. the fix mentioned above brought back the option of using /by-id and now I have this:
1 Like
Are you using a CAN bus board like BIQU EBB 36, or do you have an umbilical of wiring going from individual hotend assembly components back to various spots on the Octopus?
Fwiw I must have spent more than a week figuring out CAN bus setup/issues. PITA, but great once you’re up and running. Klipper forum existing posts and active people there were very helpful.
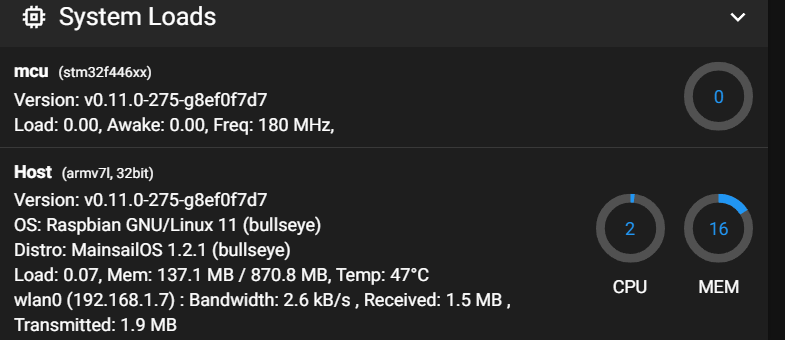
no CAN. USB communication with analog links to all components. It failed until I plugged in the temperature sensors and while it says it is 47 °C (offset by about 22 °C) it is reading something and while not correct, we can work with that.
!! it is working!!
1 Like
Congrats!
I also ran into startup failures until Temperature Sensor was correctly configured ( Start config failure thermocouple reader fault using max31865 on CAN EBB36 v1-2 with BIQU H2 V2S REVO ). I appreciate the safety focused design there, was frustrating at the time though.
at least it told me it was a temperature sensor, so I just had to plug it in
1 Like
For the record, I feel that as the rookie here it is my job to make all of the mistakes and document them so others will no have to do that. Even though most of these mistakes have been made before that doesn’t mean they aren’t worth making again for “production purposes,” though the only thing I hope to produce is a working system.
Public Service Announcement: a friend told me that one musn’t plug the BL touch into the LCD port, which is located right next to the bltouch connection pins, because then the USB will not enumerate, which could end up causing hours to be wasted trying to sort out why the board isn’t working… again. As it turns out, this can be easily remedied by moving the BLtouch one set of pins over so it will once again work though it may involve unplugging everything and systematically plugging each wire in individually and cycling the power to verify function at each step. Apparently the good news is that nothing fries in this scenario, but neither does it work until that is connected correctly
Status update: everything except the 2 end stops are connected. had to move fan0 part cooling fan to fan2 connection because fan0 doesn’t turn on the fan. The V1engineering 5015 fan I was sent is a 12V fan, so the jumper for that channel goes in the middle or if left at 24V it can be set in software the as the scale max of 0.5 instead of 1. Output on fan0 was 0 volts regardless of the output % setting. Temperature sensors are reporting believable numbers at 23 °C now as well.
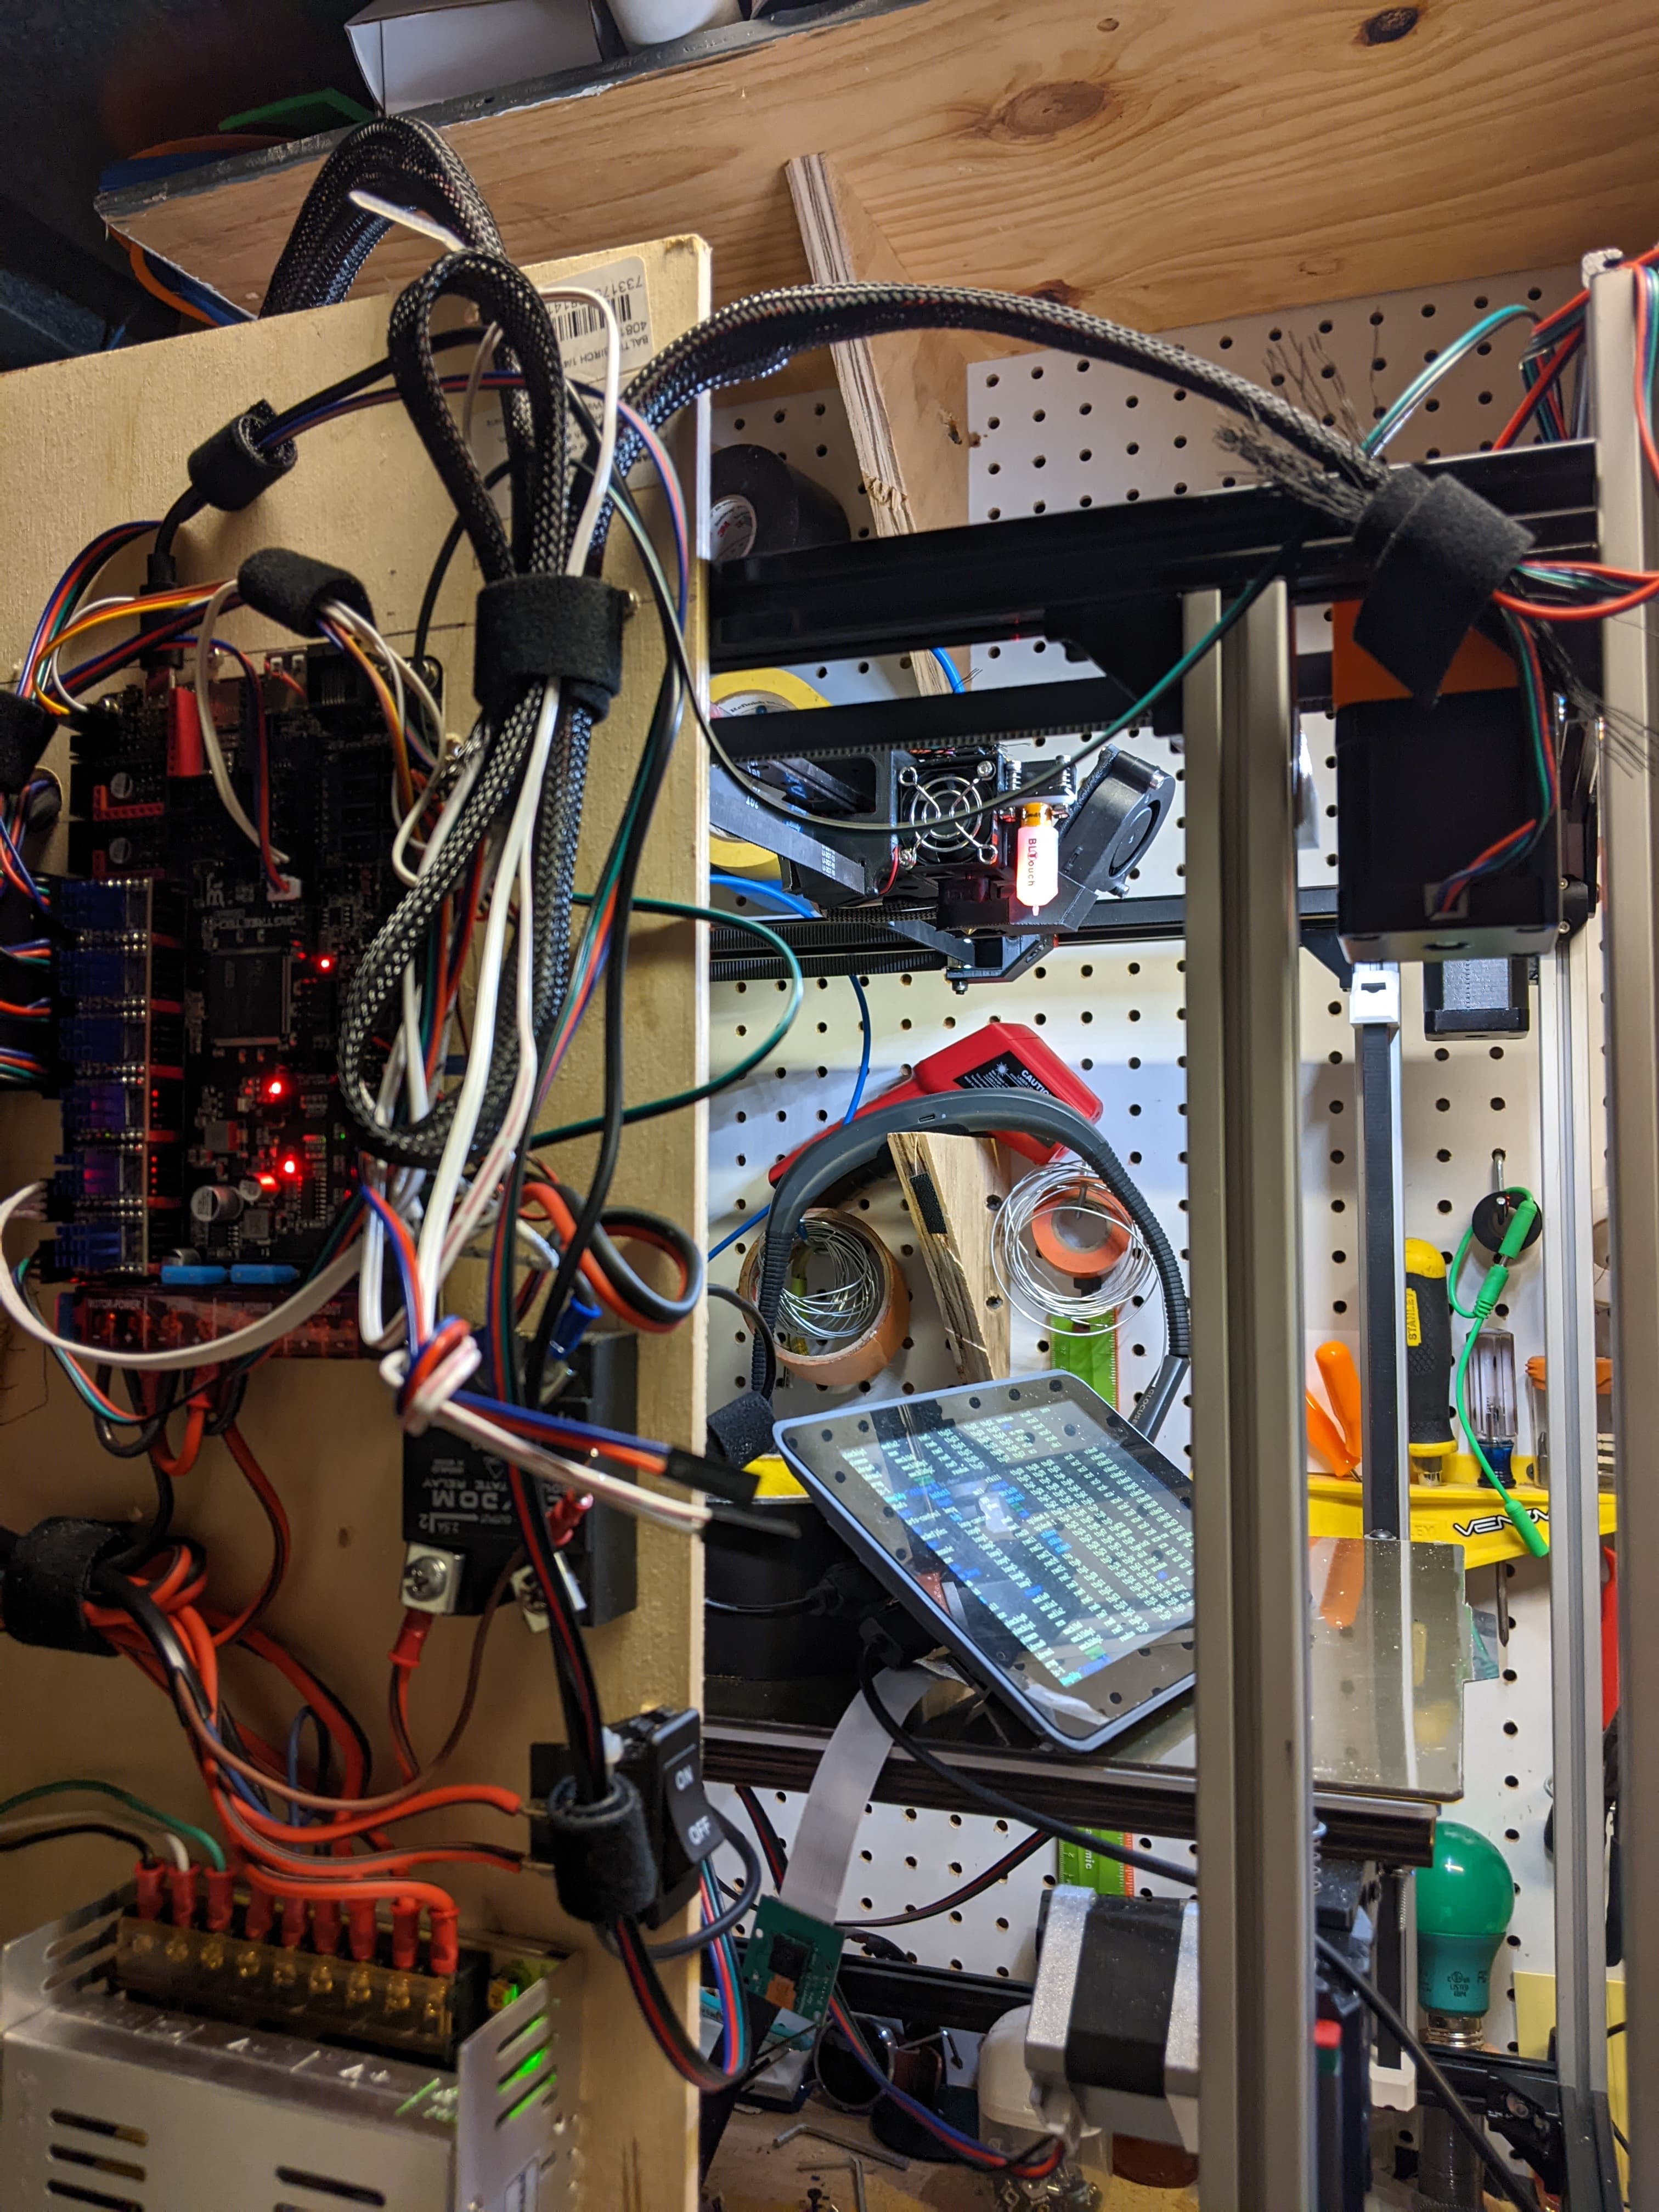
Latest picture:
So my next newb question has to do with KlipperScreen. After finding kiauh, it was installed easily, however nowhere is it stated what OS or OS mode must be used. The pi is in cli mode running a lite version. Having read through the KS docs and the fact that it isn’t working leads one to the possible conclusion that an x environment desktop setup might be required?
Again, just doing my job here asking all the rookie questions. One might suggest that is obvious, however I just implemented a smart tombstone halloween video player with a raspberry pi that shows video without the desktop and was command line only, so this is not necessarily a foregone conclusion.
1 Like
Status update:
- KlipperScreen (MIA - installed litedm for it - need to scour logs, priority is z movement)
- LCD screen: functional, but probably not necessary…
- CoreXY: both motors test fine (STEPPER_BUZZ STEPPER=stepper_x, STEPPER_BUZZ STEPPER=stepper_y). cannot command them to move until homing works. can’t home until z axis works.
- z axis: z motors have 6 pin interface jsh connectors and have overlapping coil pinouts, so center pins had to swap. 2 of 3 z motors are now working. The third one fails after one step and controller shuts down. It fails with the cable and driver from one of the working motors also. I believe it is a motor problem. the motor spins freely. Will swap with spare once spare is located. (these are repurposed motors from a friend, so there was some risk in using them. Backup plan is to order a few more from Ryan, which may happen soon.
- extruder motor appears to work, but is not yet calibrated… how do you do that with a direct drive setup?
- both x and y end stops are connected (!! no smoke) and working but likely the sense pins need to be set as pullup with a ^ before each pin name in printer.cfg (QUERY_ENDSTOPS)
- BLtouch functional as far as pin movement commands go (BLTOUCH_DEBUG COMMAND=pin_down, BLTOUCH_DEBUG COMMAND=pin_up). Had to swap sensor pin and control pin assignments in printer.cfg and add the pullup to one of them (^).
- both bed and hot end temperature sensors read 23 °C
- print cooling fan works and can be set to % of interest
- hot end fan not yet tested (automatic with hot end temperature)
- hot end heater not yet tested
- bed heater not yet tested
- controller fan not yet installed
- exhaust fan not yet purchased
the lynch pin here is the bad z motor. once that works, then several other things will be quickly tested. So close!
3 Likes
Status update:
- KlipperScreen working… run KlipperScreen-install.sh. it does everything and will run when the pi autologin to command line is selected
- CoreXY: carriage will home X and Y then go to center
- z axis: z motor not bad. One of those kids was doing his own thing and had a different wiring pinout than the other 2. BLtouch z homing not yet tested. The odd motor likes to skip steps every once in a while, so further wiring tests required.
- extruder motor appears to work, but is not yet calibrated… how do you do that with a direct drive setup?
- hot end fan works when hot end is activated.
- hot end heater heated to 30 degrees from 25 without issue (HE0 on octopus is not working - using HE3 for hot end)
- bed heater on SSR would not turn off. set to 50, but stopped it at 60… SSR on all the time. power supply (15 amps) fan turned on and it started to get really hot… SSR active ON all the time. After looking at schematic, wired up the octopus bed heater circuit and pulled SSR. Bed heated to 30 and held without issue. green light flashes on octopus with power pulses to the bed.
1 Like
Same way as with a bowden. Put some filament in and mark 100mm. extrude 100mm and see if your mark hit the right spot. If not, measure and make adjustments to your rotation distance in klipper.cfg.
120V Bed?
doesn’t it push it into the hot end? do you take the nozzle out for that?
24V bed, so the octopus has provision to run it with the 4 screw terminals on the board next to the motor and electronics power input screws. I had just seen all the SSRs in use, so I tried to use it. I wonder if the negative side switching causes issues.

Nope. I just pull the bowden tube from the input of the extruder and do it right there. You can do it anywhere in the filament path. you just need a reference.
I think most with SSR’s are using 120v beds. I had a mosfet on my Hypercube to run the 24VDC bed but actually removed it when I replaced the board with the Manta. Was just extra wiring that did not need to be there.
1 Like
For direct drive extruders, I do the calibration through the hot end, with it heated up. Wastes a little plastic, but also is a moment for me to study how the filament is flowing through the extruder.
2 Likes
I think I have the z axis working. Question on the BLtouch: when the system tries to home the z axis, shouldn’t the probe pop out to measure? it did that before I swapped the pin positions. Swapping the pin assignments, makes the debug commands work to extend and retract the probe, but it doesn’t extend when homing now. I watched teaching tech’s video on the BLtouch, which was very informative, but any additional insight for troubleshooting would be most useful.
Just about to head out the door. SOrry I can’t be more helpful but yes it should pop out. There are some g/M codes you can use to test the BL touch. You also need to make sure you use a PWM capable pin for the signal I believe.
1 Like

Yep, it does… Helps if other stuff like the steppers are plugged in correctly too.
