I’m using a H2V2s, but it requires a new carrier for it and a fan mount and a bltouch mount as well. Octopus works well for this and you can probably use someone’s config file and be running quickly. Either will work. Just be methodical with the wires.
Bonus points: if you decide to cut your area in half, you could mount a second extruder using one of the 2 extra channels and double your output… But an skr pro will work also.
From memory, the E3Dv6 block takes M3 thread screws. The set screw for the 3mm cartridge blocks are the same as the grub screws in those GT2 timing belt pulleys, and the 5mm-8mm lead screw couplers.
In the pit thermistor version, an M3x4mm screw works, I think an M3x6mm will still fit.
The clamp screw for the heater cartridge is a good old M3x8mm screw, but I think an M3x10mm will work. I ended up using some random ones I had around.
No my printer isn’t fully enclosed. Just side panels and the partial front. I found this fan/duct on printables and I’m going to give it a shot. The one @probrwr linked for me used a different heat block than mine has so I don’t think it will work.
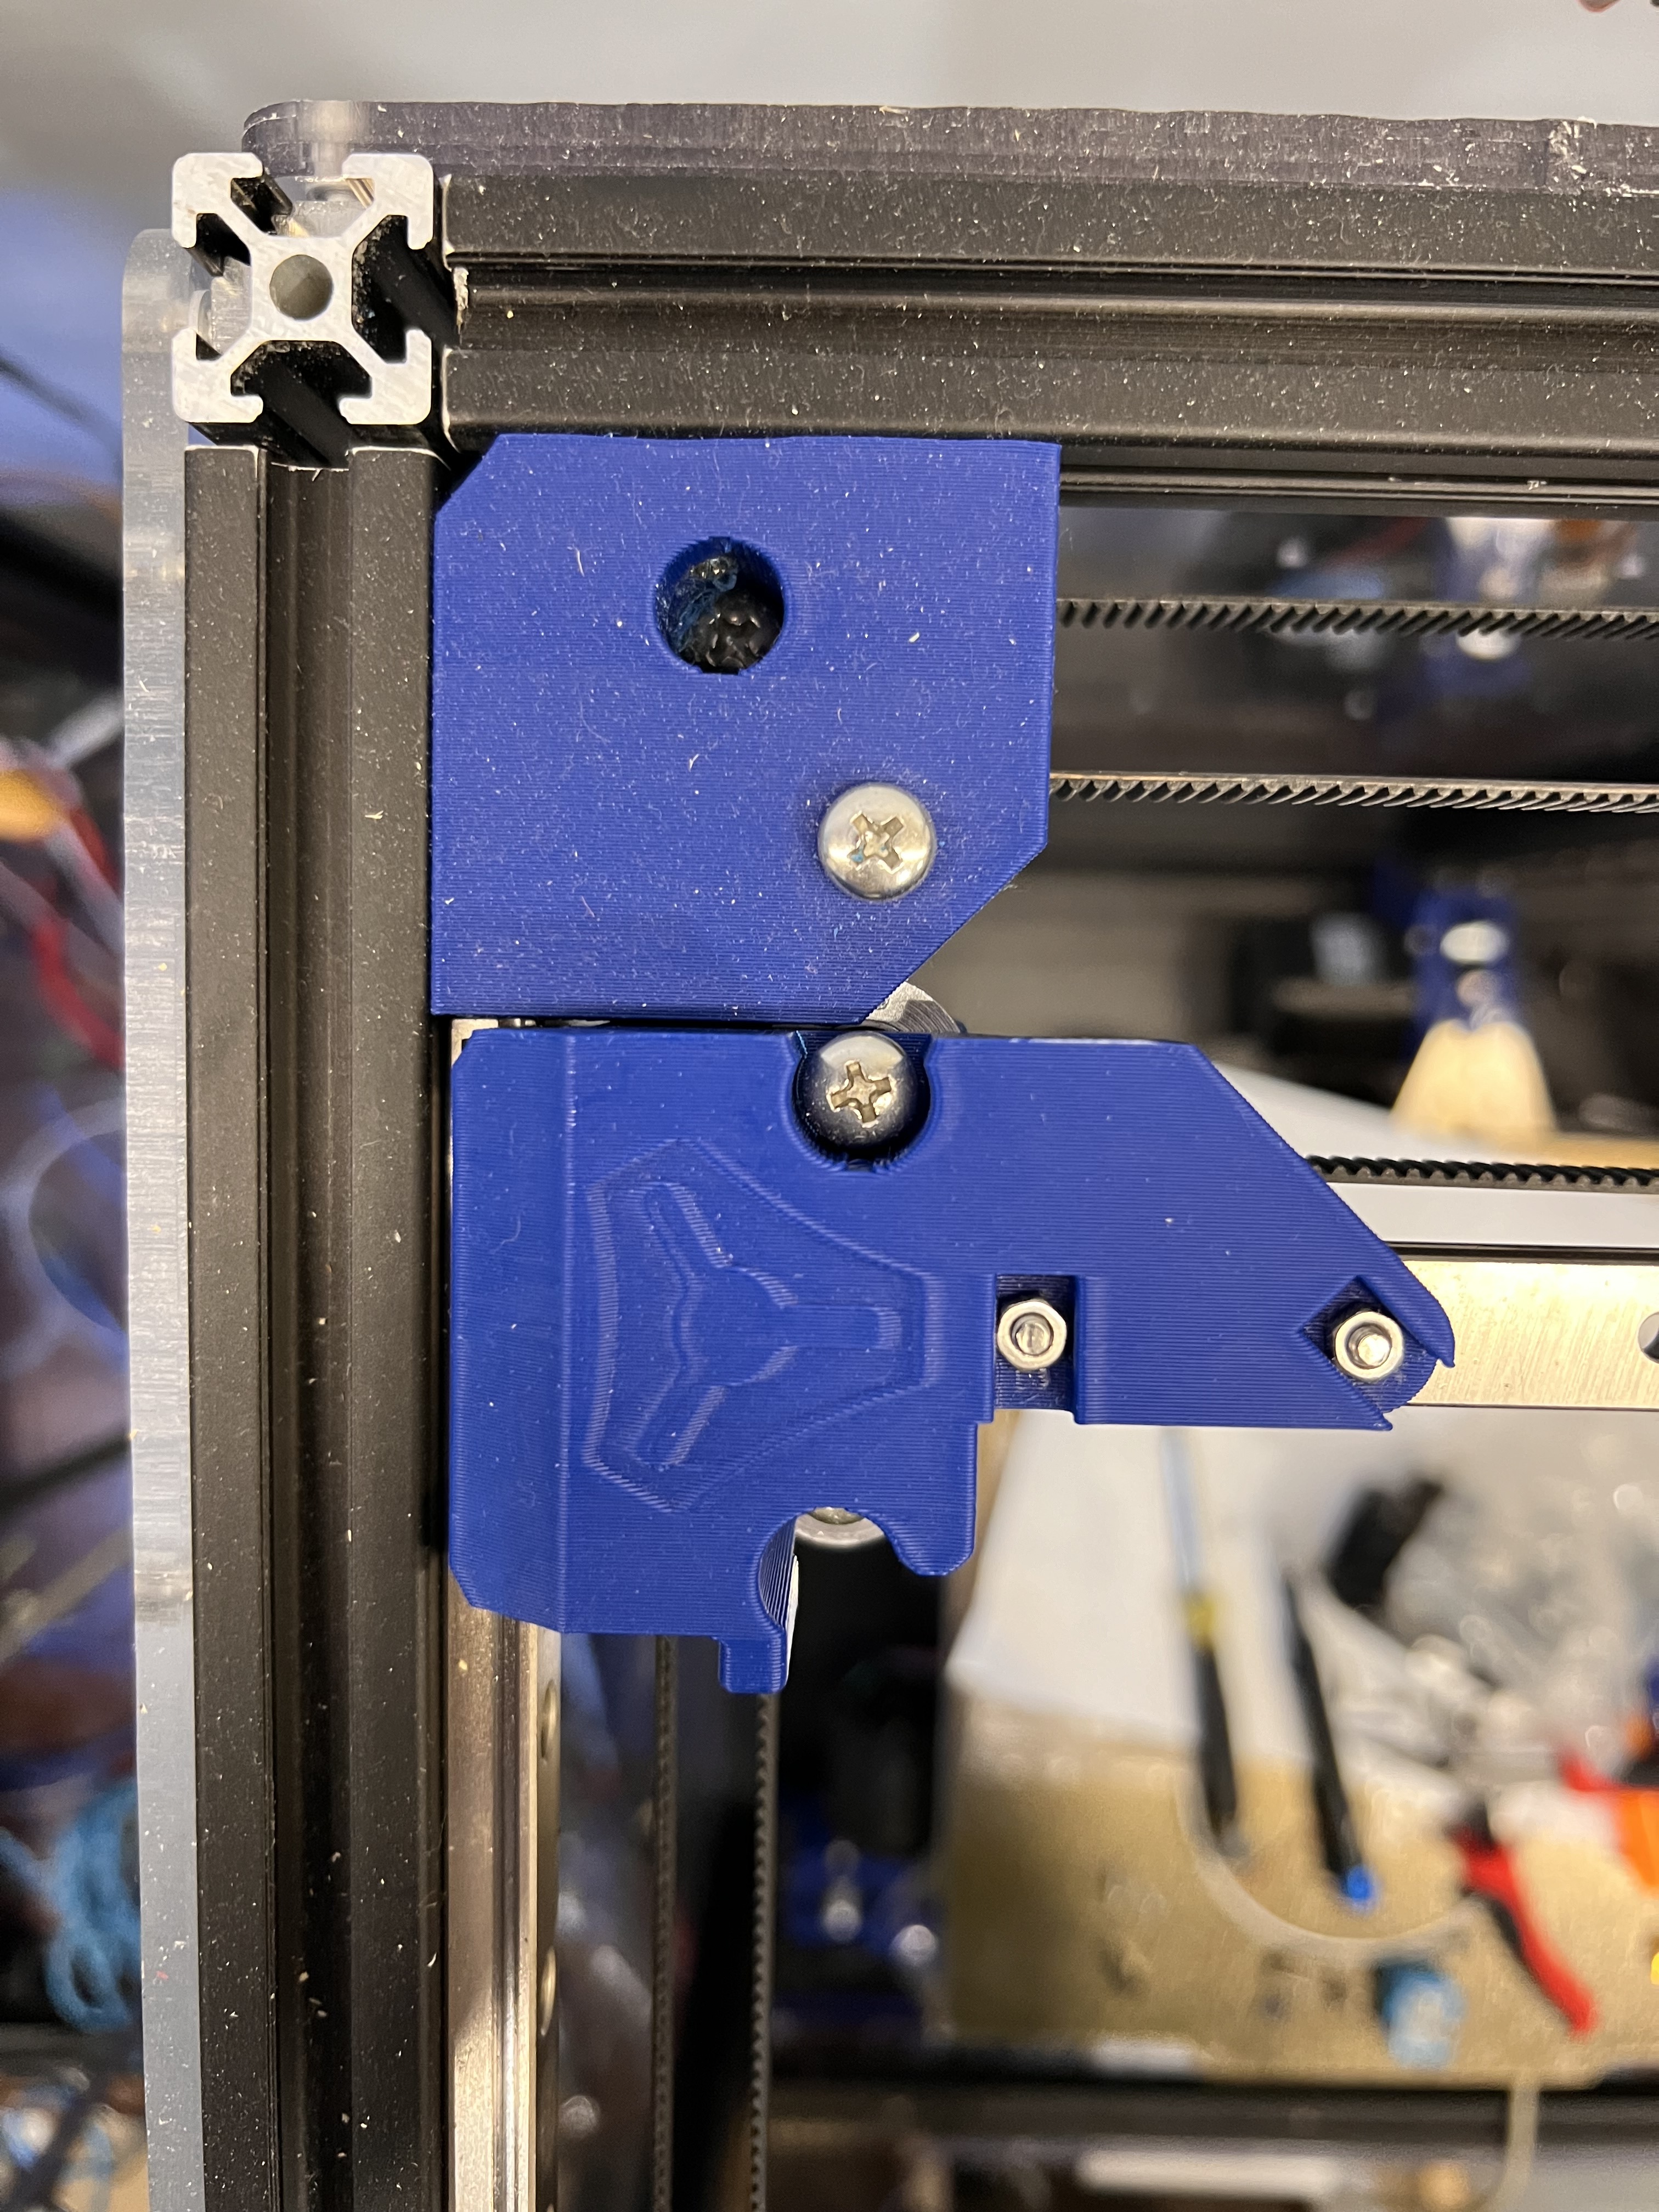
That is my mount. I do not have a door on it and honestly I am not sure if it sticks out past the front plane of the printer. I will look when I get home.
Good luck! Like that you’re going with larger screen, nice! My 3.5" screen is awkward to use. Fortunately printer is very close to PC, so am mostly using mainsail web app to interact/control.
Just created playlist of CANbus content I watched when setting up https://youtube.com/playlist?list=PLC3VDmXcVPU93-3EvwPKBNJz9Ci7V2tVx&si=ZLq9mTfzBpy6lD-H, watched bunch of Voron Octopus CANBus content given how similar the setup is. Includes some CANBus content not related to printer build, partly because am curious about using CANBus for other projects.
Mine are all in the same room but when doing something that you need to move things around its so much easier doing it right at the printer. Computer and printer are on opposite sides of the room. I put an HDMI 5 on my Ender 5 Plus and LOVE it. So wanted to try out the 7 and see if it was any better/ worth the extra money. The V4 has been a money pit anyways so why not LOL.
THANK YOU!!! This is Awesome!!! I’m sure I will need all the help plus some!
I need to go though your github again. I think the board I have is the same one you are running so with me adding the can bus as well I should be able to steal your printer.cfg as a good starting point and make things at least some what easier. I really need to learn how to navigate github better. IDK why but its always just so confusing to me.
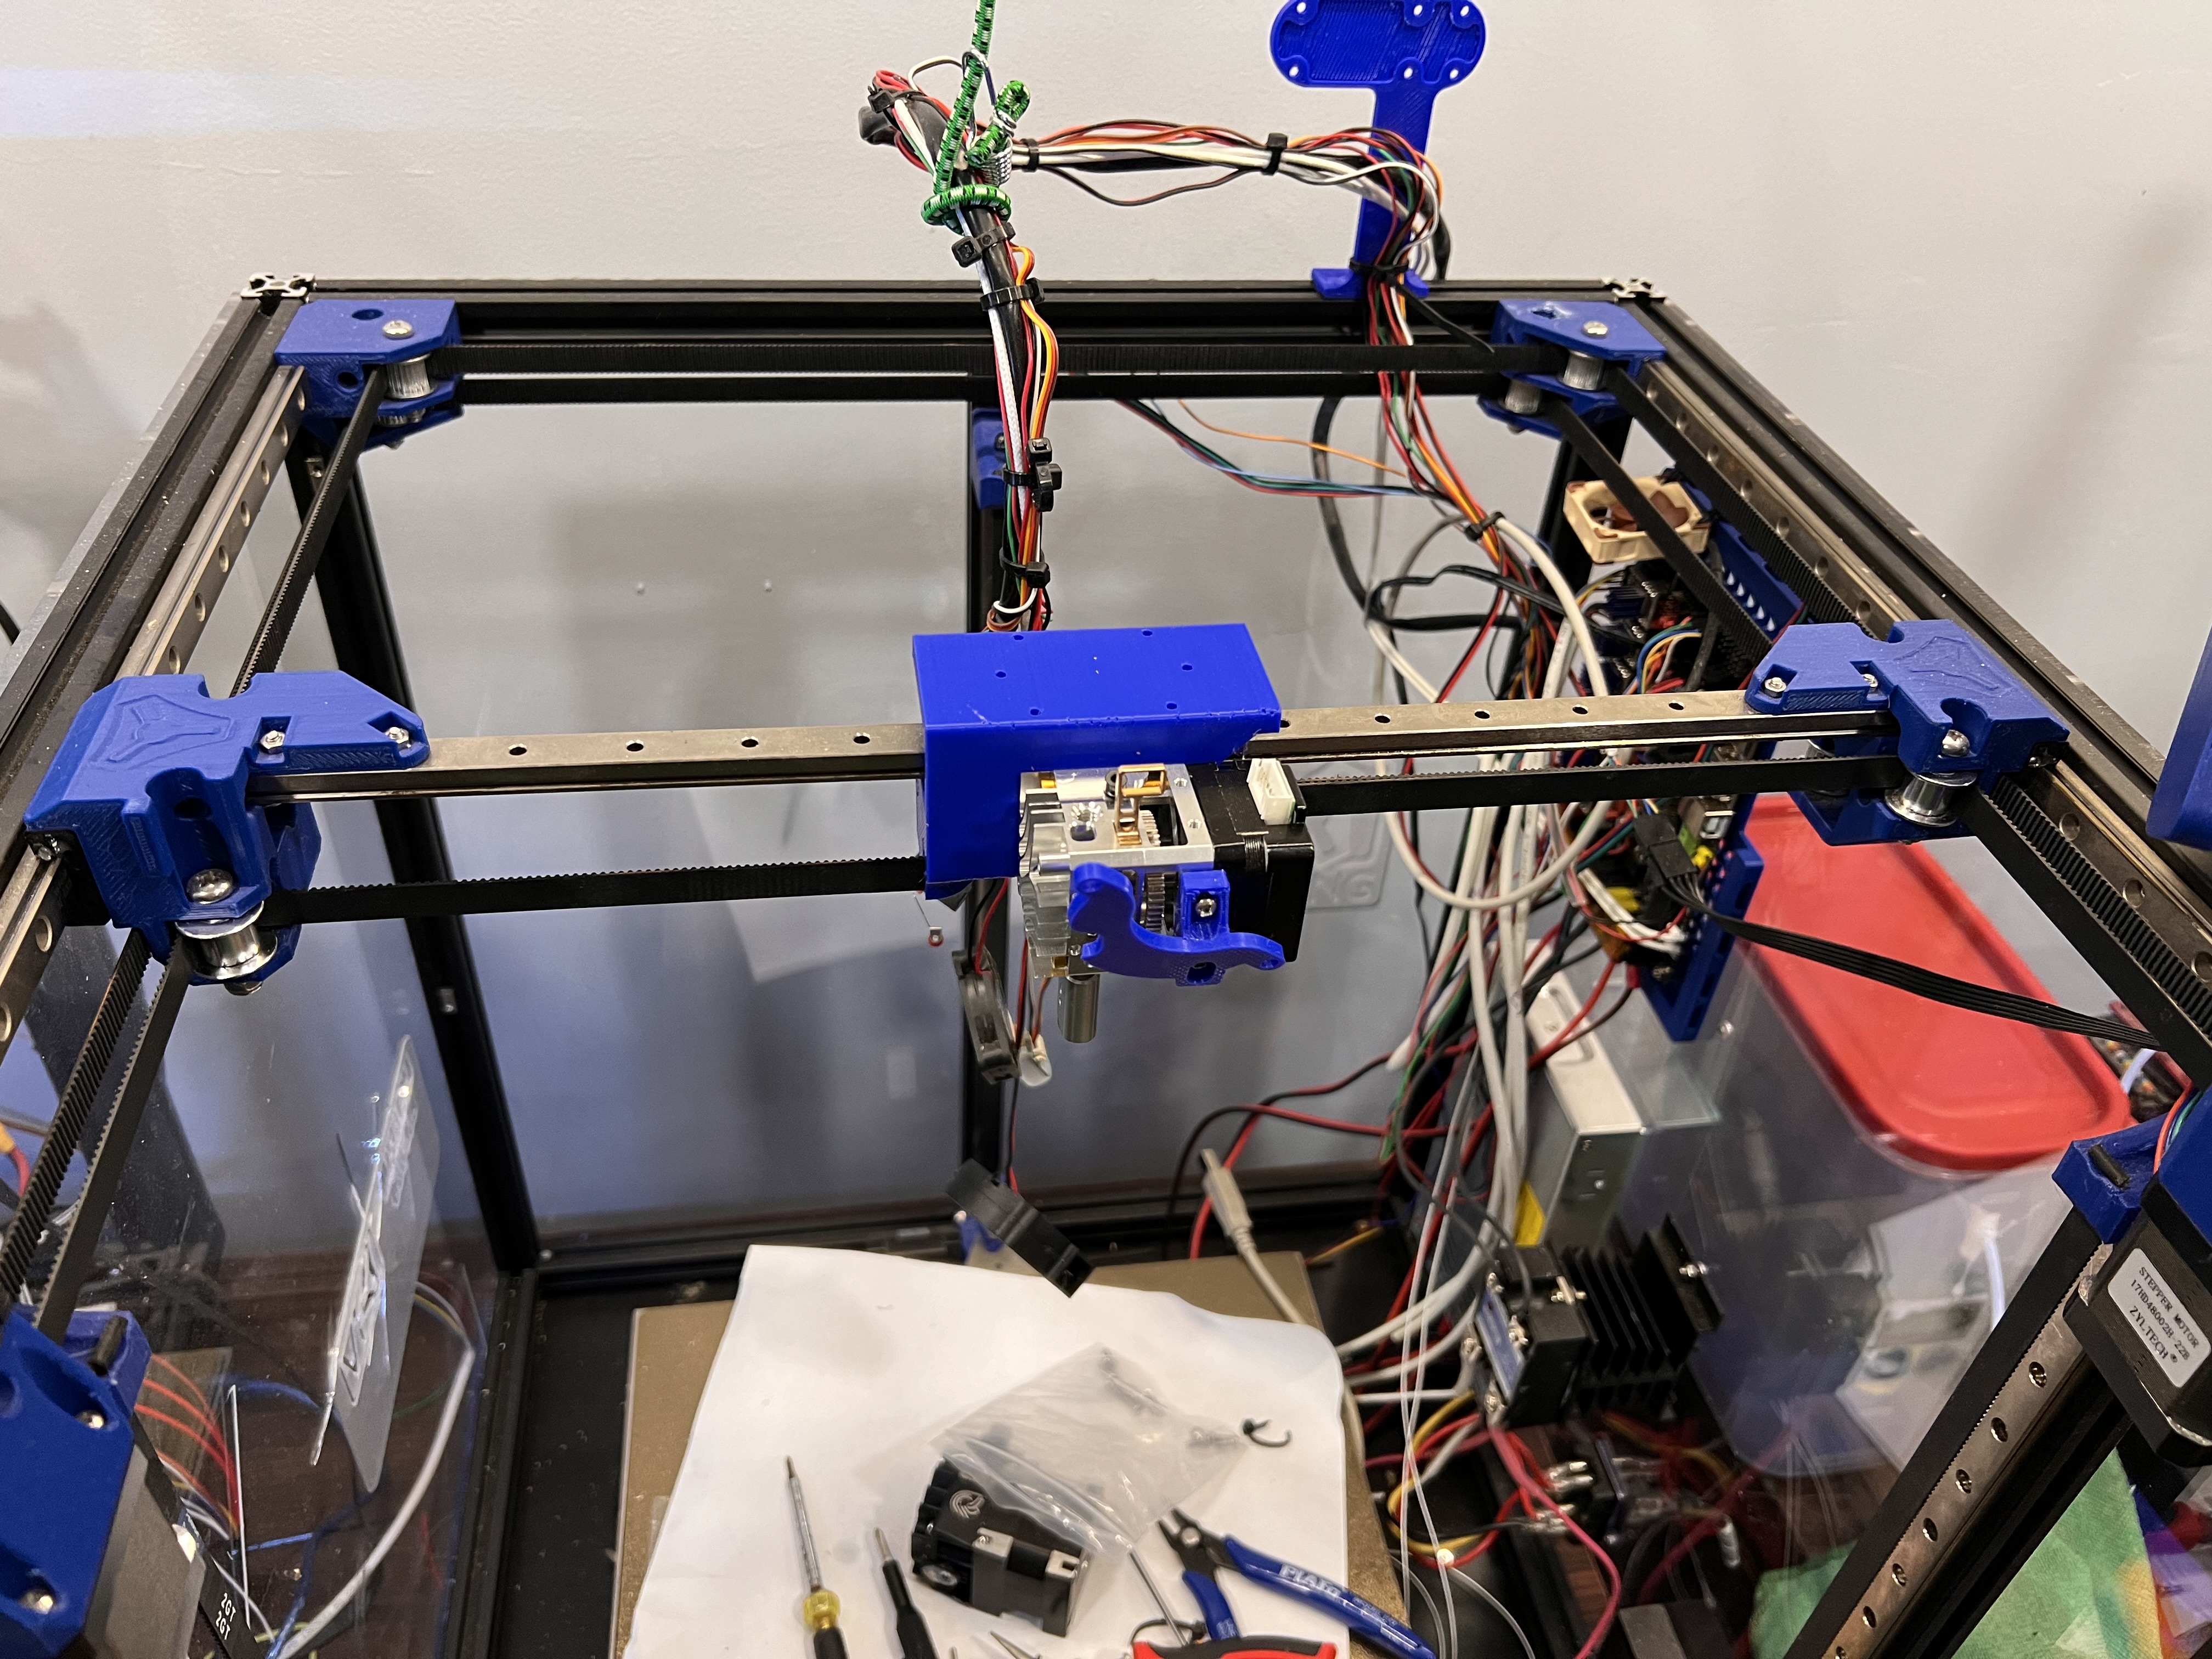
Making a little progress. Got the belts all reattached on the new core. And for the first time ever I was actually able to get it to land square in the back. I’ve fought with that so many times it’s not even funny
And he has what at quick glance seems to be a pretty good write up, and he is using the same boards I have, my octopus is the Pro v1.0 so a little different than yours but not by much.
Fixed link in my notes, added to Related: section. Definitely wouldn’t call my scraps a guide, was mainly a place to dump info for myself, but shared incase others benefit. Cheers!
@azab2c wanted to follow up on my post earlier. The fan DOES break the front plane by about 3/4 of an inch or so. I want to redesign that mount to make the fan mount straight up and down and that will fix that.
Thanks for confirming @probrwr! Was worried about how far the fan kicks out since I have a Pantheon inspire lid.
Ended up creating/using Printables, some goals I had :
Must allow full motion of tensioner arm, which should be comfortable to access.
Must enable disassembly for dealing with filament jam/clogs.
Must leave extruder stepper clear as possible for heatsinks.
Must leave front right holes clear for mounting stuff.
Must be clear at the front so nozzle can be clearly observed.
Must ensure Fan Duct placement is compact and not sticking out too far forward. I have limited front room due to my MP3DP’s polycarbonate lid.
Max air flow. Partial success here, I widened the opening, but could have done more to max flow.
Nice to have clip holes for custom grill to mount…
Works, but airflow and design could be better (less restrictive ductwork path, more precise venting). My favorite feature is the gratuitous use of grub screws Shared .stl, but happy to share .step/.f3d/.f3z if anyone wants to remix further, let me know? I like some of the Stealth Burner setups with LEDs lighting up the nozzle, that plus a cam would be awesome.


, Klipper, Web GUI, Wiring")