MP3DP V4 Build


Your nozzle should not be off the bed. It should be in 5mm (or whatever you have it set to). I have a feeling the Left and right parts are hitting the corners and it is erroring out thinking it is over 10mm away.

I will check on the next round when a printer starts but I don’t think mine probes from that far away.

1 Like

If those are new values the error is because several of those readings are 10mm and over. The last one fails because it is over 10+3.2

1 Like

I have had mine not trigger because it was so close the probe did not fully deploy.

1 Like

Just been reading along and wondered if the reversal of the springs on the bed mount plate might be a contributor to the issue as @Jonathjon posted.

If the mount bolts are not compressing the springs evenly on all three points the bed may believe it is level on the three points but actually be out at the far corners in relation to the probe?

2 Likes

i have it set to stay in 10mm. but is that setting probe to stay in 10mm or nozzle to stay in? it looks as if the probe is in 10mm on the bed.

1 Like

Im in the middle of fixing the hot end issue i created. Once im done with that im going to change the springs around and run it all again and see what happens.

1 Like

Either way, if you set a bed maximum the nozzle should never go outside of it. So maybe your minimum is a bit off. Home your machine and manually drive it to Y max to just before it hits the rear corners. Check the actual distance you have available to you both in X and Y. This might explain why your edges are so wacked out it is hitting hard stops.

The Y endstop has almost 8mm of adjustment, so you could easily be off.

1 Like

Ok I’m almost done changing out the spring locations for the bed support. Once done with that I will check the distance and let you know.

1 Like

There are some funny offsets when you probe. There are a few variables that work together. You can definitely configure it so the bed is smaller than the max travel distances. And it is technically better to do it that way, since the probe can reach close to the actual printing area, and then the nozzle gets offset by the probe offset distance, and it still reaches the entire printing area.

1 Like

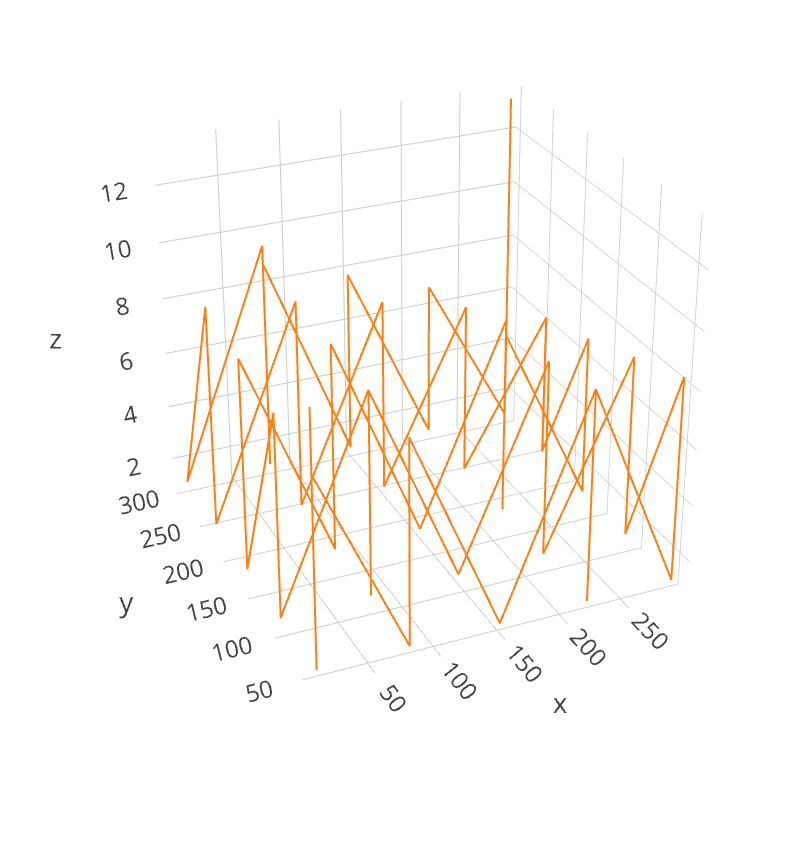
What in the world? These are all at the same xy, but they have different Z. Wildy different. I’m at a loss. I will plot these anyway, but these numbers must not mean what we think they mean.

1 Like

I second that statement!!! Wound up down a rabbit hole tiding some wires when i was fixing the hot end. Should have it back together and ready to give some answers in a few more min.

1 Like

How weird… It almost seems like there is a reasonable surface on the top of all these points. But they aren’t all populated, and almost all of them have some extra values.

I think the same link should be updated with these new values? IDK:

https://plotly.com/~jeffeb3/88/

Some of them look sort of close to where they were before too:

3 Likes

Everything looks great, until it fails to do that last point. Then it falls super fast. It would be terrifying if you didn’t catch it (I laughed out loud, because you did).

1 Like

It works.

It doesn;t make sense. One of the earlier ones was all over the place as well.

Look at the Y on this one. repeats 7, 5, 6, 1 nothing right about that. Should be 5, 5, 5, 5, 5 (five rows of five)

1 Like

Is it possible it is including points from the 3 point auto level?

If you take out the extras, it is 5,5,5,1 (and it failed here, so it makes some sense). But the extras don’t make sense to me.

Marlin/src/module/probe.cpp:719:

  // Stop the probe before it goes too low to prevent damage.
  // If Z isn't known then probe to -10mm.
  const float z_probe_low_point = axis_is_trusted(Z_AXIS) ? -offset.z + Z_PROBE_LOW_POINT : -10.0;

Written another way:

if (axis_is_trusted(Z_AXIS))
{
    z_probe_low_point = -offset.z + Z_PROBE_LOW_POINT; // (-3.2 + -2) = -5.2
}
else
{
    z_probe_low_point = -10.0;
}

It also looks like you can add more debug messages:

    #if ENABLED(DEBUG_LEVELING_FEATURE)
      if (DEBUGGING(LEVELING) && (probe_fail || early_fail)) {
        DEBUG_ECHOPGM_P(plbl);
        DEBUG_ECHOPGM(" Probe fail! -");
        if (probe_fail) DEBUG_ECHOPGM(" No trigger.");
        if (early_fail) DEBUG_ECHOPGM(" Triggered early.");
        DEBUG_EOL();
      }
    #else

So maybe enabling DEBUG_LEVELING_FEATURE could help. It might just lead to more questions though. That is always the risk :slight_smile:. If only you could flash your skr.

I’m not sure what makes an axis trusted either. I would have guessed it would be trusted after the z home/auto level.

2 Likes


it would be better like this. Oh, I see Ryan has already answered, but here is a picture anyway

2 Likes

ok after a few interruptions I got it back together…

G34 (it cut off the top part)

Z2-Z1=2.0000 Z3-Z2=1.2300 Z3-Z1=0.7700

G34 Iteration: 2

Z2-Z1=0.3000 Z3-Z2=0.2100 Z3-Z1=0.0900

G34 Iteration: 3

Z2-Z1=0.1800 Z3-Z2=0.1000 Z3-Z1=0.0800

G34 Iteration: 4

Z2-Z1=0.0200 Z3-Z2=0.0100 Z3-Z1=0.0100
Target accuracy achieved.
Did 4 of 8
Accuracy: 0.02

G29
X:10.0000 Y:46.0000 Z:10.0000 E:0.0000 Count A:1000B:4600 Z:1000
X:10.0000 Y:46.0000 Z:1.2000 E:0.0000 Count A:1000B:4600 Z:120
X:10.0000 Y:46.0000 Z:7.5800 E:0.0000 Count A:1000B:4600 Z:758
X:80.0000 Y:46.0000 Z:8.0700 E:0.0000 Count A:8000B:4600 Z:807
X:150.0000 Y:46.0000 Z:8.3000 E:0.0000 Count A:15000B:4600 Z:830
X:220.0000 Y:46.0000 Z:8.3200 E:0.0000 Count A:22000B:4600 Z:832
X:290.0000 Y:46.0000 Z:8.1000 E:0.0000 Count A:29000B:4600 Z:810
X:290.0000 Y:109.5000 Z:1.2000 E:0.0000 Count A:29000B:10950 Z:120
X:220.0000 Y:109.5000 Z:1.2000 E:0.0000 Count A:22000B:10950 Z:120
X:150.0000 Y:109.5000 Z:1.2000 E:0.0000 Count A:15000B:10950 Z:120
X:80.0000 Y:109.5000 Z:1.2000 E:0.0000 Count A:8000B:10950 Z:120
X:10.0000 Y:109.5000 Z:1.2000 E:0.0000 Count A:1000B:10950 Z:120
X:10.0000 Y:173.0000 Z:1.2000 E:0.0000 Count A:1000B:17300 Z:120
X:80.0000 Y:173.0000 Z:1.2000 E:0.0000 Count A:8000B:17300 Z:120
X:150.0000 Y:173.0000 Z:1.2000 E:0.0000 Count A:15000B:17300 Z:120
X:220.0000 Y:173.0000 Z:1.2000 E:0.0000 Count A:22000B:17300 Z:120
X:290.0000 Y:173.0000 Z:7.7600 E:0.0000 Count A:29000B:17300 Z:776
X:290.0000 Y:173.0000 Z:7.1400 E:0.0000 Count A:29000B:17300 Z:714
X:290.0000 Y:236.5000 Z:6.6000 E:0.0000 Count A:29000B:23650 Z:660
X:220.0000 Y:236.5000 Z:7.4900 E:0.0000 Count A:22000B:23650 Z:749
X:150.0000 Y:236.5000 Z:8.1700 E:0.0000 Count A:15000B:23650 Z:817
X:80.0000 Y:236.5000 Z:8.6700 E:0.0000 Count A:8000B:23650 Z:867
X:10.0000 Y:236.5000 Z:8.9100 E:0.0000 Count A:1000B:23650 Z:891
X:10.0000 Y:300.0000 Z:9.2200 E:0.0000 Count A:1000B:30000 Z:922
X:80.0000 Y:300.0000 Z:1.2000 E:0.0000 Count A:8000B:30000 Z:120
X:150.0000 Y:300.0000 Z:1.2000 E:0.0000 Count A:15000B:30000 Z:120
X:220.0000 Y:300.0000 Z:1.2000 E:0.0000 Count A:22000B:30000 Z:120
X:290.0000 Y:300.0000 Z:1.2000 E:0.0000 Count A:29000B:30000 Z:120
X:290.0000 Y:300.0000 Z:13.2000 E:0.0000 Count A:29000B:30000 Z:1320

Still kills at the last probe.

I know there are other things I need to check but I have to step out again. My apologies. I truly do appreciate all the help!!!

While we’re doing comparison photos…


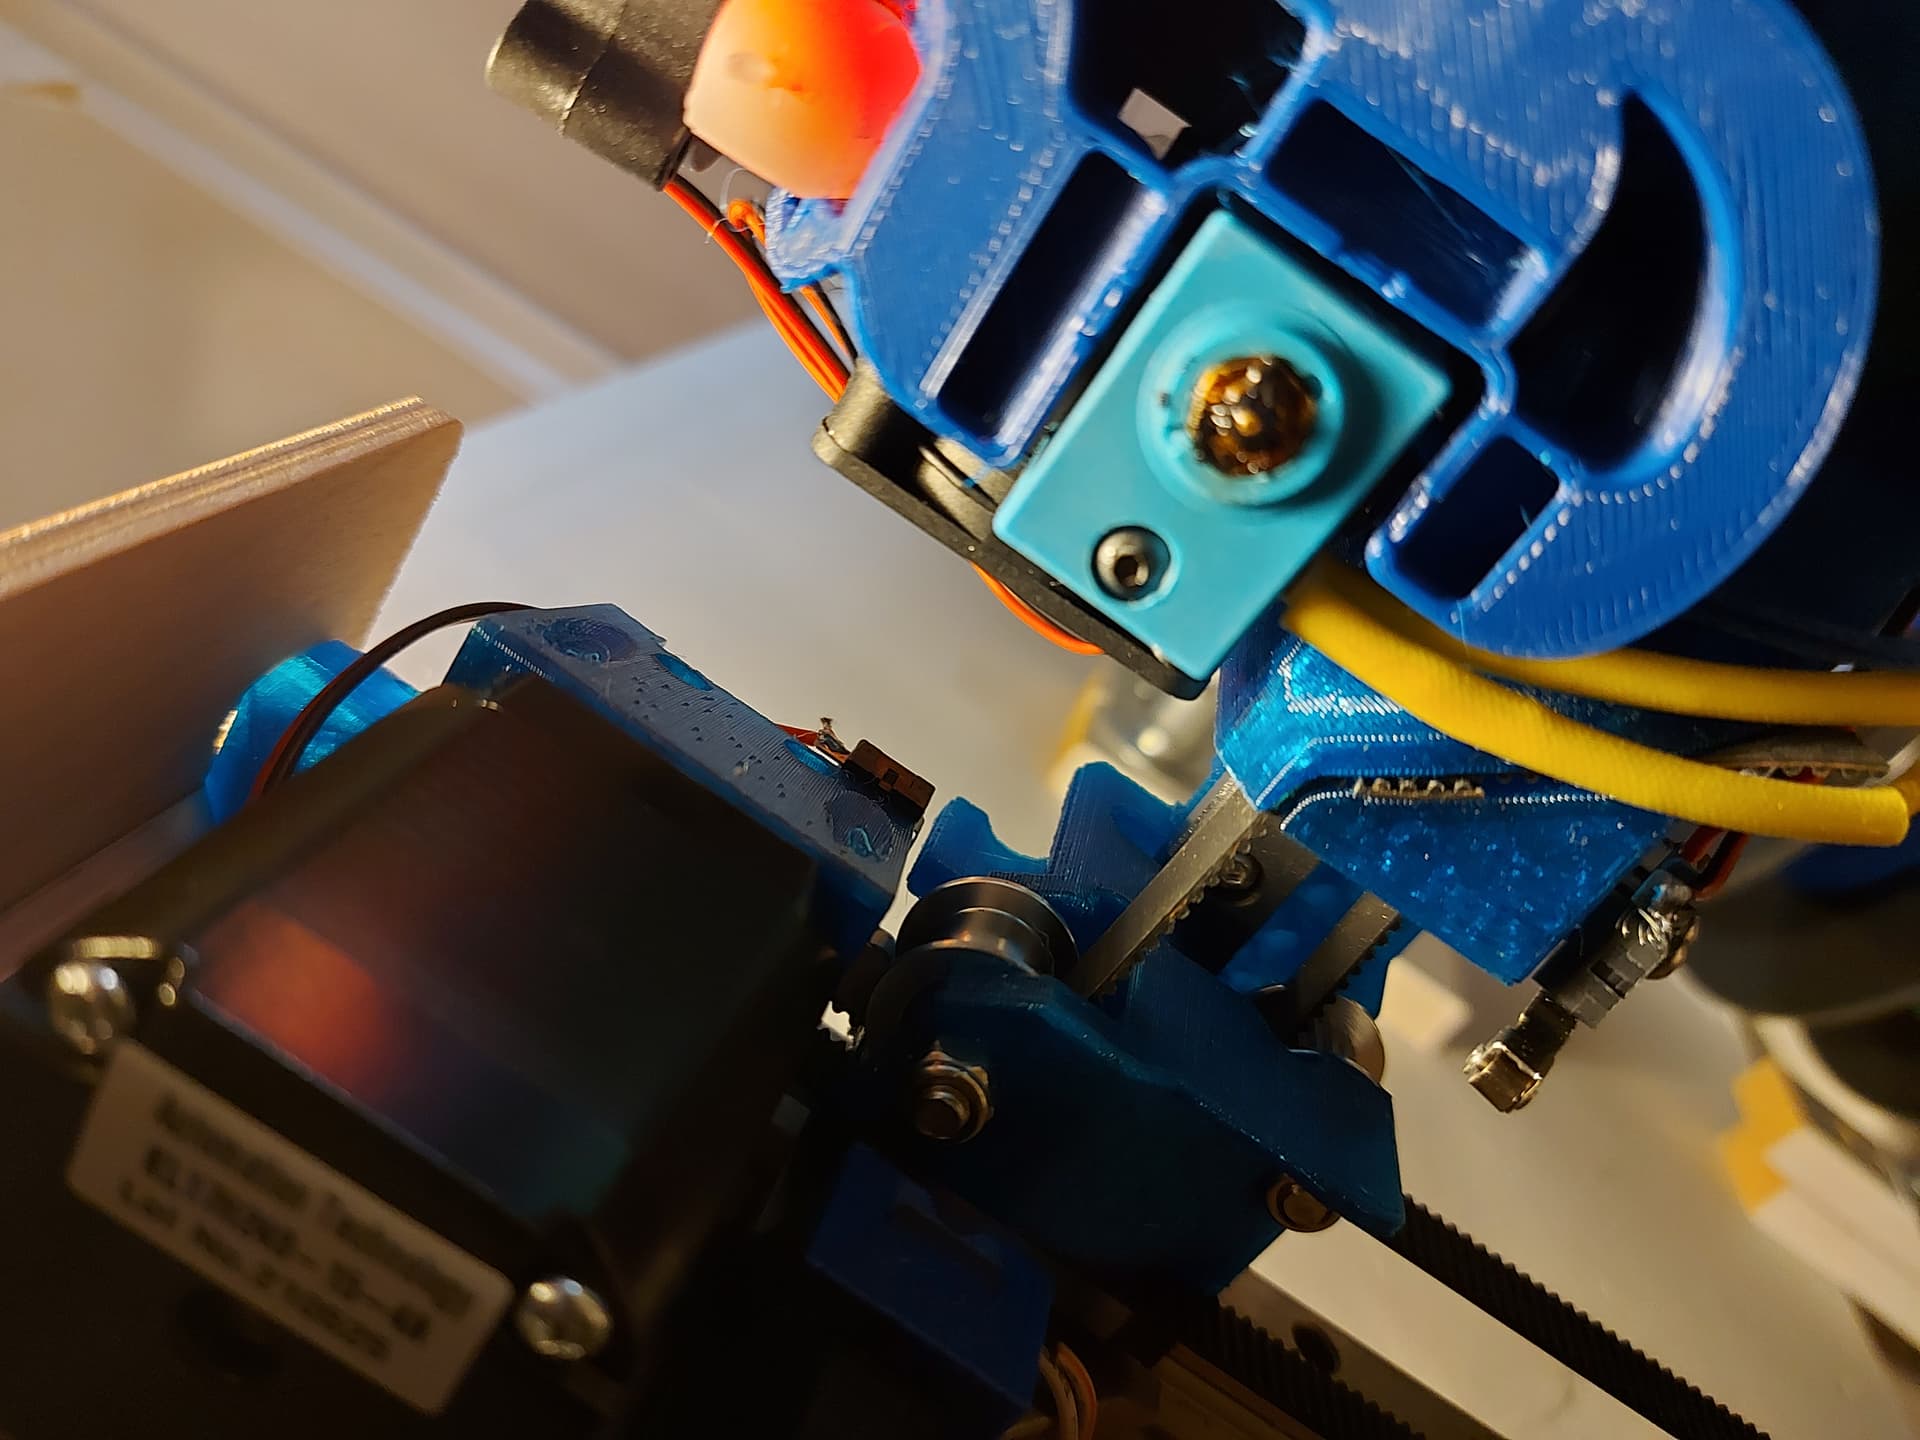
Edit: mine isnt quite right, it should be sitting with the screw towards the inside of the slot, something got weird when I changed the dimensions. All the slots got mixed up, and I forgot to fix this one.

2 Likes

He already did that and noticed that mistake. :smile:

2 Likes