First try with the new front panel installed… Bed at 60°C for about 5 min before i started test…
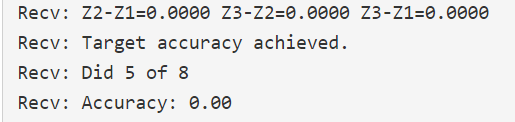
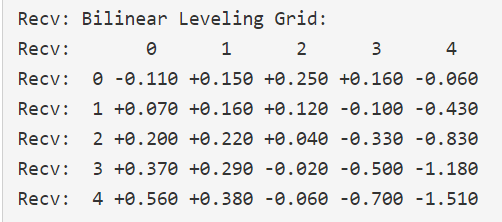
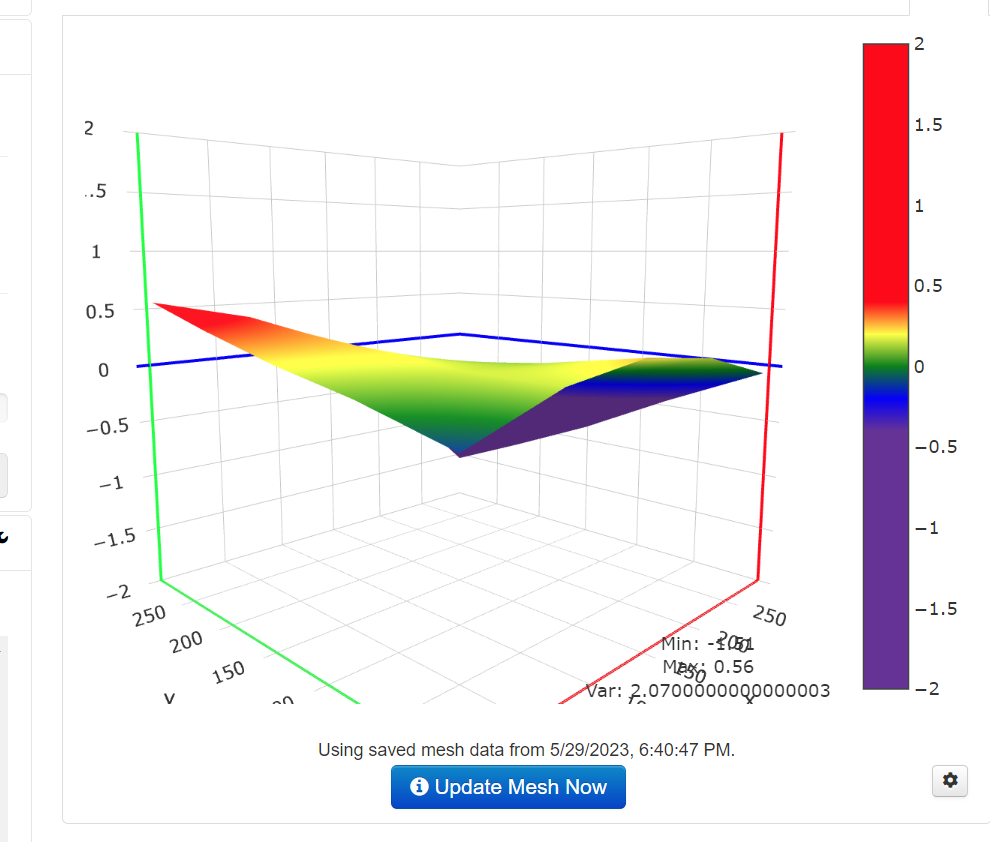
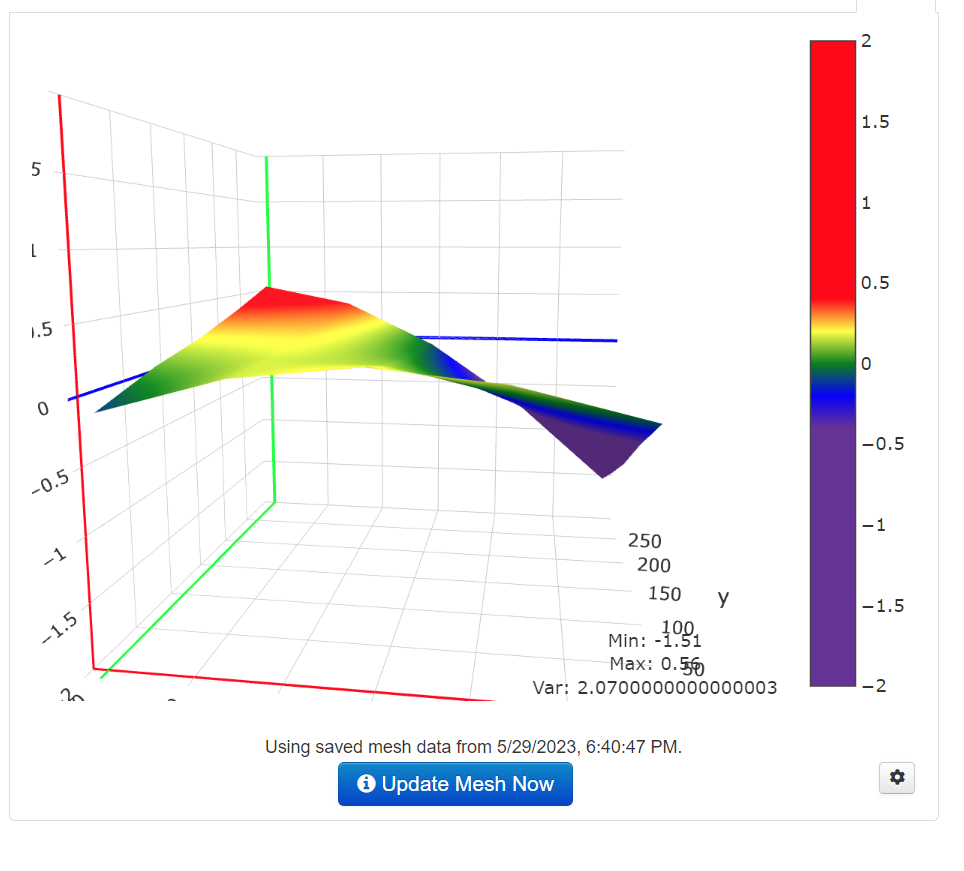
So what do we think??? Seems like its better but still not great. But I’m not the best at looking at this and knowing for sure if its ok. @vicious1
First try with the new front panel installed… Bed at 60°C for about 5 min before i started test…
So what do we think??? Seems like its better but still not great. But I’m not the best at looking at this and knowing for sure if its ok. @vicious1