“Infill on the parts is not a big deal I use 20%+ will be fine 40% is really nice, but make sure to use 2-3 perimeter walls to keep the through hole support.”
23-03-14 Edit: Ended up using 3 wall, 35% cubic. Didn’t like how much gyroid infill pattern was rattling and slinging the bed around (Ender 3 Max).
Story: I have a bunch of Ikea cabinetry in my kitchen, which I loathe, because it was installed poorly. It’s also now obsolete, so the only POSSIBLE saving grace (That you can just go to Ikea and update stuff) is no longer valid…
Anyway, one of the pieces is a lazy susan type thing to get to an area that has no door. This seems ot be so that you can get into a corner area. The shelves have a metal guard wire around them supported by a dozen or so little clips (No longer available) that attach the wire to the shelf. These break. So I drew up a replacement in CAD and set about printing them as a longer print…
The print isn’t that big, but 12 little clips about 8mm tall, and maybe 20mm by 55mm in size. Printed at 3 layers/mm, so 24 layers. The first 22 layers went pretty well. One part warped a little on the small pins that anchor the part into the shelf, but otherwise everything looked acceptable.
Then the printer decided to pick up 16 of the remaining pieces and move them around the heated bed, more or less at random. F***. End result, 0 pieces printed OK.
Time to get the steel wool, I think and give the PEI spring plate a good scrubbing.
The first 22 layers though, AMAZING! No trace of any kind of printing artefacts in them.
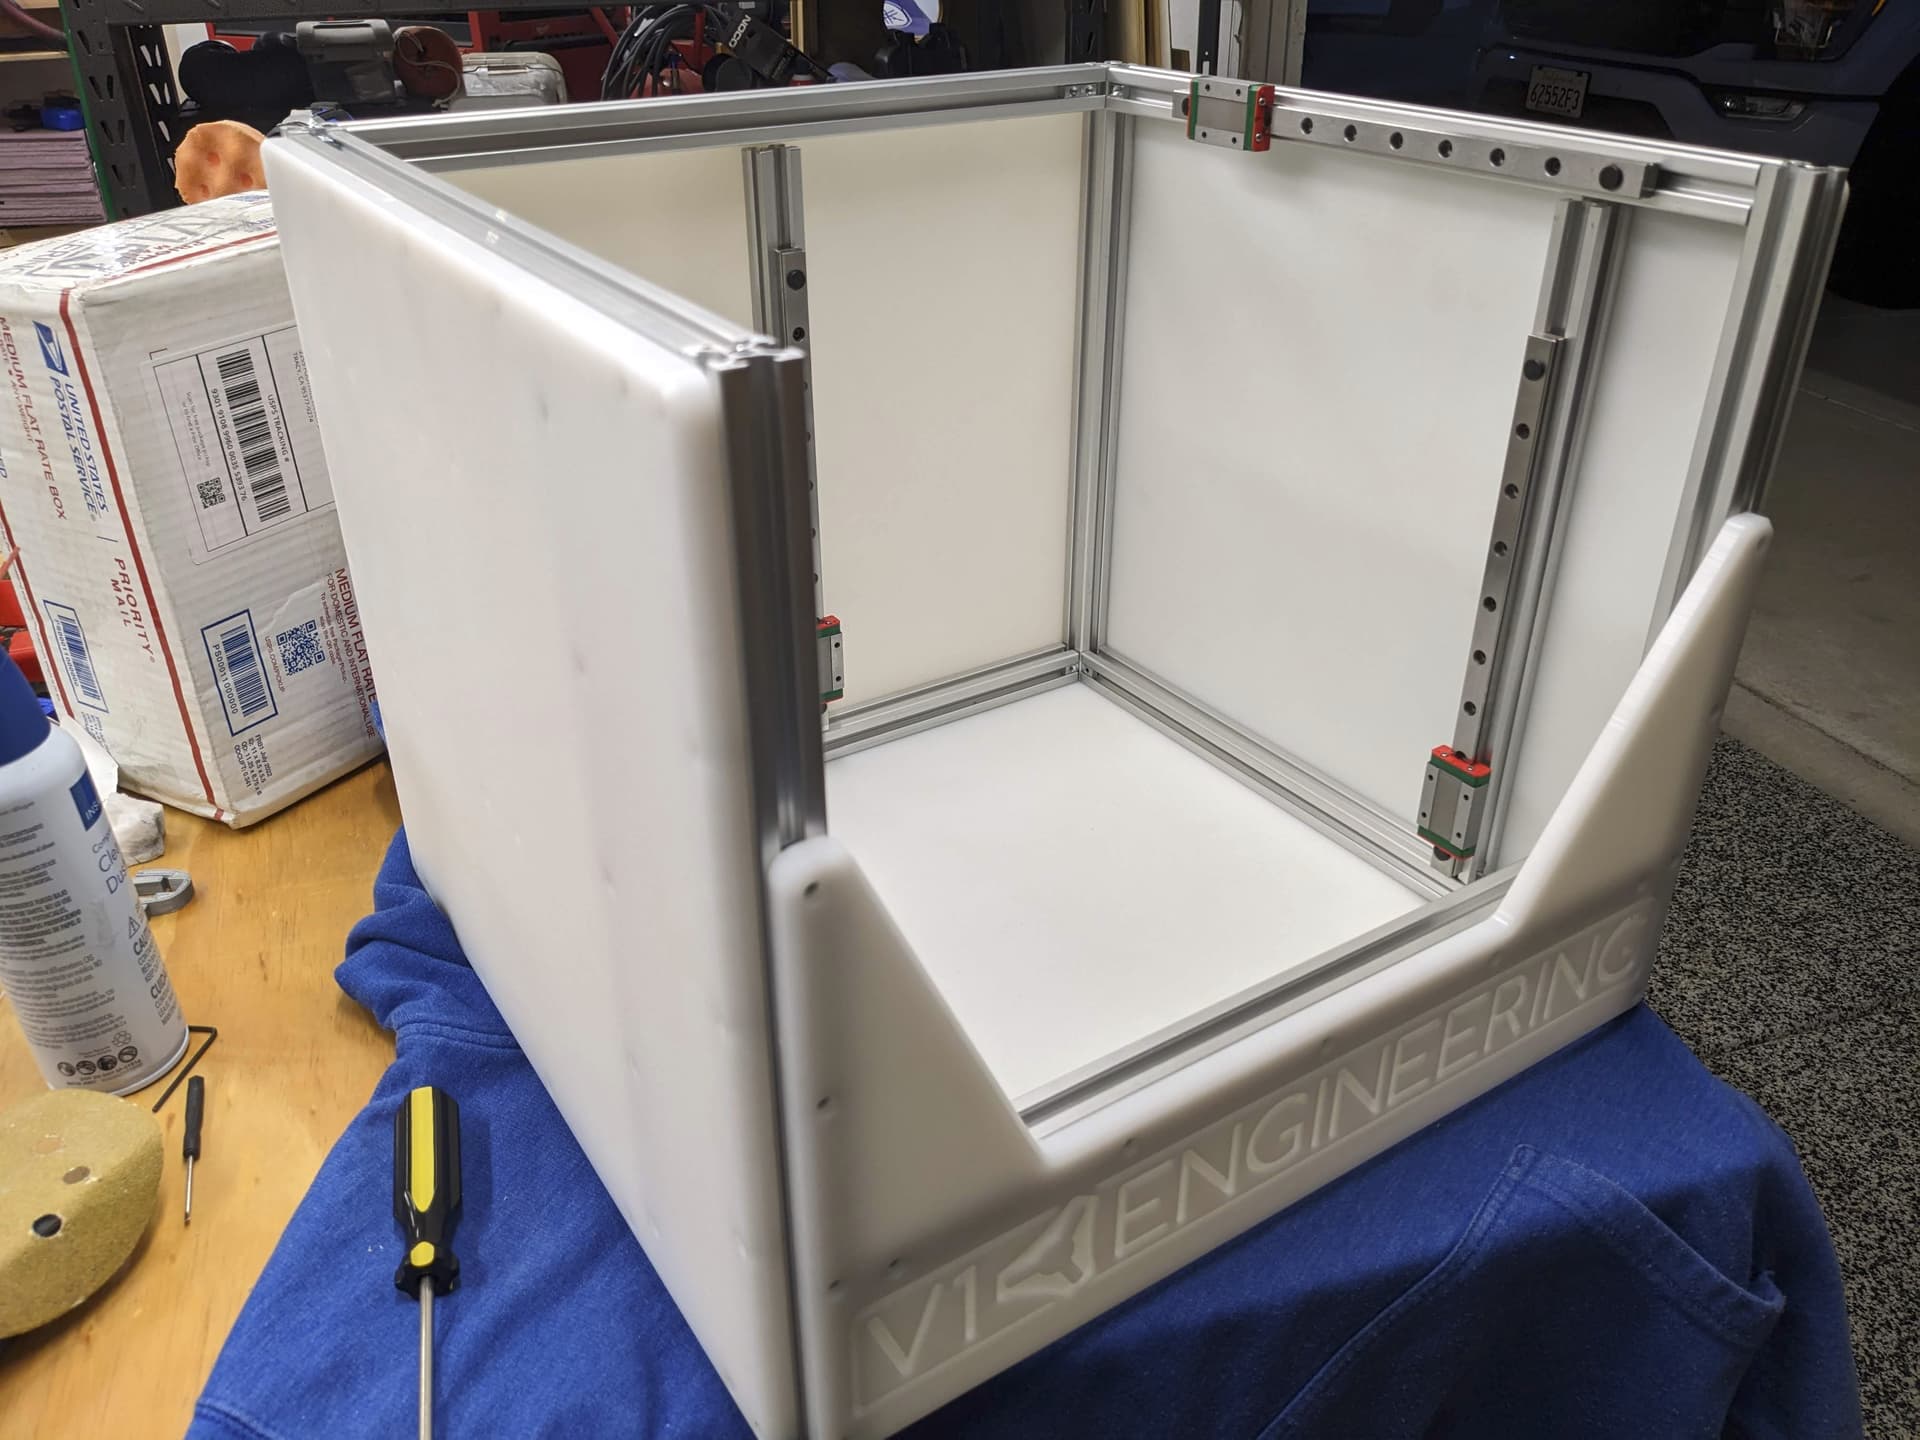
I just put my back panel together, as perfectly square as I could measure, with no trying. I am very excited for the panel and extrusion combo. Thank you!
Yeah, I actually ended up using the magic eraser, but I haven’t tried it yet. I had one PEI sheet that I never did get anything to stick to.
I used to use glass, which worked reasonably well. I found that 8X10 picture frames from the dollar store had a reasonable thin sheet of glass. It wasn’t borosilicate, so it was fragile and wouldn’t deal well with thermal stress, but when each one costs $1.25, and lasts for months, who cares? When one broke I just swapped it out, put the pieces back in the frame and tossed it. Glass works great with PETg, though you have to wait for it to cool before you can remove it, and you can’t cool that glass quickly. The PEI on spring steel is nicer, because you can run it under cold water on the backside if you’re in a hurry.
Going to do some more calibration printing with it today and see if I can get it dialed right in
I am excited to try CNC Kitchen’s flow test. That is a lot less subjective than the flow test on Teaching Tech’s guide, I think I went a bit to conservative.
I need to do another round of calibration. I think I can print faster and I have some stringing starting to pop up.
Just can’t make the PLA stick to the PEI sheet, so I went back to the old standard… Blue tape.
I think this is a good spot for the ESP32cam I can see the nozzle, so good for monitoring the first layer. Hard to see what it’s printing until it’s a little taller though. Also, glare from the LED pucks…
I found that two things help and make them amazing. 1. A super light scuffing with 2000 grit sand paper (I heard a magic eraser works well too) and 2. Isopropyl (91%) rub down before every print while the bed is heating up.
It may be this batch of PLA. I had some (Same brand) before and it printed without issues on a PEI sheet. That’s what my LowRider3 is printed with. The last 2 spools of PLA I bought just won’t stick. Not to this sheet, and not to the sheet that’s in the v3.
Seems to stick just fine to the blue tape though.
This print are the belt holders for the Primo. The belt holders that I had before were a super tight fit, and I’m not confident that I can remove them from the Primo corners without breaking them, so I’m printing new ones in preparation for cutting down the Primo to a more rigid size.
I’m thinking that I might just cut the Y axis usable size in half from 37" to 19" and leave the X axis at 25" The 25" seems quite handy since lots of material comes in 2’ widths.
The other possibility is reducing both axes and going with 13" by 19" I think this is feasable since I have the LowRider for larger goods, and I want to be able to mill aluminum parts. I think that if I could do that size it would be adequate for about anything that I would want in aluminum.