Have the Biqu mount installed and ran the belts last night. Hoping to have the physical construction roughly done by the end of the weekend so that I can move on to electronics.
Has anyone else used the Biqu mount? Having a hard time finding a cooling setup that doesnt conflict with the support rails.
Sorry for the lack of updates on my end, I’ve had a lot going on my personal life that’s REALLY slowed my build down.
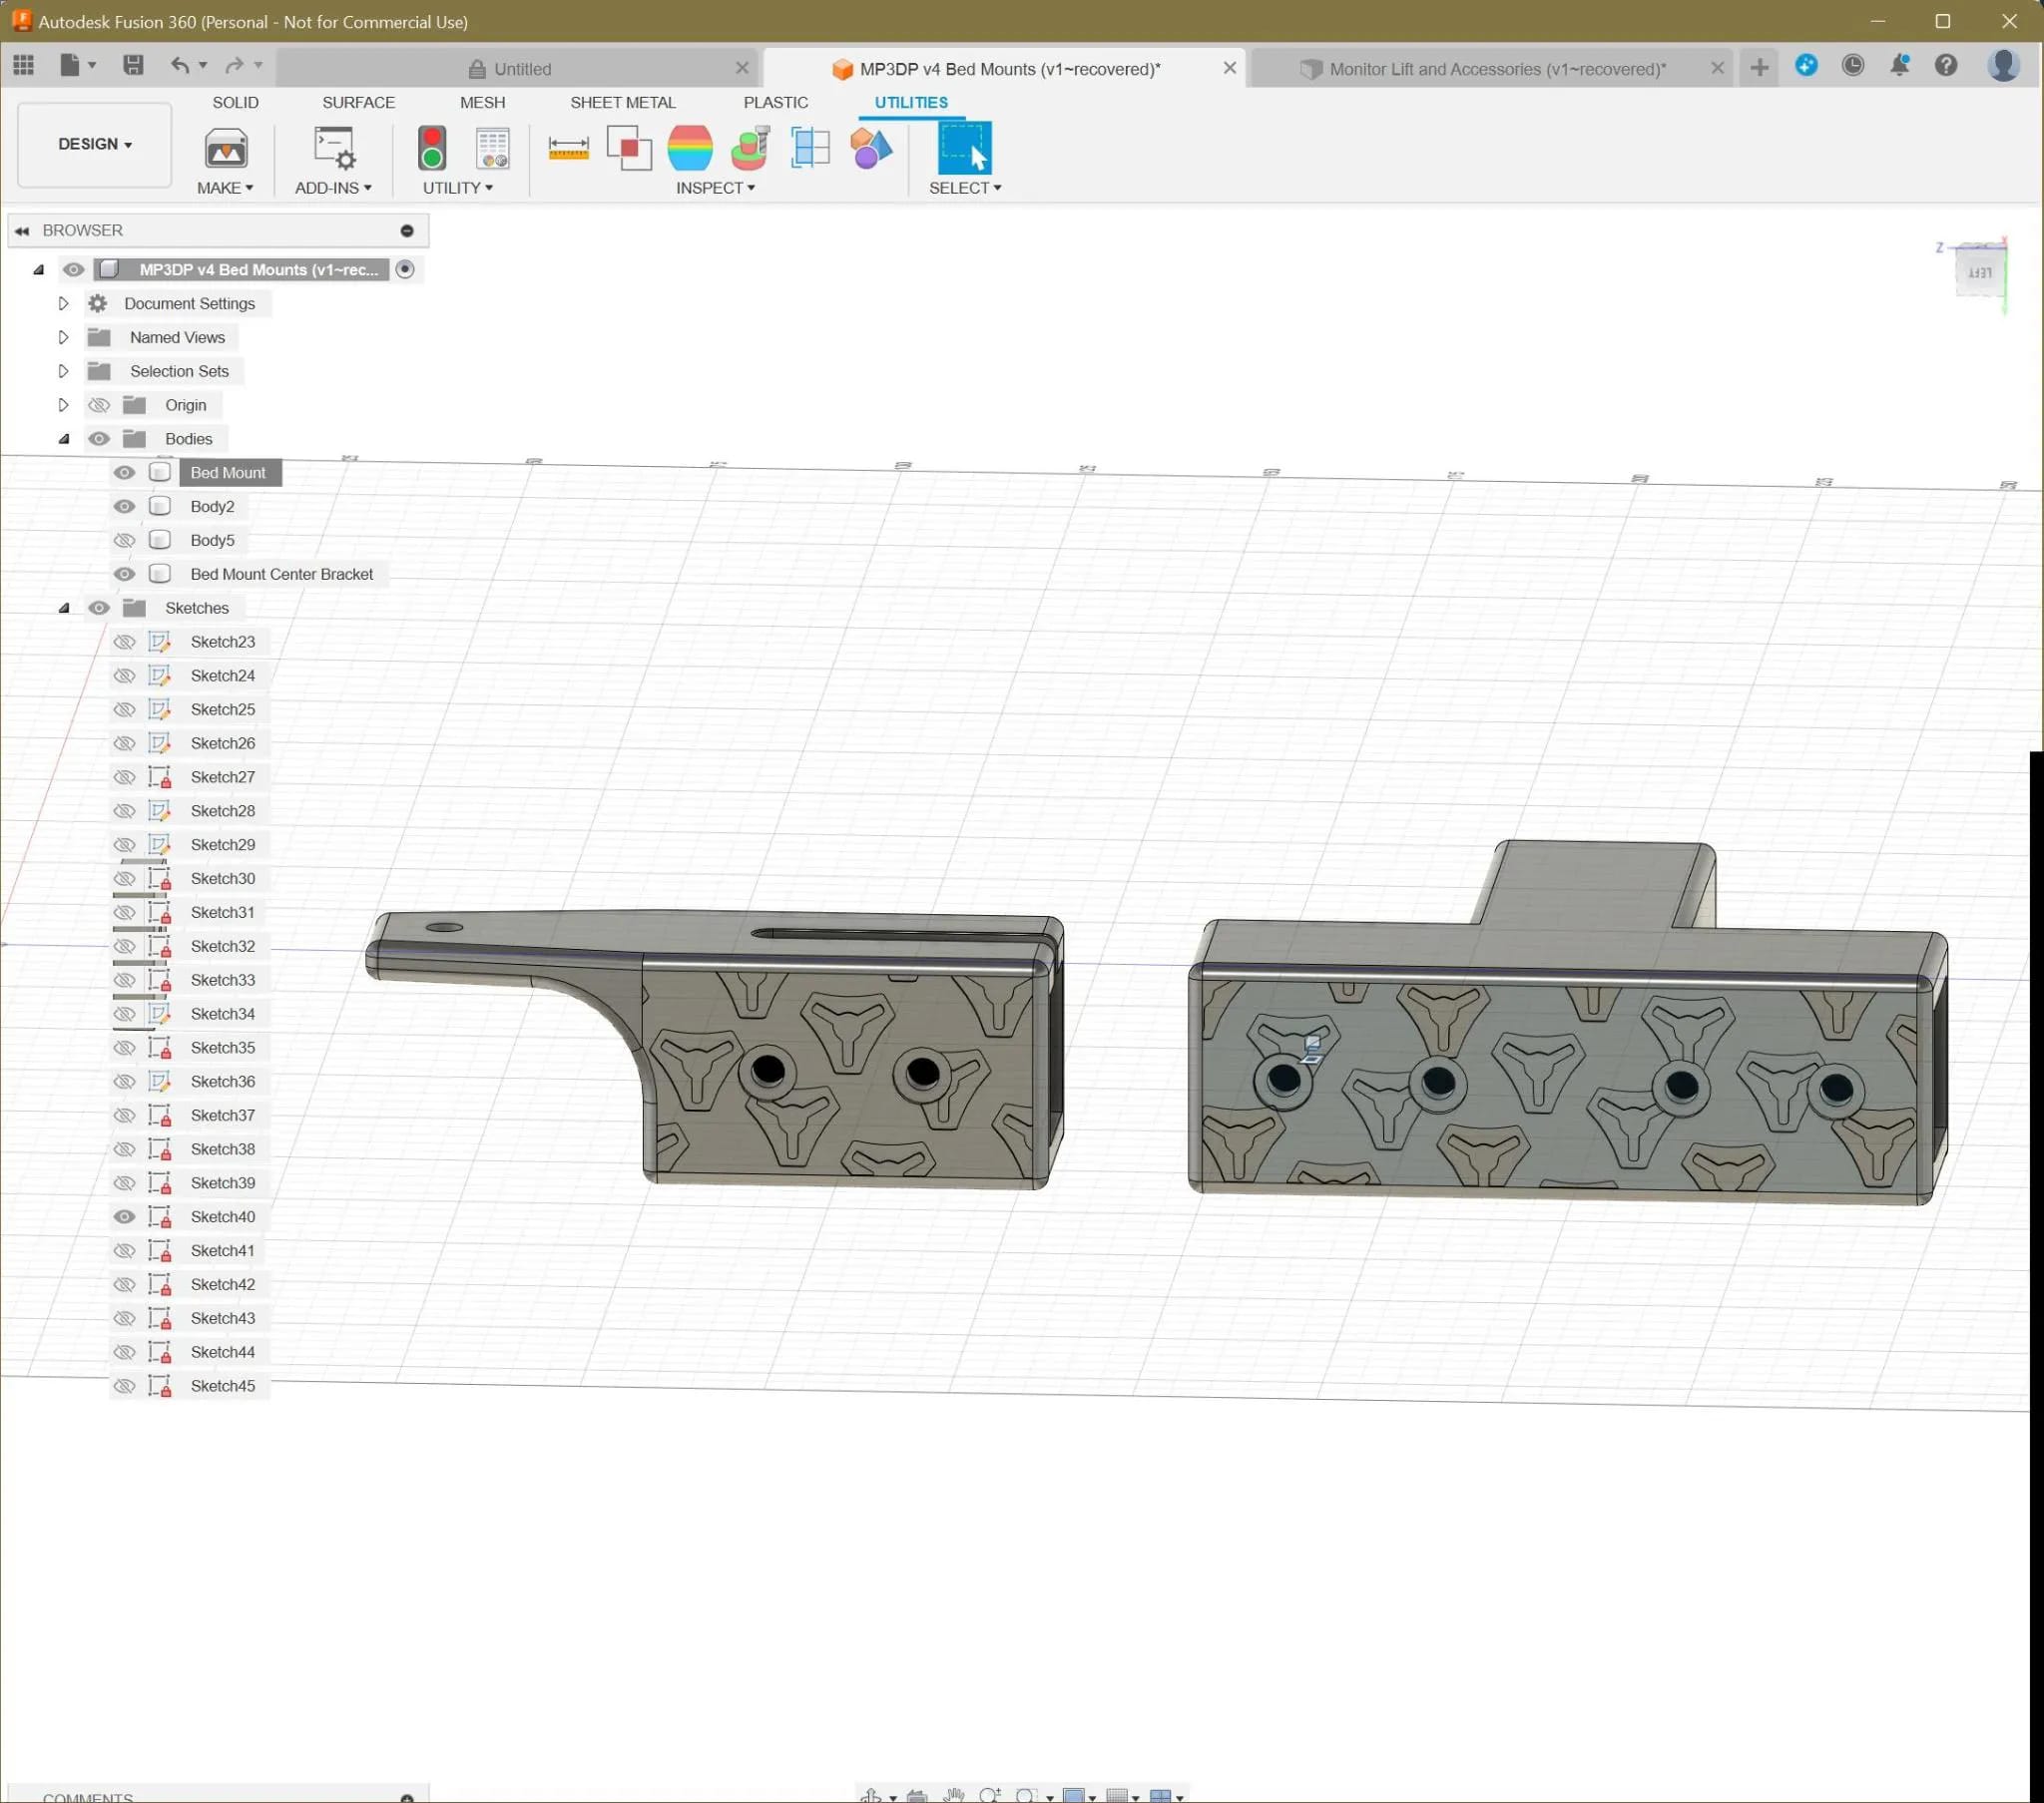
I was having trouble with the mounting brackets to use 2020 extrusion for the bed mount and decided to work on modeling some parts on my own.
Currently adding some finishing touches and doing some test prints to see how it all fits. I’m really into the color scheme I have with the red/blue filament against the silver extrusion, so trying to add more accents and such to play it up.
I hope that there’s no issue with using the V1 logo to add a pattern to these pieces.
The goal with the axis brackets is to have the bed screws in the aluminum extrusion, set with a t-nut, then using a m4 nut/washer type combo to press against the to help secure and hold it in place. I’ll see how it works in execution once it’s all printed out.
It was probably an error on my part, but the brackets had to flex slightly to go around the 2020, and I couldn’t get the bolt and nut to tighten enough to be snug without cracking the mount. I’d made spacers to fit against them which let me tighten sufficiently but had enough fun designing them that I decided to try making a new set to see if I could. It’s been a lot of fun.
Still working on mine, but no real progress to show. Lots of time spent trying to figure out the best way to mount this bed to the 2020 frame and worries that my blind joints wont hold.
Hoping to have more to share in the next couple or weeks.
Was joking with my partner that this project has turned into a ‘if you give a mouse a cookie’ scenario. I decided to use the 2020 in a t shape instead of the mdf bed platform, so I need to make new parts. To make the parts I need to learn a lot more about Fusion 360. Now I need to do heat-set inserts, but I dont have a tool to set them in at a good 90 degree angle. And so it goes.
For whatever it’s worth, becoming more proficient in Fusion has unlocked a whole new world of making things for my workshop and for others.
I’m interested in your T shape 2020 attachment designs for the bed plaform since it is likely to be more of a long-term robust solution than my sort of “farmered” solution with a 2020 corner bracket on the under side holding the two T pieces together. A piece of 1/4" ply was attached to the 2020 T with t nuts with washers placed on the extrusion to avoid sagging and excessive bow because the end brackets jut above the top of the extrusion a little. A second 1/4" ply with wiring and sensor cutouts sits between the first ply and the bed that are bolted and nylocked together. It isn’t as clean or elegant of a solution as might be desired, so I’m looking for other options.