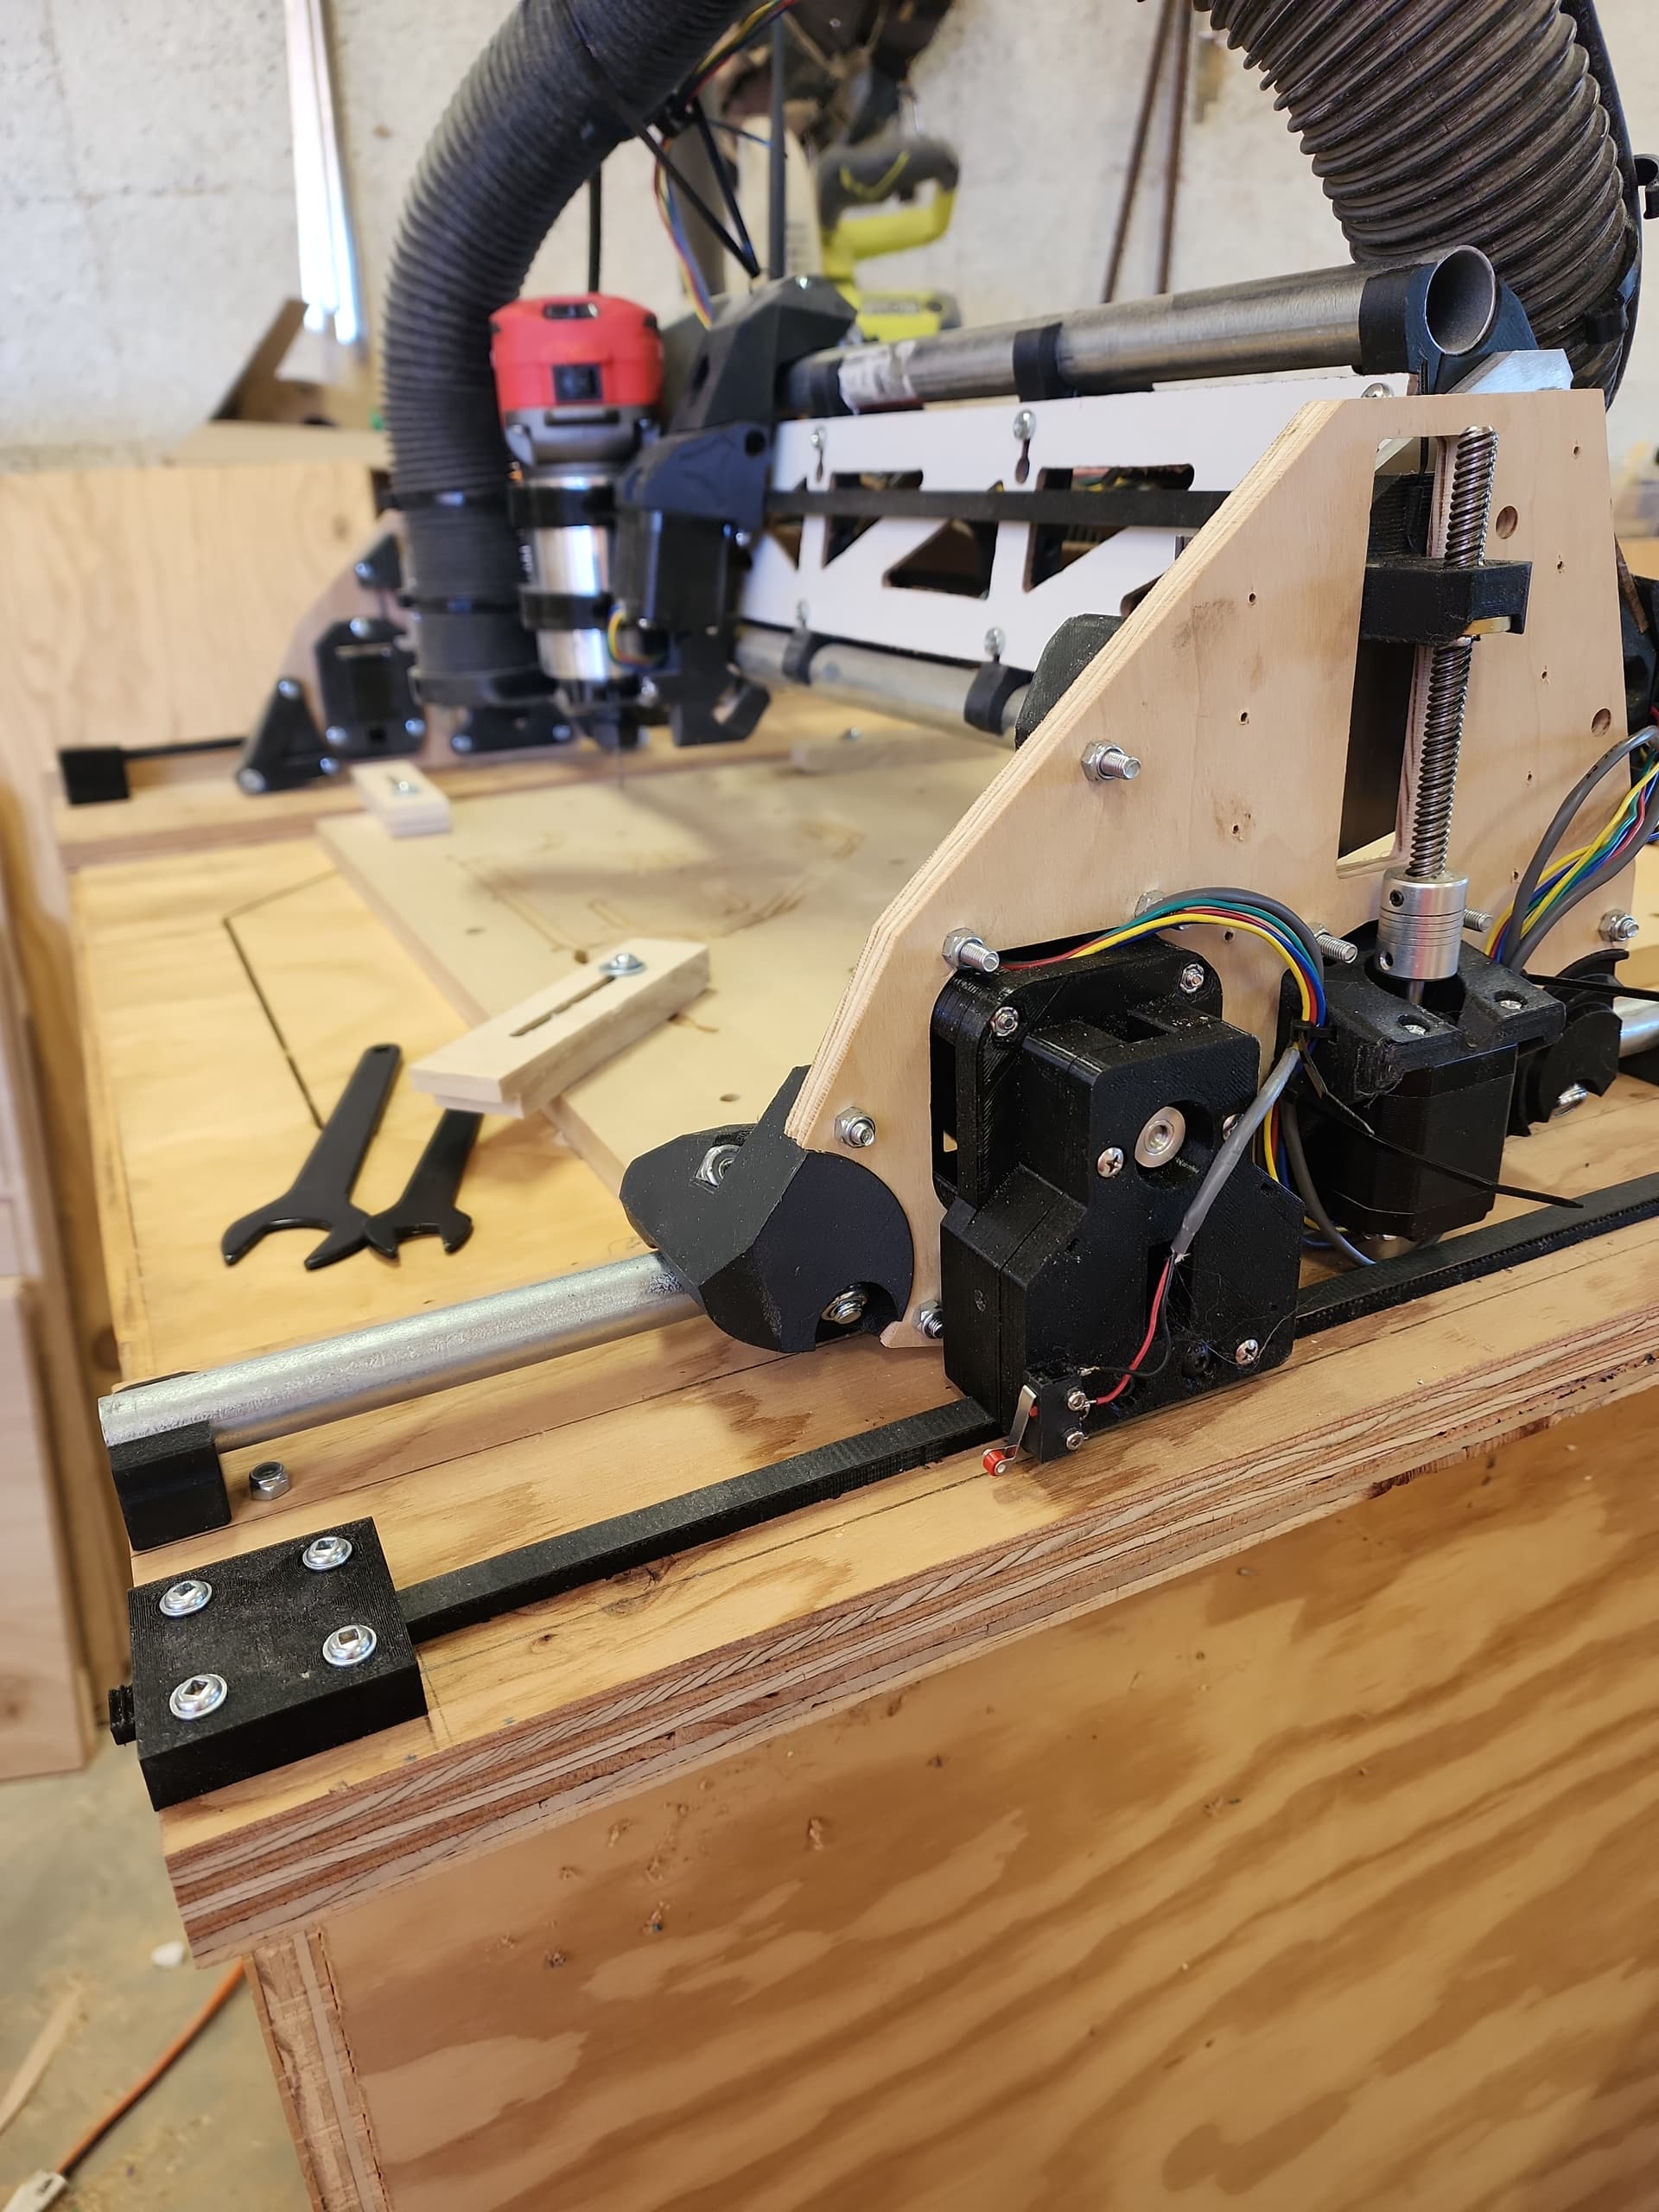
I started on this journey for my Lowrider 2 before the Lowrider 2 was released. My goals were to eliminate the need to tighten the belts for the 10’ span of my machine and to have consistent, minimal backlash across that length.
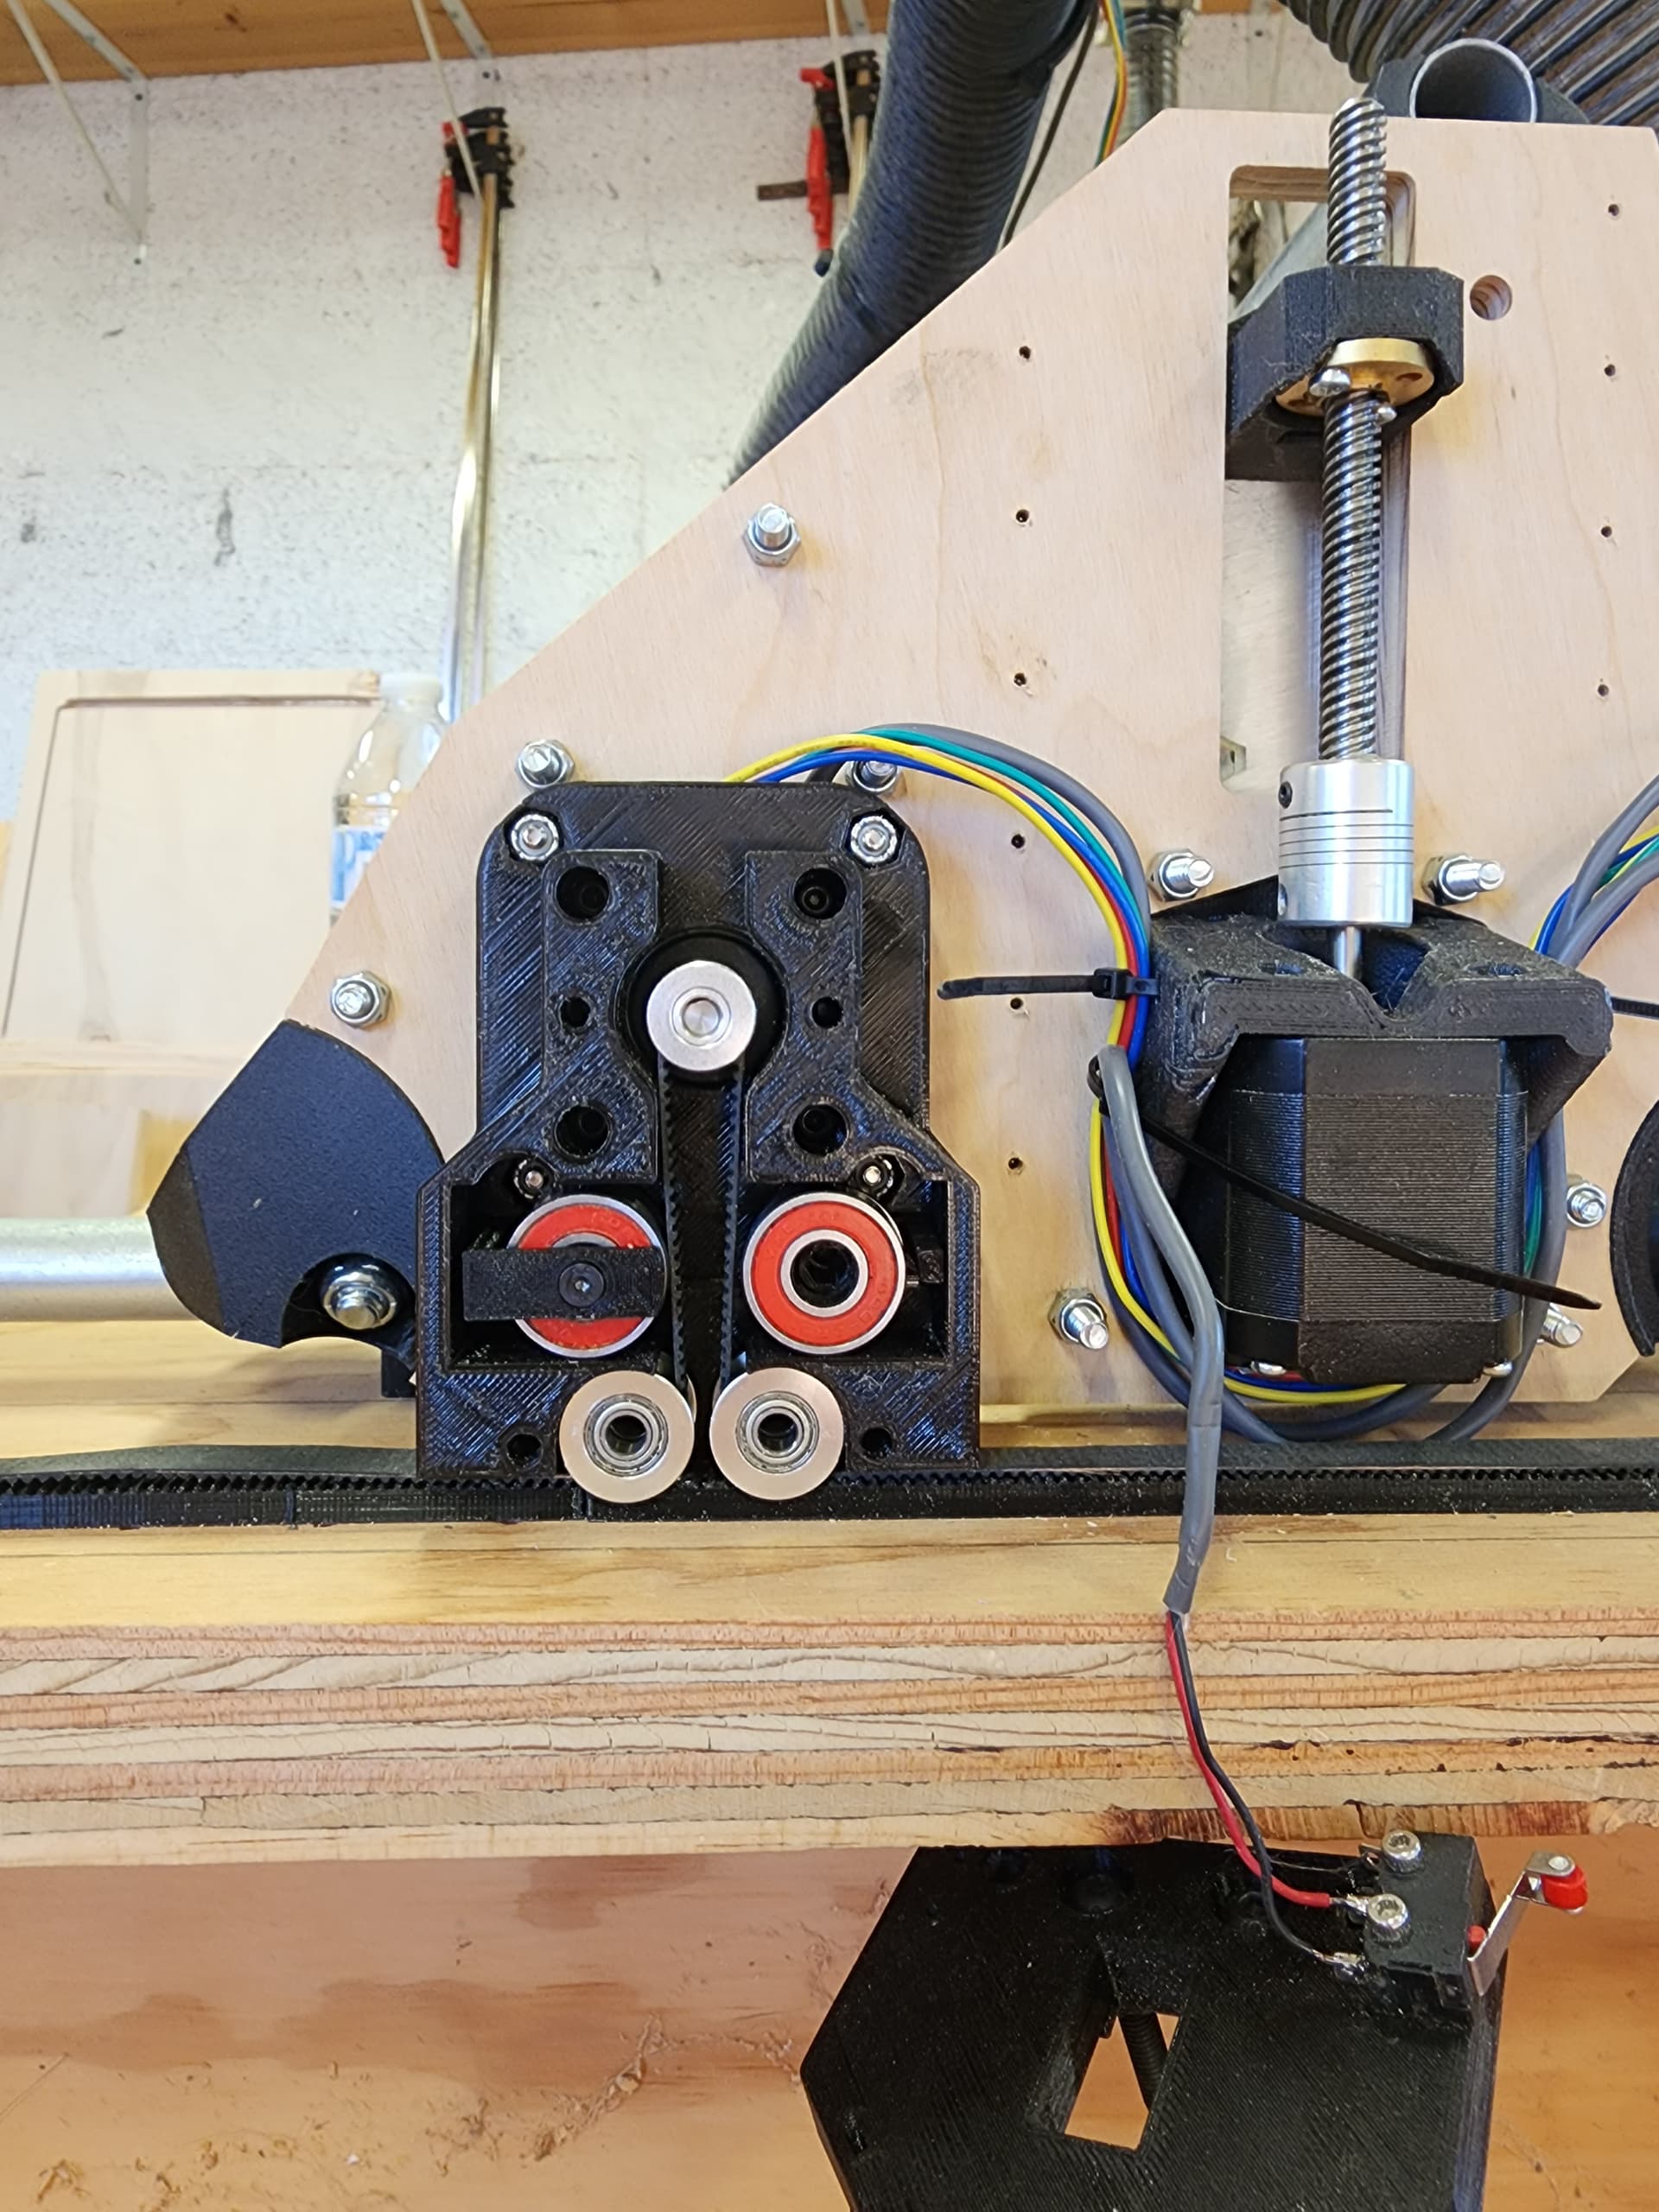
To do this I rotated the motion control for the Y-axis so that the teeth of the belt face the surface of the table and ride on a GT2 “rail”. So far I am pleased with the results.
2 Likes
Nice Mod @tgm022861! Curious how this is working out for you? Whether you started out with a stock build and have thoughts/observations on how performance/reliability has changed?
Been looking forward to seeing someone Mod their LR to minimize belt slack, regardless of Y axis length, after stumbling onto this video a few months ago…
 Mostly Printed CNC (MPCNC) Part 1")
Looks like @braunscnc’s MPCNC build uses an extra fixed belt as well:
Can’t tell from the pic if tensioned idler(s) are pressing onto the belt (or stepper) to reduce backlash for the small length of belt that’s free to move? Maybe tensioned idlers wouldn’t gain much, curious what others think.
I did start with a small, stock LR3 build for this project. My goals for it were to replace my Primo if it will perform as well as the Primo and to evaluate the gantry design for a NEMA 23 version to replace my NEMA 23 LR2. I think I will need to use the 3 rail design that someone else created to mimimize deflection while supporting my 2.2kW spindle on a 5 foot span.
I am using a pair of idlers to pinch the short length of belt.
4 Likes
Curious how horizontal belts are working out, to help keep belts clean, are you using any chip guards/barrier on inside of the gantry to deflect/contain chips within the usable cutting area?
The only section of the belt that is not captured by the rail is always blocked by the YZ plate. I have not had any issues with debris between the belt and rail.
1 Like
Neat mod!
I’d really like to try something similar, but with the belts concealed under the surface level
Could you share the design files by any chance?
Also, I see that you only installed the syncrobelt on the rail’s side
Wouldn’t it be better on both sides?
Looked like you had it installed only on the rail’s side in the first picture, that’s why I asked ![]()
Any chance you can share the designs?
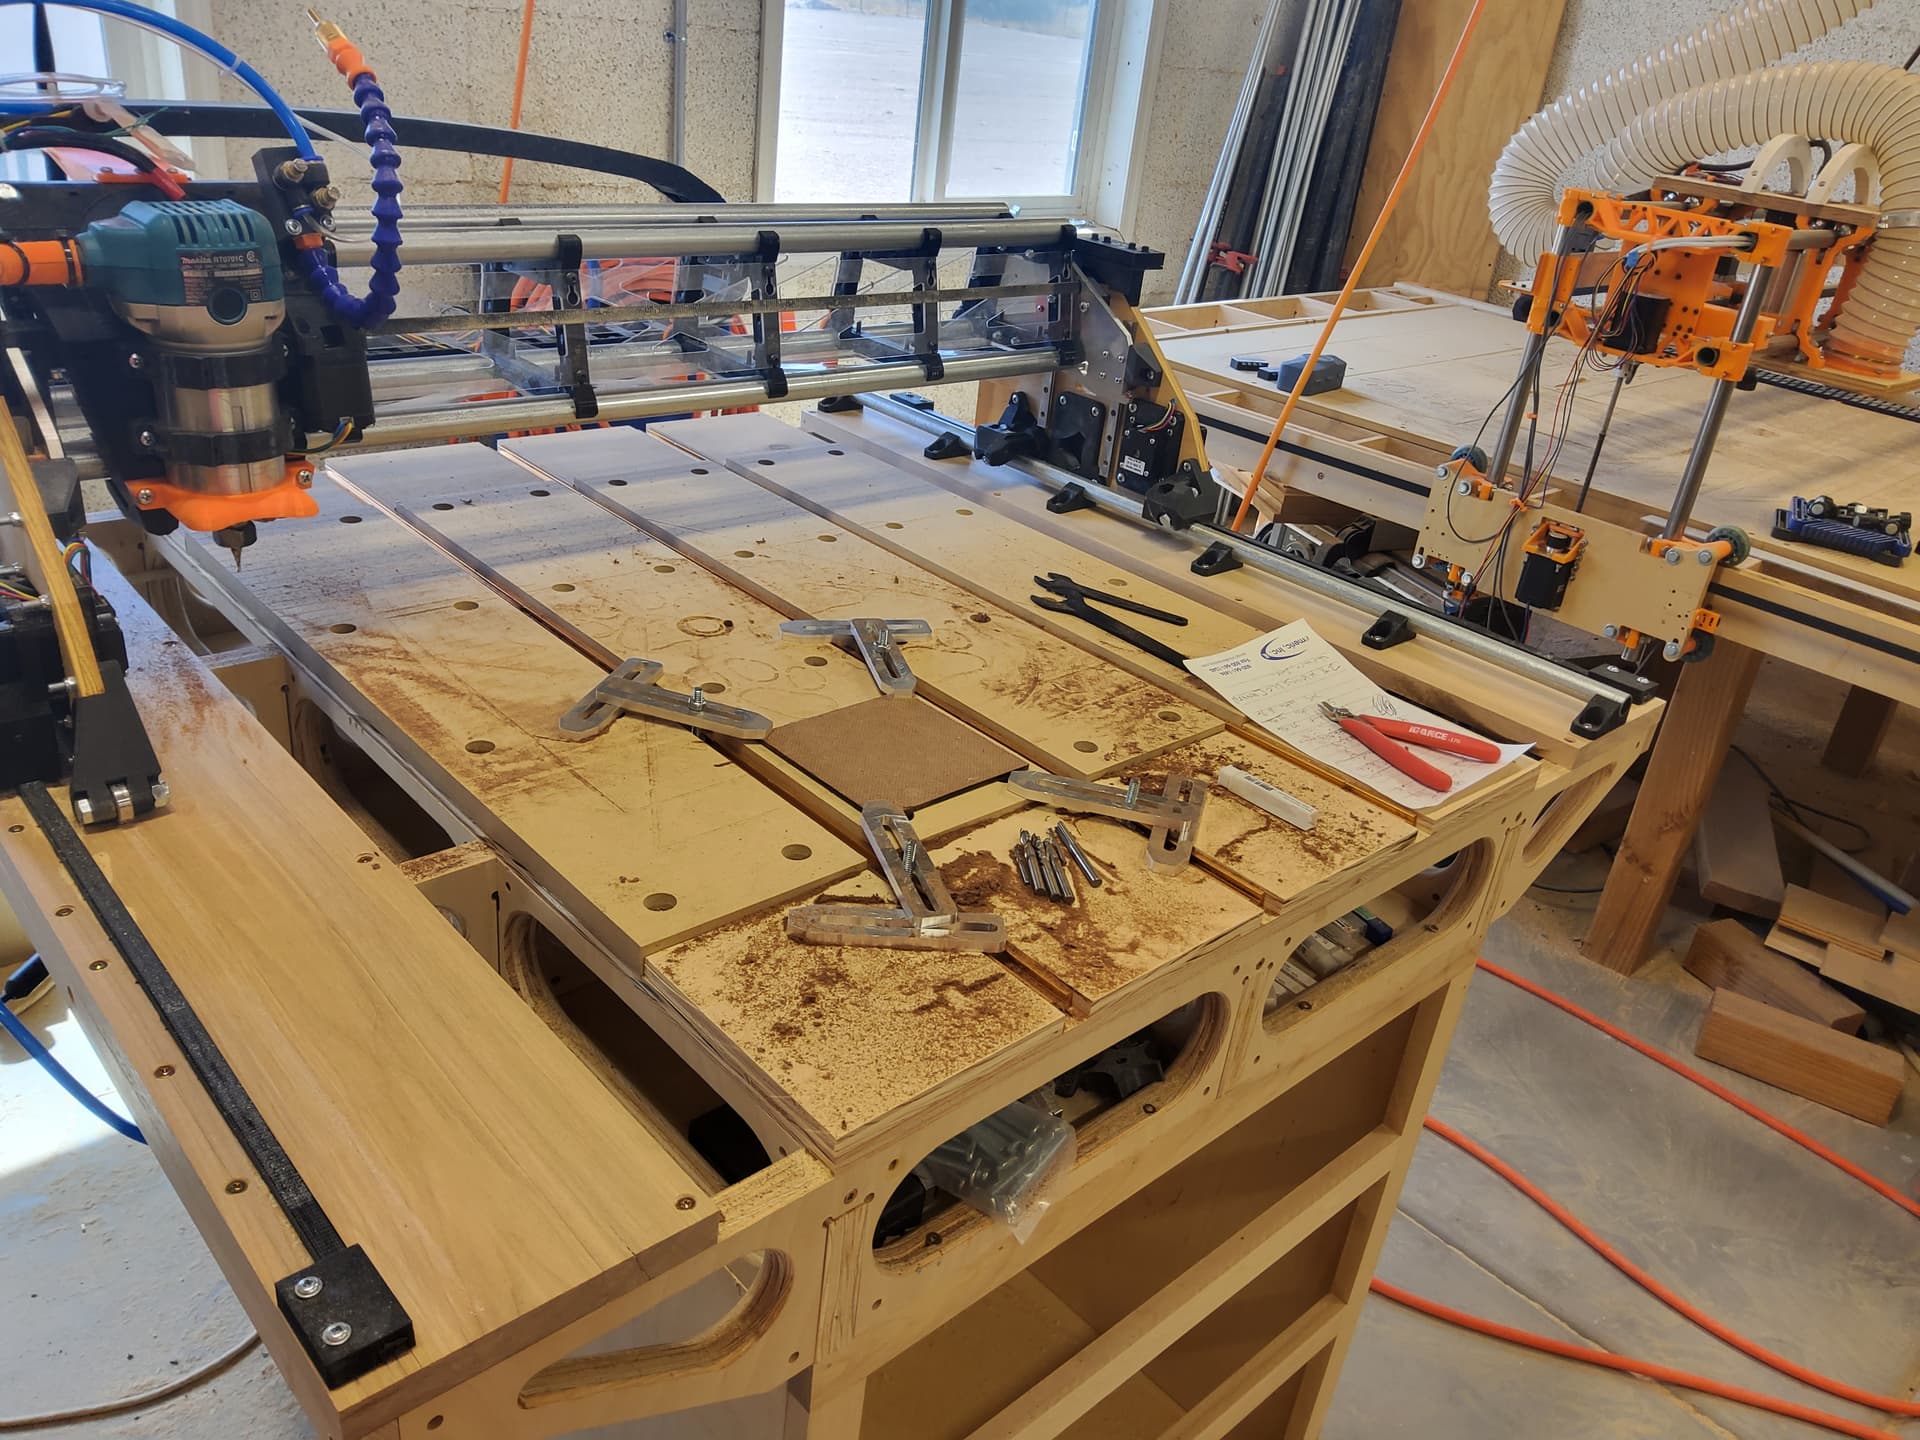
That table is VERY NICE!!
The more you look at this picture, the more awesome it gets ^^"
Monster LR2 in the background? check
Paulk style table? check
Custom cut aluminium clamps? check
Integrated air-blower to evacuate chips? check…
4 tubes LR3 gantry? check ![]()
Still need to build the drawers (front) and doors (rear) for the cabinet below the LR3
1 Like
Tom, whats that little monster with 4 shiny tubes in there?
It is a work in progress. I revised the Lowrider 3 to use 4 tubes for extra rigidity. Total overkill for the current size. However, the end goal is to replace my current Lowrider 2 with a Lowrider 3 based on my revisions. I will be reusing the 72" x 1" SS tubes in my Lowrider 2 and I need as much rigidity as I can get over that span. I still need to rework how the belt operates across the gantry. Now that I finally have A/C in my shop I am motivated to work on the project again.
2 Likes
Yeah, ac is a must. More than anyone can think im from the Caribbean and to say is hot in hear stays little short
I am in the Sonoran Desert in Arizona, so I am familiar with how hot a shop can get. Triple digit temperatures for the past few months. And no rain in that time.
Im from the Dominican Republic. This is a hot county even in December. Can’t tell you how bad are the temps here but with all the plastic parts for my lr3 deformed already by just sitting in a box… This is almost like hell.
1 Like
All of the plastic parts on my LR2 are ABS because the PLA parts deformed badly a few Summers ago while the machine sat inactive.
2 Likes
How is the new LR3 coming along Tom? Hope all is well.
Hi tom, how did this worked out in the end?
close older topics to help with spambots, and faster new user questions.