I posted an svg with the parts to cut out on the other thread here, if it is helpful. I did cut them out, but I have not yet assembled them.
2 Likes
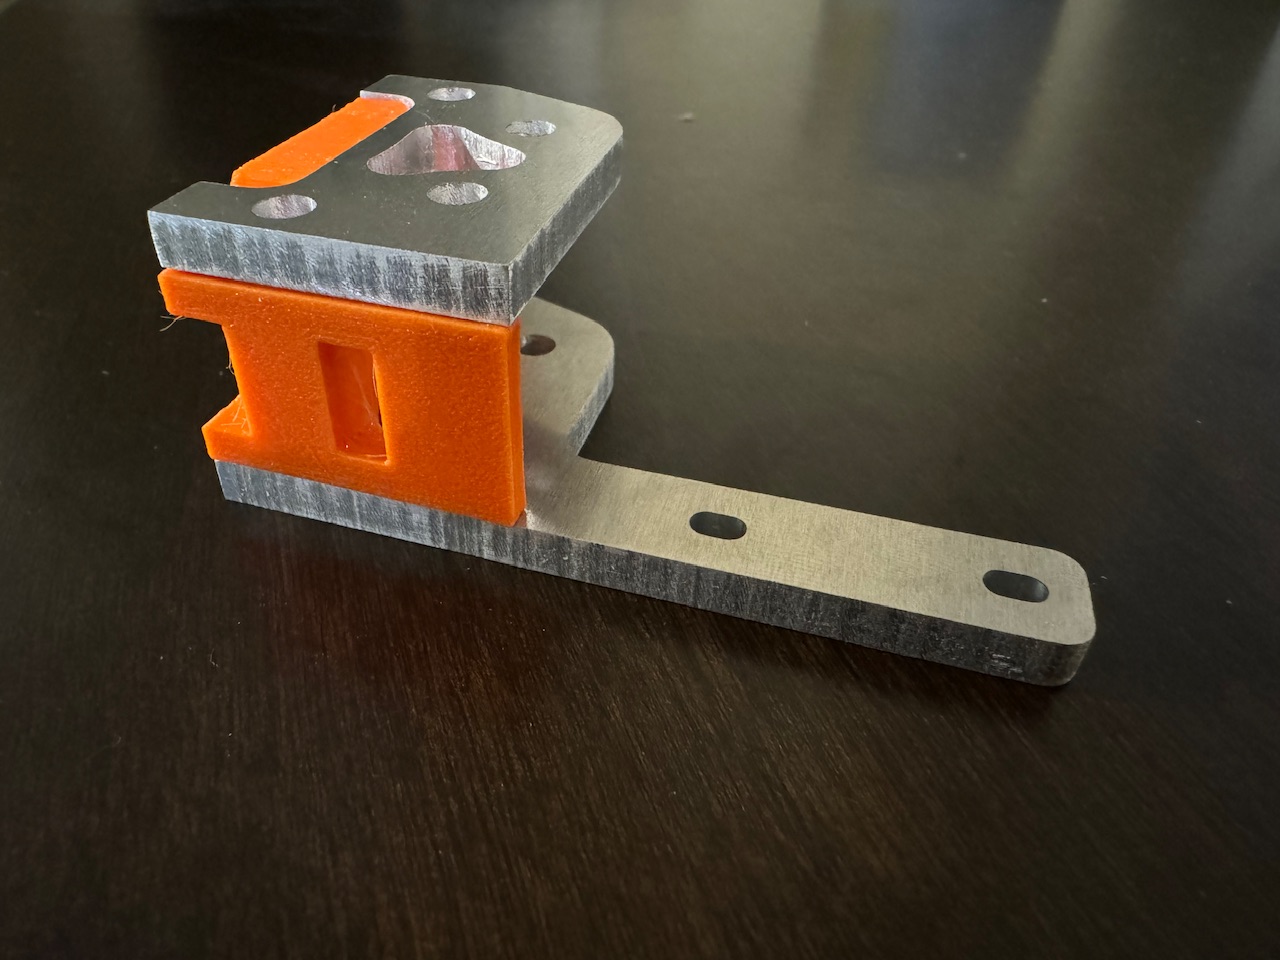
Tensioner 4x
No mirror or anything.
1 Like
Please stay on topic. We’re talking about the ducks.
7 Likes
Isnt that just “Ducky”
2 Likes
My new extruder from Biqu came with one. I think Ryan sent me one when I ordered a SKR from him. I now have 2 sitting on my LCD. My son noticed and asked where the second one came from. I just said, “It came in that box.” He goes “Oh”… like that’s a perfectly acceptable answer and warrants no other explanation.
2 Likes
My main complaint about the ducks was that my daughter was young enough to put something like that in her mouth and I don’t trust the ducks next to the solder and pcb assembly. But they are great for adults.
1 Like
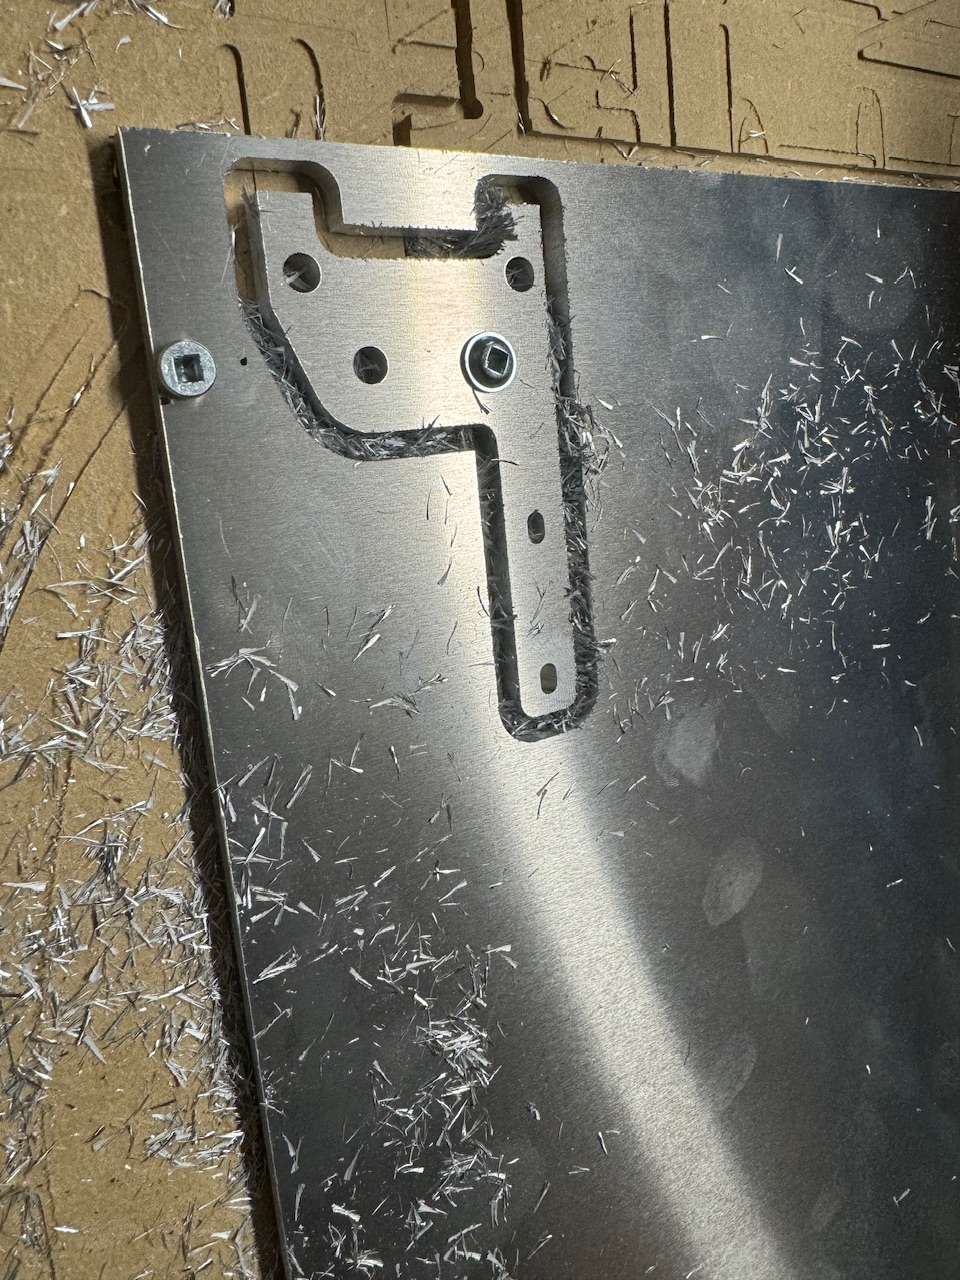
Please share a few bit of information regarding the cutting of the pictured part:
What kind of router and bit did you use?
Did you have a IPA misting system operating?
What was the DOC?
Did you use Trochoidal milling?
How long did it take to cut?
I’m really getting an itch to make a V5, but I’m afraid that it is way out of my capabilities. (And maybe unnecessary given my currently tuned 3D printers and infrequent use of them).
Mike
2 Likes
Kobalt router and the 1/8" and 1/16" bit from Ryan
Nope.
@Jonathjon helped me get set up with settings similar to his, but I need to back off a little I think and try again.
This 1 part took ~10 minutes
I am not the source for how to do this correctly lol…This was my first attempt. I was fully prepared for something screwing up.
I do intend to set up a misting system at some point, but just trying to get by slowly for now and get this build out.
4 Likes
NIIIIIIICE!!!
2 Likes
I am hopefully not far behind you.
2 Likes
Awesome to see someone else giving it a shot! Hopefully many more will follow! Now I need to get off my lazy butt and finish cutting mine out lol. I think I’m just over half way!
Very cool. I haven’t got the confidence to try aluminum yet… so my V5 may have to wait until I can buy parts. ![]()
If it helps anyone, here is what I’m doing to try fit everything in the one 12"x12" sheet.
I laid out all the parts as I would cut them if I were cutting them all at once.
I drilled holes at the 4 corners of my sheet and screwed it down to my table at exactly 100x100 from home.
I am then creating CNC programs for each part individually,
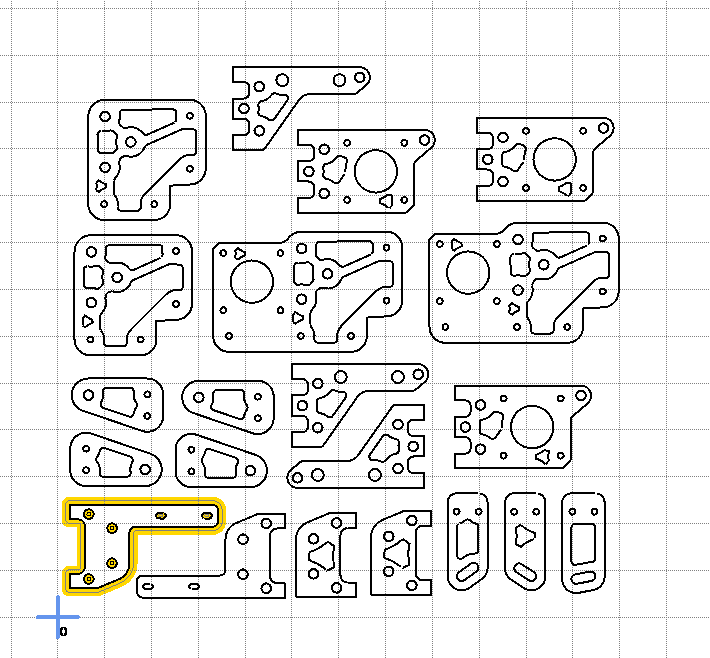
but always zeroing at the same bottom-left corner as starting point.
Hopefully with no mistakes, I can get through all of them without having to buy a second sheet.
This lets me do just 10-25 minute sessions for each part and not get stuck out there for long periods of time. Also lets me make minor adjustments between each part
7 Likes
Congrats! The part looks great. This is a very good reason to try Aluminum. I hope to follow. Thanks for sharing.
2 Likes
Fantastic! that even sounds doable! I’ve been wanting to try some aluminum and this sounds like a good set of settings to try.
One question you didn’t answer: What was the DOC?
Mike
It was full depth trochoidal. I had it set to 5.5mm I think for a 3/16"(~4.8mm) thick sheet
4 Likes
I’ve cut multiple parts in a similar fashion.
I’ve also printed templates with an inkjet printer and spray-glued them to the material with a ‘starting point’ clearly marked. Then I set the 0,0 of the CNC on the starting point for each cut. Makes it easier to retry a cut in the event one fails. The paper template doesn’t need to be perfectly aligned in X,Y for most cuts as long as clearance is accounted for. It also makes it easy/nice for drilling holes in the material to put screws closer to where I’m cutting or placing clamps.
If I’m doing wood, I’ve used the laser to burn the outline on the wood and then move it to the CNC for cutting.
1 Like
6 Likes
Looking good!!!