I’ll give this a fair shot first. I know Ryan put a lot of thought into it, so the least I can do is try it and provide actual data based feedback.
Odd, mine was (MAYBE AGAINST ADVICE) printed in PLA and snaps on quite securely. Guess you need to buy a new printer.
3 Likes
JJ had this issue. Try printing both parts on the same printer at the same time. I think it comes down to some sort of cooling issue? His would fall right off. after doing both, it snapped into place.
If not shrink the skirt holder a percent or two.
This is a result of making it not such a tight fit with the core. I edited the angles because some of you were needing to pull on the shoe to get the skirt holder on for some reason.
The gap to make that a tight fit is actually very tiny, the gap in teh angle is very tiny. As it turns out if that angle prints funky in makes it super loose.
The ones I am printing here on my old V4’s and the V5 in PETG and PLA are so tight I think it might be an issue for some not clicking them all the way into place. So in terms of The CAD To make this different I would need to make larger changes to the snap in the back (taller and angled).
Adding magnets is not easy for everyone to source the exact same size if you are planning on releasing that as a mod. If people have issues I will change the shape of the snap instead of adding hardware.
3 Likes
Maybe make the latch at the end more clicky with a little nub it gets pushed over? And then you have to slightly bend it to remove?
2 Likes
These are a little off dimensionally though. I think I need to do a finish pass. How much should I leave for that last pass? 0.2mm seems safe?
This made no difference.
98% doesn’t fit.
99.25% doesn’t fully seat in the back
99.75% is still printing
Just wondering if you did any printer tuning prior to printing these parts? You are very very close.
1 Like
Not saying you need to, just wondering what sort of tolerances we are really needing on this part. Obviously, I need to make some tweaks.
1 Like
Always do a full depth finishing pass.
0.2 is probably okay in metal, depending on how rough your roughing pass was. The rougher it is the more you need to leave, sometimes that means doing two finishing passes.
1 Like
With PLA. I didn’t explicitly test PETG which is what the tool mount / skirt is out of.
I am happy to print something to give you more specific data if that is helpful.
99.75% is better, but I don’t have much confidence in the locking mechanism. I tried a remixed dust boot on my LR3 and it fell off into the bit during a job, so maybe I am being overly cautious. That wasn’t really cool.
Thank, I’ll try this on my recut. The finish quality looked great, just wasn’t accurate enough to fit into the braces.
But first let’s confirm if others are having a problem. I bet I’m still one of the firsts to print it. Don’t change it just because of me yet
We are three now, you, me and Aza with pretty loose shoes. ![]()
1 Like
The three holes didn’t line up?? There is a bit of room there. That does not seem right. If the screws went through and holes did not line up something else is wrong by a lot. Did you square your CNC?
To be fair, not a single one of Aza’s parts fit at first. How are they now?
1 Like
Touché. ![]()
3 Likes
- Mine too. Reprinting with both on the same printer helped. But I still had it come off one time.
1 Like
I use 0.35mm finishing pass, which is a hair more than 10% of the 3.175mm (1/8") bit size. That is with Trochoidal Climb roughing cut, and it leaves a reasonably smooth surface
1 Like
Yeah I believe it’s square and I’m off by the same amount at Y+ and Y-
I expect this part of the strut to be
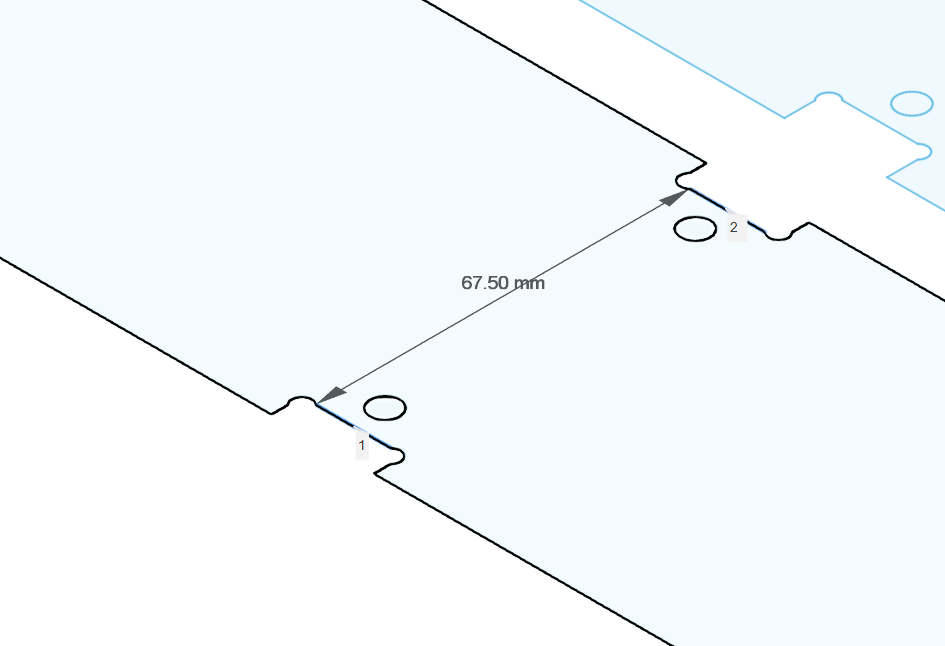
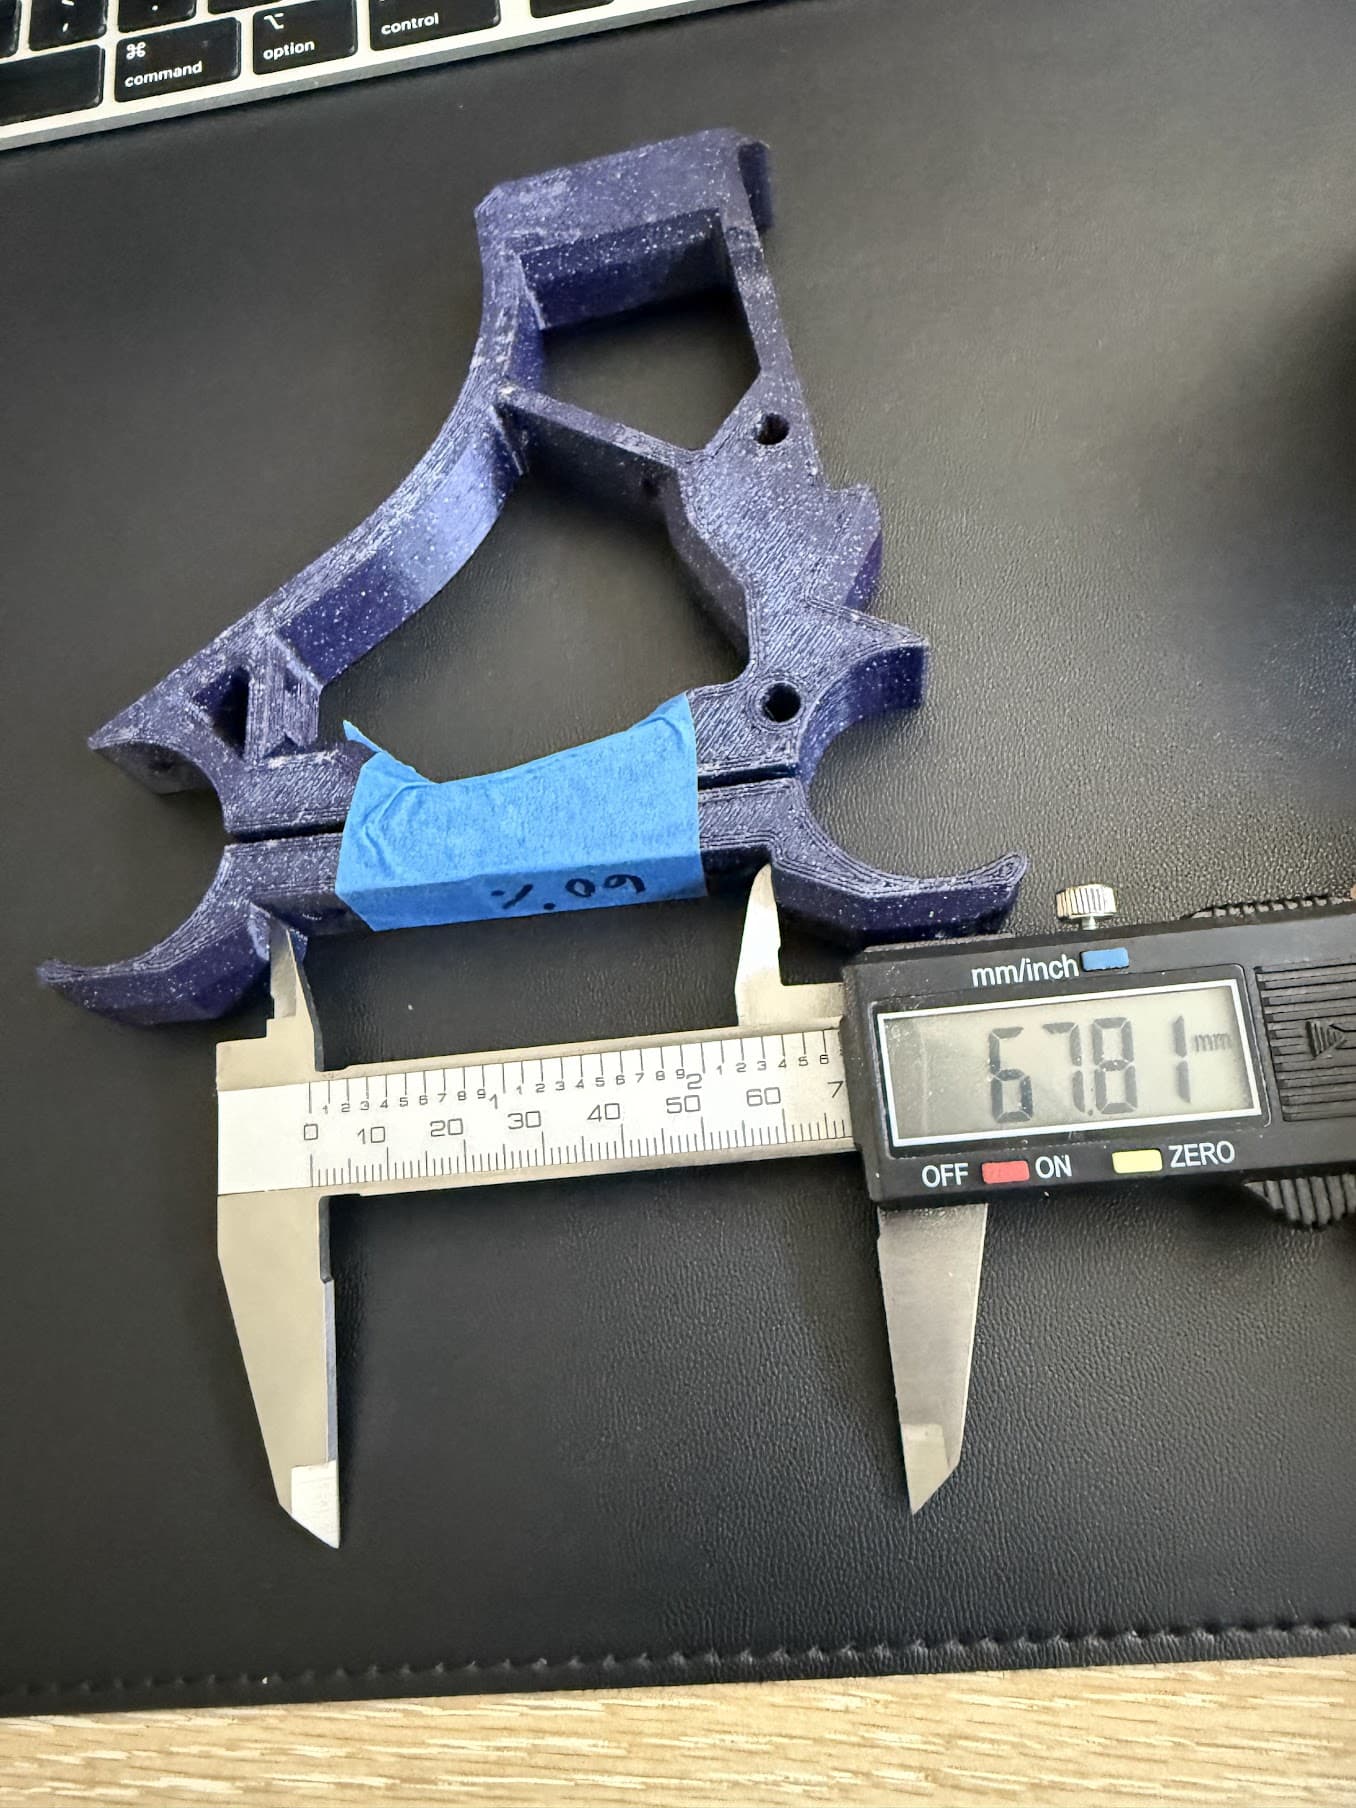
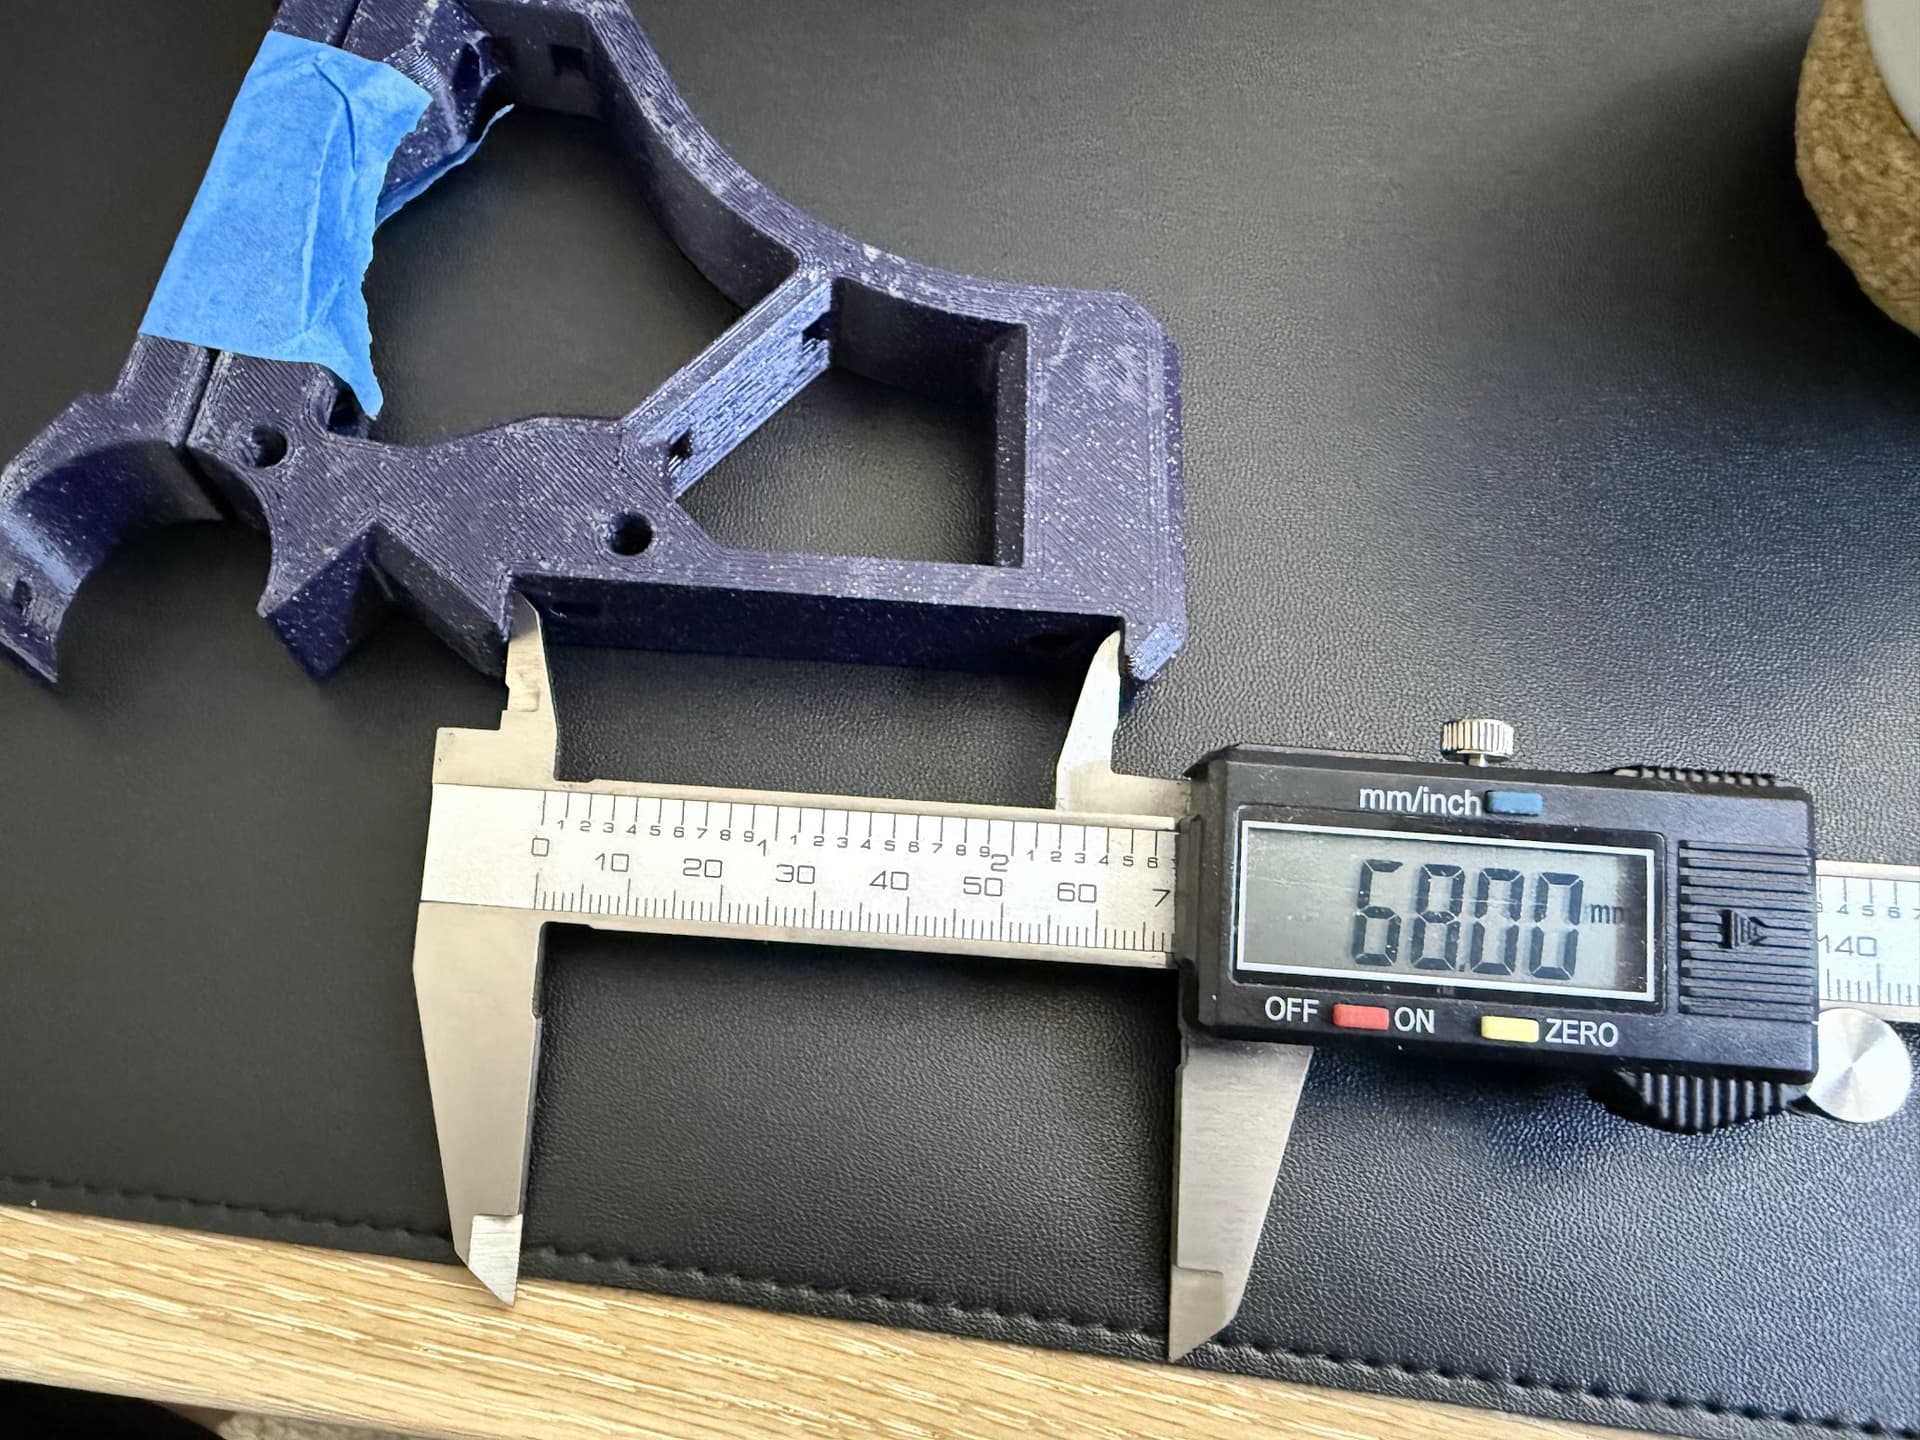
My plastic parts are
Both ends of the struts are
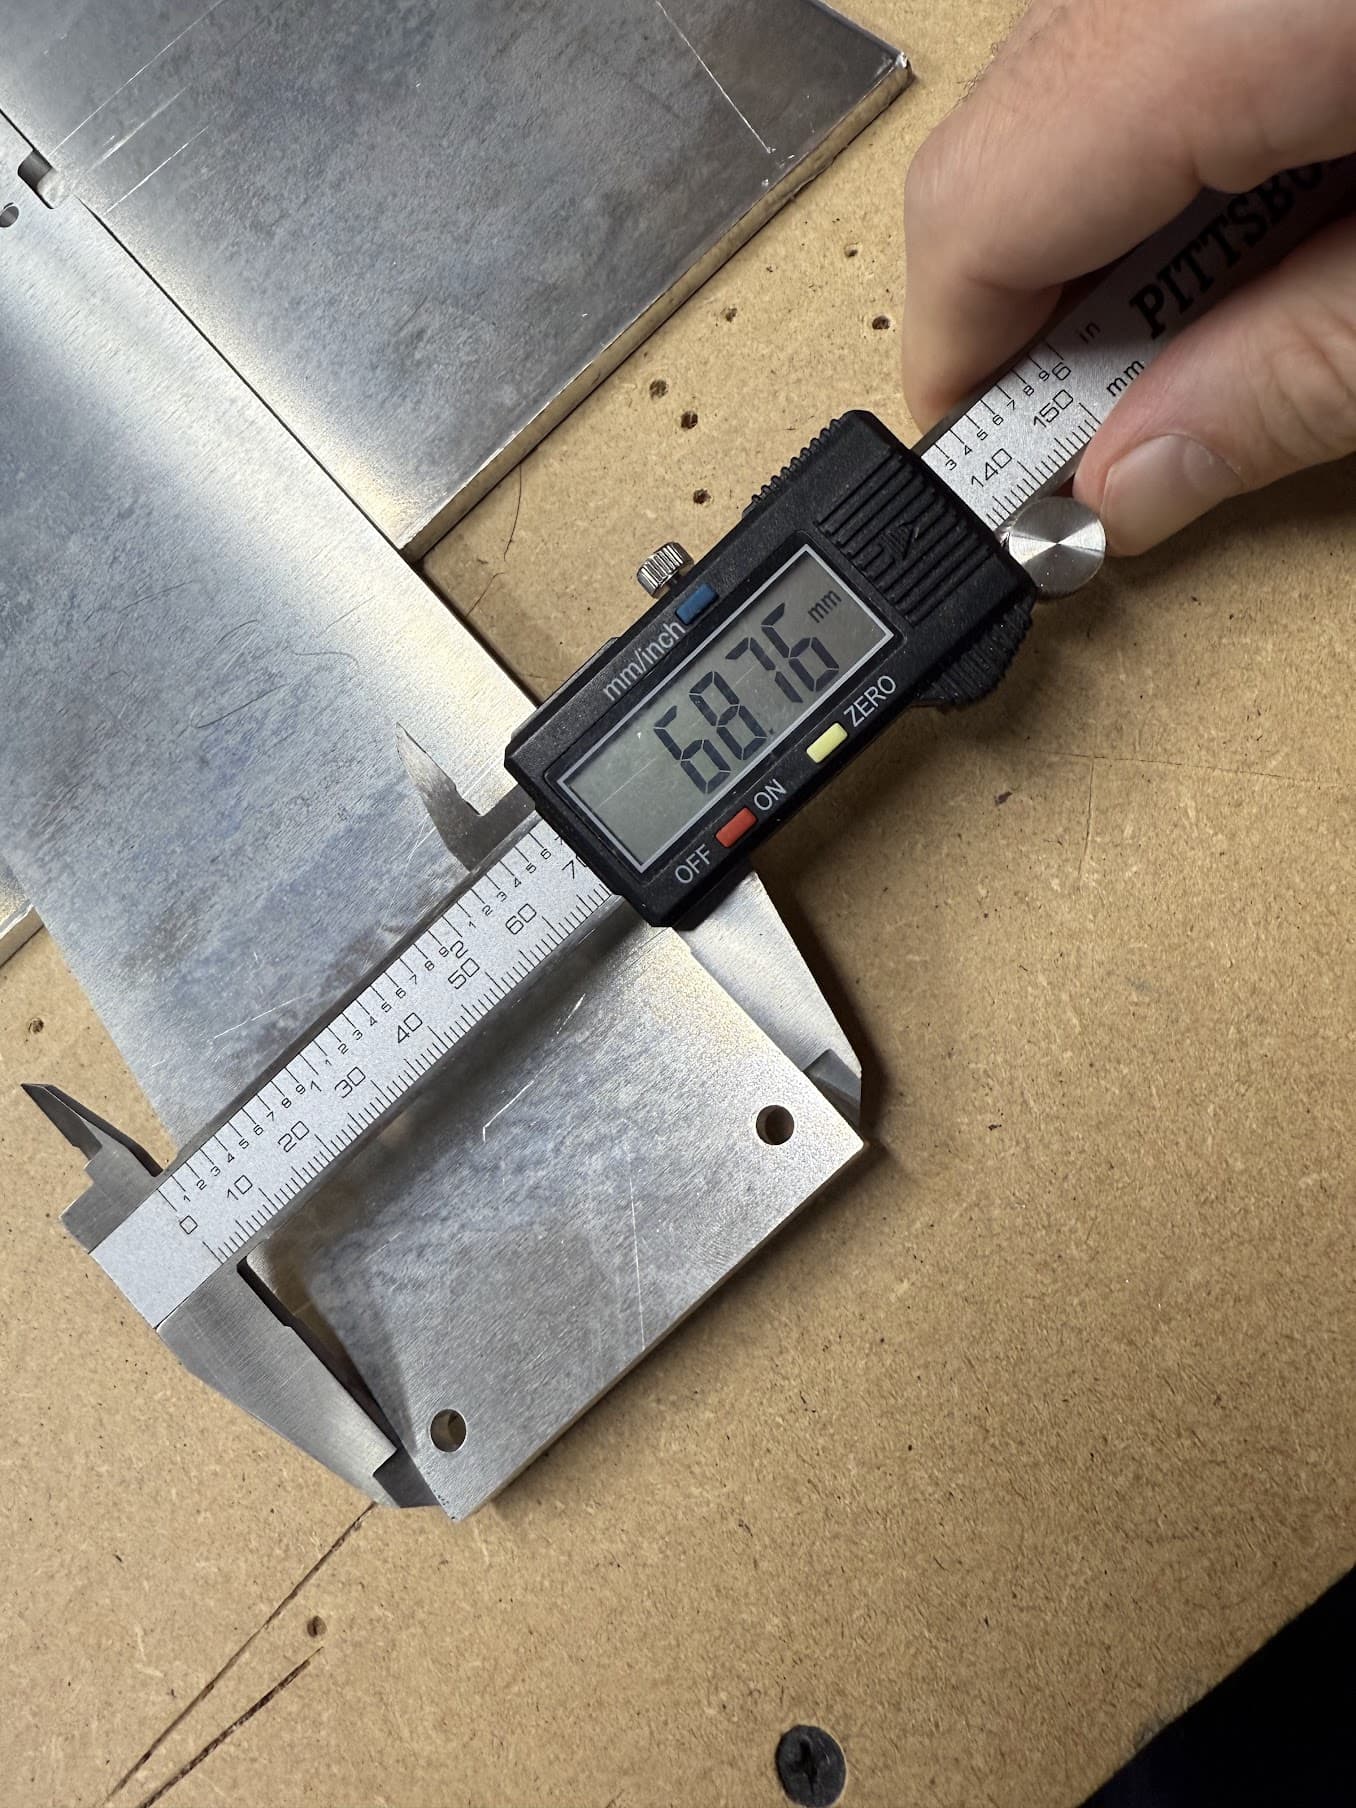
So TLDR, the strut came out 1.25mm bigger than expected using trochoidal milling without a finish path.
3 Likes
Using the same settings / petg for the dust shoe, .20 moves nice. .15 is fused / can’t break it free.
0.6mm nozzle, 0.3mm layer height, 3 walls, 30% infill.
1 Like
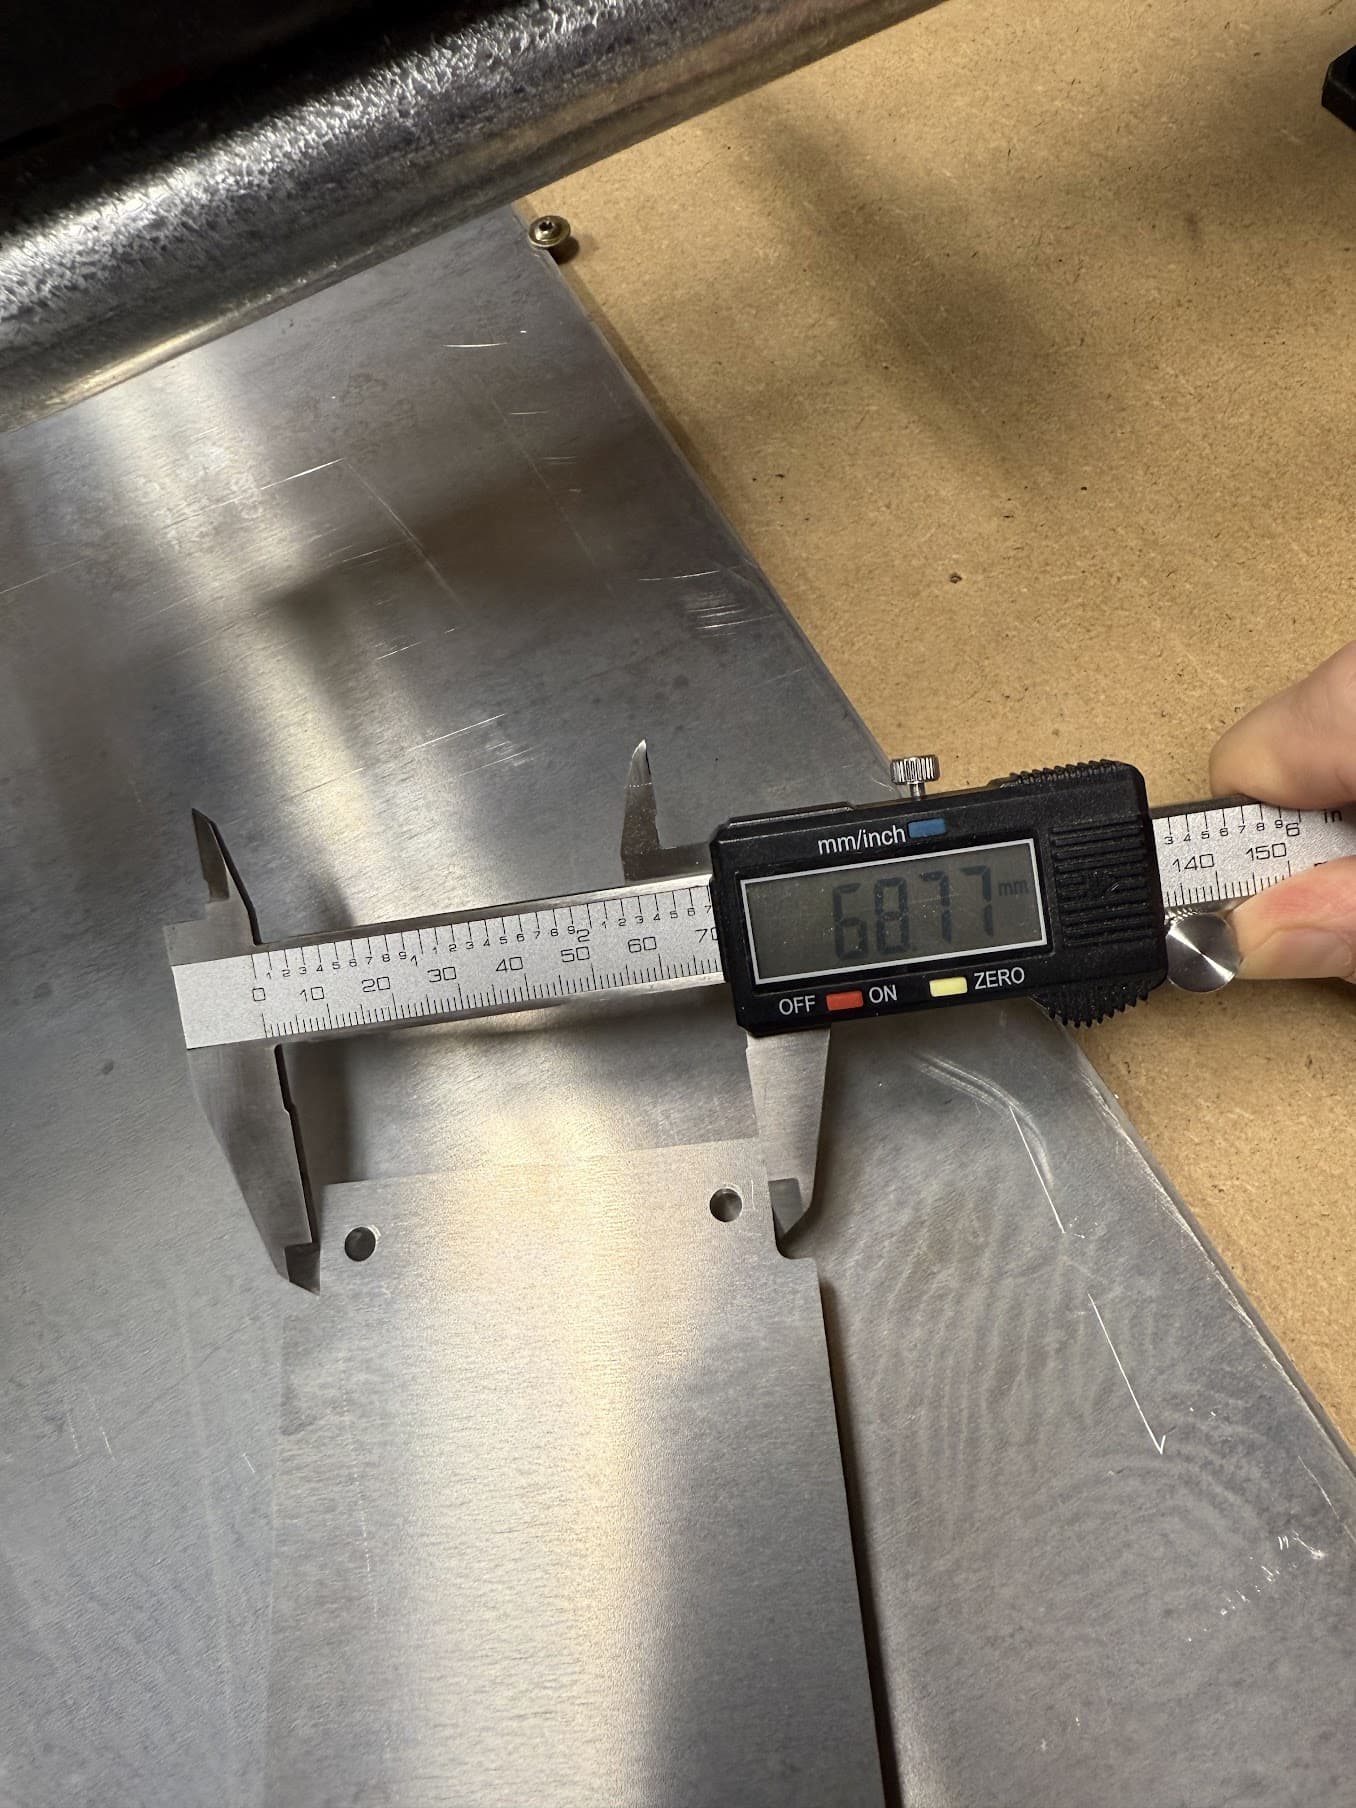
I don’t think it is just finishing pass that is the problem.
The holes are supposed to be ~5.28mm diameter
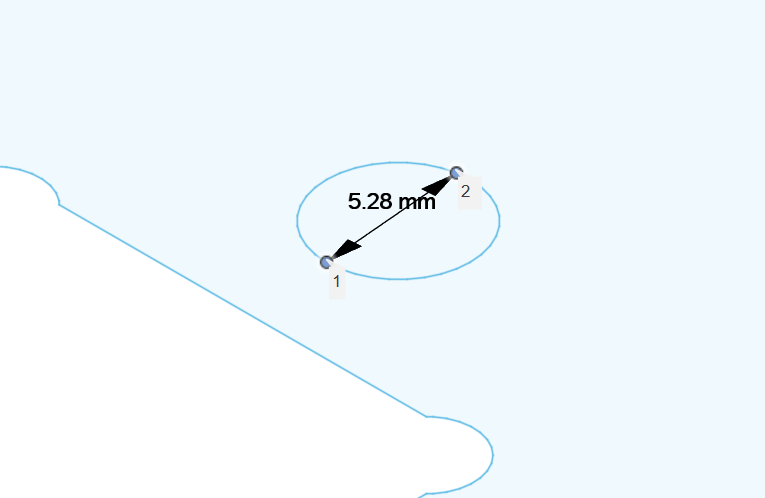
But when I cut them I get ~4.8mm
![]()
Sounds like your bit isnt as large as your CAM thinks it is
1 Like