I have created a separate thread for my design of the dust shoe. I will add the pictures of the concept up here. Ryan has said he like the front version of the dust shoe and i have been in contact with xxx and have a pre-release CAD of his mudguards so i can work that into the design.
Some goals for this.
Must be removable
Be able to fix the hight of the dust shoe independent of the router/ gantry
Has to work with the mud guards (cos i want them!)
Has to work with Ryans excellent visual design
I will add some pictures of the current deigned here and the next post.
THis picture was of a suggestion from another member to use this type of C channel due to weight.
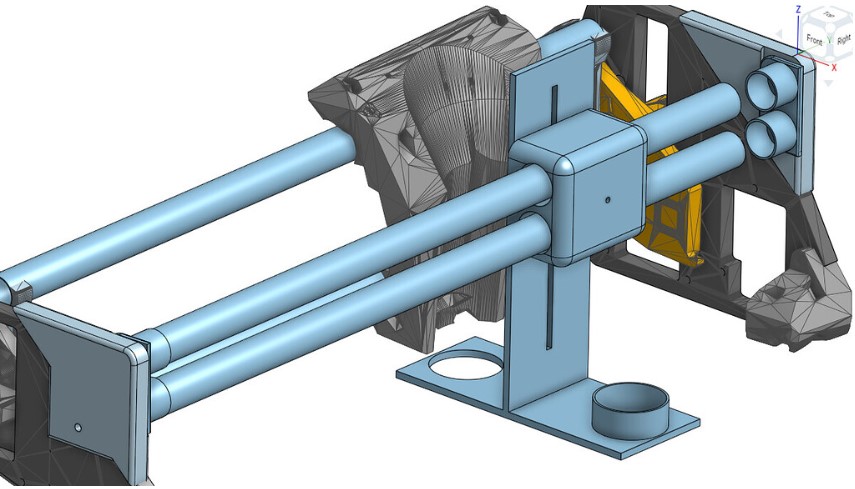
I realised after doing it that weight is not a huge concern (still a concern) as the gantry does not have to lift it. but it let me to my chosen, for the moment, design using 25x25mm square tube.
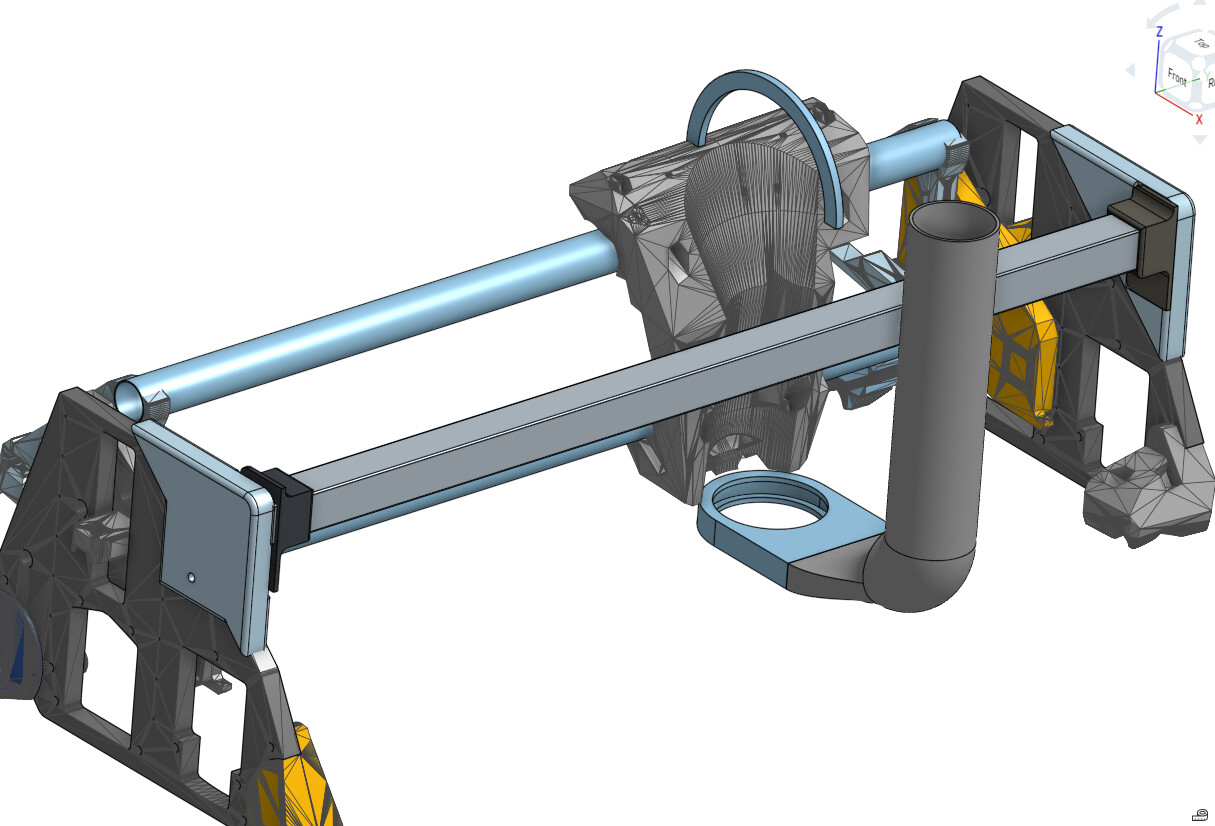
Rear mounted:
Second design with everything behind. Once i have everything else sorted out, i might come back to this as my setup has the extraction hose hanging from the ceiling so there is a lot less clutter behind there. But for the moment i and going to move forward with the front design.
Glad you’re on this. I’m about ready to share the “work-in-progress” version of my work on the other possible approach (core-mounted floating Z thing). More soon.
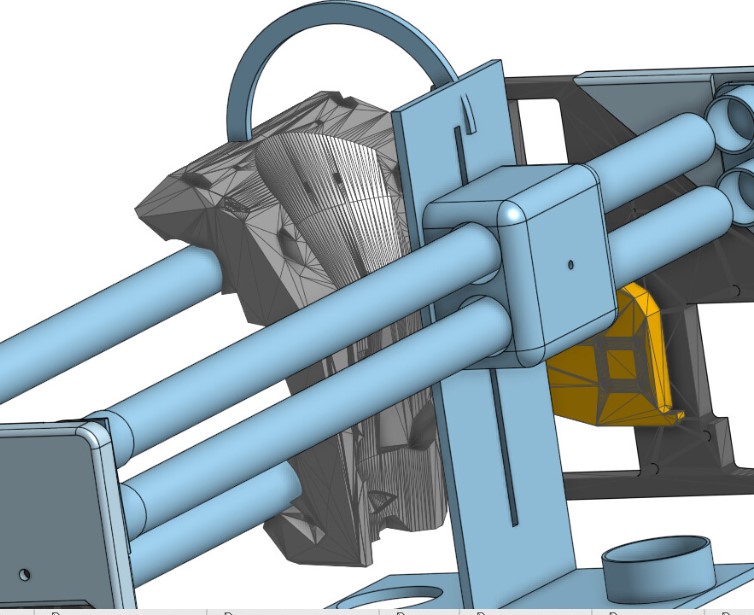
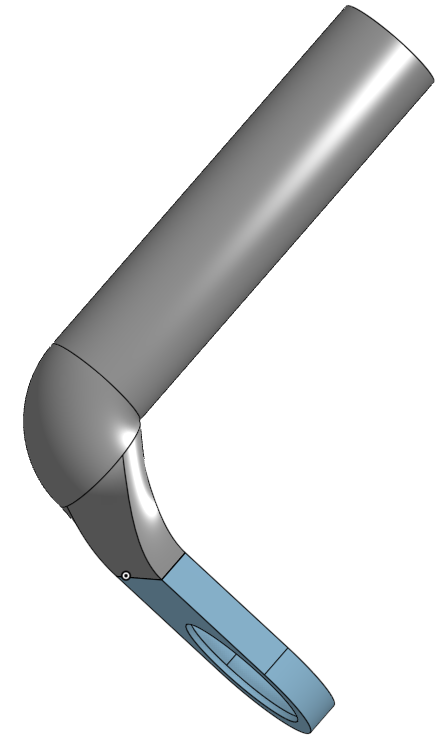
As the basic frame mounts are done, and the mounts for the 25x25mm square tube is basically done and i cant really design the slider until i have some idea of how the dust shoe is going to work, I am going to work on the dust shoe, I want this to be one part, similar to the alex chappel design with a thin flat dust intake and converting up to a 51mm dust hose exit. ( I will make sure once its done that i can update that collar to accept larger dust hoses, either directly or an adapter).
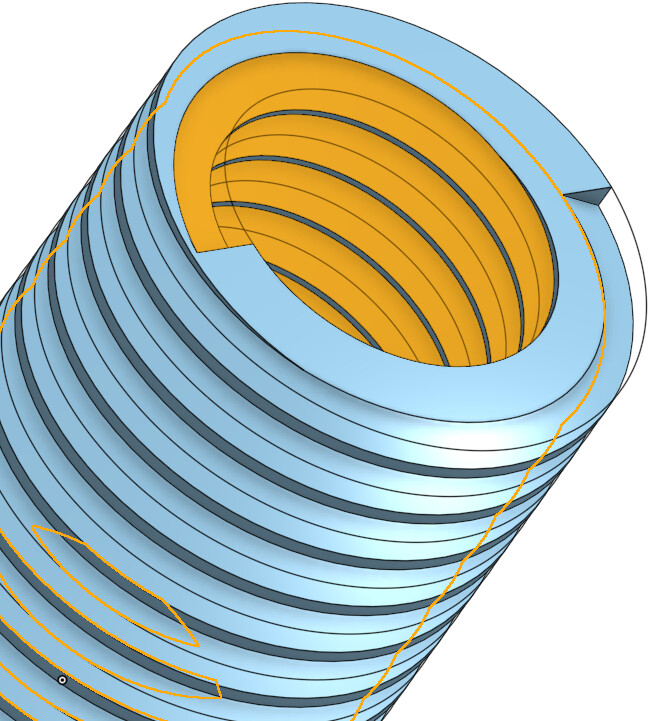
Then i will need to design the bellows, that might be beyond my CAD abilities, but you never know till you try.
Ok, here is my first try at a proper dust shoe, I dont like it, but its something to work on.
I keep thinking “i cant see the bit” and i have to remind myself that that is the idea. that this is put on after the bit is positioned. Right now i cant get it straight in my head.
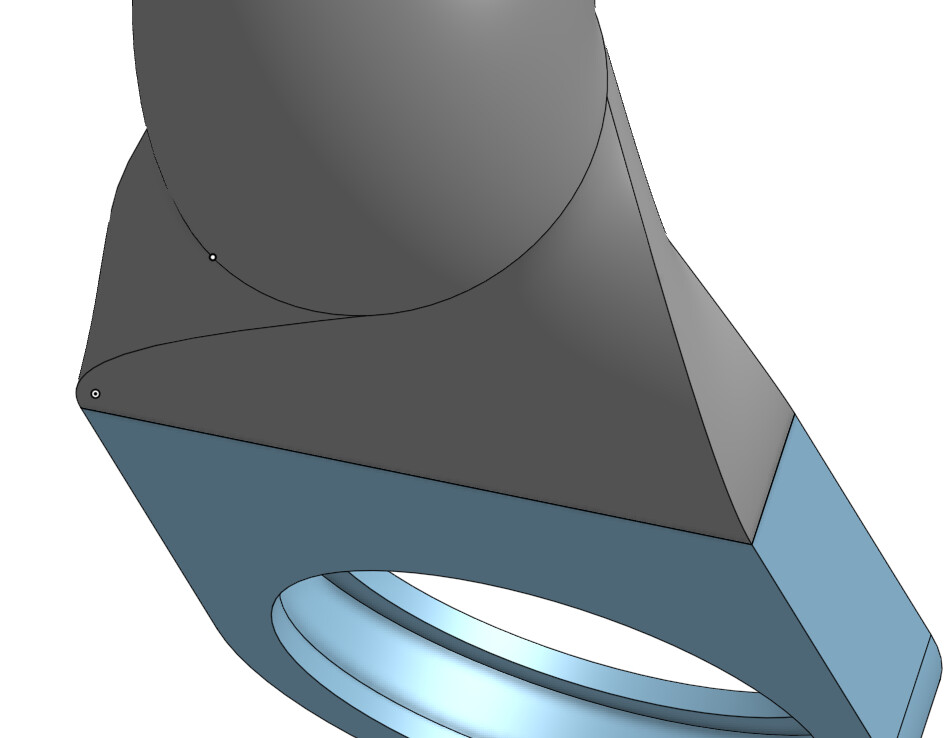
As for this part i am not loving the “loft” or square to round, its twisted for no reason i can discover. (lack of cad skill) i was thinking here that i could use the distance between the slider/bar and the router to make that change from flat to round. clearly more work needed. I am running with 3mm wall thickness. ??? To much ???
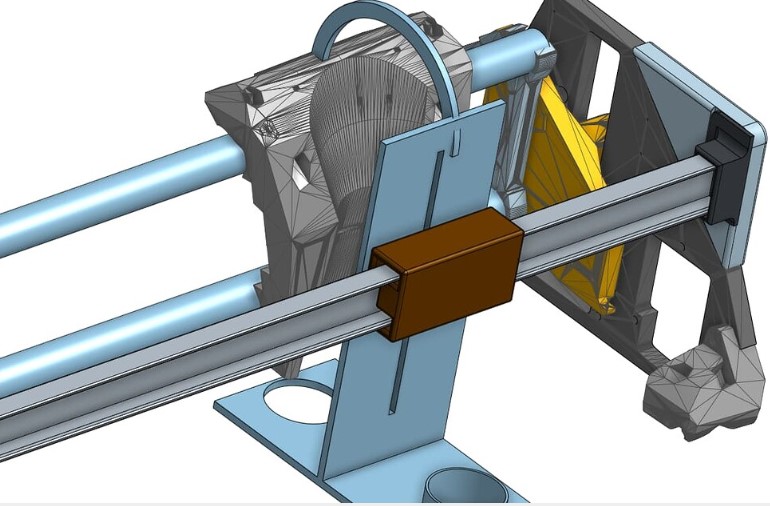
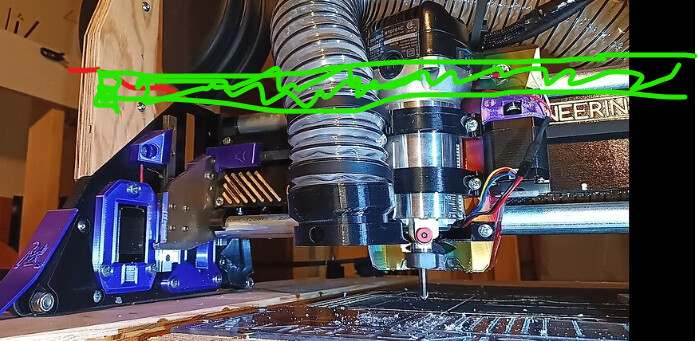
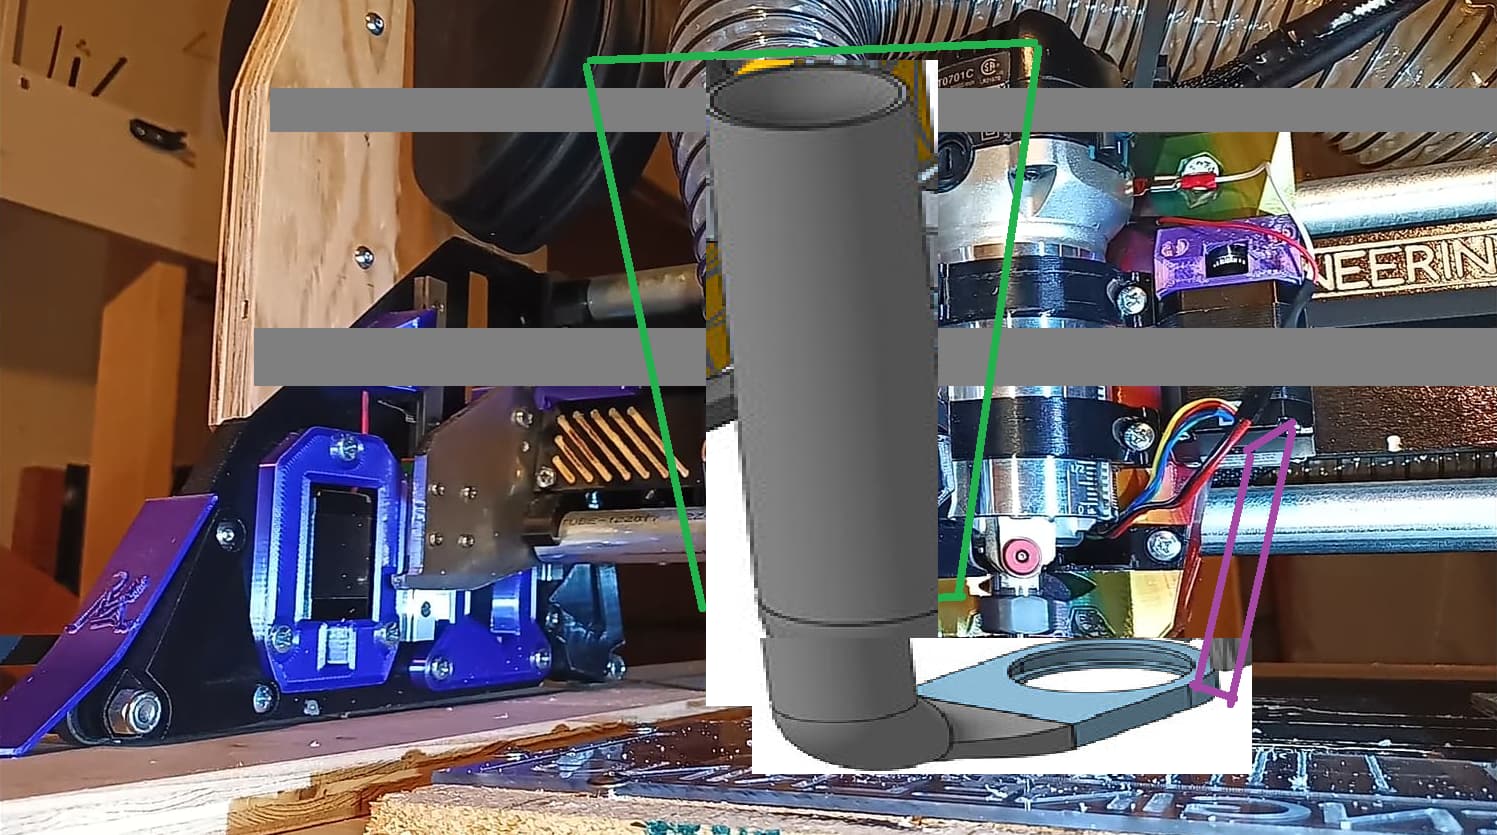
You could have a super dodgy one of this design working very quickly, buy just adding the cross bar, slider and use the existing dust shoe and some wood to connect it to the slider ( and the vac pipe)
Right, was maybe thinking of making a Vac Core (green outlined thing), a ba$tardized mirrored very slimmed down version of the existing Router Core running on pair of EMT conduit attached to YZ bolt-ons. Reusing existing spacing dimensions for Router Core’s and conduit/pipe. Planning to use pair of 3/4" conduit in my case, but others could use diff sizes, same way they do today. Just use different brackets. So, same Vac Core would work for different folks. Vertical Rigid 2"-3" pipe like your setup. Honestly haven’t given much thought.
I haven’t thought about solution(s) for other requirements am considering :
Easy height adjustment.
Easy removal.
Ensure that bits can be easily changed.
Ensure bit and cuts are easy to observe.
Ensure that existing drag pen/knife/engraver attachments are still usable.
Good low drag way to couple X motion for existing Router Core with the new fixed-Z Vac Core? Could maybe take advantage of existing Router Core’s angled profile to help nudge the Vac Sled made with upright receivers/nudge-brackets. (the purple outlined thingy).
Have been waiting for you guys to figure things out. Am using blue tape for now, mostly works
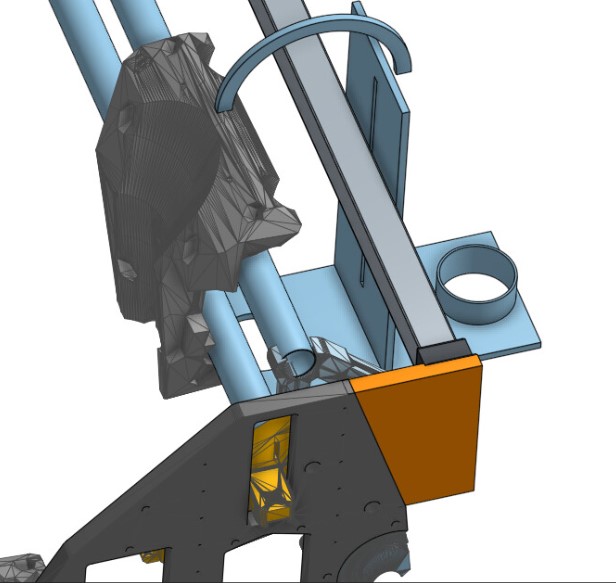
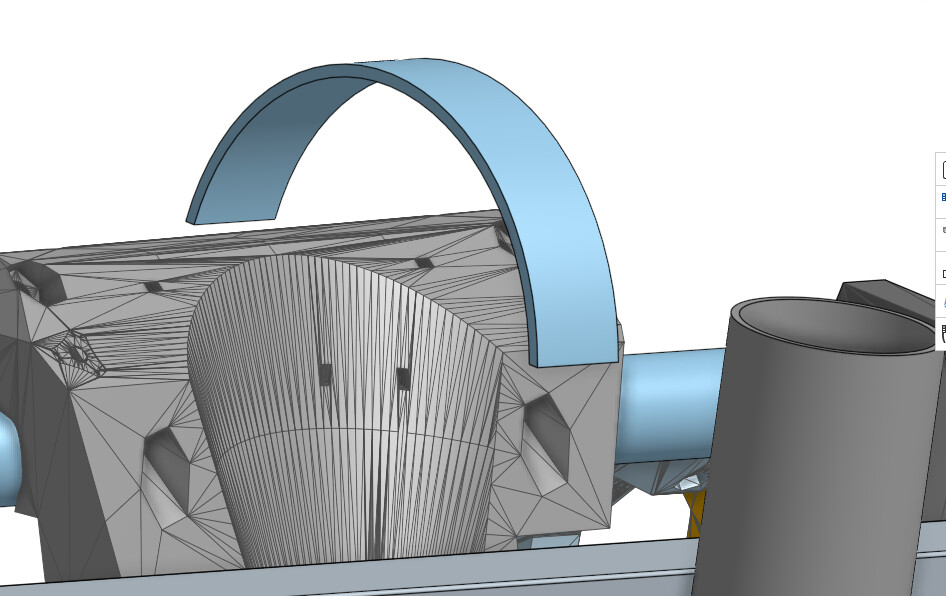
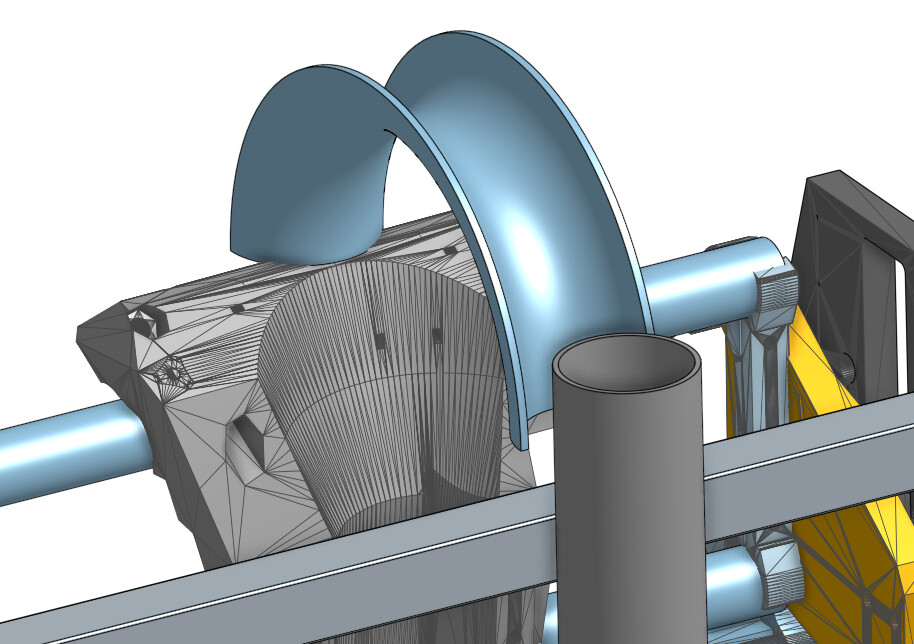
so i am going to, for the moment at least, go with the single 25x25mm bar, hopefully it will not look to bad. One thing i had not shared yet was that i had planned to create and arch that (that is eventually a convex shape, once i figure out how to do it) is connected to the top of the CORE via bracket and has the ability to lift up and over, to route the vac hose over to its original position from the dust slider.
You will have to use your imagination for the moment as i don’t have that modelled yet, but above is the basic idea. So the vac tube uses the same fittings as standard and plugs into the NEW dust shoe as it does now. (details to be worked out, LOL ) The vac hose is captured (zip ties) via this “hoop” and when you want to remove the dust collection, the hose is removed from the dust shoe as it can be now and “flooped” over the back of the CORE.
My thinking is that this will give a very good connection to the dust collection slider and does not stray to much from standard.
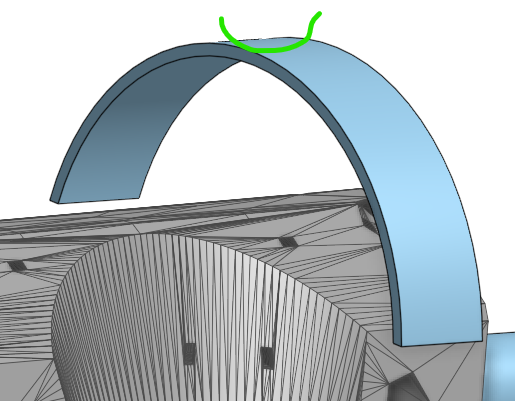
what i cant figure out how to model yet is out to make this a convex curve and the arch at the same time.
Hi Dan,
thanks for that (i use Onshape, so same same, but different)
Yeah, i have figured that sweep and helix combination out for the bellows above.
I just cant figure it out for this CONCAVE (thanks for the clarification, i was not sure )
I need to play with it more. lol
I will add it to the VERY long list of other things i now have given myself to learn and model.
BWHHAHAHAHAHAHAHAH (kinda crazy laugh)
Profile sweep sounds good, and probably better than what I’ve done before… Fusion 360 also has Pipe feature which lets you make Square Pipe, or Circular Pipe along a path. Pipes can be new components/body, or cut even. Have previously made curved half pipe by making a Square Pipe, then make a circular Pipe cut out.
LOL some day i think i should change and then i think about the VERY STEEP learning curve to change and SHUDDER…
EDIT:
thinking about it, profile sweep would work. I created it look at it from teh half moon side, if i created it with CONCAVE as the sketch and then extrude/sweep that in an arc that is equal to the distance i want, that should work.
I think.
The vac hose is zip tied into that and then plugged into the end of the dust shoe, same as it is now.
then when you want to remove the dust shoe contraption, the tube is unplugged and the convex arch is folded back on a pivot mount.
LOL, another thing has a 50% done mark on my trello board…
Yeah, i can see that. remember that this is all concept at the moment and not to scale. Also remember that in its standard form the LR3 already does have a very similar “loop” over the core from the front.
But I have to start someplace, and getting working in the front is going to get 90% of the parts modelled and work out all the kinks. @Ryan pointed out, rightly, that there is a lot going on at the back of most of the LR3’s. In my case, not so much as some as my vac hose is going straight up so I don’t really need the hose supports, but they do control the cables until I can find the time (and get a printer working, I am borrowing time on my brothers printer atm) to print everything for a drag chain. Once i do that i can probably switch a lot of this over to the back mount version, but again that means i have to work with a vac hose there for everyone else.
So I don’t see that, at the moment, I will be able to remove the “hoop” as even on the back mount version it will need to be there, in some form to support the hose and get it run and lay back down. Not to mention that hoop is what is going to link the CORE to the DUSTSHOE so it will need to be a little beefy to join those together effectively and not come off and cause a lot of damage to the the LR3 and part.
What if you make the dust shoe carriage just as wide as the core and add two horizontal arms on the sides engaging with the sides of the core?
Then the core would drive the dust shoe without having this overhang hoop
Or, even better a single horizontal arm from the dust shoe carriage to the unused home on the right of the core, magnetically coupled through a pair of magnets installer in the hole and on the arm
This one would allow the dust shoe to disengage if it gets caught some way or another