If you spent only half the time on it than you did on the LR3, then that’s definitely your baby, no matter whether it was useful at all. ![]()
I also got a little teary eyed when disassembling Schneewittchen. ![]()
2 Likes
My LR2 got enough use that when I dismantled it to make it into a LR3, I found various printed parts that were cracked or weakened. On my LR3, I recently found where one of my tool mount rings was cracked. Reprint as needed.
2 Likes
What were your print settings on that part Doug?
Mine are virtually solid (6 perimeters) so I’m not expecting trouble, but I know Chris @Fodder1 had a crack as well - is there a weakness that could do with a bit of beefing up?
My breakage issue was apparently related to me adding and removing add-on tools (via my various toolholder design iterations) over and over, and probably over tightening the screw.
1 Like
Good news and bad news-
USPS tells me the stuff is in the country - for some of you this might be yesterday, but where I live it’s two days ago, so I’m going out on a limb here and guessing it’s “stuck in customs” so we’ll see the package next week with a bit of luck.

On the other hand other circumstances mean we might be hanging around a little longer so I have once again squeaked my programme forward a little, bitten the bullet and started dismantling the LR2.
THE AUTOPSY
I think the reason I have been reluctant to start the deconstruction is that this was my first printed project and I was on the very bottom of the cad learning curve, and I had an inordinate amount of satisfaction from all the little detail bits and bobs I designed to tidy it all up, and there were a lot of them.
The spoil board is completely unmarked, because bizarrely I have always used a spoil board clamped over it to protect it ![]() however the unsealed MDF has not fared particularly well in this climate- it’s grown almost a millimetre in dimension, so I’ll whack a coat of sanding sealer on the next one.
however the unsealed MDF has not fared particularly well in this climate- it’s grown almost a millimetre in dimension, so I’ll whack a coat of sanding sealer on the next one.
The printed parts are all in perfect condition (unsurprisingly since it’s never been pushed beyond default settings), but even though I had a couple of coats of clear on the flat plates, they are about due for replacement anyway.
Undoing all the loom tape is much easier than I hoped. I wish I could say the same about the grub screws!

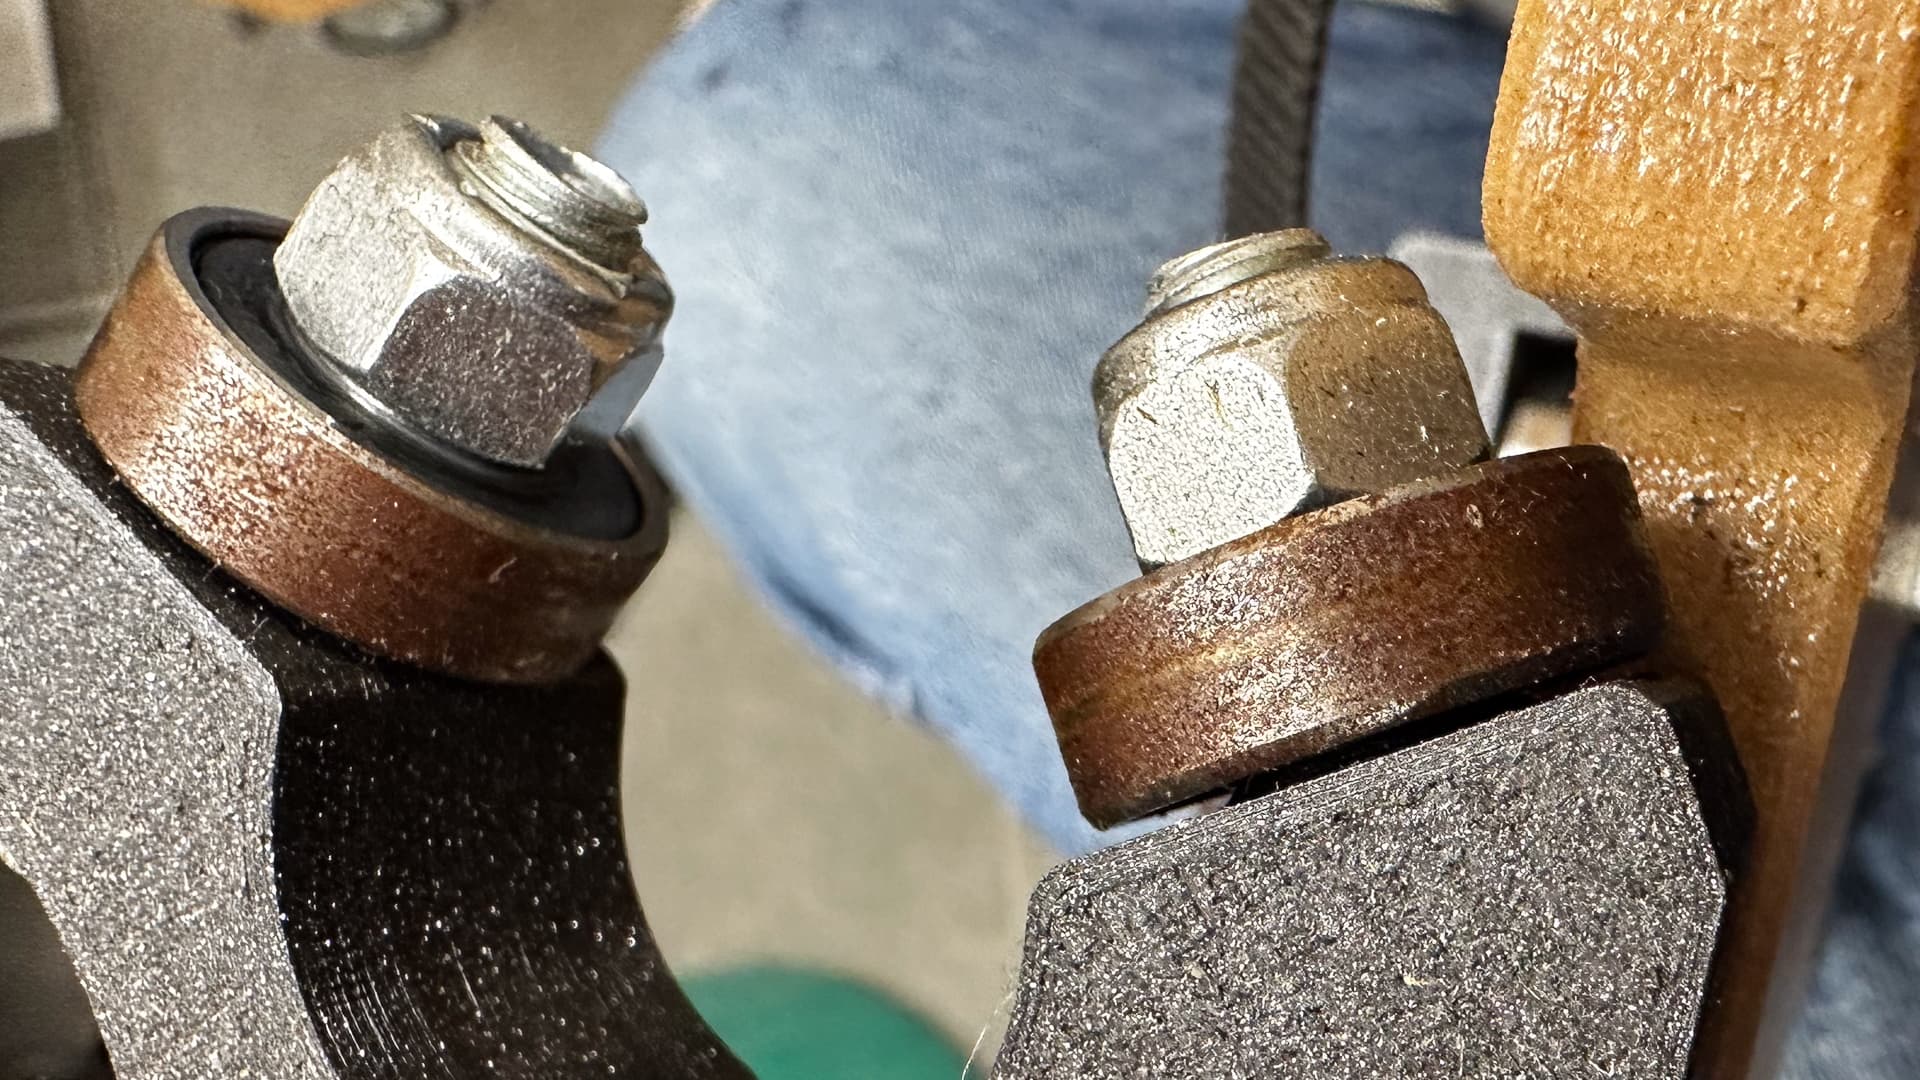
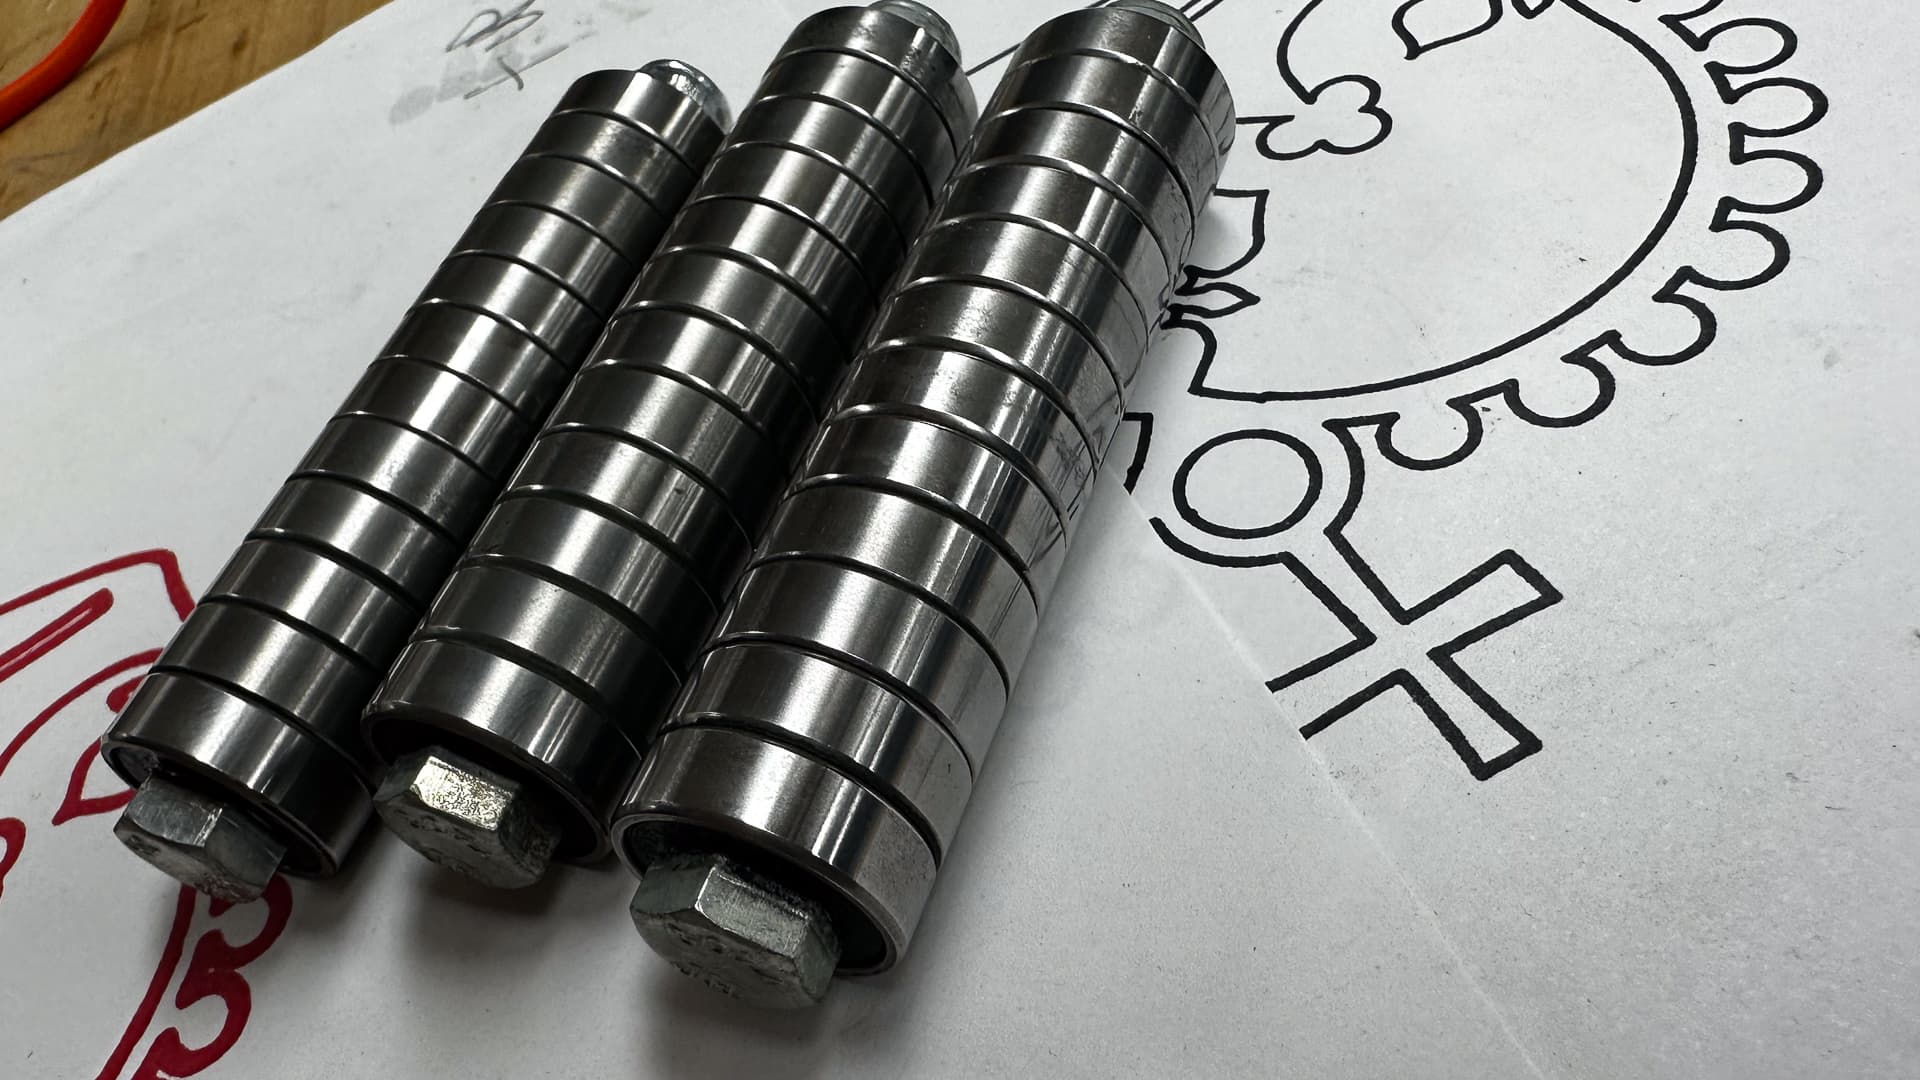
I have thought about buying new bearings, but they are only going to look like this after a few minutes, so a bit of rust converter and a polish will have to do.
3 Likes
The bearings cleaned up well enough - you can still see some minor pitting if you stand back and squint, but new ones would look worse in a week or two.
They look as though they are polished new, but they are more of a brush finish and that’s where the pitting begins, although on some it was only where they’d contacted the rails oddly enough. I’ll probably give them another coat of wax before installing them and call them done until the movement on the axes gets a bit bumpy.
3 Likes
Out of curiosity, because of your environment, were those bearings SS like your rails? Or the “normal” bearings?
1 Like
Hi Steve, they are standard Chrome Steel from @vicious1 - and there’s no problem with using them (unless you live in a severely humid salt lade environment I guess, in which case your choices are to maintain them or keep them in constant use or put up with it! ![]() ).
).
- I should have polished them before installing them originally - polished metal has a much higher resistance to rust and should result in a much longer time between service. All of my machines live permanently under drop sheets with ply covers over cast iron beds, but even then I have to wax/clean the beds every 3-4 months.
The best price I could get locally for stainless steel bearings was about $5.00 EACH (US), double that at a bearing shop - the extra hundred dollars on the build as it is such a small percentage of the real cost that it should not be of consequence, but since I have so many spare bearings and a buffing wheel on my grinder …
1 Like
Do you have a dehumidifier working at all? I was having issues with tools rusting etc. so I spent a few hundred $ on getting the garage door seals replaced/updated. I’ve got a 20L/day Mitsubishi dehumidifier that runs constantly keeping the garage to ~65%. Overall it runs about 30% of the time throughout the year and draws 300W while operation, so an average of around 900kWh/year, or about $150/year for us. That’s with the wet car getting parked in there during the winter and everything. Worth it to avoid the rust issues we’ve had in the past, for sure.
Definitely know the pain of the humid/salty environment, though. Used to work at the Port of Auckland designing custom electronics for their wharf operations. It’s amazing how quickly stuff can rust away/crumble to nothing in that environment.
1 Like
No, the garage is sealed and is part of the house. This is not a whinge - it’s just a fact of life when you choose to live in a sub-tropical marine environment, and I’ve lived in similar environments for my entire life. Apart from the rust and occasional bouts of dampness or the greasy smear of salt mist on cars left out overnight, I don’t think a casual visitor would notice anything out of the ordinary.
All tools are kept in drawers or cupboards - wall hanging is a no-no (except for the turning chisels!)
Oh, and roof screws rust out in five or six years! ![]()
2 Likes
Most of my stuff was rusting even when in drawers or cupboards, sadly. Unless I kept it oily enough that it was unpleasant and needed wiping down before use. If it’s an internal garage and well sealed then definitely give a cheap 2nd hand dehumidifier a try. Made a world of difference for us. No issues with rusty bearings even 7.5 years after my first order from Ryan.
2 Likes
Ouch, I might have to send you an early Christmas gift. ![]()
With “overboard” I found some that claimed to be SS, I haven’t done any testing on them to see what quality of SS they are, but thought of you when I added them to my cart. Which means I have an extra set of Ryan’s on standby. I’m going to have to look into options, and maybe give you an opportunity to polish, or upgrade.
This is the way.
2 Likes
That sentence is exactly why I didn’t bother chasing eBay specials in SS. No point in having shiny bearings if they don’t actually turn!
It’s funny how you don’t notice stuff until it’s drawn to your attention. I keep my gear in pretty good shape, but it’s interesting how every exposed screw head on my bandsaw for instance is rusty! It might be time to dismantle a few things and practice “blueing”.
On the other hand, I don’t have to waste any time watching all those “how to get a great patina” vids on youtube. All I have to do is leave something on my bedside table for a week! ![]()
On a more (or less?) serious note.
Not a lot of progress on the USPS front today - from the complete lack of movement one could conclude that it’s been handed over to Australia Post. ![]()
2 Likes
I would contact customs to see if they are just waiting for import taxes to be paid. Pretty universal 50/50 chance any countries customs actually reaches out to you.
1 Like
For stuff like screw heads on equipment and such, that all gets a squirt of LPS3 here, which is bloody expensive but goes a long way and works remarkably well. I’ve also recently tried a DIY concoction of lanolin and isopropyl alcohol that seems to work, but it’s hard to make it spray reliably through a trigger sprayer, they clog if sitting without being cleaned.
1 Like
Thanks for the follow up - packages below $1,000 are exempt from taxes on import but it takes a while for them to check. Most stuff takes around three days to get to Brisbane from anywhere in the world, then a week to for the last eighty k’s. I won’t panic until mid next week, although I am surprised that it’s not here today.
I use Lanotec here on stuff that’s not visible (table saw trunnion and mechanical bits) which is probably lanolin and isopropyl, it works well but leaves a big semi sticky residue - comes in a handy spray bottle too! I used to use it on the compound saw tubes, but it built up and it’s easier just to polish 'em with a scotch brite and some wax from time to time.
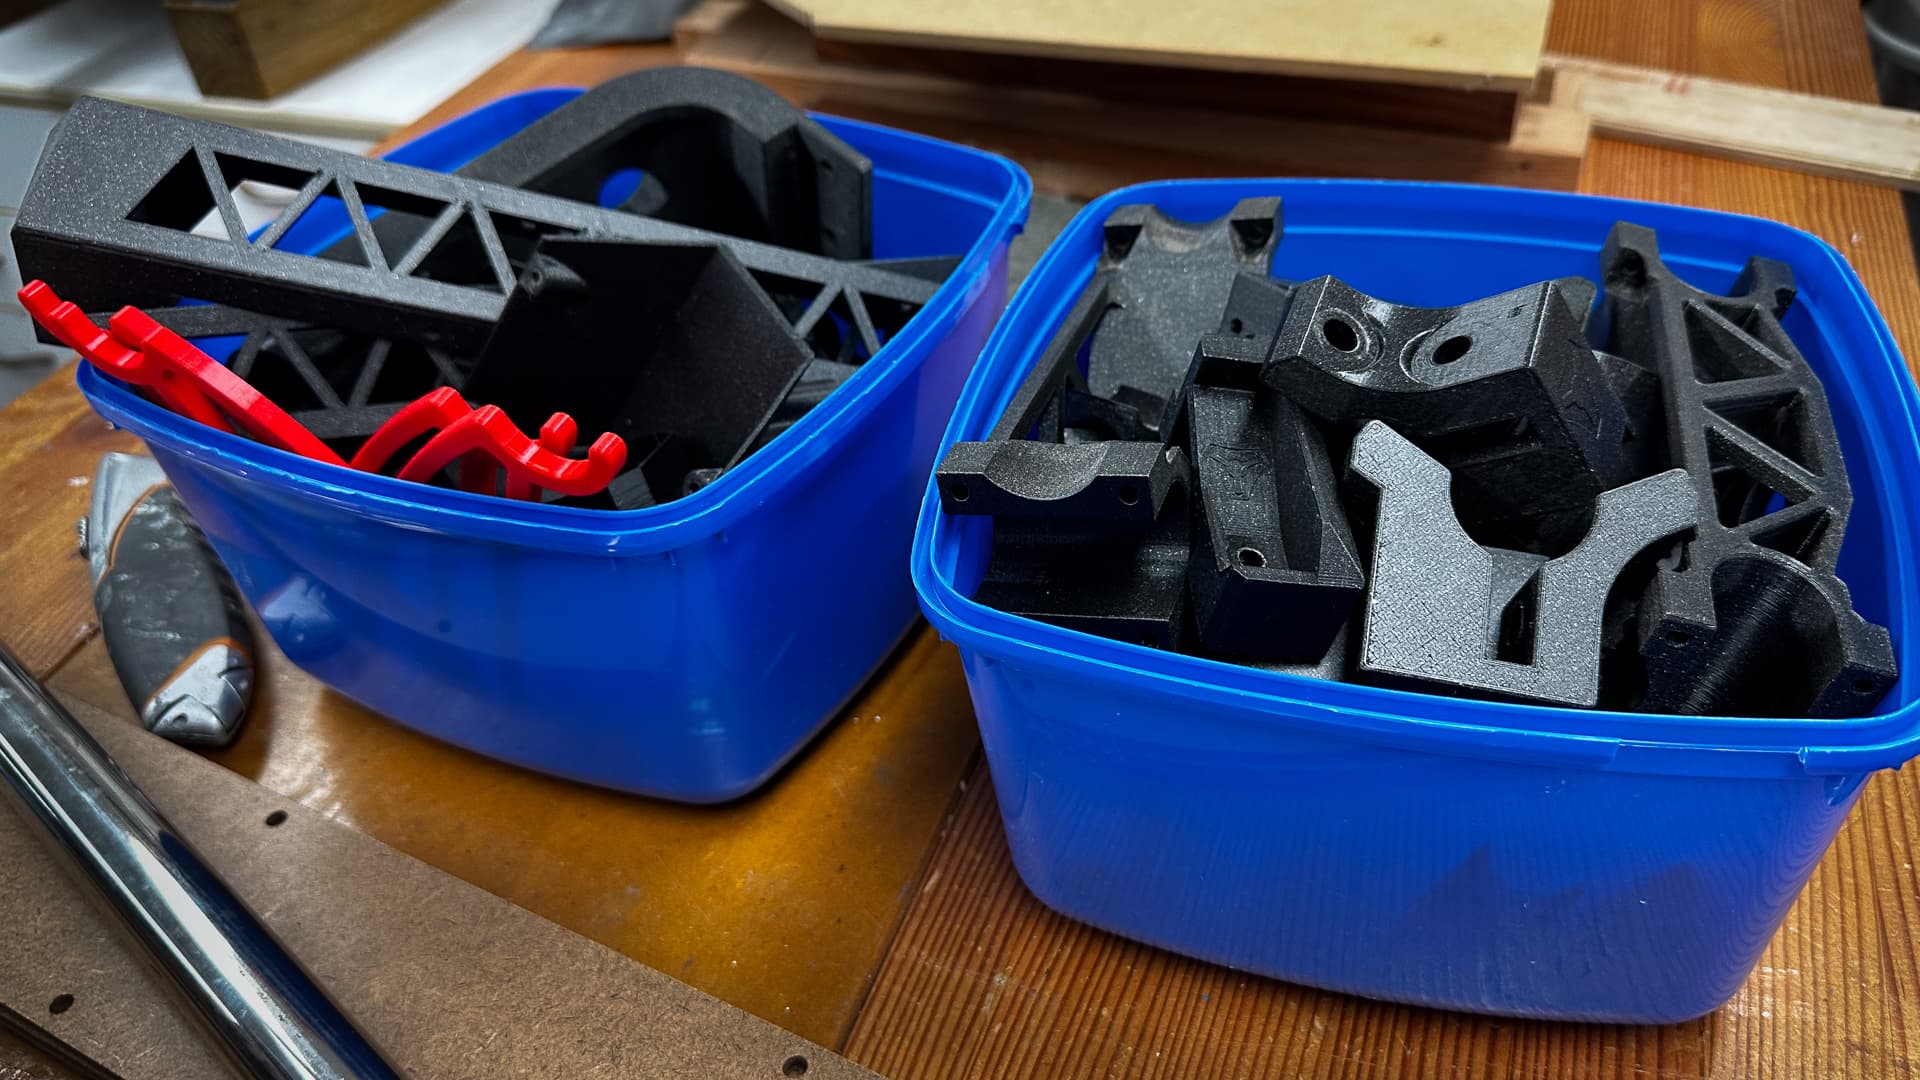
On a more serious note - the extent of my obsession with “improving” things hit me between the eyes after dismantling the LR2: On the right is the entire collection of V1 parts while the bucket on the left is full of my “improvements”. ![]()
AND in what I think is a PERSONAL BEST ![]() , I’ve made my first two mistakes on the LR3 even before packing up the bits of the old machine!
, I’ve made my first two mistakes on the LR3 even before packing up the bits of the old machine!
The tubes turned out to be 862mm long not the 866 I thought, which means of course the struts I cut are 4mm too long. So I’ve made 4mm end caps instead of the 2mm ones I had planned so that’s taken care of that, and it’s given me my first four parts to go in the “mods” bucket when I dismantle the LR3!
Then there was this bit in the documents:
Print the two left and right end braces with 50% infill and oriented so you can have the top facing out on each end,
Not having read the instructions until today, I couldn’t figure out the reason, so I ignored that… hmmm.
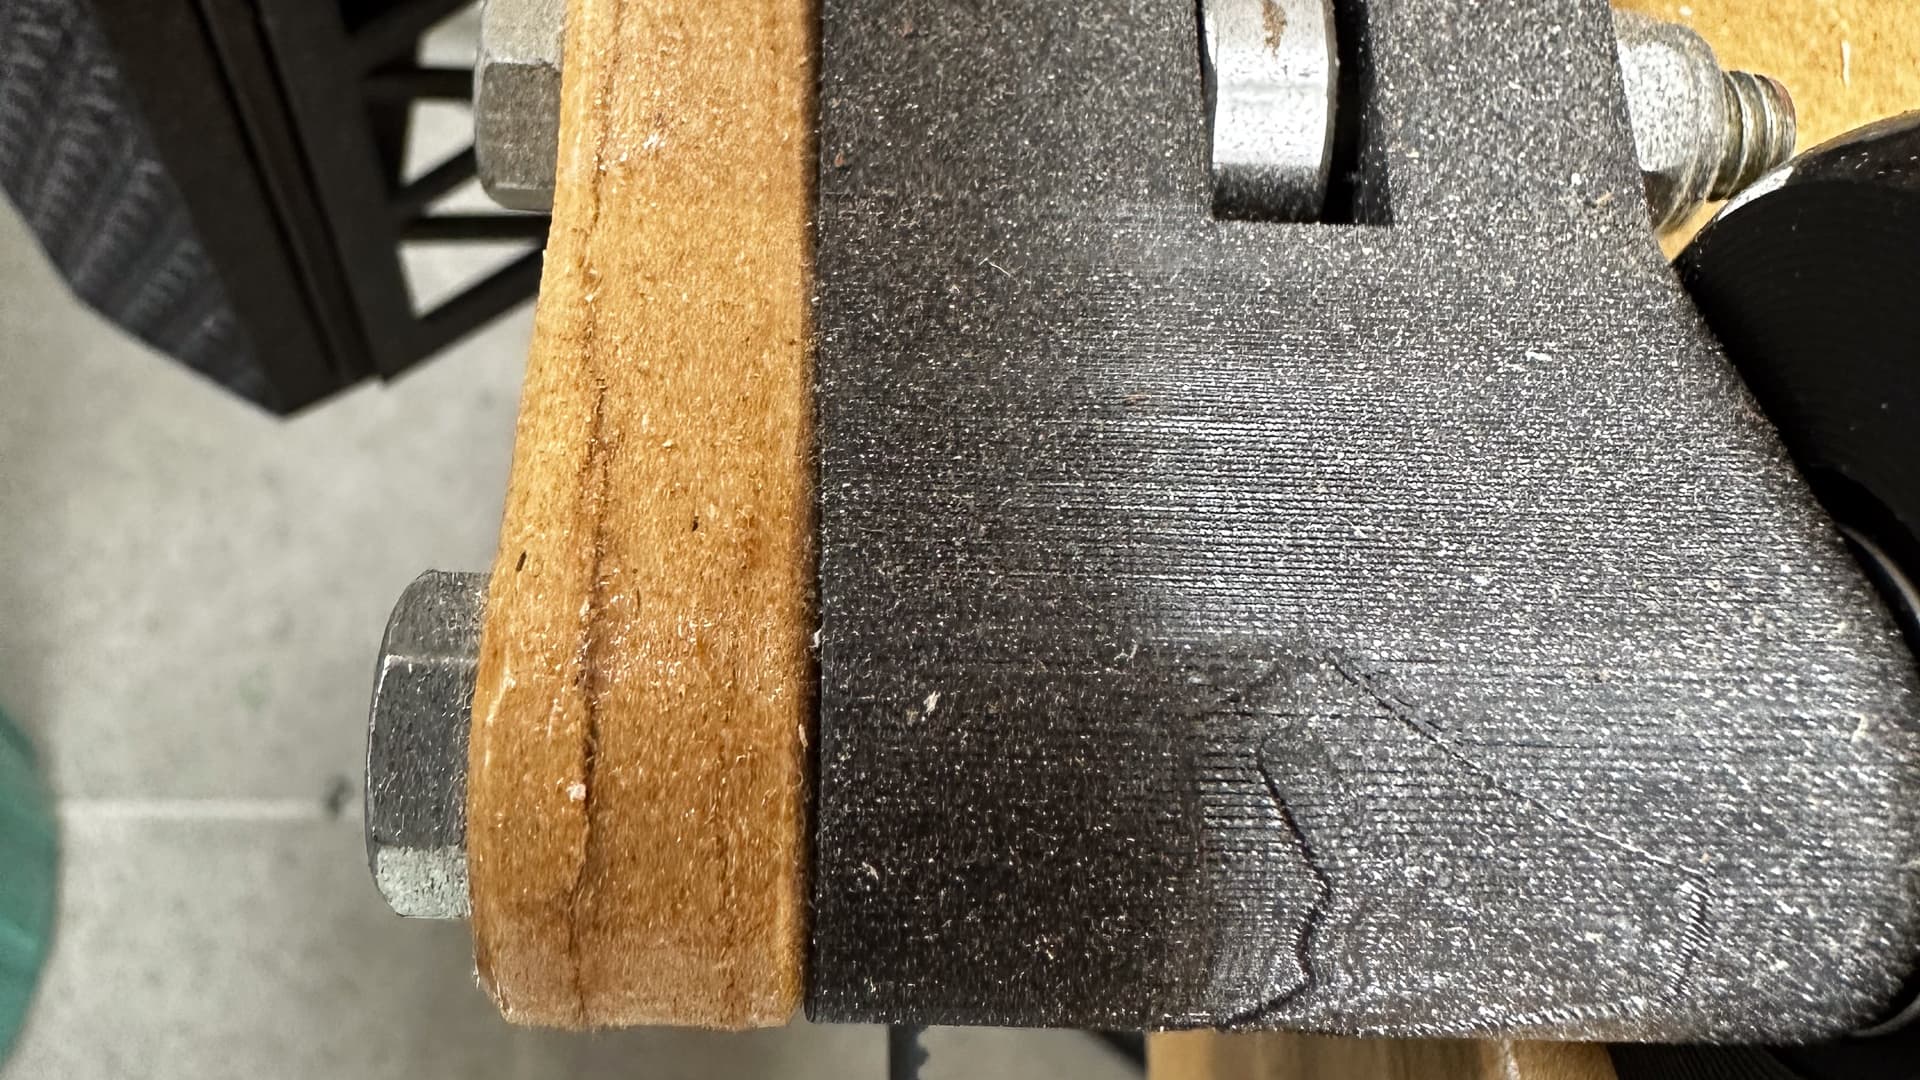
- Fit your rail together. Make sure the end two plates have a top printed surface facing out. This makes for a more perfect mating surface as mesh bed leveling can leave an odd surface on the bottom.
Thankfully my print surfaces are really tidy and it only took two or three swipes on a bit of 1500 wet and dry on a glass sheet to make the top and bottom pretty much indistinguishable.
I think that’s pretty much as far as I can go until my bits and bobs arrive, but I have to say the level of enthusiasm is quite high!
4 Likes
So close!
1 Like
I’m starting to learn USPS speak.
Apparently “departed” means “arrived”, unless there’s a way of processing things through a facility after they’ve left. Now I’m hoping that “international transit” doesn’t mean “transit” and it’s actually been despatched. If that’s the case it should be a day from here, but no doubt that will be Wednesday.
Note - I’m not blaming USPS for the delay here, just the rather obtuse communication.

1 Like
Yeah, I think of those as one step behind at all times. until it is delivered and that is instant.
3 Likes
It’s been a Sunday kind of Saturday for some reason, but I’ve got a few things nutted out and would welcome comment as we go along!
An old mate of mine was sitting in the garage yesterday and saw the braces cut out, and we laughed about how in the good old days we used to wet the backs of “masonite” before nailing it up and it would go drum tight on the finished walls when it dried. But I didn’t think about the impact of humidity on it until this morning when I decided to paint them. I know, they are “temporary” but around here “temporary” can mean “a very long time indeed”.
All did not go well - not visible until the silver acrylic was applied - but the moisture in the air had got to the tempered surface, and everywhere I’d stuck a bit of masking tape, had relieved the hard glossy surface of it’s hard glossiness!
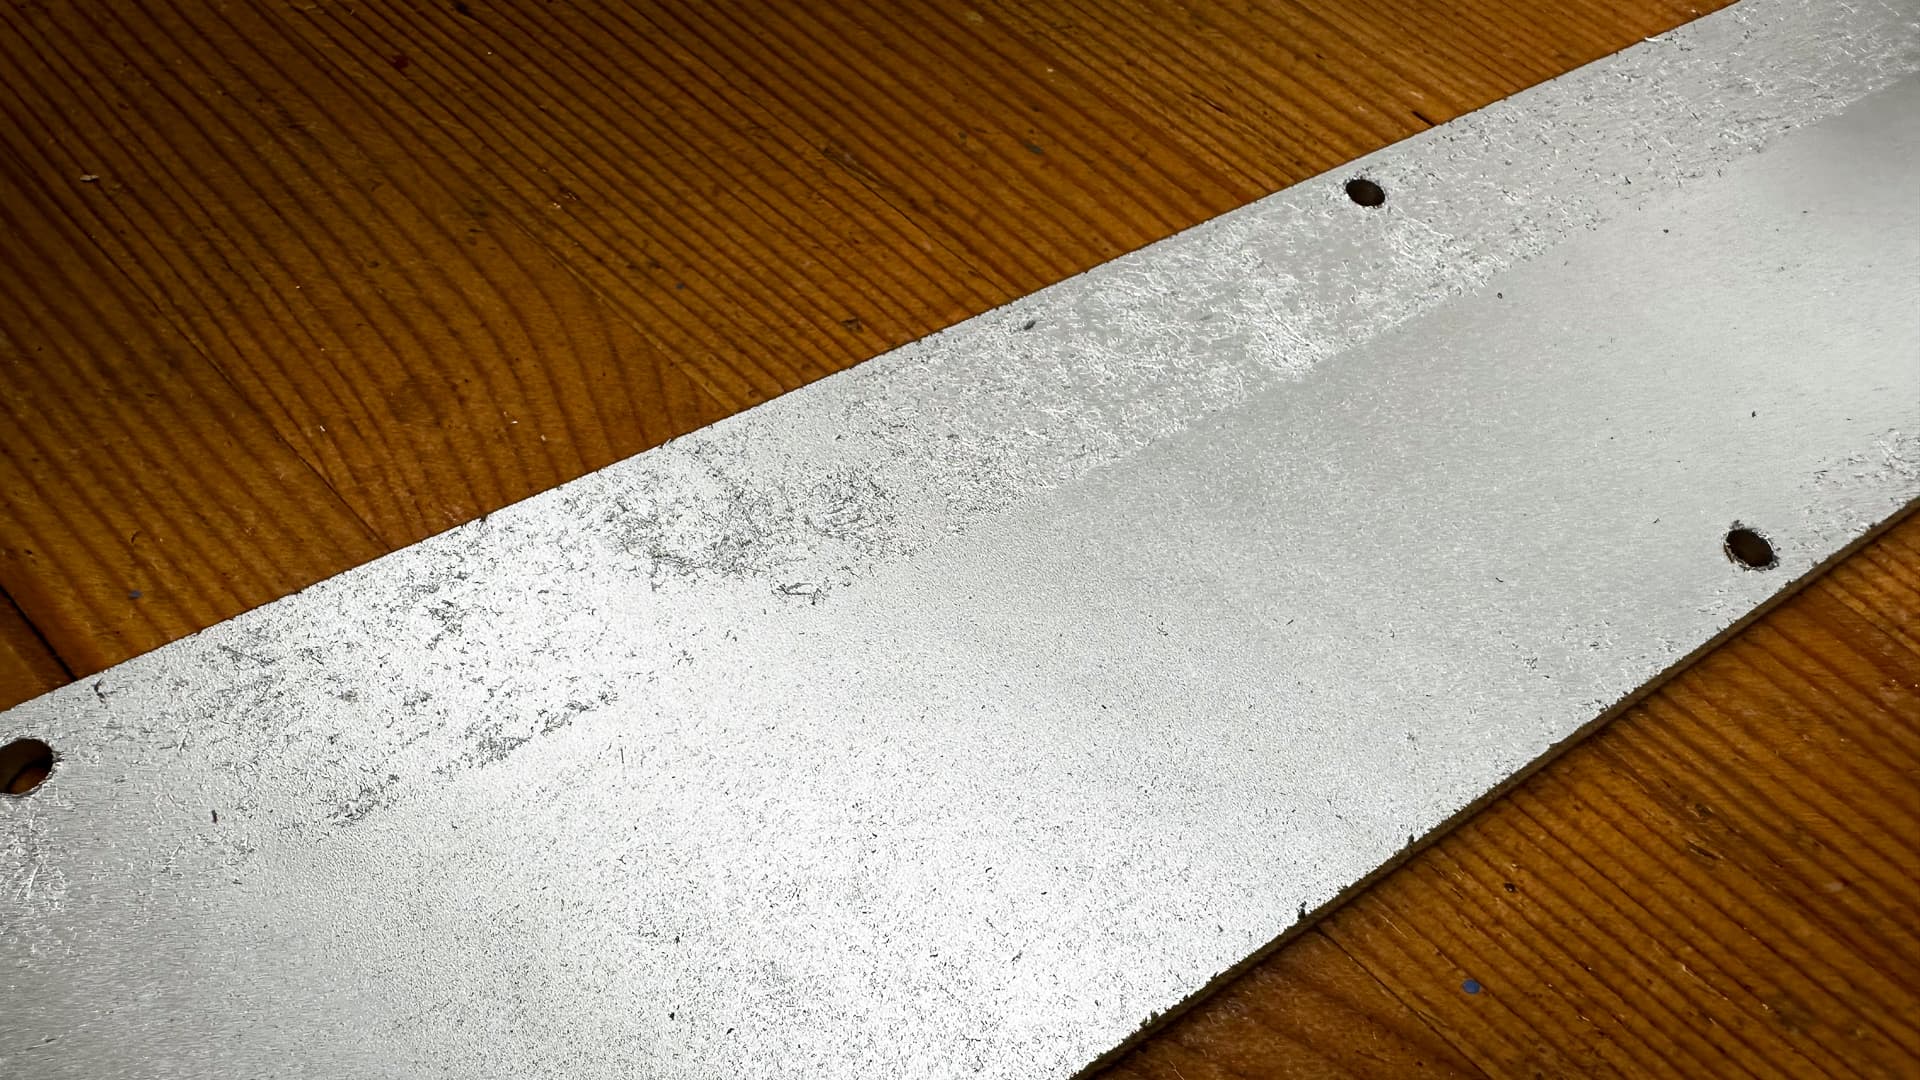
Ahh well, grey primer looks nice!
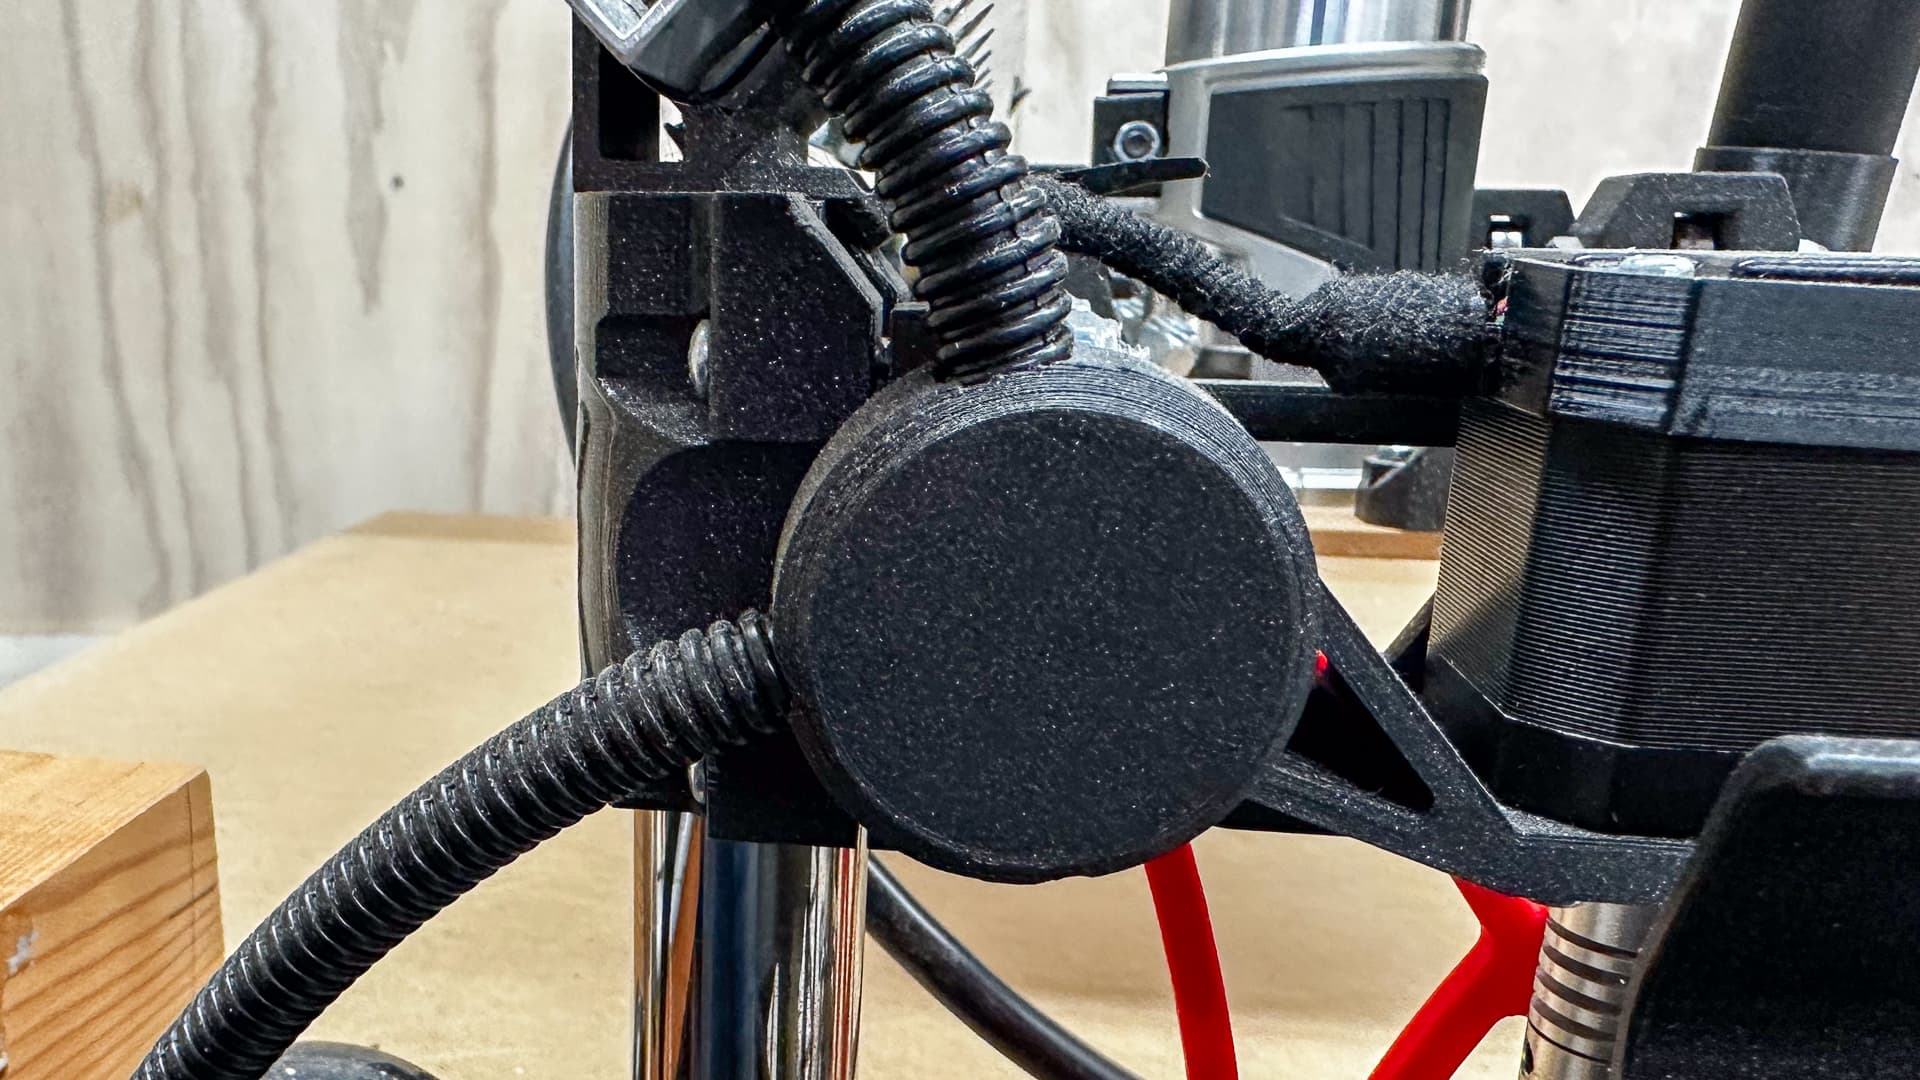
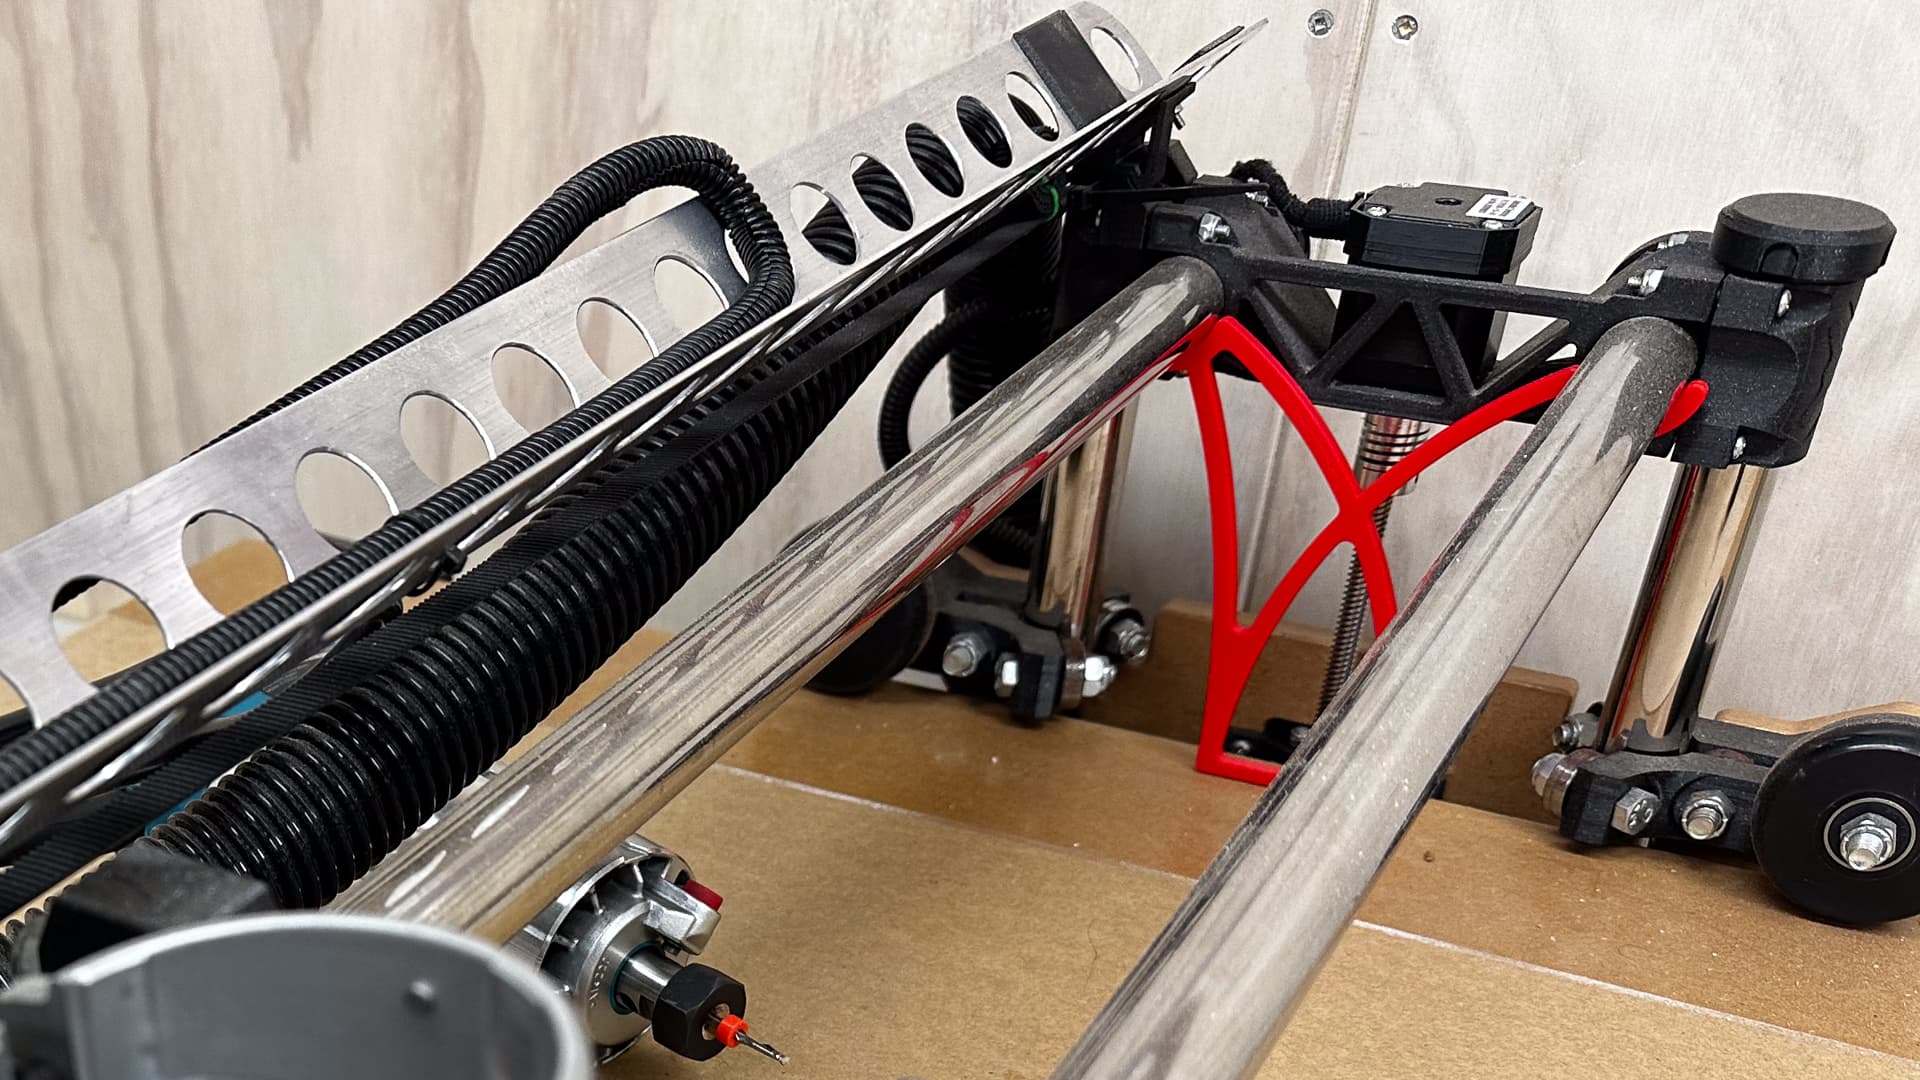
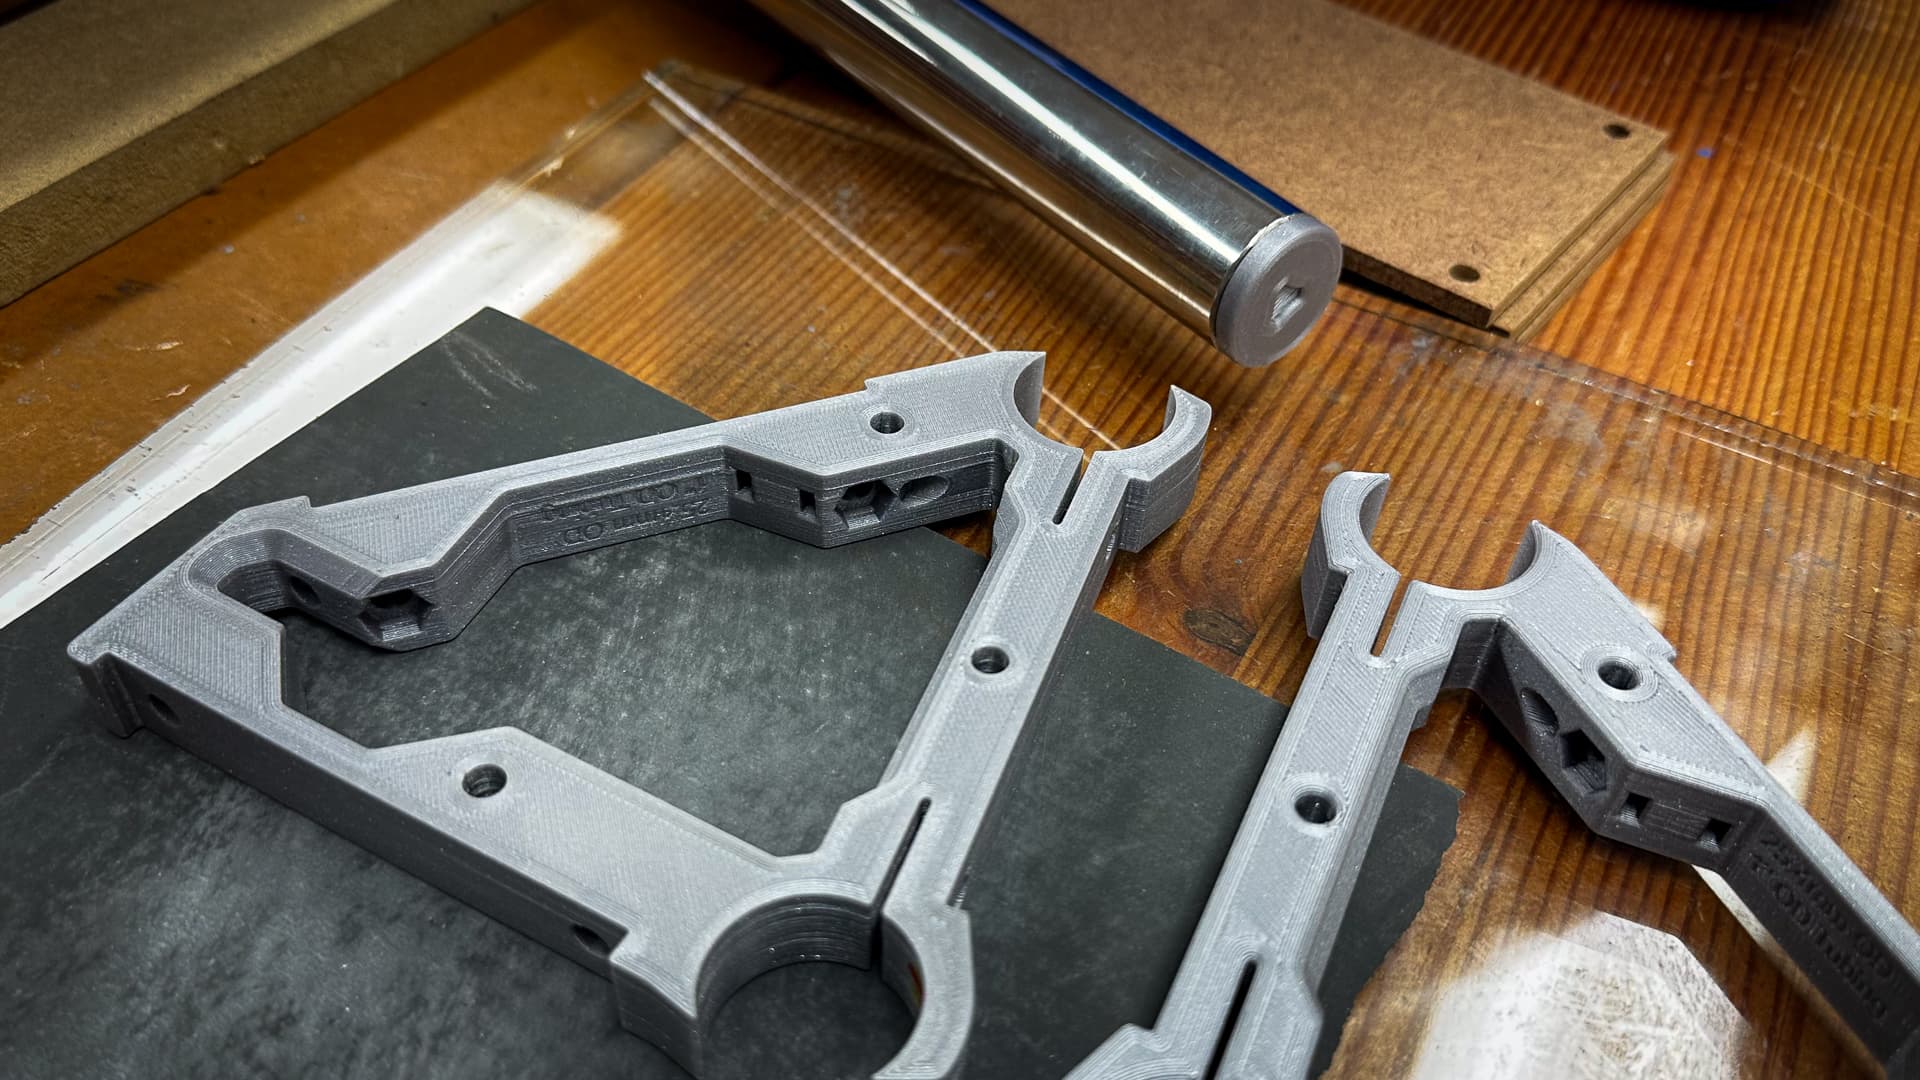
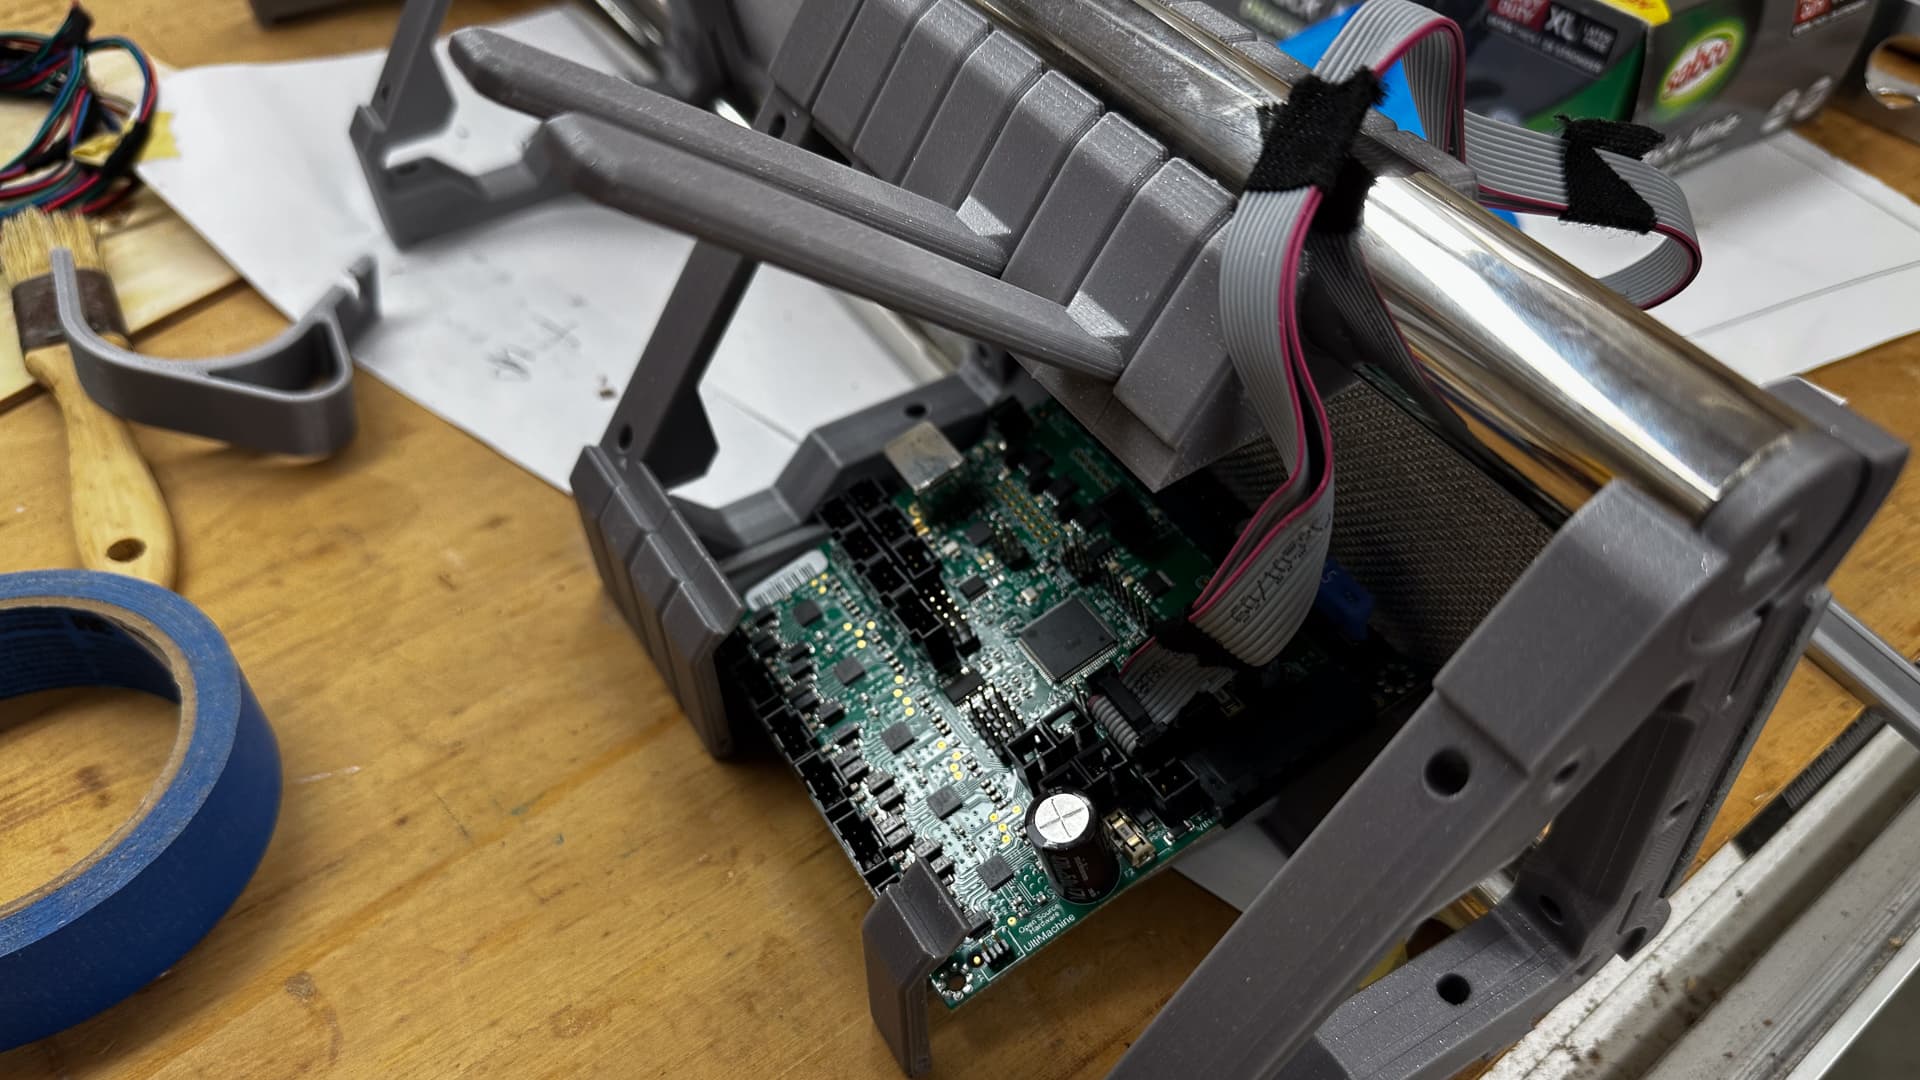
I cannot tell a lie, I started thinking about fitting the Rambo board in the beam because I bucked at the thought of all the print time it would take to make the standard box. So I’ve spent three times that in cad and print time so far, it is squeezy but I think I’ve got a solution that works.
I’ve made a series of blocks that mimic the shape of the beam and will fill in that section entirely, the board will sit there happily gently wedged in place and I’m thinking about just adding some silicone buffers instead of bolting it in. It’s very easy then to pick it up to attend to any maintenance tasks.
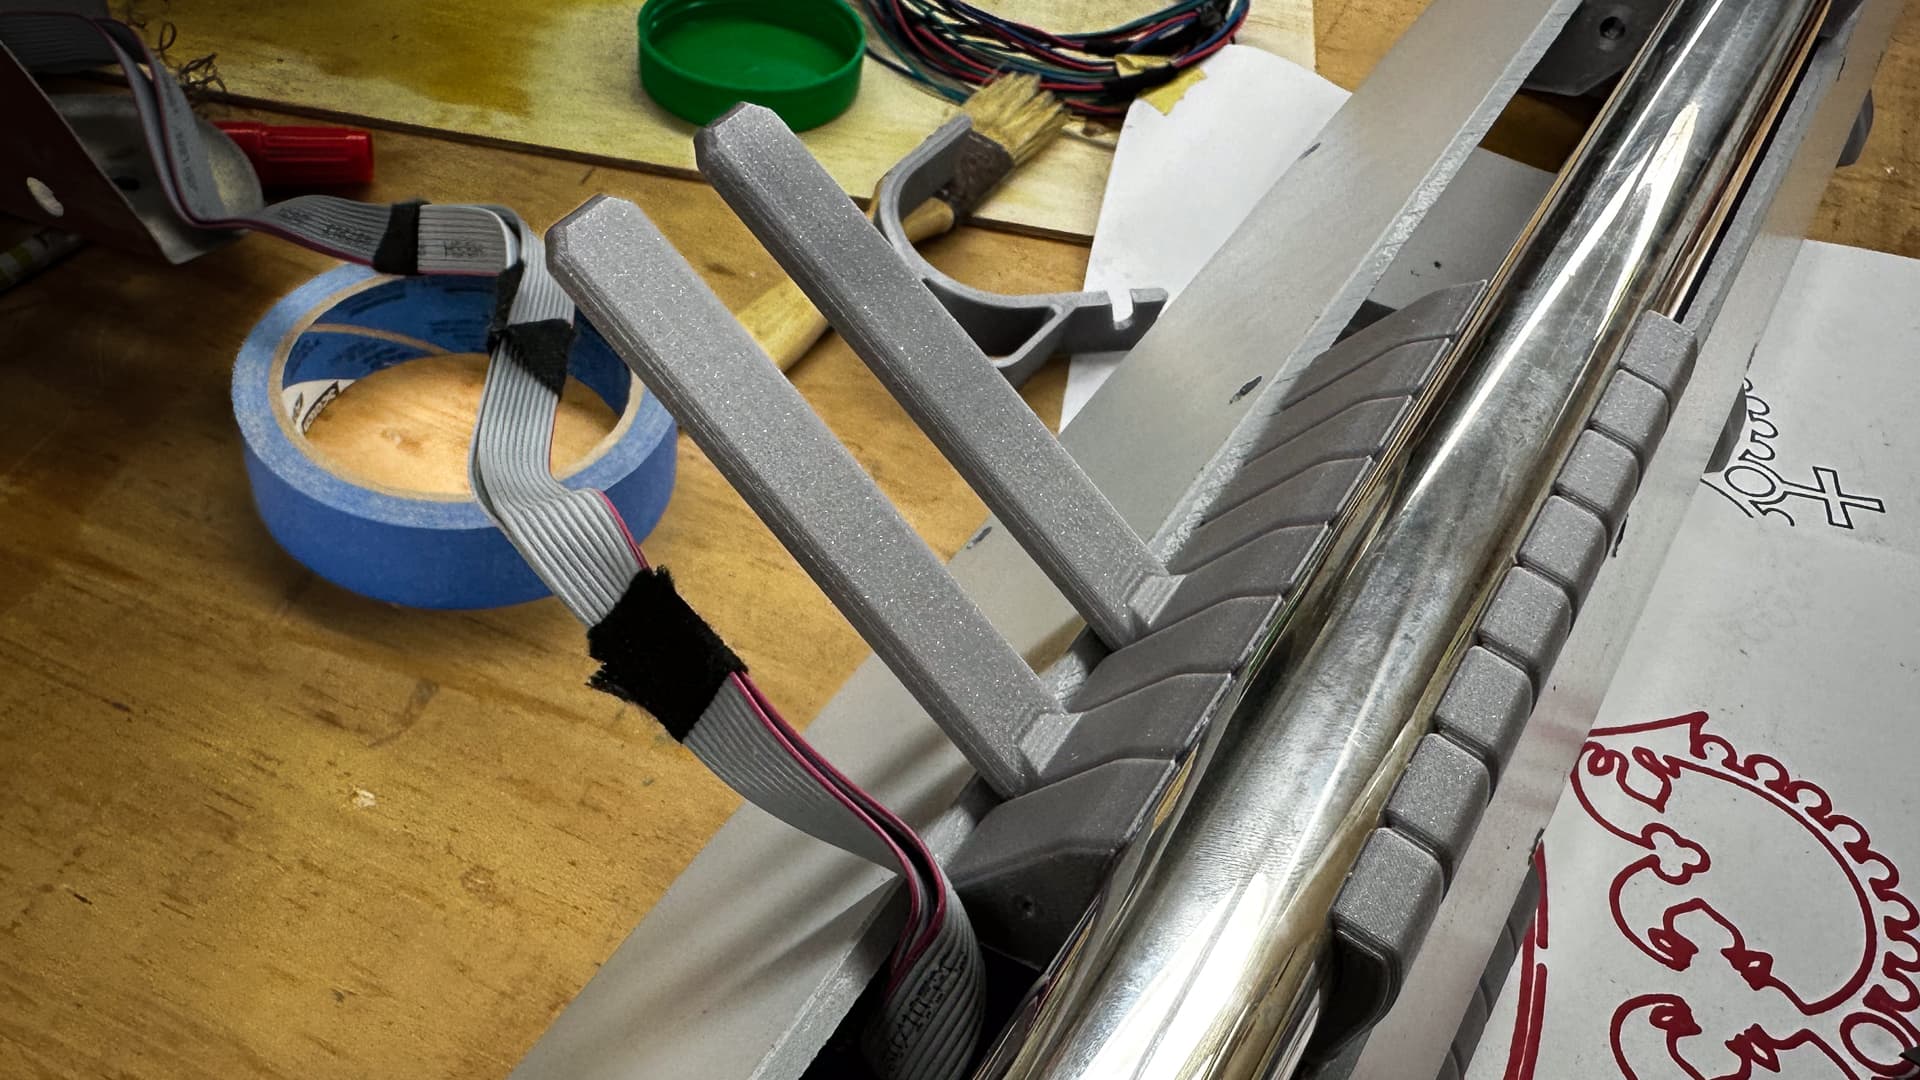
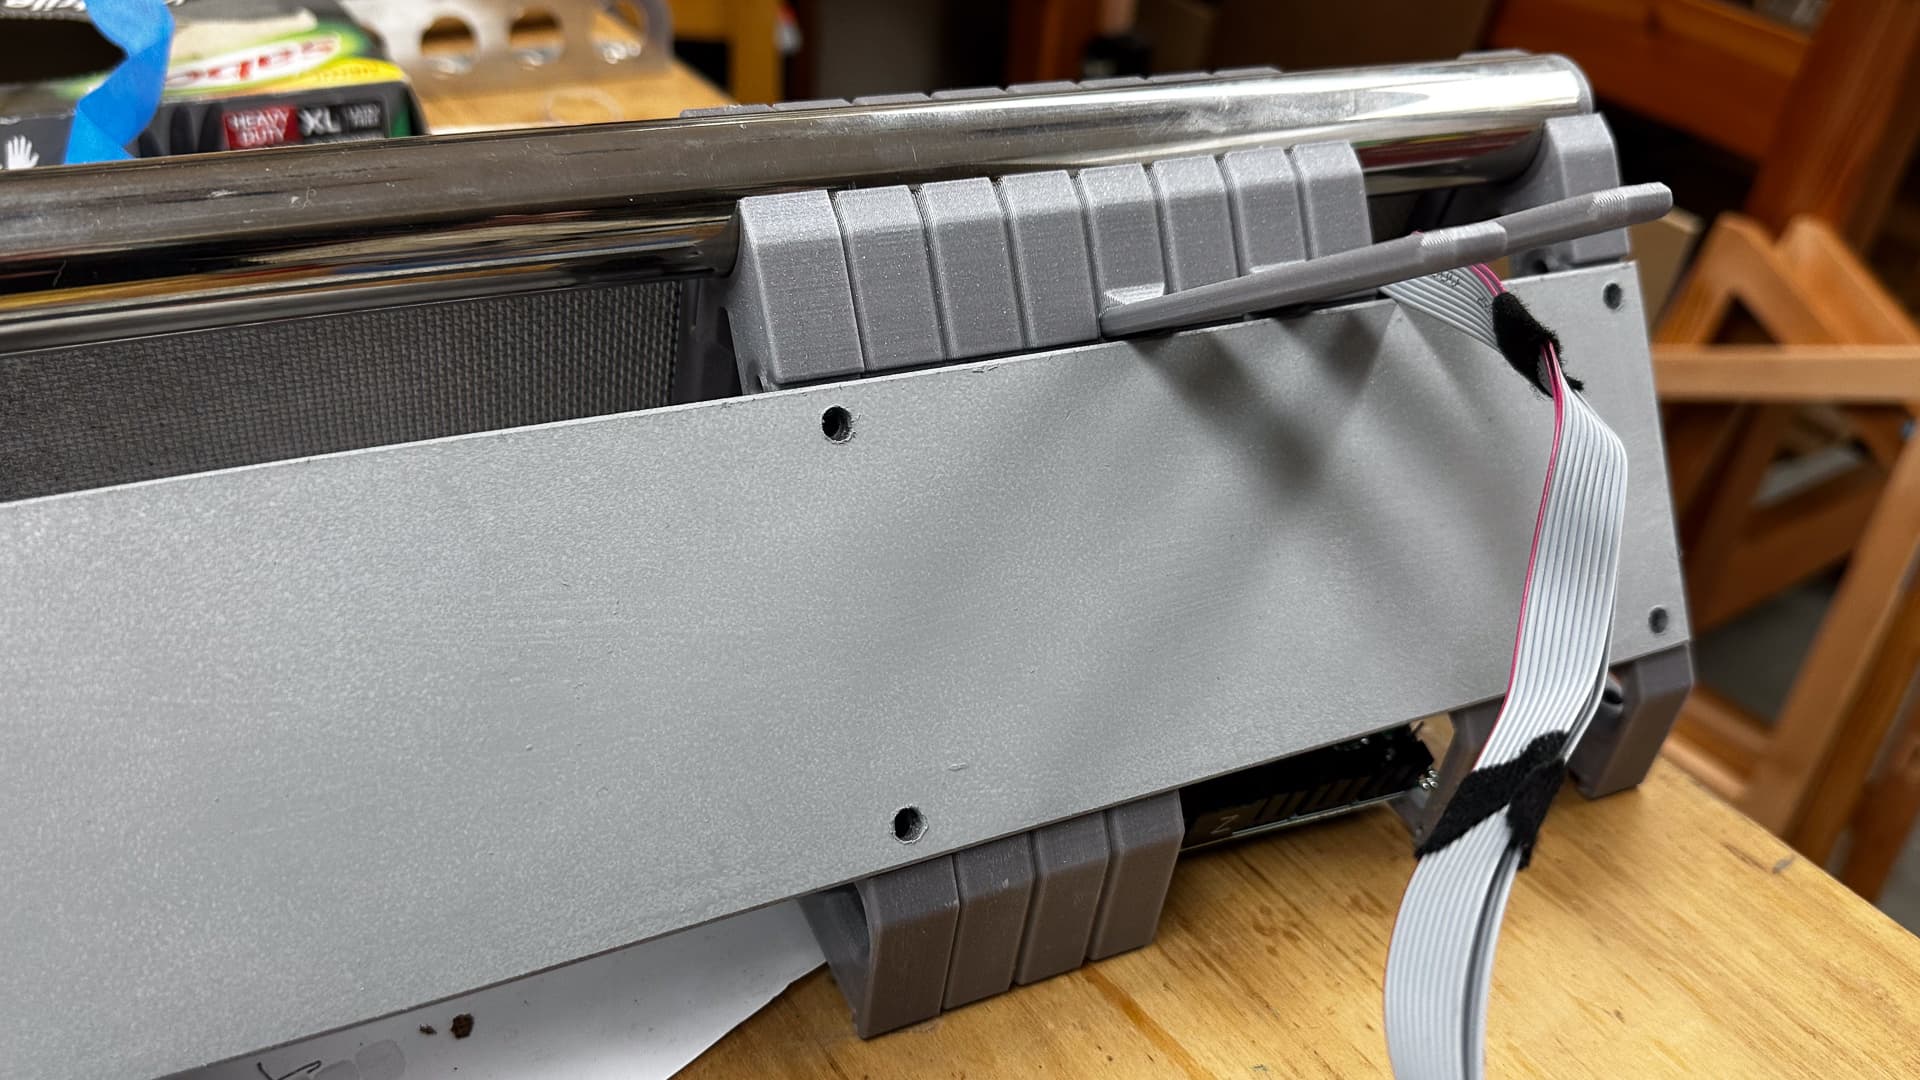
Here mocked up, with only a few sample “blocks” complete, the strut will be solid for this bay only and eventually will be a “slightly” lighter than stock truss for the rest I think. The “prongs” will be four to make a shelf for the controller and slightly changed design-wise to better match @vicious1 Ryan’s vacuum hooks, and I’m pretty sure I’ll just use a small USB patch cable and a panel mount in the blank end to connect without removing the brace panel.
The control cable exit will be easier to photograph when complete than to describe, but it will be tidy!
Oh, and while fifty million downloads can’t be wrong, rather than using Ryan’s old graphic controller case , I am super happy with my new one, which snaps together and I think is more in keeping with my machine! More info on that in a day or two after I’ve taken some proper photos.

7 Likes