Did you fall into your keyboard? ![]()
2 Likes
I’m going to try to make a serious attempt next year - it’s all at exactly the wrong time though, but maybe a round the world ticket won’t be out of the question… sigh!
4 Likes
WARNING - the following is just full of excuses, unpaid promotion and self aggrandising spam.
Well just when you think you are getting a bit organised, this time I’m going to blame Joseph Prusa for leading me astray once again!!!
We went off on a bit of a shakedown cruise in the van, and while we weren’t looking, dear Jo P dropped the MK4.
Now my Prusa Mk3s has probably got above average miles for its age and the plan was to order an “S+” upgrade kit this weekend so it’d be ready for me to pull the machine apart and have it all schmick to start printing bits for the LR3 when we get back in early May. (I do want this machine to be as nice as it can be!)
The Mk4 changes that! Given the uncertainty of delivery of the kit - I might not have it until late May or worse - after then, but I’ve been given a deadline - Grandson’s birthday is in October, and “we’re” giving him “my” old printer!
The logistics are interesting - a month in the van in Aus, May at home to get ready for the northern summer - late May to the EU (which is a very long way from home) - is anyone interested in a meetup at the Maker Faire in Prague on 10 June? Anyway we’ll be back in October and to be fair I probably won’t have started printing until then.
On another very cool note, PrusaLive blew me away today with another prize of enough Prusament to print the whole thing and have a few spools left in reserve! It’s OK you don’t have to sit through an hour of the Mark 4 Droolfest - the clip should start at 1:06 ![]()
2 Likes
I so wish I could do that. That would be an epic trip. But it isn’t in the budget or the schedule.
1 Like
That’s a great shame! We don’t have anything even remotely similar in Australia - but since we have to pay to get to EU anyway - travel there, particularly once one reaches a certain age, is remarkably affordable! ![]()
Still hoping to work a round the world ticket one of these years with timing that works for one of the big US fairs.
2 Likes
OK it’s time to update, before anyone starts asking embarrassing questions about why we aren’t where we said we’d be!
About ten minutes after I’d spelled out our itinerary for this year, and no more than five minutes after we’d paid for all of the airfares a little black spot turned up on one of my wife’s routine health check results.
This was disconcerting, but perhaps the news that she couldn’t drive, wash the car, hang out the sheets, or…MOW the lawn! ![]() was even worse. I’m being flippant of course, and she’s well on her way to a complete recovery, and we think we’ll be OK to start planning again some time in July.
was even worse. I’m being flippant of course, and she’s well on her way to a complete recovery, and we think we’ll be OK to start planning again some time in July.
One could be forgiven for thinking that this would give me time to get going on the LR3, after all we don’t actually have any lawn, so the lack of mowing is not a problem. When my brain stops it’s incessant spinning, I might just do that!
3 Likes
All the best wishes to you and your wife
1 Like
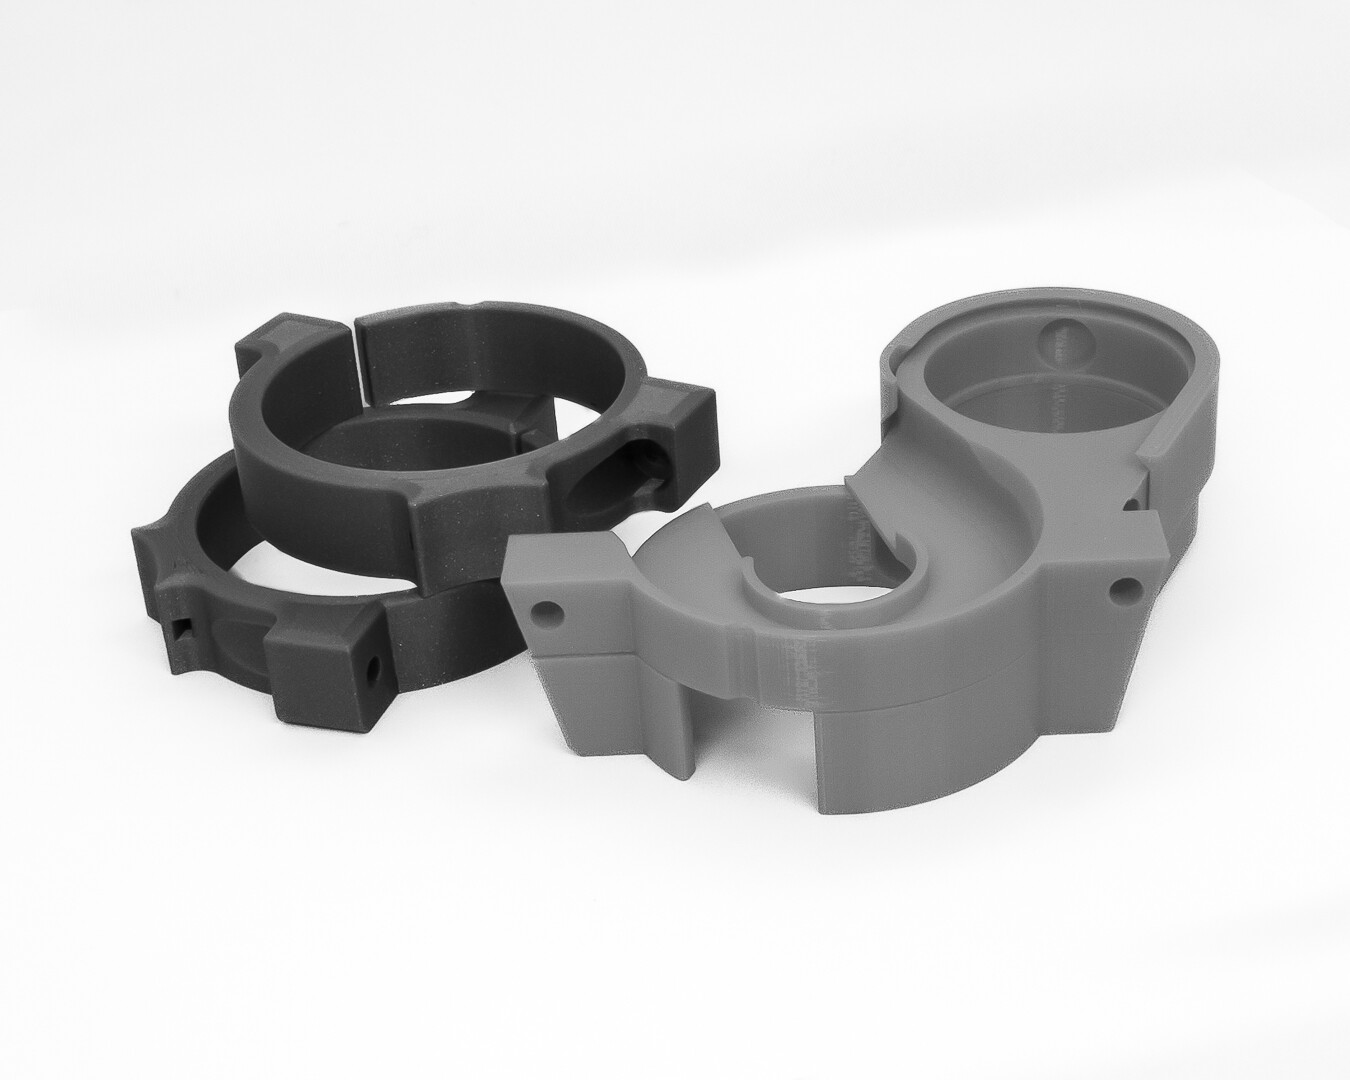
I think I might have accidentally made some progress. @Fodder1 Chris needed a couple of router mounts replaced and I figured that while I had the file sliced I might as well print a couple more, and that led to the other mount bits. Yes I know I’ll probably replace those with something custom but as with the LR2 I am really happy to build stock and nut out the rest when I know what I am doing.
As always, really lovely models @vicious1 - what a joy to print!
Don’t hold your breath for more progress, but it’s a start and I have a special bucket for all the bits!
3 Likes
come on PUSH PUSH PUSH, you can do it Peter.
4 Likes
I can’t say I’m behind with the LR3 because I wasn’t really planning to do too much till October-November but my ducks are so far out of the row at the moment I can’t be certain that a couple of them aren’t pigeons!
In no particular order - except that most importantly, (and the key to all this disruption), my wife has recovered almost completely from surgery. The prognosis is great and after radiotherapy there’s a 0.5% chance of a recurrence. So that’s fantastic.
The current lead time for the Prusa Mk4 kit is “we’ll let you know in August” which seems to indicate they are singing from the same hymn sheet as our doctors!
That of course should mean plenty of time to get on with things, so I’m not waiting, and the print queue on the Mk3 has just had a bit of a reshuffle and we start printing bits in earnest tomorrow!
That should give me a few weeks’ respite to get a few other shed jobs done, and with a bit of luck I’ll get my head together in sufficient time to place an order for the rest of the bits with @vicious1 shortly!
In the meantime, although I’ve posted it on another thread - I will be watching filament spools go round in sync.
4 Likes
This is how things get out of hand! I guess it’s why “hobby projects” used to be called “pastimes”.
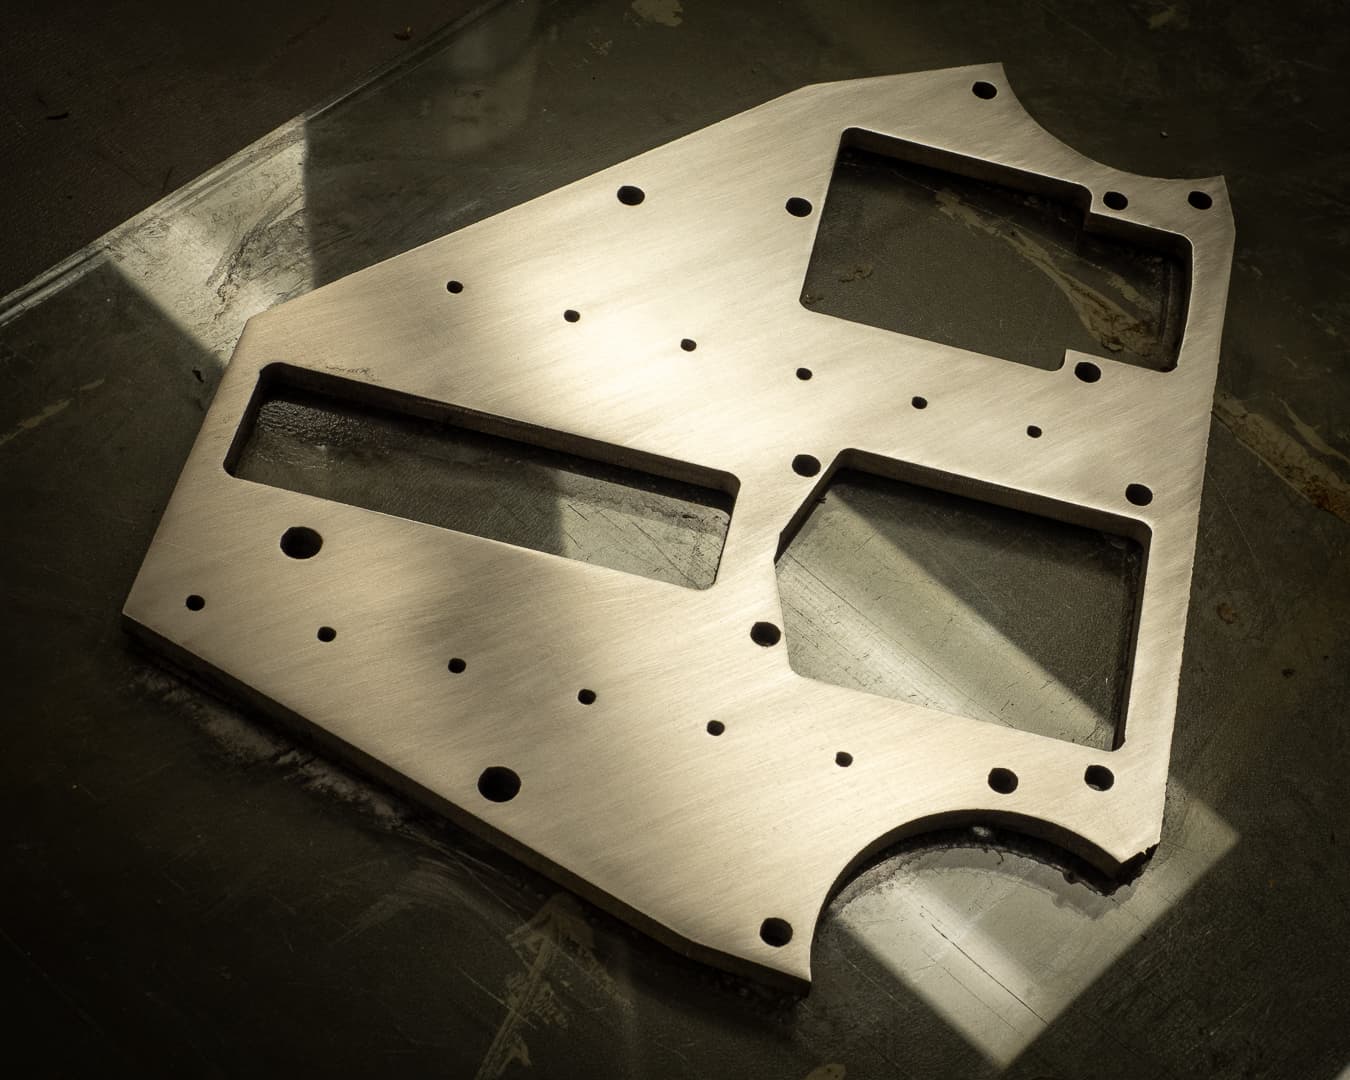
I noticed that the laser cutting had left slight “swelling” around the perimeters of the cuts, so I thought I’d lap the plates to make sure they were flat.
Which led to taking a sander to the thing to iron out the bumps, which led to giving a quick rub with 400 grit, and then 600, and then 800 and that’s where it will stay.
For now.
I figure if I do one side of each plate per day to “good enough” it will be finished well before the printing, but I am quite afraid I won’t be able to leave it at that!
4 Likes
As my descent into madness continues, I couldn’t leave it at that so took it to 1500 and even polished a test patch, just to show that 1500 grit isn’t good enough to polish.
This kind of metalwork is completely new to me, and I should have cleaned up the laser swarf and ugly cuts before I got this far. Nervously filing now lest I make some ugly mistake.
And if I haven’t said this a thousand times before, it’s worth saying again @vicious1 , those parts are a joy to print! I’m in no rush, but there’s a bit of momentum happening and it might turn out quite pretty in the end.
Perhaps in the language of @Tokoloshe we might have to call it “der König des Bling” ! ![]()
5 Likes
The anticipation is building!
3 Likes
So much so!!! You know he is going to bust out the buffer and have that mirror finish first though!
1 Like
No buffers. It’s one of those delicious paradoxes - a fully printed, computer generated CNC machine that was hand finished! ![]()
3 Likes
Will be praying for your wife, and congrats on the progress! Looking great!
2 Likes
The way you are headed this is no joke! I love it!!!
I’m headed to the hardware store in the morning to get paint matched to the blue printed parts and paint the engraved numbers on my aluminum struts. Fighting the urge to polish the rest of the aluminum after the wife paints…and easily winning LOL
2 Likes
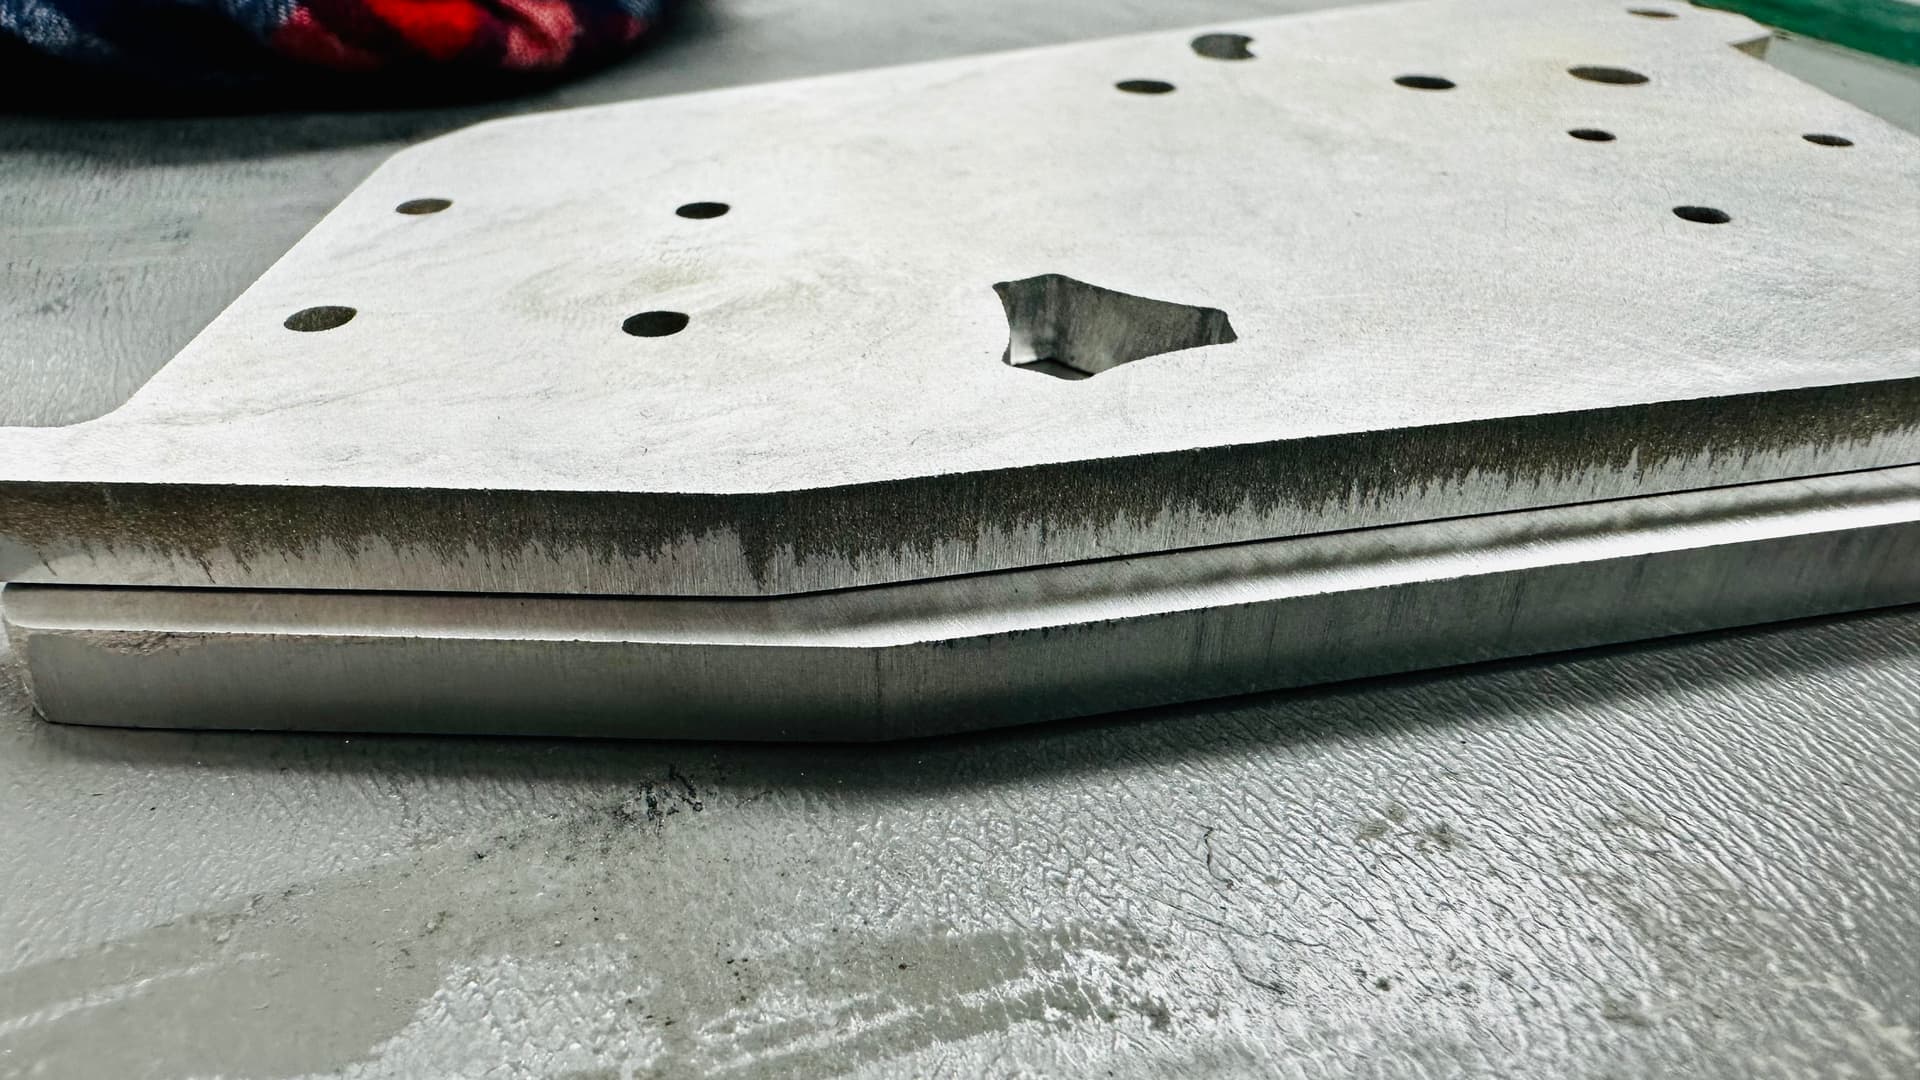
Just a note for those contemplating laser cutting of metal components.
This photo graphically illustrates the amount of cleanup necessary if you care about having the edges of your cut square.
The bottom part has been squared and when I can figure out how to do it and get a nice even edge I’ll soften the corners a bit.
The top part is about half way, maybe a little less towards being square. (The bit that’s been removed is shiny.) It’s not a huge amount, but there’s a noticeable (half a mm or so) difference in overall dimensions of the two.
I’ve had a bit of a play with a needle file and cleaned up the logo and that other jellybean shaped hole a bit as well. There was very little filing needed to get them lookign tidy again.
2 Likes
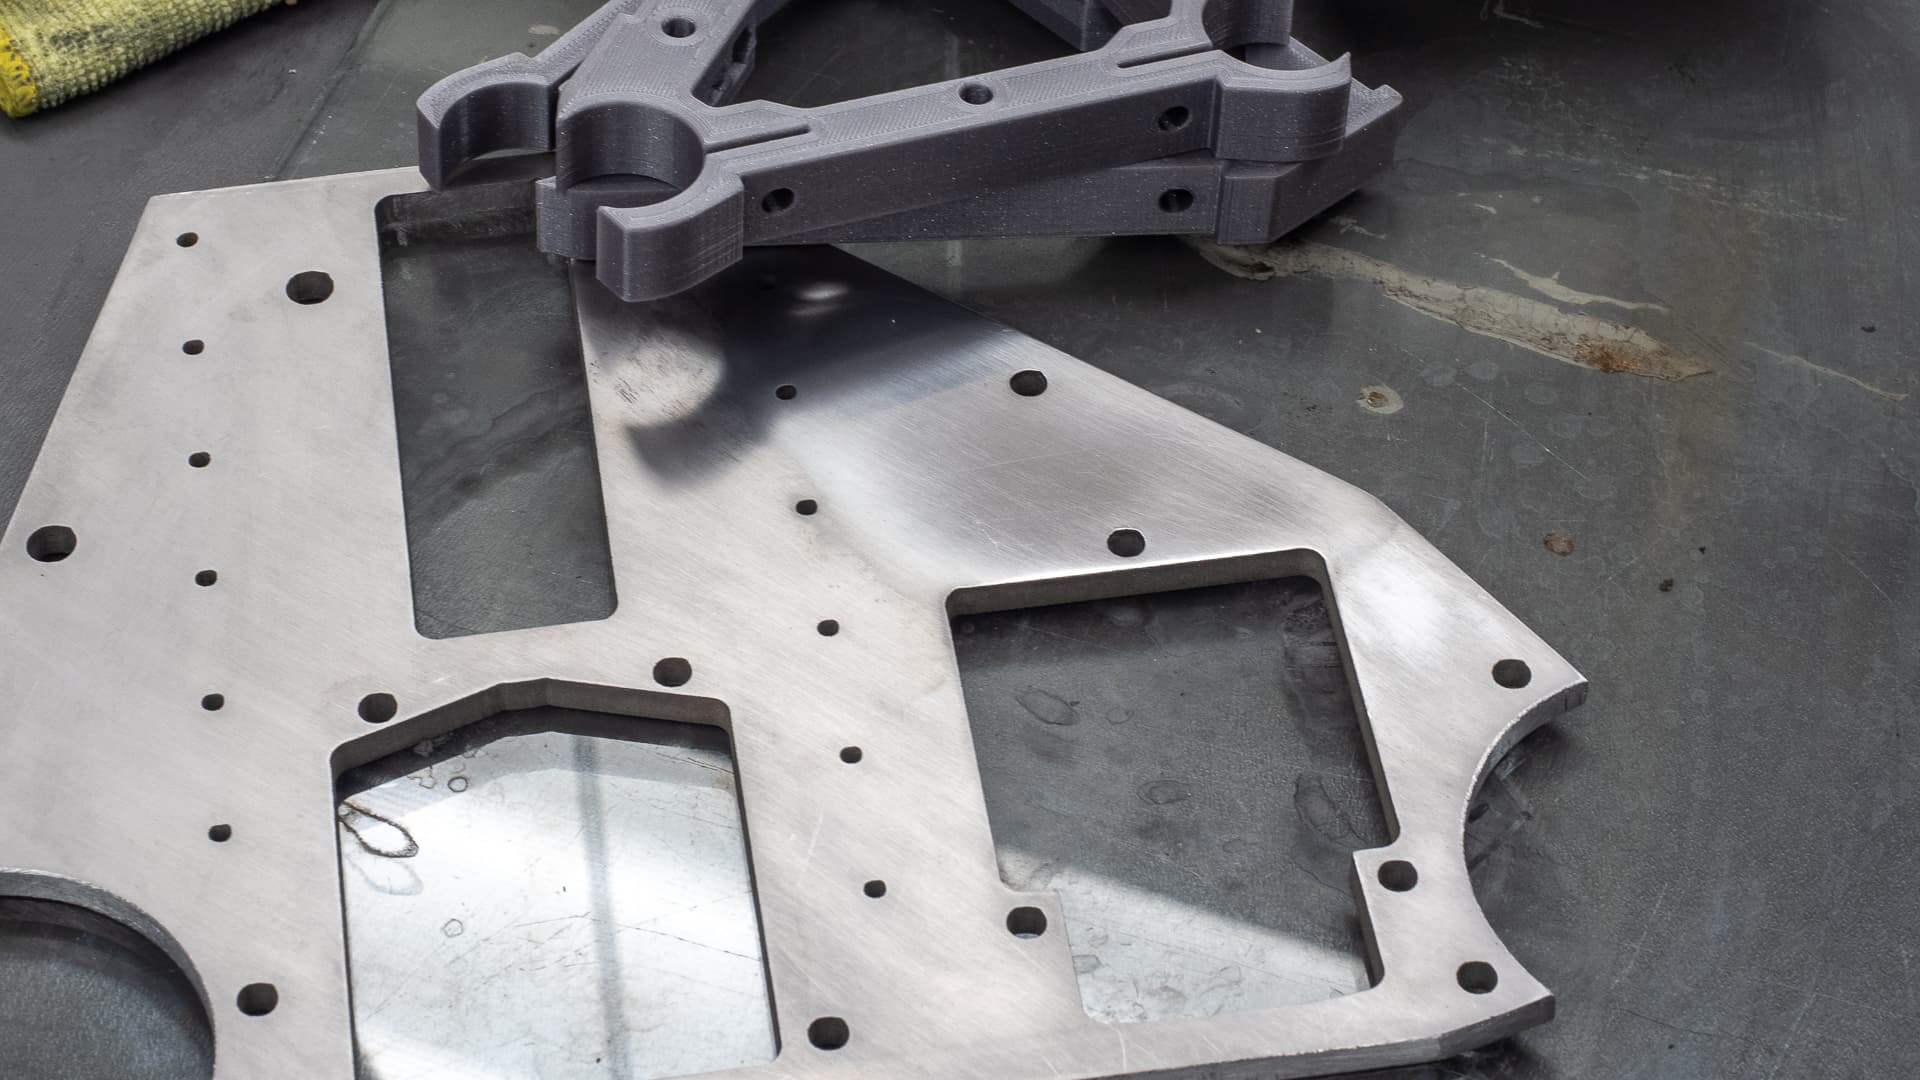
I’ve probably got several more days (a few hours a day) worth of fettling, but it’s quite satisfying, almost like polishing a casting in places. I thought I’d get away without doing anything to the internal corners but that thought didn’t last long.
If any of the metal work guys reading this can give me a tip on the easiest/most efficient way of relieving those sharp corners I’d appreciate it. Presently I plan to just go through the grits of sandpaper using my thumb as a cove.
The braces will be finished printing today, and tomorrow as if to convince myself that I really am underway, I’ll start the core. I was going to wait until I had the Mk4 of course so I can show off a perfect print, but time and Lowriders wait for no man.

2 Likes
We’ve always just used a Noga deburring tool to break the sharp edges on parts. It can be tricky to get it looking good/consistent though, if you’re after more of a machine chamfered look. The rotary countersink for the Noga tool is awesome for relieving the edges on holes, though.
Alternatively, a light chamfer using a trim router and bearing-guided 45 degree cutter should work well for the majority of it. If the bearing is larger than the internal radii then a little bit of blending with a hand file might be needed to get it looking consistent.
Edit:
https://www.noga.com/Products/sets/Sets%20and%20kits/SP1007/NOGA_007_-_SP1007
That’s the set that I have at work and at home, as well as a couple of bigger countersinks etc. The bigger rubber handle is much more comfortable, though. The blades last near forever on aluminium It is possible to snap them but spares are cheap. They also work really well for removing the edges left by brims or the ‘elephant’s foot’ effect on 3D prints, too.