It’s Friday already, and in life, not every hobby gets to be attended to every week.
This week, in unrelated stuff - work on the van progressed, we ‘had’ because we haven’t had time to celebrate it yet, a VERY big wedding anniversary and I did muck around a bit more with Kiri:Moto and the LR2 and remain very impressed with both.
Since our next anniversary is one of those designated with a particular precious metal, I did suggest that I should find some Gold filament and print the LR3 out of that as a gift to us both. The fact that suggestion was met with the merest hint of rolled eyes is probably an indicator of how she’s stuck out the last 49 years!
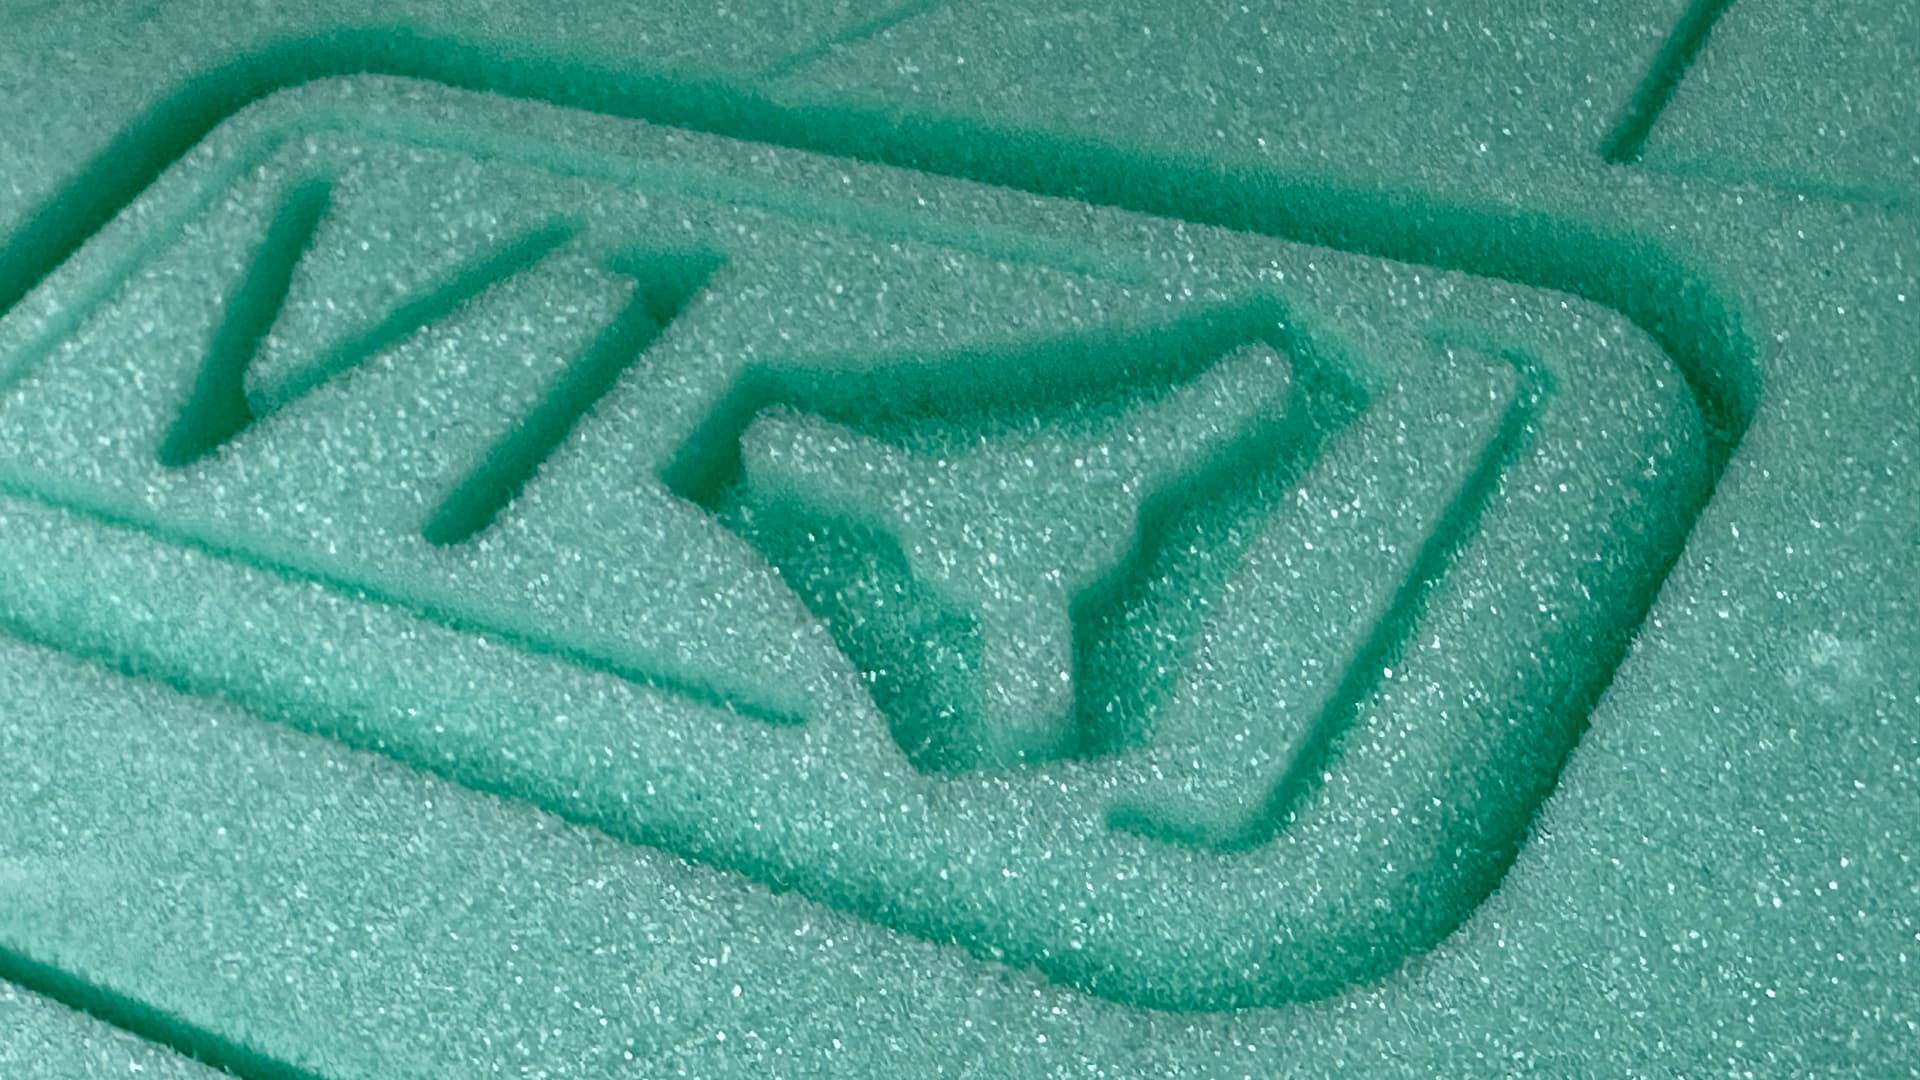
Anyway, Kiri does contours easily - waiting to clear the bench to take a better pic before adding to the “basics” web page.
Well @DougJoseph I guess that’s why “proper” youtube “stars” have studios, and their mess stays behind!
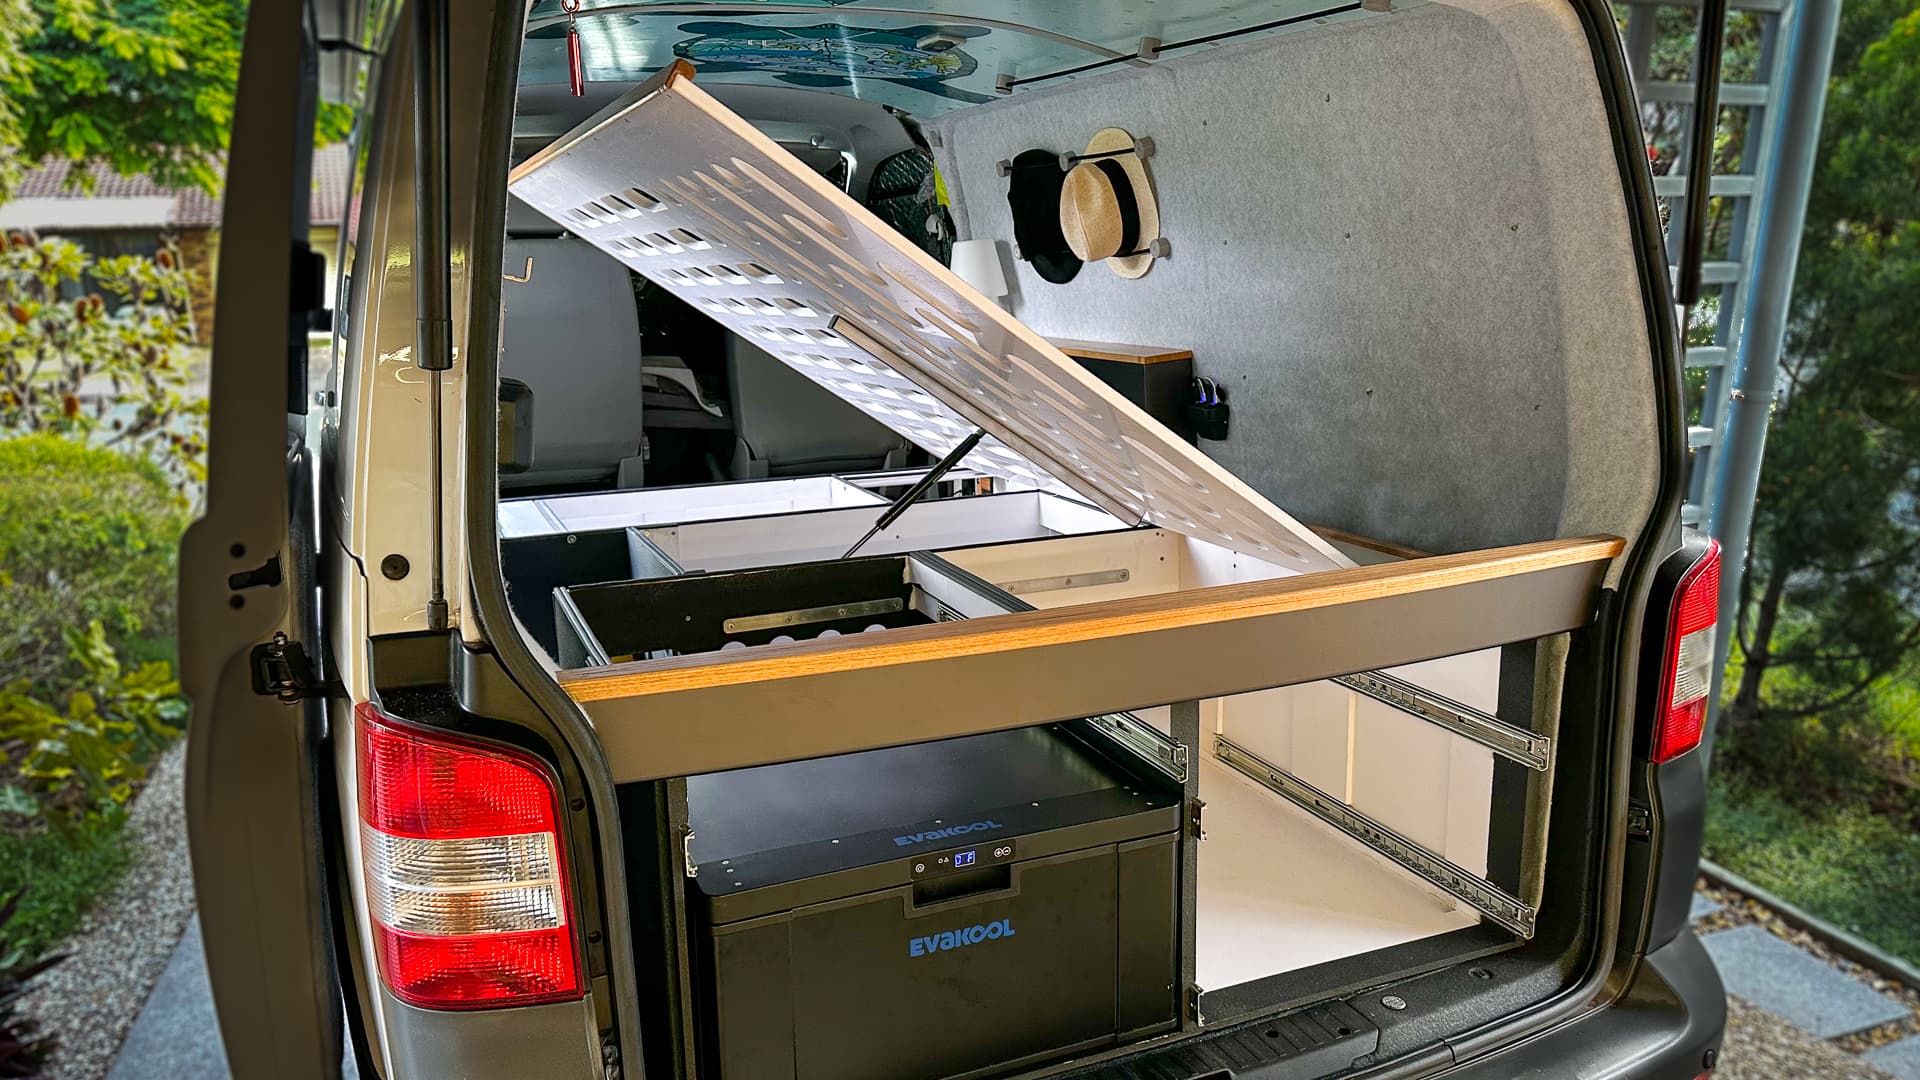
It’s another week and my shed is now under cover while I spray contact adhesive in and around the van the interior of which is starting to look like a reverse fur ball!
LR3 progress is happening slowly though - @AJG Anthony has very kindly been in touch and has sourced a local manufacturer of aluminium parts. By “local” I mean “local” to him, which is a 9,000 km round trip if I want to pick them up in person! That should spur me on, but it might actually slow me down a bit as I have a few little things in mind for the LR2 before it falls to pieces.
Another week and things should be back on track. (Three or four till the plates arrive and by then I might have started printing too.)
On an entirely different note - the Rambo board from it starred in an art photo this week - I’ve called it “life on the grid”.
Well it’s been a couple of weeks since the last update.
25 days on, the van is still parked in the same place, but I’ve only got a couple of days of detail work till that’s out of the way. It’s been a back to bare-bones job but it’s looking ready to roll (which of course will once again get in the way of my “proper” project!
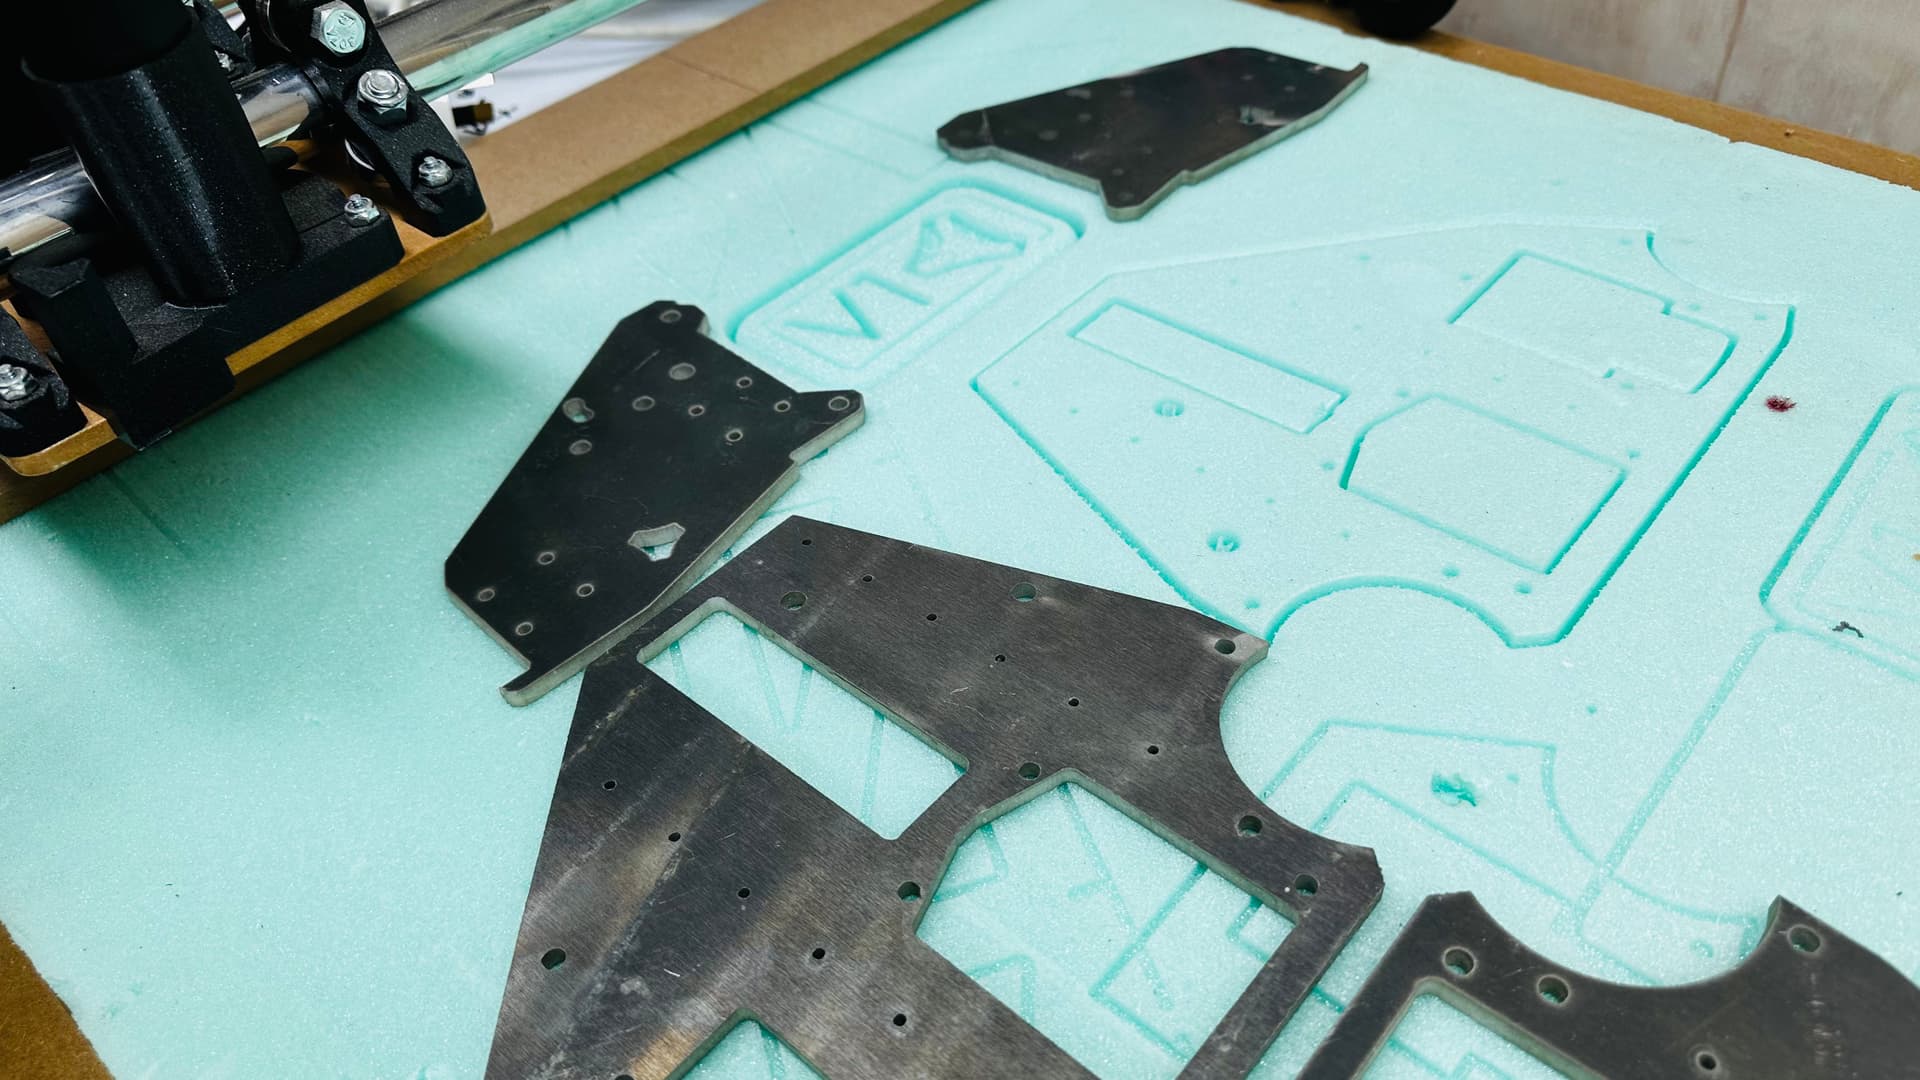
More importantly Anthony’s @AJG package arrived today filled with little metal bits! Thanks- so much Anthony they really look fantastic - I guess that’s it - it’ll be an aluminium build!
Sadly for me the printer still has a week or two worth of backlog once the van is finished, but that’s OK my brain is not quite as good as it once was at keeping multiple projects bouncing along and it will take that long for me to decide whether to print it in silver or black!
Well the van’s almost done, but there’s still a lot of other stuff to do before I get serious.
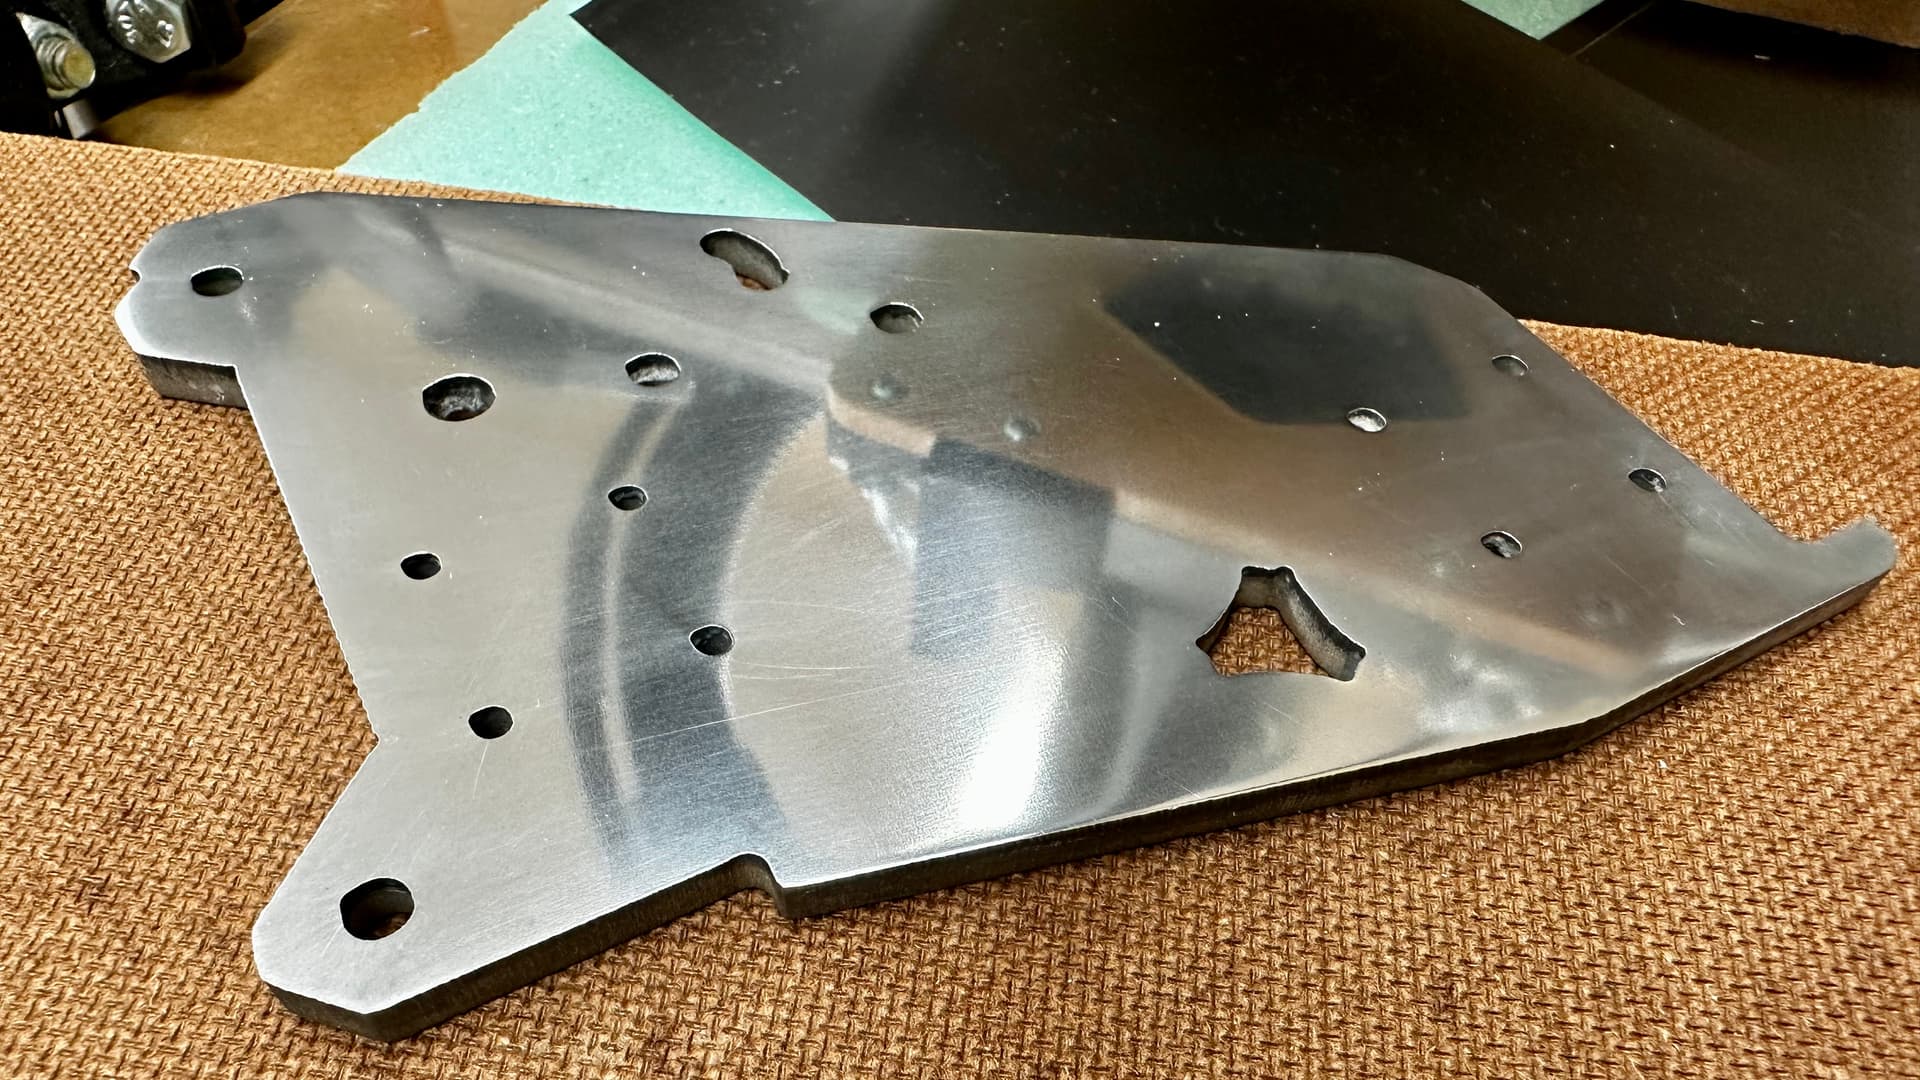
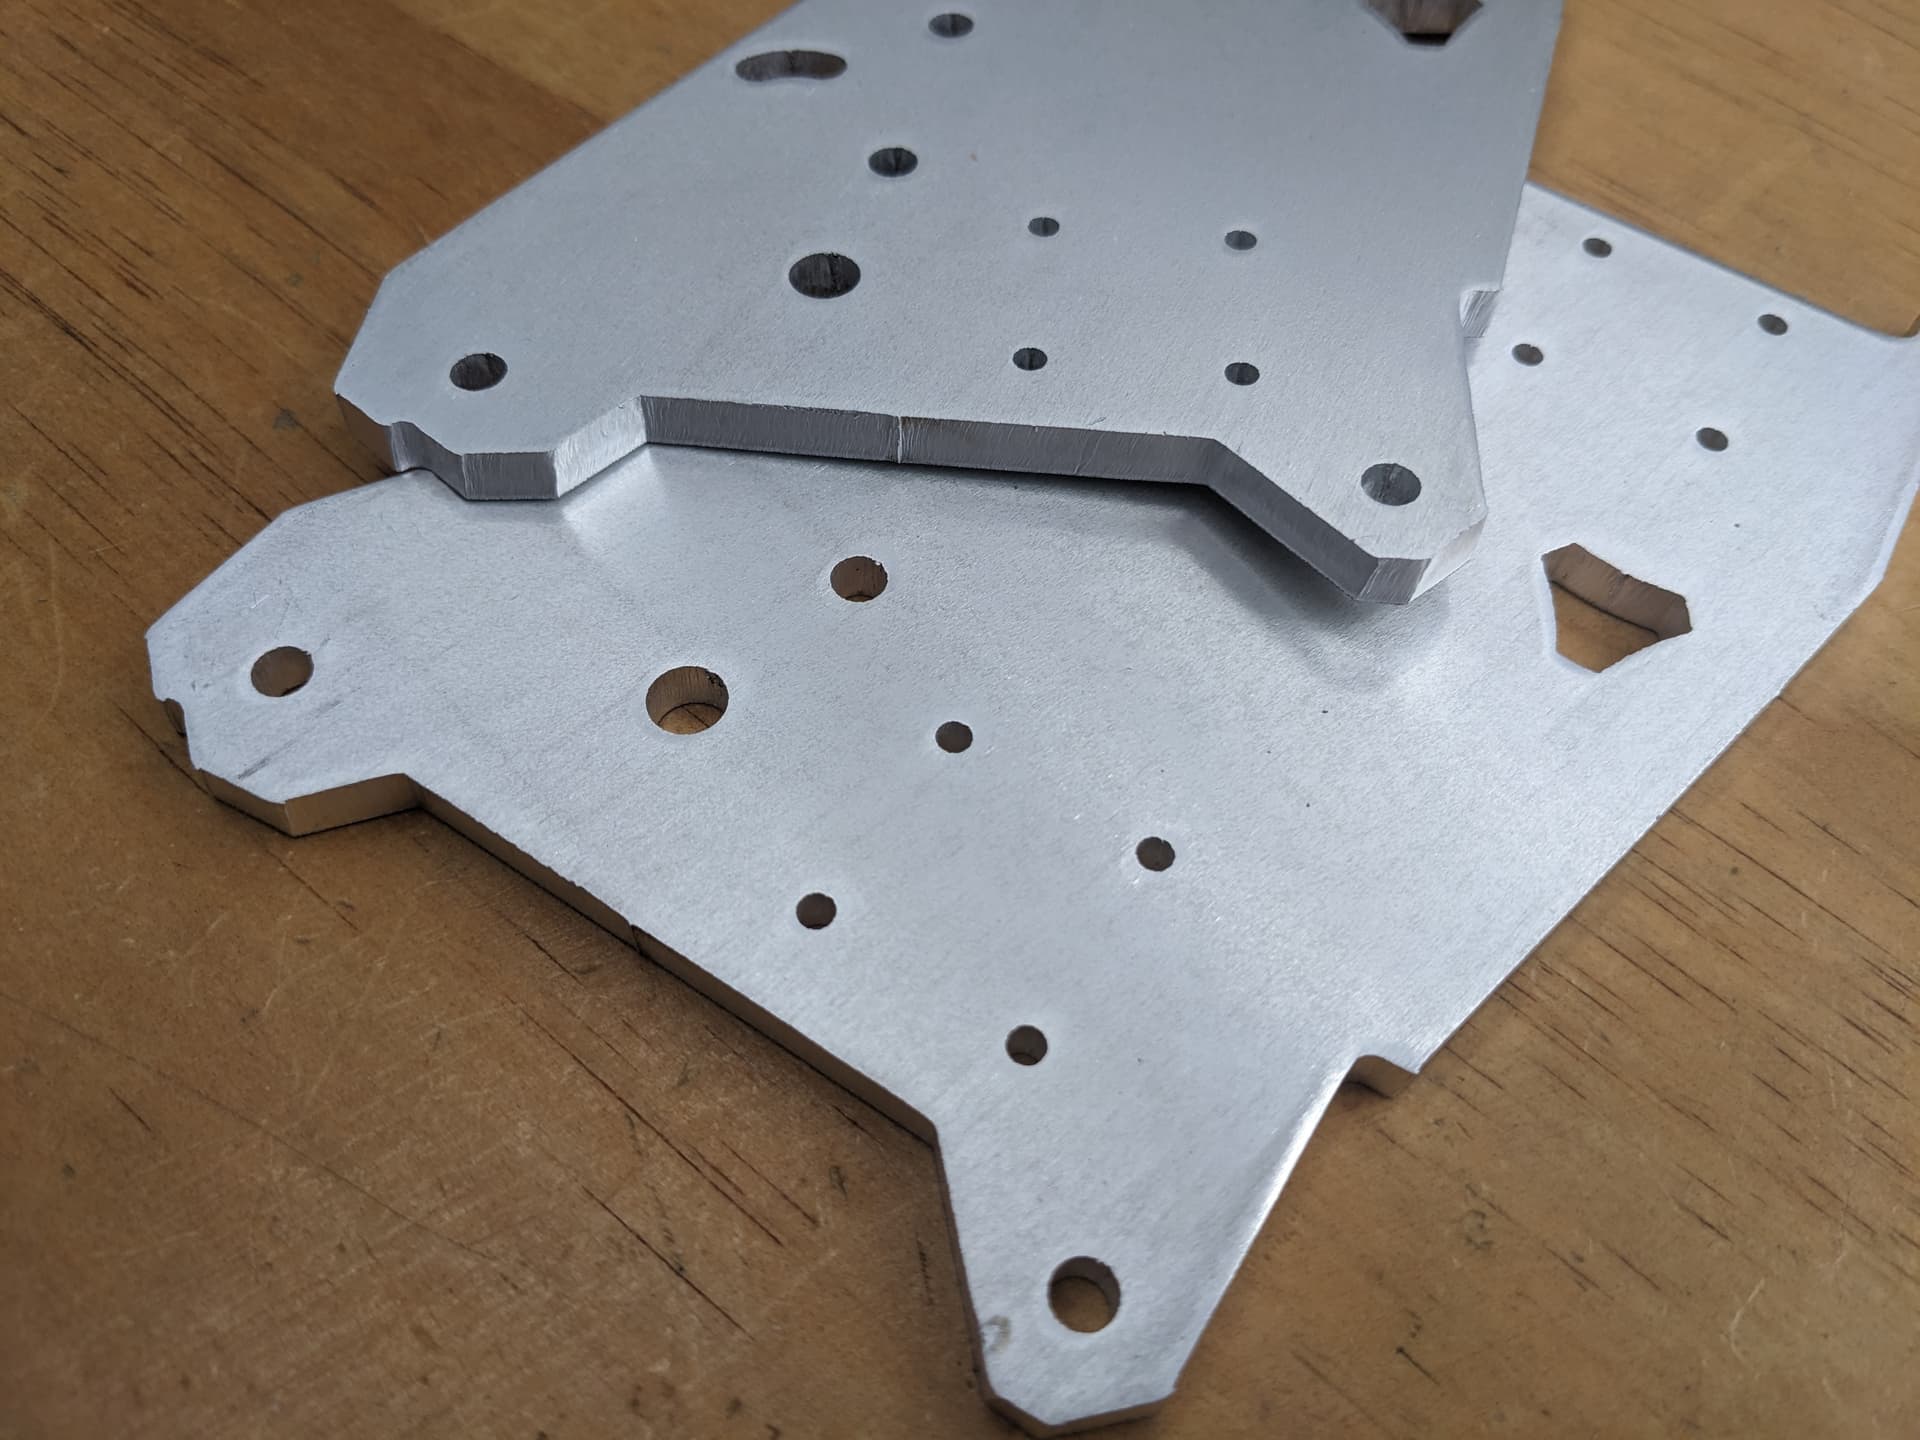
None the less I’ve had a bit of a preliminary crack at polishing one of the bits - not too bad, but I need to go down a few more grits before I call it done I think. It does however point out one of the big issues with laser cut metal.
Let’s be clear, I knew what I was getting and @AJG Anthony was very clear about the tolerances before I bought - so please no mistaken thoughts about that! Having said that, I didn’t really think through the ramifications of the tolerances - I don’t think they are an issue, but would appreciate anyone with serious metalworking experience chipping in before I make things worse!
I intend to drill out all of the holes as close to size as I can - I expect that even clamped down in the drill press some will wander off where they are supposed to be. I think that if I drill those slightly oversize I won’t have a problem, and for reasons of (stupid vanity) I am planning to print a 6mm thick part backing to correctly locate any minor drift, and to make the gadget “look” a bit stronger!
here is the old machine reflected in the new machine. I haven’t cleaned up any of the holes yet - will wait till my plan to move forward is clear.
I am a little surprised at those holes. I would have expected them to be … rounder?
That said, if you can drop the screws through those, I think they’d probably be fine, assuming that the machine that cut them is reasonably calibrated. The tolerances aside, I expect with stuff like this that you end up with generally larger holes than smaller, so additional drilling should be unnecessary
What I usually see with laser cuts is that the top surrface under the laser is usually quite accurate, but the bottom surface “flares” a little, and what is cut is a bit larger. Kind of like an exit wound is larger than the entrance, and for similar reasons. The material diffuses the cutter somewhat, making it a slight cone shape
Anyway, if you can get the screws through the holes, chances are that it’s good enough. If not, don’t enlarge the holes any more than you need to. If you start from whichever side has larger holes, it will probably push the drill pretty close to the intended center. A 3D printed hole guide can’t hurt though.
Thanks heaps for that Dan, it makes sense and should be obvious, but I’m not a metal kind of guy, so am looking forward to the process (as long as I don’t make any big mistakes on the way through).
The “exit wound” phenomenon is pretty visible on these parts as well, but I think they’ll be OK in the end!
Those look like the entry hole was a bit to close to the edge, and the accelerations are a bit low (overcut on the logo corners). I am sure they will work fine.
I won’t understand how critical that is until I actually assemble, which is a while away - I was just going to hand file the edges clean - I have considered setting them up and running a clean up pass with the LR2, but given my skill level, would be wise to wait a bit before I give that a try.
From my perspective it’s just part of a very big learning curve! At worst I’m sure they are good enough for me to cut a new set with the new machine.
It’s been a while. We’re pretty much on the road for the next five or six weeks.
Since we have a shiny new van fitout we have our work cutout adding some patina to it!
I “think” I have the shed cleaned up, and one of the printing jobs is done (the new camlock system for the shop vac - details on Printables in a week or six), and of course the van bits kept the printer going all night and all day for a month. I’ll be checking in from time to time of course, wishing I was meeting up in the Rockies, but I’m not, but if anyone between Bundaberg and Bega wants to say gidday in the next month or so, let’s know and if I’m passing at a convenient time, we could have our own remote Rocky Mountain meet up!
For now, here’s some new vacuum bits to stare at as evidence of my lack of idleness - the fitting for the LR3 conspicuous by its absence.