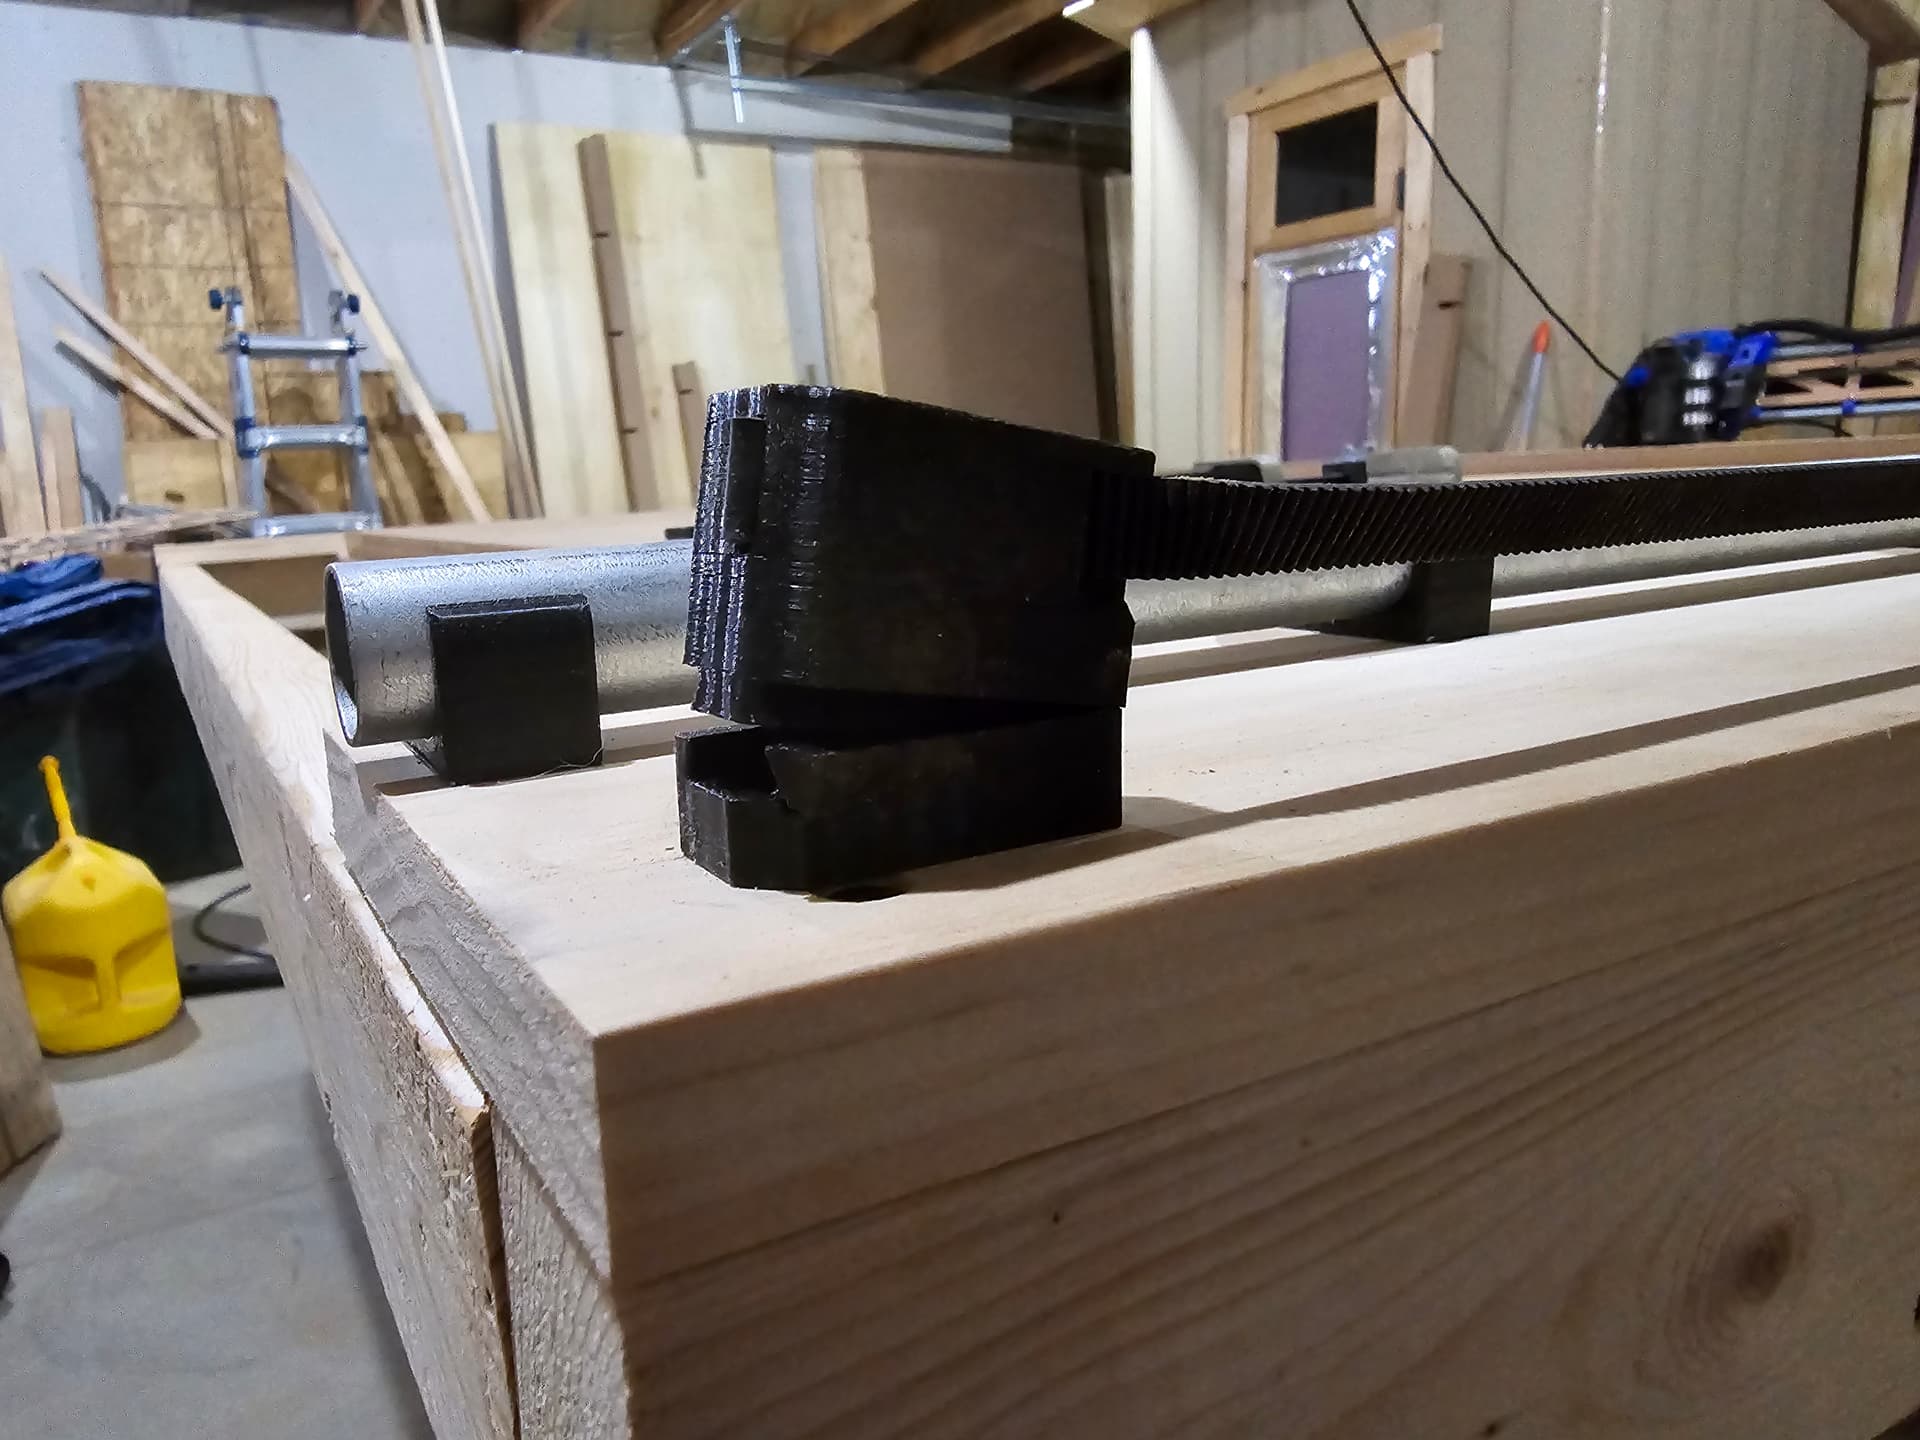
My goal for the tensioner should keep it perfectly in line with the belt. That’s if things go perfectly, I’ve already changed everything I thought was perfect so far so we shall see when I flip things around to the other side of the table!
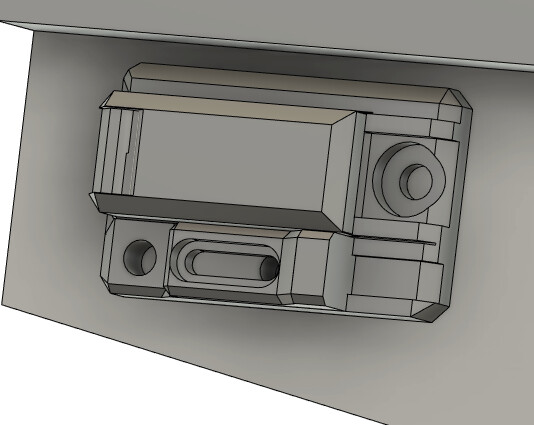
Something like this would make more sense? Actually in a few ways it should, it’ll give that larger more uniform surface for the switch, but it also move the fastener from having to spin a wrench right up against the wall that it’s mounted to, to now straight in from the outside.
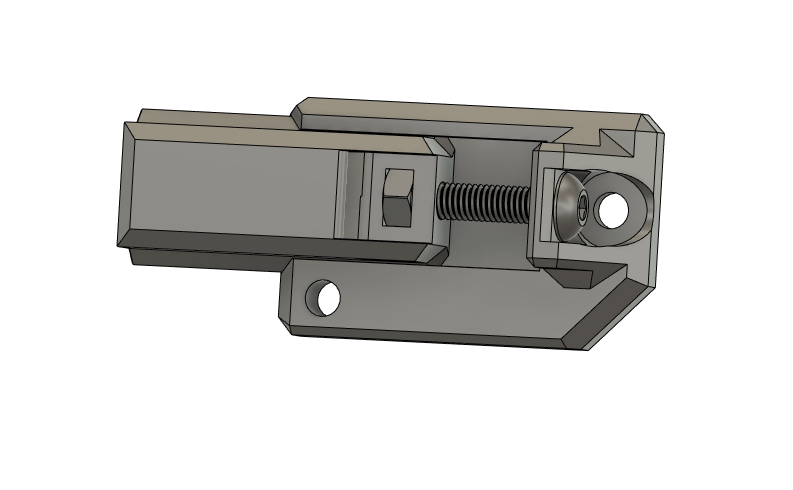
An m3 screw and 1 heatset is required of course
1 Like
I started a thread here for an mpcnc I’d like to convert to klipper if you have some bandwidth to chime in. So far the responses have been basically yes, its possible, but until I got to your thread that mentioned klippy-cnc, I didn’t know how that was possible. I’ve been reading up on it. I have a kindle tablet that lives next to the primo, so that will load mainsail without issue.
Is the dual endstop squaring a feature already implemented in klipper? If so, it should be pretty easy from there I think.
2 Likes
Awesome yup I’ll chime in in a little bit! But yes, dual endstop is ridiculously easy in Klipper. Just list the endstops under their corresponding stepper and done. You don’t need to “tell klipper” to do anything different, once it sees two endstops (1 for each y stepper for instance) it’ll know what to do from there.
I’ve also been talking with somebody else who has been using Klipper on a different CNC via Discord. He’s rewritten all of the macros he likes for Klipper and basically picked up where the Klippy-CNC left off. Super easy to implement, just copy the cfg files in and include them. His work is here: GitHub - noobydp/CNC-Macros: CNC Macros for Klipper
I’ll check out your thread in a bit and help where I can!
1 Like
This confuses me a bit. Are you saying you don’t plan to have adjustable belt tensioning on both sides? How will you adjust the tension on the side without a tensioning mechanism?
No sorry, I’m so scatter brained I’m not explaining very well.
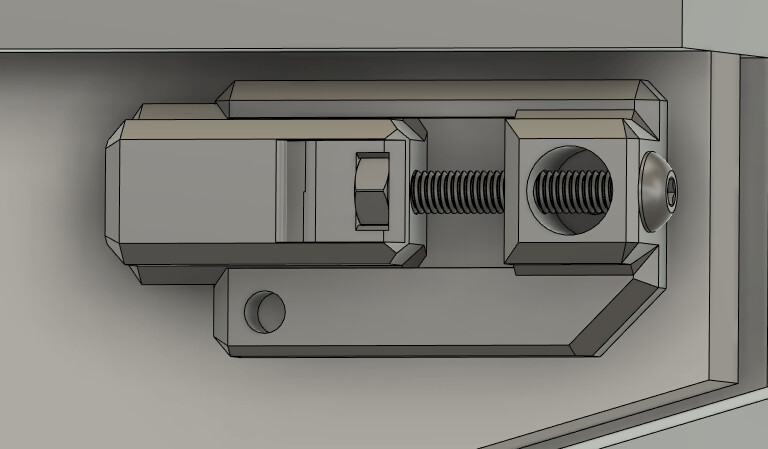
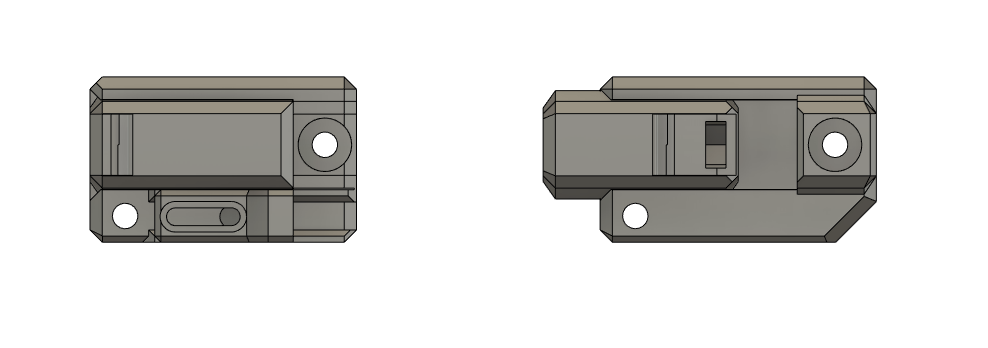
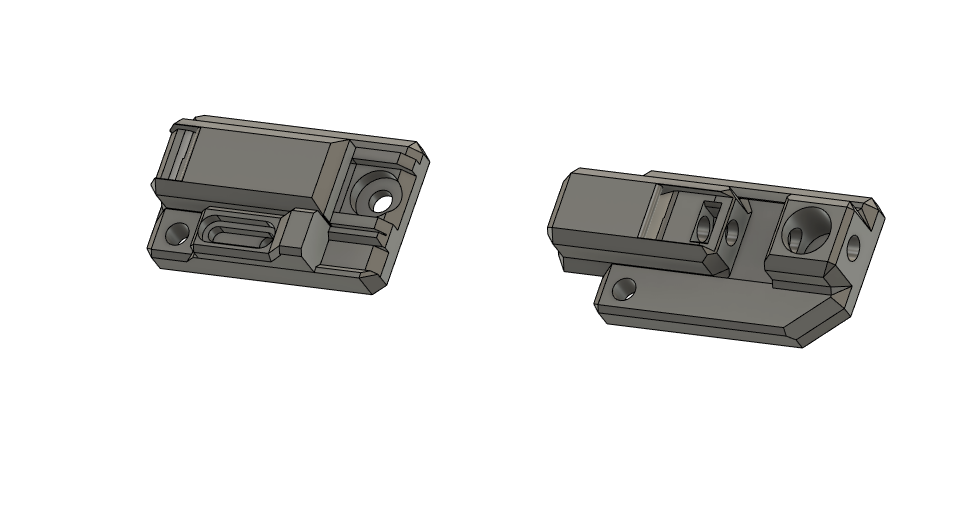
This is my plan for the other side I just threw together. Keeps similar design language, similar slide, similar screw placements, and uses a captive nut for the M5 bolt to pull on.
AH, OK, so “stationary side” meant “stationary end of one belt on each side” not “stationary non-tensioned belt on one side of the LowRider.”
1 Like
Yup, one day I’ll use terms that make sense to everybody not just myself haha. Today’s not that day though! I’m printing this tensioned side now as well Something I might toy with is moving the should that the bolt head sits on to the far right so that the slide doesn’t need to be ridiculously long but people can still use the same size M5 as used in the rest of the build. Actually I’m almost definitely going to do that…
1 Like
I think this is what I want here, same M5 x 30. Gives 12mm of slack for creating tension. I hope that’s enough!
1 Like
Final Answer:
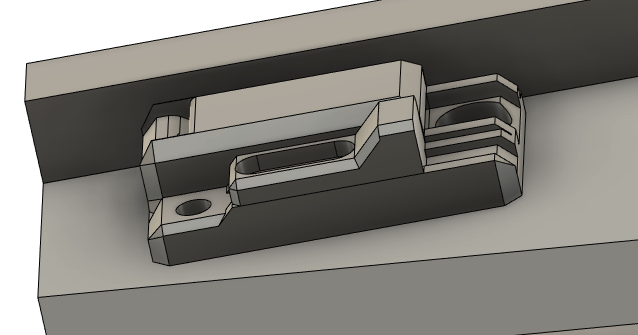
Front and Rear set. Mirror for the opposite side of the gantry.
Requires 4 of whatever screw you choose for fastening to wood or whatever it is your table is made of.
Additionally, requires 1 M3x6 bolt, 1 M3 heat insert, 1 M5x30 bolt, and 1 M5 nut for end stop adjustment and tensioning.
Let me know if you have any suggestions or if anybody tries it out! I don’t have my table built yet so my real world test will be a bit ![]()
Y Belt Holders.zip (74.7 KB)
1 Like
Hi Rob. Another Maryland guy here starting on a LR3 build. I built an MPCNC five or six years ago and had fun with the project but wanted something bigger and a little more rigid. However, after the MPCNC project I built a few more oddball CNC machines that were around the same size for some reason. Then found a deal on an aluminum 6040 that I currently have but they’ve all been too small for my projects.
So, when I saw the LR3 and the simplicity and flexibility of it I was sold. The parts should be here this weekend and I’ll get going on it.
I really dig your build. I want to be able to cut over a full 4’x8’ sheet. I guess I’m wondering how far out the side supports need to be to cover a full sheet of plywood. I have my bench framed out but can extend the sides pretty easily at this point.
Anyhow, just saying hi and embarking on the build.
Dan
1 Like
Hey, welcome! In the LowRider Docs, check out the LowRider Calculator.
I recommend inputting 49" x 97" instead of 48" x 96" if you want to be able to also reach full sheet on MDF too. It will tell you the table size needed. For example, I just ran it, and it gives:

Table Size
This output is the minimum table required. An extra 25-50mm (1”-2”) or more on each dimension is nice if you will be pushing it up against a wall or in a corner.
| Length (inches) | Name |
|---|---|
| 61.5 | X table size (width) |
| 112 | Y table size (length) |
Hi Dan, nice to meet ya fellow marylander! Appreciate the kind words and I totally agree, the same reasons I got into the Lowrider as well, such a great design!
Yup Doug’s got the correct answer! I’m very visual as well, so I actually used Doug’s CAD file for his table that’s perfectly setup for 49"x97" cutting area. It really helped to make sense of things for me. Thanks @DougJoseph!
1 Like
Hey, many thanks for the warm welcome and information. Looking forward to the build and a few little modifications I have in mind. But that’s what is so cool about all this; personal change ups and tinkering.
2 Likes
@DougJoseph I noticed your table is drawn out for .719" thickness material (happens to be the same as the cabinet grade plywood I have). Do you recommend using that over .75" MDF? I’ve got both on hand. Thanks!
Ryan recommends this order of preference, if I remember correctly: MDF > OSB > Plywood > Lumber
I think I’ve seen him say that before, and a few echo, but was curious about your design specifically as well, you seem to use it! I subscribe to your youtube and I’ve seen you cut a couple out of what I believe is cabinet grade plywood as well so was curious of your thoughts between them. My worry with the MDF is longevity and strength being glued and screwed. Also curious if I’m going to have a nasty time with all the cuts as MDF seems to bulge a bit at the cutting area. Seems like it might be a struggle sliding things into place.
I cut mine out of plywood primarily because at that time I did not yet know Ryan’s guidance on material choice, and I defaulted to thinking plywood was best. On a couple of other occasions, guys paid me to cut ribs and spars for tables for them, and seem to remember recommending MDF but they chose plywood because, if I remember right, they were concerned about humidity and they felt plywood would stand up to it better. They may be right. Either of the choices, MDF, OSB, Plywood, can work well.
1 Like
Ah great to know! I was curious if you had certain experience with MDF on the table. Thanks for the info, I’m going to tweak what I’ve got here for the 3/4 MDF!
1 Like
Well, I either made it too tight of a fit or MDF torsion boxes suck. Tried my best to hammer them down evenly but here we are…
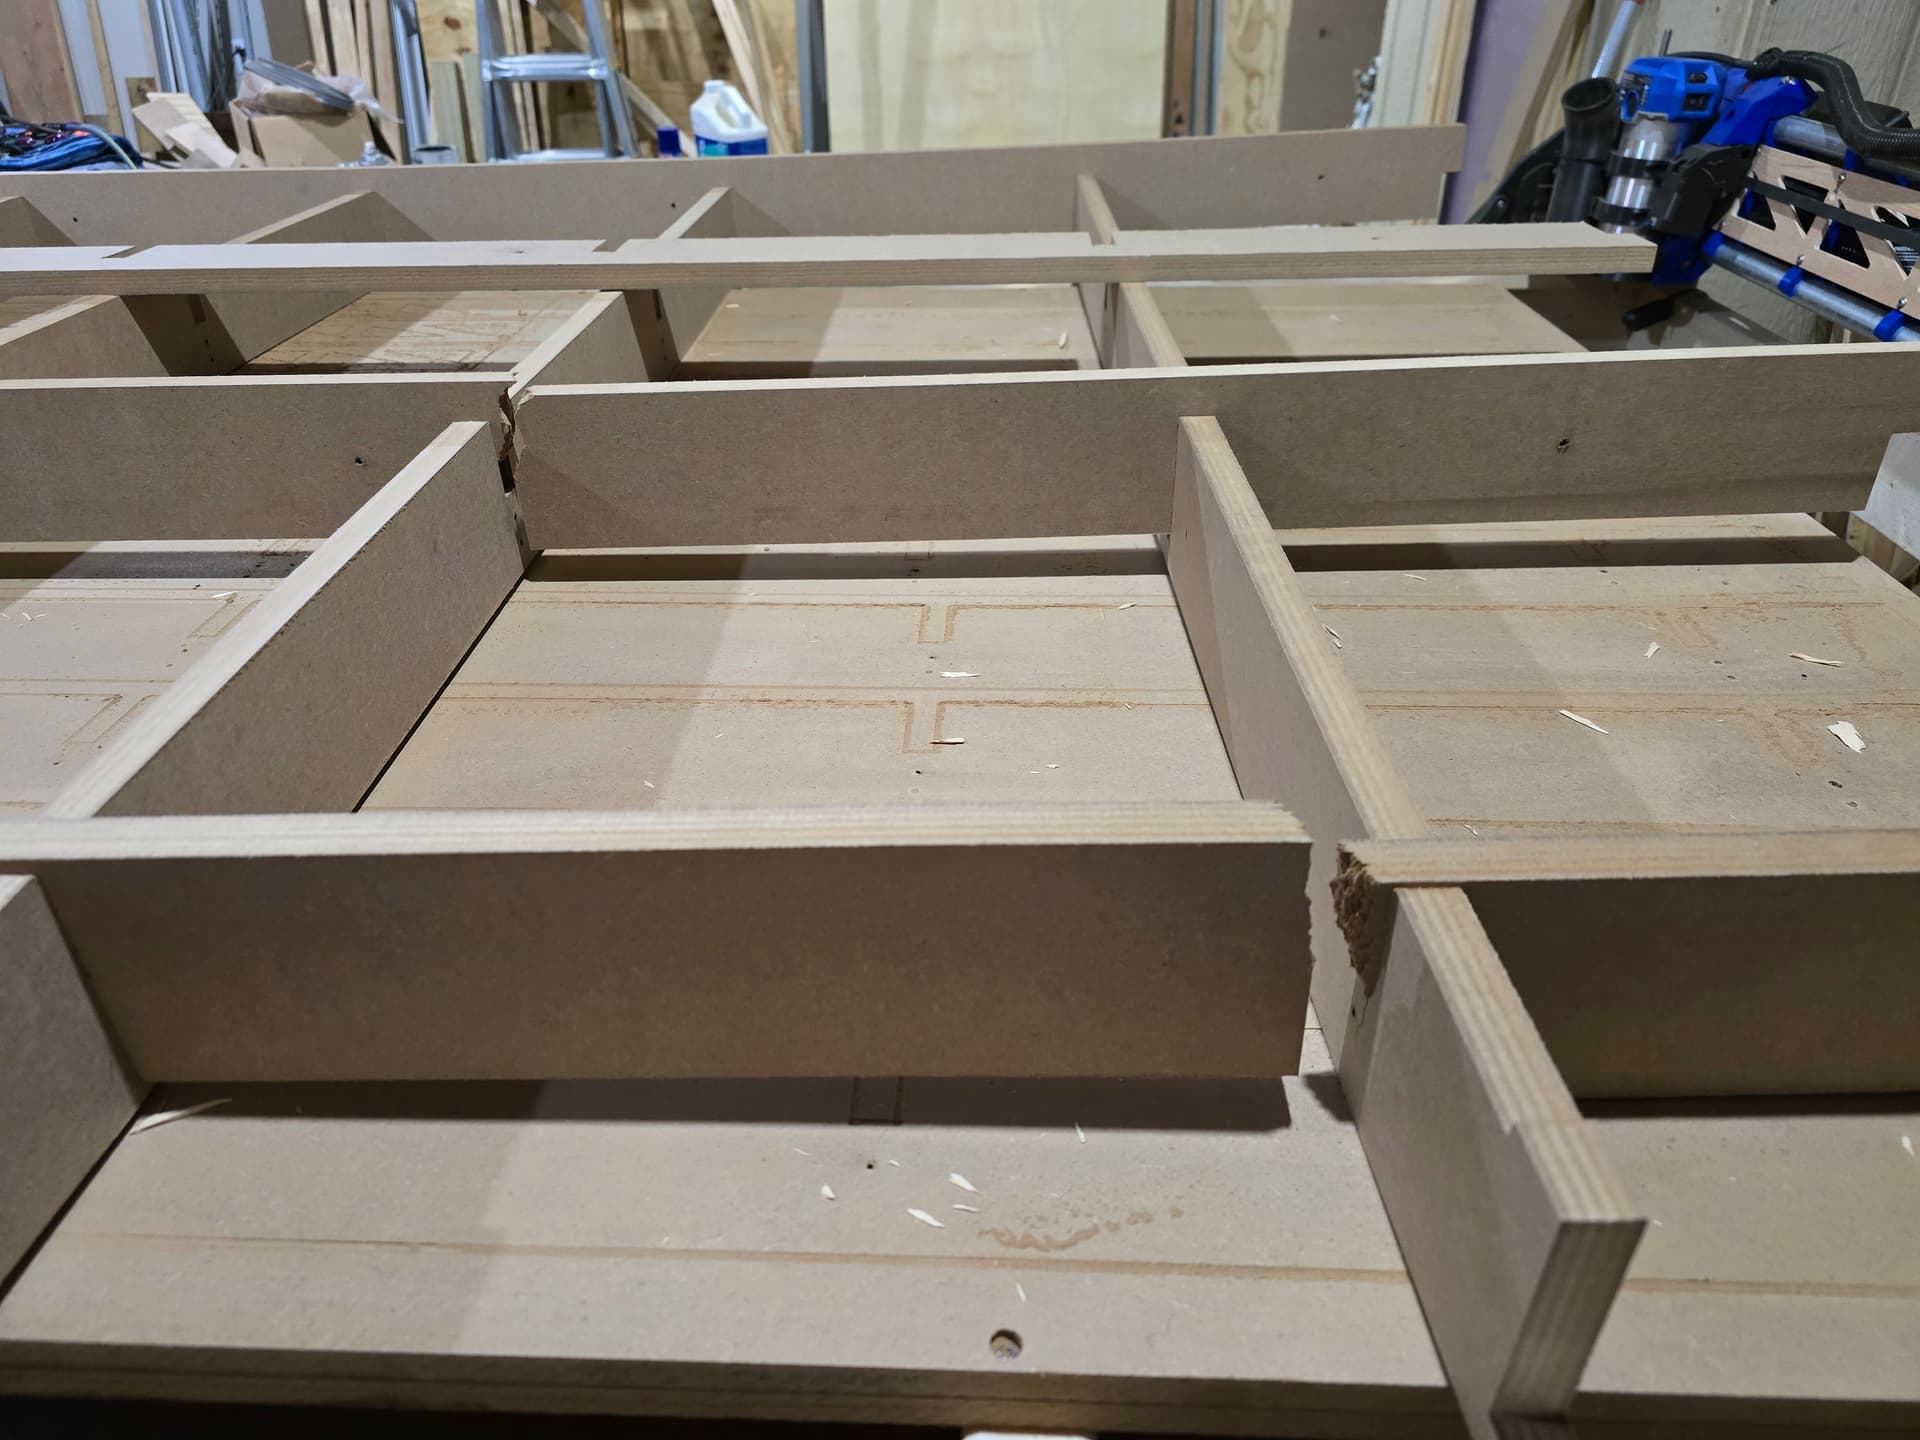
Just as I thought I got lucky too because this happened on the very last cut of the box pieces:
I’m second guessing this MDF idea, need to see if I can salvage the pieces that are here and cut out new of the broken ones or call it practice and just cut this out of plywood…
2 Likes