I am looking to buy a Neje N40630 Laser to use with my Lowrider 2 and because my 3d design skills are not present, I was wondering if anyone already made a mount for it or has any suggestions how to easily mount the laser.
I have already searched on thingiverse but couldn’t find one specialy for the lowrider 2 and N40630.
I am using the makita version baseplate and I would like to use both the makita and the laser, offcourse not at the same time
So I guess the best place to mount the laser is at the dust suction side of the baseplate.
What I did find on thingiverse is this universal mount for the lowrider:
and this laser mount module, which I’m not sure if it works for the N40630:
If anyone already has some experience or already made one, I really appreciate to hear from you.
I don’t have a LowRider, so I only have a vague idea of how the router is held in place. I have a mount that is designed to fit inside the Makita mount on the MPCNC. It allows me to quickly change from router to laser by just loosening and tightening the two screws on the mount. It may work on the LowRider if you are using the Makita router, and I’d be glad to share.
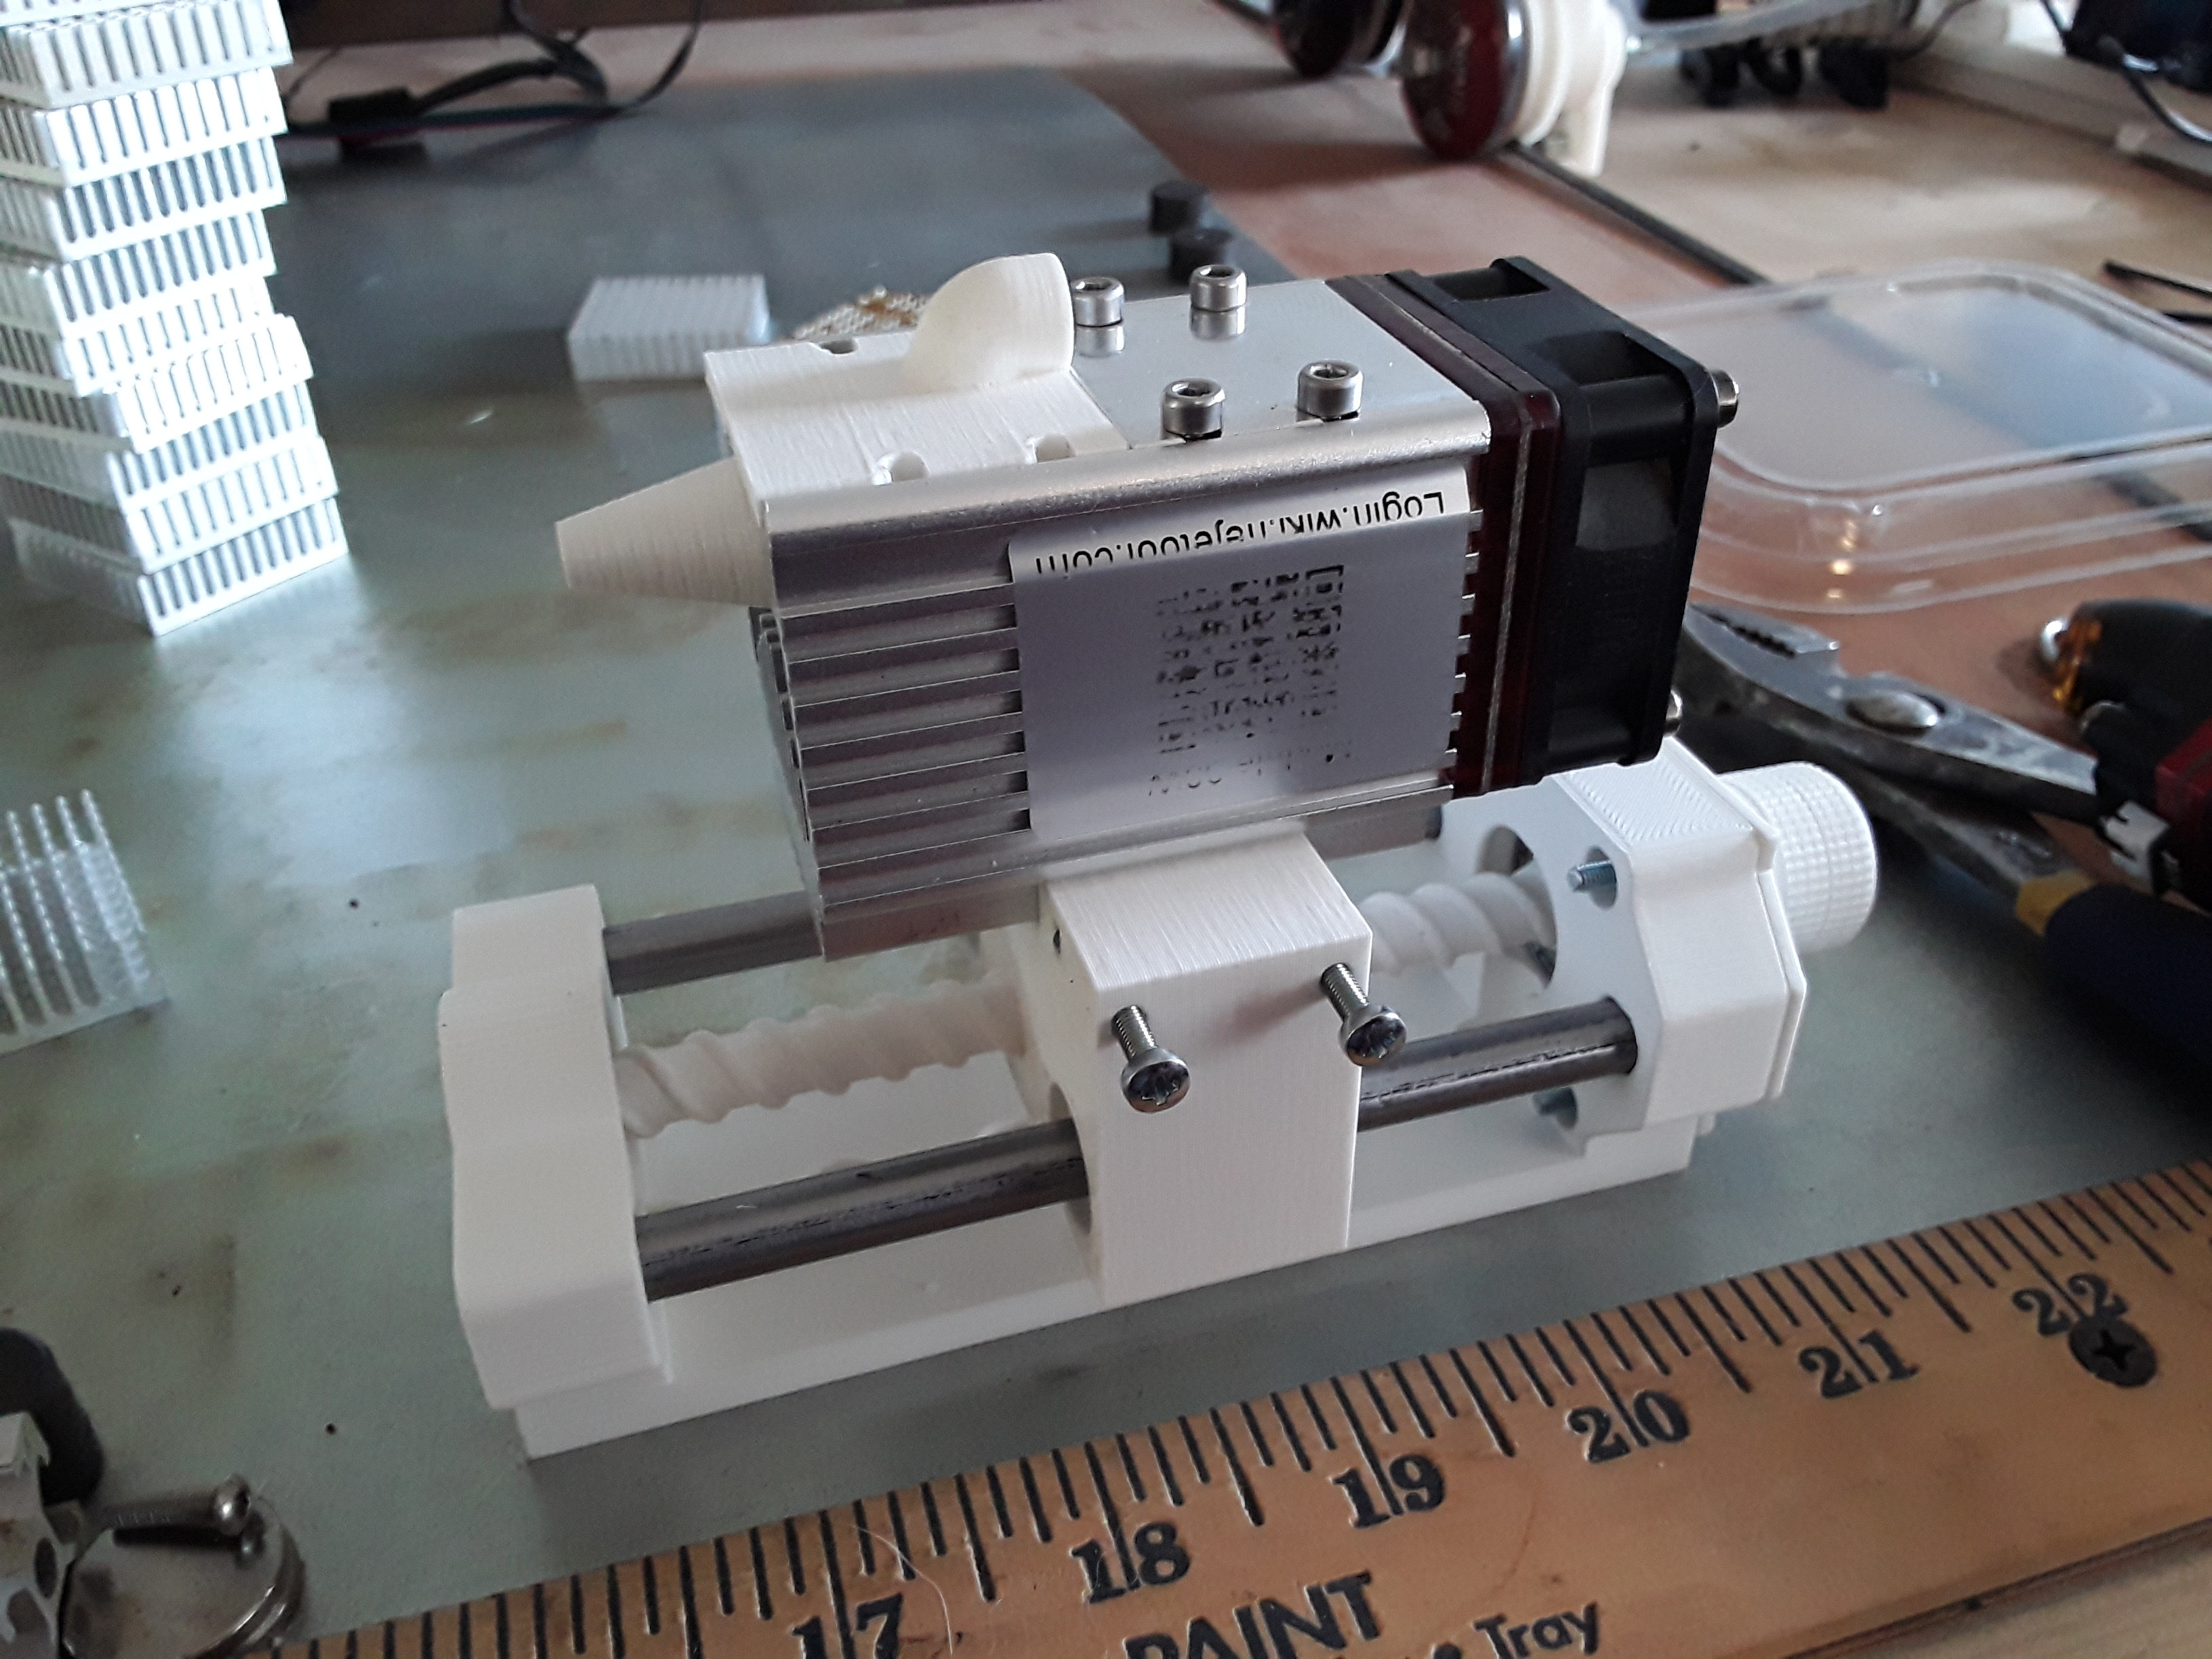
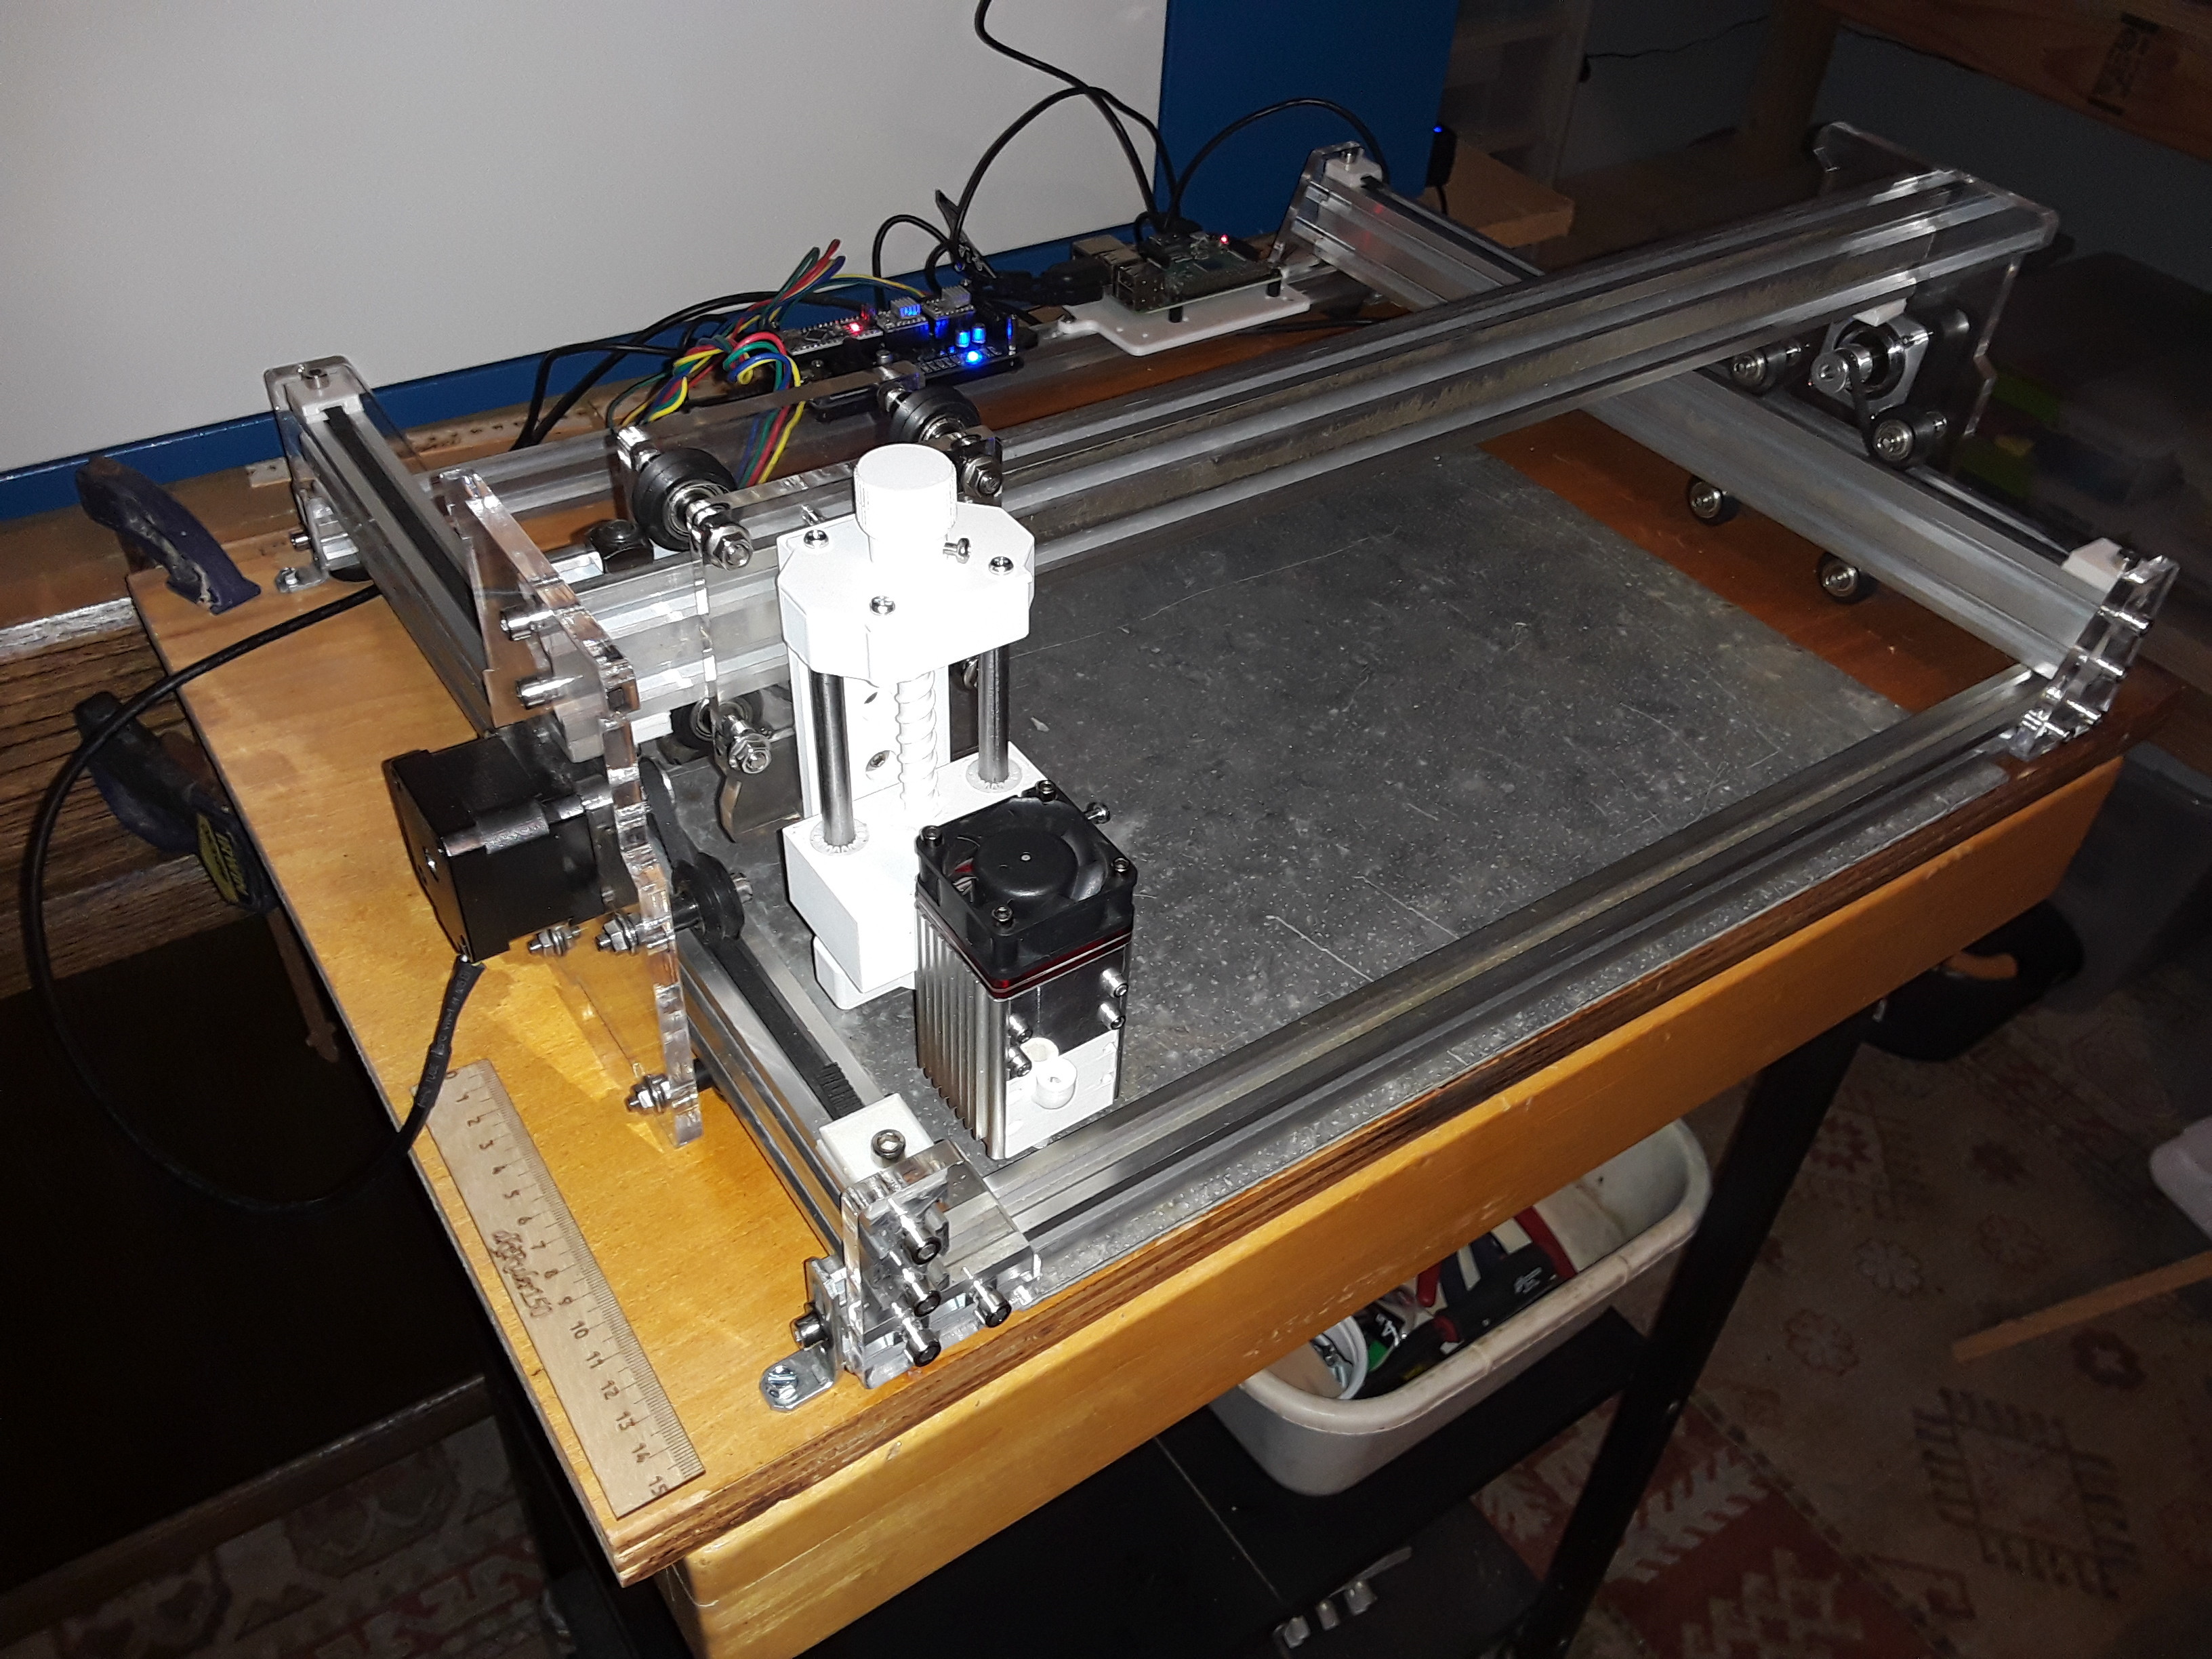
I’ve recently been playing with those Neje laser modules, air-assist, and a manual Z-axis mount for them. It’s a bit more complex than those you’ve shown and I don’t know how much room you have on your Makita baseplate but maybe this will give you ideas…
It’s fairly compact and has ~75mm of Z-axis range…
The lowrider uses the original makita RT0700c holder which is bolted to the baseplate. I don’t have a MPCNC but what I see on pictures is that the MPCNC has a printed holder for the makita router. So I’m not sure if your mount fits the original makita RT0700c holder…
If you switch between the router and the laser, do you disconnect every time the wires from the laser?
The diameter of the mount is 65mm…the same as the Makita router. I’m not sure if that is enough to fit in a LowRider mount. As mentioned, let me know if you want the STL files to try.
If you switch between the router and the laser, do you disconnect every time the wires from the laser?
I unplug it from the control board and leave the wires plugged into the laser. I like removing the laser from the router environment when not in use.
Attached is a ZIP file containing the mounting tube and the set screw. I modeled and printed this mount with tight tolerances as printed by my 3D printer. You may want to 3D print the bottom 8mm and then test it with your laser before 3D printing the whole thing. To get the laser to slide on, I had to do a slight bit of sanding on the “rail.” While the tube would fit unmodified in my mount, I was much happier with how it slid in and out of the mount after I spent 5 minutes sanding down the outer layer lines.
I have let the laser mount printed at a 3d printing shop, so I couldn’t do a test fit.
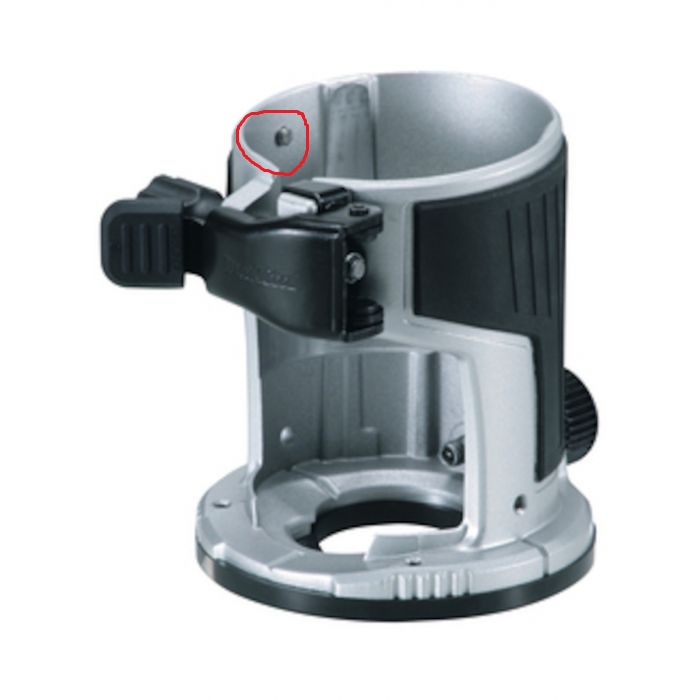
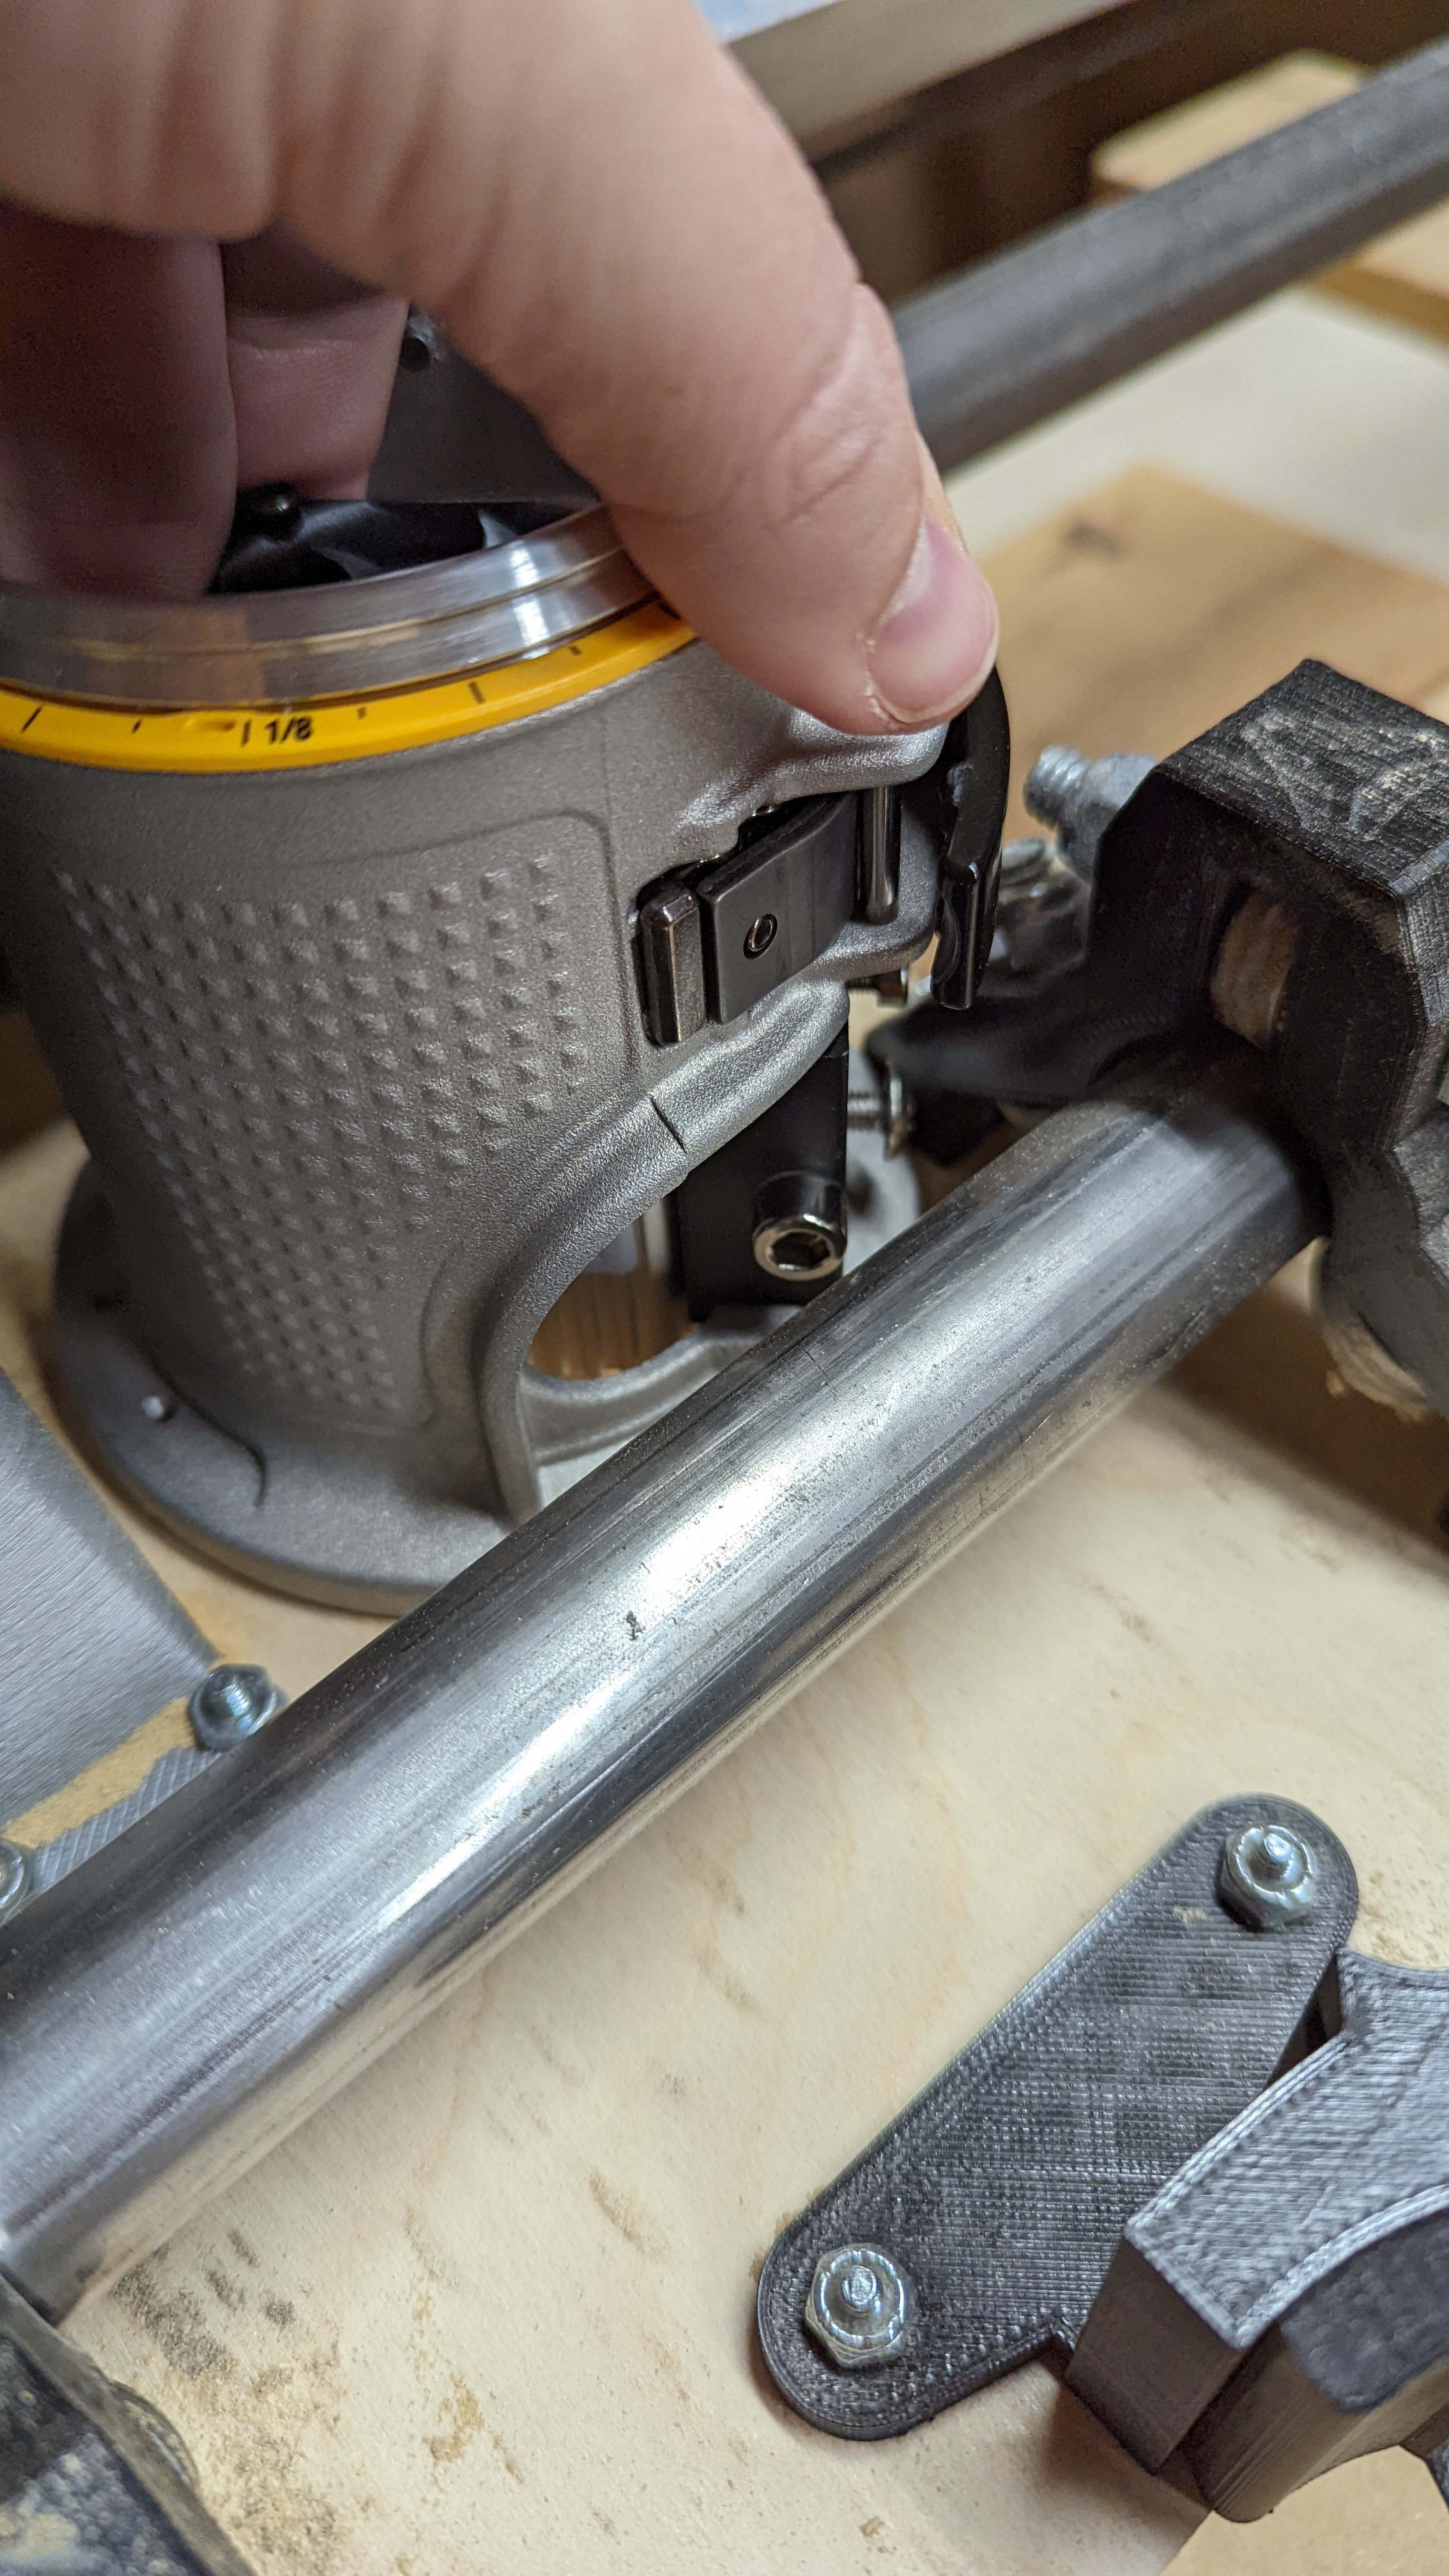
Unmodified it would not fit the original Makita base because it was to wide. But after some sanding it fits almost.
The original makita base has a lip, where the router slides in. Highlighted in the picture below
I’d be glad to modify the model to take into account the protrusion on the holder and the tight size. You would need to provide me with the information to make the changes like size of the protrusion, at what angle around the mount to create the slot, etc.
Also. the teeth of the gear for height adjustment needs to be taken into account in order to fit it into there. The pen holder that I put together for the LowRider has teeth for the gears to mesh with, but really, a slot would be fine.
For both the locating pin and the gears, I went with a width of 5mm. I think I used 1.75mm as the depth for both.
I expect my laser to arrive any day now, so when it is arrived let me check how that’s going to fit and if I can get some slots in it. If that fails I will let you know.
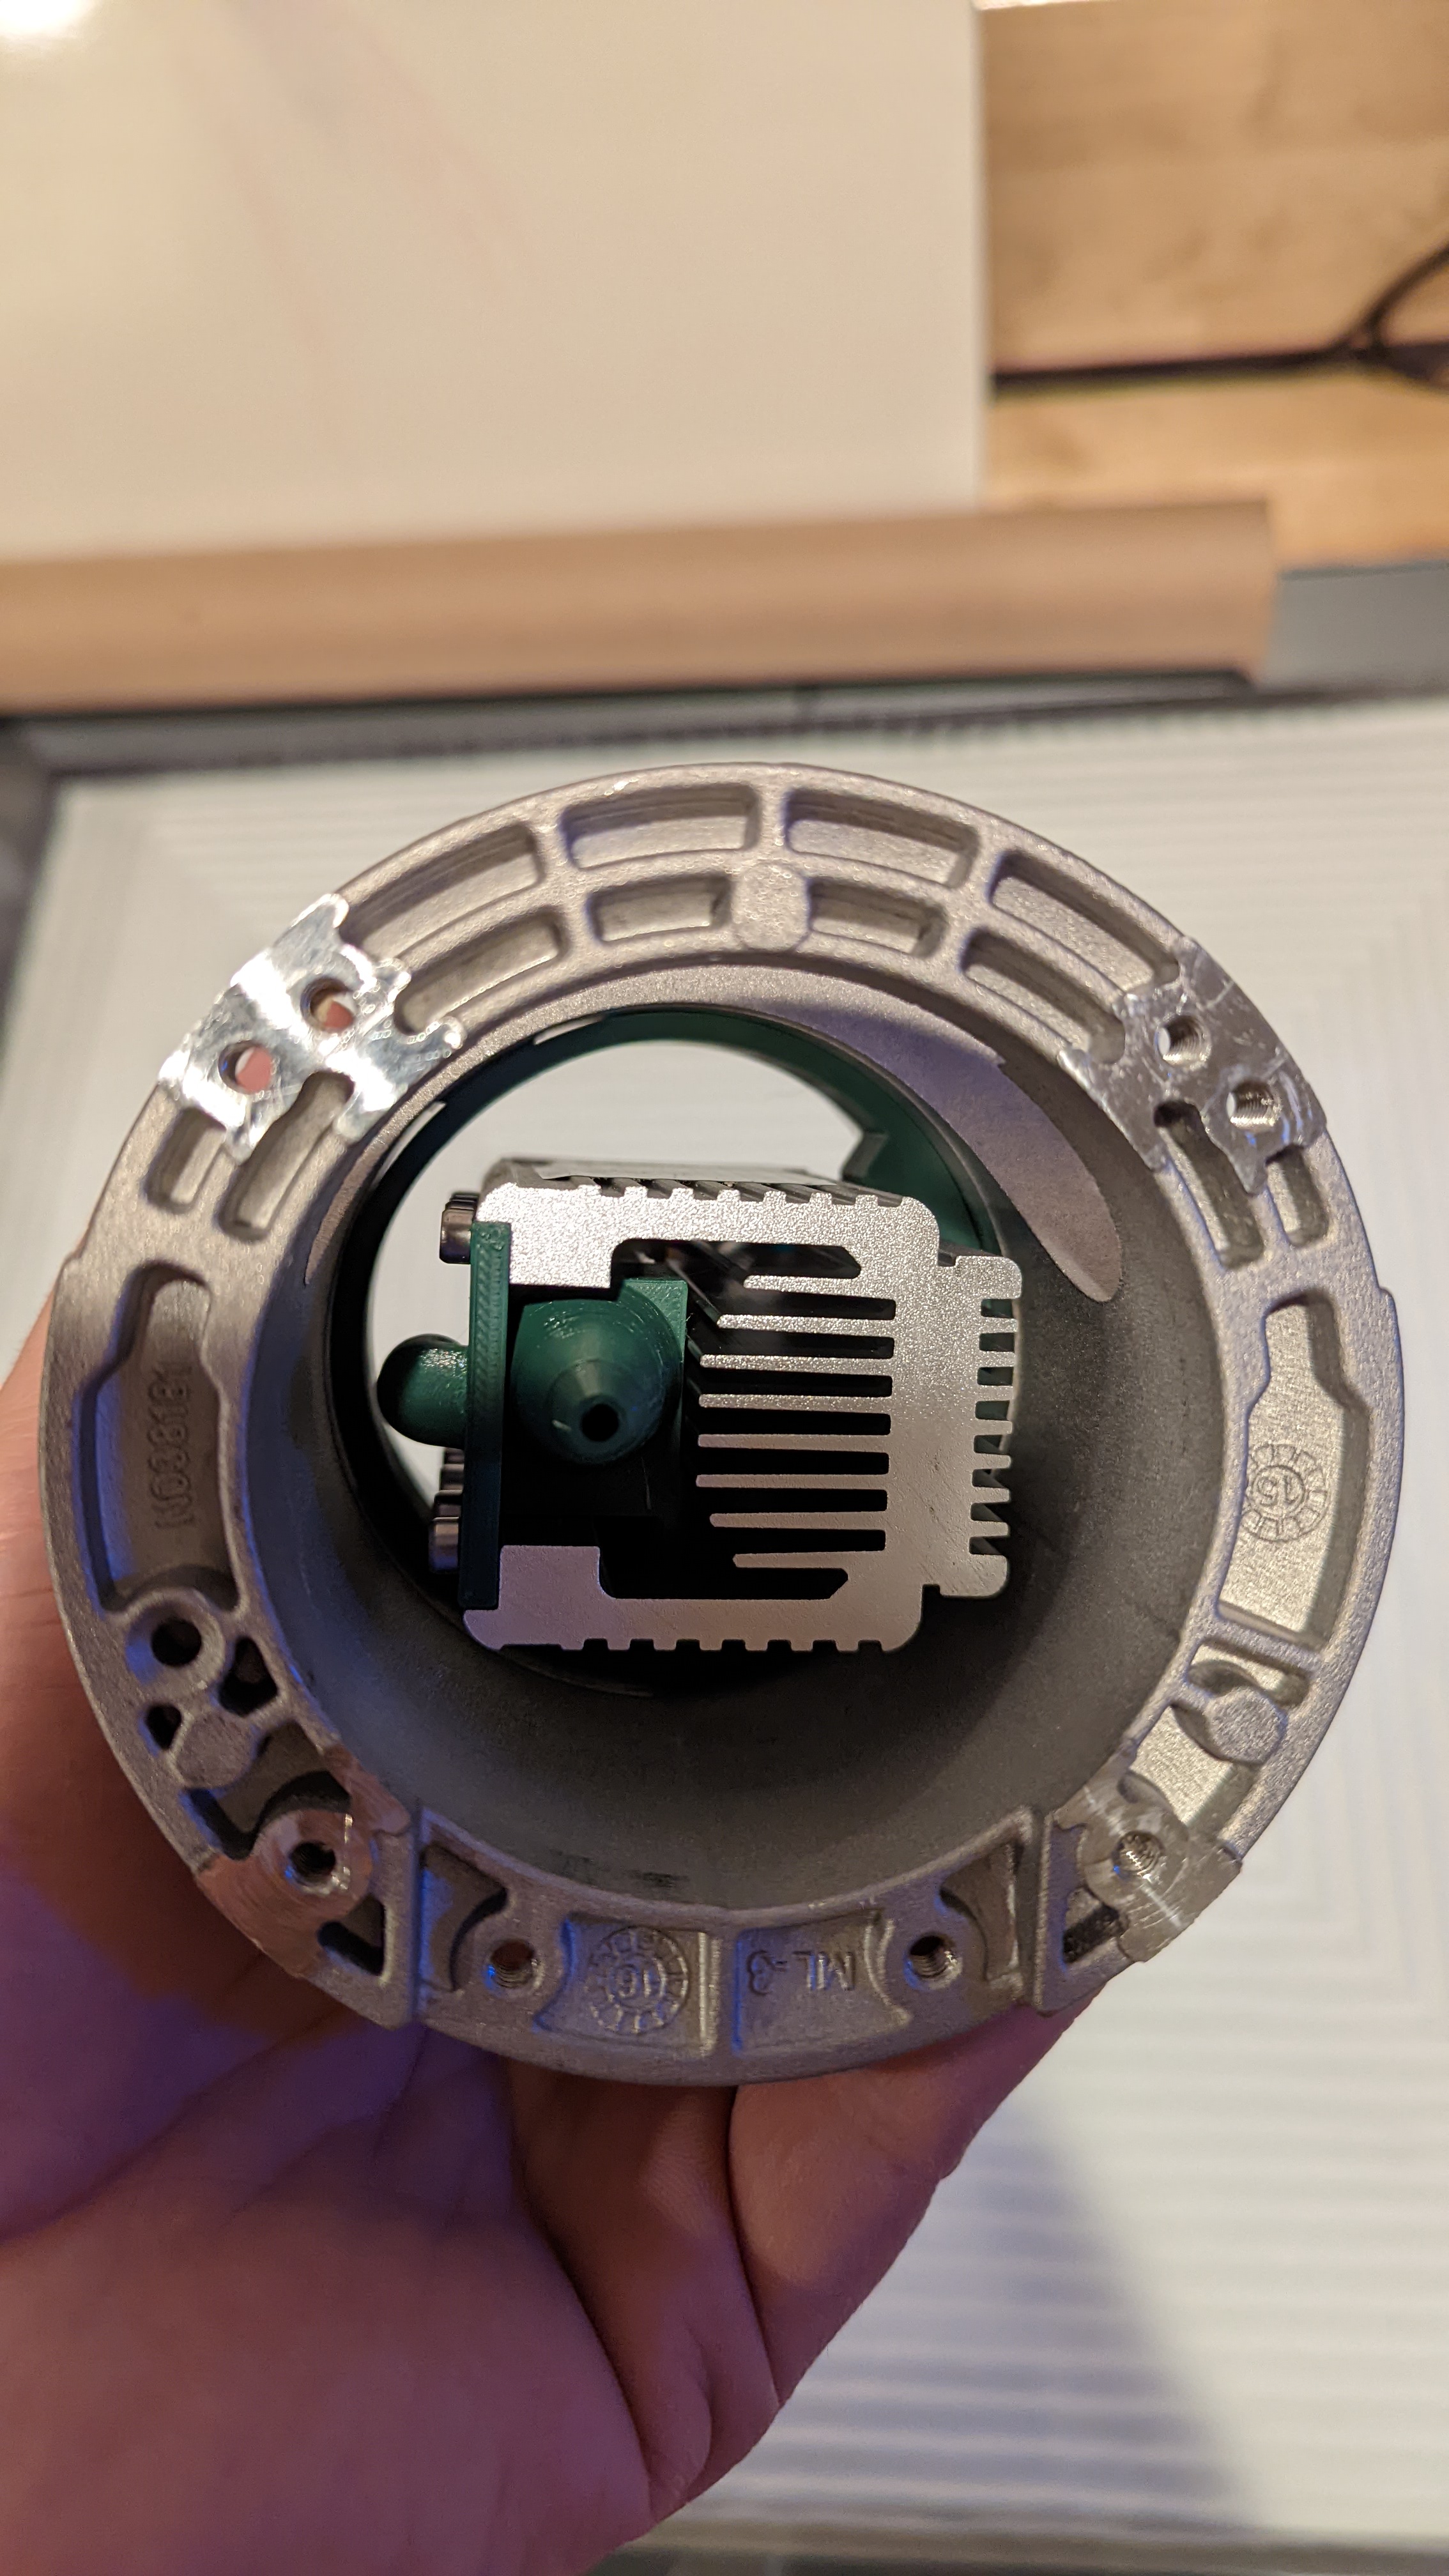
I have the DW611 (69mm interior and a nubbin) and the low rider 1, along with a new neje a40640. I am taking inspiration from your design, and drawing something up. I have the DW base and the laser parts on my desk and I thought I had a eureka moment:
This mount that comes with it just fits in the vent hole. I tried it out and I can slide the laser in from the top and then tighten it down from the outside.
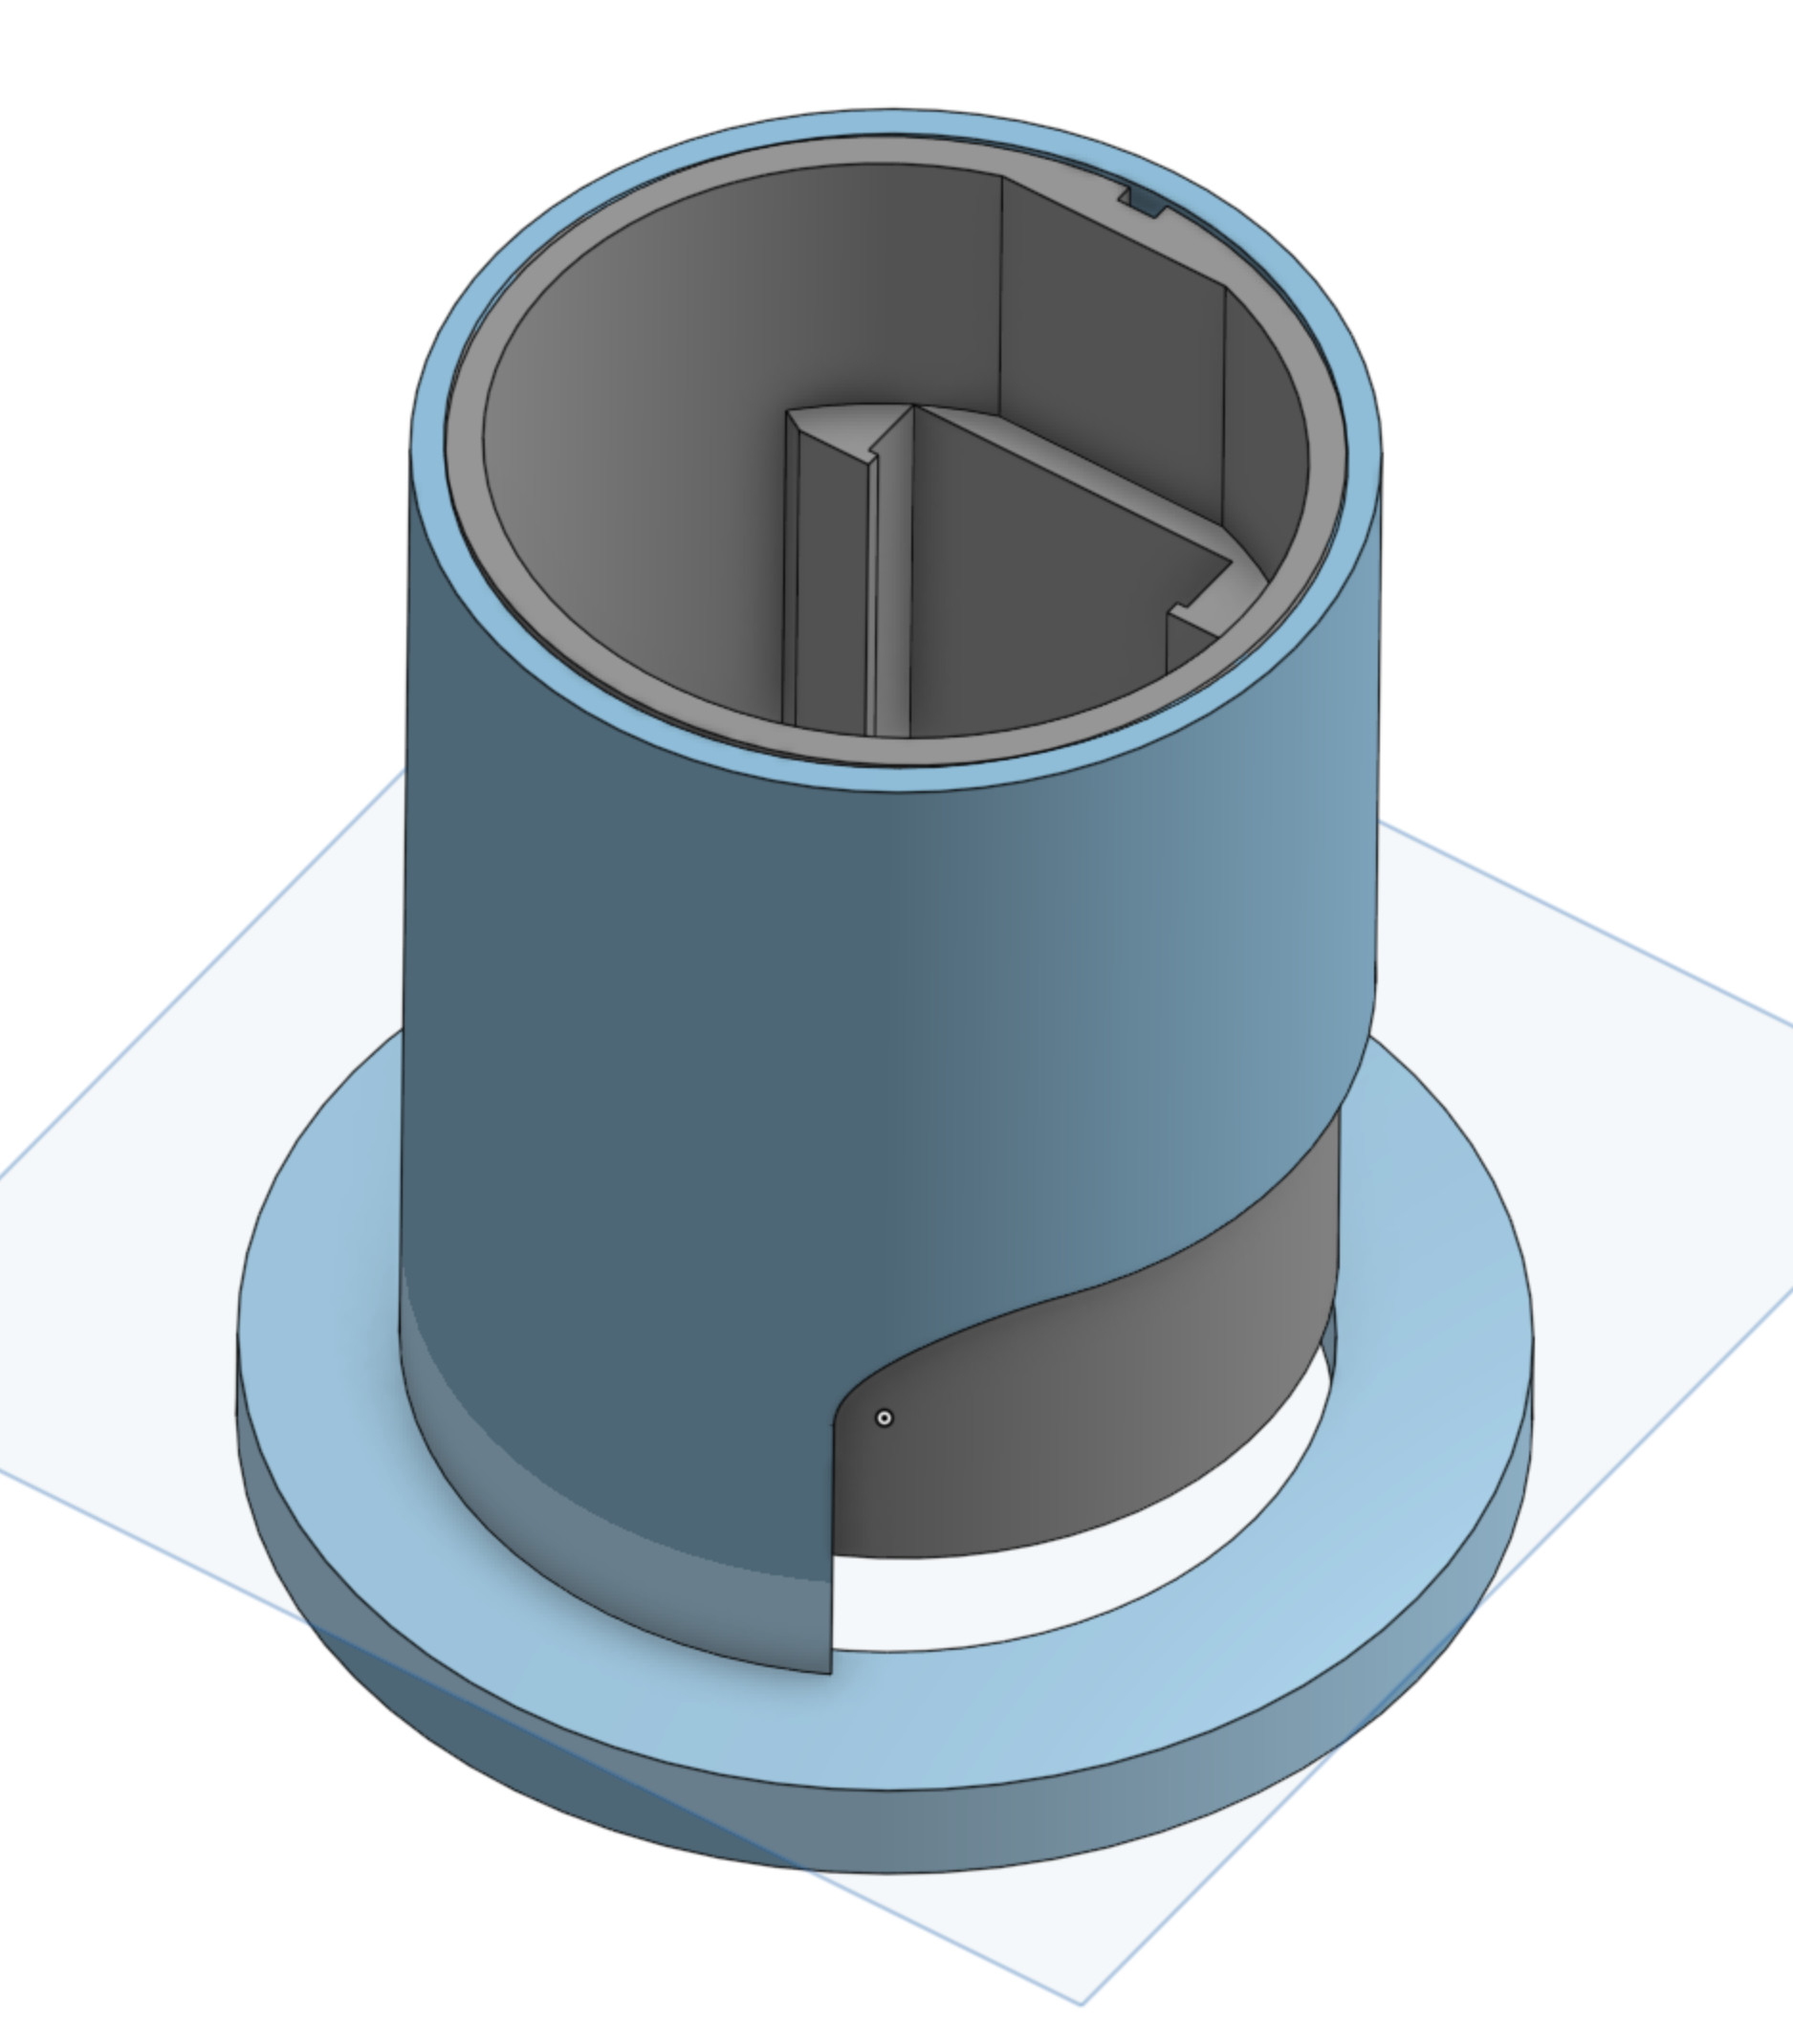
The only problem is, it won’t work, because I can’t reach it when the base is in the LR. So I am back to making the “cup” version of the mount fit my parts. I am printing a test piece now.
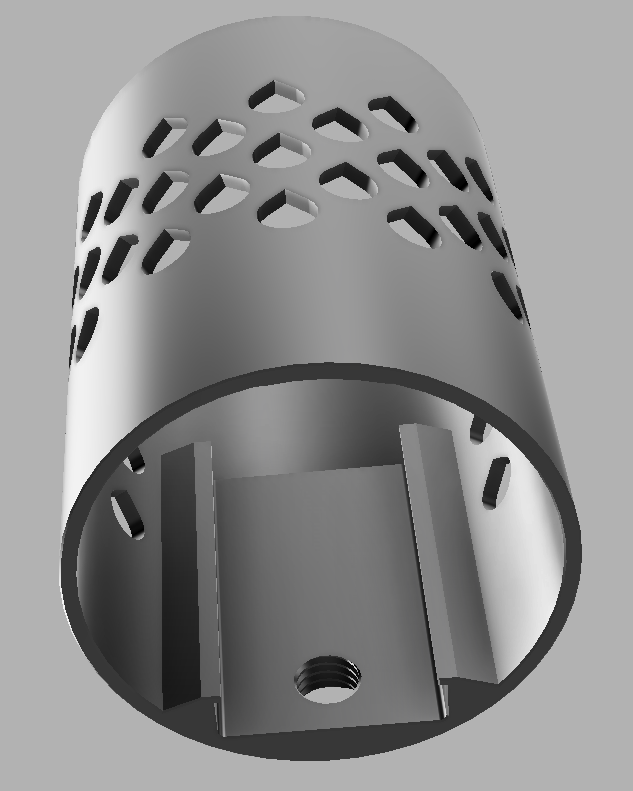
I chose to make it a little small, but elliptical. I am also hoping to add a lip on the top to positively set the height. I haven’t added the set screw or neat tear drops yet. But I have to, or it won’t feel complete
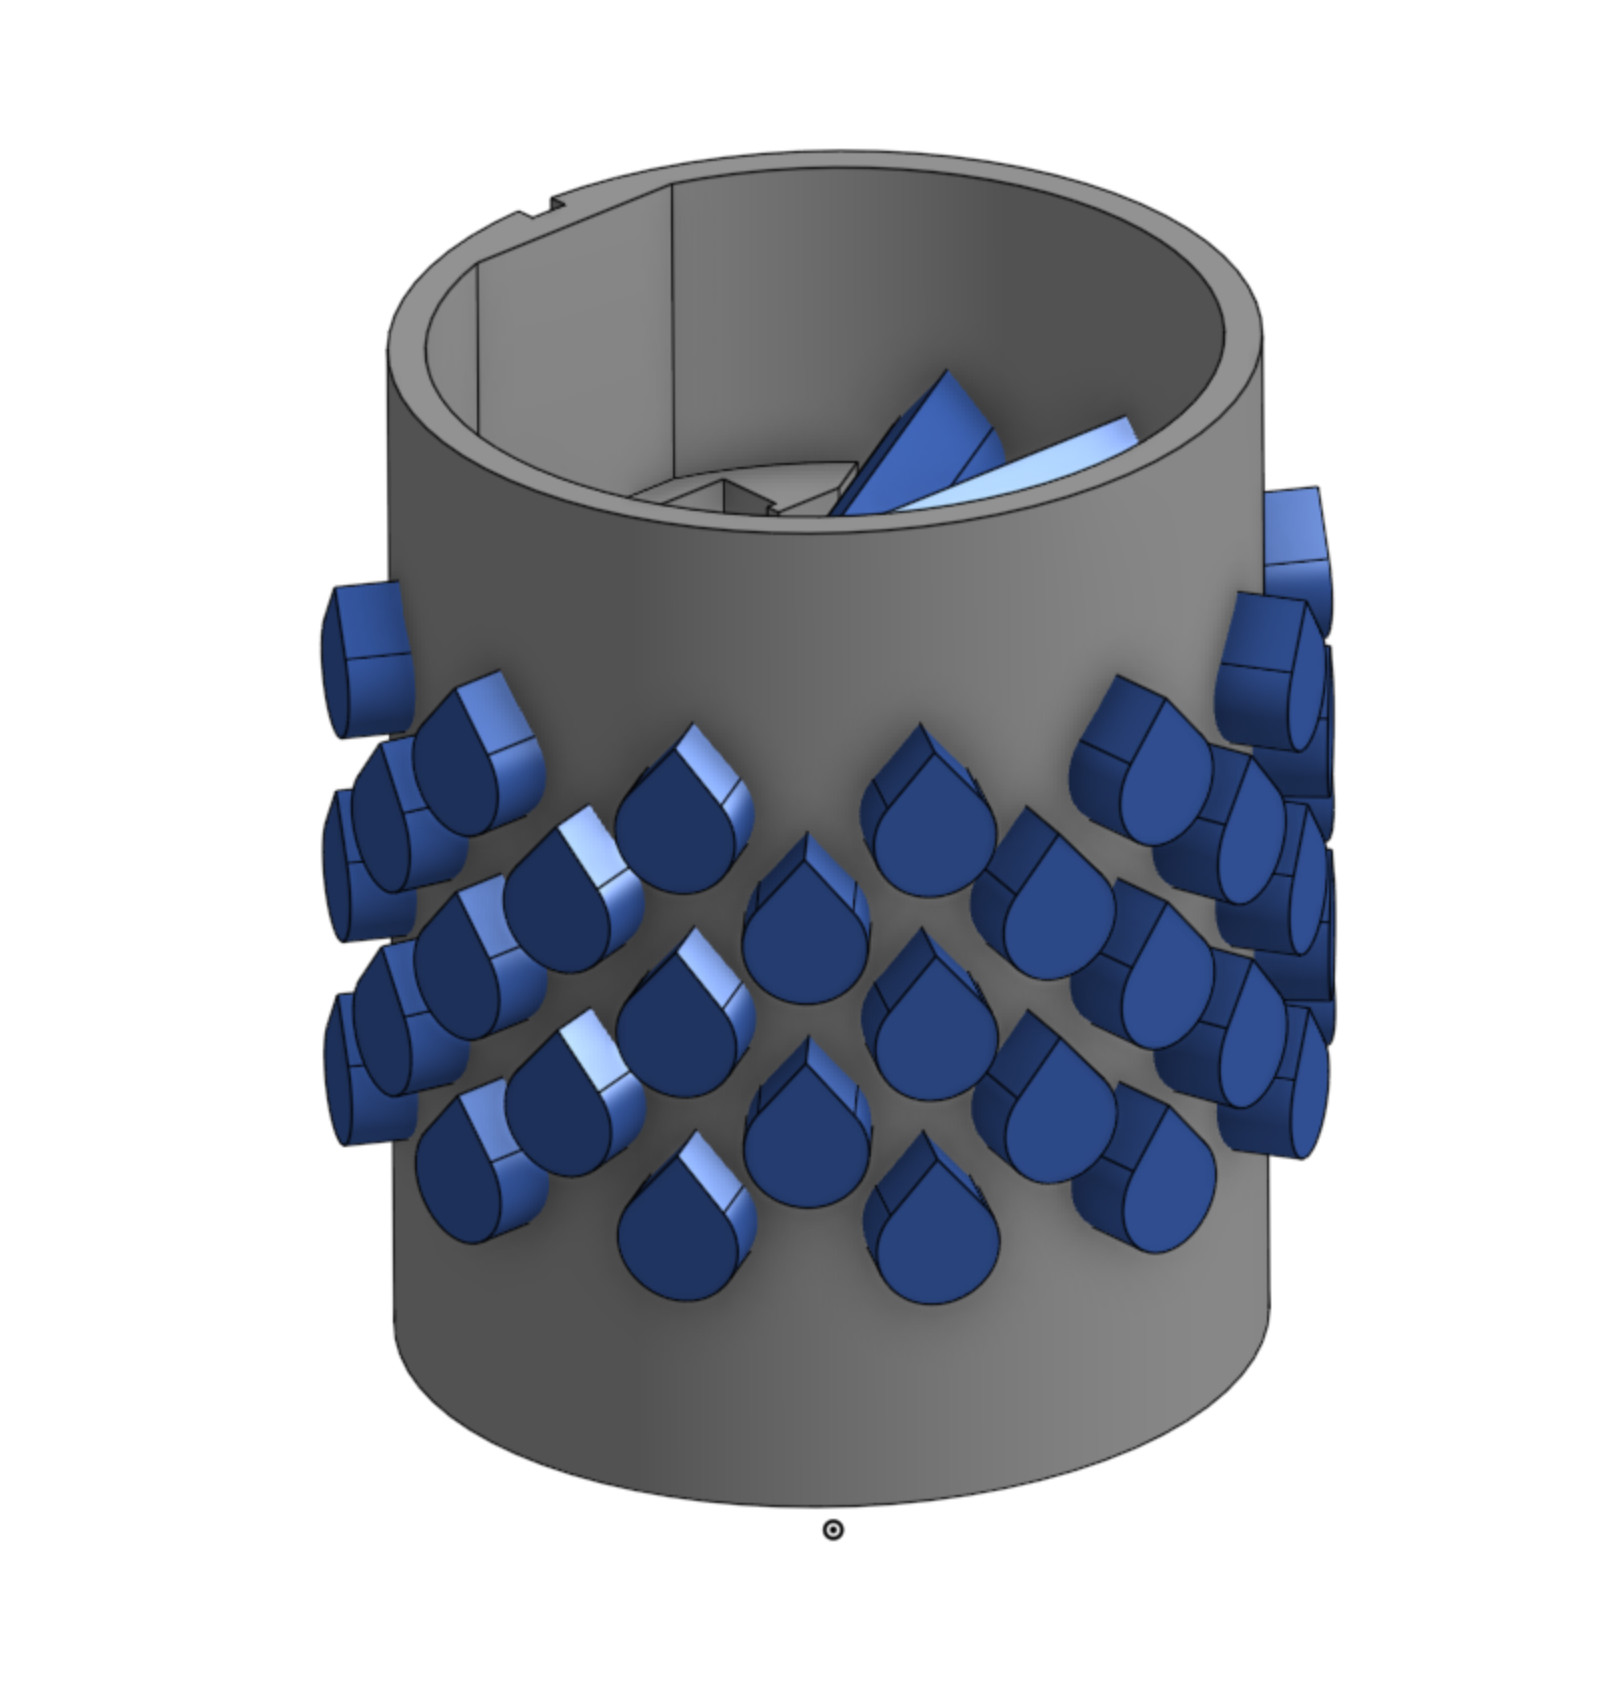
Looking good. The teardrops were for ventilation and fit between the upper and lower portions of the Primo mount. They look pretty but are useless for most of the LowRider mount. As for a lip, I designed a fan mount for the top of my laser tube. I dry fitted a 3D printed version, but have not hooked up the fan. Making the ring a little larger than your tube would give you your lip and a fan mount.
I mostly wanted to make sure I could make the holes (I chose to do a circular pattern and a boolean operation). I am not sure what the right choice is for ventilation. It seems like most of the cool air comes from the top and gets pushed down. I don’t think a side vent will do much, but I did model in the dw611 vent (approx). I could add some holes there.
I still want to trim it down a little. I would like to have less area and volume to print. But I will wait until I see the test piece to decide. I am planning on printing it upside down.
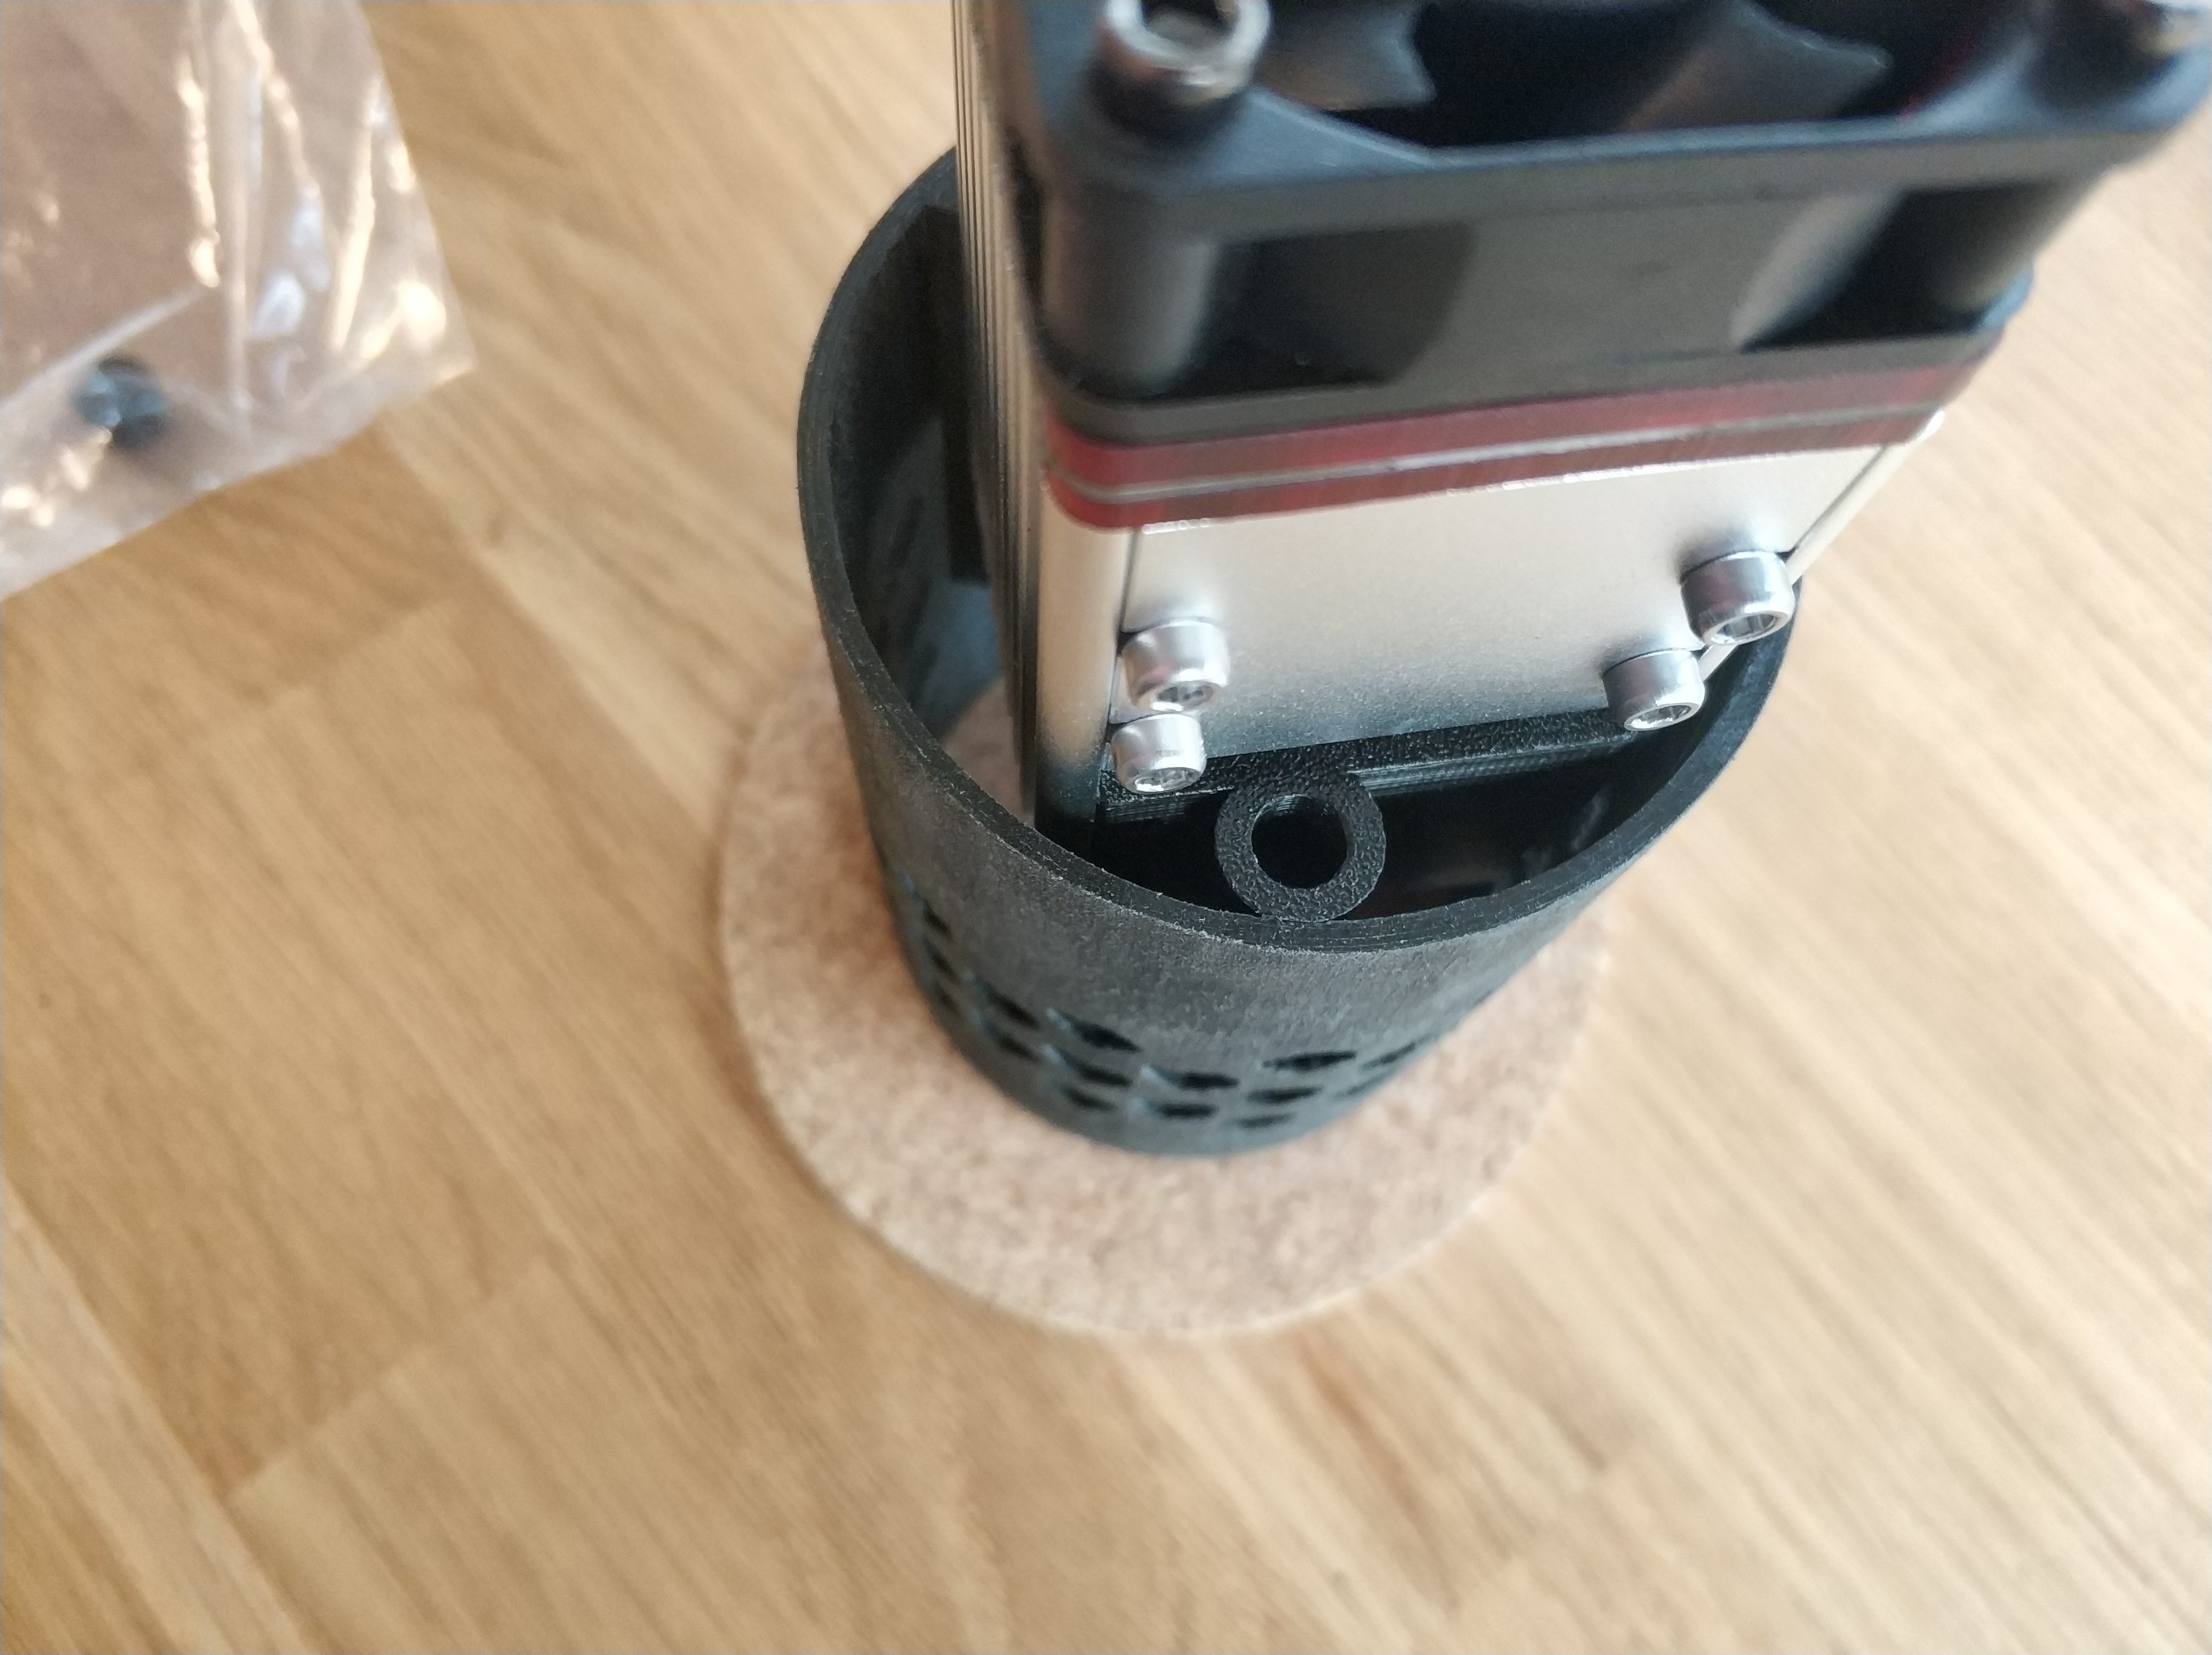
I made the bigger one, and it looks like it will work well.
I added a fan mount (I’m not sure what fan you were designing for, Robert, but I have a lot of 60mm fans from old PC cases).
It fits pretty well. The laser is super tight, but I can get it in there. I just won’t have the fine adjustability that I would have if it was just a tad looser, held with set screws. I added some holes for set screws, but it doesn’t need them on my print.