I am getting ready to test new parts from Ryan’s next ZenXY (name TBD).
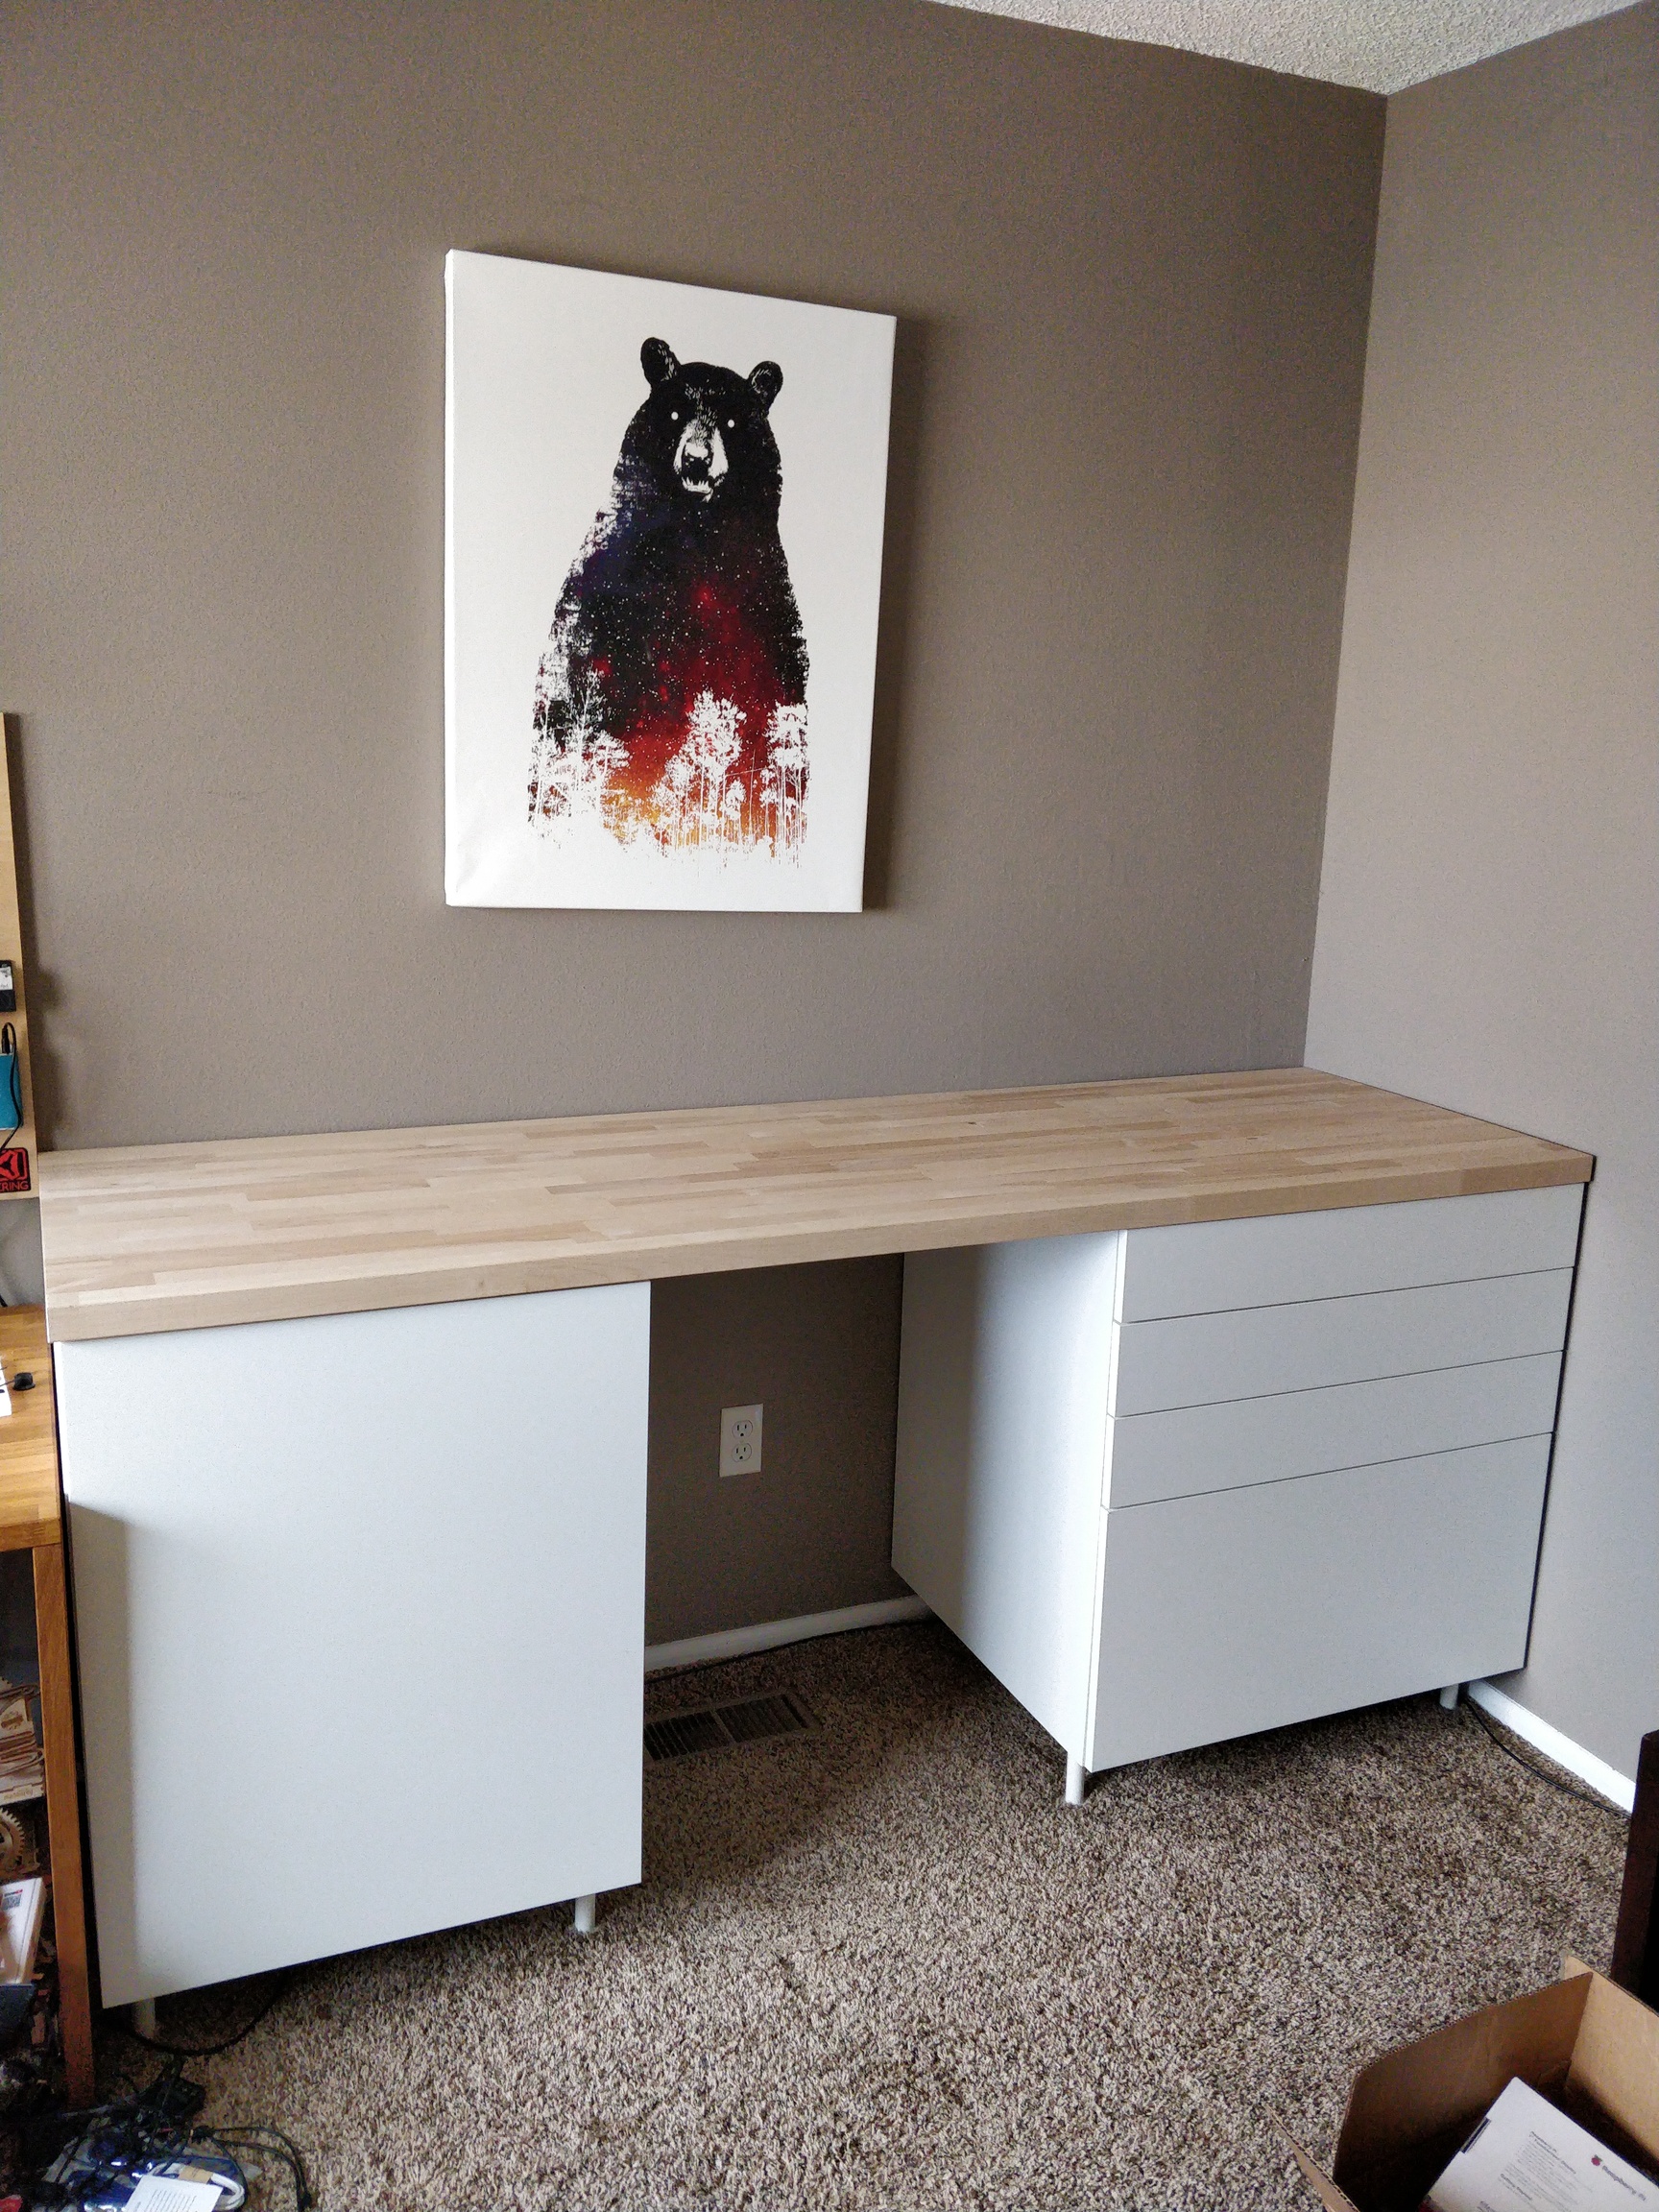
The idea is to build up a counter height space for working on electronics projects, as well as add enough storage to ignore my disorganization. There is a nice space in the middle that is great for a ZXY, so that’s what I’m going to do.
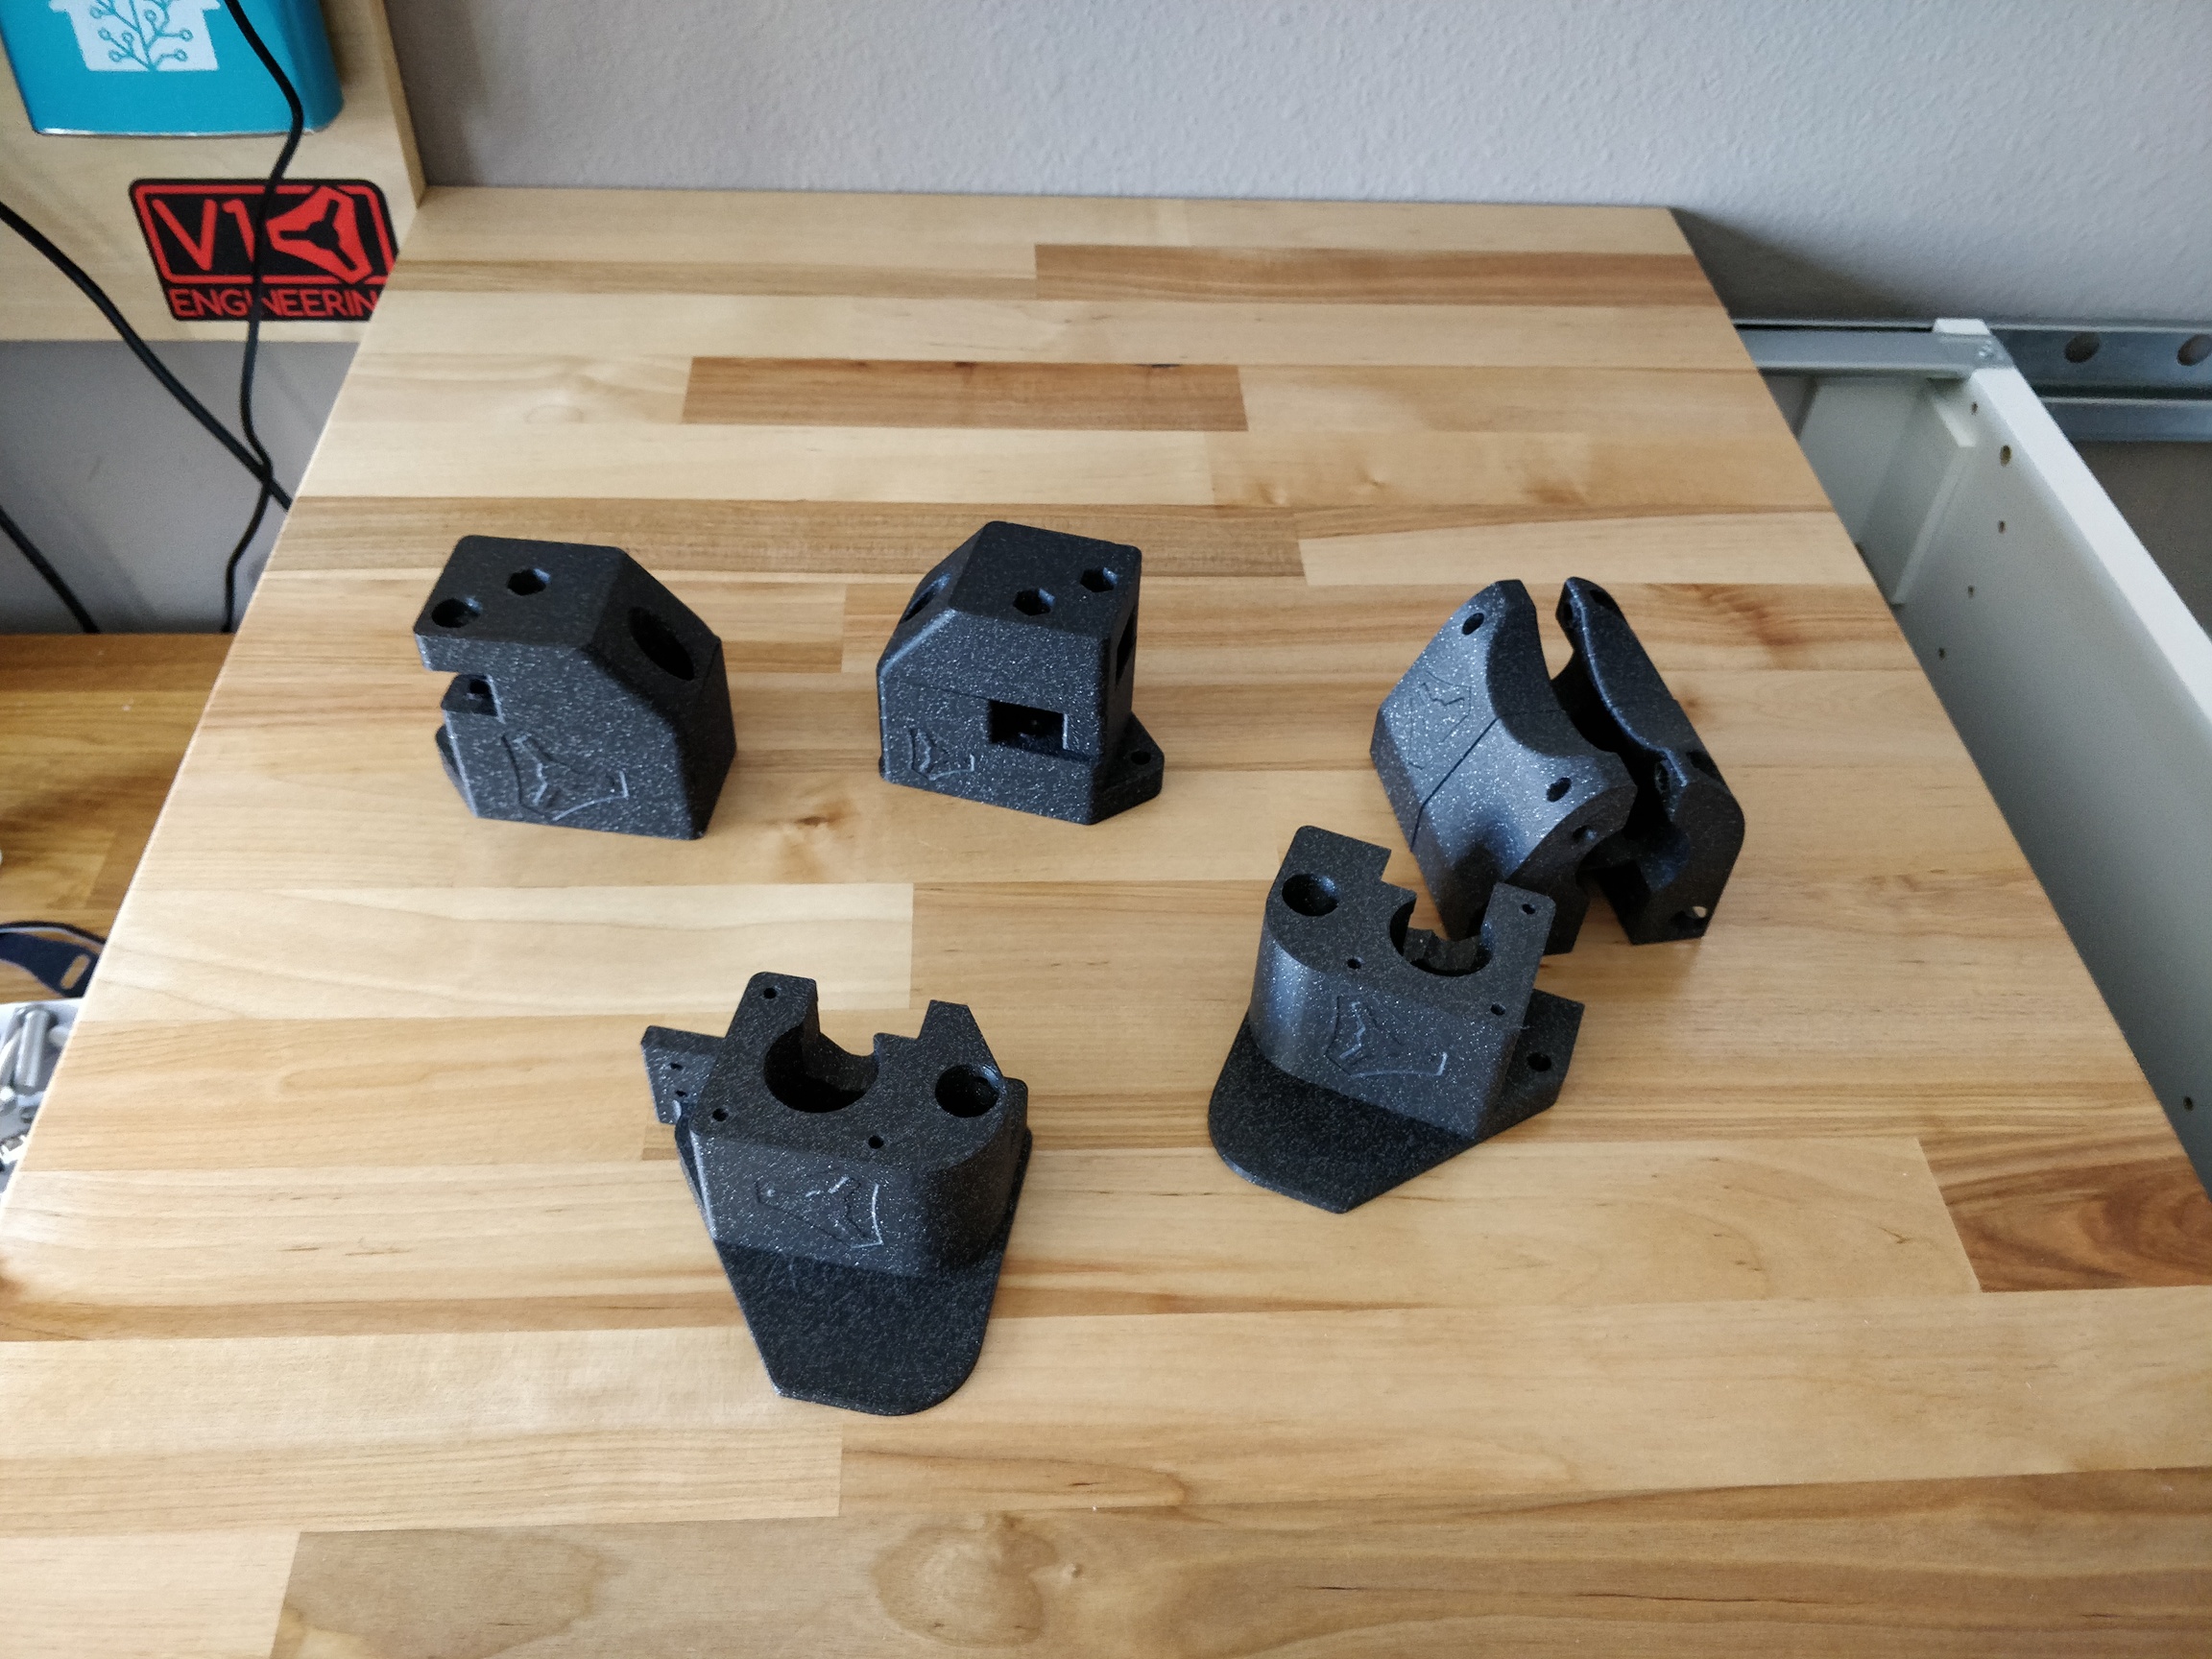
But it needs finish. I took the “scrap” and I tested a finish. I am also making good progress printing the parts in protopasta “Empire Strikes Black”. They look great:
(That V1 Engineering sticker was in danger of being in the way, but I moved that tool board over to save it).
Ryan sent me all the hardware I need (tracking says it will be here today). I have enough 3/4" EMT, but I will need some 1/2". I have some glass that seems like it is the perfect size.
I am thinking I will design something to hold the glass up, screw into the sides, and have a place for the LEDs around the outside. I haven’t decided yet. I need my printer to make some test prints. That will make cutting the hole easier.
I’m excited to see how it will all go together. I hope it will look pretty professional from the top and you will be able to still be comfortable working and looking at it from the bottom.
I am pretty anxious about cutting the hole. I definitely don’t want to mess up this awesome chunk of butcher block. It was a real chore to cut off the end with my circular saw. I did end up with a little burning (but it’s on an end that no one will see). I will be taking it slowly, and methodically before I cut anything. CAD looks good though.
I don’t know for sure. I think the paint would have to be thick.
My printer should be done with the center overnight and I can try something tomorrow.
I’ve done the rabbet like that before. It can be hard to do perfectly. It sucks that I have to choose before I cut the hole. It would be nice to know if I liked it after I had tried cutting the hole.
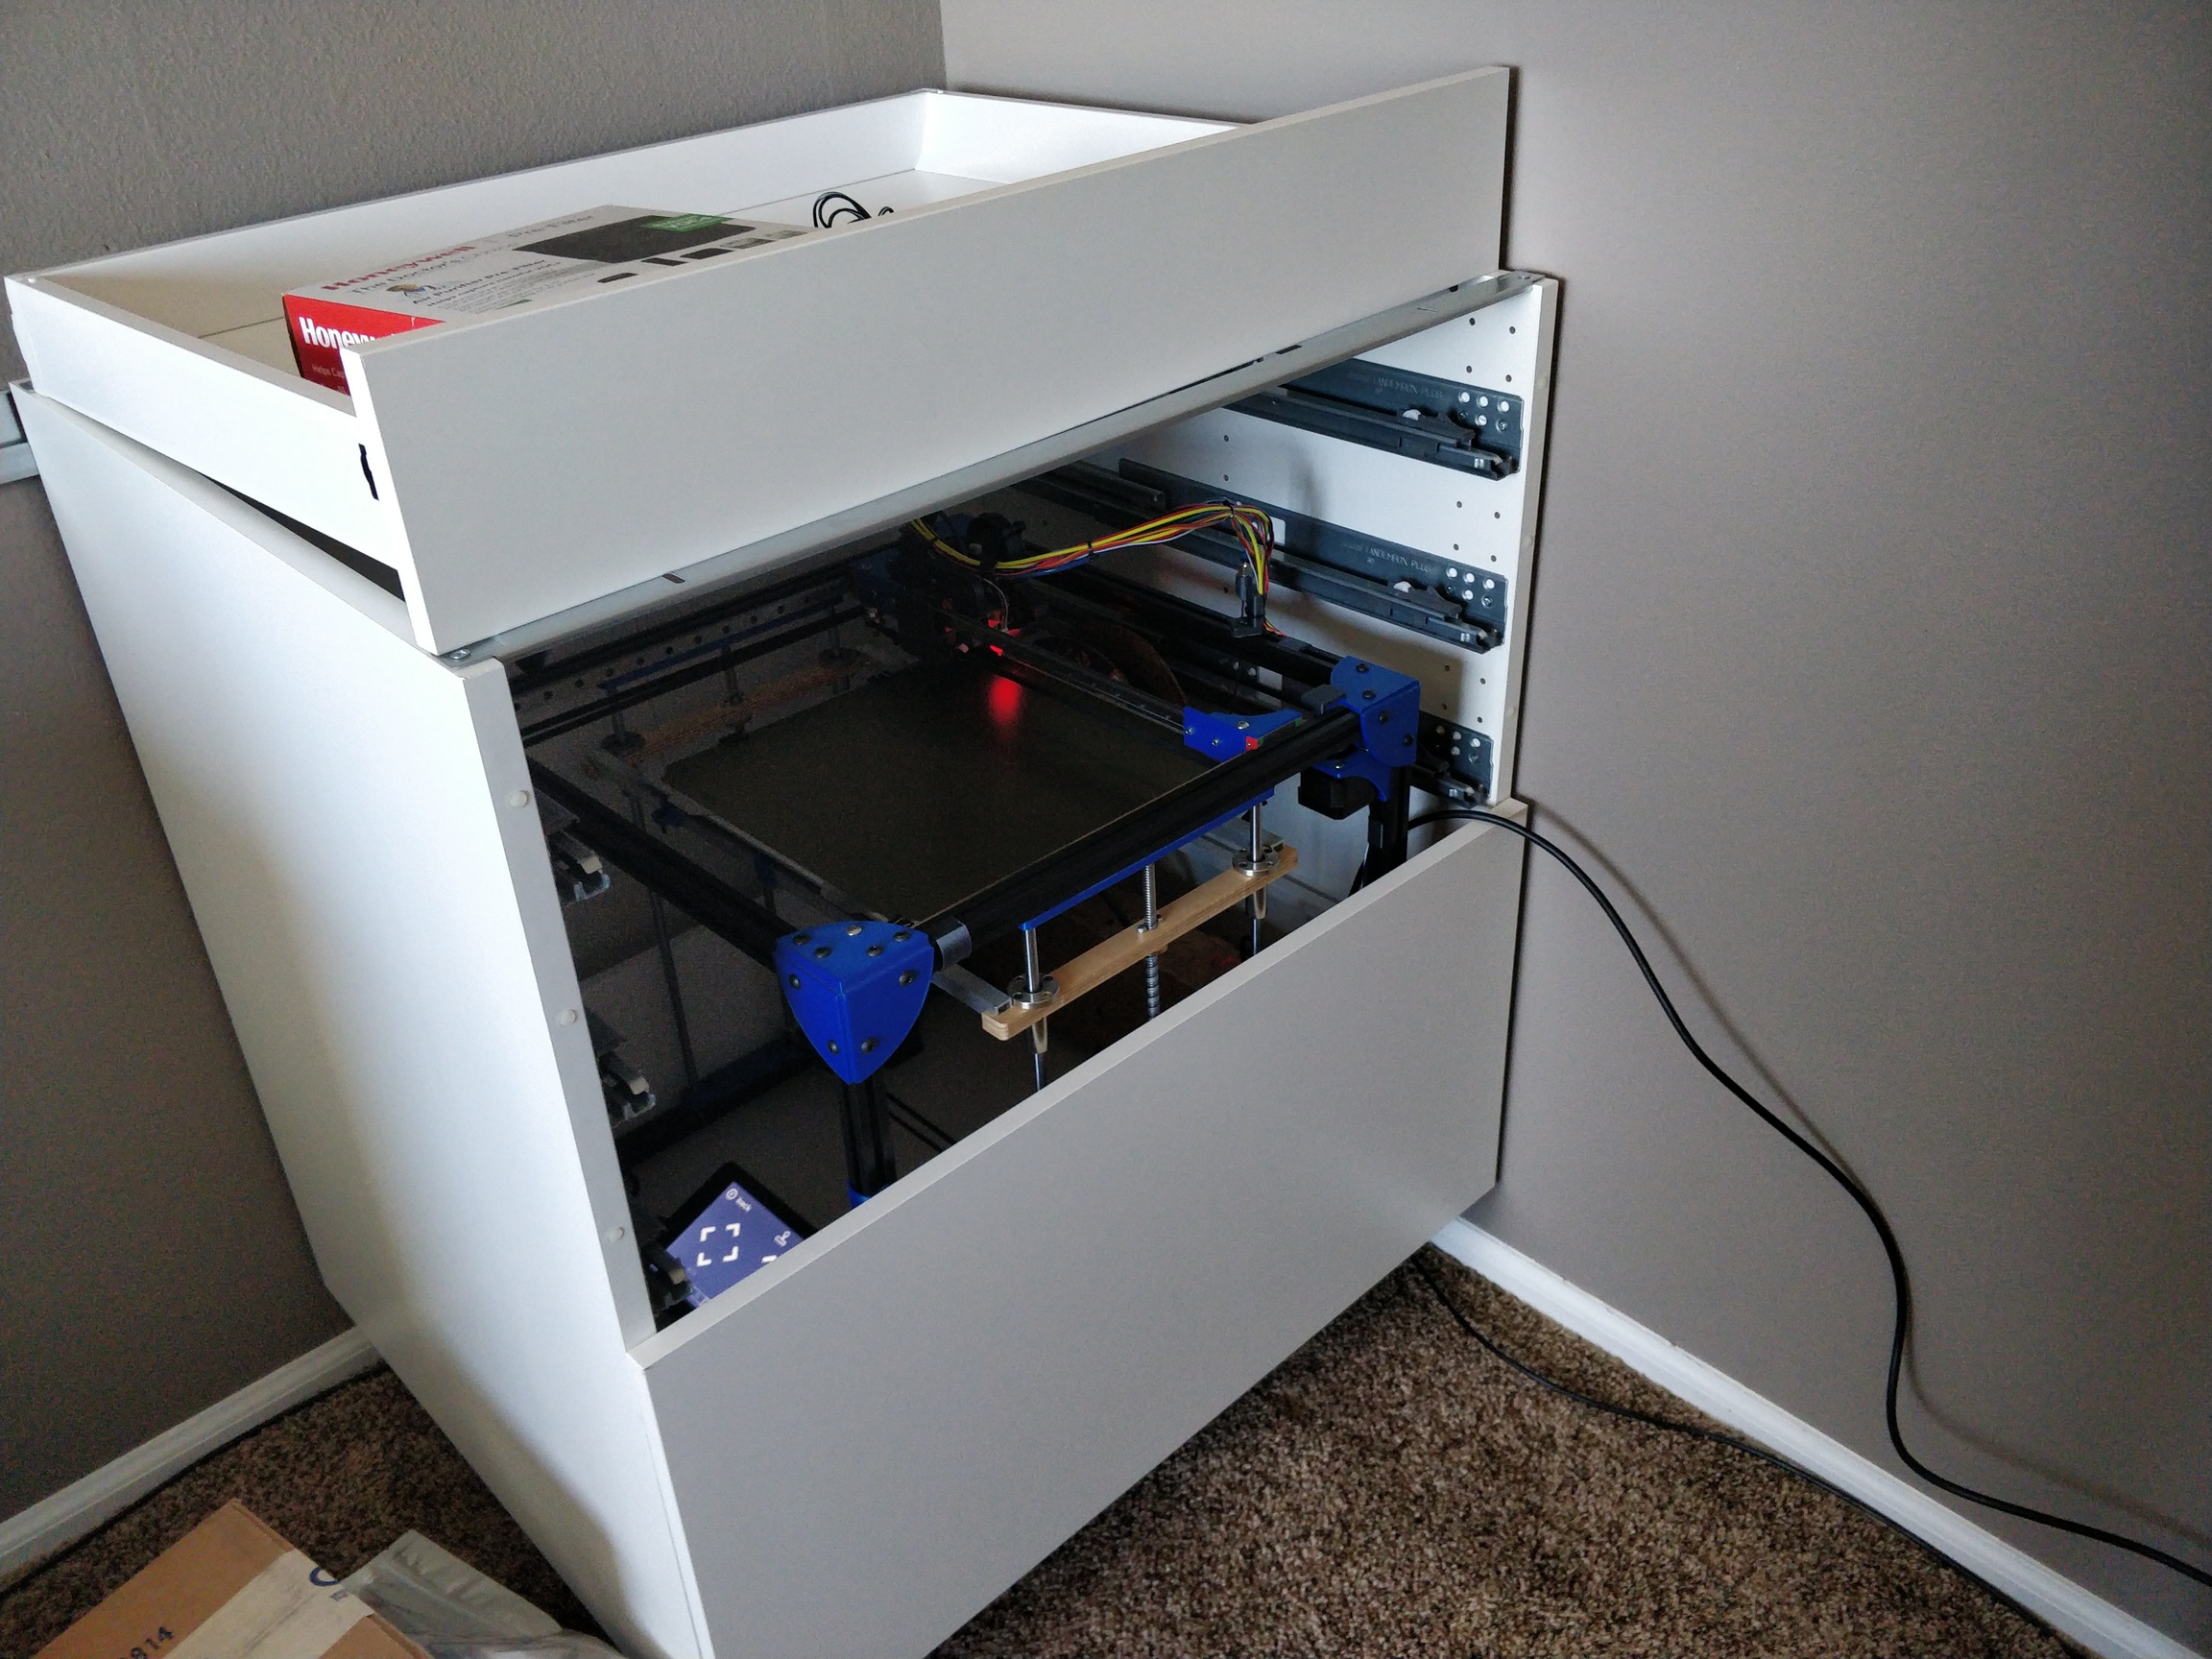
I was trying to fit the gridbot into the left cabinet. The hope was that I could fit the gridbot into the huge drawer on the left. I am hoping to cut down on noise and I have read that enclosures help printer quality (but it is printing great ATM). I would still keep it in the counter when I am testing or working on it.
It doesn’t fit in the drawer though. Ikea just wastes a lot of space in the drawer slides.
My options are:
Trade the left drawer for a door. I won’t be able to get to the printer as easily. But it will fit, and it will be easier for me to work on other electronics for the zenxy that I will tuck into the cabinet. I can fit one secret drawer in the top.
Forget putting the printer in the box, and use the space for Moar Droars! I definitely have enough to fill these up and they will be useful for the next decade+.
Reconfigure the left side for drawers and reconfigure the right side for the printer. It sort of fits (I removed two corner brackets and I couldn’t print larger than 200mm when the printer was in the drawer. I may have to redesign some parts to make it fit. I don’t like the idea of taking everything apart and building more drawers, but that pain is temporary. This printer also won’t last forever.
Is there anything I am missing? I am leaning towards 1 or 2. Has anyone regretted putting a printer in an enclosure? Anyone have any guesses on what the noise will be like?
It is entirely possible that due to the resonance of the enclosure, and how the printer itself is insulated, for lack of a better word, from the base of the cabinet, it may amplify the noise.
I don’t know enough about the ZenXY to state with certainty about the placement of LED lighting - but I’m sure there’s enough meat in the butcherblock slab to hide a slot to mount the LED strips. When you get to that part - I can offer some woodworking tips to get your tools where they need to be to make the cuts.
I think it depends on how much you print. If you print something at least once a week, #2 for sure. Drawers will organize a mess into more organized chaos. An open desktop can quickly become a pile of stuff you wish you had in drawers. Dealing with a super low printer is a pain, I did that for a while.
You could get something like this to mount to the cabinet base that pulls out and you get to keep the door. This product is pricey, but I know you can source just the rails somewhere.
At the size you want to make your zen did you have any issues using the thin MDF as a base? Like did it sag or bow? If not I keep coming back to something like this.
I think this is just the nature of drawer slides, however there are options regarding where the space is sacrificed. You might consider modifying the left drawer with bottom mount slides. If the width is the issue, this might allow putting the gridbot in the left cabinet…
No. I have dealt with a lot of drawer slides. These waste about 1.25" on either side and the depth is about 3" short of the depth of the cabinet. They seem like excellent drawer slides and very strong, but not efficient in terms of space.
I have a big pack of drawer slides. I could do something like that. That is a good idea and another vote for #1
I print in spurts. I will print non stop for a month, and then not at all for the next two. That is an interesting way to think about it.
The wanhao doesn’t fit either. I have long been saying I need to drop it off at my dad’s house and let him learn with it. But I have not been willing to give it up. It is just a good little robot. I can also sent to the basement.
For sure. It will look like a magazine when I clean it (once a year) and it will look like an episode of hoarders: electronic edition the other 360 days of the year.
I have been racking my brain on this. I want to start on my big table but I am having a very similar issue. Adding the lights adds a bit of complexity to the layers of parts, and some thickness that I am not too happy about. The “light shield” isn’t an easy thing either, thin but not going to sag with a clean corner joint…
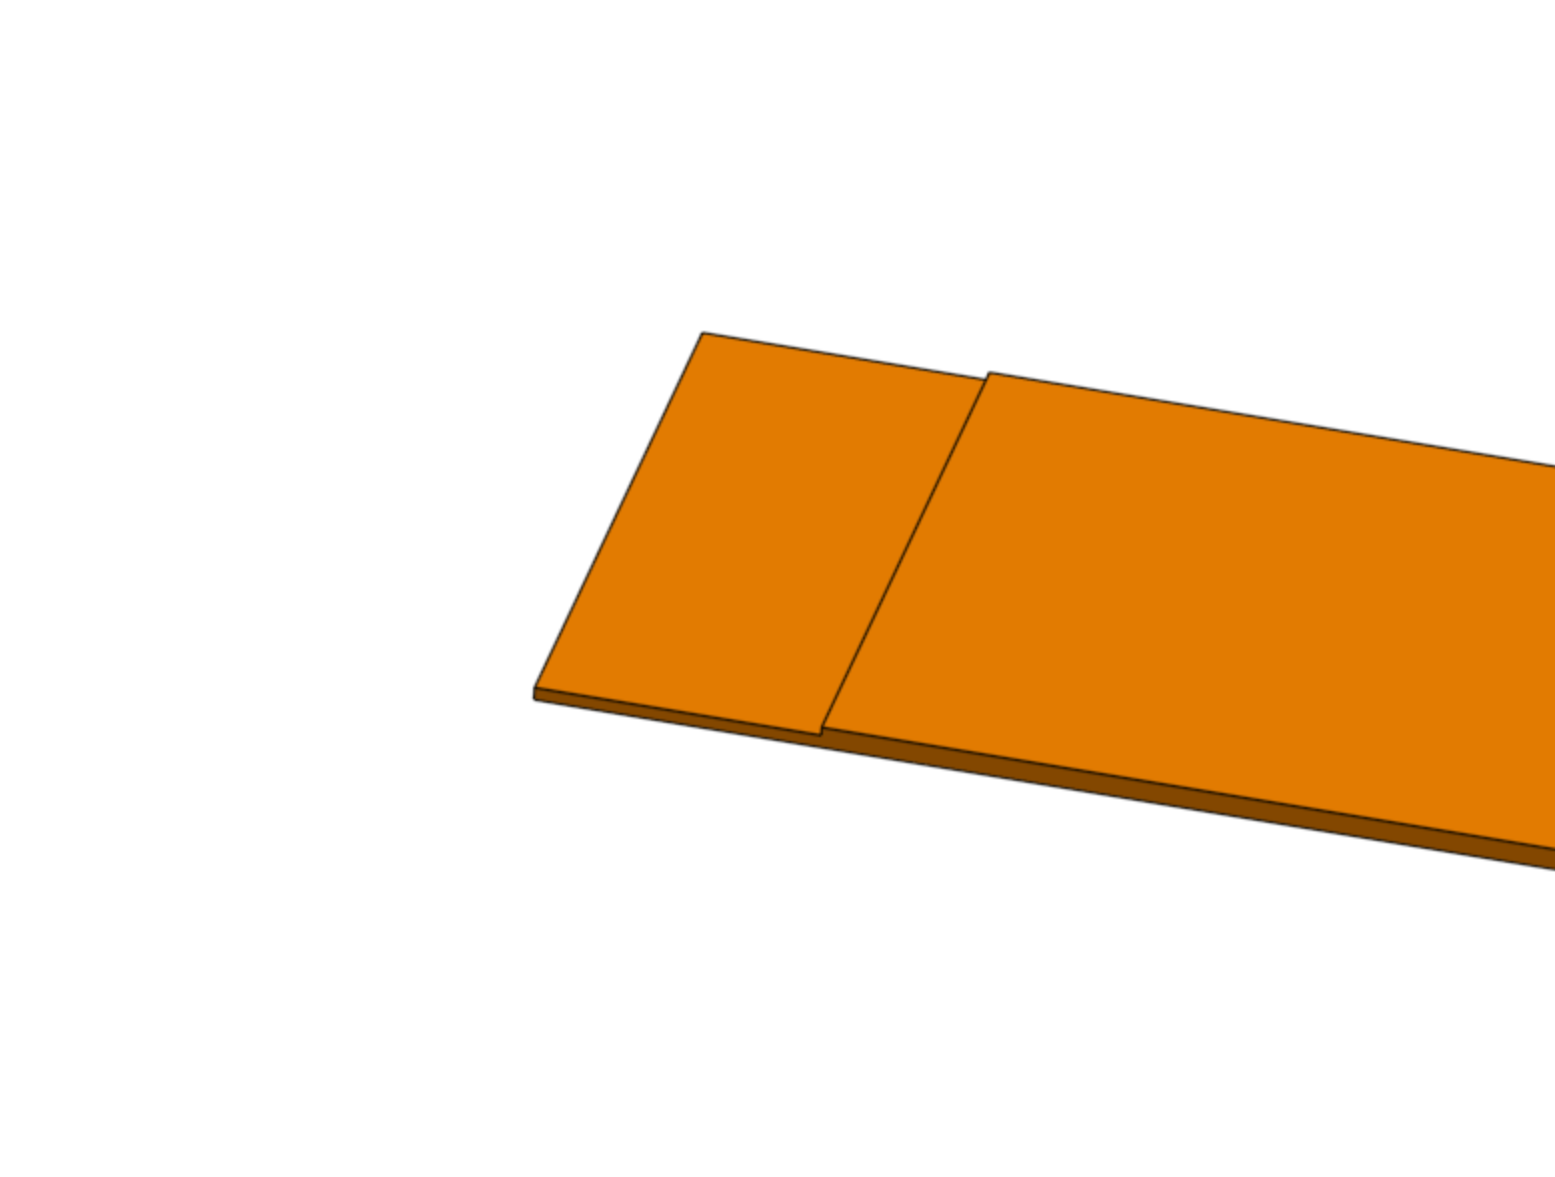
I had a crazy idea this morning for printing a long, thin, continuous flashing. If you wanted the whole thing 1mm thick, for example, could you print a part, then print a second part and pause at 0.6mm and butt the first part up to it, and then the stl of the second part would include more plastic over the first part, slightly adhering them together? It would help if I could paste in a drawing…
Then, when you get to the overhang, you can pause, or just be quick, and jam this part 1 up next to the covering part. The nozzle would then be able to print over it, and adhere them together. I have not idea how well they would stick, since the part 1 plastic would be cold. But maybe? I will try this with a small test. Just because I am curious.
Here are some things I know about the space I have:
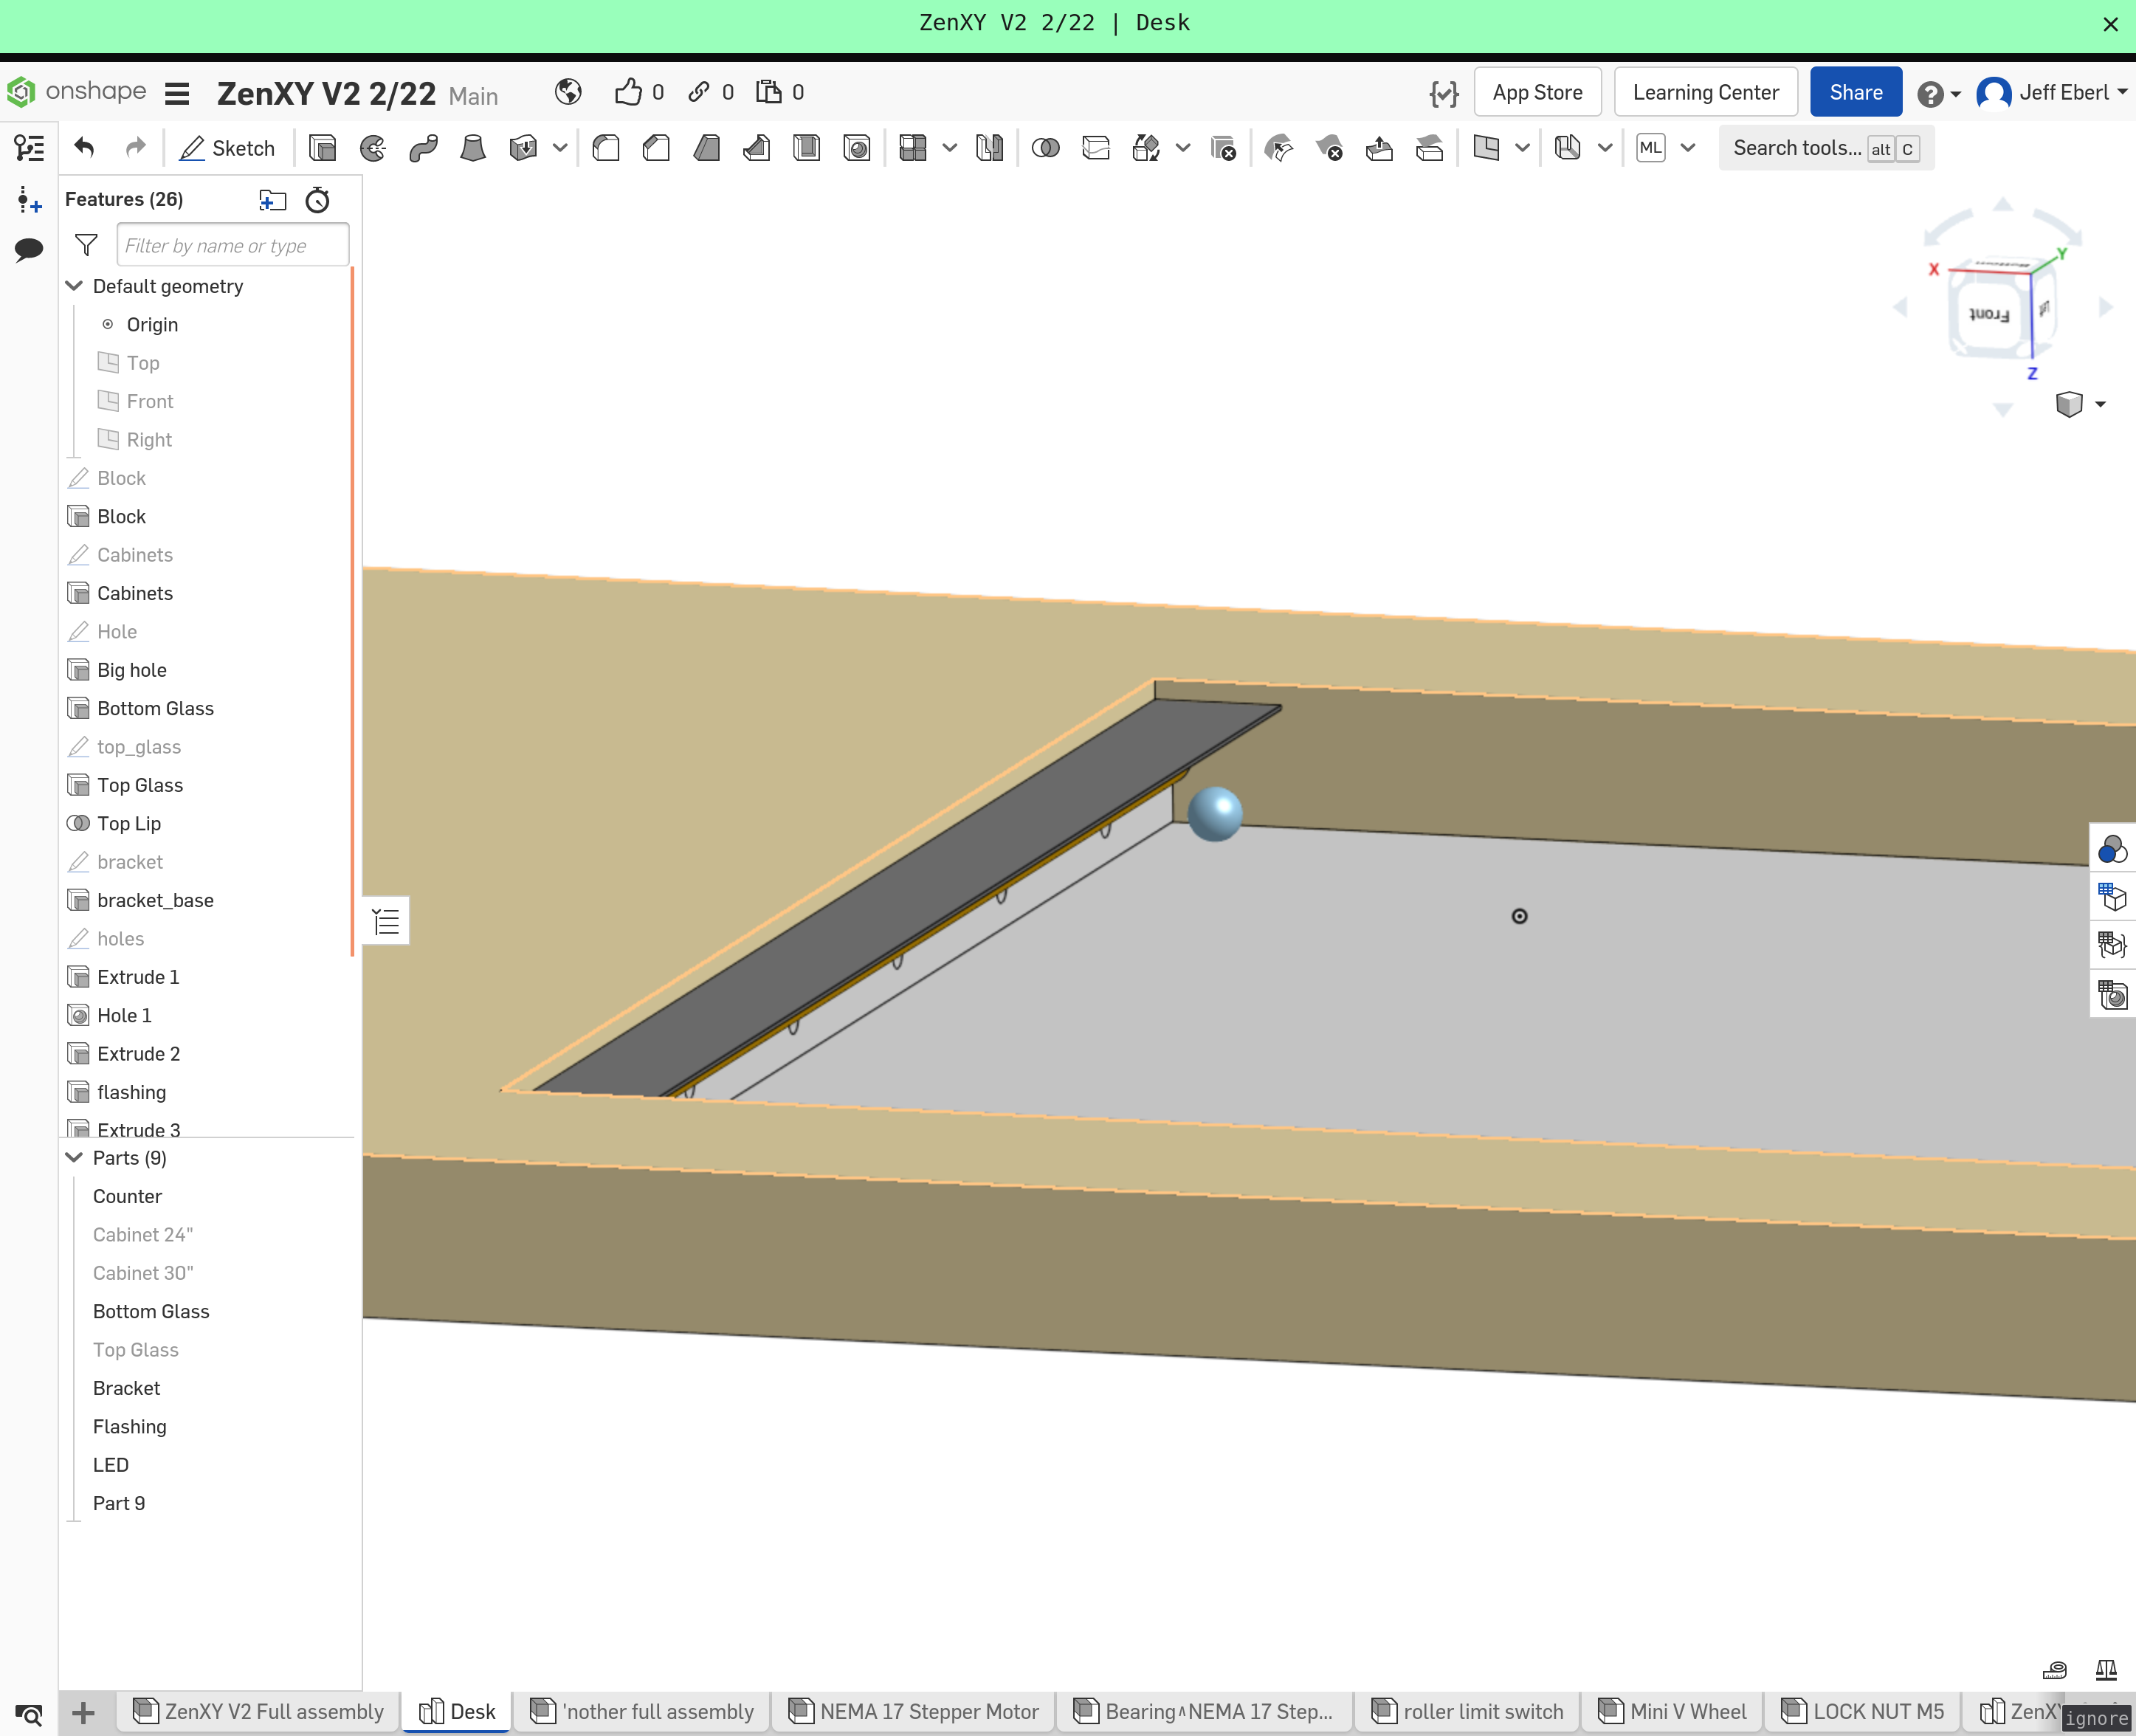
The machine will not be able to reach to the dimensions of the glass. I want to have an inch or so border where the ball can’t reach, but there is still space inside this area. This just seems like a good compromise to me. It helps with the LEDs and I am not interested in optimizing the size. I just don’t want to spend the brain cells on trying to get it perfect.
I am happy to do a complicated woodworking cut in the middle. But I can’t cut 1.5" on the LR, and this counter is so freaking heavy, I am sure I will not be comfortable even trying. I could cut some templates and follow with a router, but basically, the simpler the cut in the counter top, the better. If I can skip a rabbet, then it will give me probably 3x better chance of not ruining this workpiece. I do have a rabbet bit though. I would really not like to rabbet the top and the bottom.
The inside of the wood will probably not look that great. I’d rather hide it.
I can cut the flashing from some other material. That would be a good application of my big CNC machine in the garage.
I’m not too worried about a little extra sand getting somewhere. The ball can’t reach the corners anyway, so I doubt I will get that much pushed into the edges.
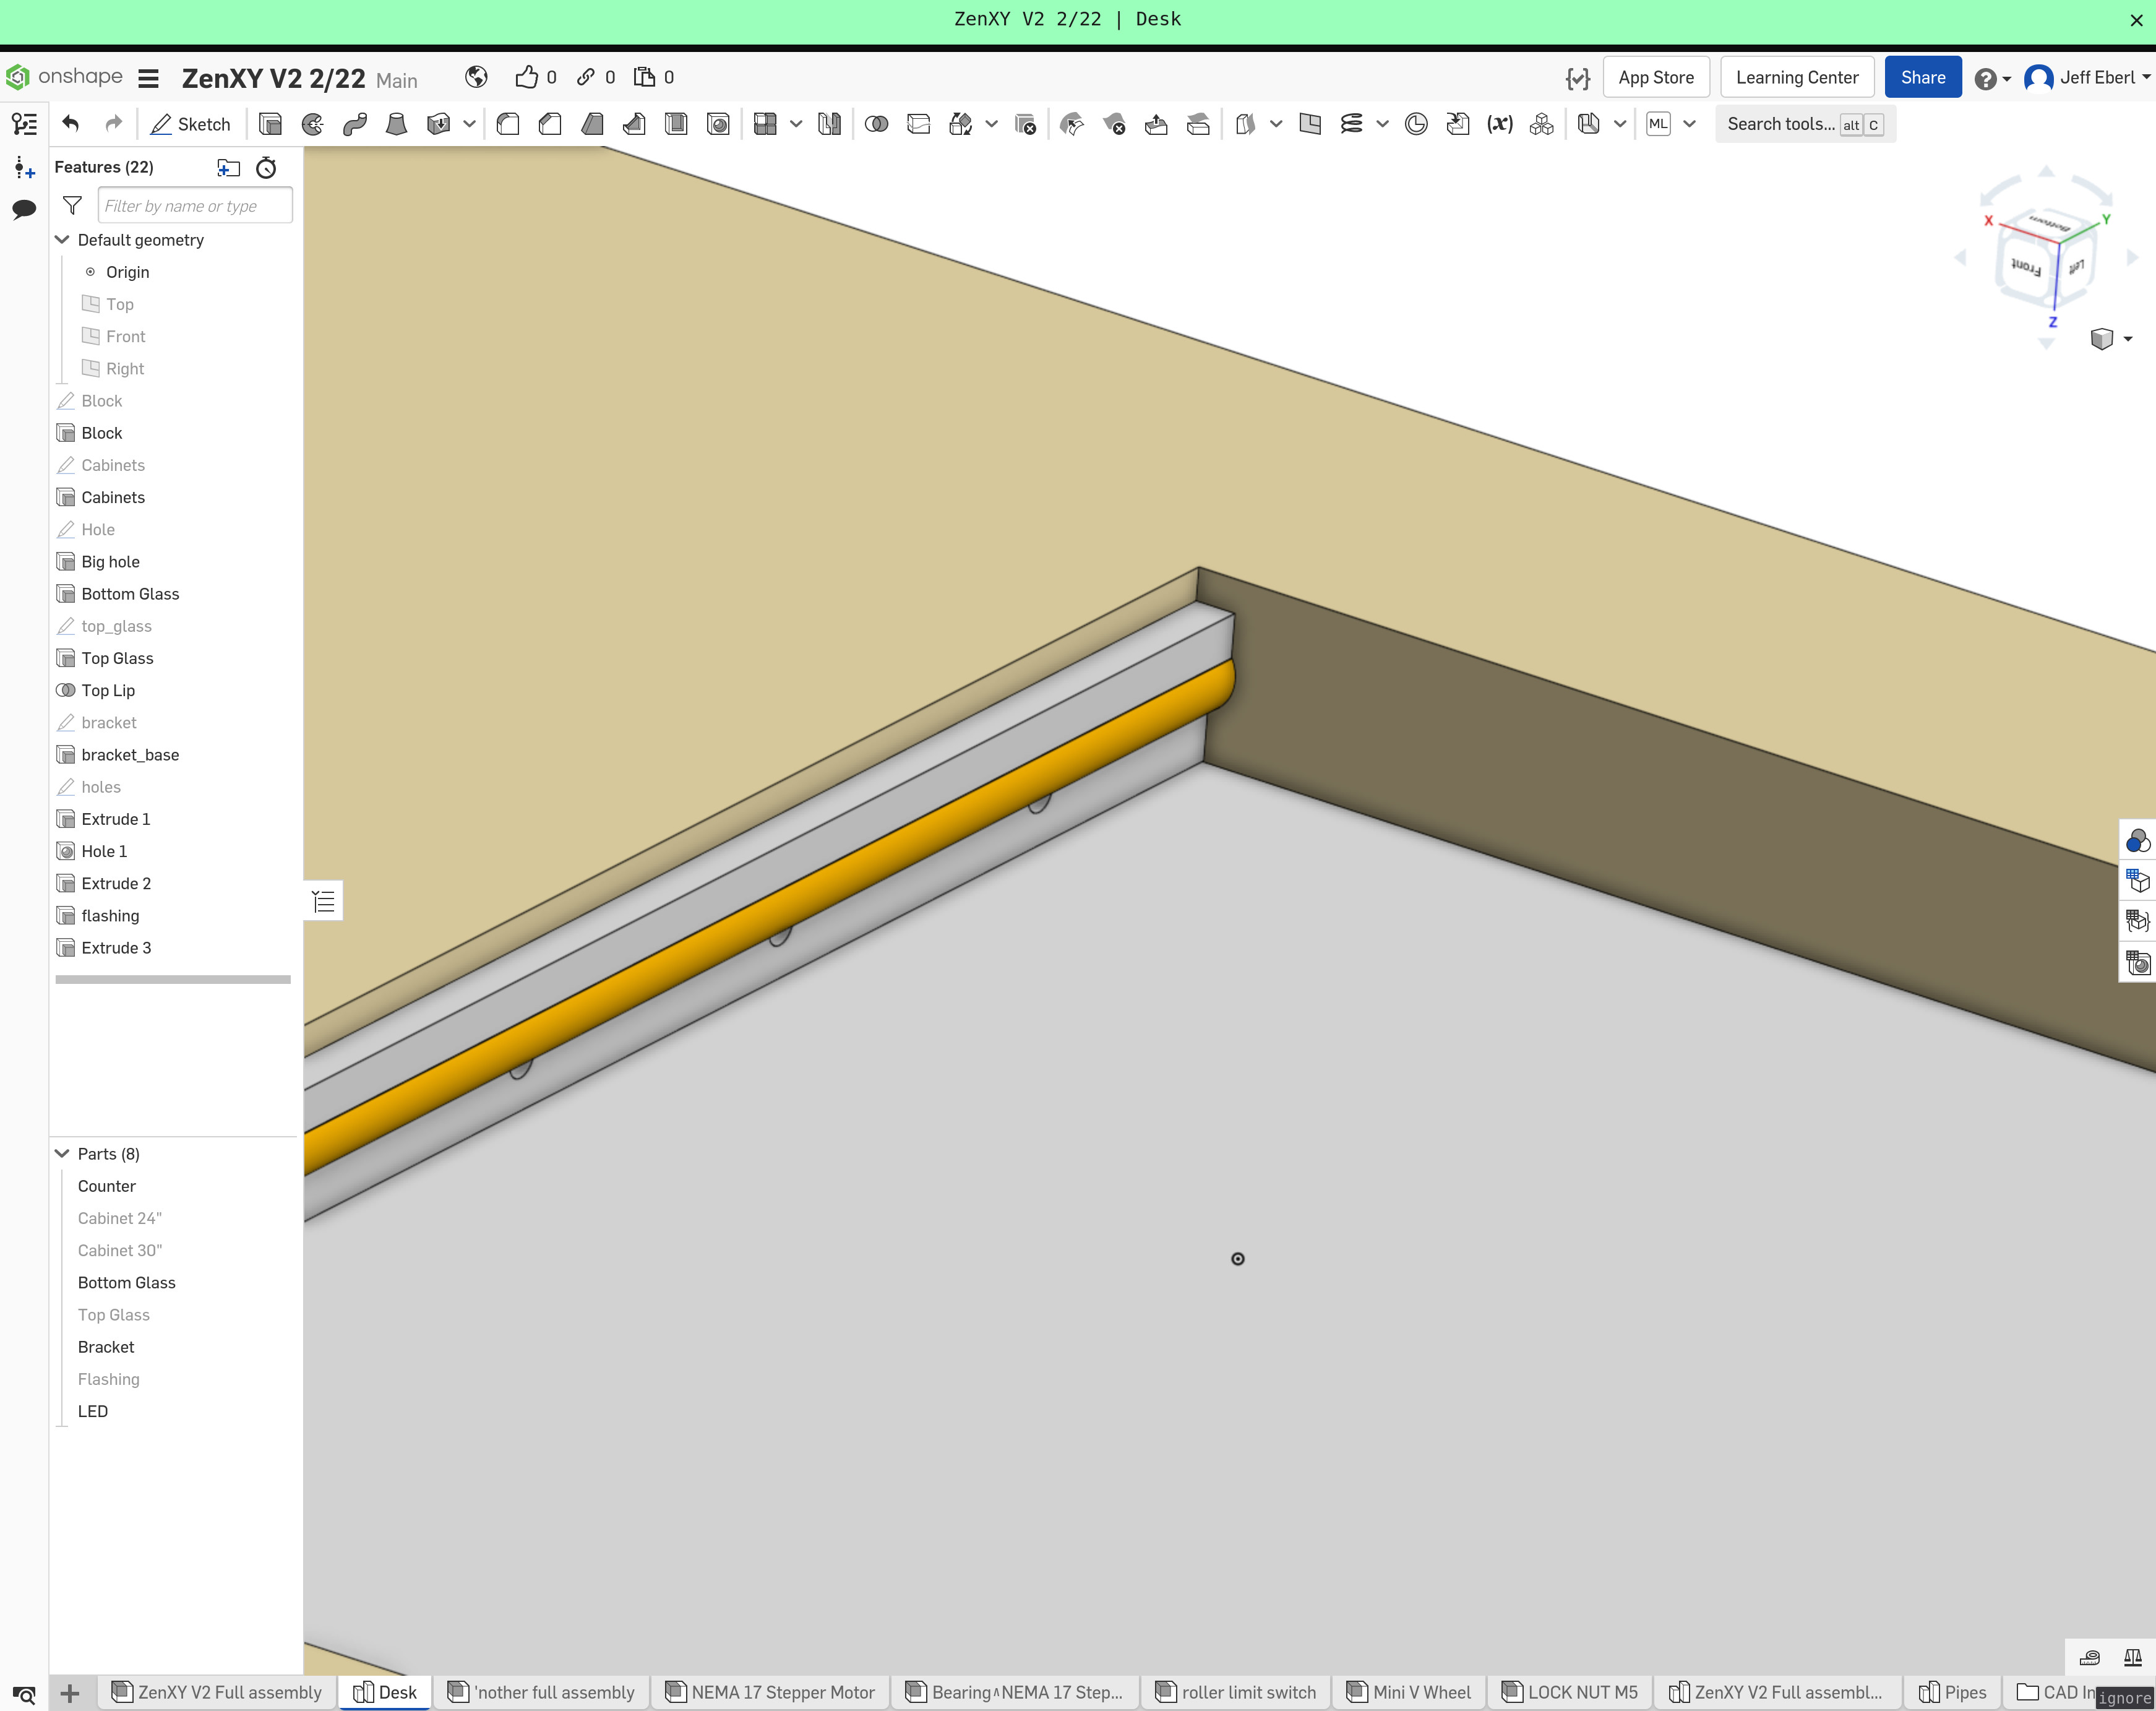
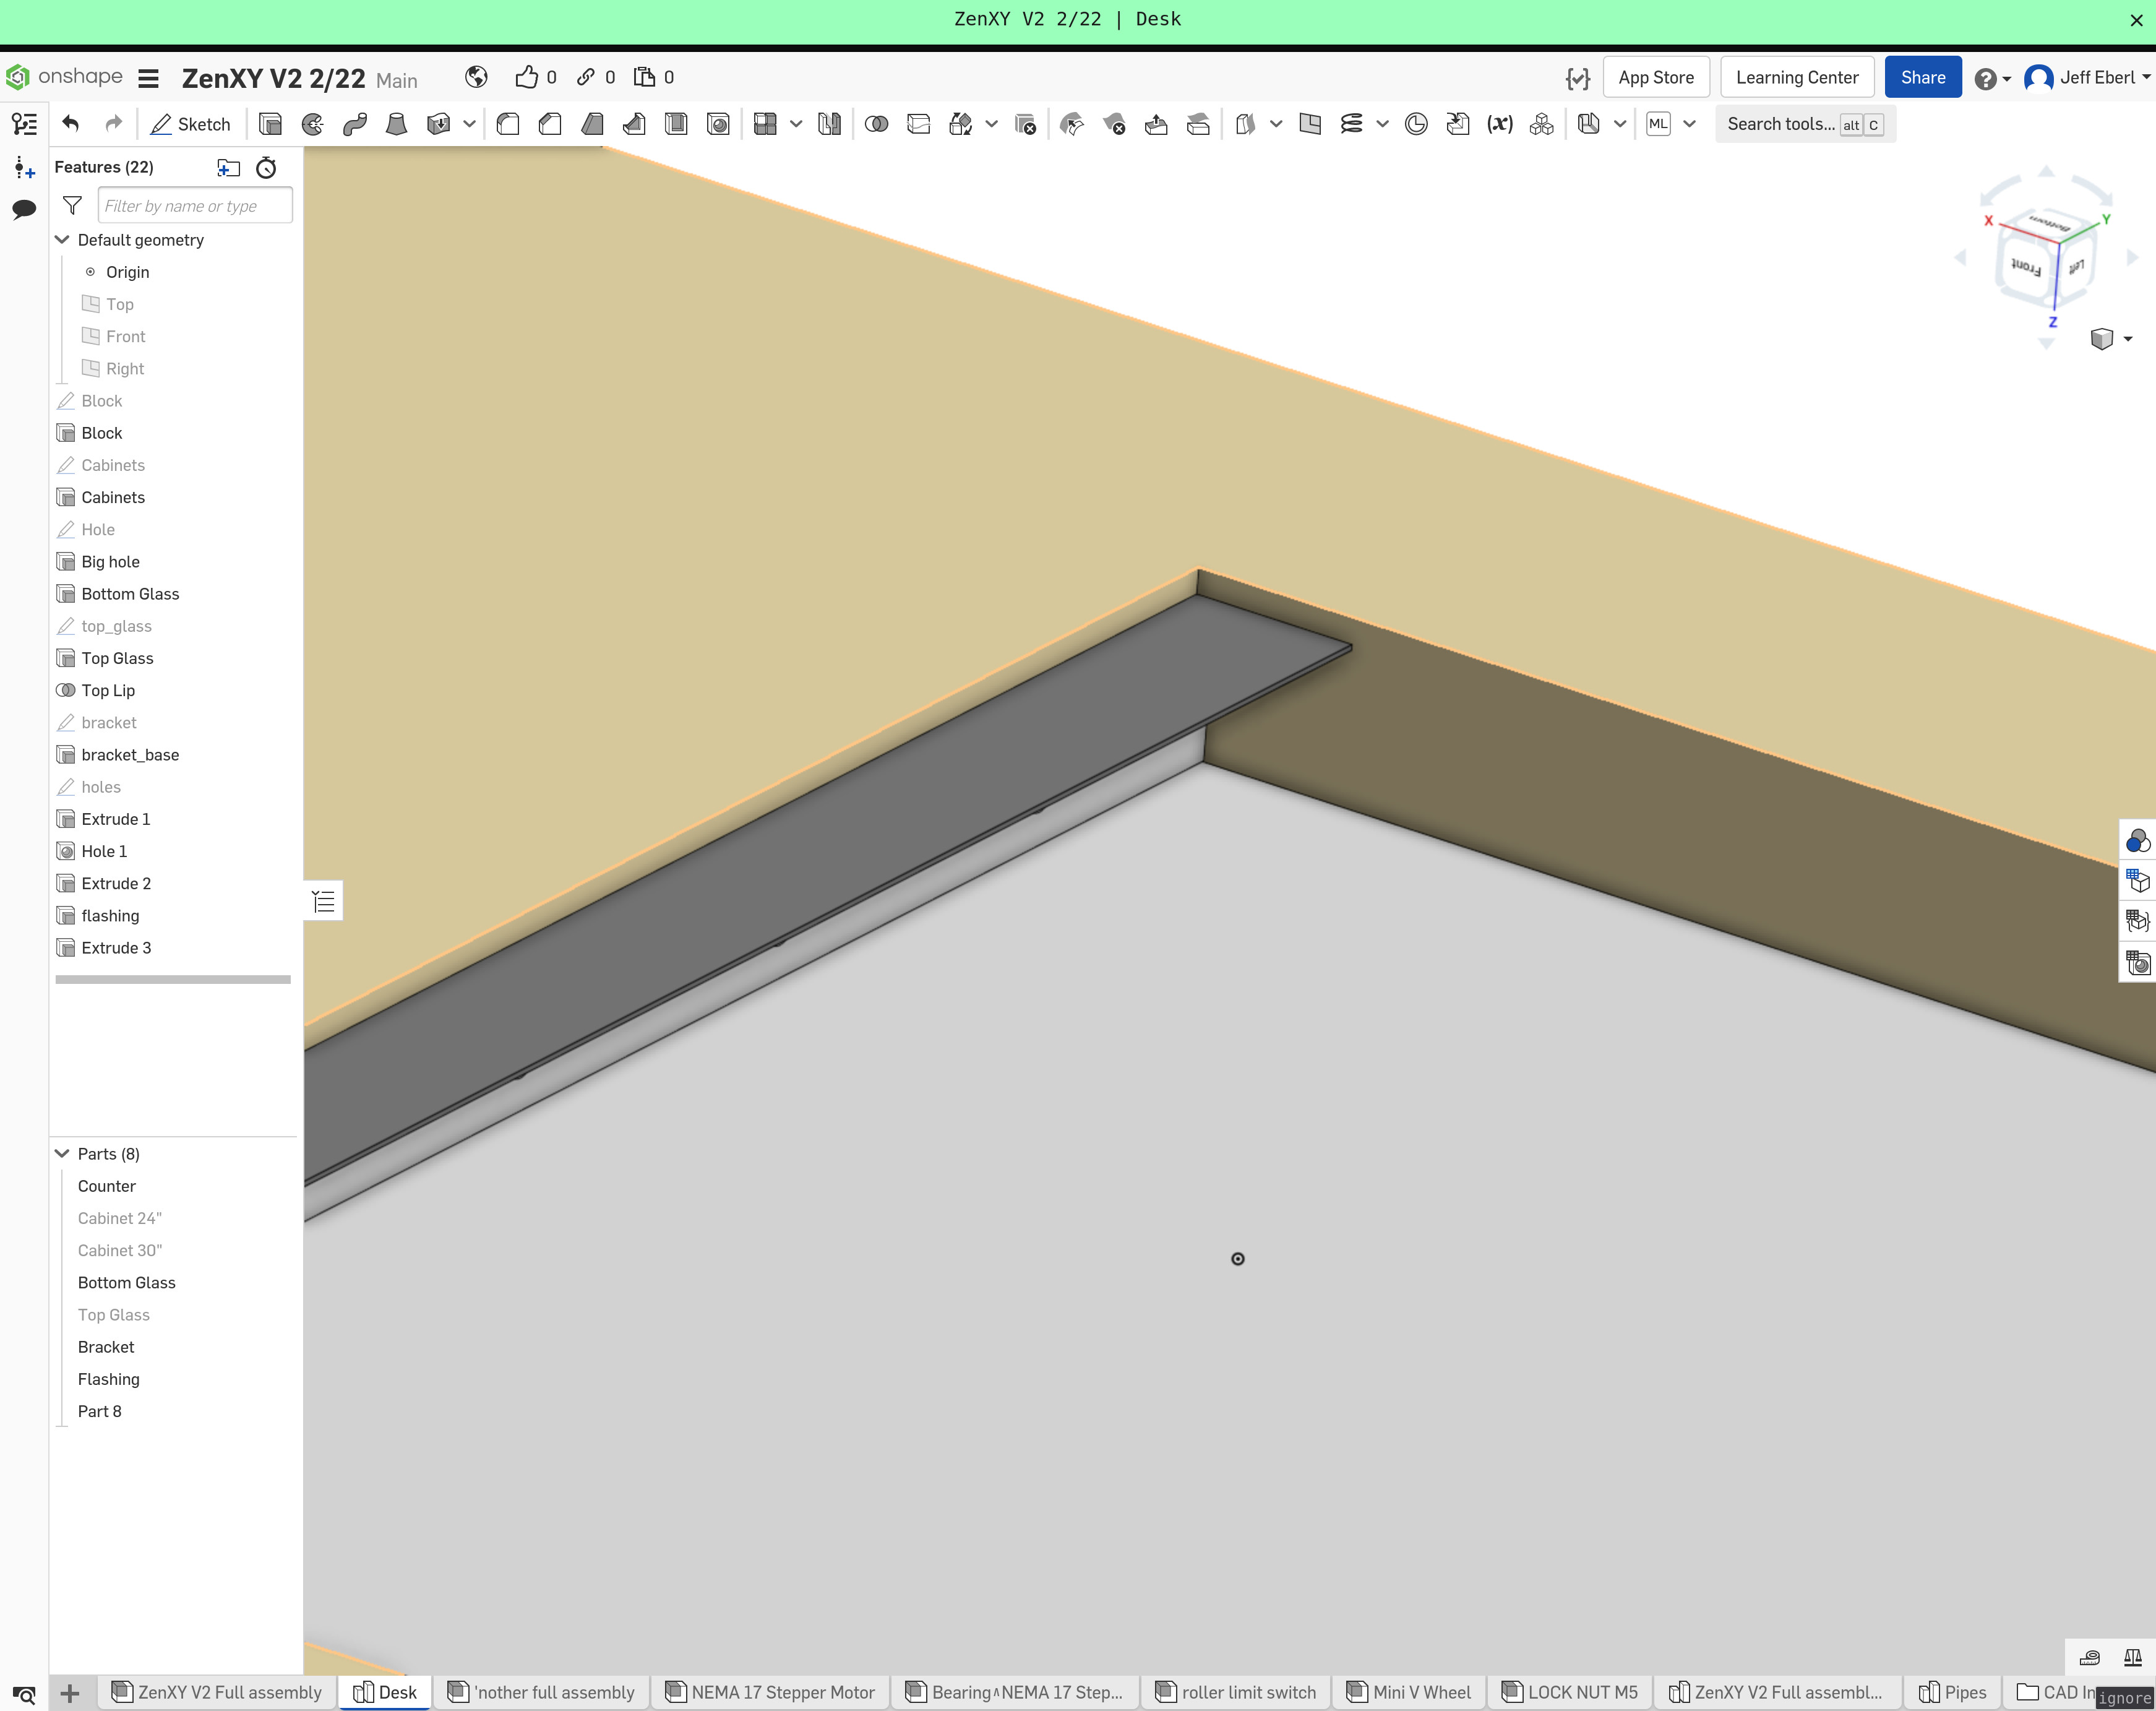
I do not want the glass in the top to fall through. I would rather it break. I think people will be careful not to lean on a floating piece of glass, but breaking before falling seems like a decent rule of thumb. This may affect the print direction of the brackets.
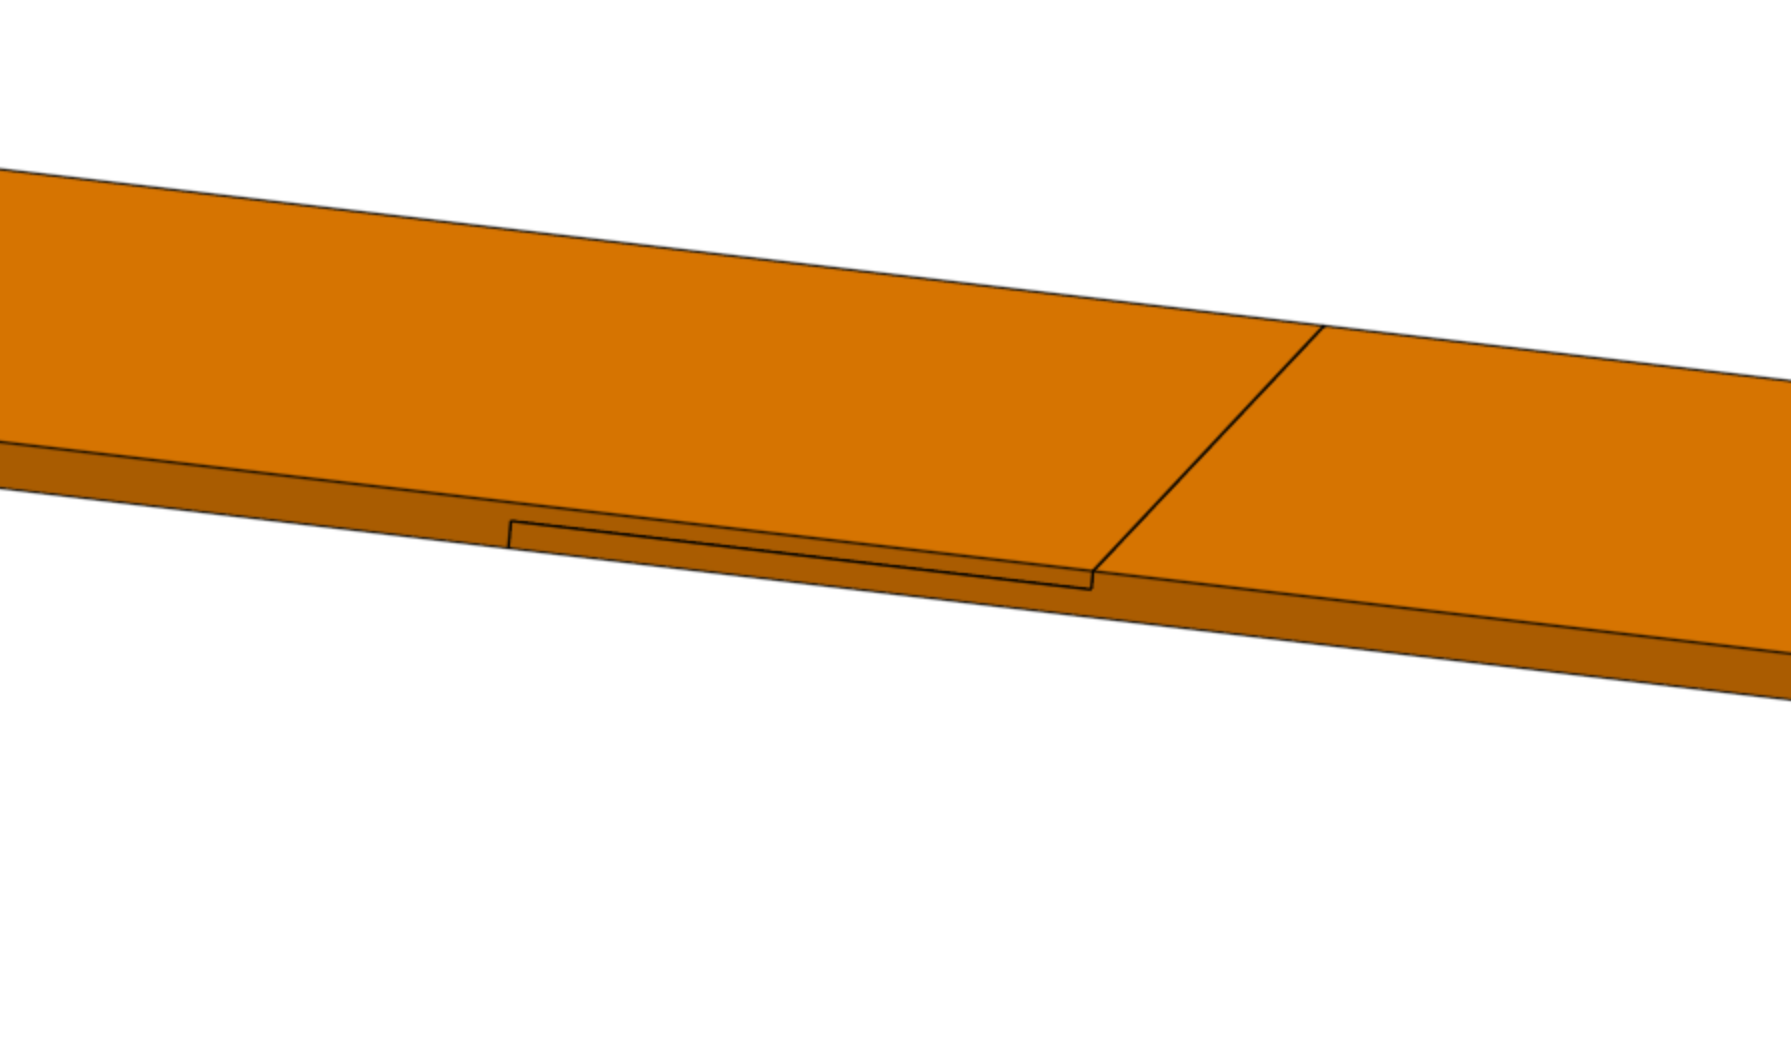
So this is what I am thinking. Cut a straight hole, on 4 sides (I will probably rough it out with my circular saw or my jig saw, and then file or chisel the corners square).
Print a bracket to be the strength to hold up the top, and fit the glass into the bottom. The bracket is drawn full width, but I would probably just cut off the last 0.5in, or make it a miter. I will have to print it in multiple pieces anyway to make it fit inside the printer volume. So maybe I will just make 2x brackets per side, with 2 screws each. The parts will be printed so the layers will be vertical, and the screws would need to break before the glass could fall through in one piece. I might need to add a small amount of wiggle room for the screws to allow for wood movement (but it is plastic, they will get moved if I don’t).
3D printed bracket (but this will probably go on all 4 sides):
Here are the steps I’m going to take for this hole, I think:
Put the counter in place, screw it onto the cabinets.
Use some blue tape and a pencil to mark out the stuff on the bottom.
Mark out the hole on the bottom. (TBD if I will do the smaller hole for a rabbet or a larger hole for the printed bracket).
Carefully square up a fence for the circular saw and cut away from the line, leaving the corners.
Finish the corners with a jigsaw.
Create a scrap template and measure the hole from the top. I will be close enough from the bottom, but not perfect. In this step, I need to be really close. Use the template and a pattern bit to cut the hole and chisel or file the corners tight.
TBD, use a rabbet bit and router to cut the rabbet for the glass top and maybe bottom.
Sand and finish the cut edges and put it back on the table.