That’s helpful. (and it makes sense when you show me). Did you make your own USB between the pi and the skr? I’m assuming you didn’t find enormous stepper and bltouch wires and you’ve got connectors somewhere along those lines?
you can get a 5’ black USB cable on Amazon for PI to SKR. I had to extend the hot end and endstop cables the hard way. It’s the most #%@!#% part of the build, tbh. the stepper cables came long enough.
When I extended my heater last time (since it is that heat resistant wire), I used those crimp on double ended tube things. What are those called… Cable crimps? By endstop, I assume you mean the bltouch?
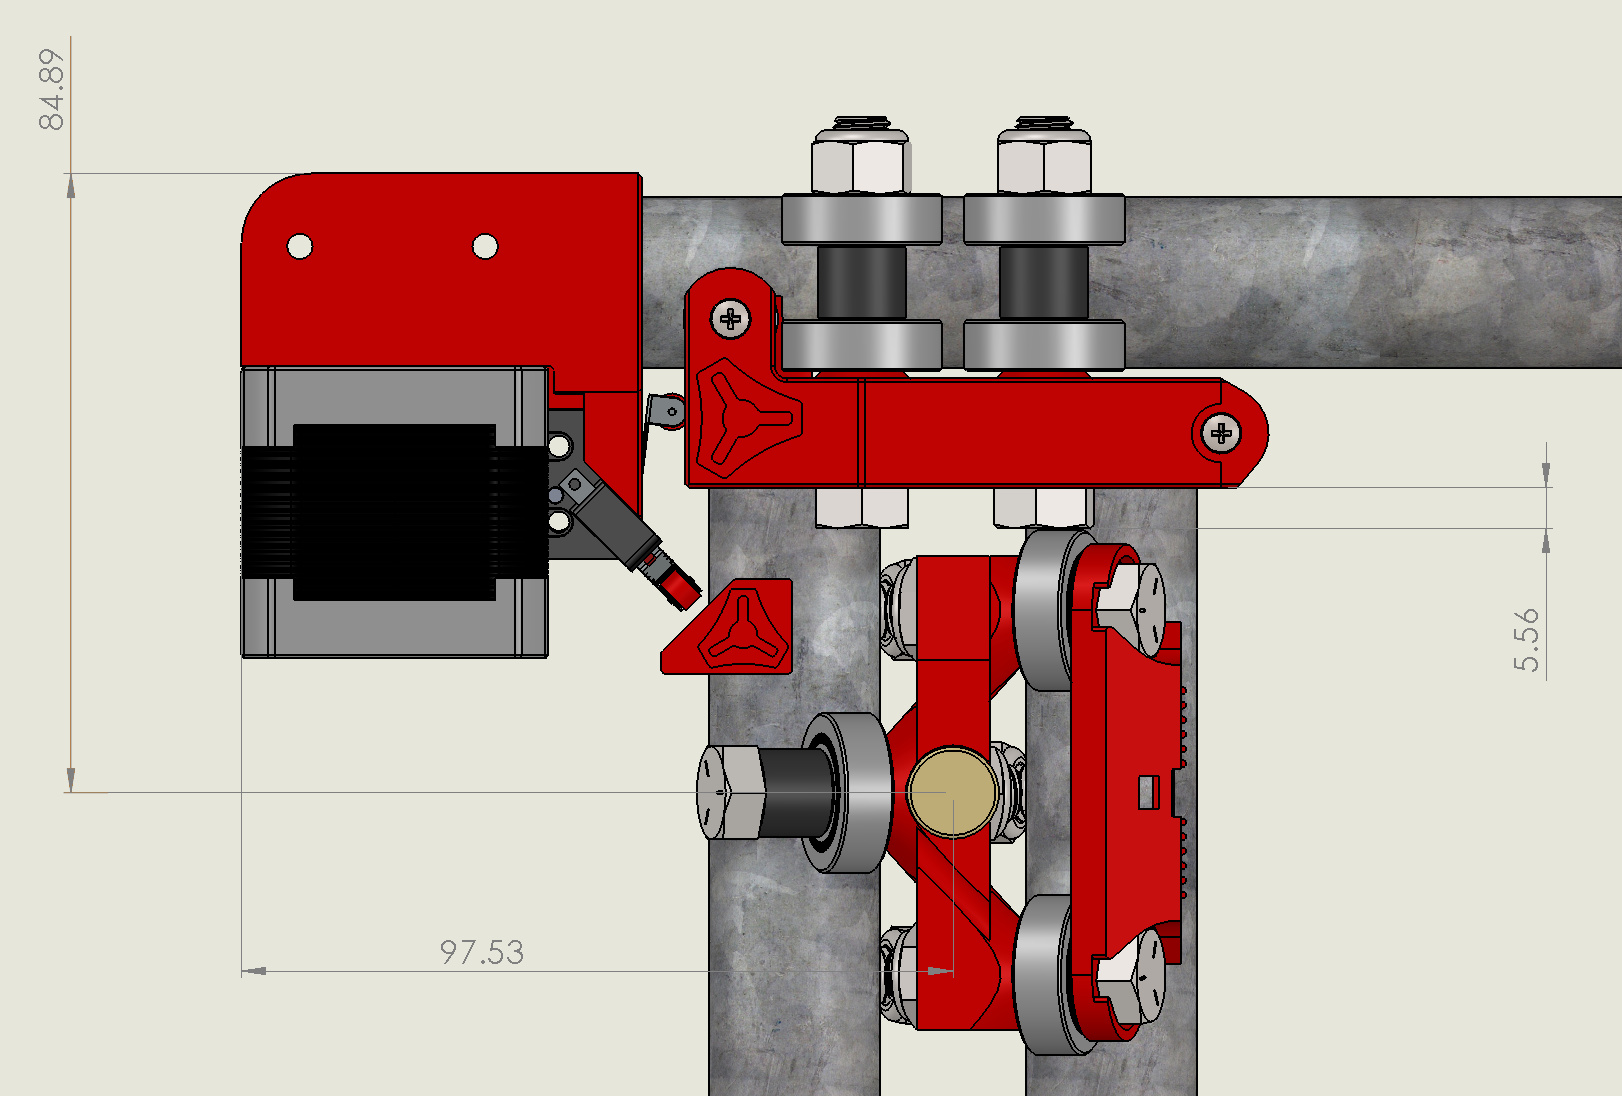
if you look closely, I re-added optical endstops to the printer pictured. was using driver stall detection, but ended up not liking it. the bltouch i got came with an extra long cable. i also mean the heater and fan wires for the hot end.
actually, one is on the head. check this out. then think about it if you put both endstops on the corner, then your homing is depending on y-first then x. which can be tricky. also, putting a endstop on the end of the rail causes cable dragging and eventual failure.
Those must be sensing the break of an IR beam. Is that new? I haven’t seen that used as an endstop before. Is that more reliable than the microswitches? Or just more fun?
I have a ZenXY machine, and it has both endstops wired stationary in the corner. You just have to be careful to home Y before X, and you have to watch out for the Y moving too far away from the corner after it homes:
The smaller corner brackets came today. I have been pretty careful to keep the frame super square, so I took my time replacing the ones that needed it. 9 total. Here you can see the size difference. The gray ones must be aluminum. They are much lighter.
So, now I can fit the linear rails in there. They make a huge difference in the feeling of completeness. Now I am thinking, “I’m done, except for the wiring, the software, the electronics case, and the tuning”
I haven’t used linear rails or 2020 before. I am assuming I need to loosen and adjust the rails and tighten it in place. I am going to use my combination square to the top plane of the frame for that.
They are pretty smooth, but not perfect. I’m not sure how to measure them, or how much drag is ok. They certainly move as well as my lm8uu bearings do, and they are very rigid in the other two directions.
There aren’t any belts yet. The X axis isn’t square. Right now, the two plastic pieces are determining its squareness. When one side touches the endstop piece, the other is about 3mm from the end. Are the belt lengths or tension going to keep that square?
Here are some shots of where I’ve left it for now:
I am making it a goal to get this moving and extruding this weekend (I don’t work tomorrow, but I have two young kids). I have all the parts but the bed plate, but I can pretend and use my 220mm one in the interim.
I"ll have to look at this more carefully tomorrow when I get up. There is a piece that ensures exact alignment of the x rails to make then square. If it’s not in the model (it was in V1 for sure), I’ll post it here.
Once the X rails are aligned in the middle of the extrusion, you will need to make sure the mounts into the pillow blocks are tight, but the y rail is not fully tightened onto the printed angle connector. Run it front/back on the x rails to look for interference and to ensure the y rail is set properly into its mounts. Then tighten it.
I put all the links in the first post. It is 300mm^3 or so. I think 310x350 might actually be possible. The bed does raise and lift. The xy is corexy.
It is similar to a railcore, blv mgn cube, seckit sk-go, hypercube, dbot, ultimaker. But not exactly like any of these. It is Stewart’s design. I’m enjoying the build so far.
I have been surprised many times by this build. I keeo thinking, “This won’t work”. And then I put it in the right place and I’m suddenly aware of how well it is designed.
The belt clips on the hotend mount. They seem small, thin, flimsy. But I can put an enormous amount of tension and they hold firm.
After I made the belts taught, but not tight with zip ties, I tightened one motor all the way and then it got way out of square. It is clear now that the tension on the separate belts that moves that side forward or backward. So I loosened that side and added a little tension to each of them, watching the corners and I have a good amount of tension and it is holding super square.
Stewart, admit it. None of the corner screws on these motors are tight, are they? I can almost get a tiny allen in there, but I am happy just making the others do the work.
That’s what I meant. The one screw in the corner for each motor. I was thinking maybe I could do it in another order, but I decided it didn’t matter that much.
once the belts are reasonably tight and double-zip tied, then I pull the motor back against the belt for full tension and tighten the screws. i do this with the Y axis at the home position to ensure both belts have the same tensions. if they do not, the x rail will not seat exactly on the home corners (the square bits on the end of the corner cover)
 if you put both endstops on the corner, then your homing is depending on y-first then x. which can be tricky. also, putting a endstop on the end of the rail causes cable dragging and eventual failure.