this is my first time using a CNC machine and I am very lost. I finally finished wiring the machine and endstops and started the fluid nc UI. I think I understand the concept of needing to get the machine at zero then clicking home for it the track the size. After that now what do I do, do I need to zero and hone it every time I use the machine or do I export the code to the ESTL firmware and reuse that.The machine was built for 4x8 sheets and I’m using the JACKPOT3 controller. Please help…
Hello and welcome! It can sometimes be a bit overwhelming at first but we’ll get you sorted out.
In general, you should home the machine every time you use it. At least at the first startup. This does a couple important things. Once the machine is initially configured to be square via pulloffs, homing the machine will re-square it. It also will let the machine know where 0,0 is in machine coordinates so it can accurately return to the same positions.
I think you might be getting some terminology confused. The Jackpot is the controller which runs the FluidNC firmware. FluidNC includes a WebUI that can be used to run gcode files, home, jog, zero, etc. Estlcam has 2 parts: CAM (defining toolpaths for a DXF/SVG and creating gcode) and control (but this only works with specific hardware, not the Jackpot). So, we just use Estlcam for creating gcode, then upload via the FluidNC WebUI and also run it from there.
Typically, the general workflow looks something like this. Use Estlcam to create gcode, upload to FluidNC via WebUI, attach the material to the spoilboard, install the endmill, jog to the position where you want to start, and then run the gcode from the WebUI. The gcode will typically set the current position as 0,0.
What have you done so far? Have you squared the machine? Installed the strut plates? Drawn the test crown with the already prepared gcode? Drawn the test crown with gcode you created yourself in Estlcam? Just trying to understand where you are at.
I would highly recommend reviewing the milling basics and Estlcam basics.
So far I only did the zero and honing of the machine. I’m not sure if I can’t move forward because I never bought the touch plate because I thought it was optional. So EsT. Is just for writing the code and fluid nc will run it right?
It is optional but recommended. You can get by without it for things where you are cutting all the way through like the strut plates. Without it, it will require a bit different gcode than what is described in the docs. Instead of gcode that zeroes X and Y and probes for Z, it still needs to zero X and Y but you would also have to set the Z starting point manually as well. When you get there, we can help you through that. For the test crown gcode that is already prepared, you don’t need a touchplate at all.
Thank you all for the replies, I’m so amazed with the fast replies! I decided after 14 hours straight to give up and pick it up tommorow. I will try to run the crown cutout as well. My goals are after the crown works, I want to cut out the struts and/ or prior to that level out the board. I would really appreciate some guidance on the leveling through CNCing the base board.
Also to preface the use of the this machine will be to cut out letters for signs, mainly acrylic or some sort of 1/4in plastic boards. I don’t plan to use it for anything crazy detailed just yet, strictly just cutting.
Always best to take a break, but I highly suggest to ask here ASAP next time. Some stuff is stupid simple things that we all just look over from time to time. Other times we can help solve a mystery before it gets too frustrating.
The crown will do all the same exact steps as cutting struts so, it is very very worth the time.
use the premade code, then make your own…then the struts should be pretty easy.
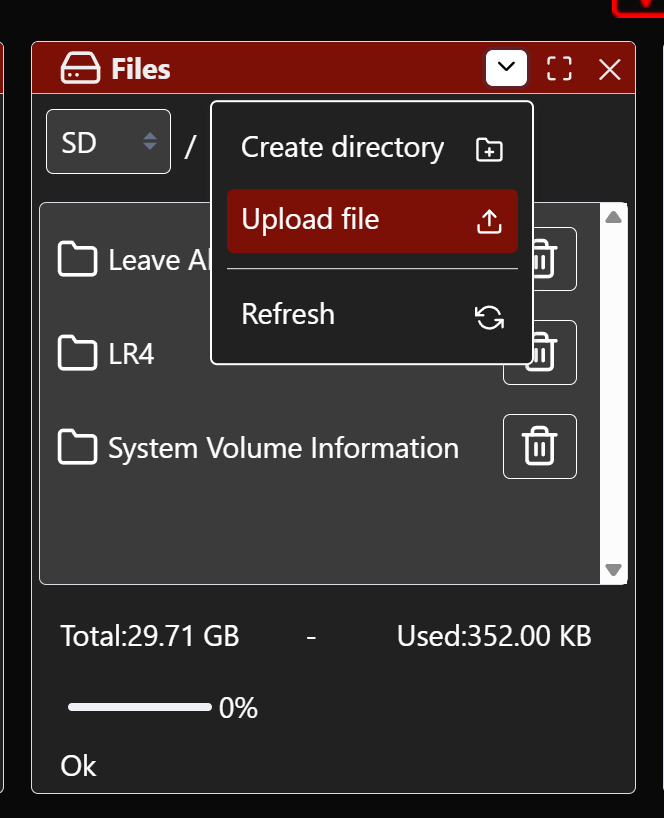
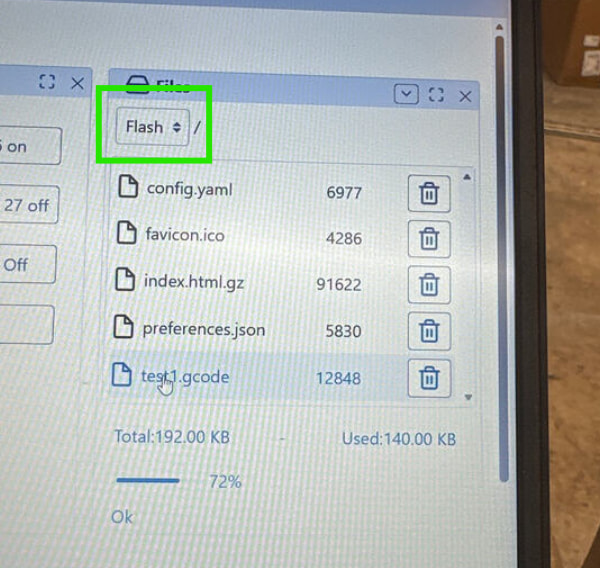
2 ways. You can remove the SD card and take it to the computer you made the gcode on and save it to the SD card, then reinsert it in the Jackpot and get it there. Or if you are wifi connected to the jackpot from the computer your gcode is on, you can pull up the webui on that computer and either click upload and chose the file, or drag and drop it and upload it.
It was great to speak with you @Laithrayyan! Your doing better than you realize! He was able to get 2 successful crown drawings from the test crown gcode so that is great!
Work on cleaning up that wiring in your control box. That seemed to clean up the wifi disconnect issues and hopefully will continue long term.
Here is the start and end gcode for estlcam since you dont have a probe:
Start Gcode:
G21
G90
G94
G92 X0 Y0 Z0
End Gcode can stay the same. You said you don’t plan to do any tool changes so you can leave that code off. Without a probe its best to separate different bits into different jobs anyways.
I want to start off by saying thank you to each and every one of you for your help and a special thank you to Jonathan! I am at the final step to make my strut plates! before I CNC them I want to paste the gcode file and get some input. I am not using a touch plate.