Hello and greetings. I’m new to the maker world, though have been a bit of a tourist for some time. I recently received my first 3D printer, and have started looking at beginning a LR4 build.
I started by reading through the LR4 docs and the printing guide in the engineering docs.
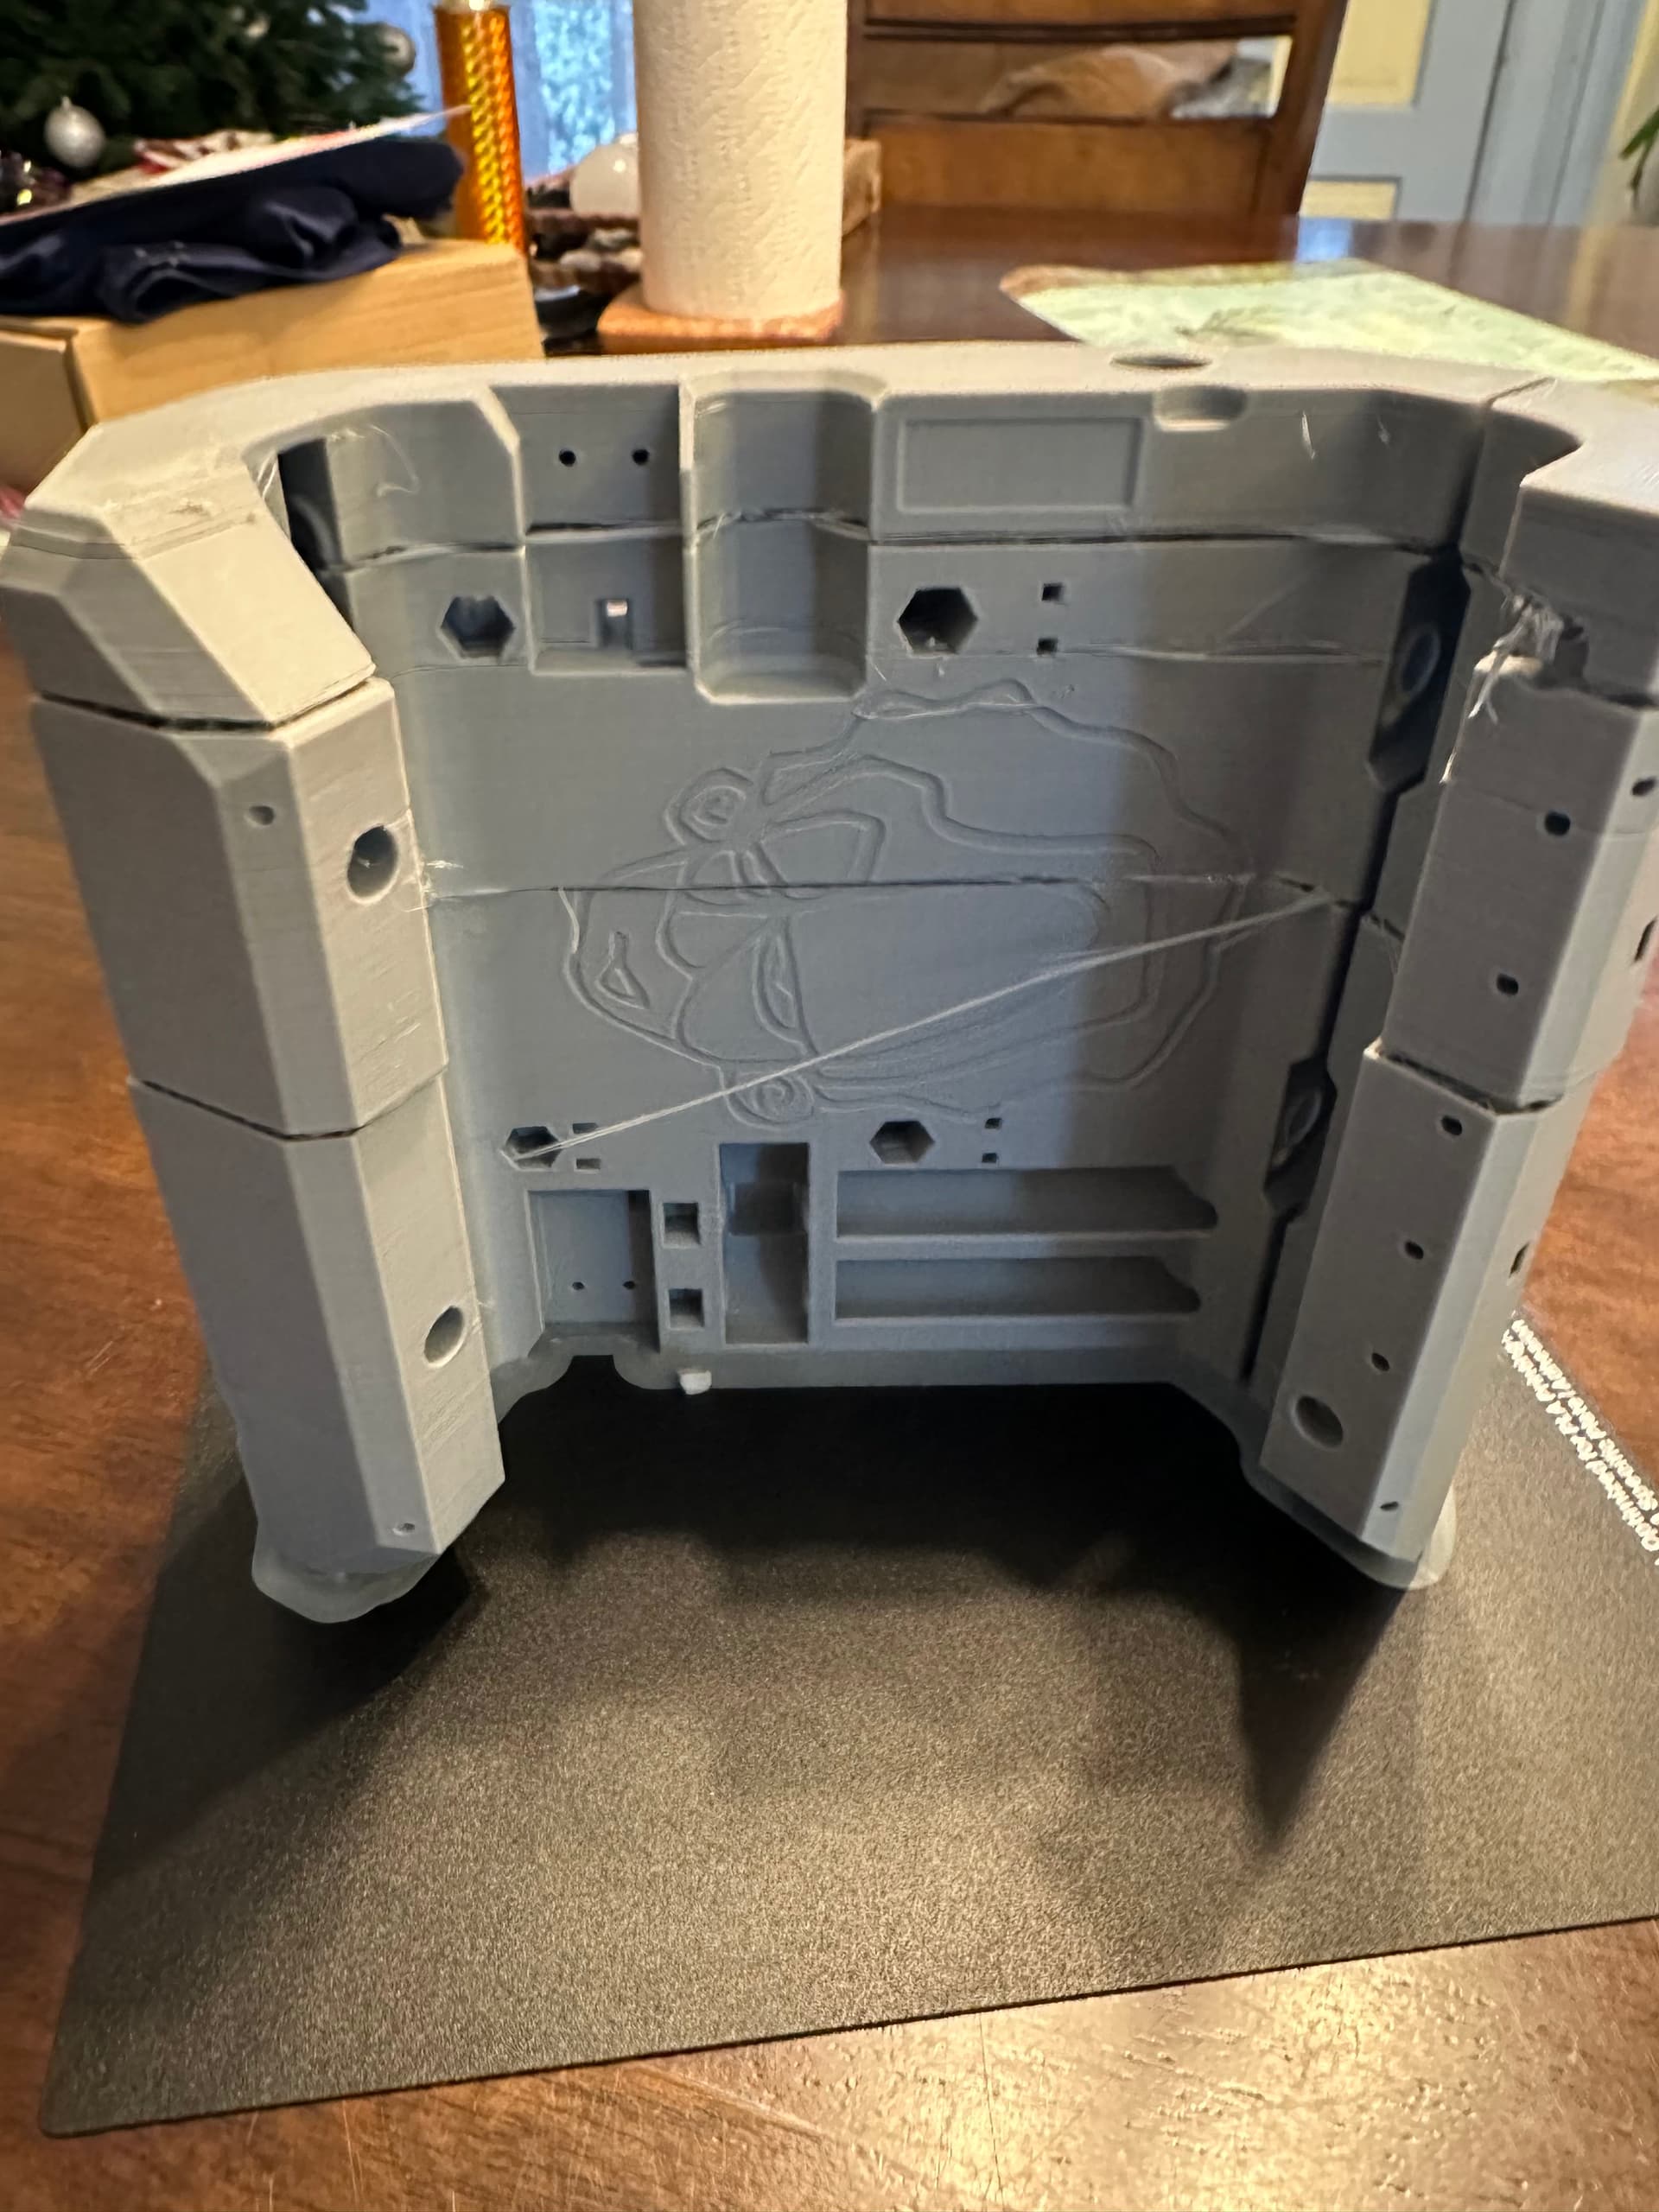
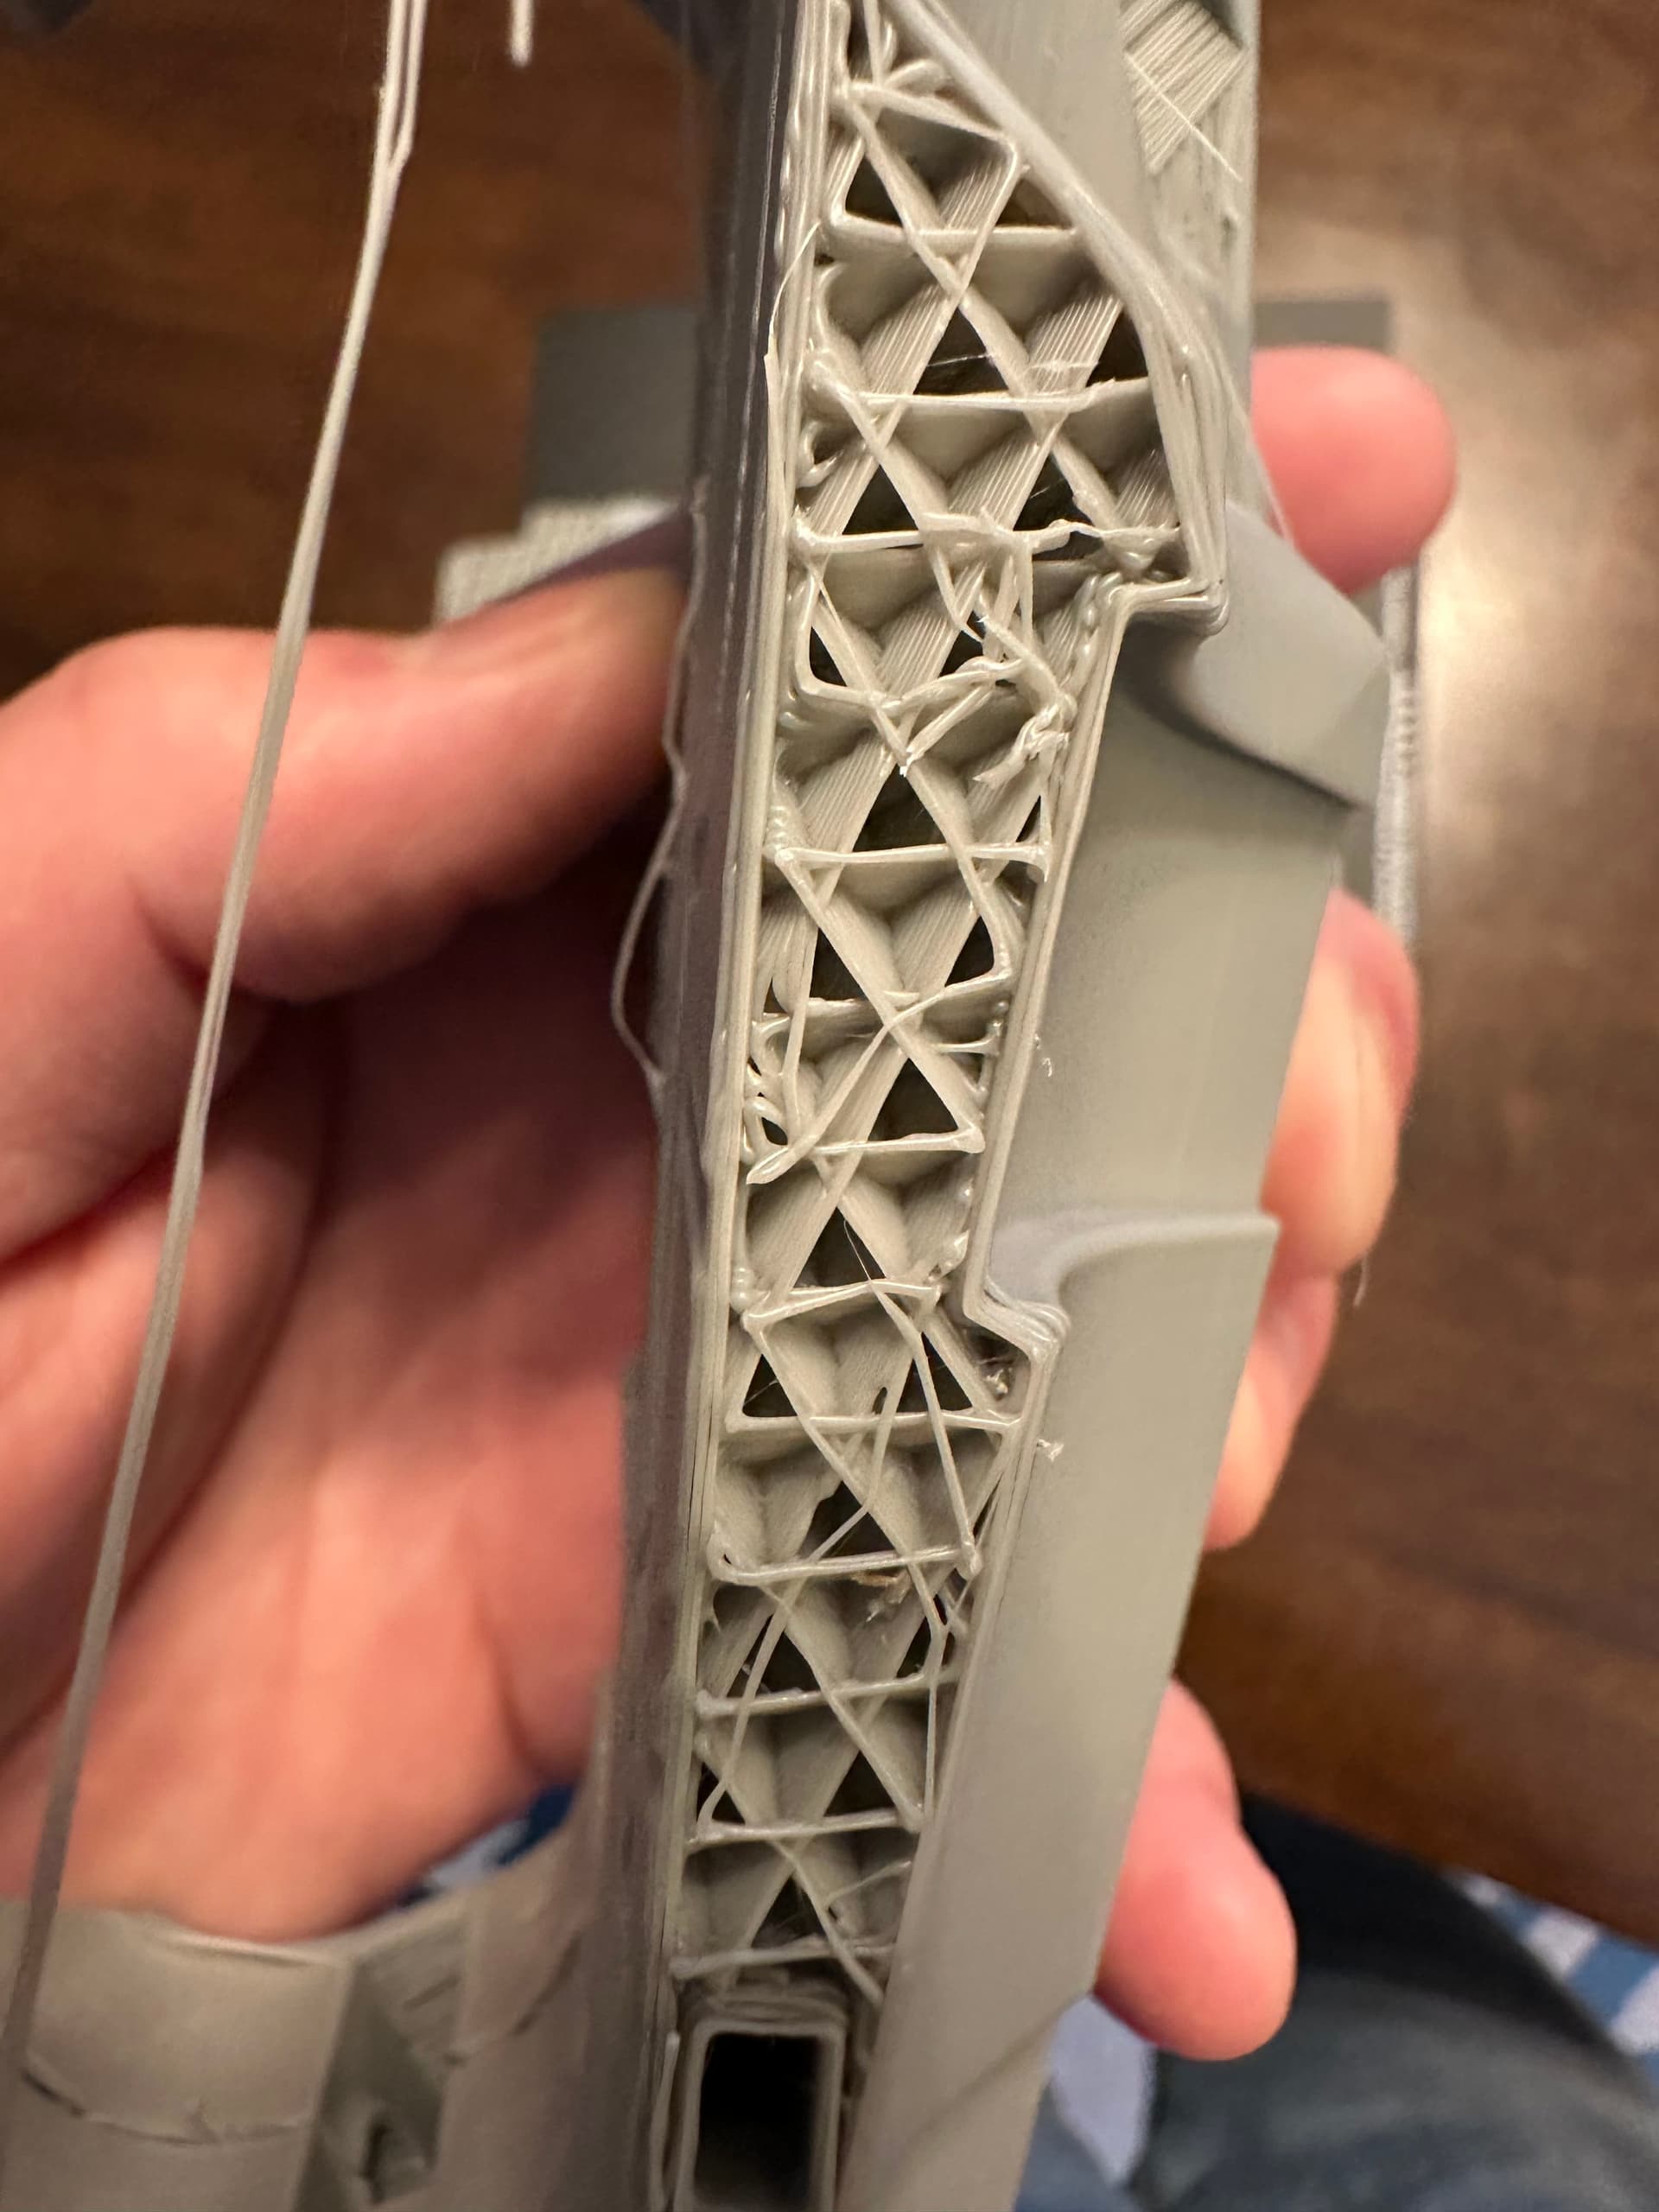
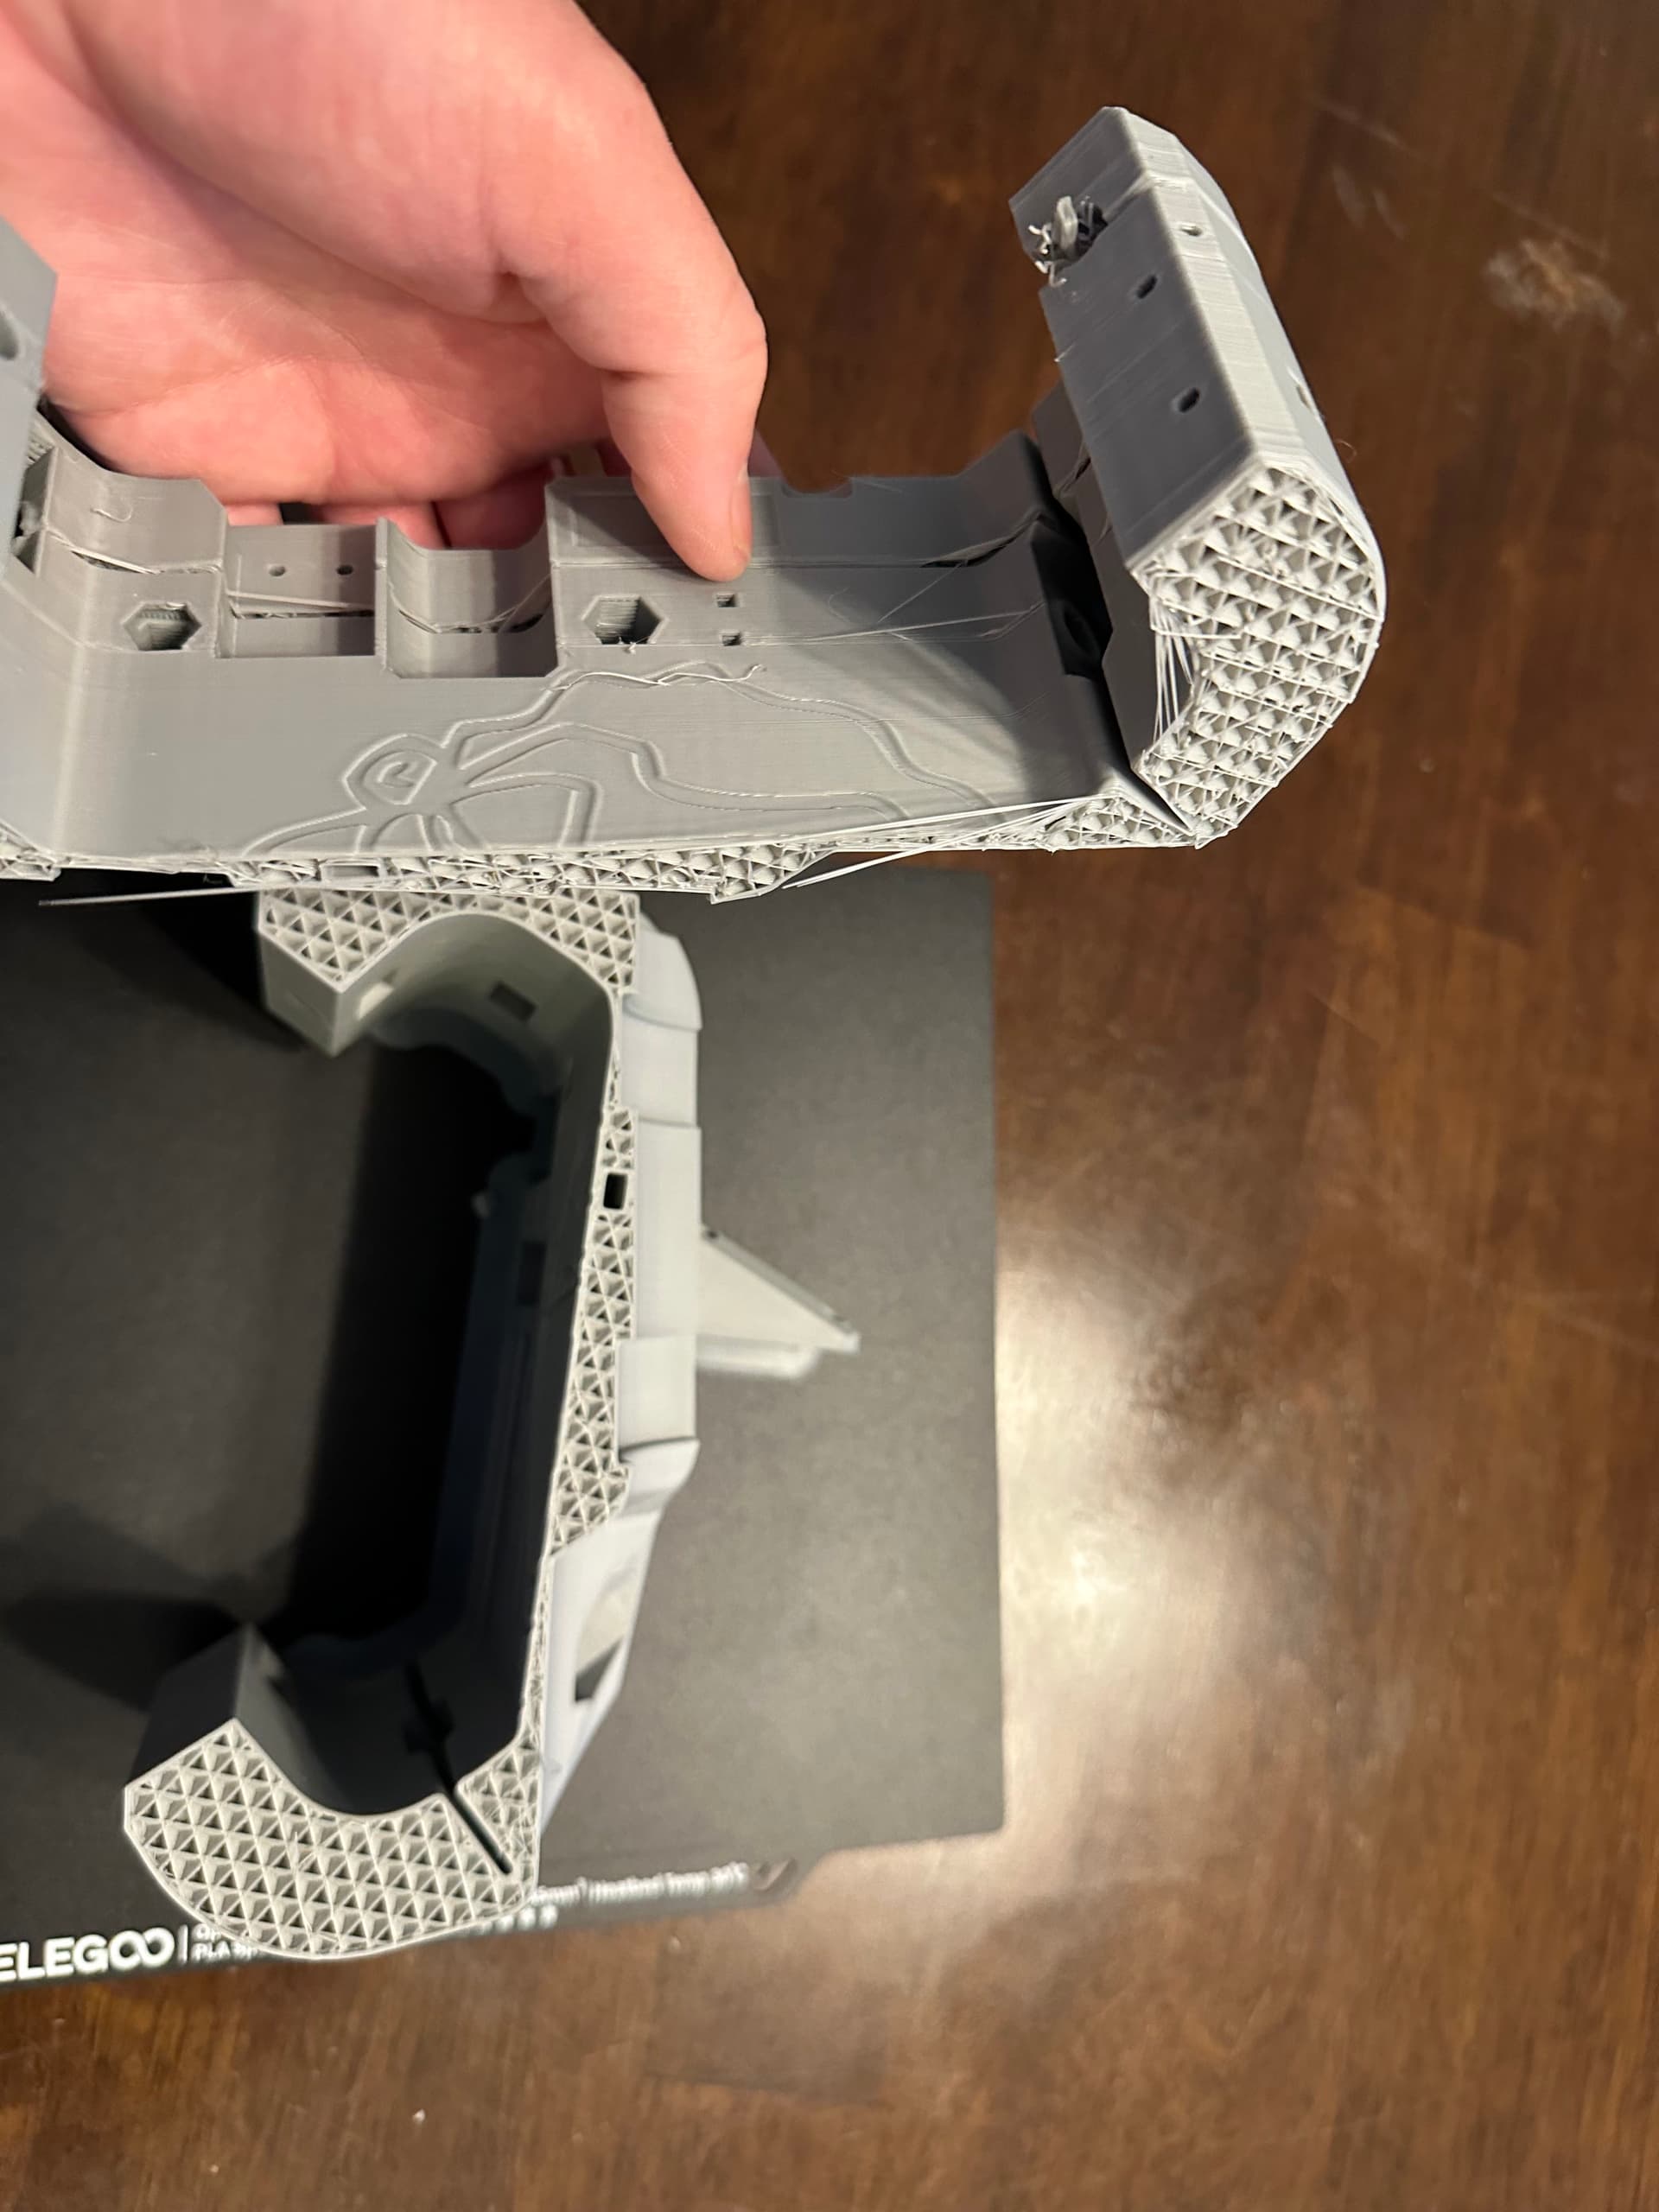
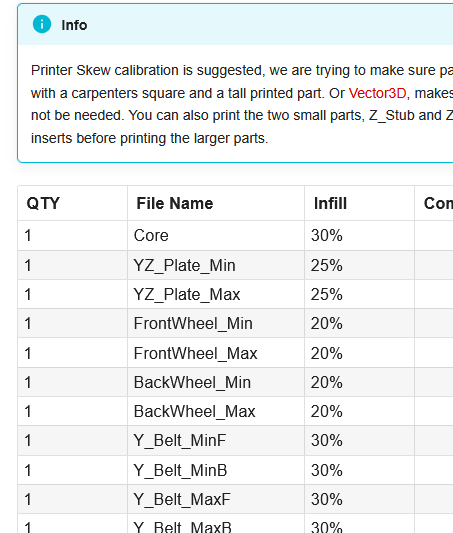
My first print job was an attempt at the Core part at the top of the list linked above. I started it in the evening and it finished some time in the morning (12+ hr print). When I checked on it, I saw that there were several layers that seemed to not adhere properly, a few critically (the pieces fell apart when I tried to pull it off the plate). Are there any known causes, tips or suggestions on getting a successful print?
Few details;
Printer: Elegoo Neptune 4
Filament: Elegoo PLA+
Slicer software: Elegoo slicer
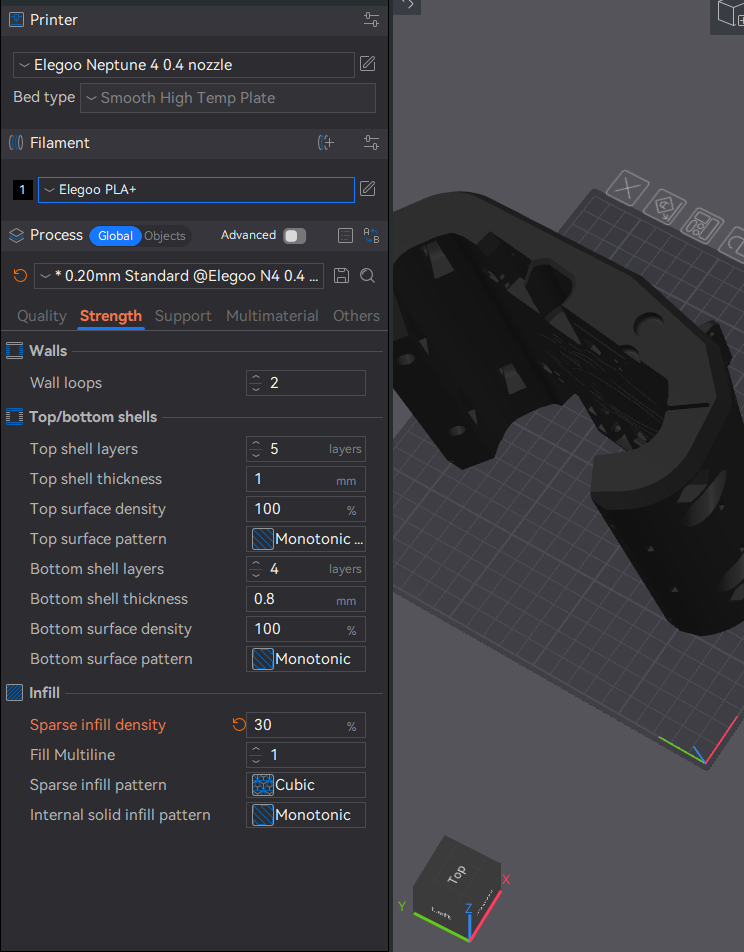
I ensured the settings in the software were correct, including infill @ 30%
My first assumption is there’s something causing intermittent filament heating/feeding, such as print head/nozzle..
(I can provide links and pictures, the forum just isn’t allowing them on my first post apparently)
Thanks for the quick info! I’ll def check out Orca - I bought the PLA+ specifically with this project in mind, thinking it’s a higher grade - one more L in the ‘assumption’ category I guess…
I do have plenty of regular PLA, so I’ll try with that. I have had an issue with a previous reel of filament tangling pretty bad, but this batch looked like it didn’t have issues outside the layers printing poorly..
I’m 100% open to any and all other printing suggestions, as I’ve only had one for about a week!
PLA+ is “improved”, unfortunately that improvement is elasticity.
It makes the parts less likely to break on impact and in case of a lowrider, makes the machine less rigid. Not worse in general, but worse for a cnc machine.
As a complete noob, I started with a Benchy, then did some calibration prints, then printed all of the smaller parts before attempting the core. I had a few failures, learned a lot, and made some tweaks before printing the core without issues.
Many users recommend the CaliLantern as a calibration print before printing the LR4 parts, just to ensure that there’s no issue with skew or sizing.
Greetings, and welcome to the V1 community forums!
Always a good start.
Yes, there are. You need to tune your printer, and your slicer, and get some more experience with making it work right before you’re ready to print a core.
As noted above, PLA+ is less suitable for a CNC because it is less rigid. It also takes different printer profiles as the additive packages make it really a different filmament than regular PLA.
You appear to have bad layer adhesion. This may be from too cool a print setting, wrong cooling, extruder issues, slicer issues, or filament issues. We will need to work that out.
That’s a good suggestion.
A common mistake. + means better, right? Not for this application.
Very well stated.
Agreed. YOLO’d it, and failed. Now it’s time to learn and improve and you’ll be on your way to a LowRider build in no time.
Calibration and tuning are needed for sure- with the material you are ultimately going to use. (different brands of PLA even are different- there isn’t a generic that is perfect.)
Zero you need to do some temp towers, some flow testing, and then get things right with a good calibration print like Bartman’s suggestion of the CaliLantern. There are others, that’s just a great general recommendation.
Oh, my first print wasn’t the core module, just my first for the LR4 project…
I’ve been getting the hang of the software and machine in order to feel more confident (less un-confident?) and have a few other ‘side quests’ active, including a gridfinity project.
If there’s a recommended starting point / order, perhaps that should be in the documentation. I noted that it mentions the z_Stub and z_Nut parts, but as I’ve done a decent amount of printing other things, I’d thought it unnecessary.
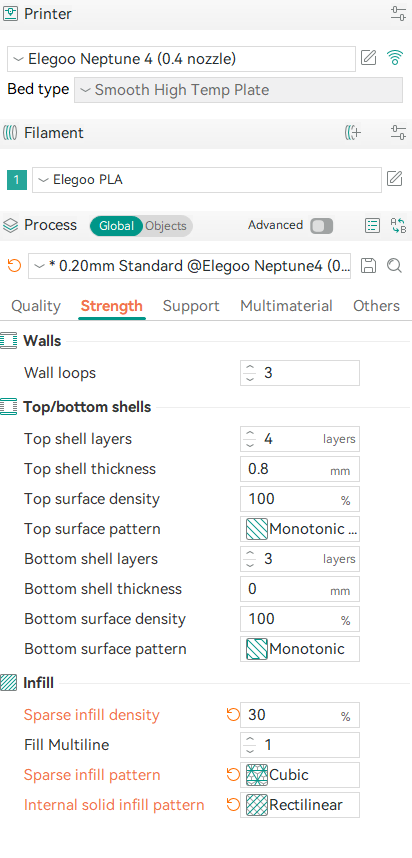
So apparently the Elegoo slicing software is based on / a fork of the Orca software and looks identical. Does this look like the proper settings for a 30% infill?
How many of those things required dimensional accuracy sufficient to use for a CNC machine?
Most prints are very forgiving of poorly calibrated or executed prints. These are technical parts. Very doable with most printers, but requires a next level understanding of the machine and processes.
Agree with @MakerJim here. And the previously mentioned Calilantern will help a ton. Very much worth the cost. That is assuming you have a printer you can make the adjustments on. Have zero experience with any Elegoo printers so I cant say if you can or not.
I made assumptions. I saw I was wrong. I came here and sought help. As I mentioned, I am a newb. I’m just looking for some advice on using my machine to successfully implement this project’s instruction.
I’ll for sure do some research on how to fine-tune my printer. I did all the manufacturer’s recommended calibrations, but as I’ve been made aware, it was insufficient for the needs of this project.
It may not have been insufficient. BUT it is wise to double check. Print errors can cause MANY hours of troubleshooting later. Would be best to know your prints are on point.
We say all of this because we learned from experience ourselves. My first LR3 was printed with PLA + It took me forever to believe that it wasn’t just as strong. But when I reprinted all the parts and did it from standard PLA I was very surprised at the results.
FWIW, this printer is a Klipper-based printer, so I have the fluidd web interface available, which I hope is sufficient for the needs of fine-tuning to the requirements of a CNC project. I am currently looking through a guide on tuning this printer found here: p3d.mx/blogs/3d-printer-review/tuning-elegoo-neptune-4