What about a daughter mount that was the full wiring umbilical mount and another that was an EBB mount with the umbilical mount on it. could be a three point mount using the back two bearing block bolts and the top extruder mount?
1 Like
EBB?
The idea was get the basics done for the top, belts, and endstop(which might be done) all extruder and can stuff could be easily added to the CAD after.
So provide a blank slate. People can modify and share their specific tops. The biggest issue here is there are sooooo many variables in terms of hot ends and electronics.
1 Like
Oh…Yeah you will need to add some sort of standoffs to the printed top, If you are using one with an accelerometer I believe it needs to be in 90 degree increments? In that case I would definitely mount it flat (XY plane).
With that in mind I will try to move the umbilical all the way to the front edge to leave room. I can then make one as an example config and hopefully the posts can just be moved to suit whichever one you get.
I don’t think I will be using one.
Man you really should try it. SOOOOOOO much better with just the 4 wires going to the head. And for your farm when you need to change out a fan or something it’s just a little short wire. No need to deal with running the wire all the way back to the board
1 Like
I have an idea, I might try that first.
What is the entry barrier for CAN BUS? As in, can the average V1 Engineererer set up a CAN BUS system?
I like the idea and utility of it, but I am afraid I will spend more time and effort figuring it out then I would expend just running all the wires as normal.
1 Like
It can be a little intimidating because there isn’t a ton of information out there about it. But that’s getting better. How you go about it also depends on your board choice. I have it running on 2 printers now. The V4 with the SKR Pro 1.2 and my Ender 5+ with a SKR Mini E3 V3. Both of those boards require a U2C as well. The octopus and newer manta boards have can connections on board. If you want to give it a shot and have any questions just start a new thread and those of us that have it will help you out as much as possible
2 Likes
This!
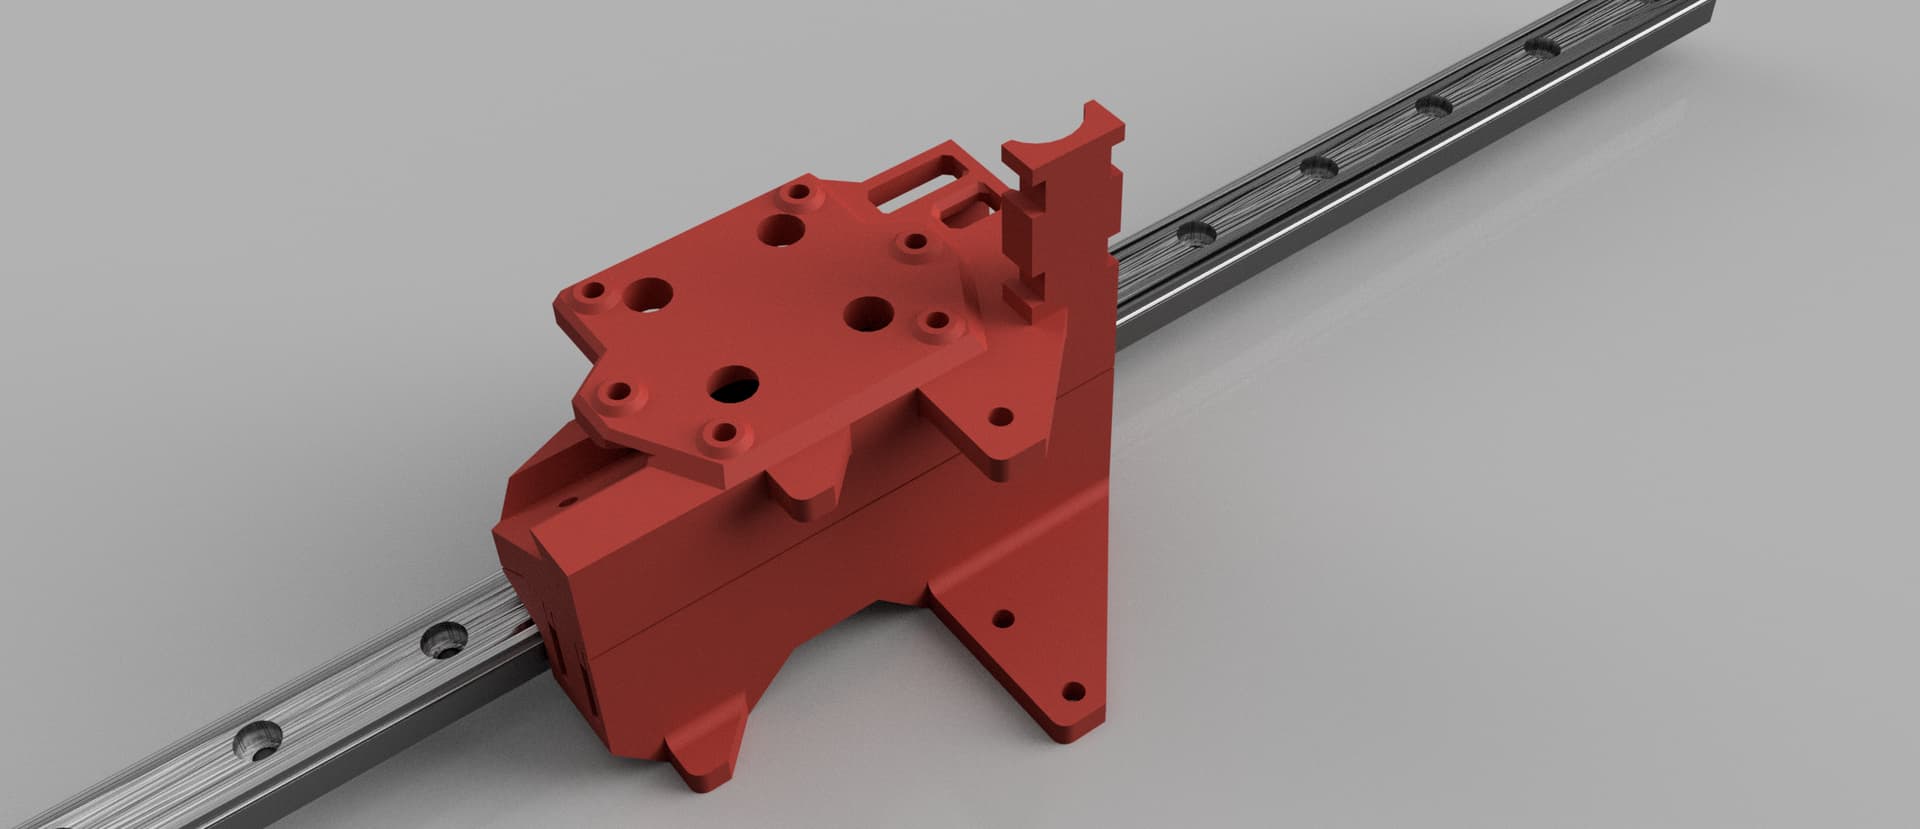
That is correct. In my original adapter I made it vertical but the new core has it flat on top.

What I was talking about above. Use longer screws on these mounting positions to create a flat plane to mount the board and then put the umbilical mount on it. The red holes can just be threaded holes to screw in standoffs to mount the EBB36 or add 4 other holes for the EBB42.
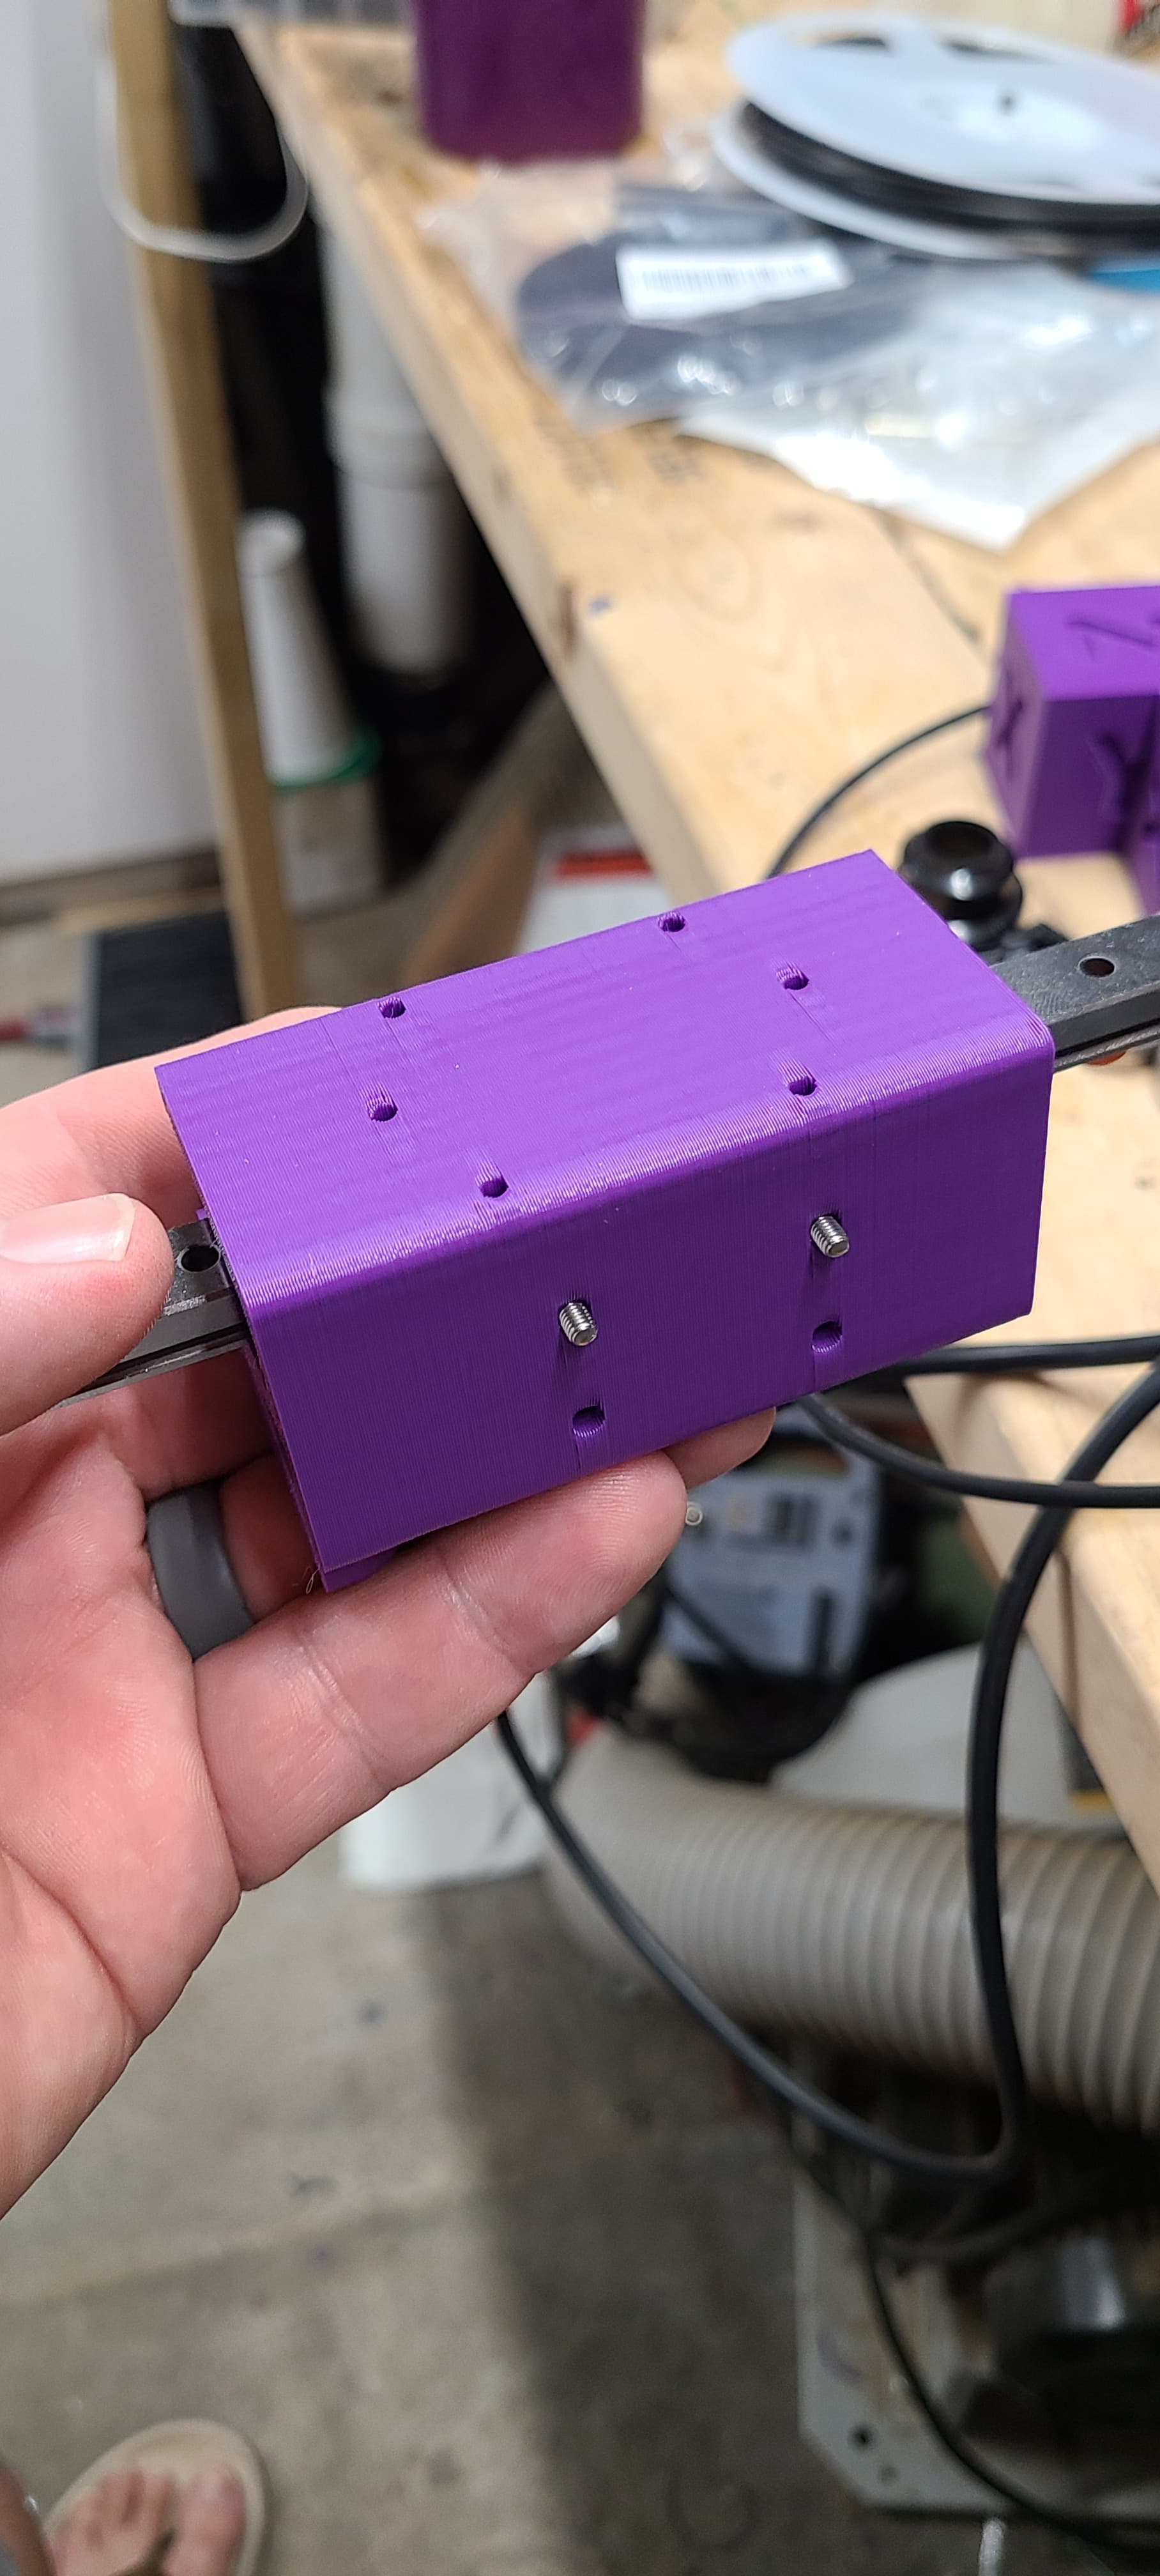
Like this
3 Likes
Exactly. I will take a look at some dimensions and see which fit. I guess that means I cover up the endstop, and leave a bunch of holes in the top for can cards.
1 Like
Well @vicious1 how are things coming along? Just giving us a friendly bump for some cool updates lol
1 Like
Good Afternoon (depending on where you reside)
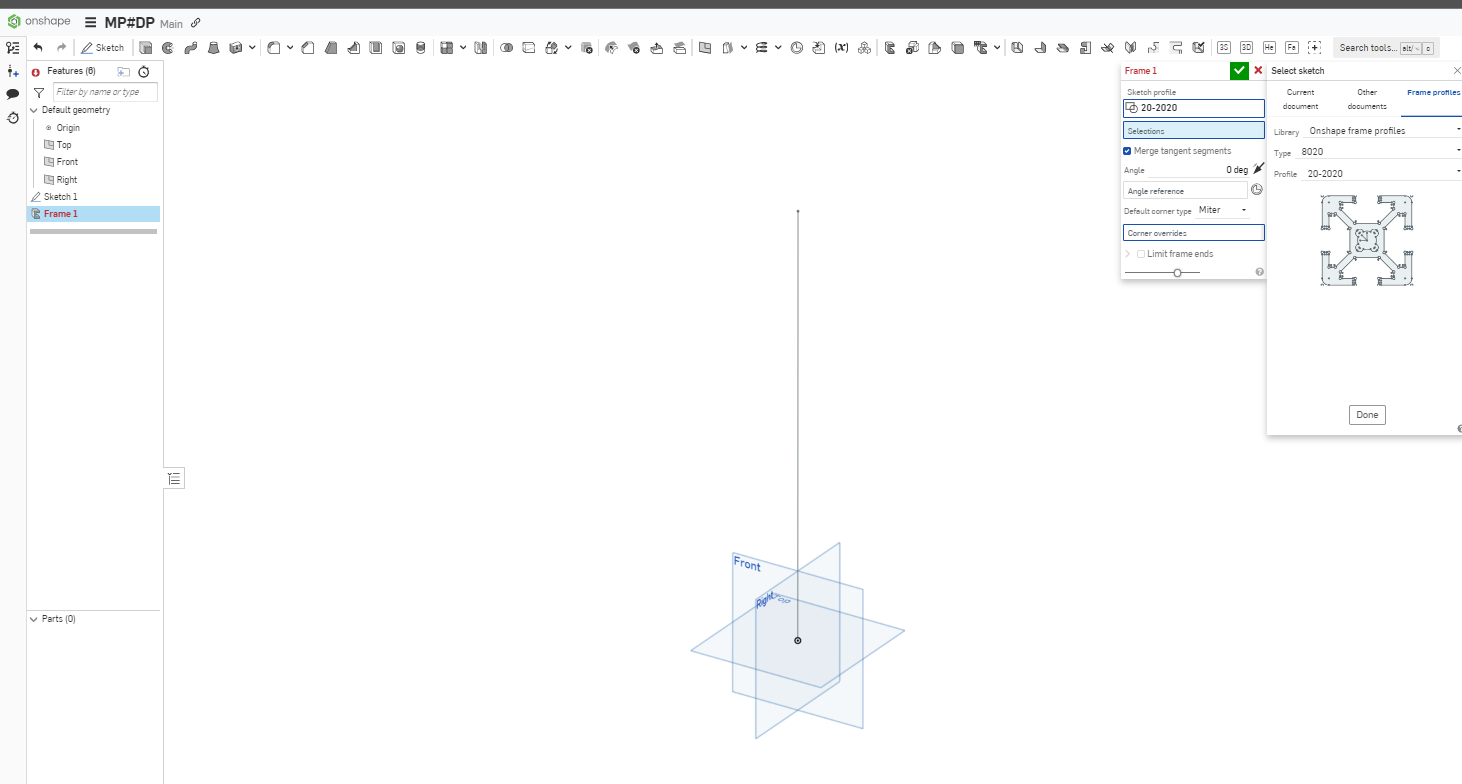
Just wanted to throw this out there for those that want to modify build volume and resize the frame, or modify the frame…
Onshape is an amazing tool, weather it is enterprise account, pro account, or free account (remember free is not private).
Onshape has a full 8020 profile library making it amazingly fast at making custom frames…
It has 99% of 8020’s extrusion library available…
I made a few small changes this morning. The rear wire catch, the PTFE belt separator, and making sure most of the sketches are fully defined.
Then the resizing was misbehaving. I am going to give it another shot in an hour or two.
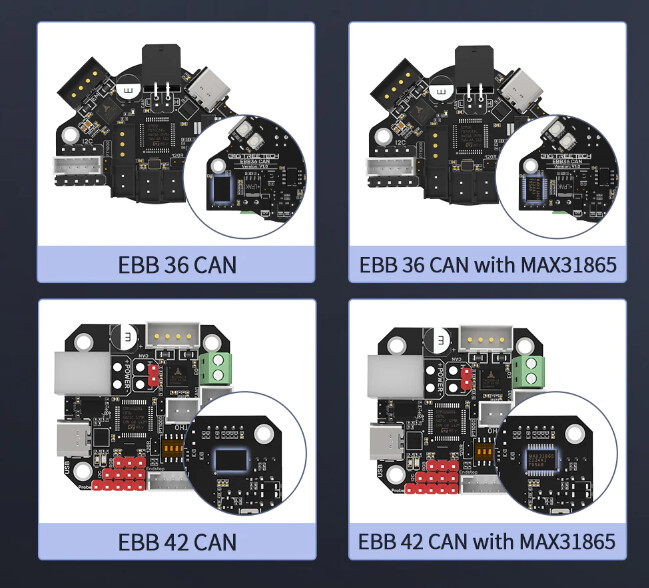
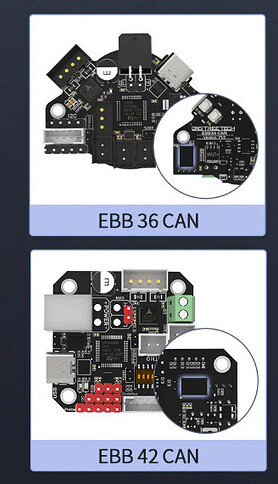
What specific can cards are you guys using, so I can see how they might fit? EBB 36/34? I will just add some sort of flat deck on the core.
2 Likes
I’m running the EBB36 right now but I do have an EBB42 as well. Not sure which one I will run on the V5. Just depends on how it all looks/fits. I think for me it will depend on which extruder I end up running. If I go with an orbiter V2 like I did on my E5+ then there are tons of mounts to put it right on the back of that. But options are always nice
That is the square one (40x40mm), and the triangle (50x35mm?).
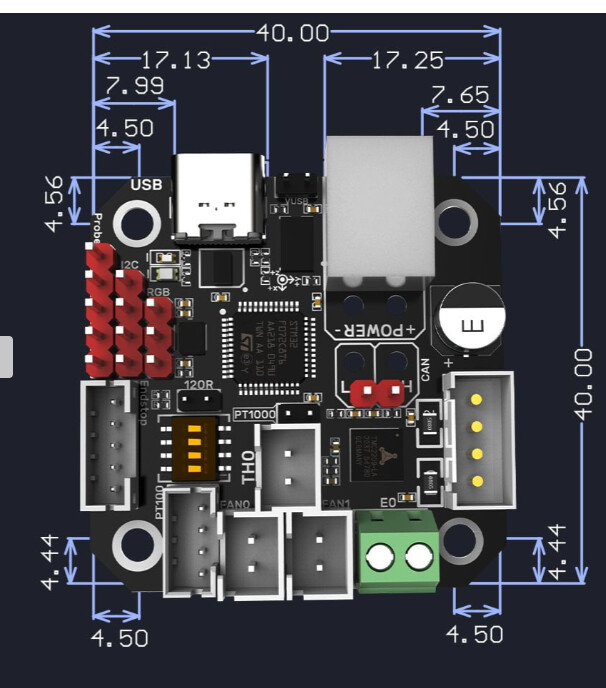
Using EBB36, at the time, seemed like most MP3DP Makers using CAN went with that.
Noticed @gpagnozzi used EBB42 for his build when I was reviewing what everyone was Making https://forum.v1e.com/t/mp3dp-v4-azas-build/37251#bigmp3dp-v4-v1e-community-builds-buildersbig-35
1 Like
As far as I know they are basically identical boards. The EBB36 is designed to mount to a nema14 and the EBB42 is designed to mount to a nema17 being the only difference between the 2
Okay, looks like I just need another test print of the core after all the fiddling.
Has optional ebb36/42 mount, hemera or H2, and a umbilical holder(not sure about this one until I print it.).
So XY needs a X rail nut holder (tnuts), and a Y endstop. After those we finally get to move on to the Z axis.
I will add a note here The XY has 1.5-3mm “extra travel” on all sides. We just got lucky. I know for a couple of you this is not enough. I would rather cut it this close (maybe even lose a mm or two) than have all machines with an extra 12-15mm on all sides. If you want all sorts of extra room for some reason you will just need to add 25+mm to your bed size, and pay attention to the bed mounting holes, should be no big deal. Same goes with adding things to the sides or back just add more room
H2 & EBB
3 Likes