I was looking at this and wondering how well it would work if it used the belt routing from the cantilever corexy. The far side would still be supported by the linear rail, but fewer parts and belt (I think). The plus side of doing the belts on all sides is the far end is less likely to bind. Just thinking about i over my coffee.
This H-Bot was what I found. Then I changed… Well everything. I looked up a bunch more H-Bot designs, and once I had wrapped my head around the belt routing, this is what I’d come up with.
The design goals for printed parts were to have zero supports needed and as few as possible overhangs,
The kinematics were to have everything all on one level, so no angular strain on rods or the laser shuttle from belt tension.
1 Like
Nevermind. Found some problems that are going to need a major relook. Basically the idler side of things just doesn’t get any sideways power. It will follow the motor side, so it sort of works, but accuracy isn’t good. Looks like it’s back to CoreXY decision Hell for me.
Okay, so full speed ahead and damn the torpedoes!
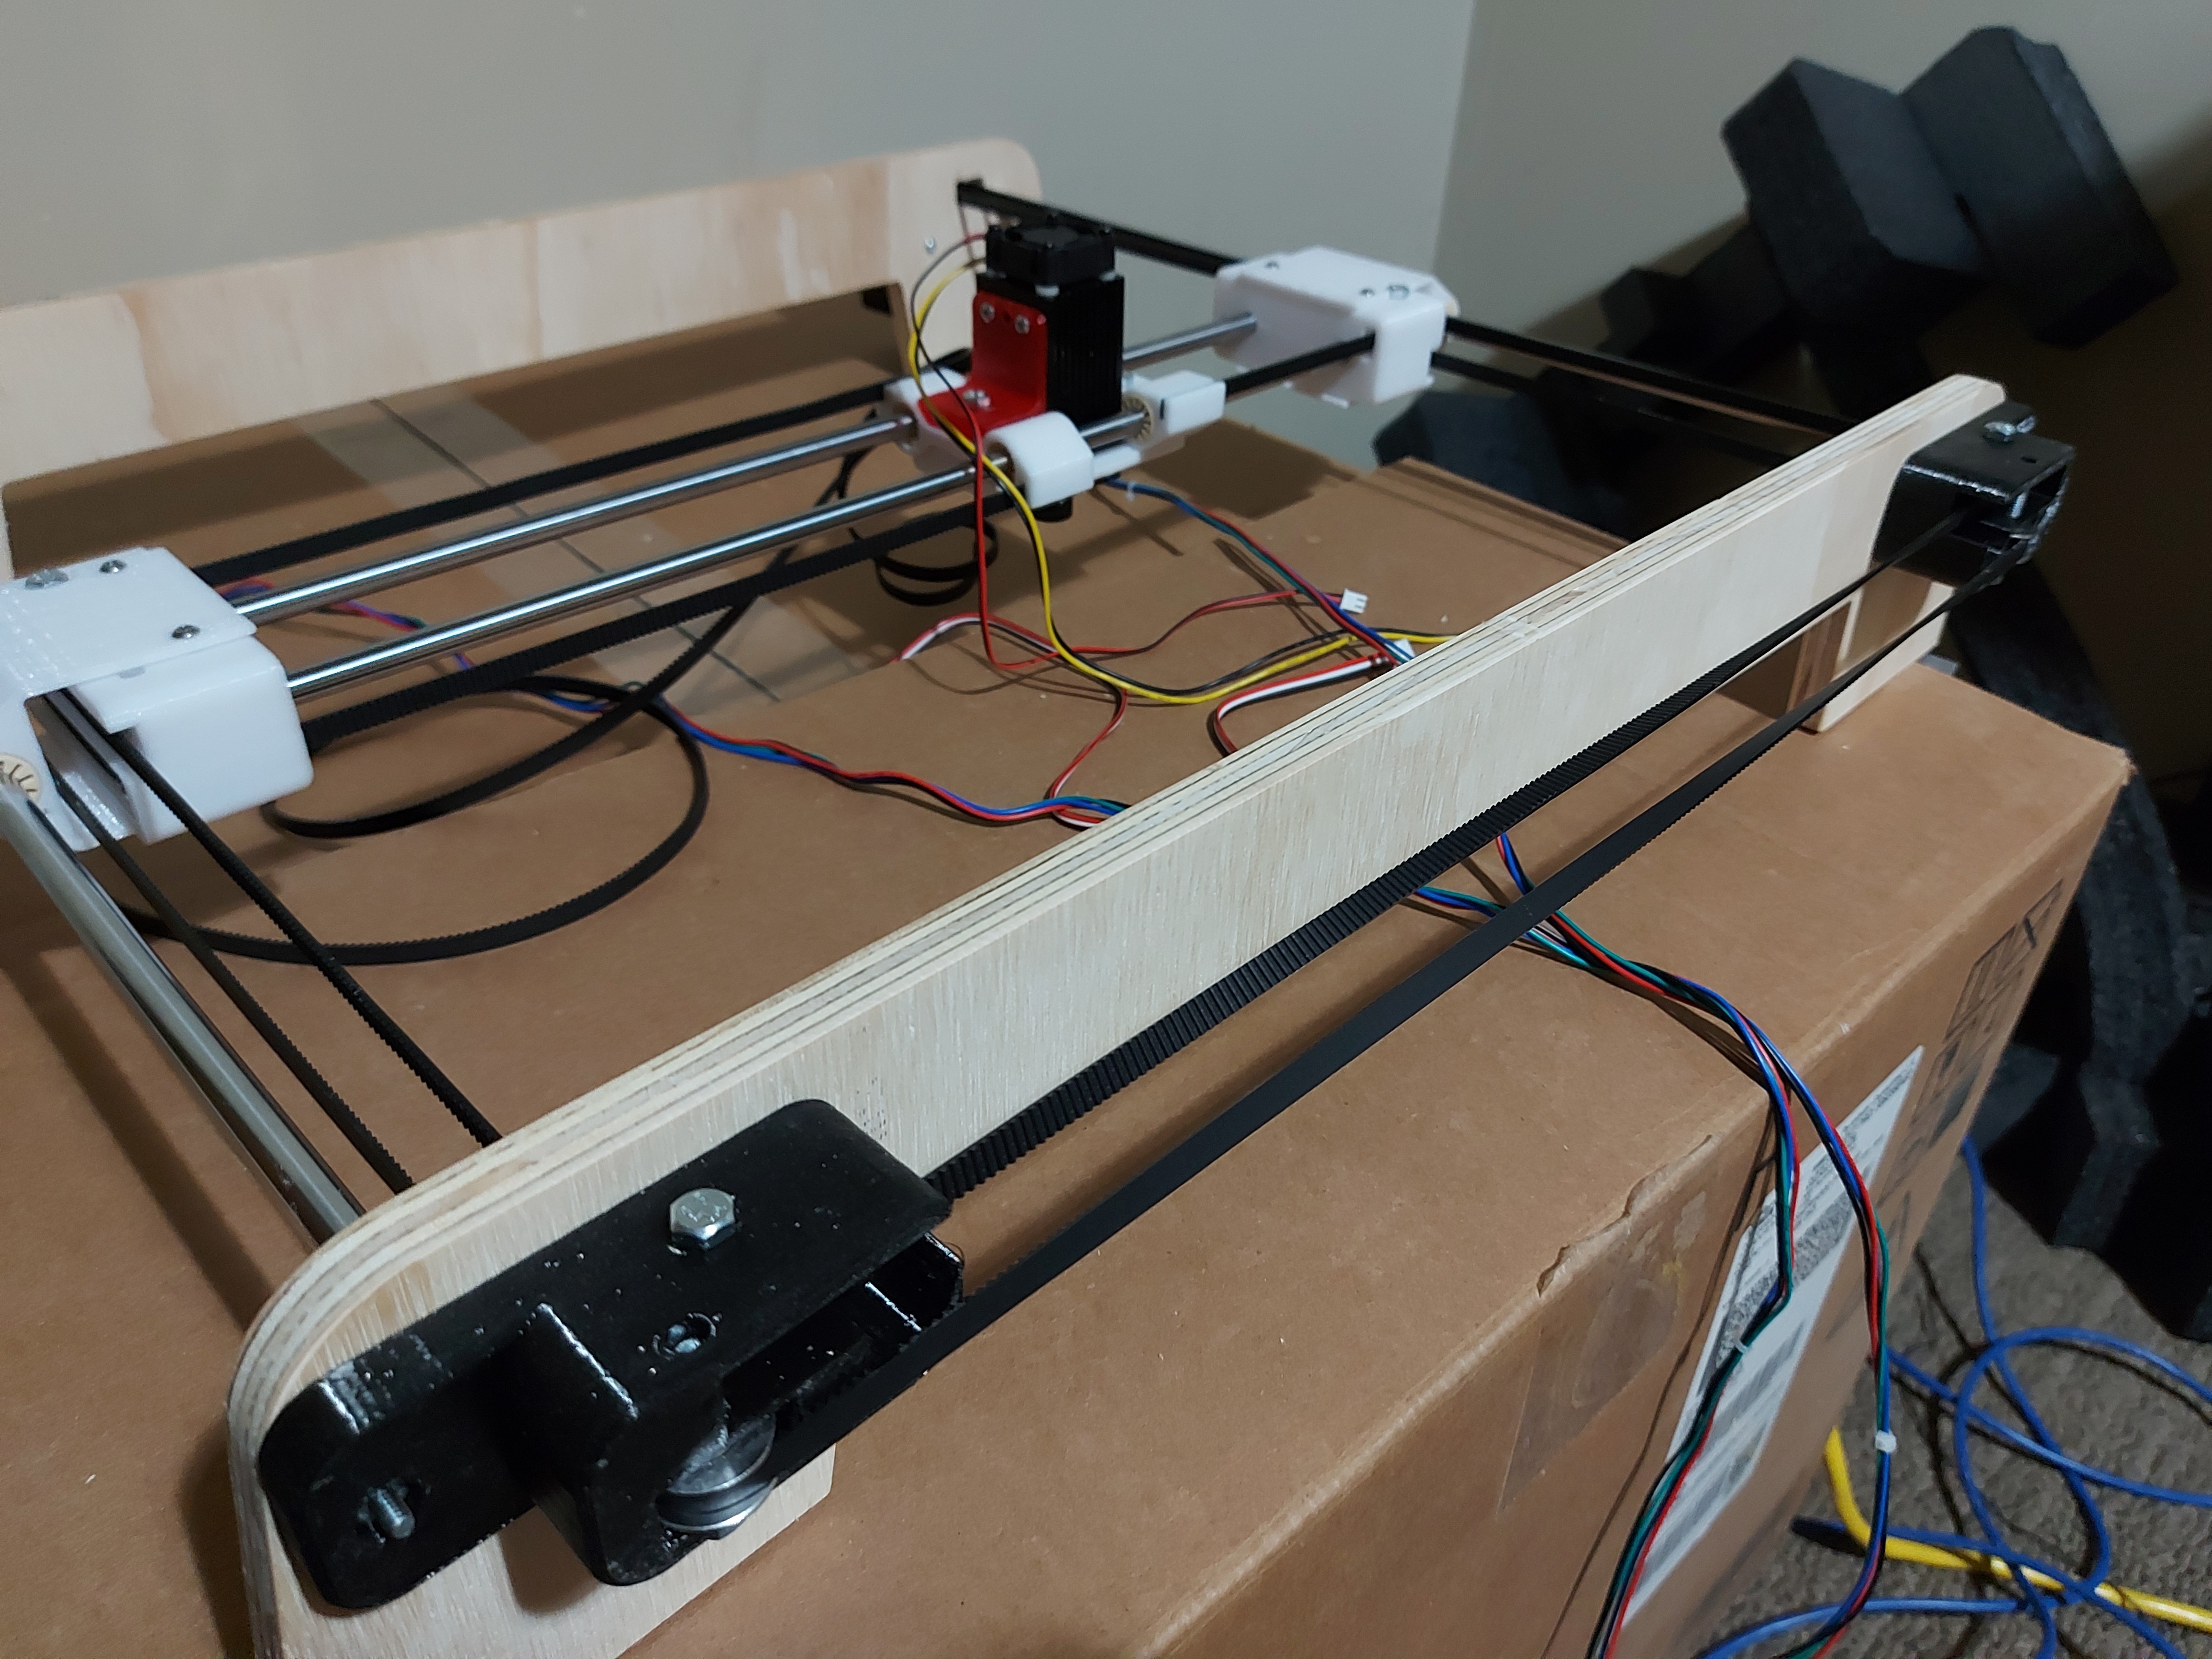
Redesigned as CoreXY. Changed what I had to kept what I could, which was precious little.
Machining new legs, and…
You’re watching the tool, and think: “Is it going to clear that clamp?”

… Nope.
1 Like
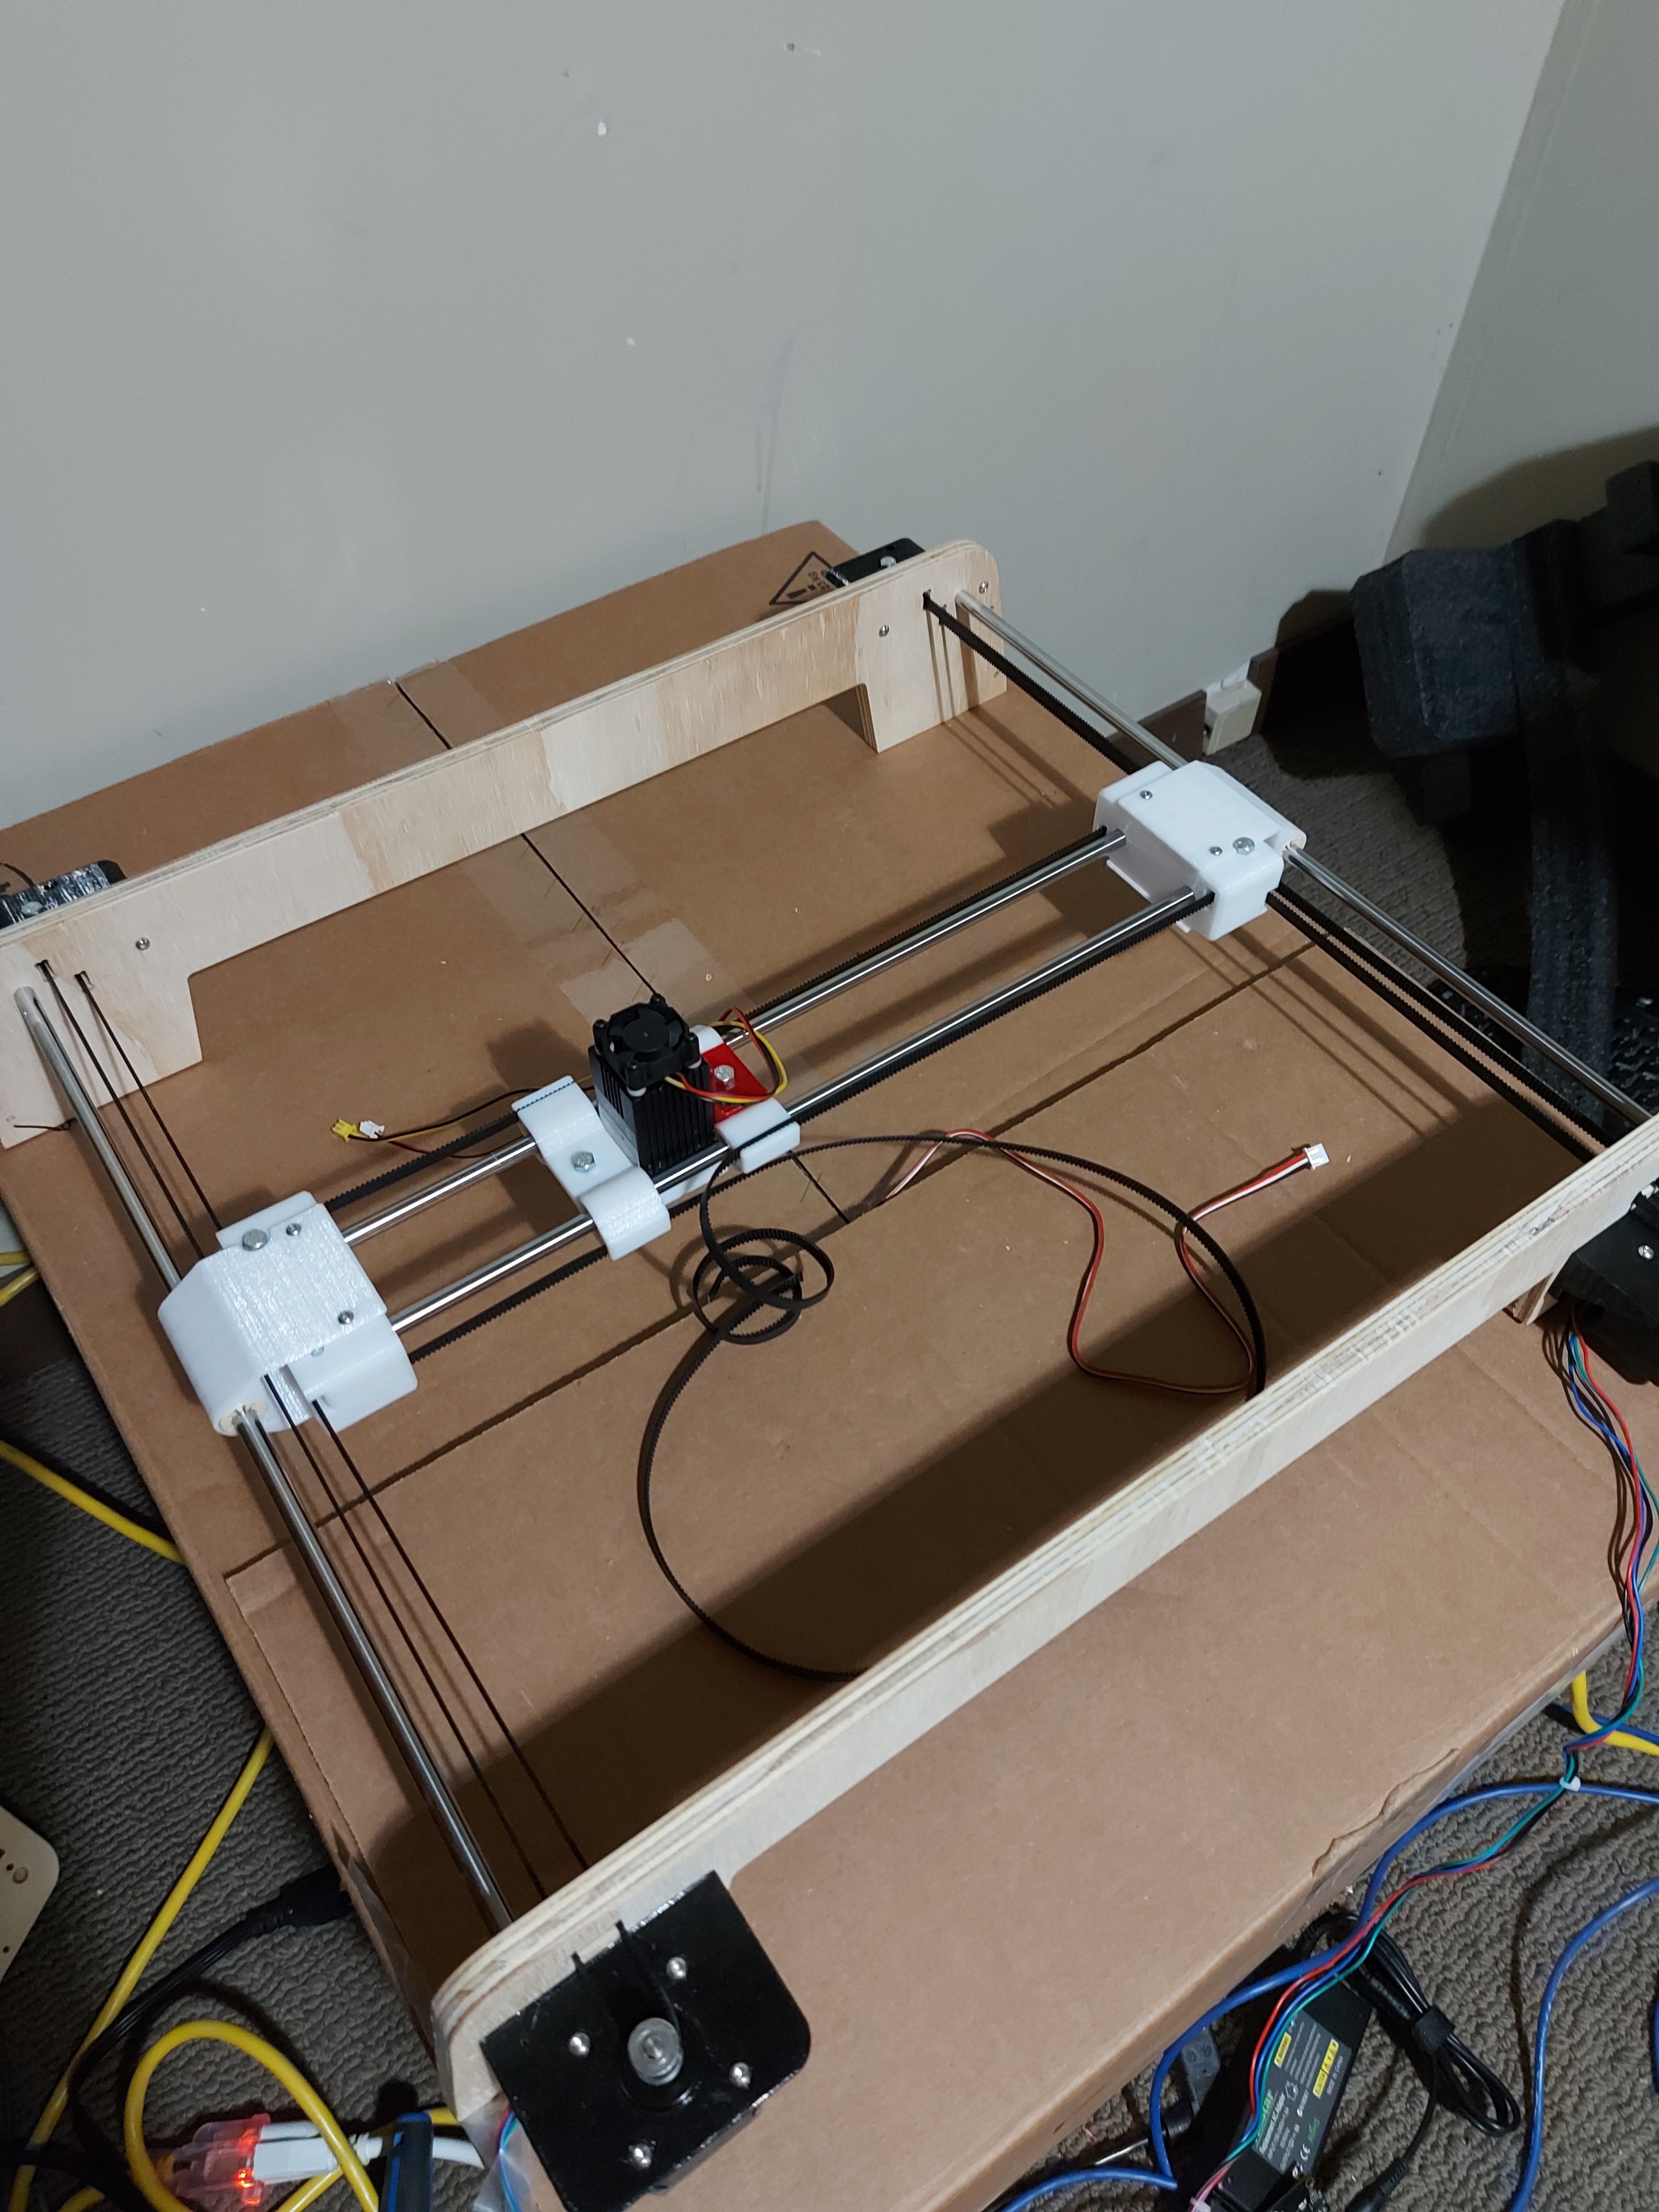
So the motor mounts and laser bracket are straight re-use. The corners are new design. I accidentally drew them in mirror image to what I needed, and printed a set like that.
 look at the pieces, and they just did not line up. No good to swap sides either.
I put a half twist in each belt between the corners, because it was either that, or make the belt clamps at the centre unique parts with many wrong ways to install them. As is, they are identical parts that only need to be the right way out. They work on either side, and either way up. The twist was way easier to keep straight in my head.
I tried reaming the drylin bearings a little to see if I could make them slide easier. They’re a little better, but still awful. Almost acceptable, but way too much resistance, the motors will skip instead of moving in the Y axis. X is ok, if I don’t tighten the belts. Probably would need belt tension exactly matching, not just close. I suppose I can crank the current.
One issue is that the drylin bearings are a bit bigger than the rollers at 16mm diameter, as opposed to 15mm diameter. Of course I designed for the parts in hand. Not really looking forward to altering the design. I might just wrap the bearings in tape for now. I still need to do an endstop solution, and make the side skirt pieces.
So I decided not to do the tape wrap, and edit the parts for 15mm diameter linear bearings. Reprinted in what I shall now forever call “Jolly Rancher Red” (thanks, @jeffeb3 )
Twizzler red is the colour my MP3DP parts are printed in. Twizzlers don’t have the transparency to them.

The MP3DP needs some tweaking. Dimensional accuracy is still a bit off.
3 Likes
Neat fact: Jolly ranchers were originally made where I live, in Golden, CO. I don’t have any details about the red. And I don’t have any specific knowledge that they were in fact on the team designing that color. But I don’t have any knowledge that says they weren’t.
3 Likes
Getting this debugged was a pain. Apparently one of my 2209 pen controllers is buggered. The other one works, but now I have no zen table. I’ll put the RAMPS back in that until I am sure it wasn’t just a bad motor connection.
I tested movement, and it was all good, then installed light burn, and it did something weird.

You see on the box, the distorted image burned… dunno what caused it, but after that, X and Y moved at what appears to be 22.5° towards top right, and persisted through resets and reflashing the firmware, until I found the
$RST=$
command to factory reset GRBL. Weirdness…
Anyway, I don’t know what I did wrong with Lightburn, not sure I want to troubleshoot it, bit not sure what else to use, since I haven’t got other CAM software for the laser. I can’t find what light burn set either, it’s like it reset either microstepping on one motor, or steps/mm, but both of those looked right when I checked
$S
$$
outputs.
I’m new to GRBL, so not like I get it.
The second burn on the plywood looks right, and is as close as I can see to the target width of 55mm, so probably is ok. I reran the laserburn gcode after resetting the board and turning laser mode on again with
$31=1
I just found this topic, and this is impressive work in such a short time frame. I really like it though, it looks simple yet effective. I too would be highly interested in all of the part files to try and make one myself (once you spend all of your time working out the bugs ![]() ).
).
What laser are you using? I know very little about the lasers for a DIY engraver, I never really cared to build one, but I’m starting to think it may be fun to build one for other projects I’ve had in mind.
I’m also going to need a source for that Jolly Rancher Red filament. Its beautiful.
Woah there, lets keep this topic family friendly!
2 Likes
Well hello hello! Look at this! I’m planning to make a pen plotter, and this is certainly up my alley. I’ve been meaning to make an h-bot, but I wonder if it’s too unstable. I think that axidraw and these professional machines with aluminium rails are precise enough, but if I’m supposed to print the parts myself and use steel rods, an corexy option like you are going for - is perhaps better. Thanks a lot for the inspiration.
Would you say an corexy frame is overkill for a pen plotter? I might use it for laser later on, but now I just want to make a dedicated plotter.
Let’s try this again.
5 Likes
Funny thing, I was googling corexy plotter/engraver machines, and yours showed up on google, but gave a 404 error. Perhaps I’ll just go for this then!
1 Like
IMO, a CoreXY mechanism is better for a pen plotter. Because the pen is lightweight, use a 7g servo to give it the Z lift, a mechanism that doesn’t have to sling a motor around gets even better. The pen can move quite rapidly and still print perfectly.
2 Likes
What do you think about size? I’m considering a 50x70cm area, to have plenty of room for a2 sizes. The 8mm steel rods are quite stiff, and the short side will use 10mm rods.
My main concern is how it’ll impact the maximum possible speed…
50x70 is pretty big for 8mm rods. I’d probably want 10, or even 12mm rods for that size… That said:
I lose about 95mm off of my X rods and 85 off of Y from the lengths of the rods. I was aiming for larger than 8.5" X 11", not enough for A2.
Probably wouldn’t hurt to try 600 and 800mm length rods, the laser shouldn’t put much stress 9n them, and with all 4 sides on the frame, it’s pretty solid. Maybe it would need corner supports to provide a bit more.
The DXF files should be easy to extend for longer rods, and I cut the sides on the tablesaw anyway. I’d love to see you build it!
1 Like
Well, I tried a test, 5mm/s at 100% power, and got a smoky room

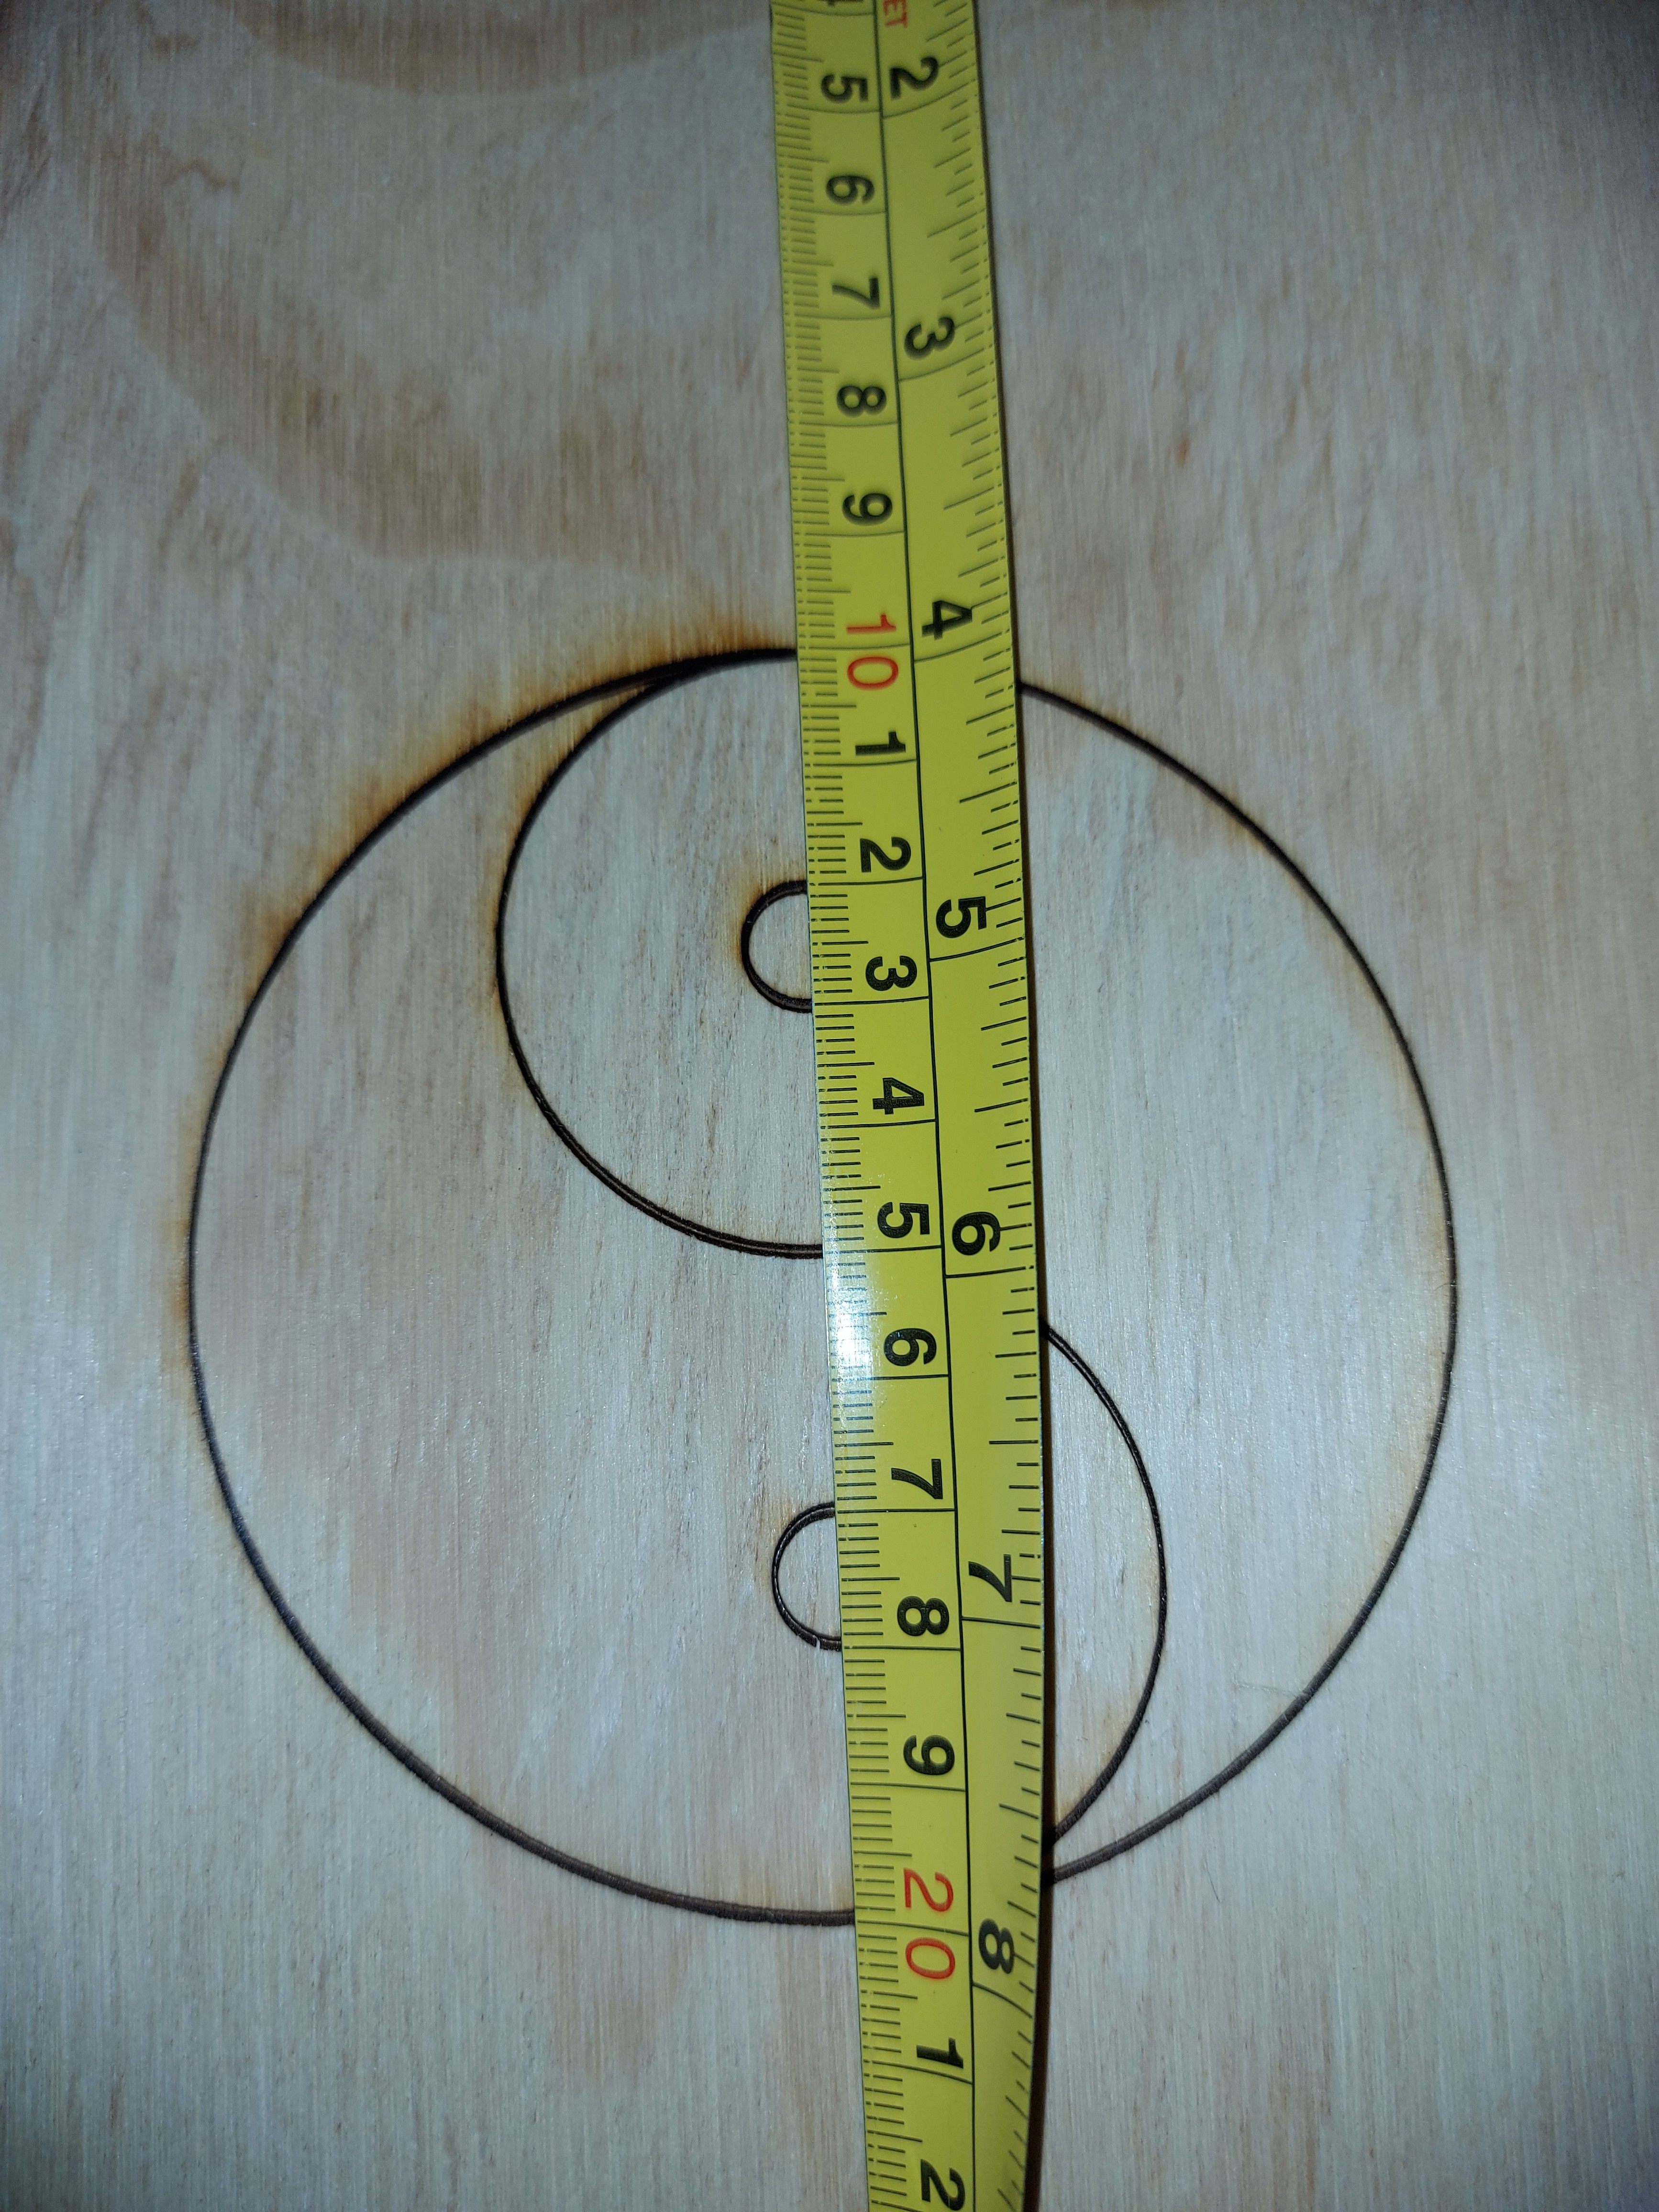
And not a bad little image. The kerf is most definitely rectangular, taller than wide. It burned in quite deeply, about 1mm by eyeball. Air assist would help, I’m sure, this might be able to engrave/cut after all. I was expecting to be able to mark, not to actually cut.
4 Likes
Yes, that’s what I’m thinking as well. On the other hand, a servo with a spring holding a pen should be much more forgiving on z accuracy. My only worry is sideways wobble.
What do you think about mm/s, would a bigger work area impact speed when working in a corner??
A larger area will affect acceleration, maybe top speed less. The centre of the work area will be most sensitive. Well, same with things like the MPCNC. Aside from some rigorous math, about the only way to know would be to build it. The good news is, this one’s pretty inexpensive.
1 Like

VERY nice, that looks great! How flat was that section in the machine? I kinda like the idea of not needing an extremely flat surface to laser onto.
Did you fill it in with black paint, or is that the results of the laser burning?
I’ve got a lot of things I want to laser my name onto 
1 Like