A larger area will affect acceleration, maybe top speed less. The centre of the work area will be most sensitive. Well, same with things like the MPCNC. Aside from some rigorous math, about the only way to know would be to build it. The good news is, this one’s pretty inexpensive.
1 Like

VERY nice, that looks great! How flat was that section in the machine? I kinda like the idea of not needing an extremely flat surface to laser onto.
Did you fill it in with black paint, or is that the results of the laser burning?
I’ve got a lot of things I want to laser my name onto 
1 Like
It’s a section of bamboo, so not very flat. I put it pretty close to level to get a minimum of distortion, but it has a radius of maybe 50mm around.
The black is just the laser. It’s only a little scorched, enough to be felt with a fingernail.
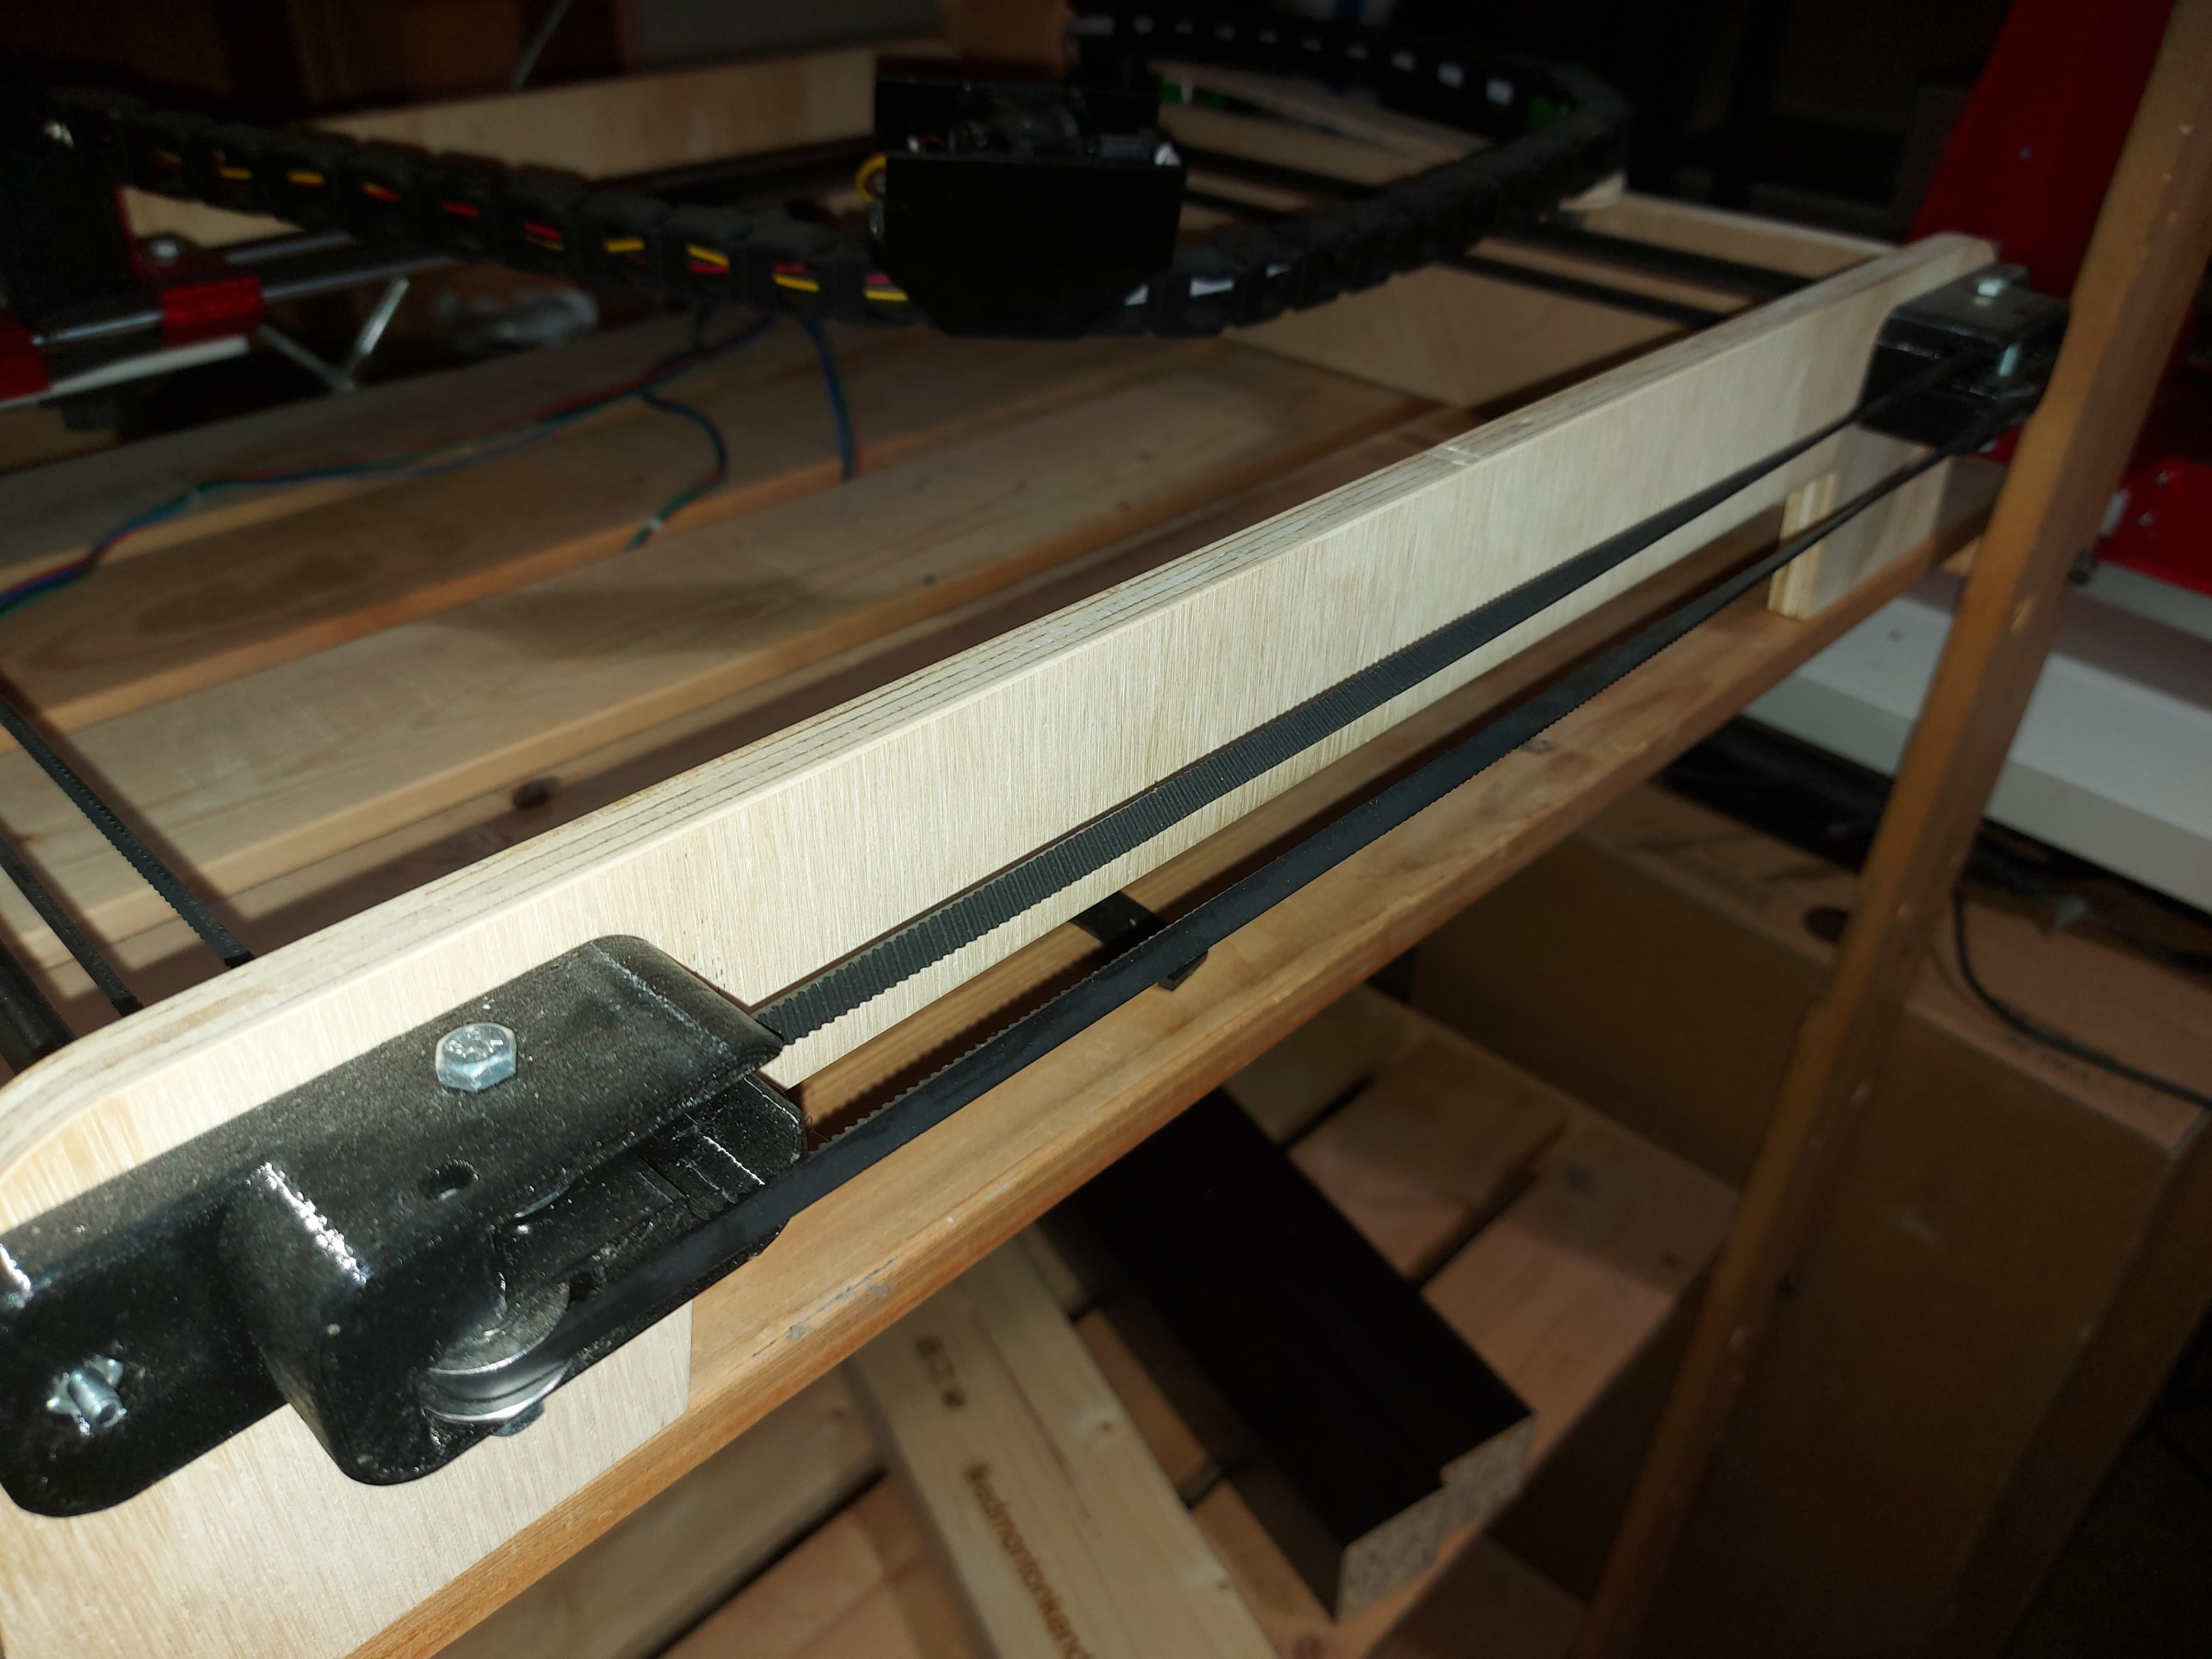
I got the drag chain mounts done too.
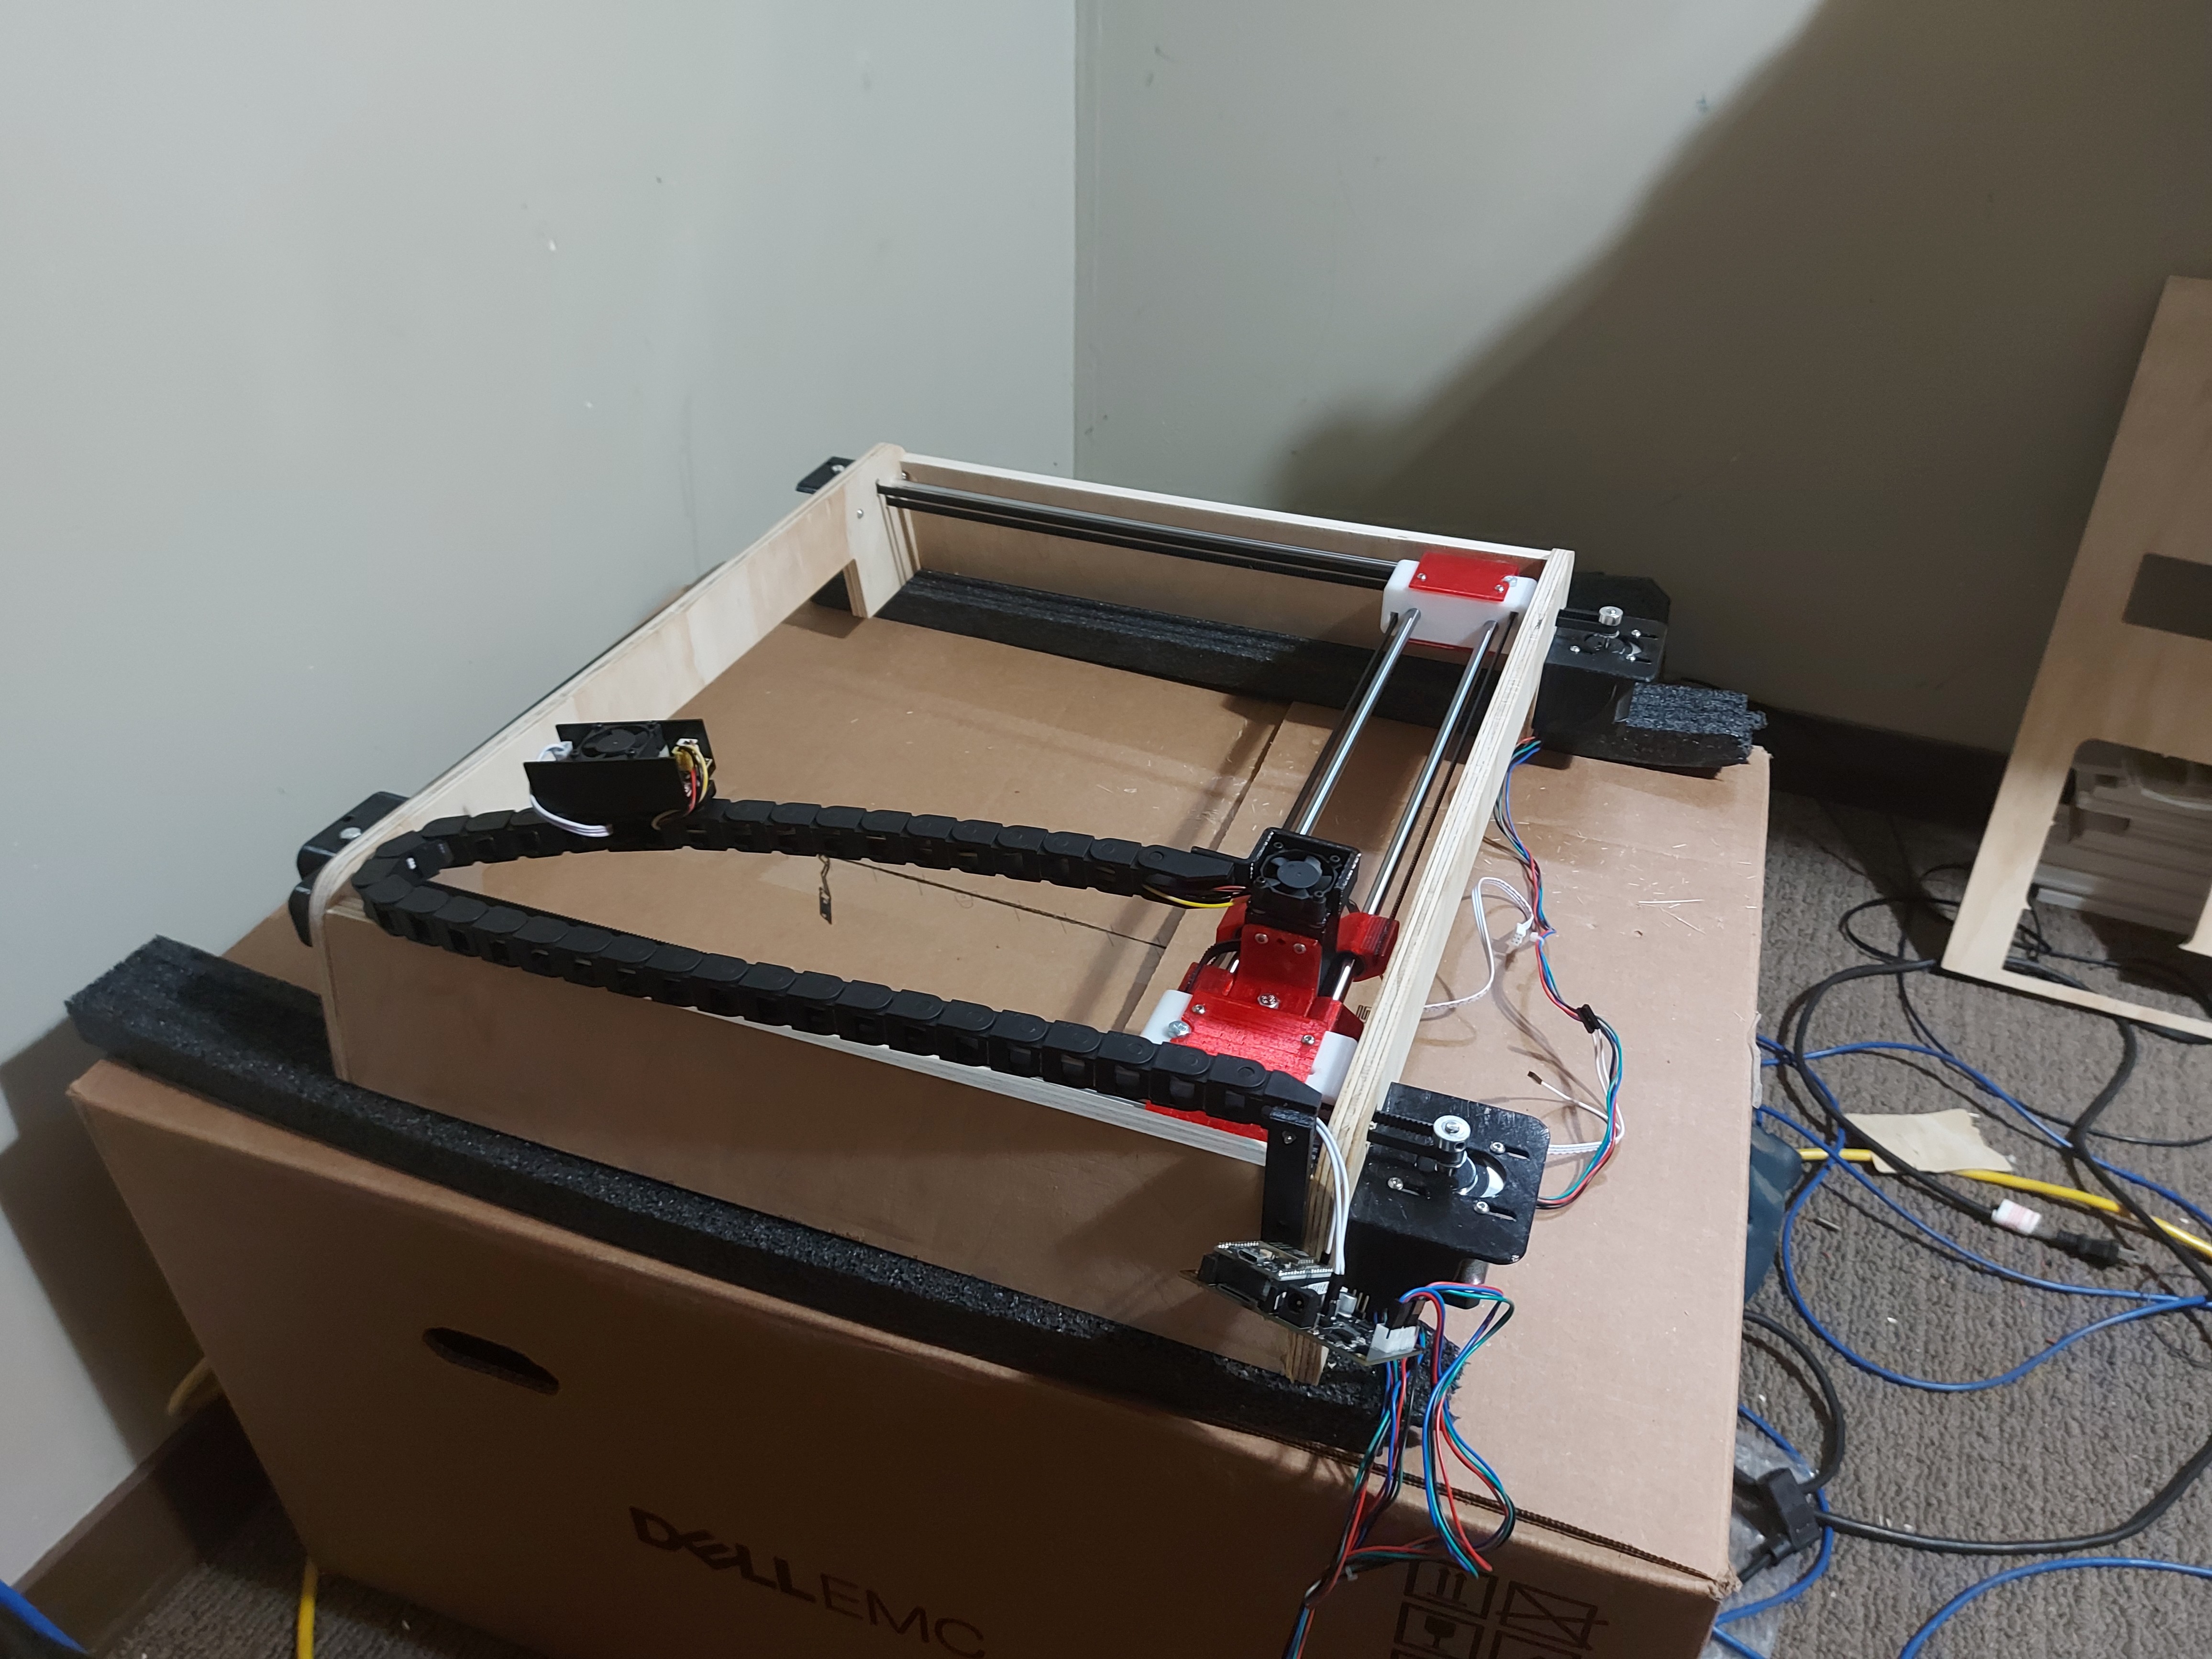
I decided to just stick the laser PCB in the middle where I could fit it instead of mounting it. I might change that later, but it’ll do for now.
I’m getting a weird phenomenon from LightBurn. It seems to be messing with one motor on initialization sometimes, and I get X and Y converging at 22.5° each, so they meet at 45°
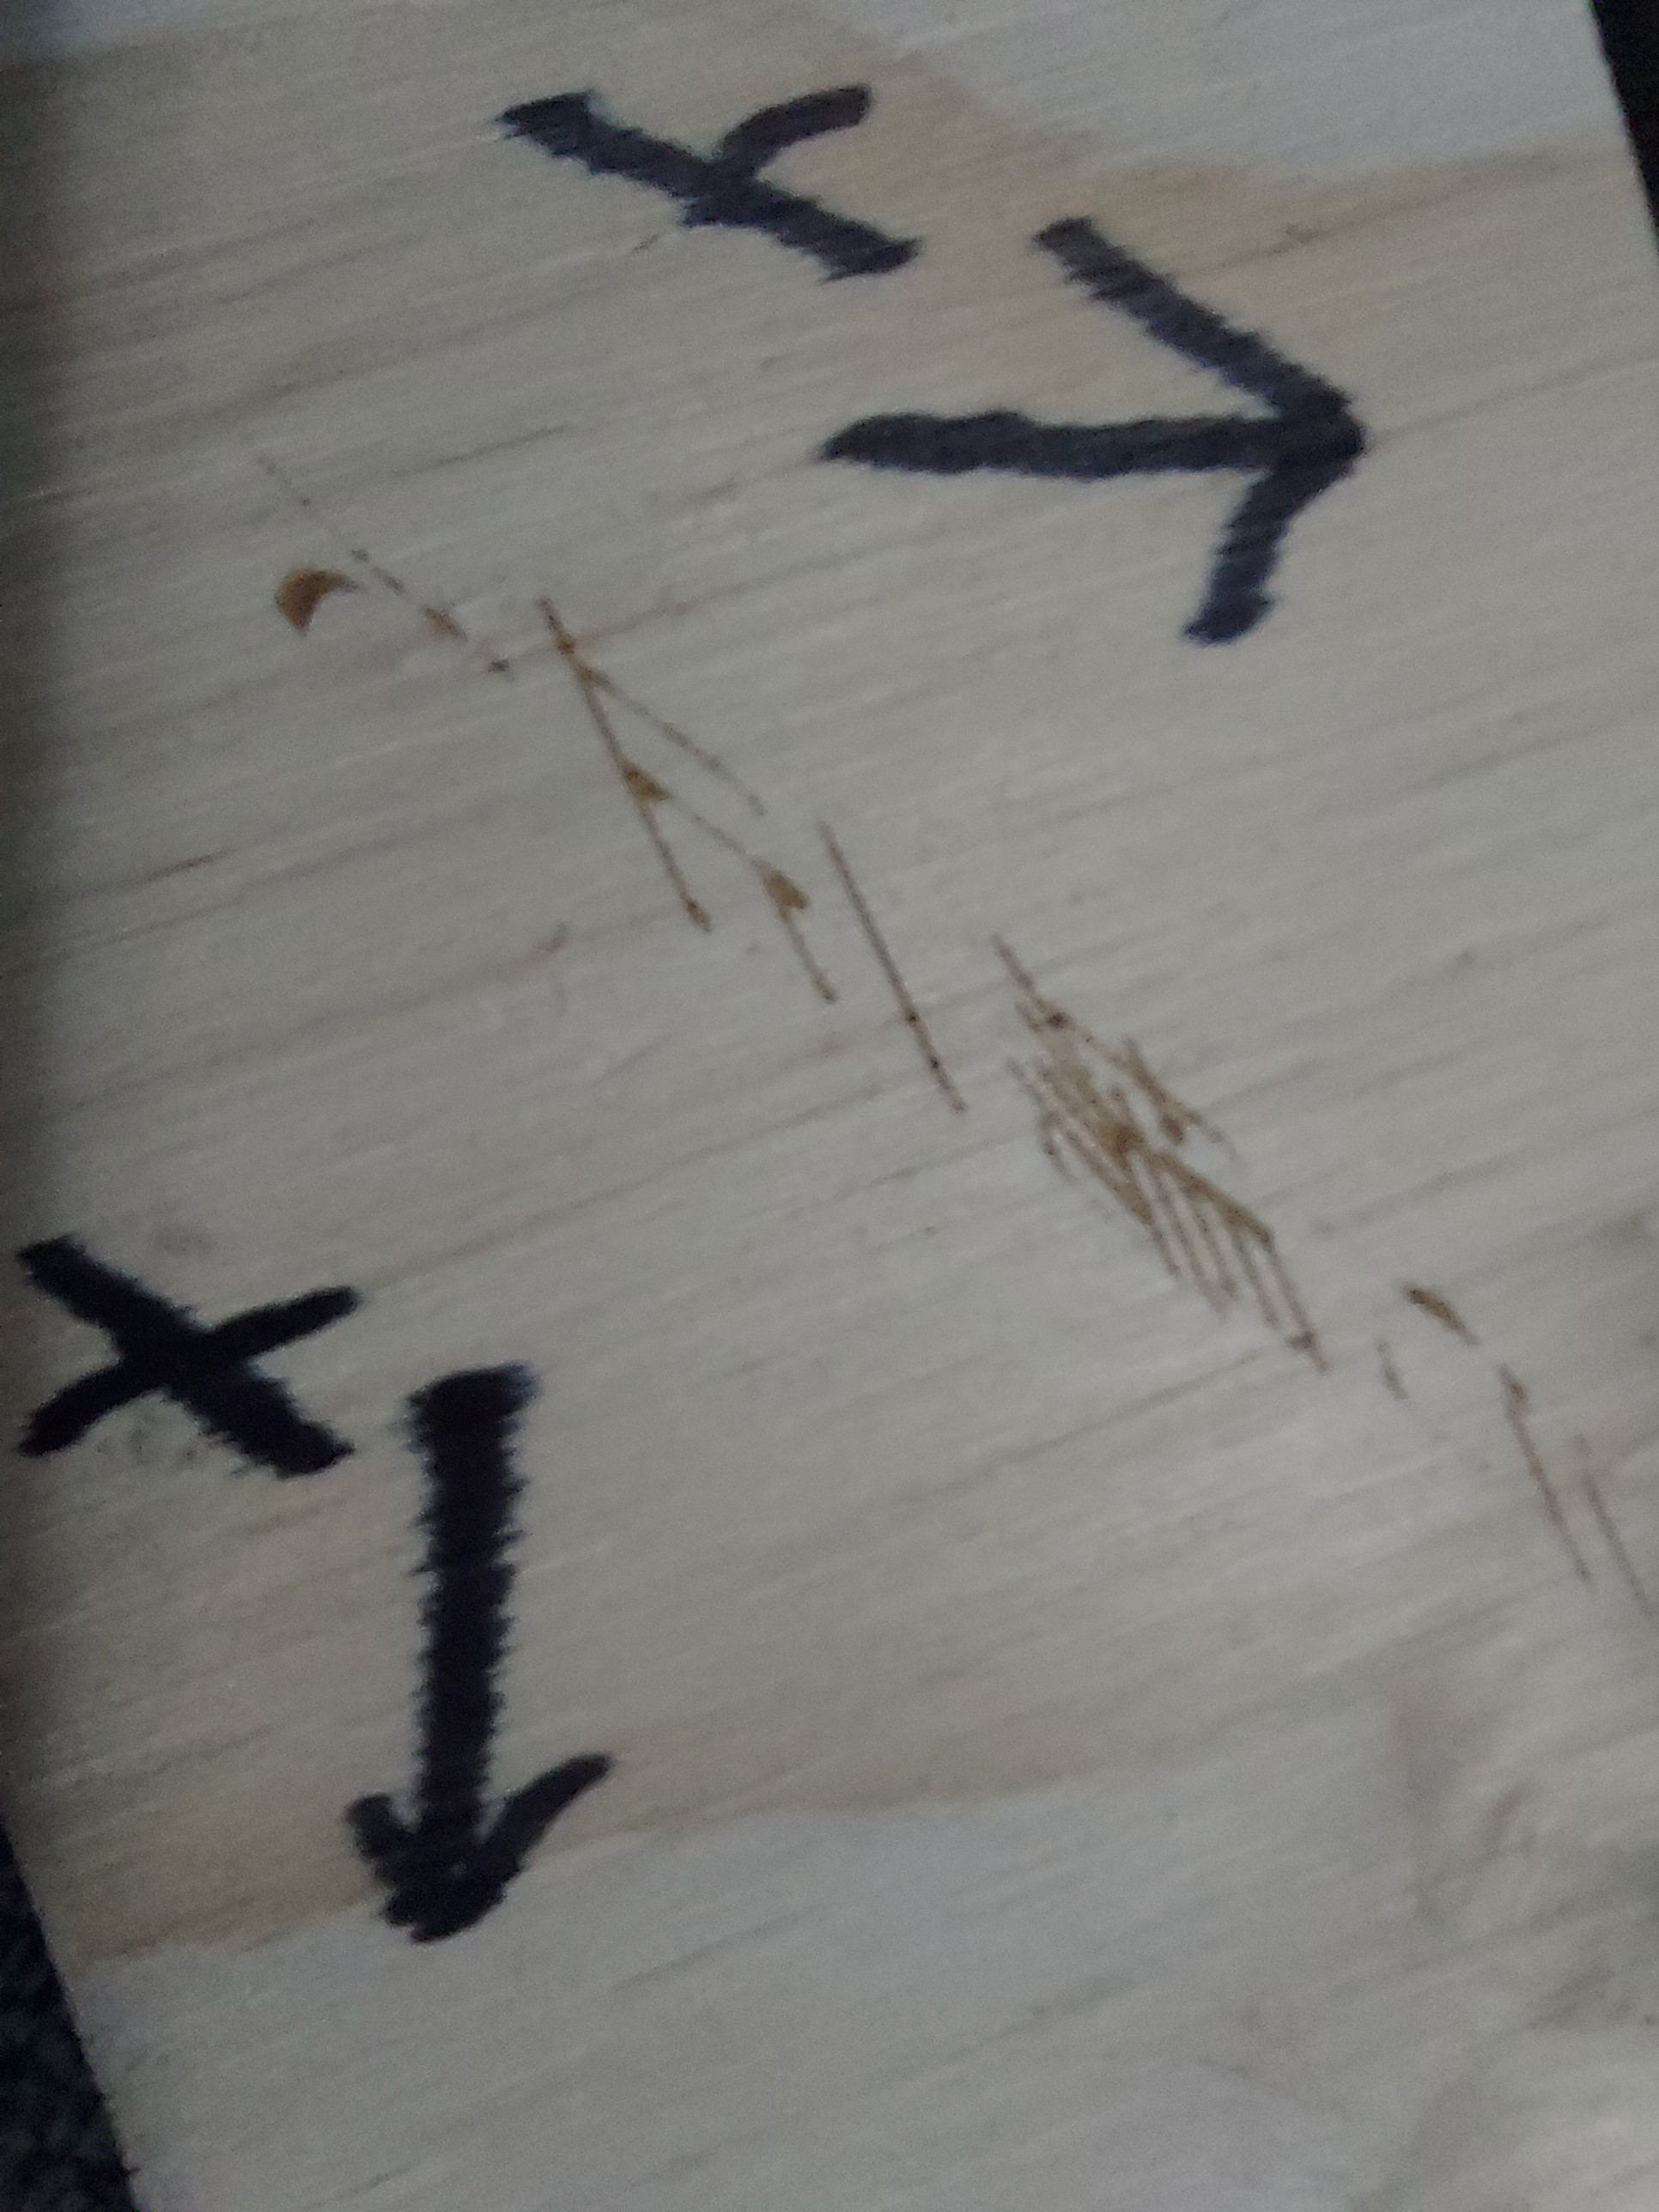
That was the same file at 50% power that I burned on the shinai. The sharpie shows X and Y axes as they are supposed to be.
Scared that I’m going to ruin something not checking movement before burning… I just don’t know GRBL well enough to even know what went wrong. (I did check $S and microsteps was set to 16, which is what I expected. Steps/mm was also right.
I suspect that one motor is running at either half or double speed somehow, not sure which, total X and Y look close, but it would only make 25% difference. Hard to measure I’ll have to catch it and burn a 100mm square to measure to see which way it’s wrong, bit either way I just want it fixed so it doesn’t happen again.
2 Likes
Decided to ditch LightBurn… unless someone can tell me what’s happening or at least how to make it stop.
Meanwhile, made it 100% more “V1”
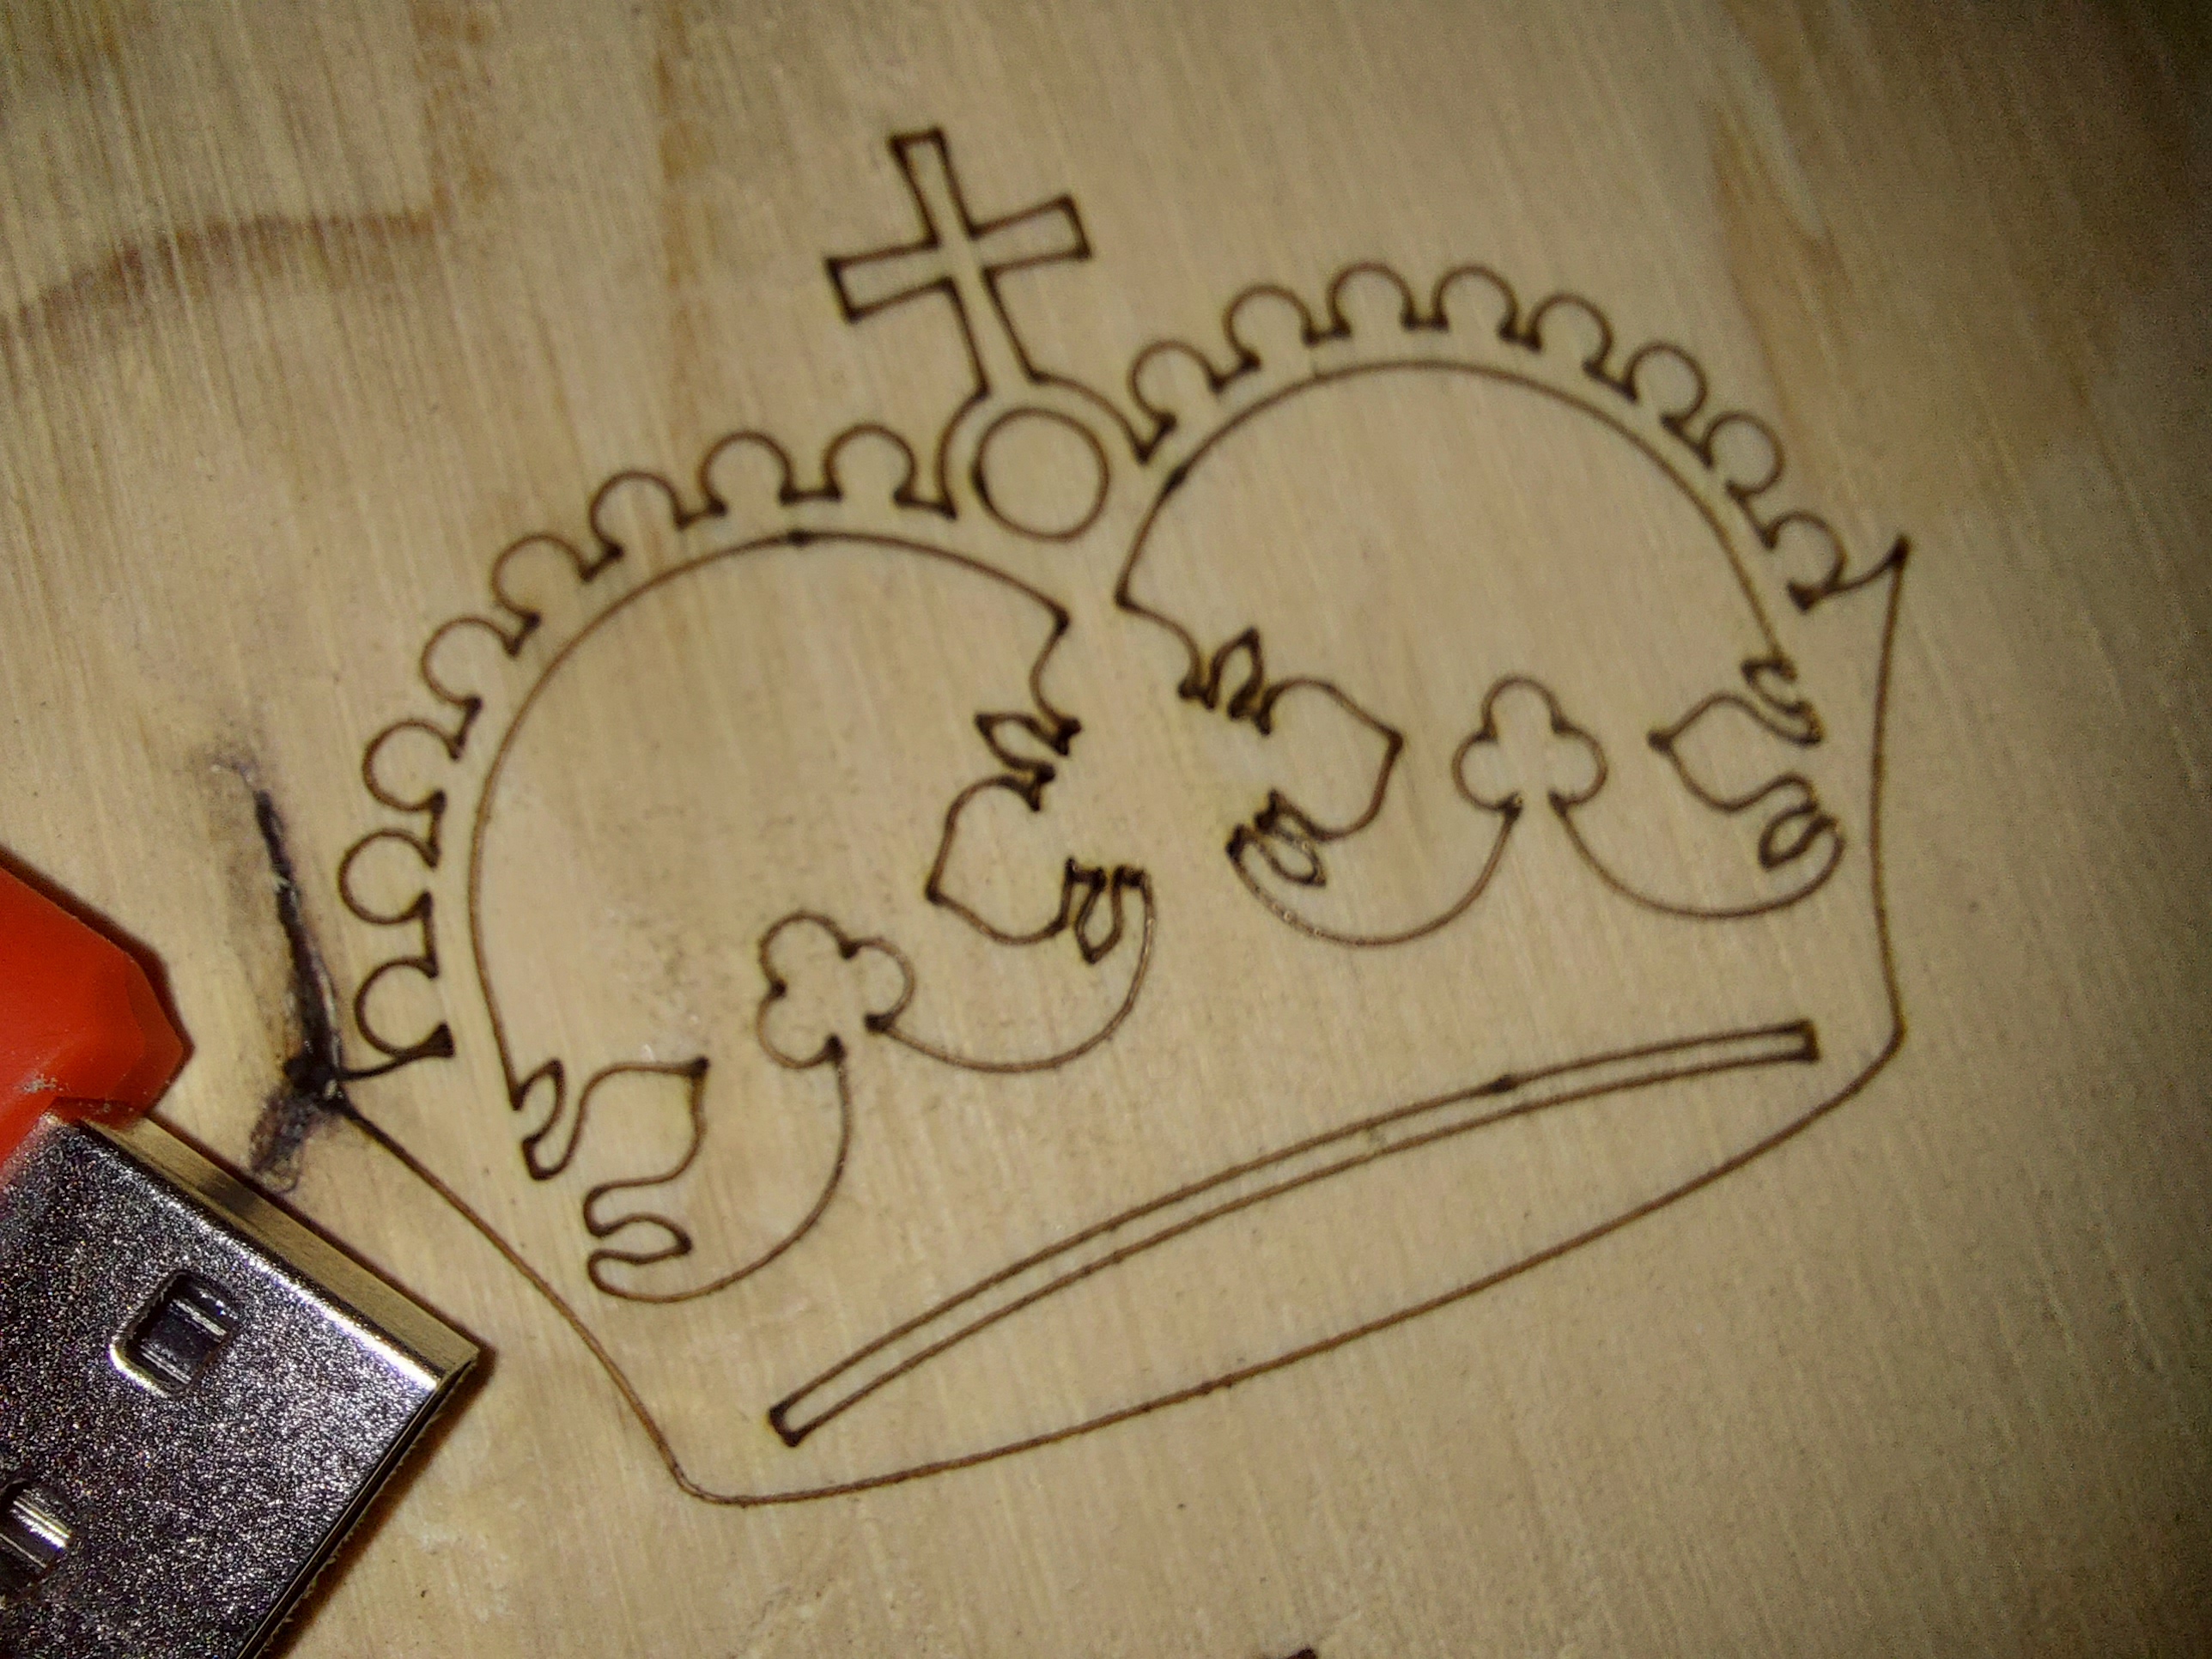
Didn’t realize the original DXF file was so tiny, and that’s converting from “inch”. USB key for size reference.
5 Likes
Looks great, this will certainly be my next project once I am comfortable with my MPCNC.
I’m not familiar with LightBurn, but the skewed etching looks like both motors are moving too much, but only in one direction. So it seems that when either axis makes a positive movement it moves more than it should, while negative movements are ok. (Or vice versa depending on direction).
I’m pretty surprised that the lightburn gcode could cause that odd shape. grbl is pretty simple, and many years ago, that code was the basis for Marlin. So there’s nothing magic here. If the machine goes to the right place when you send it G1 X100 and lightburn sends G1 X100, then it should be fine.
It doesn’t look like a relative/absolute issue.
Lightburn would have to be doing something funky to adjust your steps/mm.
I haven’t used LB. I have high hopes that it is good quality software. But I know it has hooks for many many machines. So maybe it is just too customizable and you’ve got some setting wrong.
I can’t find any way to replicate it, but since I stopped letting LightBurn connect to the laser over USB, it’s stopped happening.
Honestly, it seems like it’s adjusted either microstepping or steps/mm on one of the two motors. The 22.5° angle is significant that way, as it’s almost certainly a halving or a doubling on one motor. I should point out that it is able to close shapes correctly, nd returns to the 0,0 position properly at the end of the job, so it’s definitely not just “one way” that it’s wrong. The dynamics of the CoreXY though is why it skews so oddly.
I customized nothing. I set up LightBurn to use the laser as a plain vanilla GRBL device and left the settings all at default. GRBL-ESP32 was configured straight from Bart Dring’s example, with the addition of the CoreXY kinematics.
I do see that the TMC2209 microstepping is done from software (though it looks normal from what I see when it’s gone wrong)
It might be expecting something in regular GRBL that is a different setting in GRBL-ESP32. What makes me crazy is that it’s not every time, and the only way to get it back is to power cycle. Makes it difficult to troubleshoot.
What version of Lightburn are you using? I’ve noticed they have been running down bugs since they released v1.0. I haven’t been able to have it work correctly with my ESP32 rig with anything after 0.9.20. 0.9.21-0.9.24 won’t connect right, and I haven’t tried 1.0 yet.
Yeah, pretty sure it was 1.0.0 (One point uh-oh.)
Maybe I’ll give them some time and try it again. It seems to work, just that weirdness when it connects over USB. I’ll wait out a couple of dot releases.
Meanwhile, Estlcam seems to be delivering as expected for vector images, when I define a 0.25mm tool as the laser. I’ll have to define a few of them I guess for various speeds/power (Spindle speed 0-1000 RPM, and then Feed Rate) so that I can do different etching/cuts. I should try cutting some thin material at some point.
Another thing you might try, if you are still interested in Lightburn, is to lay everything out, then export the gcode, and upload and run it via the ESP-UI. See if you still get the weird skew. The more I use and study up about Lightburn, the more I realize how powerful it is and you are going to hit a wall with Estlcam’s capabilities depending on how you are using your laser engraver. (Sorry for sounding like such a fanboy for Lightburn) 
I’ve already run into things that LightBurn can do that Estlcam cannot, though I’ve managed to figure out some tricks using various techniques like pocketing.
I’m sure that it’s not the job gcode that’s the problem, because that image I have of the skewed work was exported and run, and I have 2 examples of the same gcode file run from the SD card via the web UI for GRBL-ESP32 skewed and not skewed. The difference was after rebooting the controller and not allowing LightBurn to connect via USB. (As in, the USB cable wasn’t connected at all.) Something happens when the serial port is initialized by LightBurn. I assume that’s it, but of course can’t be 100% sure, because it doesn’t happen every time, but I have only seen it happen when LightBurn is connected at power-up.
Just at this point, I want to be sure before I pay for the product.
1 Like
I wish I was as technical as y’all so I could DIY myself an engraver. But I am really new to this so I bought an Ortur laser master 2 & it’s working great as of now. Honestly, I consider myself an amateur & still working my way around learning a lot of things. If there are any modifications or suggestions regarding this engraver do let me know. If you’re not sure of the model I am talking about you can check it out here . It’s the last one on the list.
2 Likes
Well, I went and paid for LightBurn… And I still haven’t really tried it out. Every time I start trying to do something with the laser, something comes up and I get sidetracked, then start working on one of my other projects. “Oh I could use the laser, I should try LightBurn…” And then the phone rings or something…
4 Likes
The slow north-pole hobbyist chiming in again. I’ve been wanting to build a dedicated plotter+laser machine for a long time, and now I feel likegettingserious.
A year later: will you still recommend your machine and approach??
Well, I still haven’t mounted a laser to my LR, and this one is working very well. I have actually used it for several projects, and Iike the results.
The gotcha here is that the laser I got was an oddball size, so things might need adjustment based on the laser heat sink size you get.
I think my laser was 33mm square, seems that most are 40.
The coreXY gets good speed for raster images, and the lower power laser gets a very sharp focus.
I haven’t used mine nearly as much as @dkj4linux of course, but I’m pleased with my results.
2 Likes
Hi Dan… I can’t figure out the belts. I’ve changed the direction of the plates and the mounts many times by now. Do you have a simple instruction for a simple guy like me?
1 Like
Wow! Okay, the trick is thst there is a half turn in the belts on the opposite side from the motors.
The holders will have a high and low side.
Oh… and the belts double on the side rails…
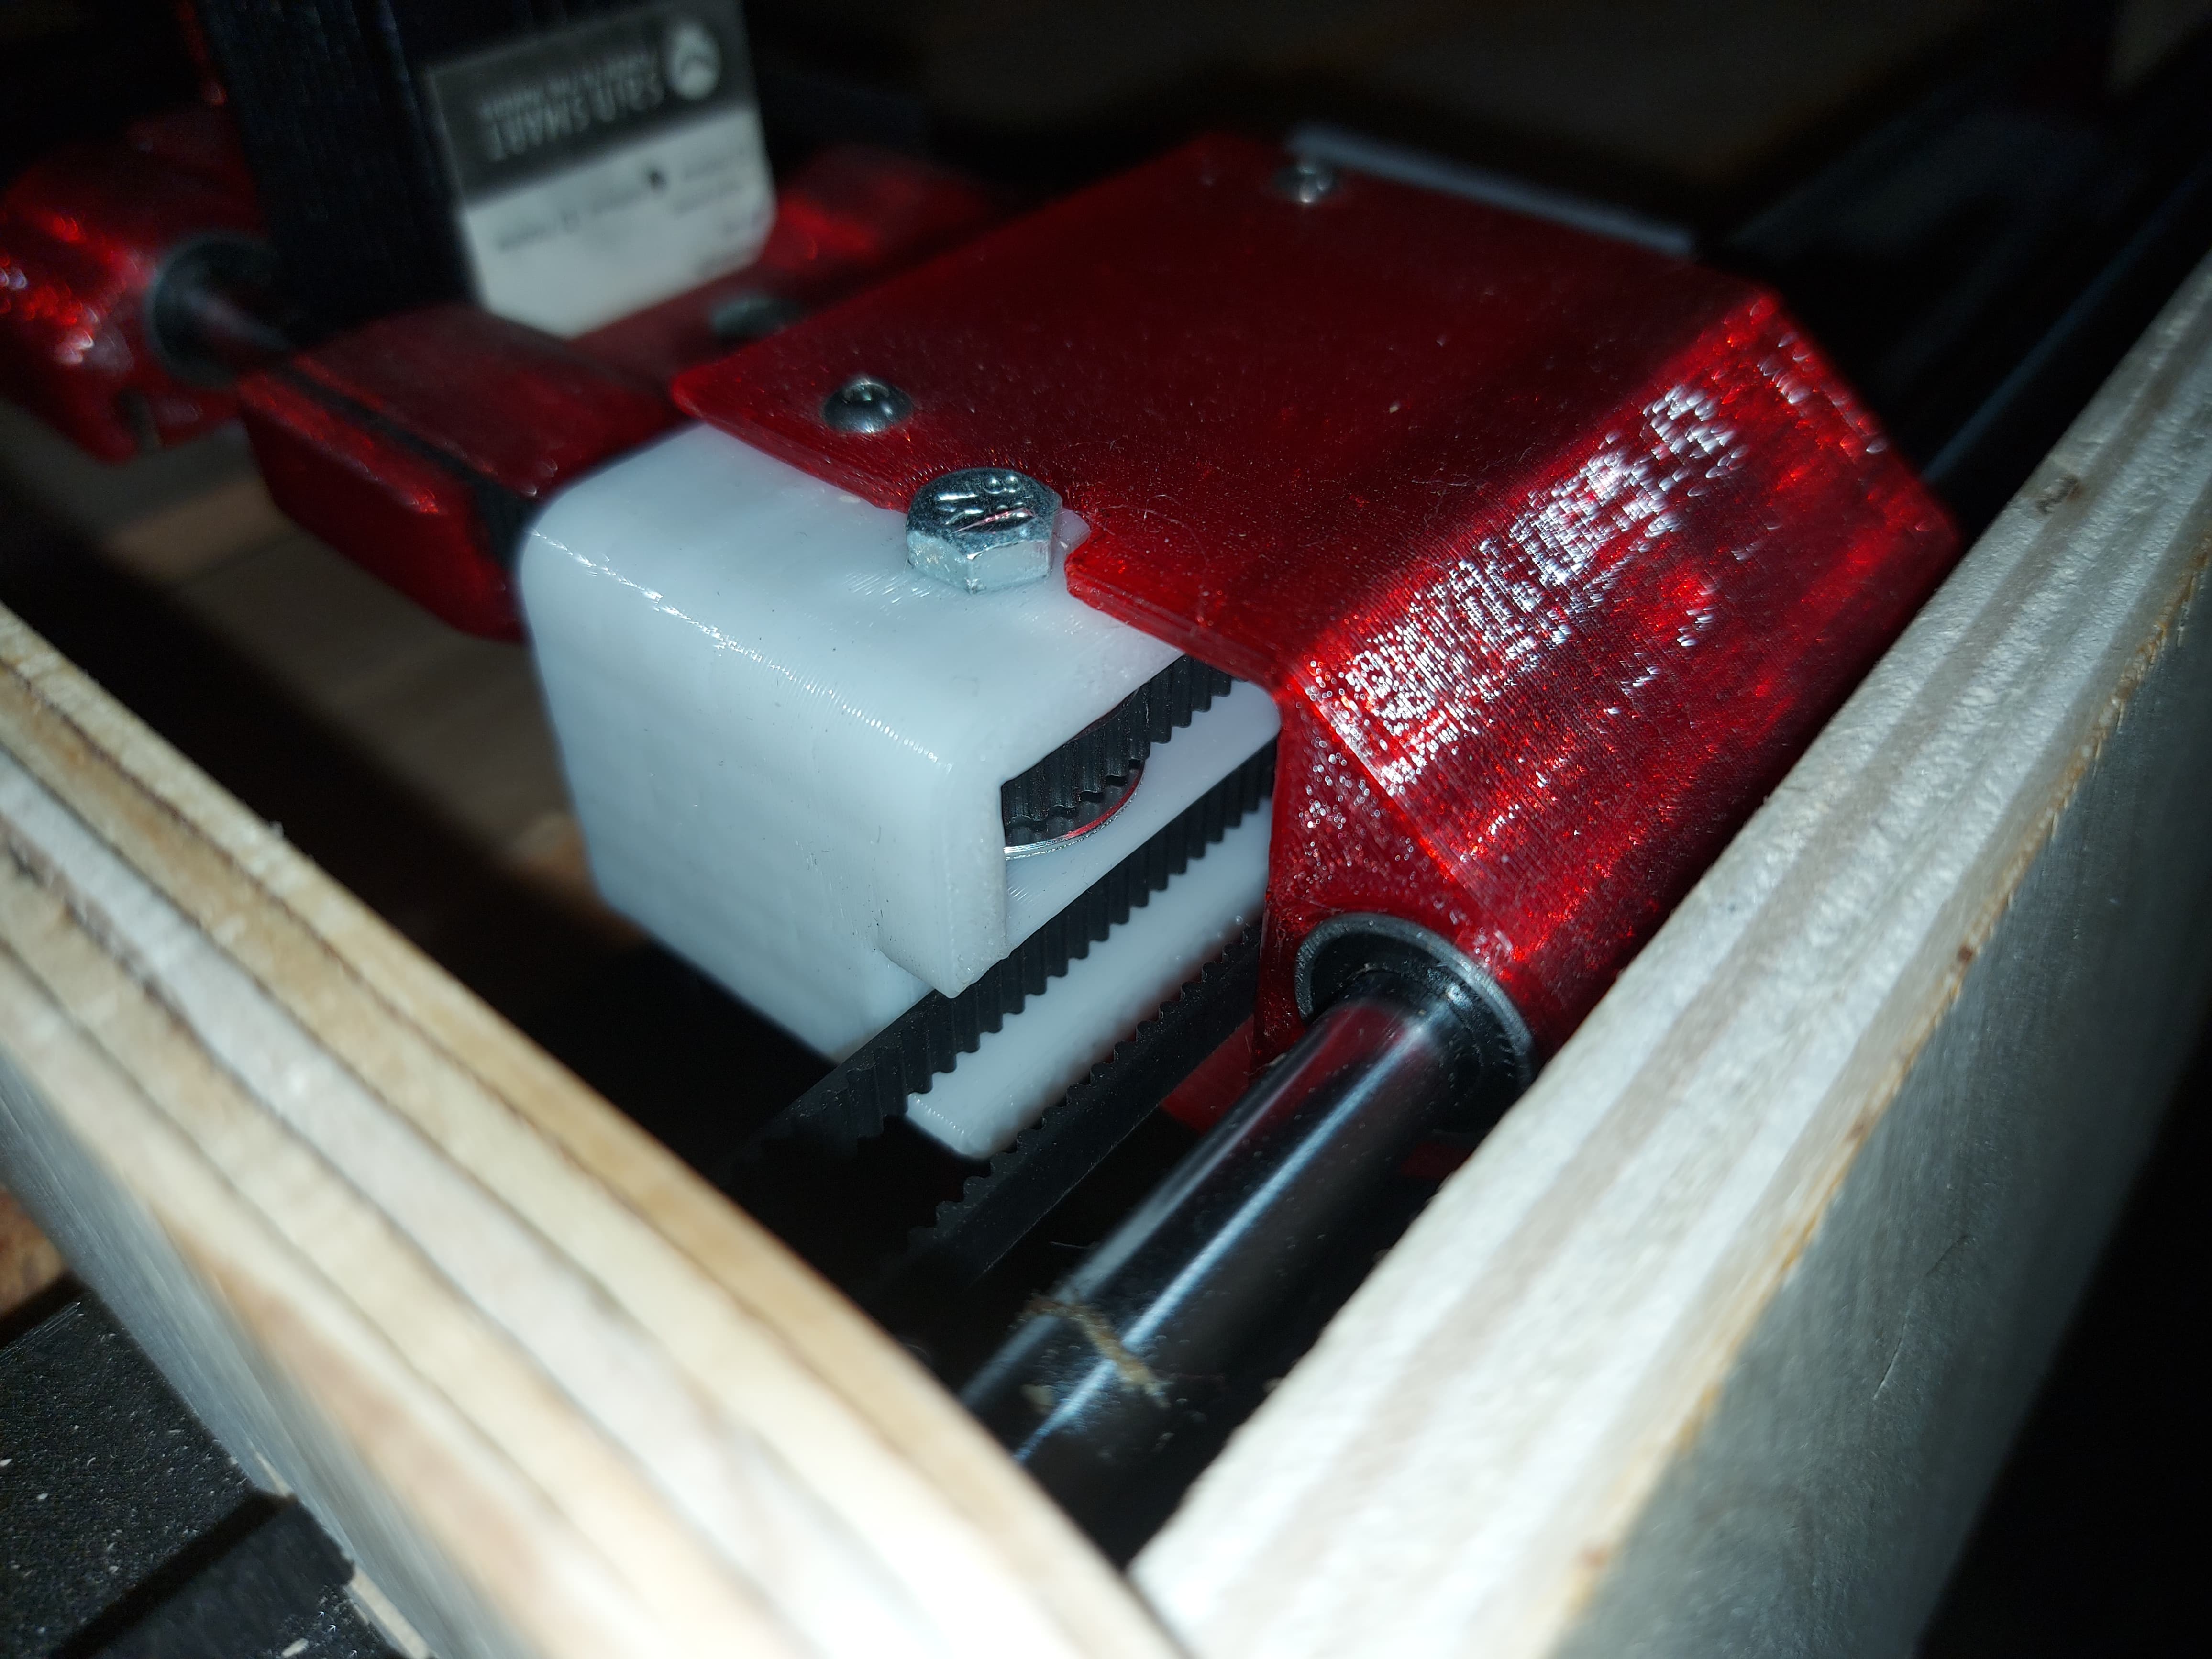
So from the motor, the outside belt goes back to the rear pulley, and the inside one goes to the far carriage pulley. The belts do a 1/2 twist across the back, (necessary to have both side pieces the same, IIRC. There was a reason it needed to be that way…) anyway from the back, it goes across to the near side pulley…
Does that help?
2 Likes
Gotta help junior with his homework and get him to bed - and then I’ll have some peace to look at things!
2 Likes
As instruction…
Loosen the motor screws and push the motors to their farthest in positions.
With the motors towards you:
-
Start at the far side of the core and push the belt into the locking slot.
-
Run the belt through the truck to the corresponding toothed pulley, then route it towards the motor.
-
Go through the large hole, and around the motor pulley.
-
Go all the way to the back, through the outside slot at the same height as the motor. It should go to a toothed pulley.
-
The belt makes a half twist to a smooth pulley at the same height, towards the inside at the other back corner.
-
The belt goes to a smooth pulley closer to the motor on the truck, and goes inwards towards the core. Make sure there is enough left over to reach the core, but don’t put it in yet.
-
Repeat for the opposite belt. It will route the same, but the opposite side.
-
Once both belts are in place, put the ends into the core slots reasonably tight. I managed this to be very nearly target tightness.
-
Small adjustments to belt tension will pull the machine to better squareness.
I never did put end stops on this machine. My idea was to use the roller arm switches, but since the coreXY keeps the machine square, I just power it on with it at the zero point, and let it run.
1 Like