miserable naming fail. New name shall be:
Rubber Baby Buggy Bumper
call me before misname the Vitameatavegamin
miserable naming fail. New name shall be:
Rubber Baby Buggy Bumper
call me before misname the Vitameatavegamin
LOL, I had a flashback to an old “Tom Slick” cartoon episode (or was it George of the Jungle?)

I think @DougJoseph only designed the variable size shoes for the Makita for v1. It appears that a re-engineering of the design would be required to accommodate my Dewalt or Kobalt (coming soon) and work has me tied down pretty good right now.
My spindle is 65mm so it rides in the makita mount.
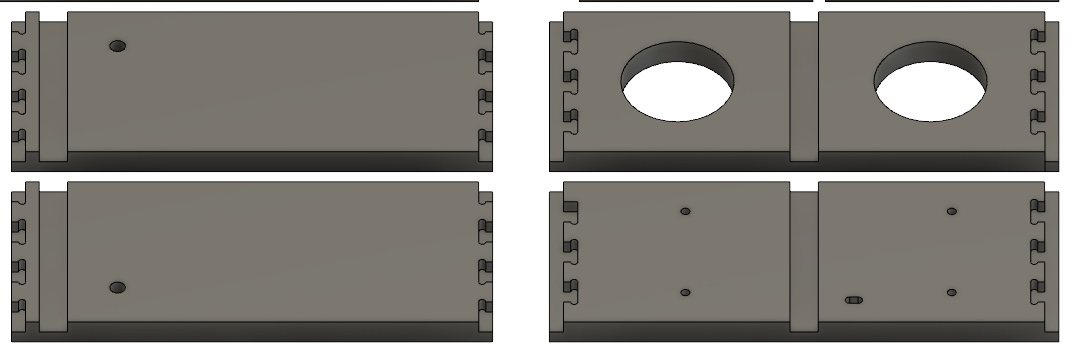
The v1.1 Kobalt and v1.1 Makita shoe bodies are the same. I think the v1.1 Dewalt shoe body was ever so slightly longer.
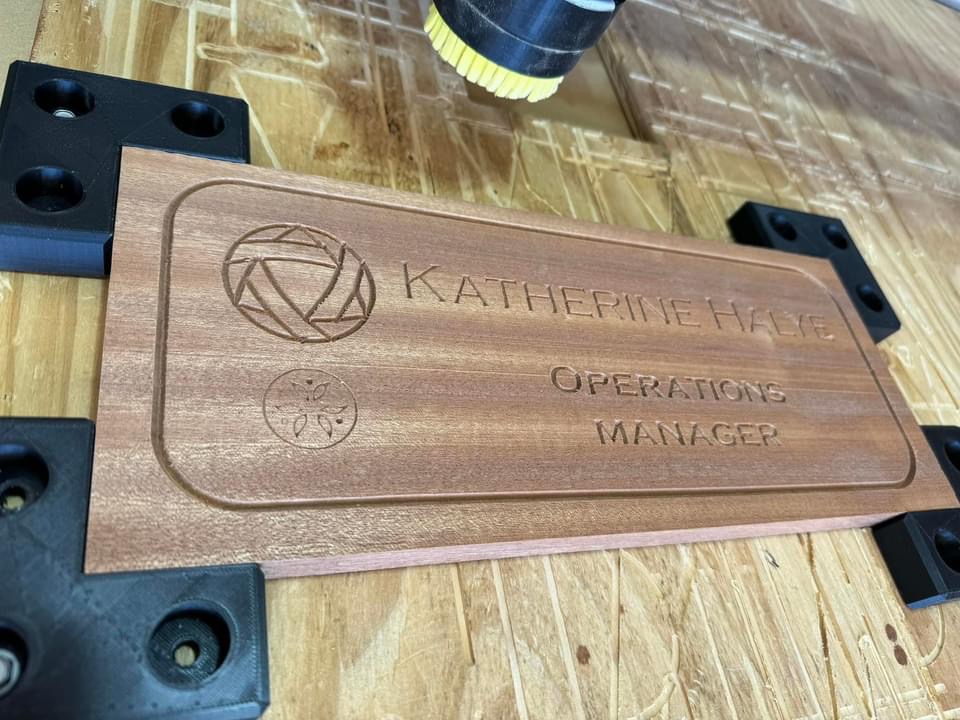
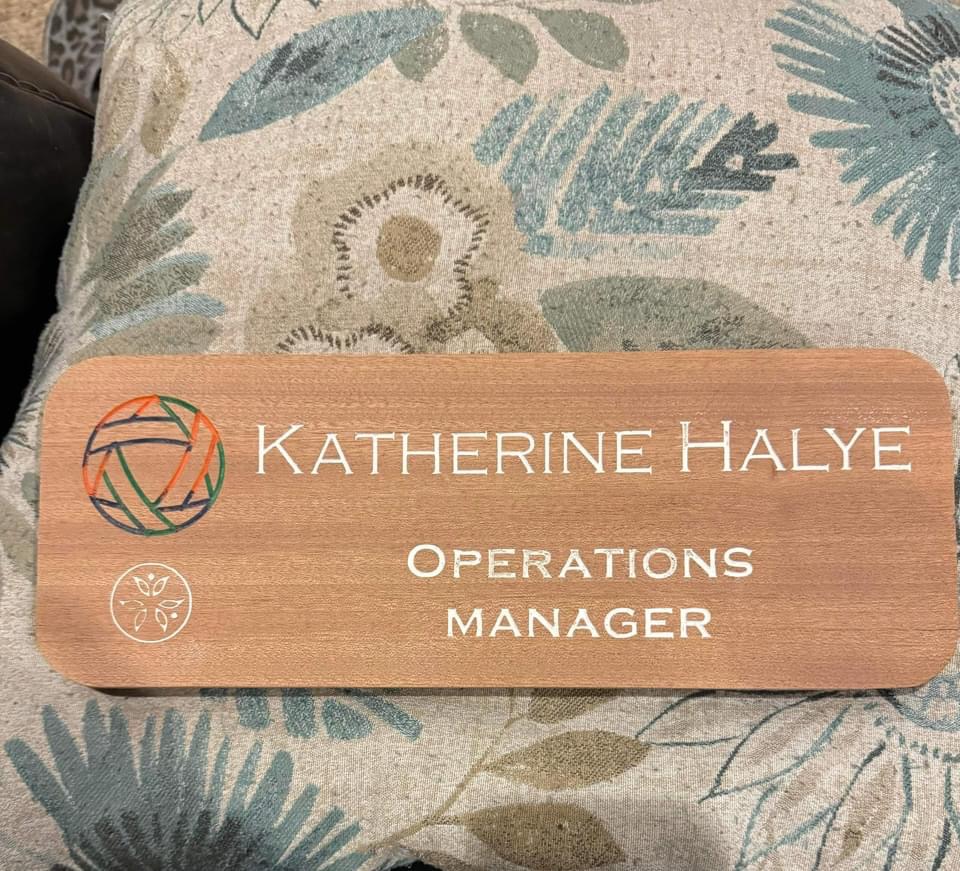
So today I created something interesting for my wife (I am not an artist/painter and the paint could use some work before a clear coat) and learned a lot of things NOT to do, lol…
So, starting off with the good stuff:
The things not to do hit the trash before I thought to take pictures. The good news was that the failures were not on African Mahogany…
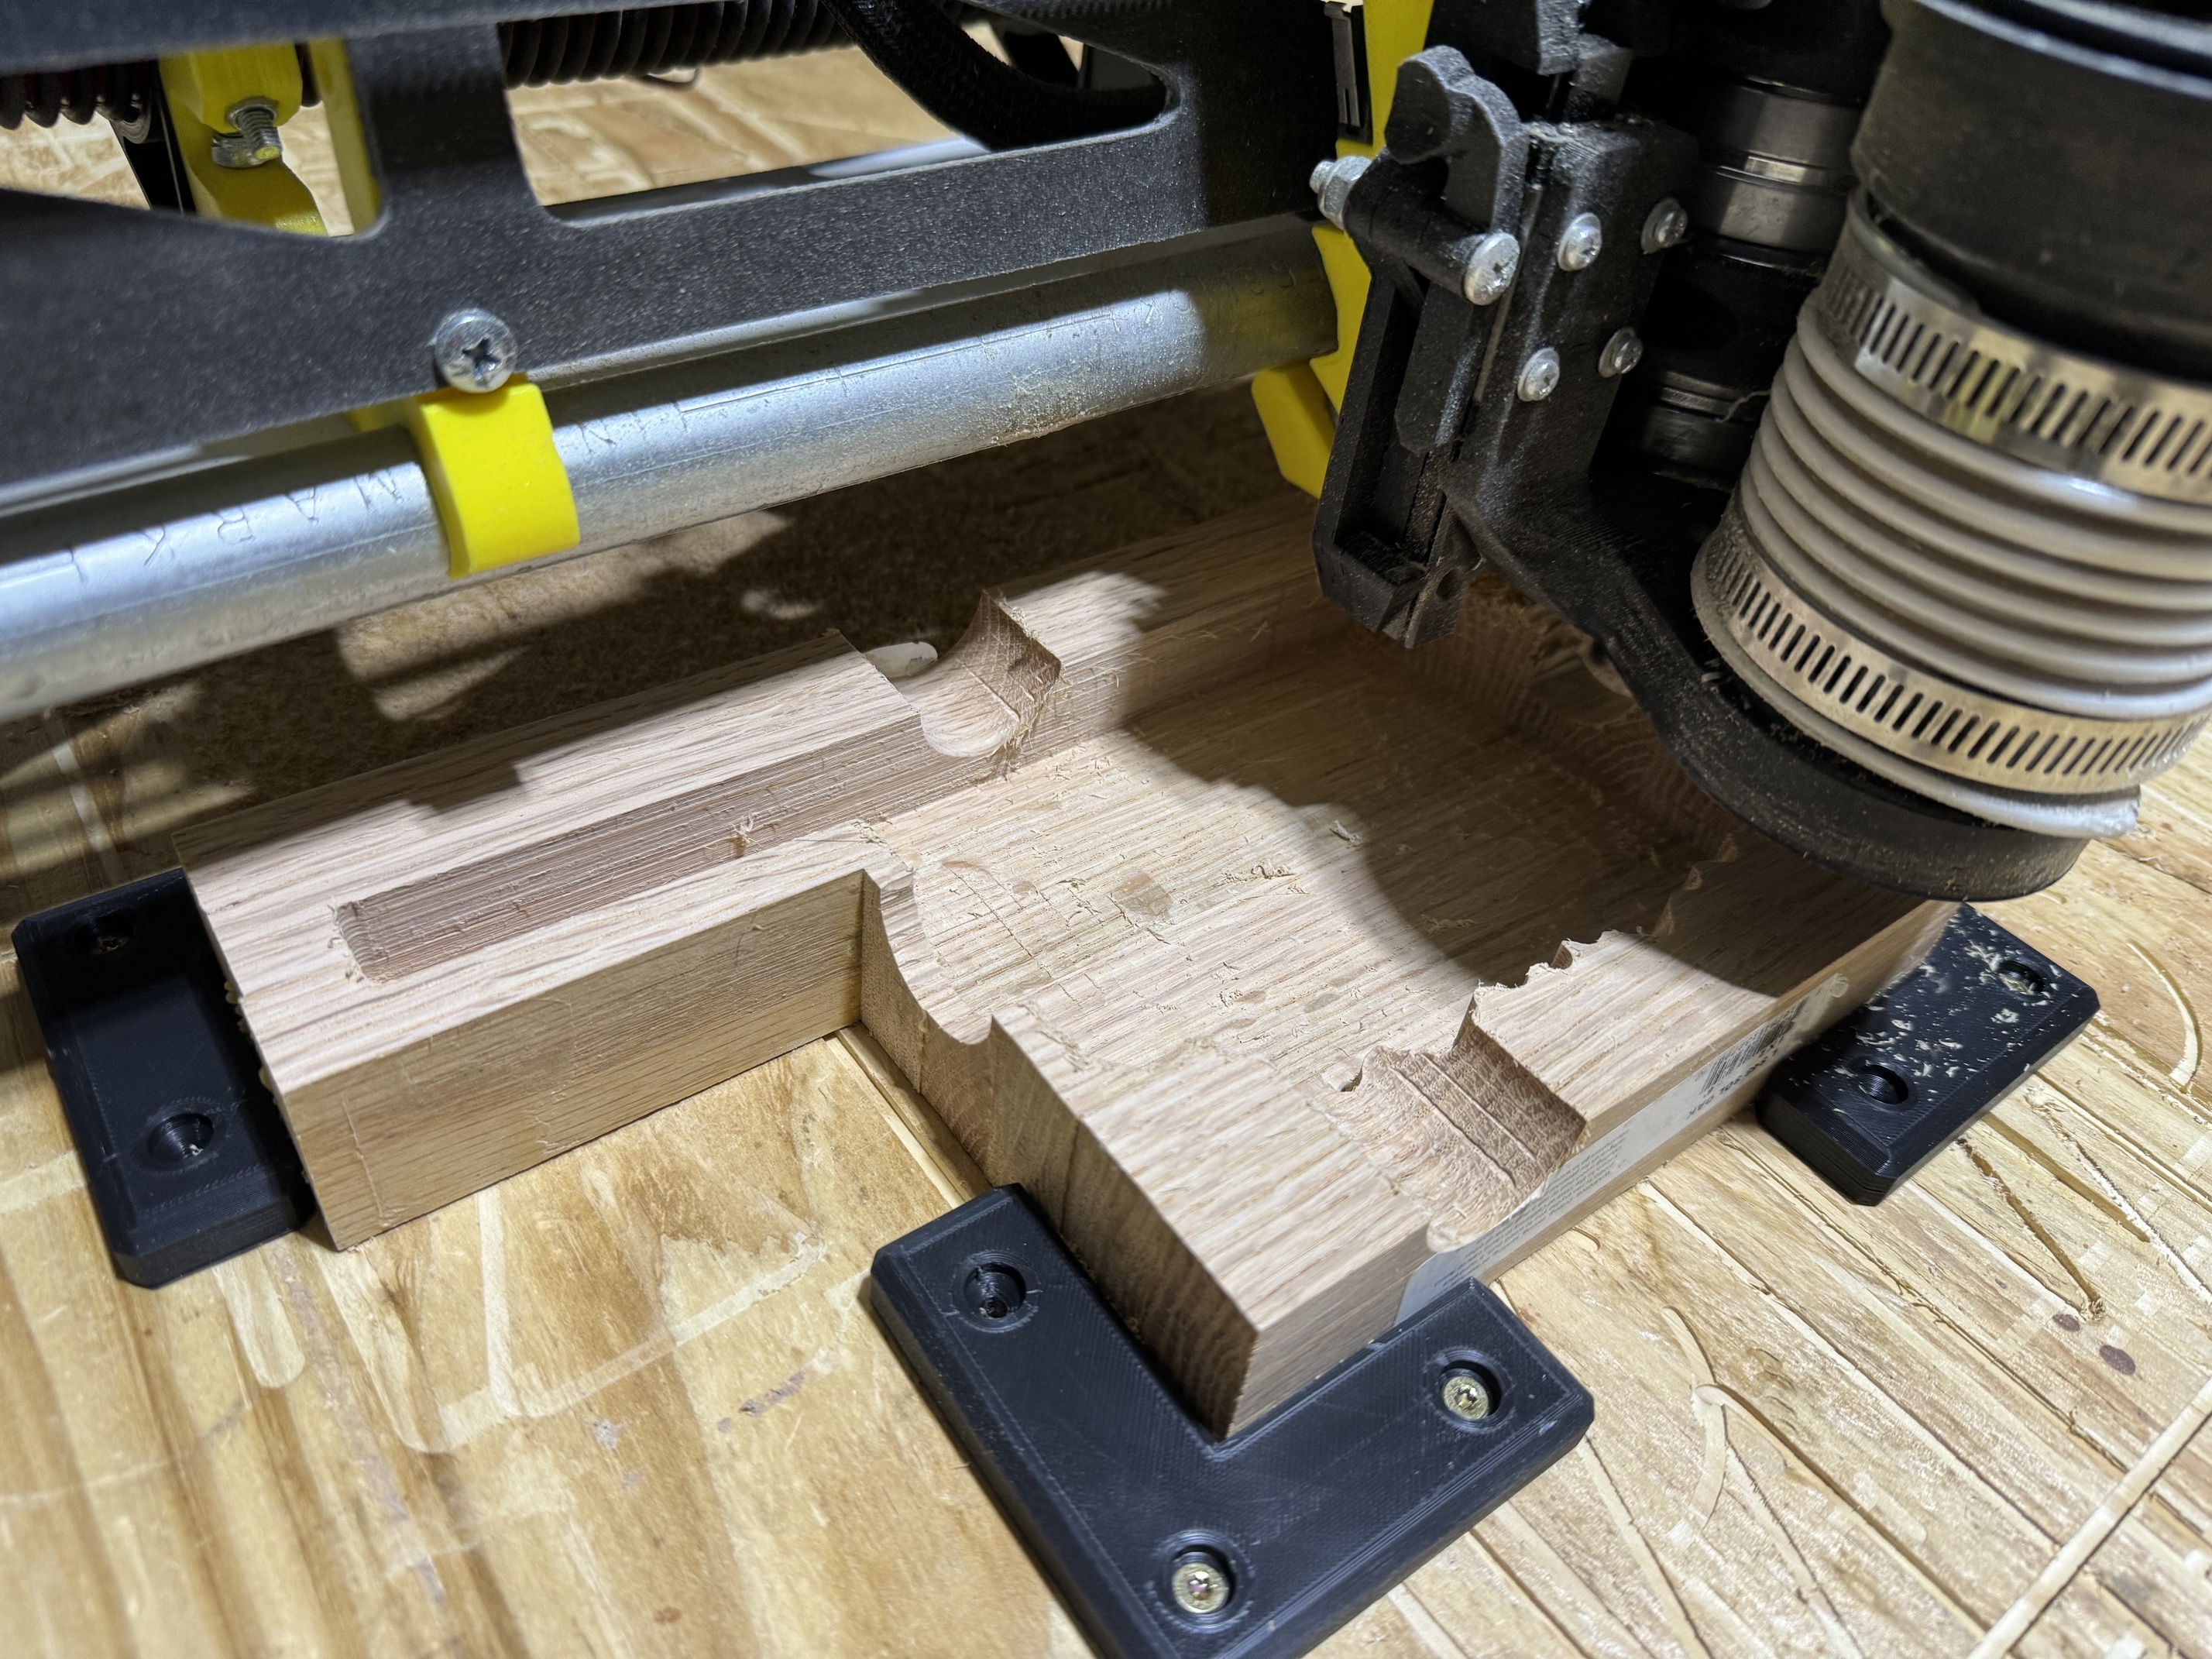
First, if you set up a 2D contour cut and forget to set the layer depth height, it will totally turn your CNC into a full depth cutting (3/4”) full speed screamer that tends to lose steps. I was surprised at how little problems I saw on this, but it still caused them nonetheless. This was my first attempt at using IDC Woodcraft’s The Beast 1/4” Roughing Bit and it worked surprisingly well when unintentionally abused.
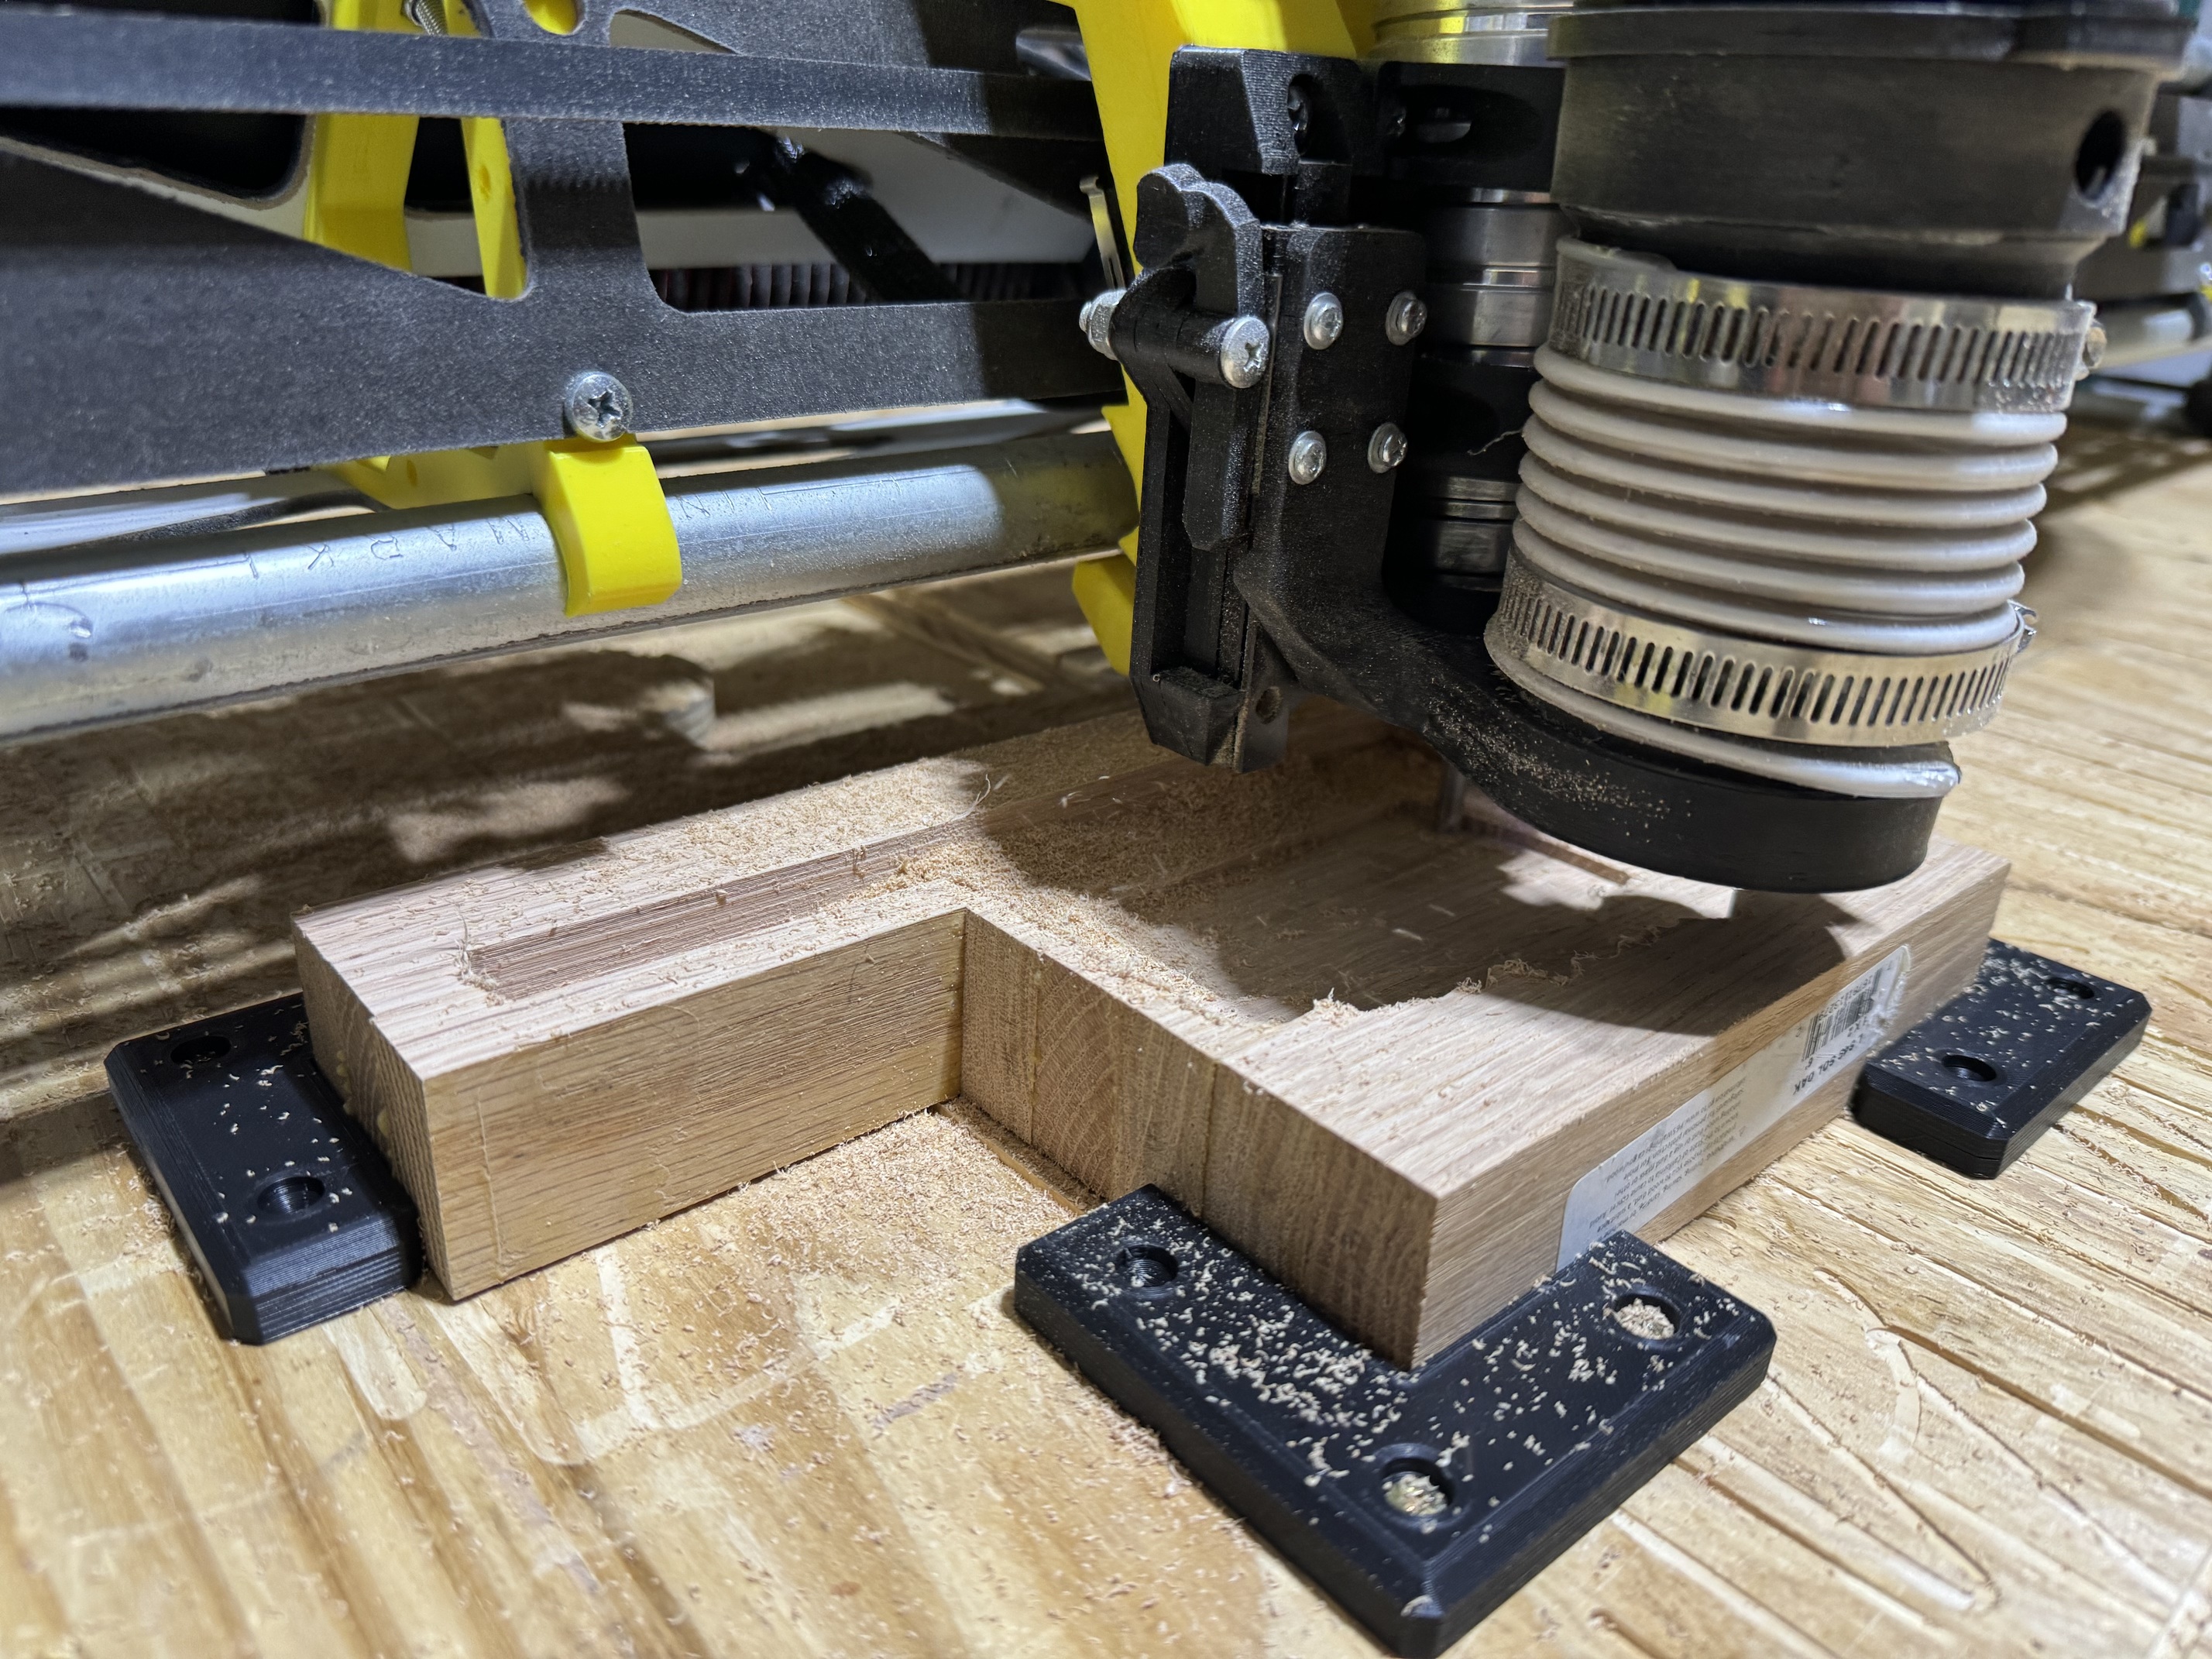
Second, sometimes upgrades don’t work the way you thought they would. I altered my dust boot by adding the “Rubber Baby Buggy Bumper” and it caused a couple problems. The boot to struck the side of a piece and did not ramp up, which caused one failure. The bumper also prevented my router from dropping to max depth causing the gantry front wheels to rise during deep cuts and eventually ended up grounding out in a previously cut pocket. Lots of lost steps and destroyed pieces. But, I learned and that’s what is important. Also that I did this learning on MDF. @DougJoseph your original design still reigns supreme on my machine.
Third, when you buy new bits, compare them to your old ones to see if you might need to alter your tool paths. My new 1/8-bit (IDC Woodcraft’s The Badger) is 3/4” shorter than my 1/8” Compression Bit and my LR core grounded out on the surface before completing the cut and ruined the piece. It’s still a great bit, just can’t run it on that job anymore.
Lessons learned today:
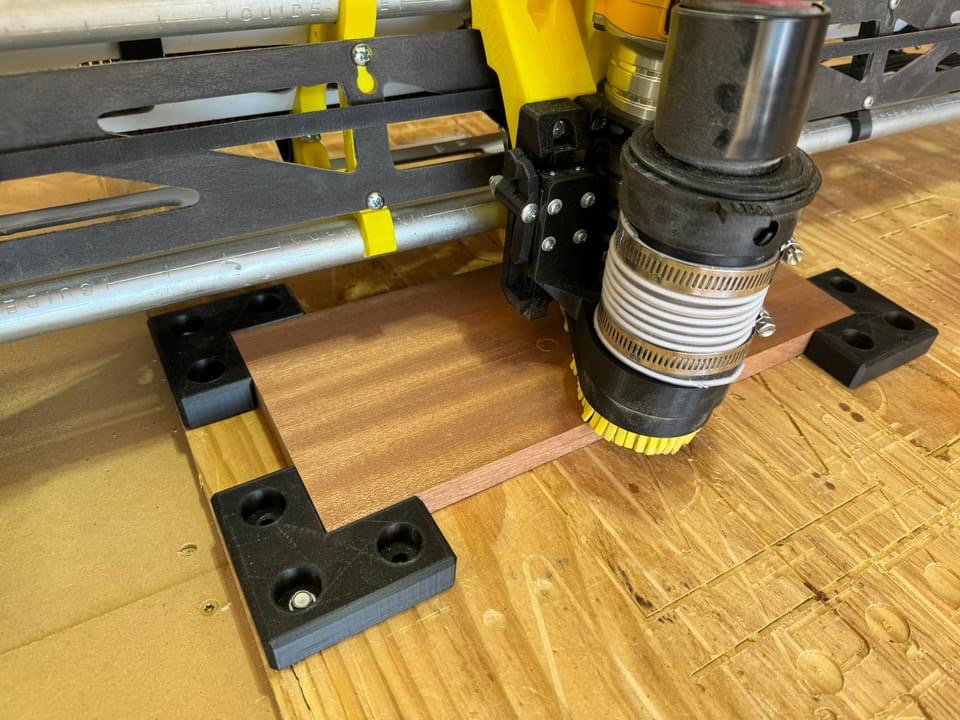
1 - If you wire your Y-steppers correctly, you, too, can engrave your wife a cool new office name plate with her name facing in the correct direction.
2 - M17 does indeed engage the steppers, but tightening the collet nut on a Dewalt can still force the X and Y steppers to pop out of zero if you use big old bear paws to torque on that sucker. As with many other things, a gentle touch is better appreciated.
3 - My LR3 can successfully take 1/4” passes at 1500mm/min on plywood and MDF, making much shorter work of jobs.
4 - An efficient CNC dust collection system makes for a much happier CNC operator.
5 - Baltic Birch plywood is both fantastically built and ridiculously expensive, but damn it’s pretty.
I might be wrong, but I think you mean mm/m? 1500mm/s would be quite a feat!
Do you mind sharing some other details about your contour setup in fusion? If you’re doing left or right compensation and finishing passes etc. I’m still trying to hone mine in a bit, would be nice to compare to others!
Good work so far!
You sir, are not wrong, that should be 1500mm/min.
I’m not sure what you mean about compensation, but I’m allowing for cutting in both directions on pockets and I believe I’m using climb on the contours. Also just a single finishing pass at 0.2 mm if I remember correctly.
I can get you my exact cutting parameters when I’m messing around on it tomorrow. Hell, you’ll probably end up giving me pointers on stuff I’m doing wrong. I’m new at this and a lot of people prefer Estlcam or VCarve software over Fusion360 so it’s hard to compare.
My wife named our car and it lives in the garage, so I can’t leave it outside overnight or during the day in bad weather. I only get to experiment with the CNC on weekends as setting it up for a few hours after work and then breaking it down before bed would be horribly inefficient.
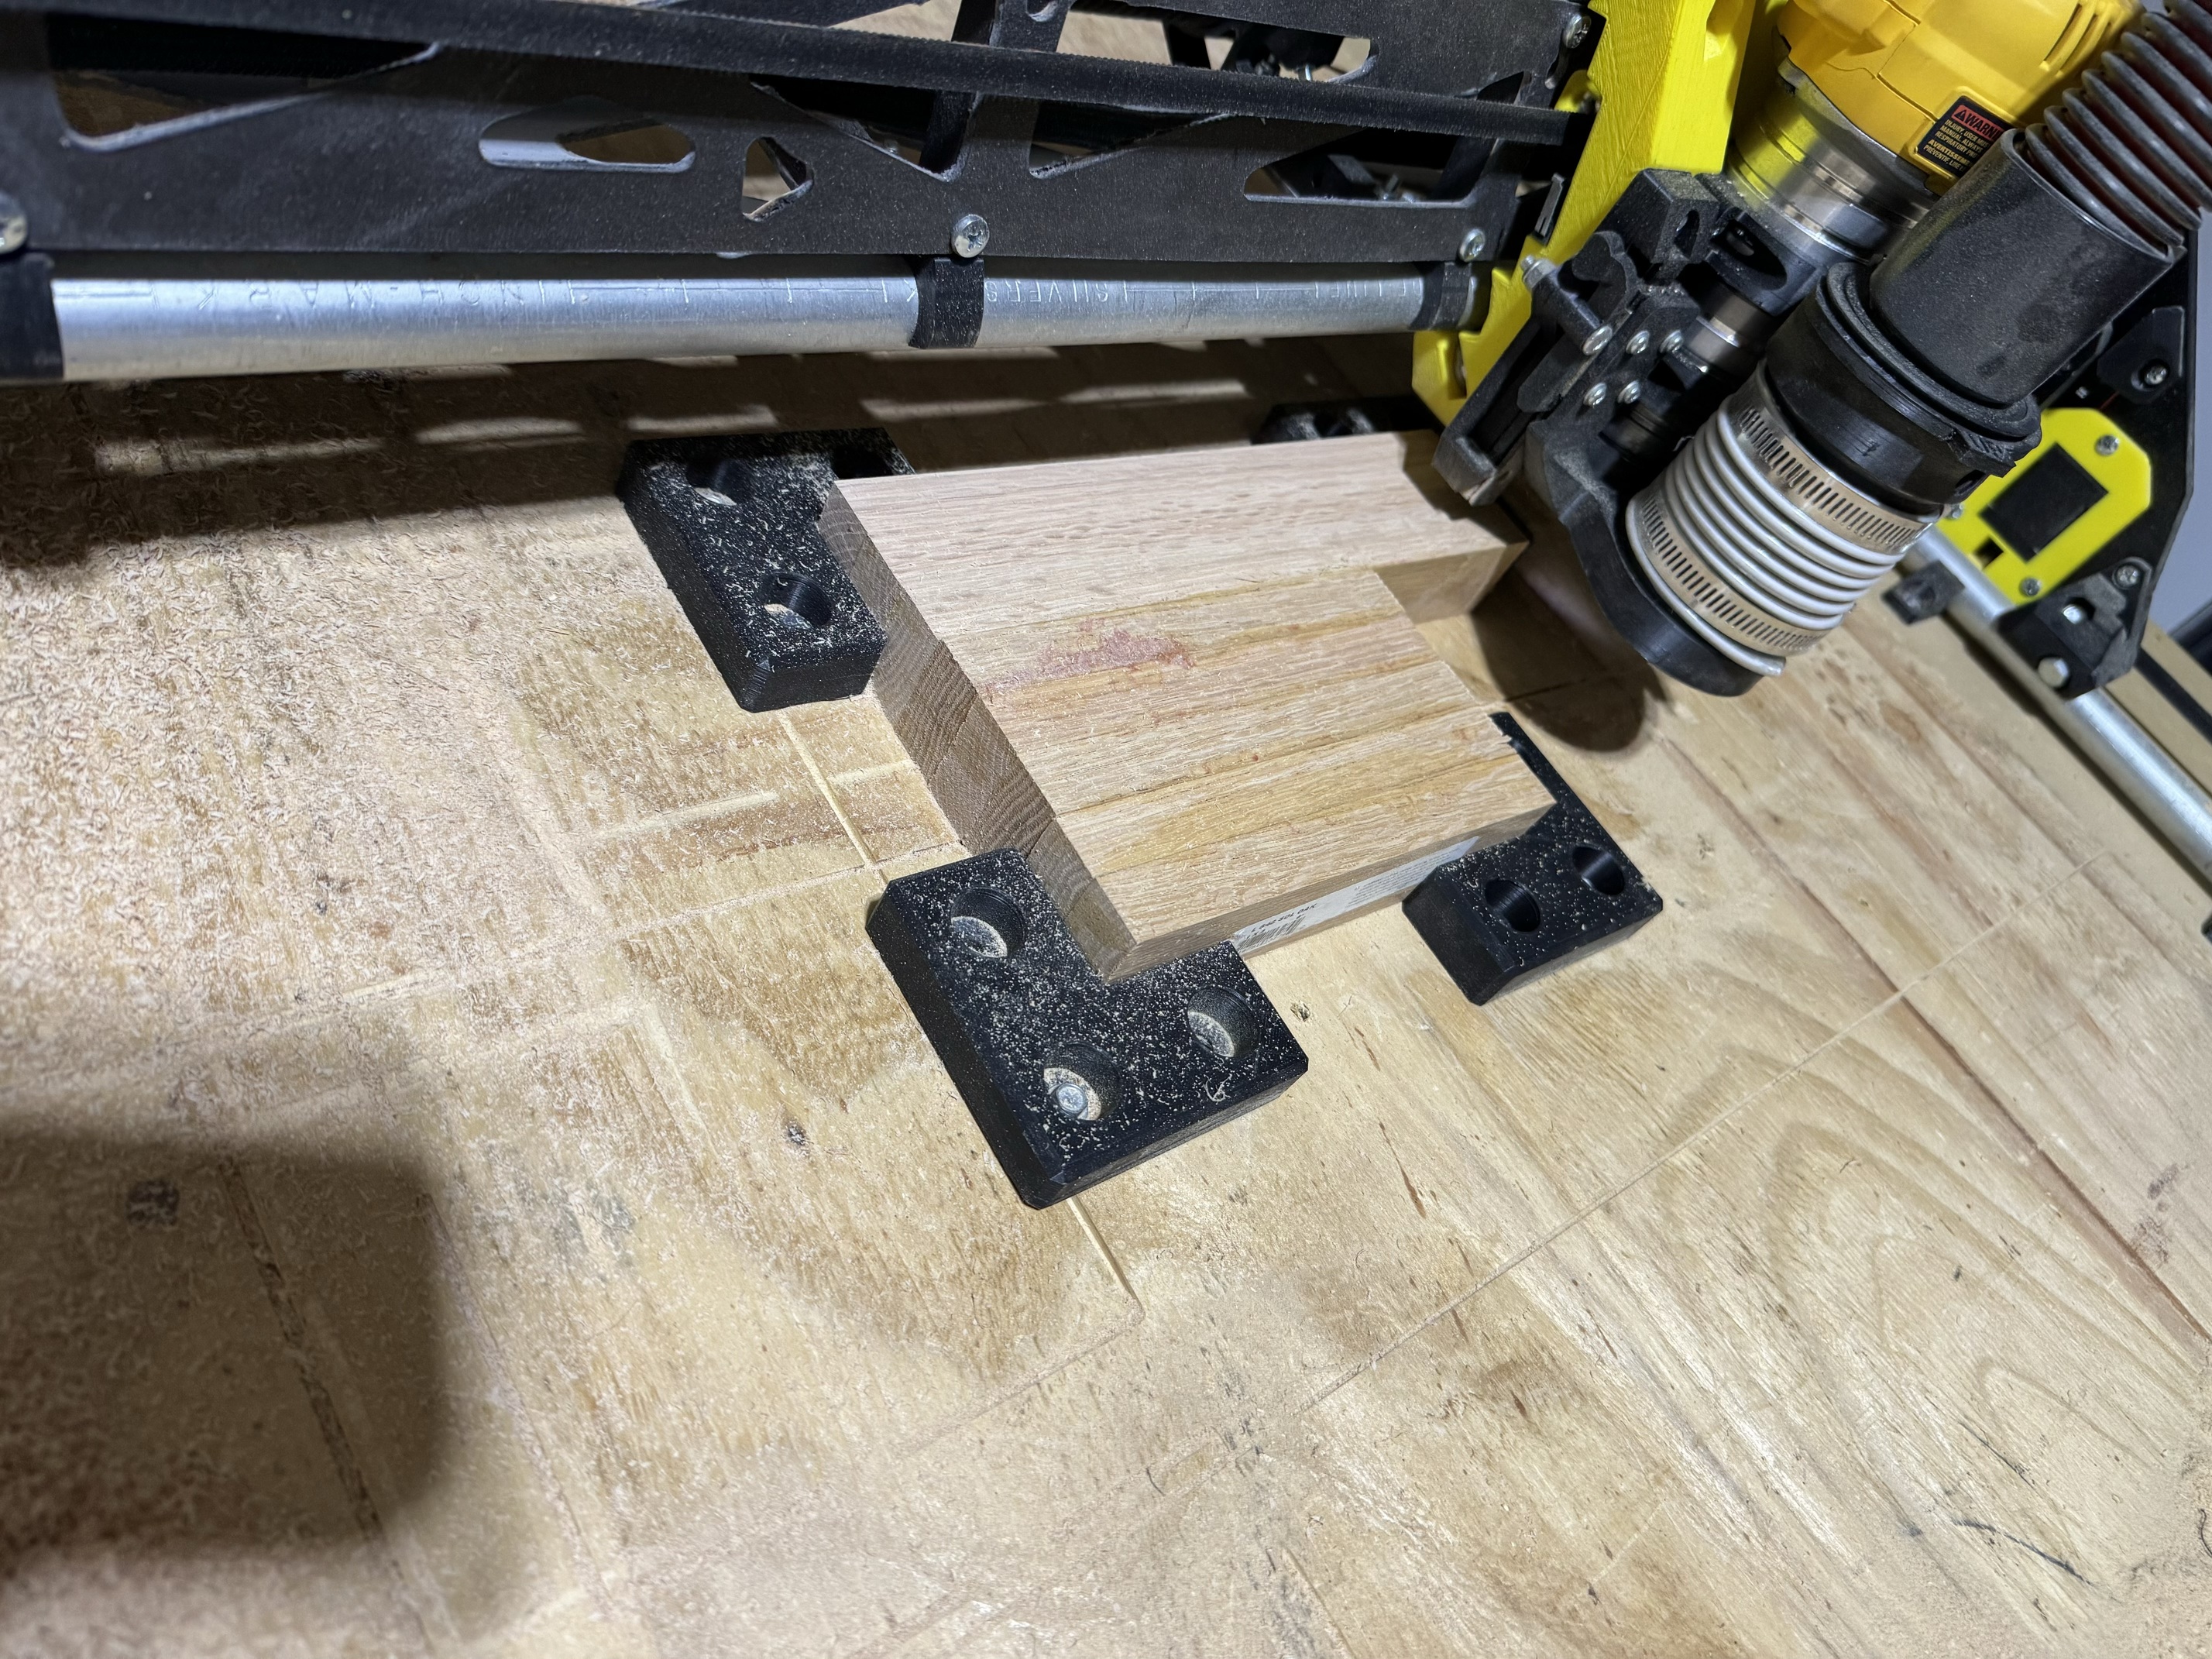
However, I’ve gotten fairly decent at designing things in Fusion 360 since i can sort of play with that at work. I really like these blind box joints I’ve been making for boxes.
First try at Surfacing using a Kowood 1-in diameter 1/4-in depth 3 flute surfacing/slot cutter bit.
It will hopefully end up as a custom engraved Oklahoma shaped cigar ash tray.
Goals… everybody has them. Now i have mine. 1500mm/sec. Lol no way i ever get there but it’s good to have goals.
I’m I looking at expanding into a new Laser and I’ve been looking at the 40W optical units so I can cut 3/4” plywood and MDF, but the Neje Max4 E80 claims that they out perform the 40W unit at their optical power rating of 24W.
Anyone done any testing on this to validate if that’s true? If so, it also comes in at about $200 less than the Laser Tree and Creality 40W optical power modules.
I’m also wanting to adapt this for use on the LowRider 3 and my Snapmaker A350T, but that’s a whole different problem, lol.
I’ll probably go with the @DougJoseph mount for the laser to work in tandem with the Router without having to change mounts, wondering if my SKR Pro will handle them both, is there a firmware change requirement for this? I have been told the Jackpot would likely be a better main board for this idea, but just testing the waters first.
I’d want to see 24W optical power at 450nm cut 3/4" MDF.
That cut would be trouble for a 100W infrared tube laser, so you can count me a serious skeptic that you’d have good results with either point focus 24W or even the 40w optical laser on that material.
Someone, I think Dan (@SupraGuy) mounted a heavy powerful diode laser, and had flexing issues with my laser mount on Printables, and he had to beef up the support for it to keep it from vibrating on sudden direction changes. If I remember right, this was not raster engraving but vector cutting.
The SKR can control a laser (send the low voltage PWM signal). My understanding is that where the Jackpot does better, is the speed for raster engraving, and ease of using Lightburn with it.
Yeah, the mount does want to flex under load. Probably OK with lower accel, but that brings more problems to vector engraving. I did a different mount that uses the same system that works better, but I broke my example. It broke rather than the magnet disengaging…
So question about belt tension…
Can you use a digital fish scale and a ruler to calibrate belt tension and ensure that tension matches on both sides?
For instance, pick a spot in the middle of your belt and place the ruler down perpendicular to the belt. Then take the digital scale and pull on the belt laterally until you hit a cm or inch, the distance is arbitrary. Read the weight from the scale and then do the same on the other side to deflect the belt the same distance. Then, just adjust one to match the other and re-measure the tension to make sure it’s right.
Something like this for the scale?
https://a.co/d/1LuvE3y
@vicious1 Would the 6-10 lbs of tension you mentioned in the documentation work with this method?
Sure, but it does not matter that much.
You are kinda overthinking it. Once you get the slack out there is not really a difference between 6 and 10lbs tension. Close is plenty good here.
You’re not wrong there. I picked up The Beast from IDC WoodCraft and I’m trying to think of ways to maximize roughing speed without losing steps or over-tensioning the belts (I’ve already snapped a set of Y-Tensioners and rebuilt them at 100% infill to compensate on a prior occasion).
Also, it wouldn’t hurt to get a baseline for myself on what 6-10 lbs of tension feels like. I see the Y-belts kind of jumping around when the steppers change direction or stop suddenly, so I don’t think I’ve got it set right.
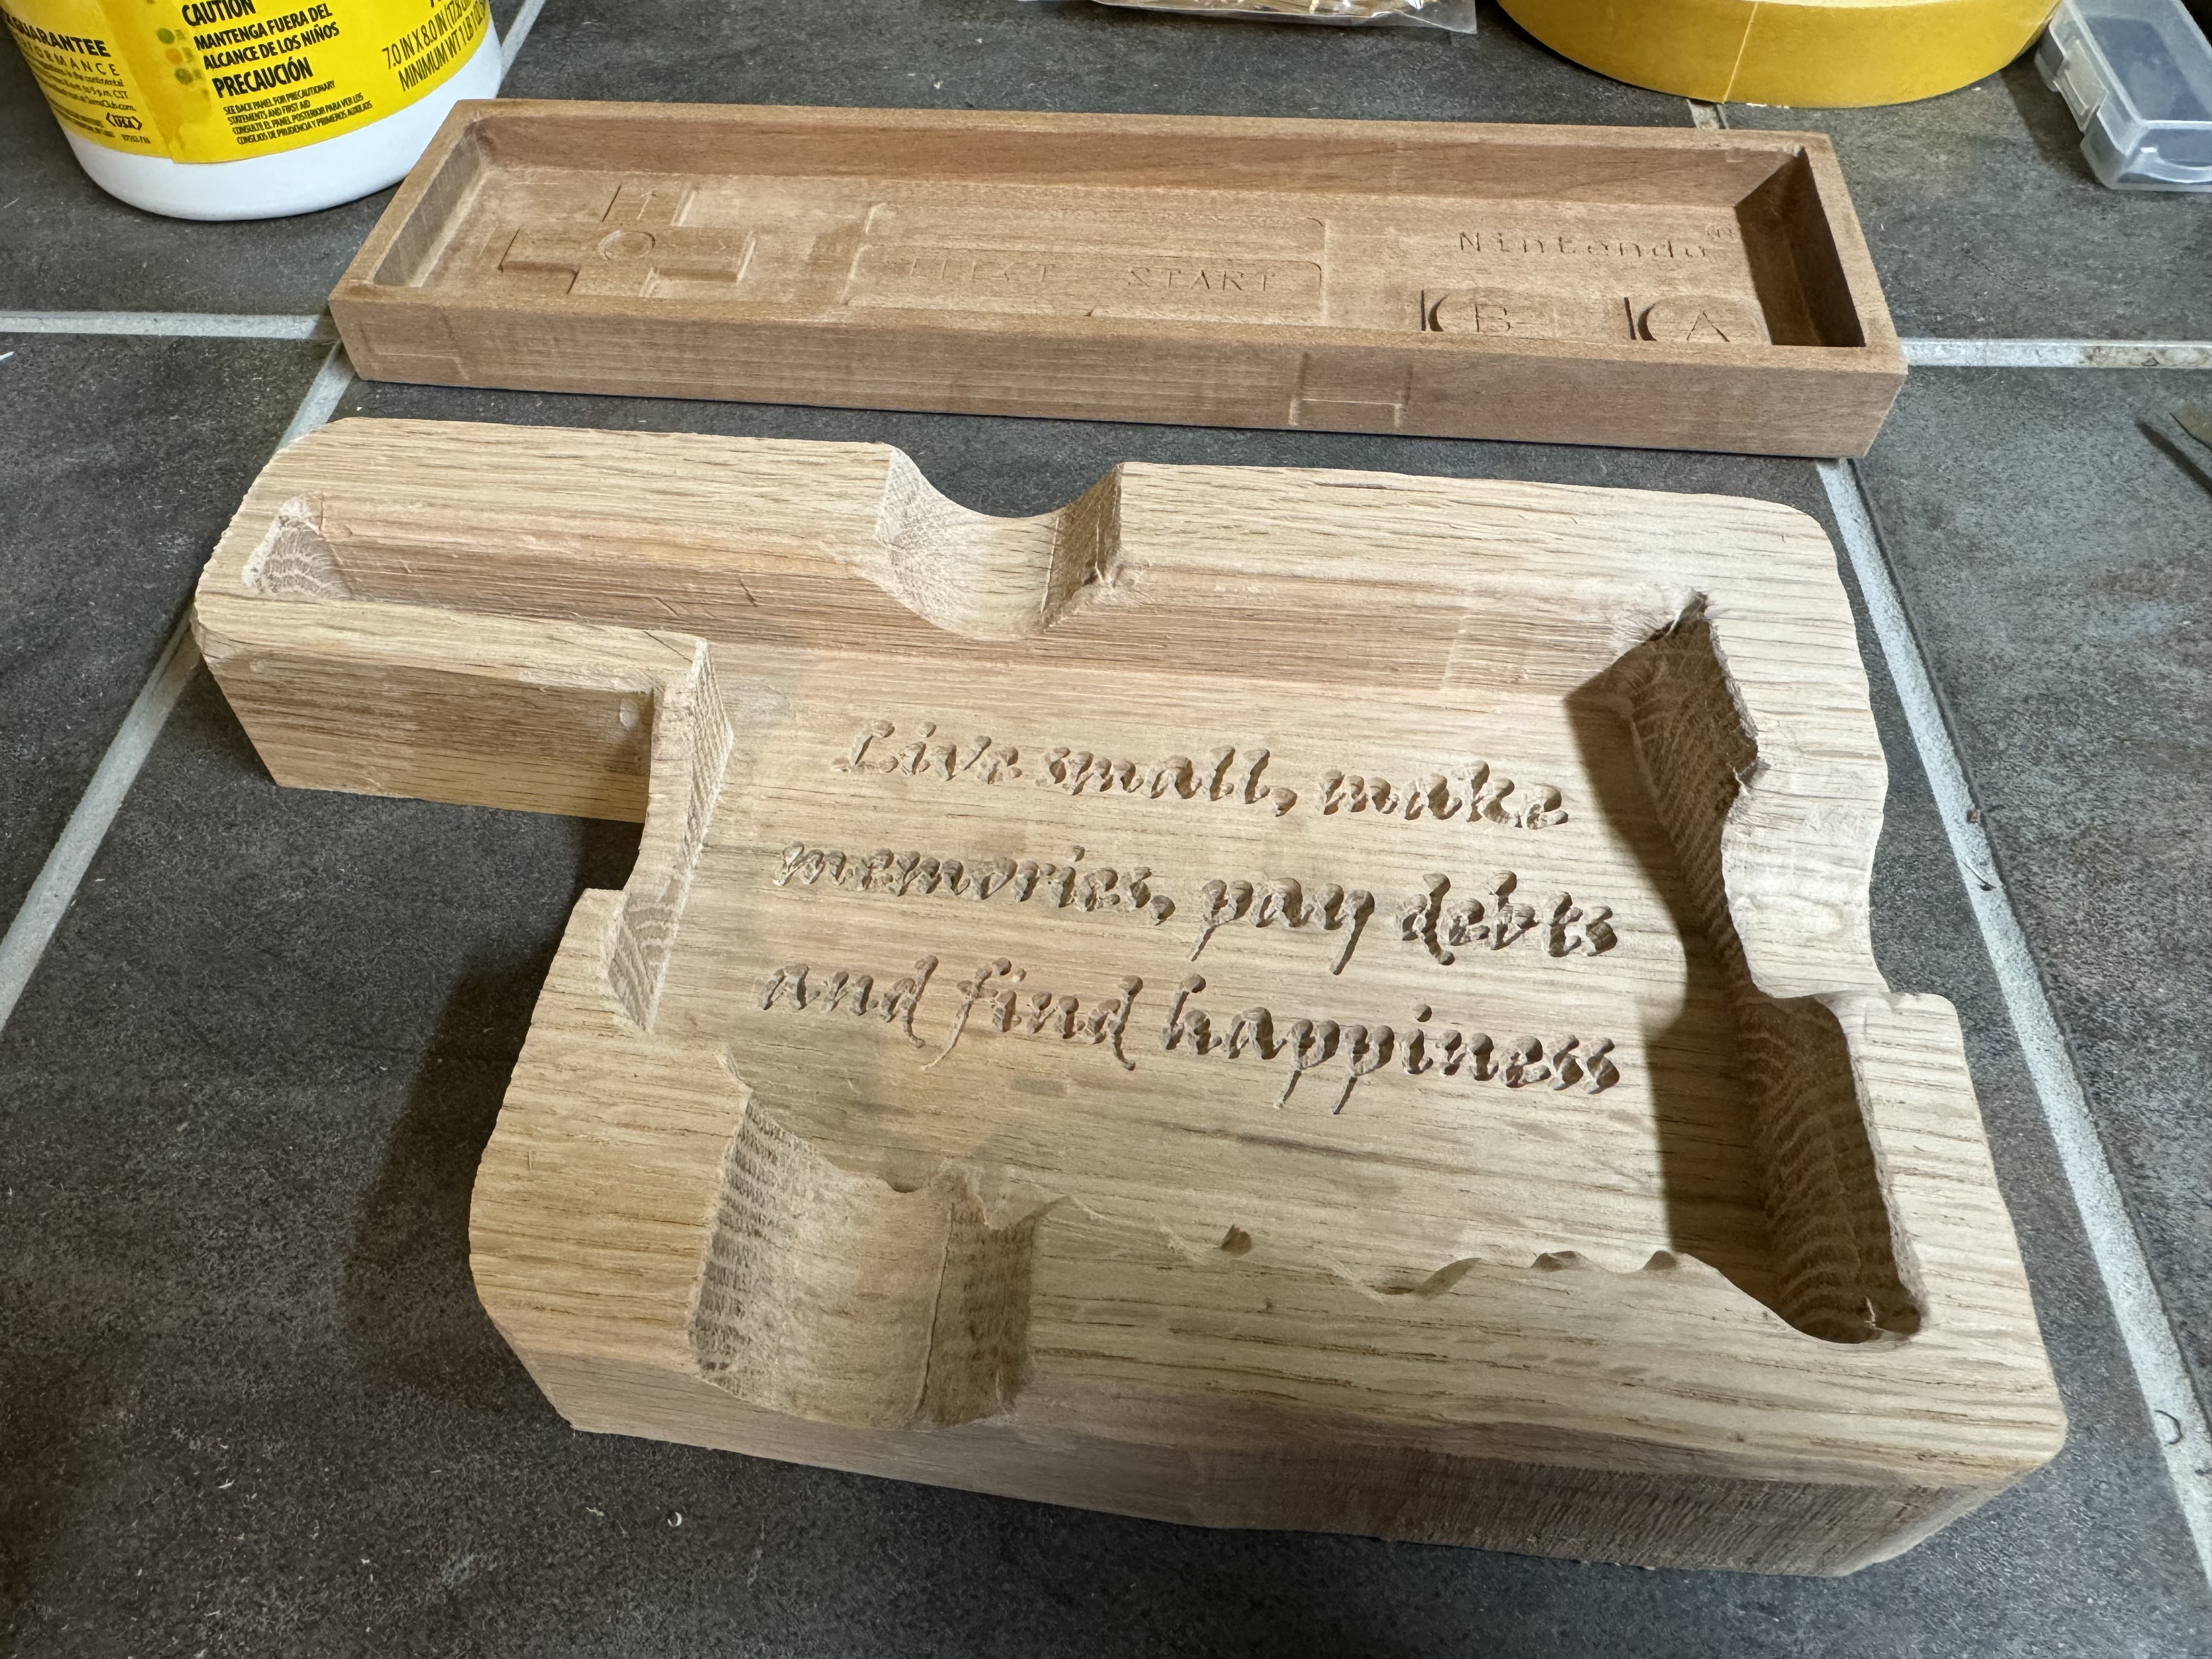
Pulled the dust shoe in case it caught an edge, so I’m on shop vac duty for this one, but the Oklahoma pocket is looking pretty good so far!
And.:. My v-bit is too short to get down to the bottom to engrave it.
Ooh!!! My Snapmaker has a spindle that sticks down pretty far… maybe there’s a solution without having to go buy more stuff, lol.
Update
Snapmaker for the win! Nice deep 60° engrave for a quote a friend wanted. Still needs a little sanding and cleanup around the outside, maybe a couple feet on the bottom and some mineral oil.