Welcome to the world of getting caught just starring at your table!
3 Likes
This thread is just what I needed to stumble across - thanks! I’ve had ZenXY on the brain since my first burly but right up until this very read have always put it on the back burner because my target is our [giant] dining table. I’m now going to follow your footsteps here and build a small version to “sort it out” and play with before the full table build.
2 Likes
I’m really glad I’m doing this small first as it really is helping me find and sort out little issues.
I’m still struggling with defining the dimensions and getting homing working reliably. I think at this point I’ve crashed it enough that the belt has shifted a bit making the issues worse…so I need to do some real investigation into the belt and homing which will require flipping the machine over…and that’s a lot easier to do on this smaller build!
Last night I remembered that I have some small 6mm bearings…so I decided to give one a try - I’ve been a little frustrated with the “resolution” of the 1/2" ball on this small table. My first try I screwed up though and did a spiral at 1.5 wiper thinking it was a 3mm ball. It worked…but it was way too fine and I had my machine dimensions off again so it crashed into Xmax:
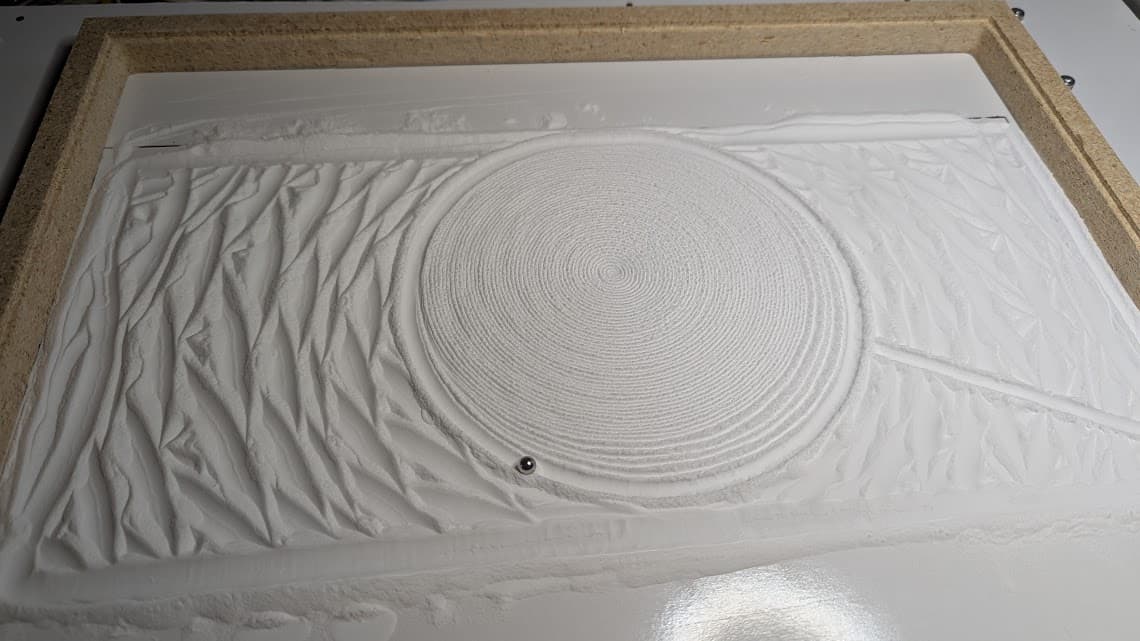
You can see how the pattern stopped being consistent after it crashed.
But you can also see how it’s not centered.
One part of that is it’s not homing consistently - there’s an almost 5-10mm range where it seems to home and I’m not sure what is causing that.
I’m guessing Ryan went with the optical end stops to avoid the click of a switch…but I’m starting to think I’d rather live with a click if I can’t get consistent results out of the opticals.
The other issue is I just input my table size wrong into sandify. Whoops.
I tried again with a 3 wiper to go with my 6mm ball and it looked better - but apparently I forgot to take a photo…and even with the machine dimensions set smaller it still crashed because x homed slightly differently ![]()
1 Like
Optical endstops can travel past the zero point as well. With trigger switches, you do get the click whenever you go back to 0. But you also can have trouble because you can’t travel past the zero point. And IIRC, the worse consequence of regular trigger switches is the the X trigger can only be triggered when Y=0. If you travel down into that X trigger switch from positive Y, you can hit the switch from the side.
The optical switches should be pretty reliable. But I would recommend adding a small (1/2") border to your boundaries and just not traveling all the way to all of the edges. It adds to the width of the frame, but everything has much bigger tolerances when you’re dealing with a marble being pulled by a magnet.
2 Likes
I hadn’t thought about travel past the endstop…though I’m not sure that that’s physically possible on the ZenXY. I did notice when building it that it can’t really home x and y at the same time - you have to home Y first because the X endstop only lines up with the flag when Y is already homed.
But…now that I type that out - maybe that’s why I’m seeing inconsistency in my X homing…I’m manually “homing” Y by just moving it until it’s about to hit or does hit. So I might have different parts of the X flag doing the triggering depending on where I manually homed Y to. That actually makes a lot of sense now that I think about it.
So I really do need to sort out Y homing first and figure out why it’s never triggering. Which means figuring out a way to access the top of the mechanism while it’s running so I can see what’s going on in there.
And I hear you about bigger tolerances. Though I hate to give up another 1/2" of space as my X already feels really small. But now I think getting Y homing properly is probably what I need to do first for sure. Having a consistent Y should make a more consistent X and that could resolve the issues I’m struggling with.
1 Like
My homing code is added to the instructions and should be very very close to what you actually need. It homes and moves in a very specific manor. The only thing you need to adjust is the homing distances. It actually homes, then moves past zero to home the other axis.
The only issue I ever had is with trying to use translucent filament and the triggers not working so I painted them.
If you tell us what your starting gcode is and what is actually happening we can help you figure it out. It should not be an unknown, it works every time once you get your trigger offests right. I have it to use every spare tenth of a mm on my table.
I guess in other words the trick is we home then reset the home position to be PAST the switches, that is the only thing new. I do not waste any table space at all so I do not start at home spot, same reason we do not use adjustment screws for home, we don’t need them with opticals we drive through them.
3 Likes
I’ll check that in a bit Ryan. Makes sense and I was really considering moving past zero.
But….i found my main issue.
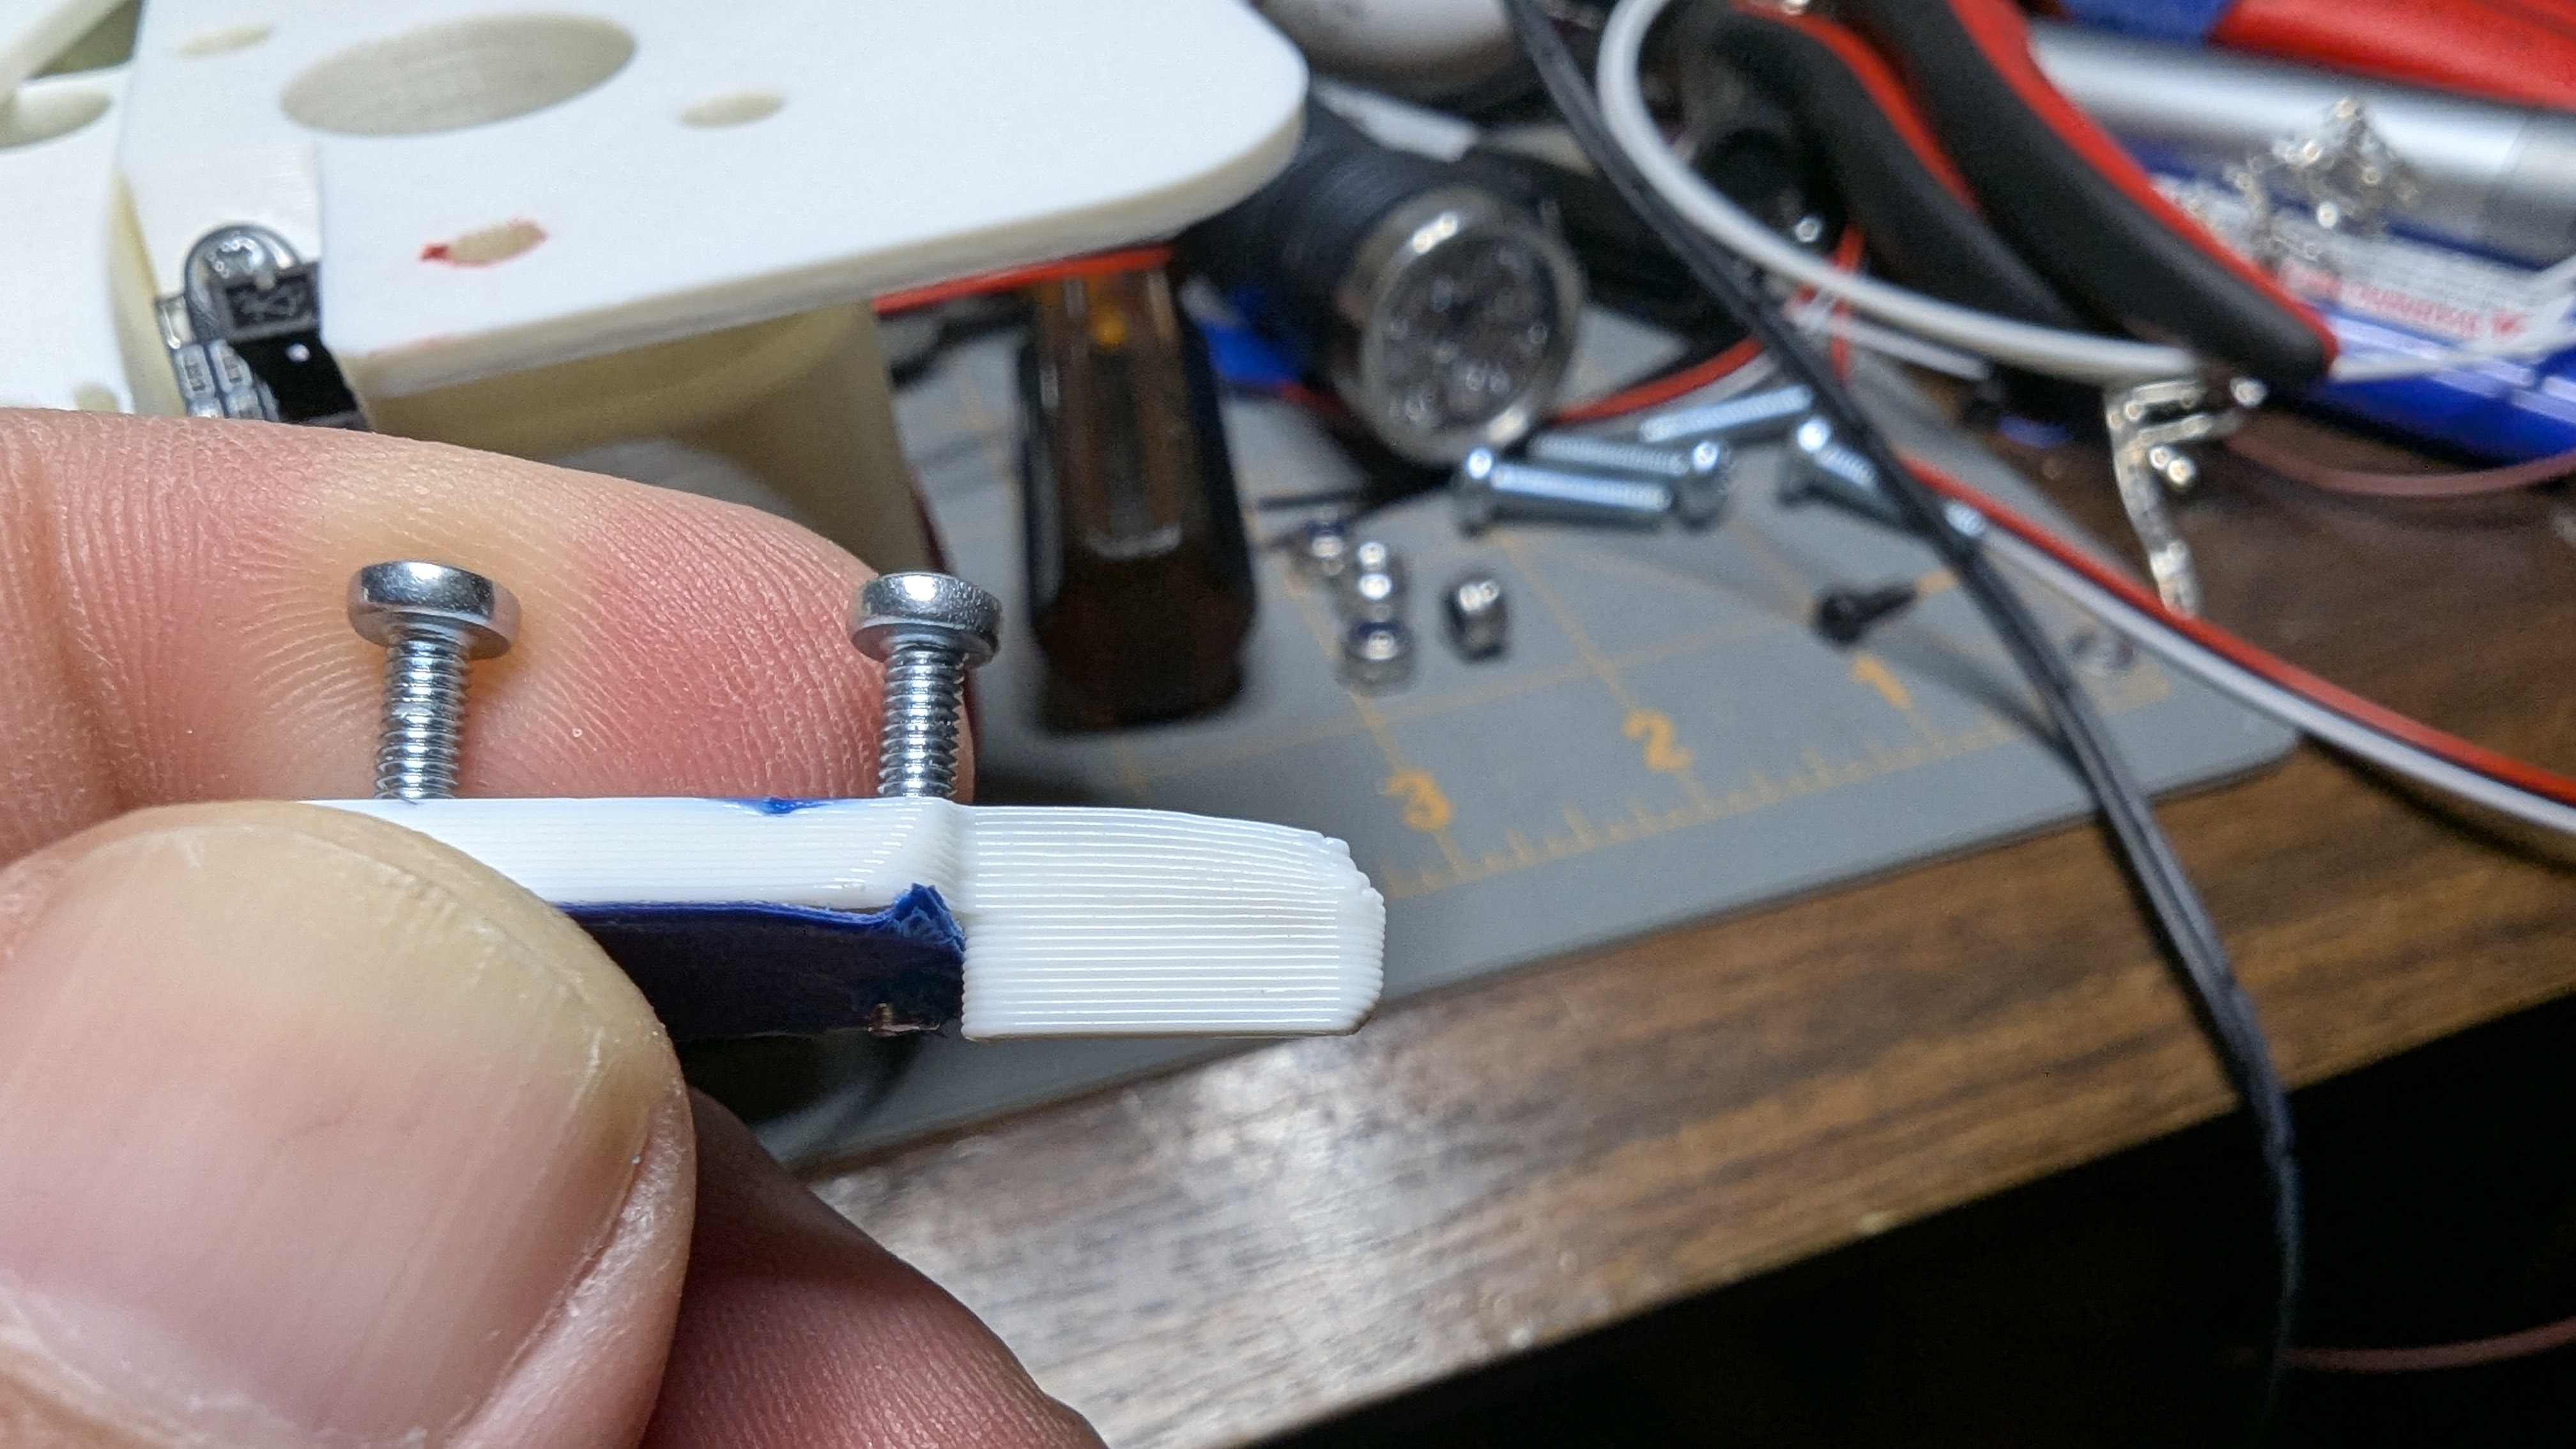
My trigger warped slightly when printing. A few pieces of painters tape as a shim and it’s triggering reliably now.
Waiting on a big spiral with a small 6mm ball…will check out your new info when it’s done. But I’m very close now!
4 Likes
Ok, I see the homing code now…I completely forgot it was there by the time I got to the end of the build page ![]()
Makes sense…though -18.5 and -28 seem really big…I feel like once I trigger on Y I have maybe 2-3 mm I can go negative…and on X about the same.
Right now I’m just using sandify and all I have for start code is:
G0 X0.000 Y0.000 F1200
Mostly just to make sure I’ve got a feedrate. I’ve been homing by hand since it wasn’t triggering on Y
Side note - I’m wondering if there’s a way to use variables in fluidnc to write starting code that returns to 0,0 by going to the nearest edge and following it back. I’m thinking there is but I need to be a lot less tired to look into it. Basically make it so it homes along the perimeter instead of just dragging a ball through the last pattern.
What was odd is that while I was now able to do a pattern with no crashes at 165x380 for my drawing area - I did have a crash immediately at start…even though I was at 0,0 and my starting code is just G0 X0 Y0 so it shouldn’t have had to move at all…
Not that I know of. You can configure that in sandify. I generally try to make patterns that start or stop in the middle or the outside edge, and I make the edge go back to the min,min. I can then string a outside-in pattern with and inside-out pattern and end up back at the start.
2 Likes
Shoot I can cut and paste some of my patterns tomorrow if that would help but I am pretty sure that is the exact starting code I use.
I’m getting really close now.
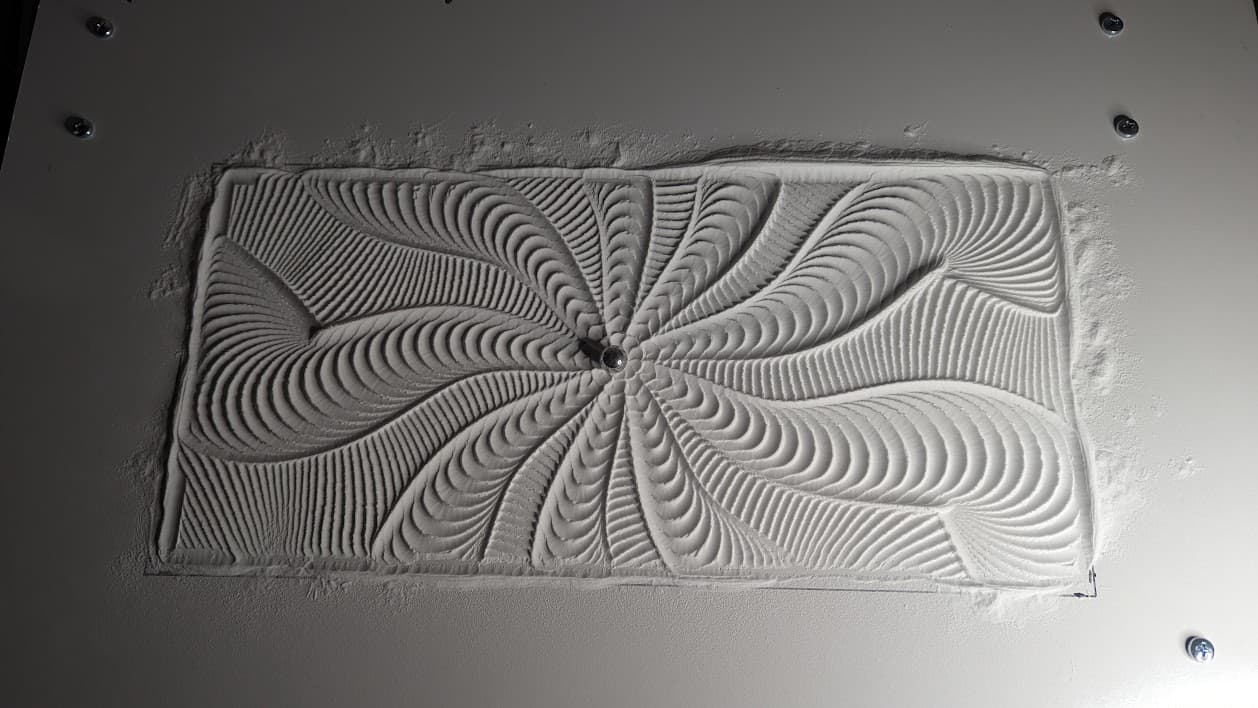
My attempt to re-create this pattern on my smaller table in the newer version of sandify. Sandify file and gcode attached.
fract4.zip (622.0 KB)
Just getting the negative offsets dialed in still.
I’m using:
$HY G92 X0 Y0
G0 Y-6
G92 X0 Y0
$HX
G0 X-15
G92 X0 Y0
G0 X89.928 Y196.938 F1200
And when I run it by hand line by line it all works as expected. I found the -6 and -15 experimentally…originally I was only using a 1mm pulloff and those were Y-2 and X-11 but I increased it to a 5mm pull off since sometimes it wasn’t clearing for the 2nd homing.
I found the -6/-15 by doing G0 commands 1 mm at a time until the machine hit it’s physical limit then going back 1 from there.
But…when I run it from a .gcode file … the G0 Y-6 line seems to cause a surprisingly long crash. Like…longer than it should take to move from Y0 to Y-6. And if I run the lines by hand I don’t get a crash.
Also odd - that last line (which is from “G0 X{startx} Y{starty} F1200” in sandify) the ball shoots across at what looks like WAY more than 1200mm/min. It looks faster than the 3000mm/min moves I’ve tried. But then the rest of it runs at what is definitely 1200mm/min and there are no other F’s in the gcode. Though…now that I type that out I realize it’s a G0 move not a G1…so maybe I should change that to G1 and it may be moving that fast because it’s a G0 and it’s ignoring the F and running at the rapid speed (which I think should be around 3000 or 5000 with how I have it configured currently and would explain that first move shooting off so quickly.)
I am running the latest fluidnc instead of the v1 recommended build. So it could be something funky in there.
And - sometimes $HX is still finding a 0 that’s about 5-10mm away from actual 0. But I think that might be the endstop wires getting knocked into the sensor - so some better cable management might be the solution there.
I also sometimes get a big crash off the G0 X-15 - last night I made a quick pattern from a spiral wiper with some perlin noise…and each time I tried to run it I’d get crashes on both negative moves then it would start drawing right at the Xmax instead of in the center like it was supposed to. But this morning I ran the same gcode immediately after plugging it in and it ran almost perfect - just a small crash on the Y-6 and a bit of jingling as the Xmax moves got close enough that the idler on the center started to bump against the Xmax truck.
So…I’m getting REALLY close to having it homing reliably now. Just working out a few final issues. I could easily back things off a bit and give up 5mm or so of drawing area and probably have it working reliably…but I’m trying to make use of every mm just because I’m enjoying the challenge ![]()
I had been hoping to bring it into work to share today - but since I didn’t get these last few issues ironed out last night I’m not quite ready to demo it in person to anyone just yet ![]()
2 Likes
I hadn’t thought of that. Makes a lot of sense.
Right now I’m just doing a single pattern at a time…but I do look forward to stringing multiples together.
Are you doing that with multiple layers in sandify to create a long playing file…or are you just planning them to be run individually back to back?
Have to admit with some of the things @jeyeager has done in the v3 fluidnc I’m starting to wonder if it’s possible to embed sandify as a plugin right in fluidnc…would be really neat to have a setup where you can just hit “play” on a pattern instead of having to download it and transfer it to the controller. But looking at the gui code and sandify code is still way down on my projects wish list ![]()
I’ve done it both ways. I would make a new project, import both patterns as layers and then make sure they play well together before exporting. Or I would just concatenate the files in a text editor.
It would be really neat. I really wish I could make sandify more easily added to other websites and stay updated. It would be great to basically make a wrapper for this, but let sandify live inside that fluidnc specific version. I could see it working to have a new exporter and have the dropdown that picks thr or gcode pick “fluidnc direct”, then you would pick settings for a direct connection and push the file directly.
RMRRF is this weekend and I’m bringing my ZenXY. Would you like to make a pattern for it? It could have a message or just be an enticing pattern to draw in people that want to ask questions. Here are the machine limits for it:
;  Machine type: Rectangular
;    Min X (mm): 5
;    Max X (mm): 400
;    Min Y (mm): 5
;    Max Y (mm): 330
You can post it here or DM me if you want. That way, you can be represented at RMRRF.
To be clear, this offer is open to anyone. I just specifically wanted to call out Jason because he is deep in the sandify world ATM.
1 Like
Everything I’d come up with would get you guys kicked out… I’ll leave it to Jason. ![]()
You were going to draw the tacoma water pump gasket?
4 Likes
That is a sandify bug. That $HY needs to be on it’s own line. I manually edit all my files.
$HY G92 X0 Y0
G0 Y-6
G92 X0 Y0
$HX
G0 X-15
G92 X0 Y0
G0 X89.928 Y196.938 F1200
Try it that way.
Sandify always cloapses the first line for some reason.
Great catch…I didn’t even notice it had combined the two lines. Between that and using a G0 instead of a G1 to go to the start point (which probably isn’t even necessary other than as a way to get the F1200 in there…I had been doing a G1 X0 Y0 F1200 before I changed it yesterday which probably makes more sense.) that may explain why this doesn’t work automatically when running from .gcode but does when I run it manually line by line.
Unfortunately I don’t get to go home for lunch today so I won’t get to test until this evening ![]()
It’s killing me reading that thread about the RMRRF! I actually looked up flights and it’s <$200 round trip to fly out of SD. But…there’s also rental car and hotel costs (or bus or uber or some other transportation) and it’s just a weekend I have things I really need to do here. But I’m going to try to plan ahead for next year ![]() (Bummer is flying out of my local airports jumps that up to $600 round trip…so the 3 hour drive to SD or PHX is worth it.)
(Bummer is flying out of my local airports jumps that up to $600 round trip…so the 3 hour drive to SD or PHX is worth it.)
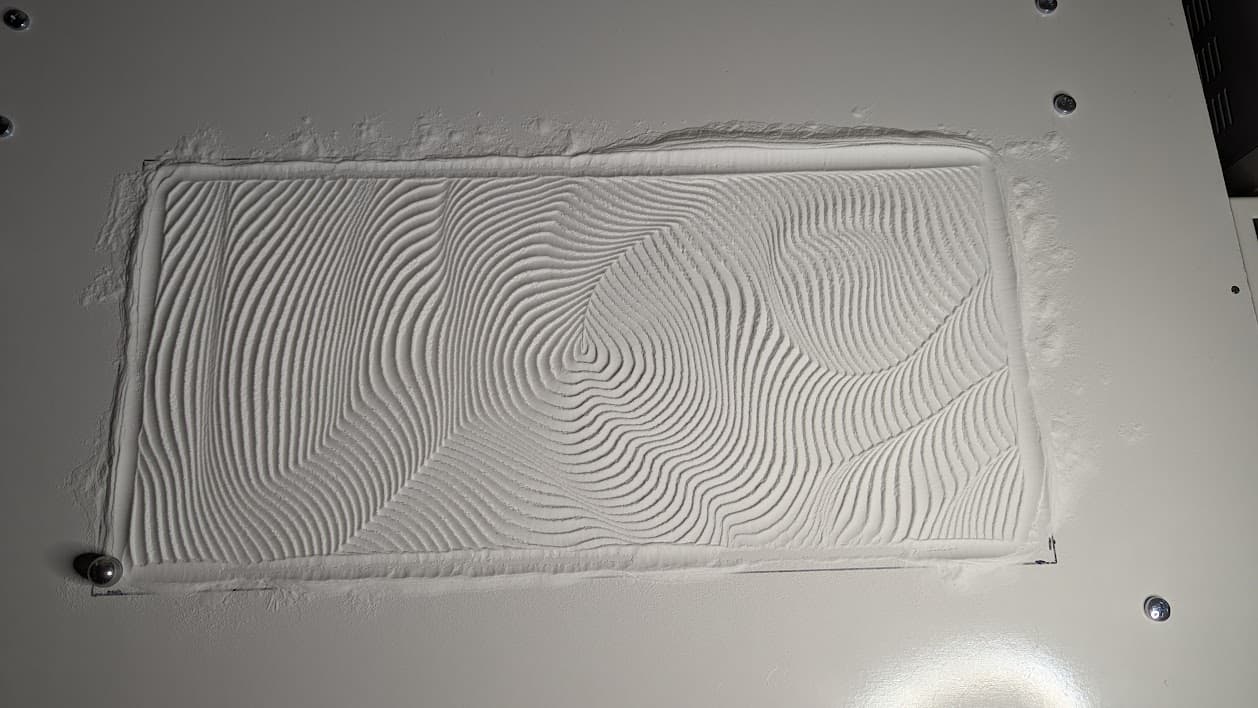
I’ll see if I can come up with a pattern of some sorts. I’m still just figuring out sandify and how to make patterns that are actually interesting. Most of what I’ve come up with hasn’t come out the way I expected yet ![]() But that’s just learning the way the sand falls.
But that’s just learning the way the sand falls.
Like - I tried doing two layers of wipes to get a diamond pattern - but they were too close together so instead of the second one leaving bits of the first one visible it just wiped them out completely.
I’ve also been experimenting with creating gcode to import for drawings…but so far have really struggled with coming up with drawings that can be done as a continuous line or finding a good way to hide the line between segments.
But if I come up with anything interesting tonight or tomorrow I’ll let you know!
1 Like
RMRRF is fun!
It takes a bit of messing around with sandify to get the spacing right, you will learn to recognize what is too close and what is too far. Then learning layers, using points to steer between them. You can make some super intricate patterns and never see the travel moves. super fun
1 Like