ok, so I haven´t found time to do anything for this yet. So let me write it here first so the seniors can correct it.
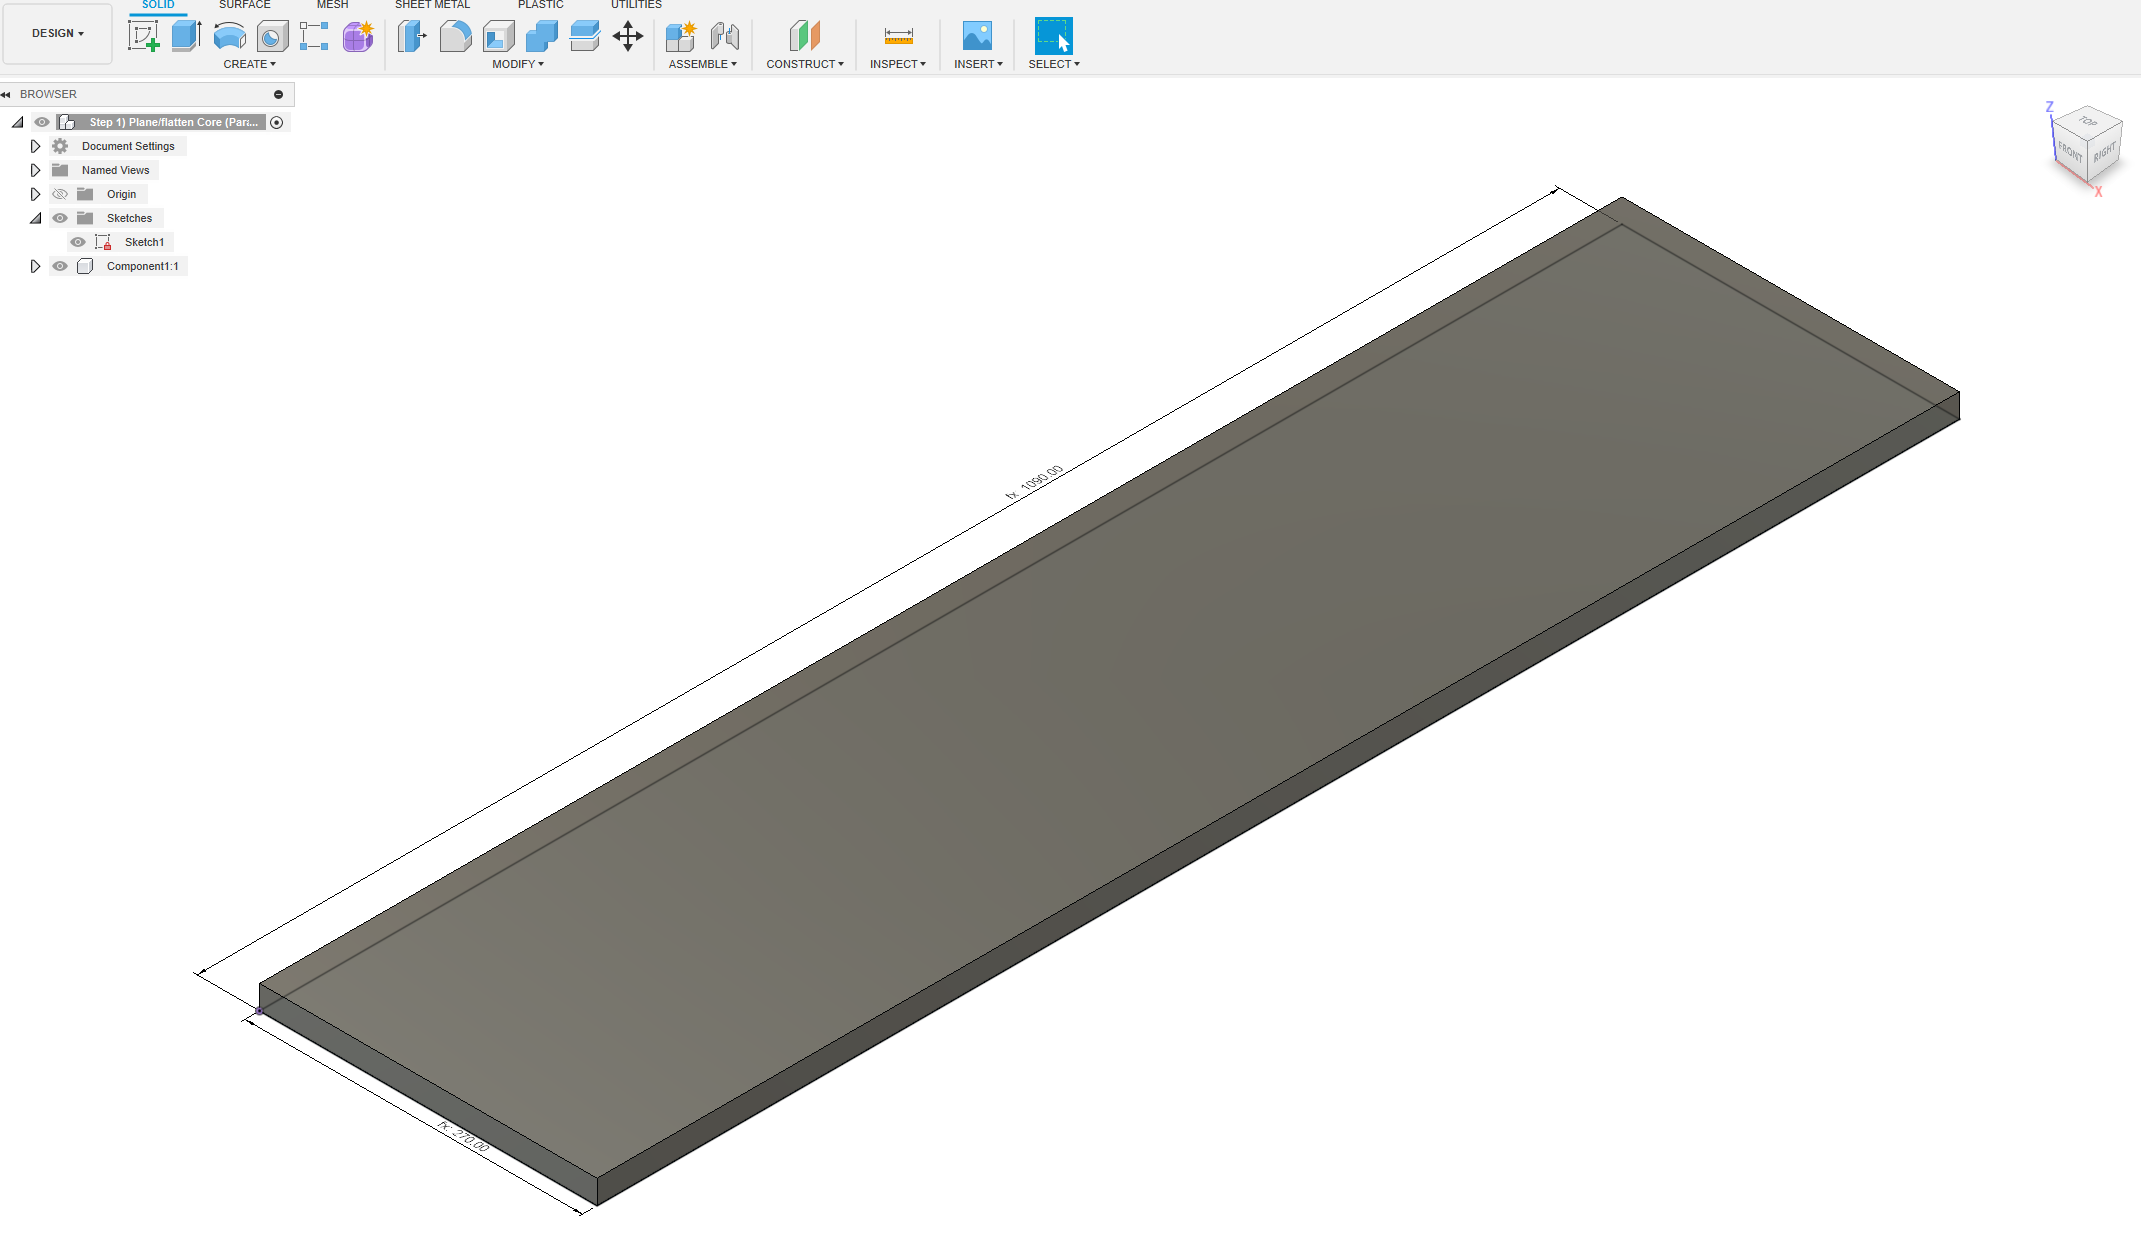
I have laminated some wood beams, obviously they are not flat and it´s much too wide for a planer. So I want to use the LR3 for planning / facing the wood. I suspect one could use this tutorial also for planning the LR3 table so you have a flat surface.
The Facing operation:
Step 1
- Draw a rectangle as you would do normally. In my case I´ve used roughly the dimensions of my laminated wood.
Step 2
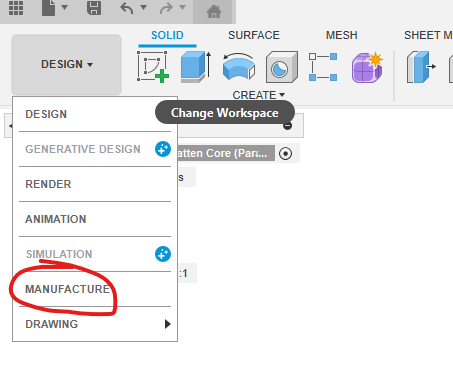
- Open up the “Manufacture” tab in Fusion 360.
Step 3
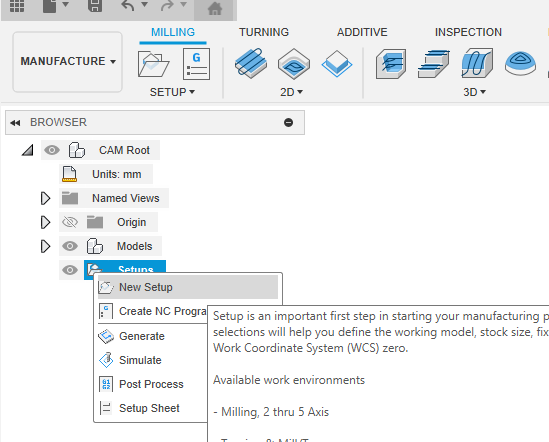
- Create a new setup using the top toolbar, or by right clicking the “Setups” header in the browser.
Step 4
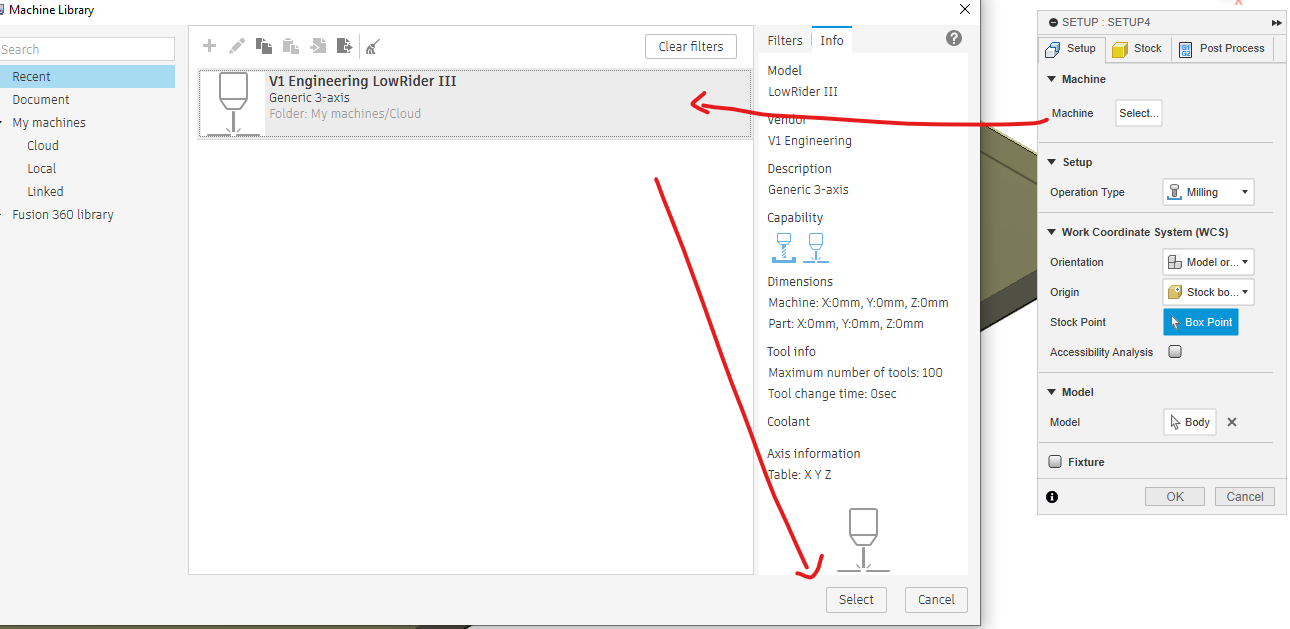
- In the setup menu, select your “Machine Definition” (will try to document later how to create a cloud machine definition).
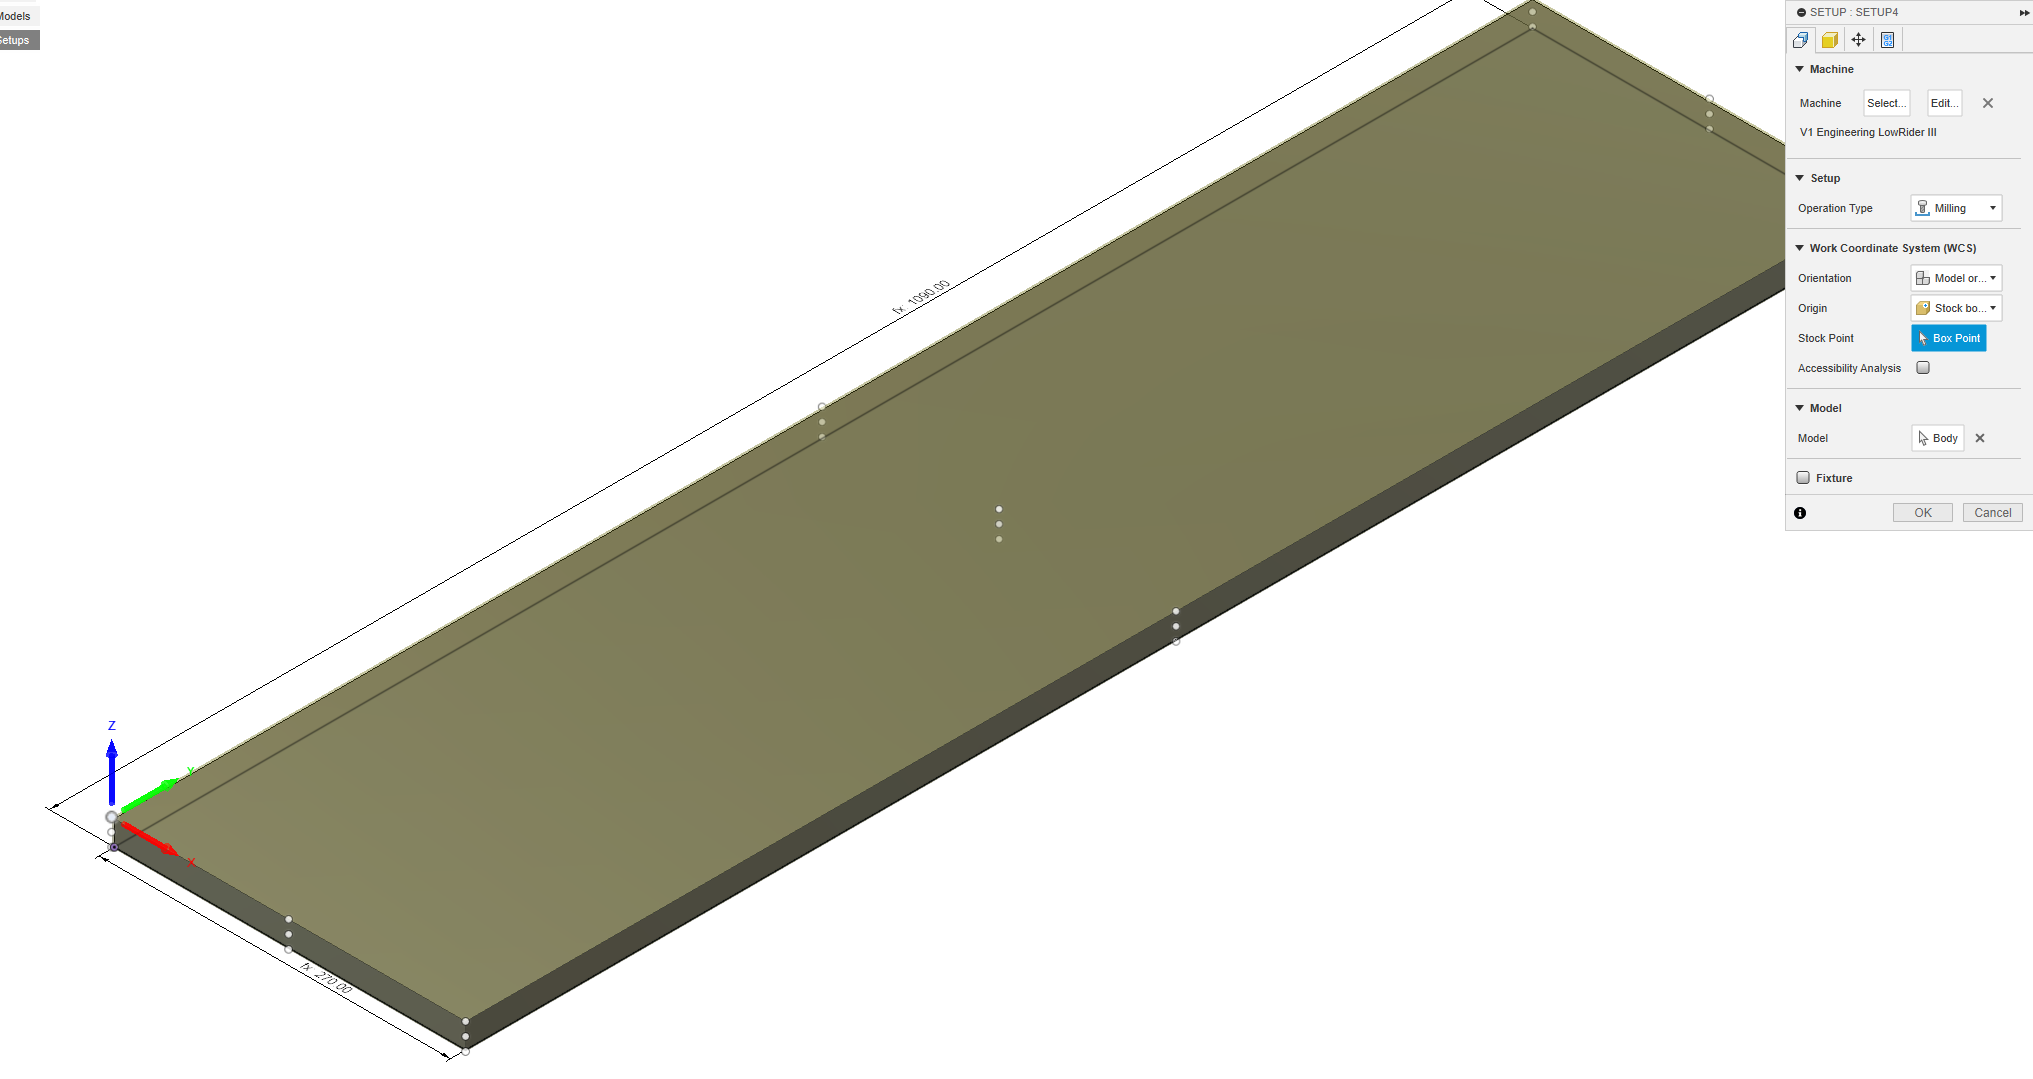
Step 5
- Set your operation to “Milling” and define the “Origin” point as you would orientate your workpiece to the CNC. In this example I set “Origin” and afterwards I used “Stock point” to select the Origin it self. Note: it is easier to draw your part in the same direction as your CNC works in X/Y.
Step 6
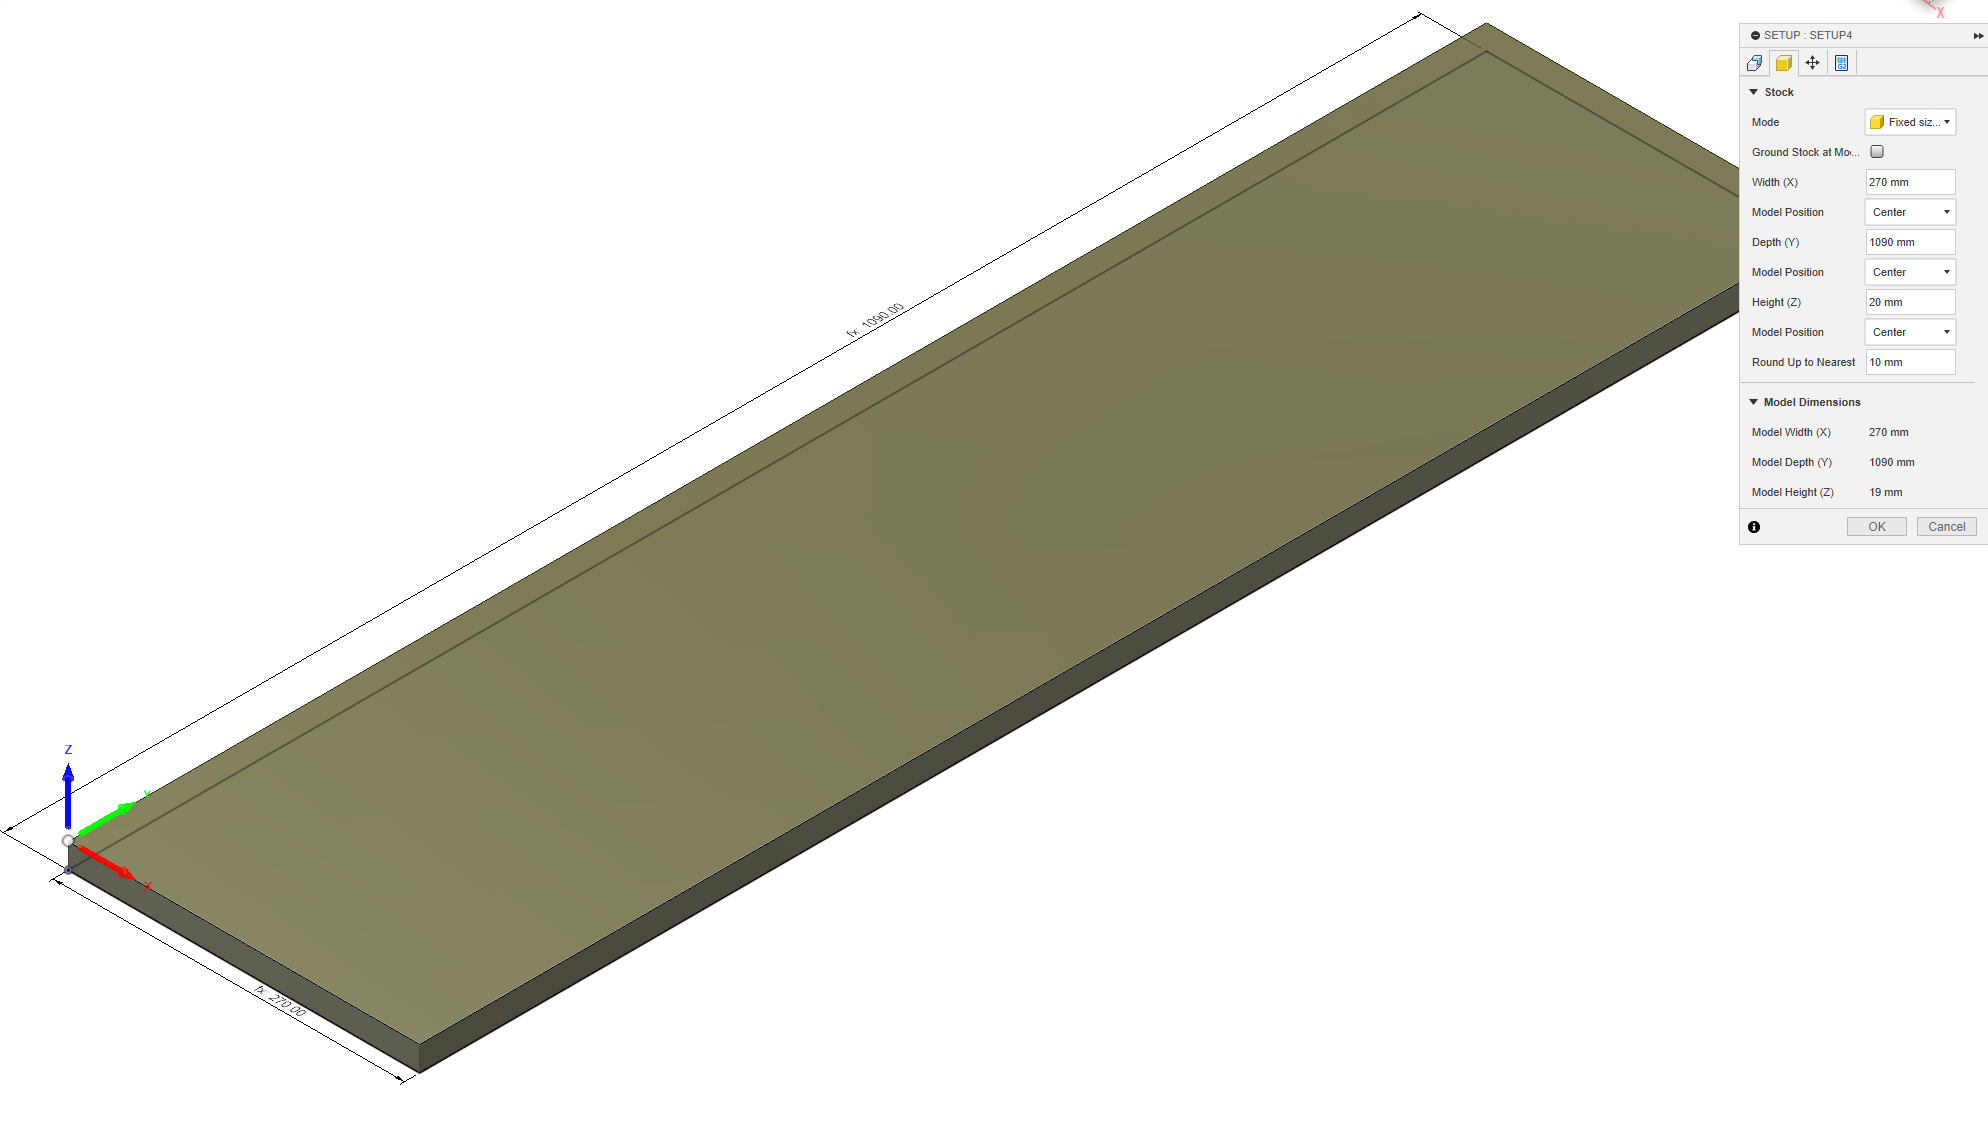
- Define the size of your stock. This could be bigger than your workpiece, but doesn´t need to be so.
Step 7
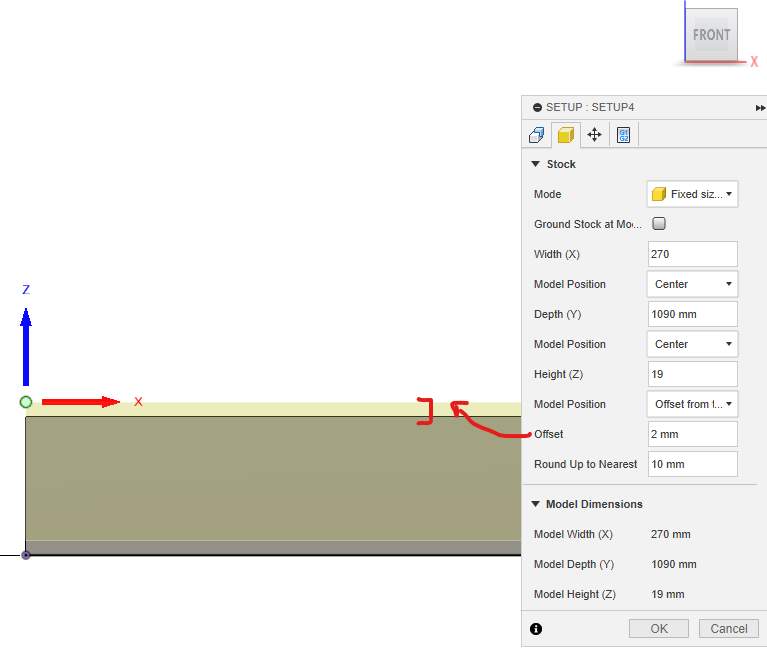
- Make sure to set your “Model Position” for Z to Offset, choose how many mm´s you want to remove from the top. By changing the viewpoint you can see exactly what will happen.
Step 8
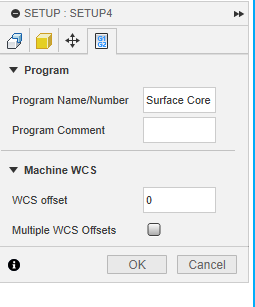
- It will be a good practice to name your Gcode to something you can remember
 Select ok to “save” the settings.
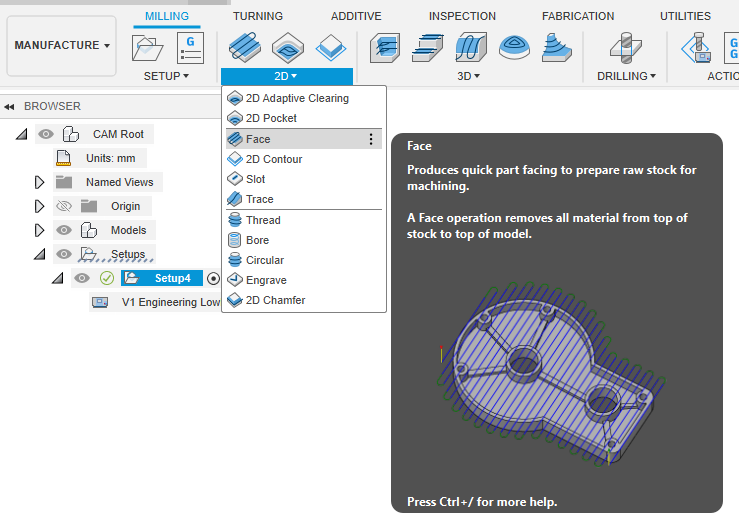
Step 9
- In the milling menu, go to 2D / Face operation.
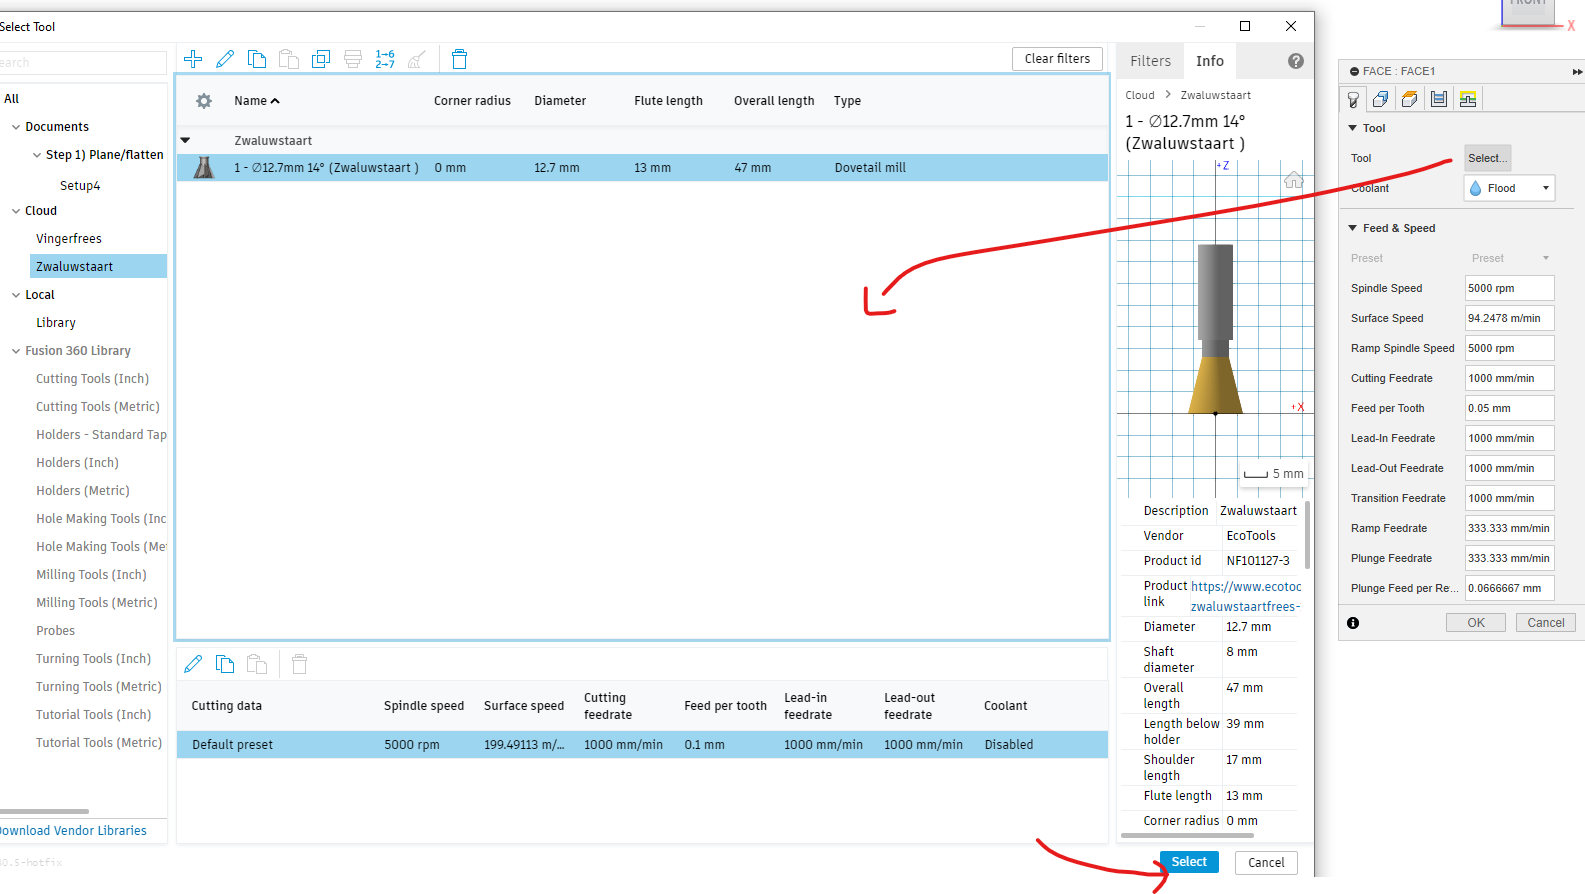
Step 10
- A new menu will pop up. Select your tool to be used (ofcourse, you will have to had set up a tool library first, have a look here on how to do so). If you created multiple presets, it is best to select the preset matching your job.
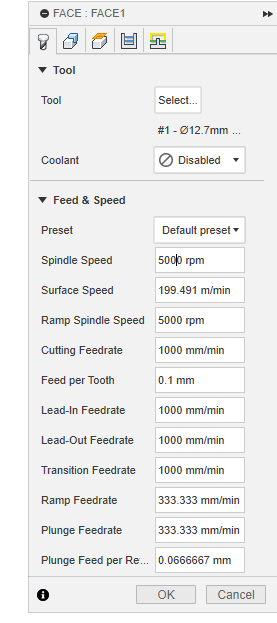
Step 11
- Once selected you can still adjust your speeds for the wood/metal/plastic you are using. Or you can leave it as is.
note: the screenshot is just an example. You will need to adjust your feeds & speeds depending on your material & machine capabilities. Have a look at this topic to get some idea´s.
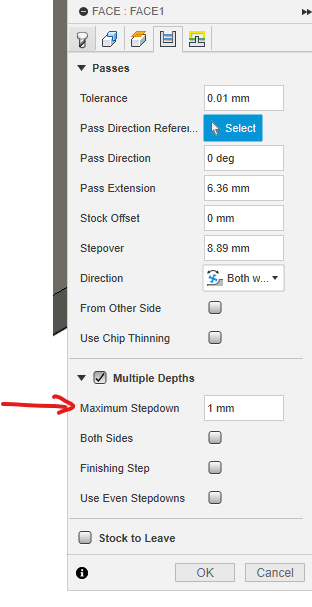
Step 12
- Define in how many steps your full DOC will need to be milled. Fill in the “Maximum stepdown”. Select “ok” to save.
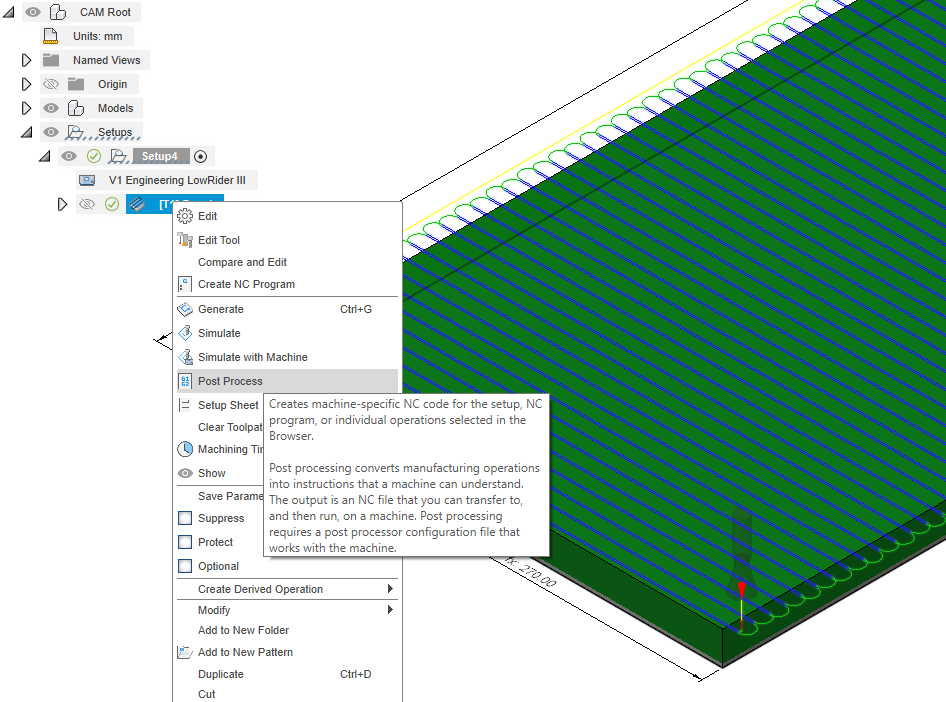
Step 13
- Now right click the created operation, and select “Post process” to generate Gcode.
note: some users mention that a simulation is a wise idea to avoid issues during the milling job. So you want to do this before creating the Gcode. To simulate, right click your tool path and select “simulate”, after which you can just push the play button and check it out from all angles.
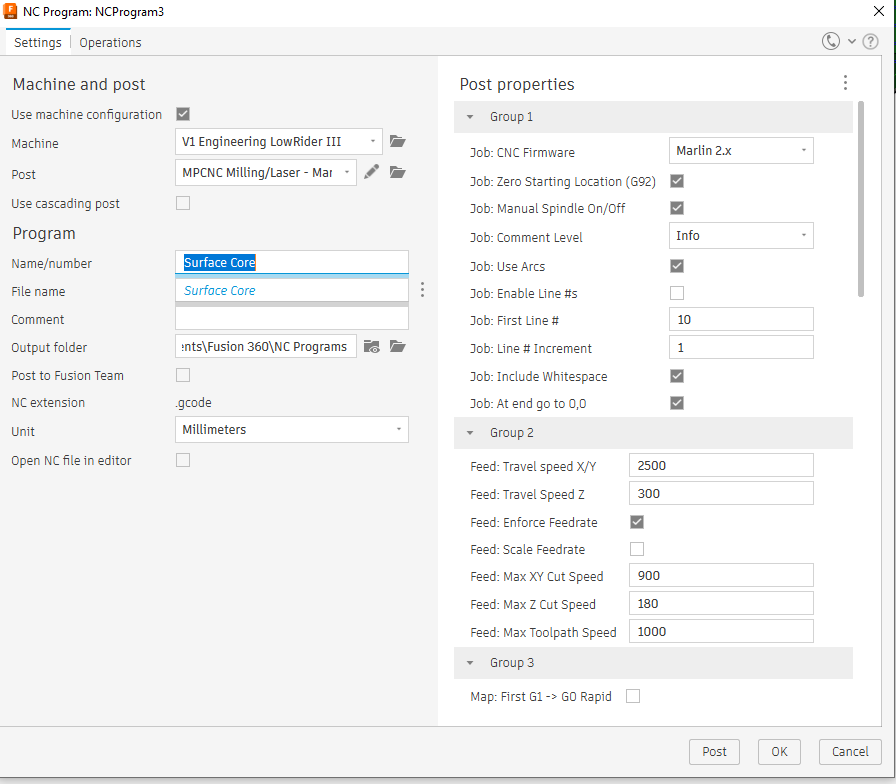
Step 14
- You can rename your file, choose the output folder, and more important you can select the post processor and it´s options. Afterwards select “Post”.
Note: If your machine is running Marlin, the recommended post processor can be found here.
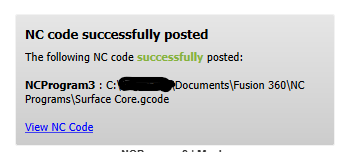
Step 15
- if all goes well, you will now have some .gcode created in your output folder. You can store it to SD and start watching magic of the V1 machines!
Let me know if it contains errors (and if someone wants to add it to the FAQ, go ahead!)