That turned out great David.
2 Likes
Thomas Guide.
I lived in the L.A. area for 8 years, just as smart phones were getting started, when car navigation was all proprietary map software. But everyone had a Thomas Guide in their car.
1 Like
This is awesome. I’ll be trying this at some point.
1 Like
Each time you post a set of these, it brightens my day. Those look great!
3 Likes
Yeah, this one and @forcerouge threads are some of my favorites!
3 Likes
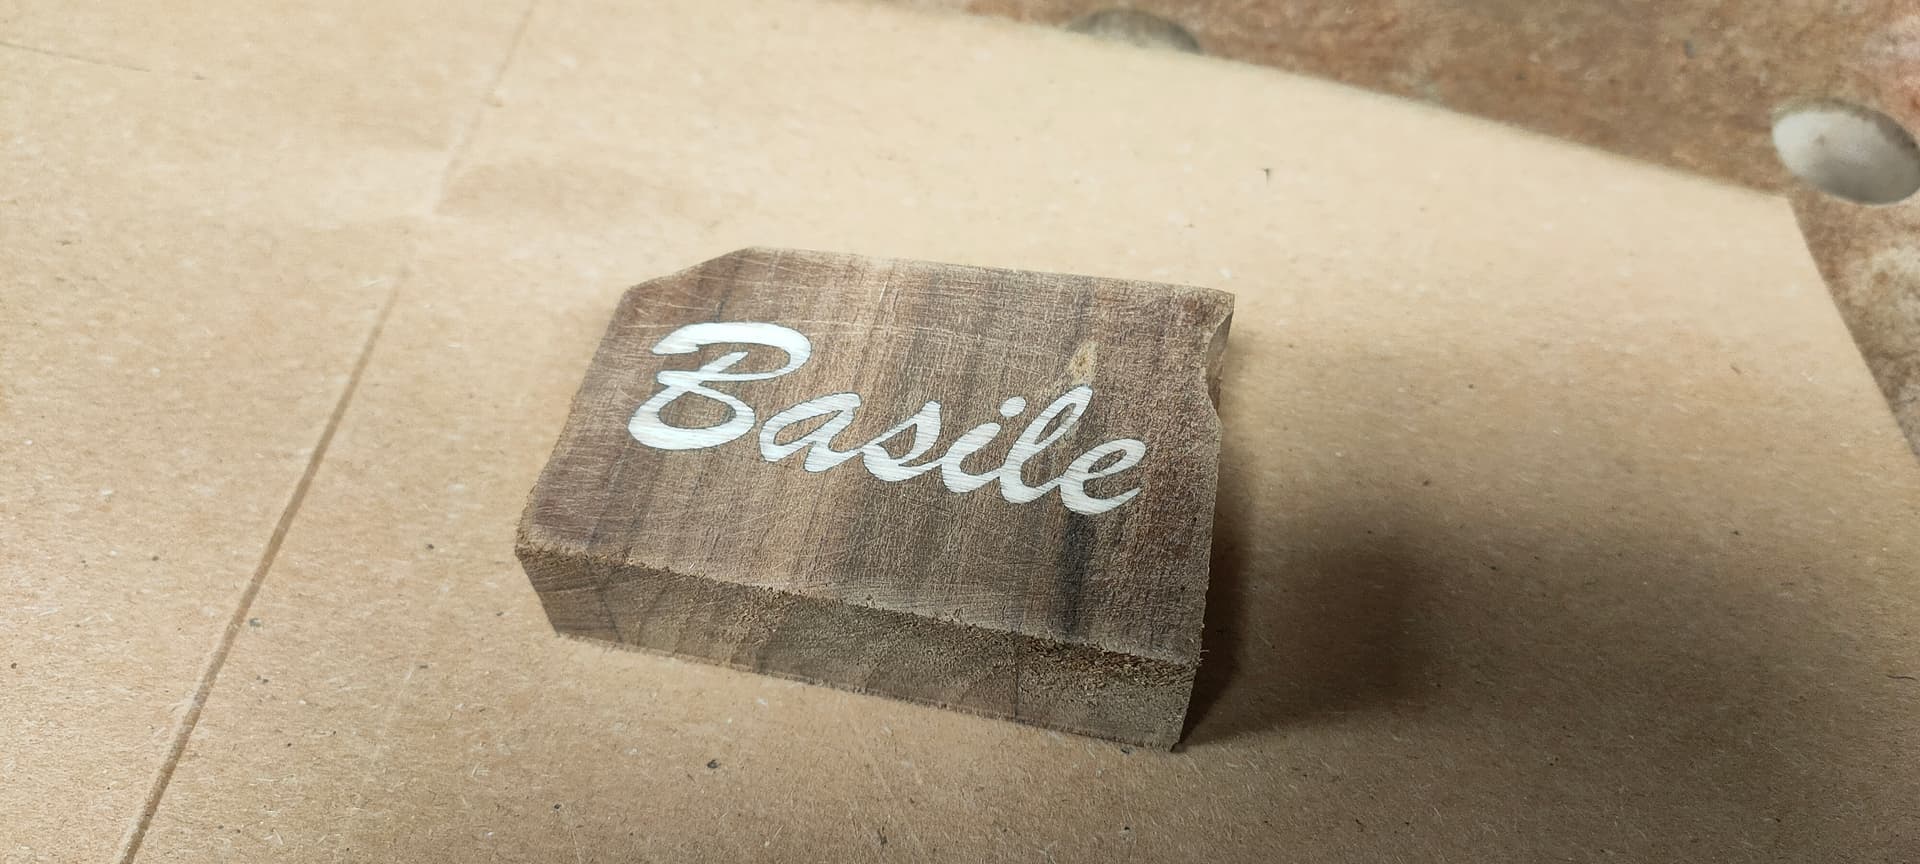
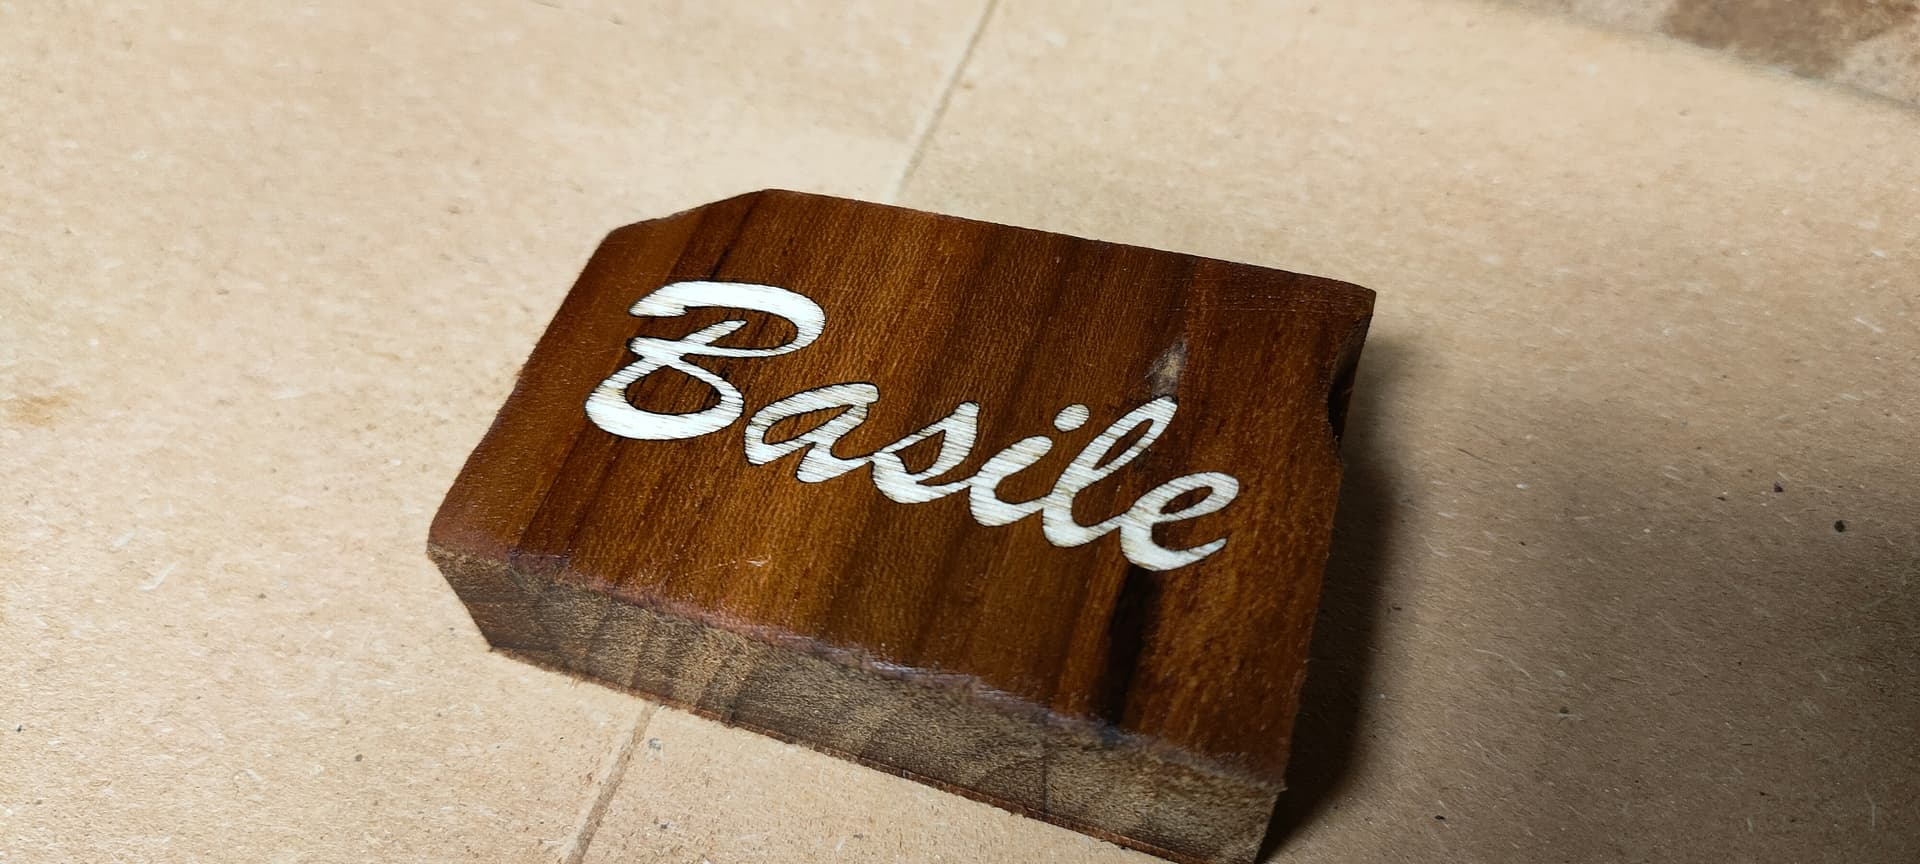
Ok, you got me… Had to try this for myself ![]()
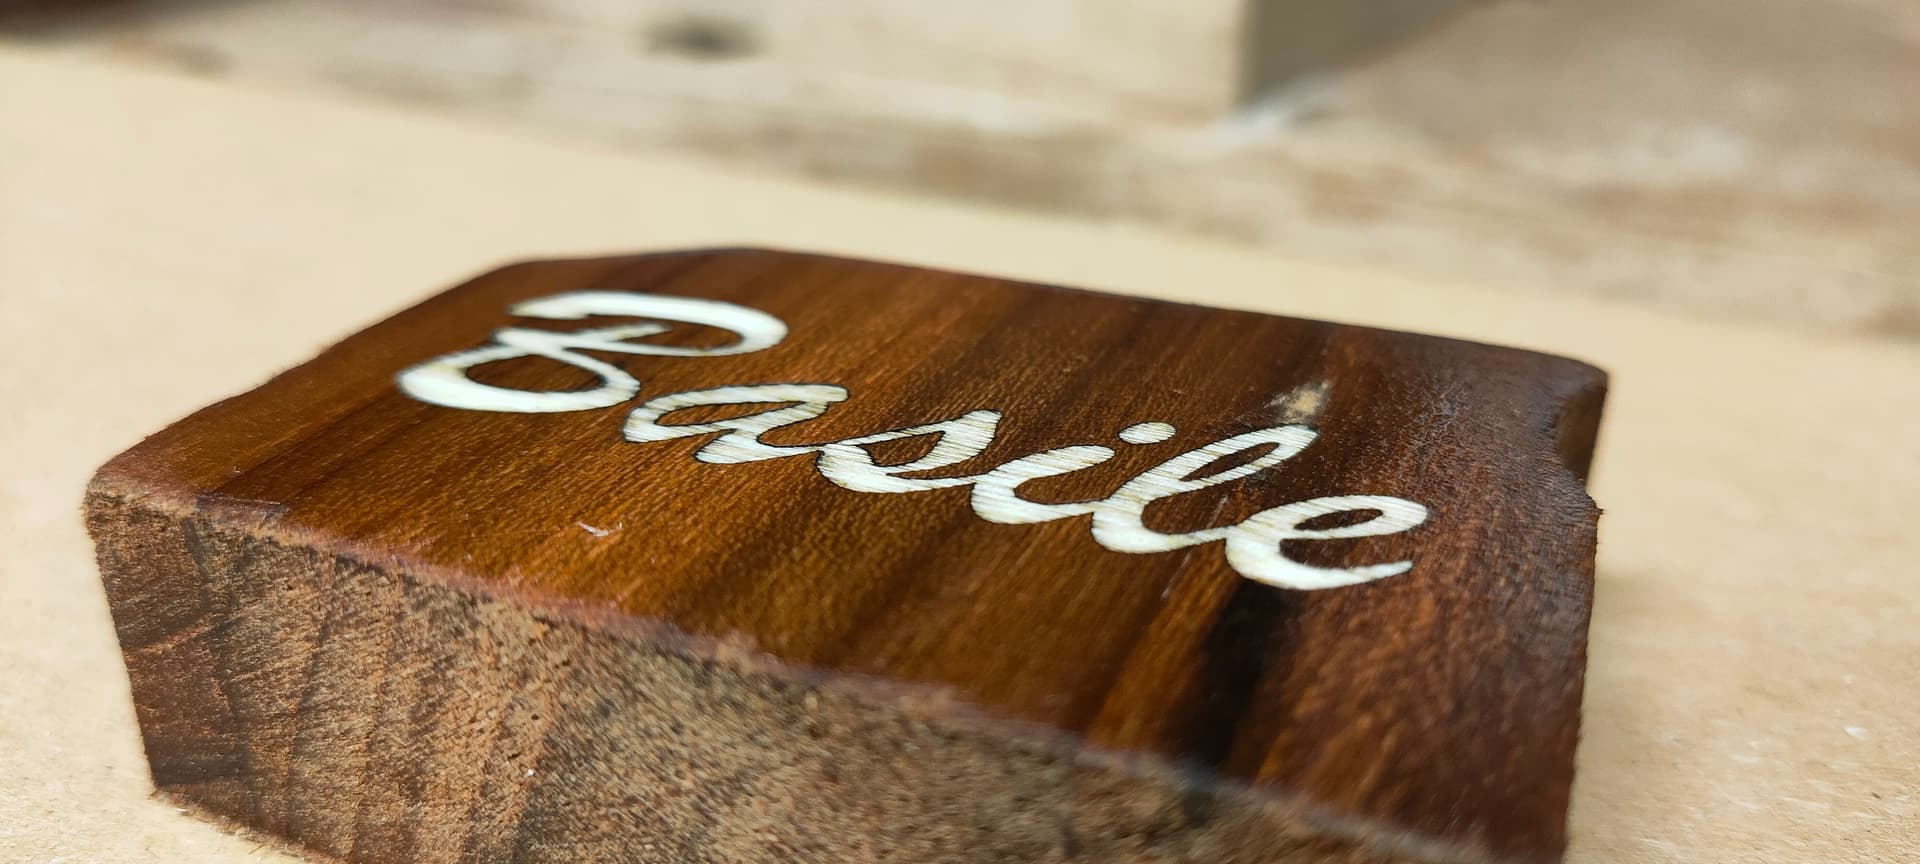
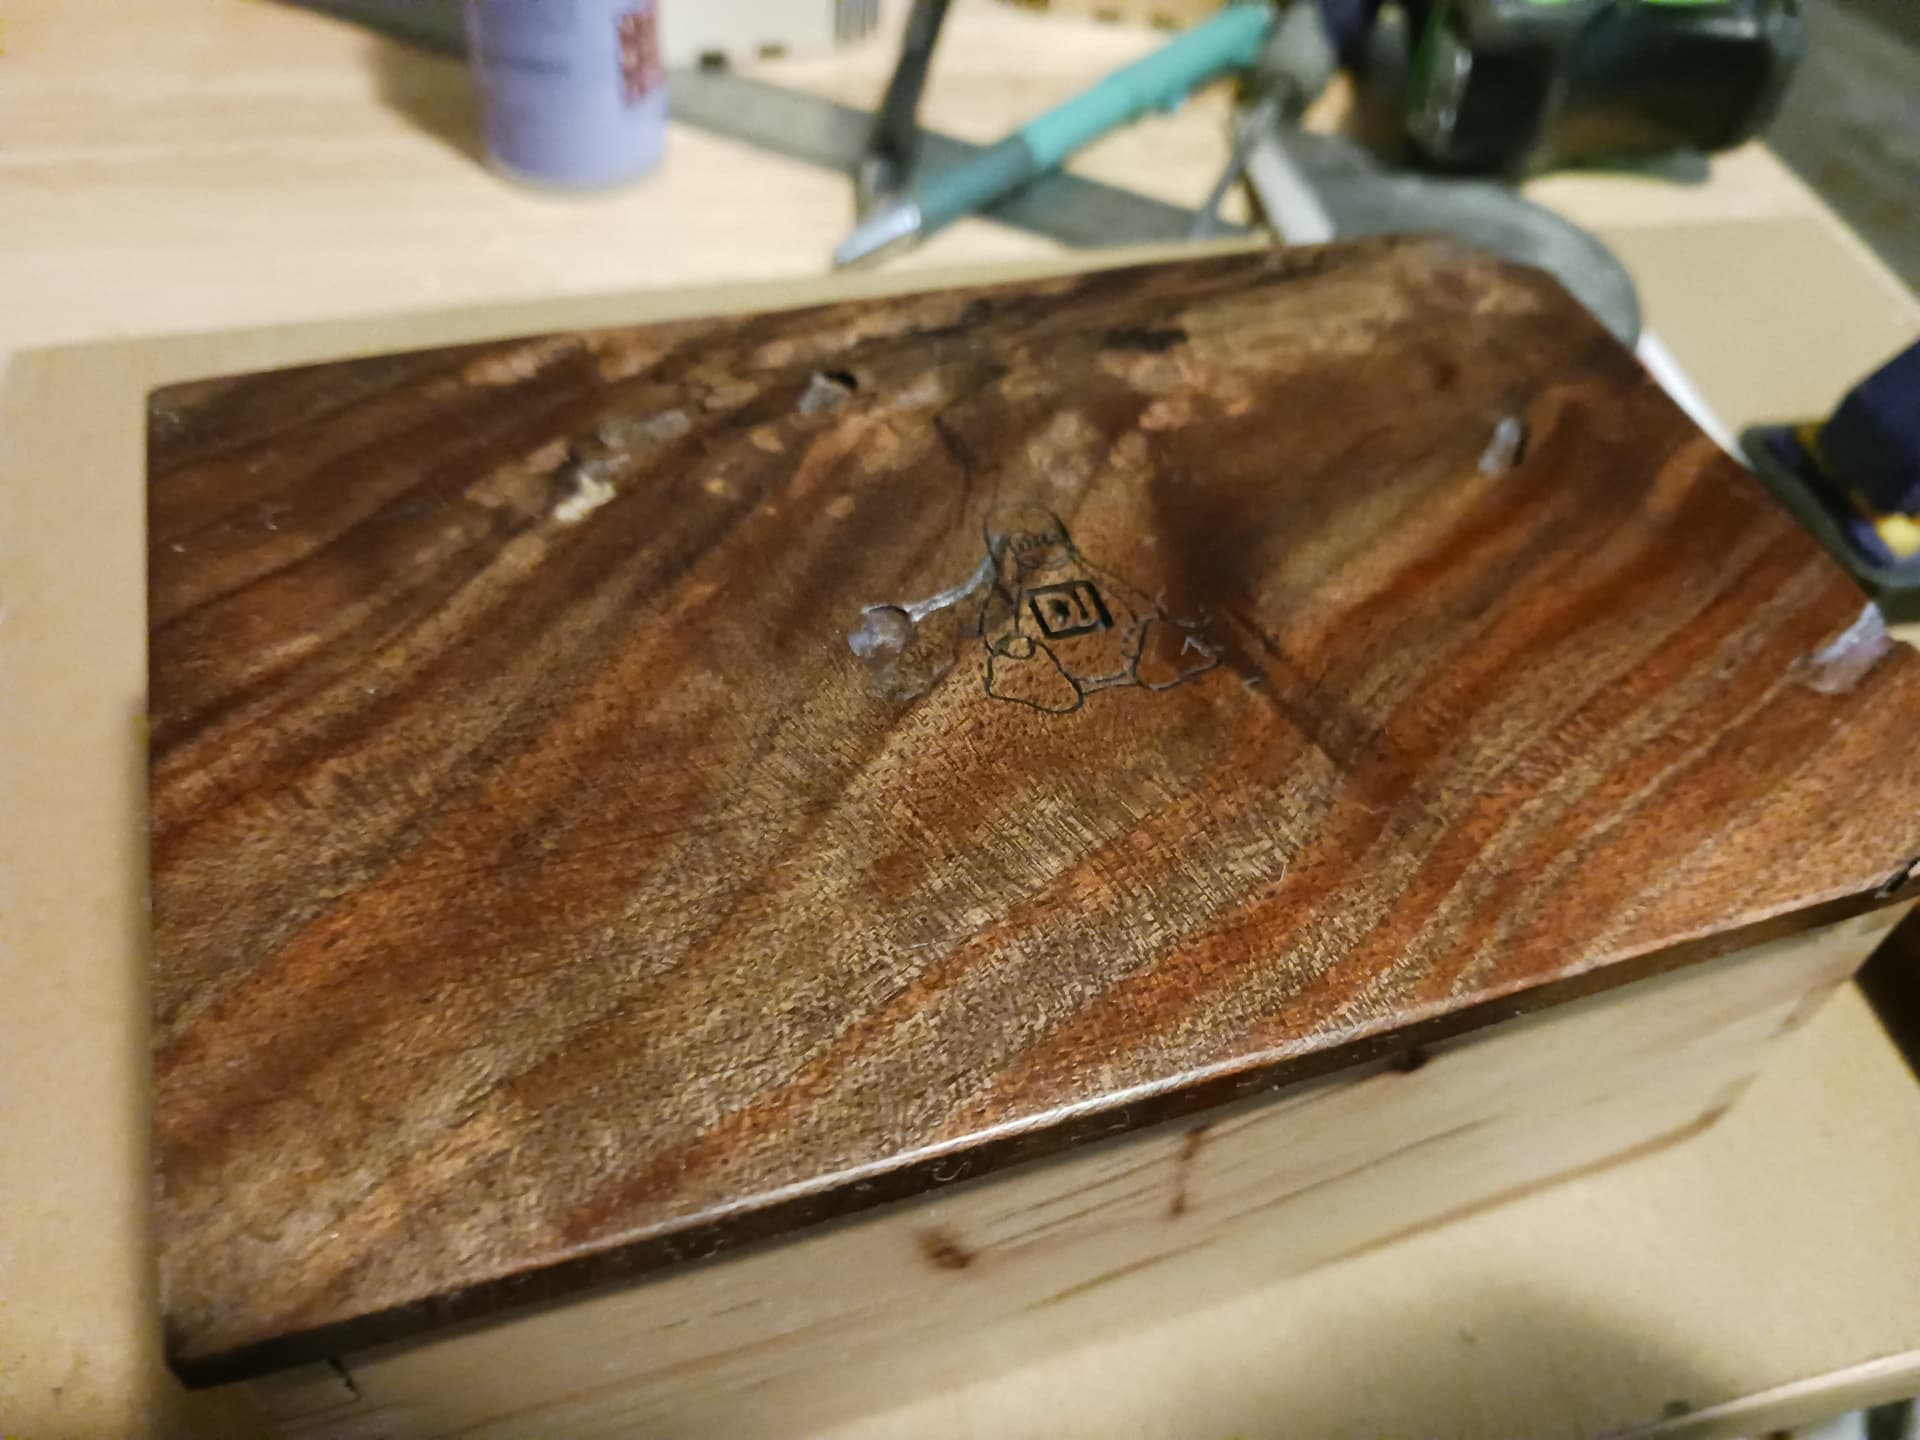
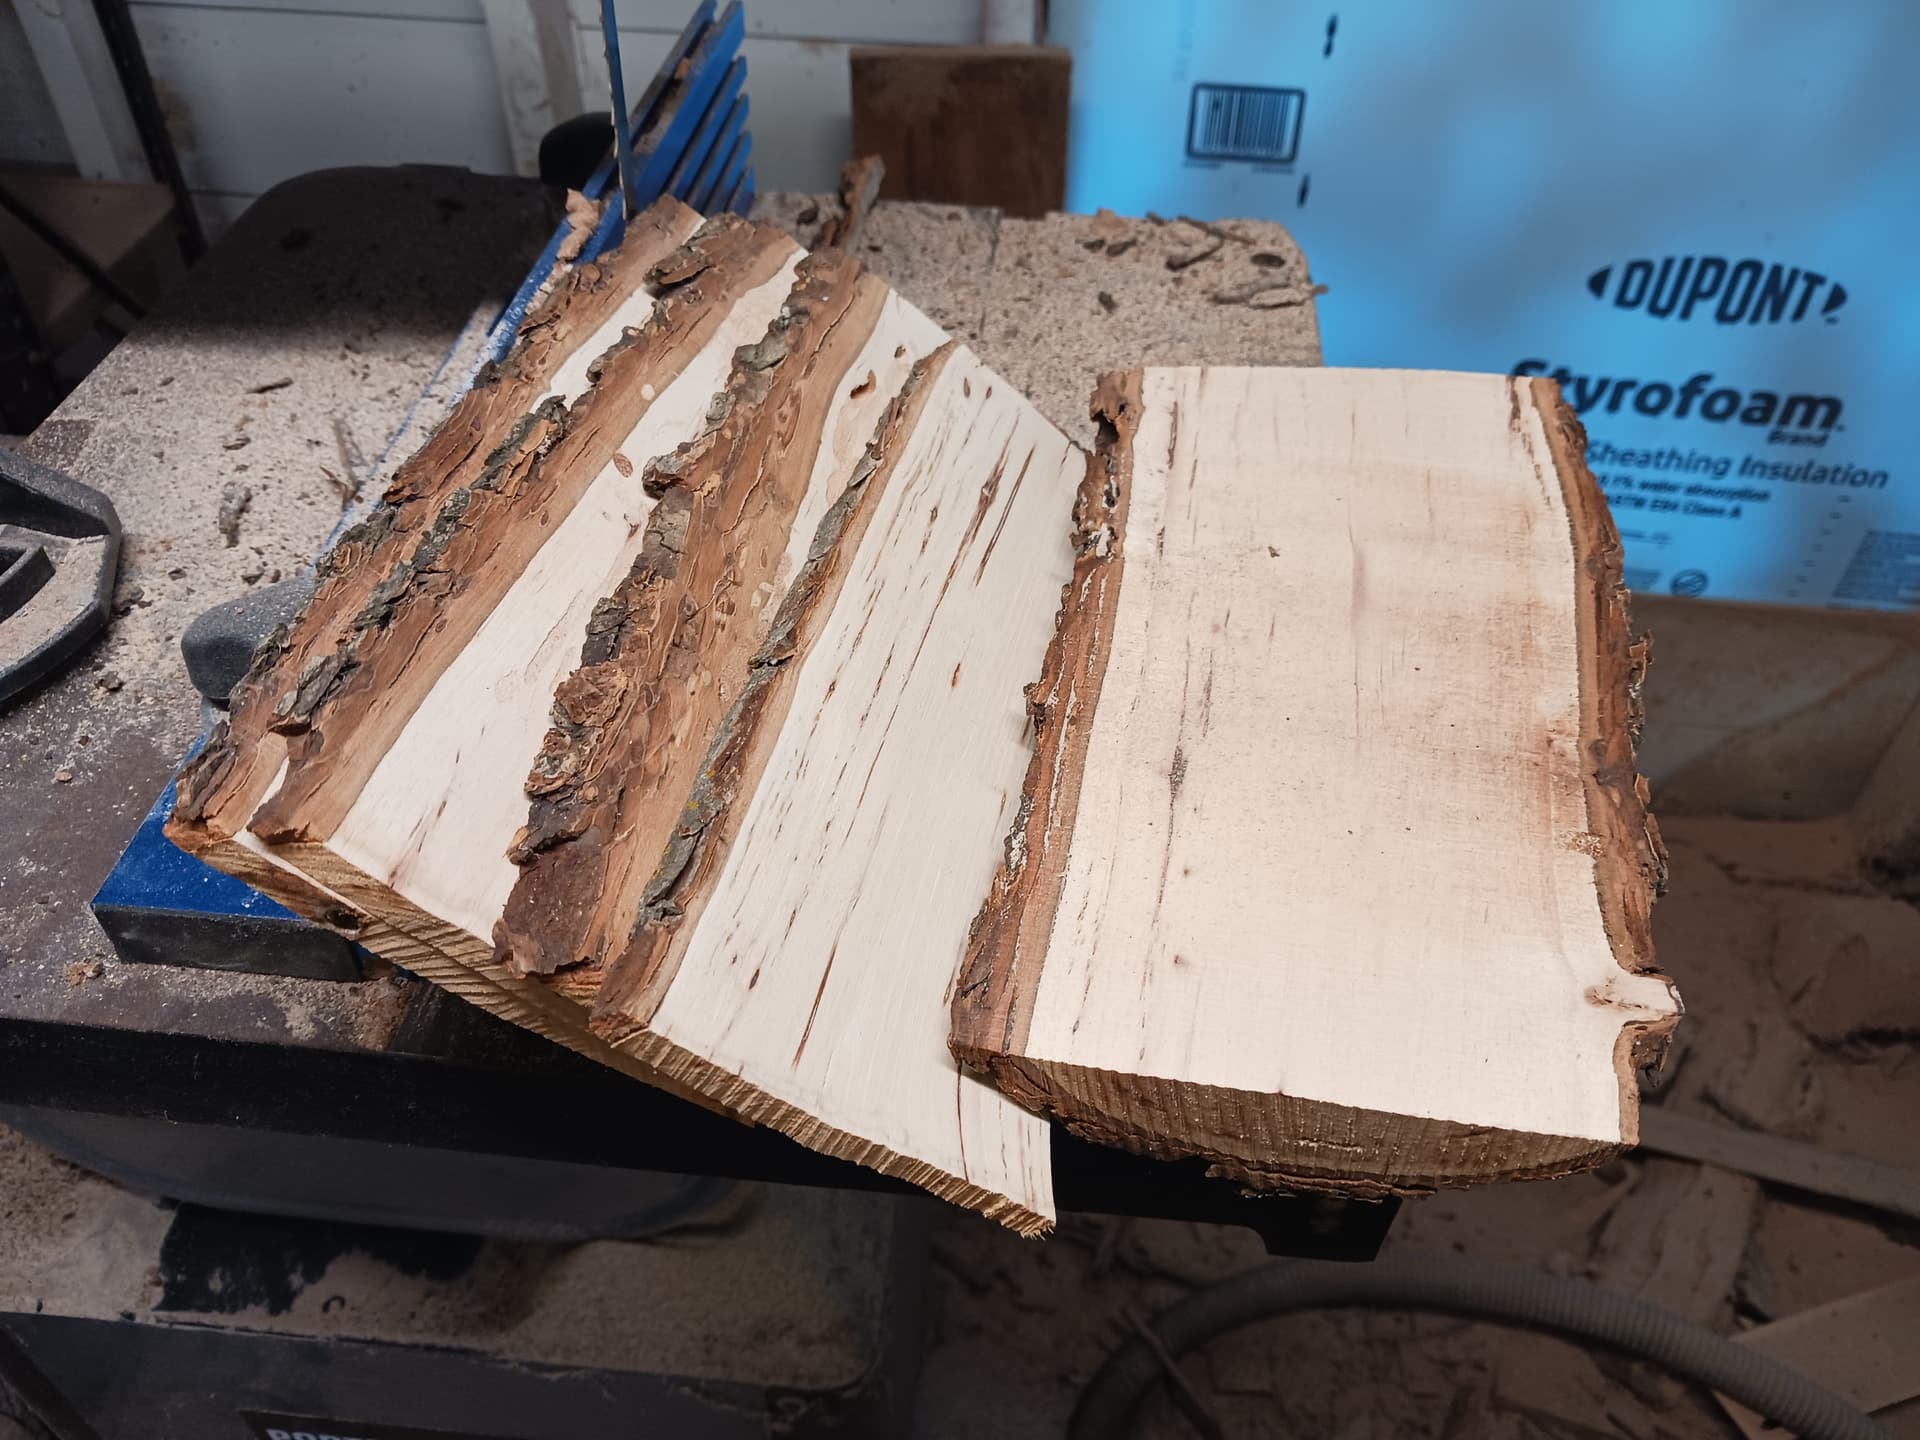
Just a little test with my son’s name on scrap teck
The inlay is plain poplar plywood as I do not have a clear hardwood available
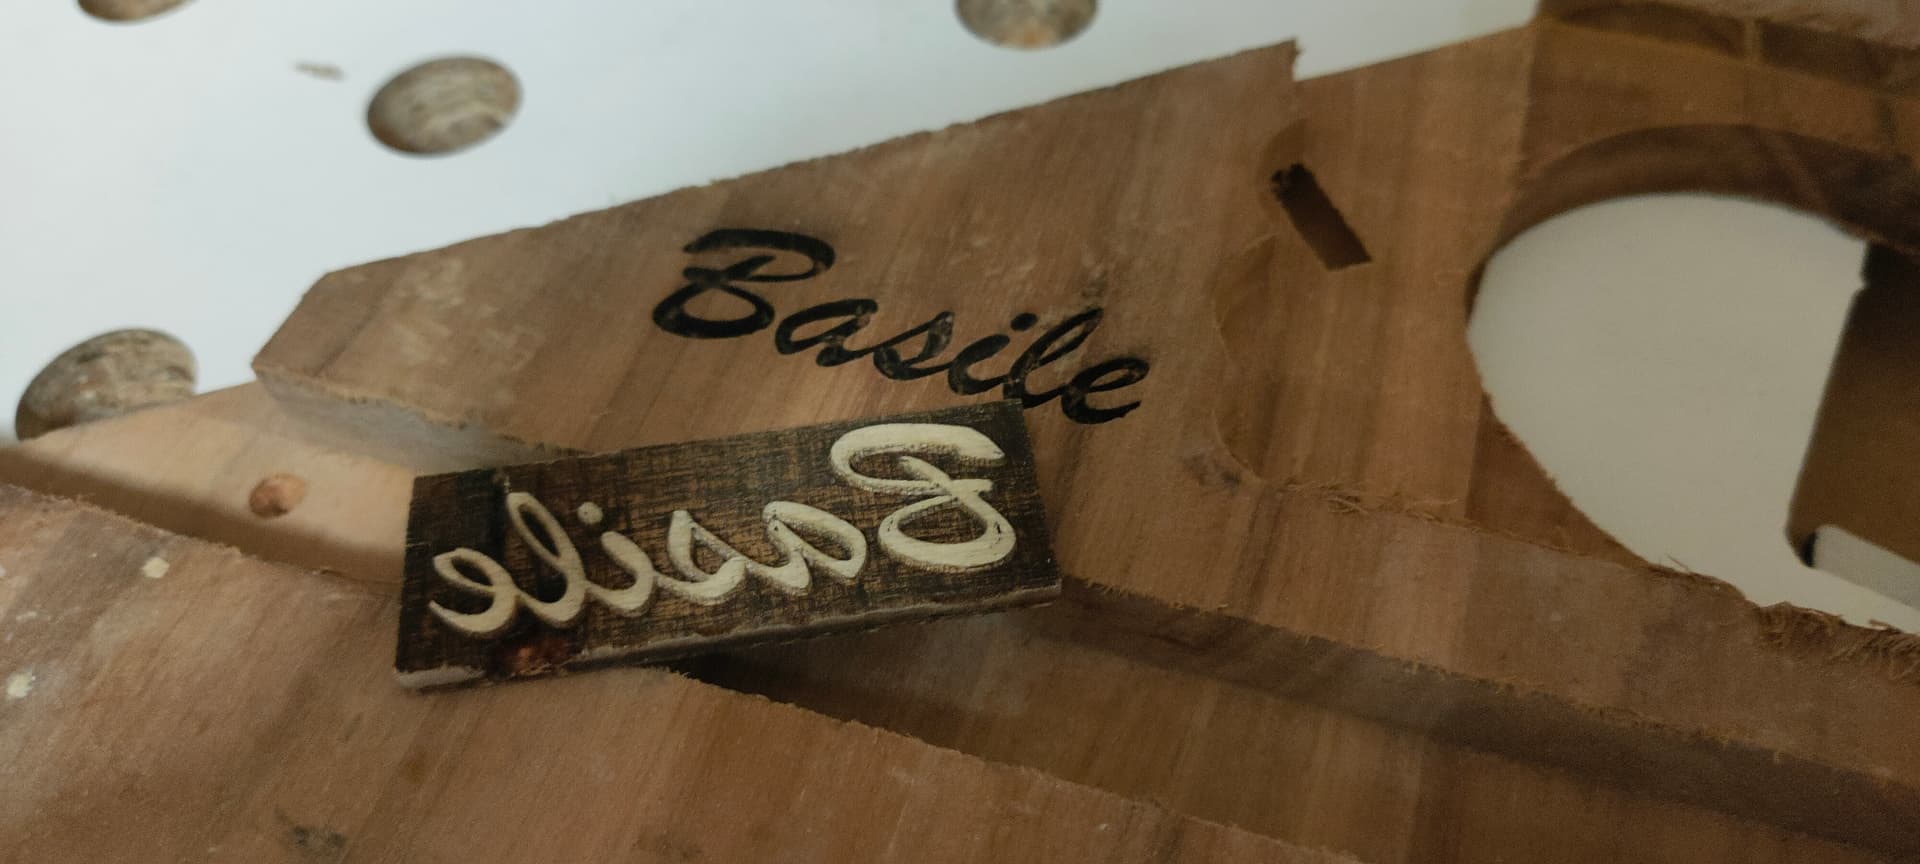
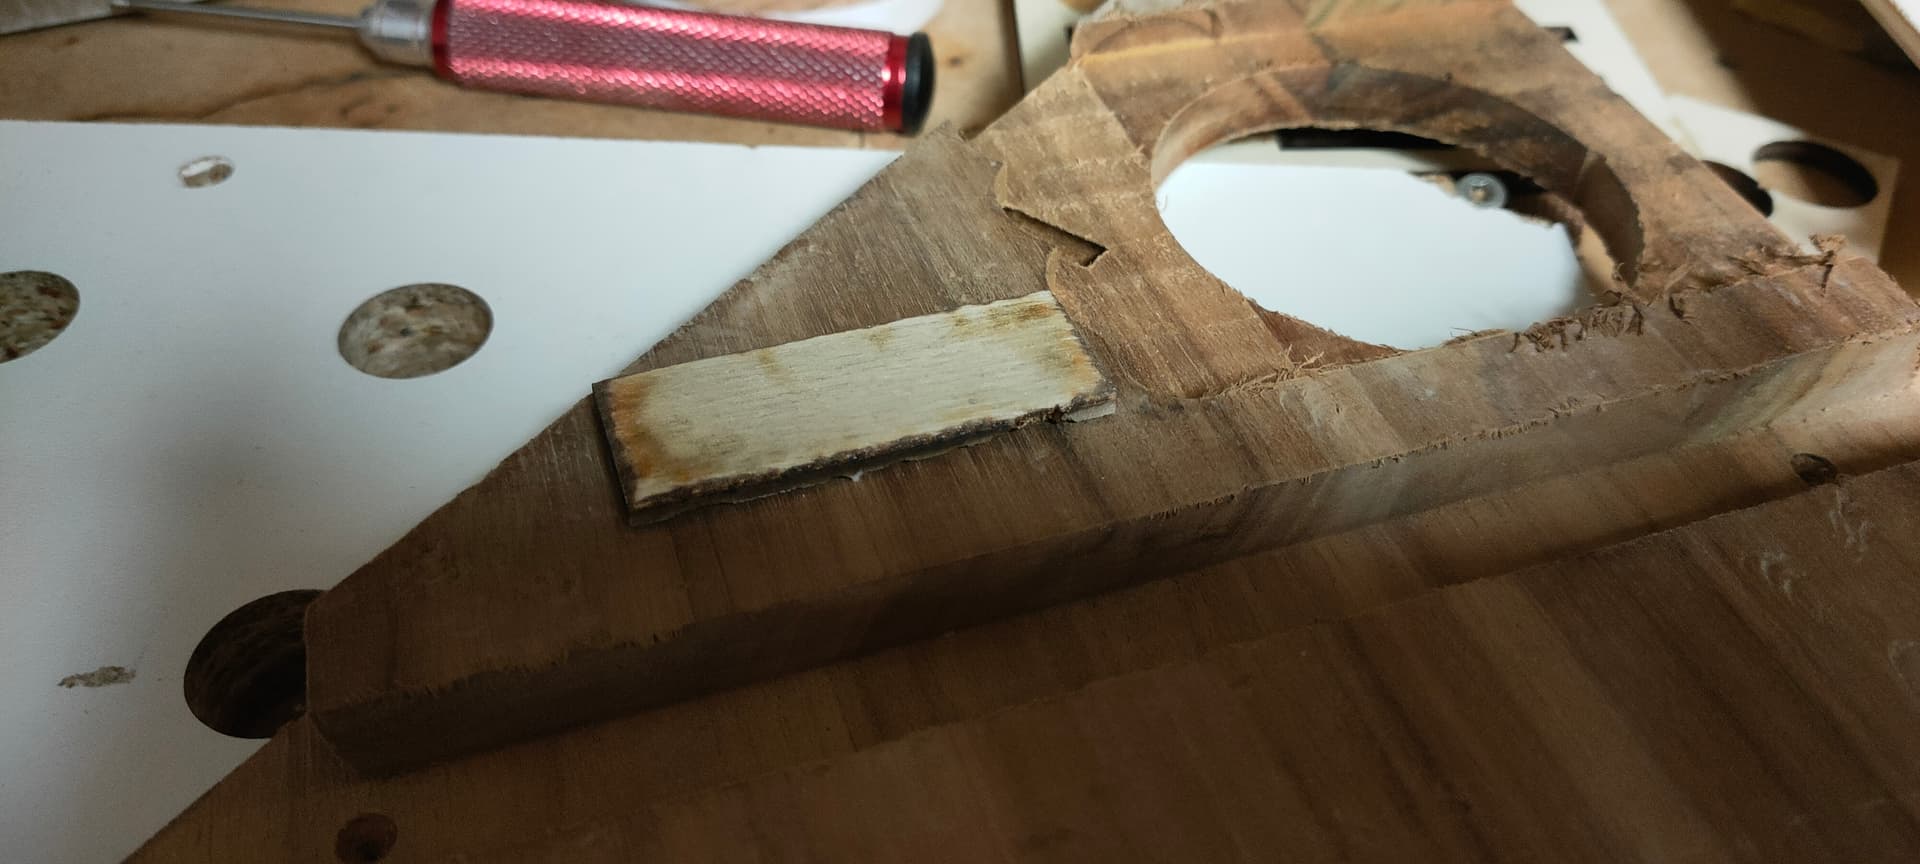
I used an offset fill for the pocket rather than horizontal lines
400dpi 50mm/s 100% power 2 passes for the male part
600dpi 50mm/s 100% power 2 passes offset fill for the female part
The inlay is 60x20mm
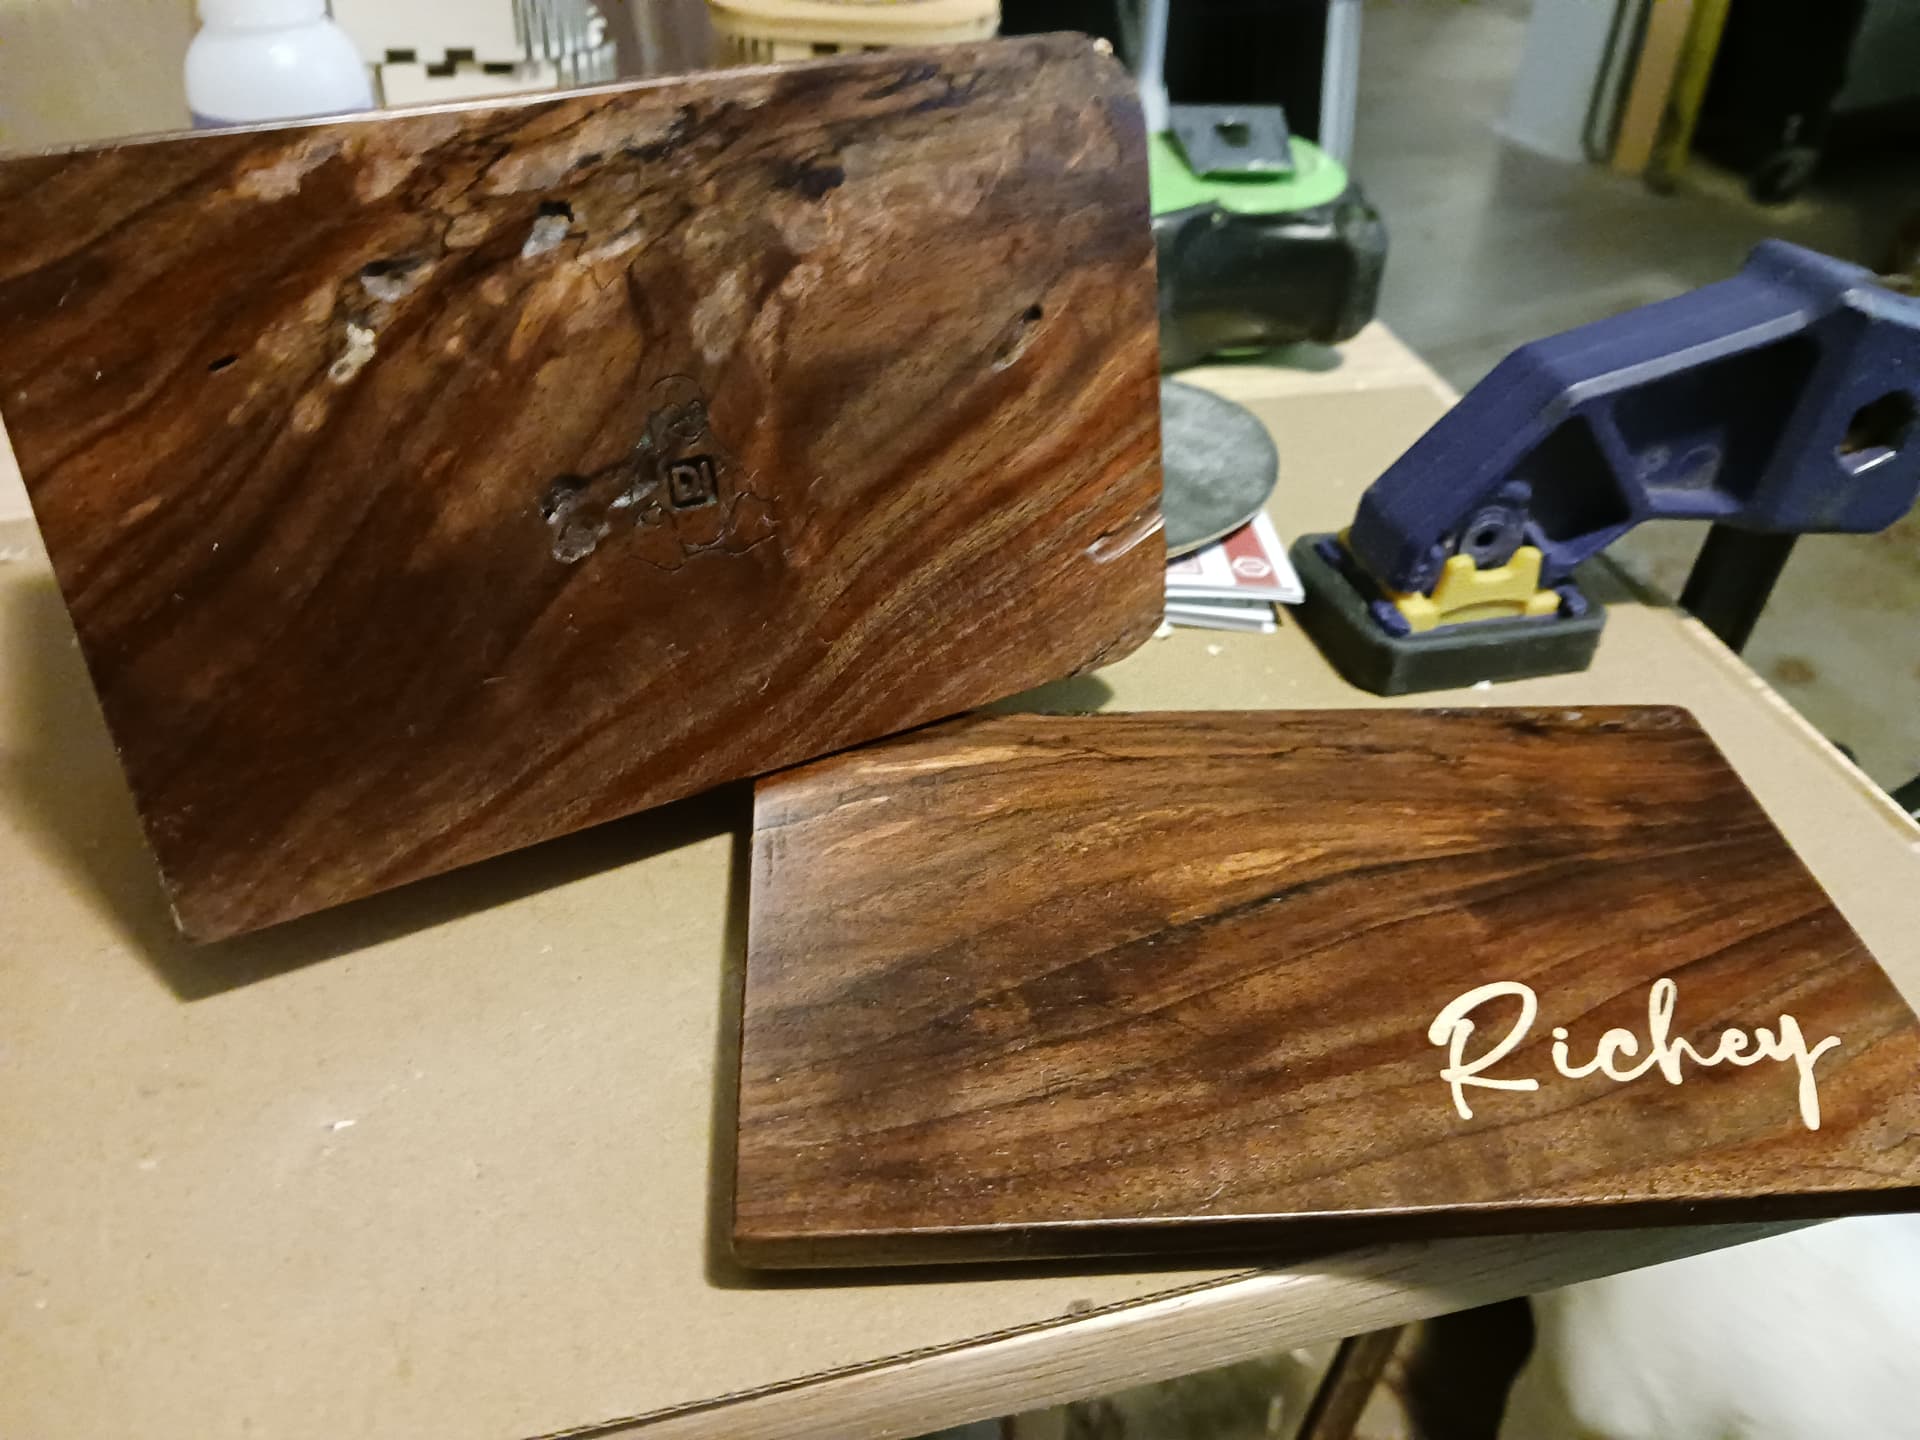
The process is indeed pretty easy, just got to keep organized with the different steps and find the correct settings for the materials and your specific laser setup
The result is great, with very thin lines easily do-able (see the “s” and “B” shallow parts)
Very impressed, thanks for the discovery !
11 Likes
That is a fabulous result, Fabien! I’m so glad you gave it a try. And thrilled that you found it relatively easy to do. AFAIK you’re the first to test it. Since describing the method in the first post, I’ve found that there will still be a few little things to fiddle with to make the offset operations work in “all” cases but, as you’ve indicated, staying focused and being willing to test a few things will soon make it become “easy” to get good results!
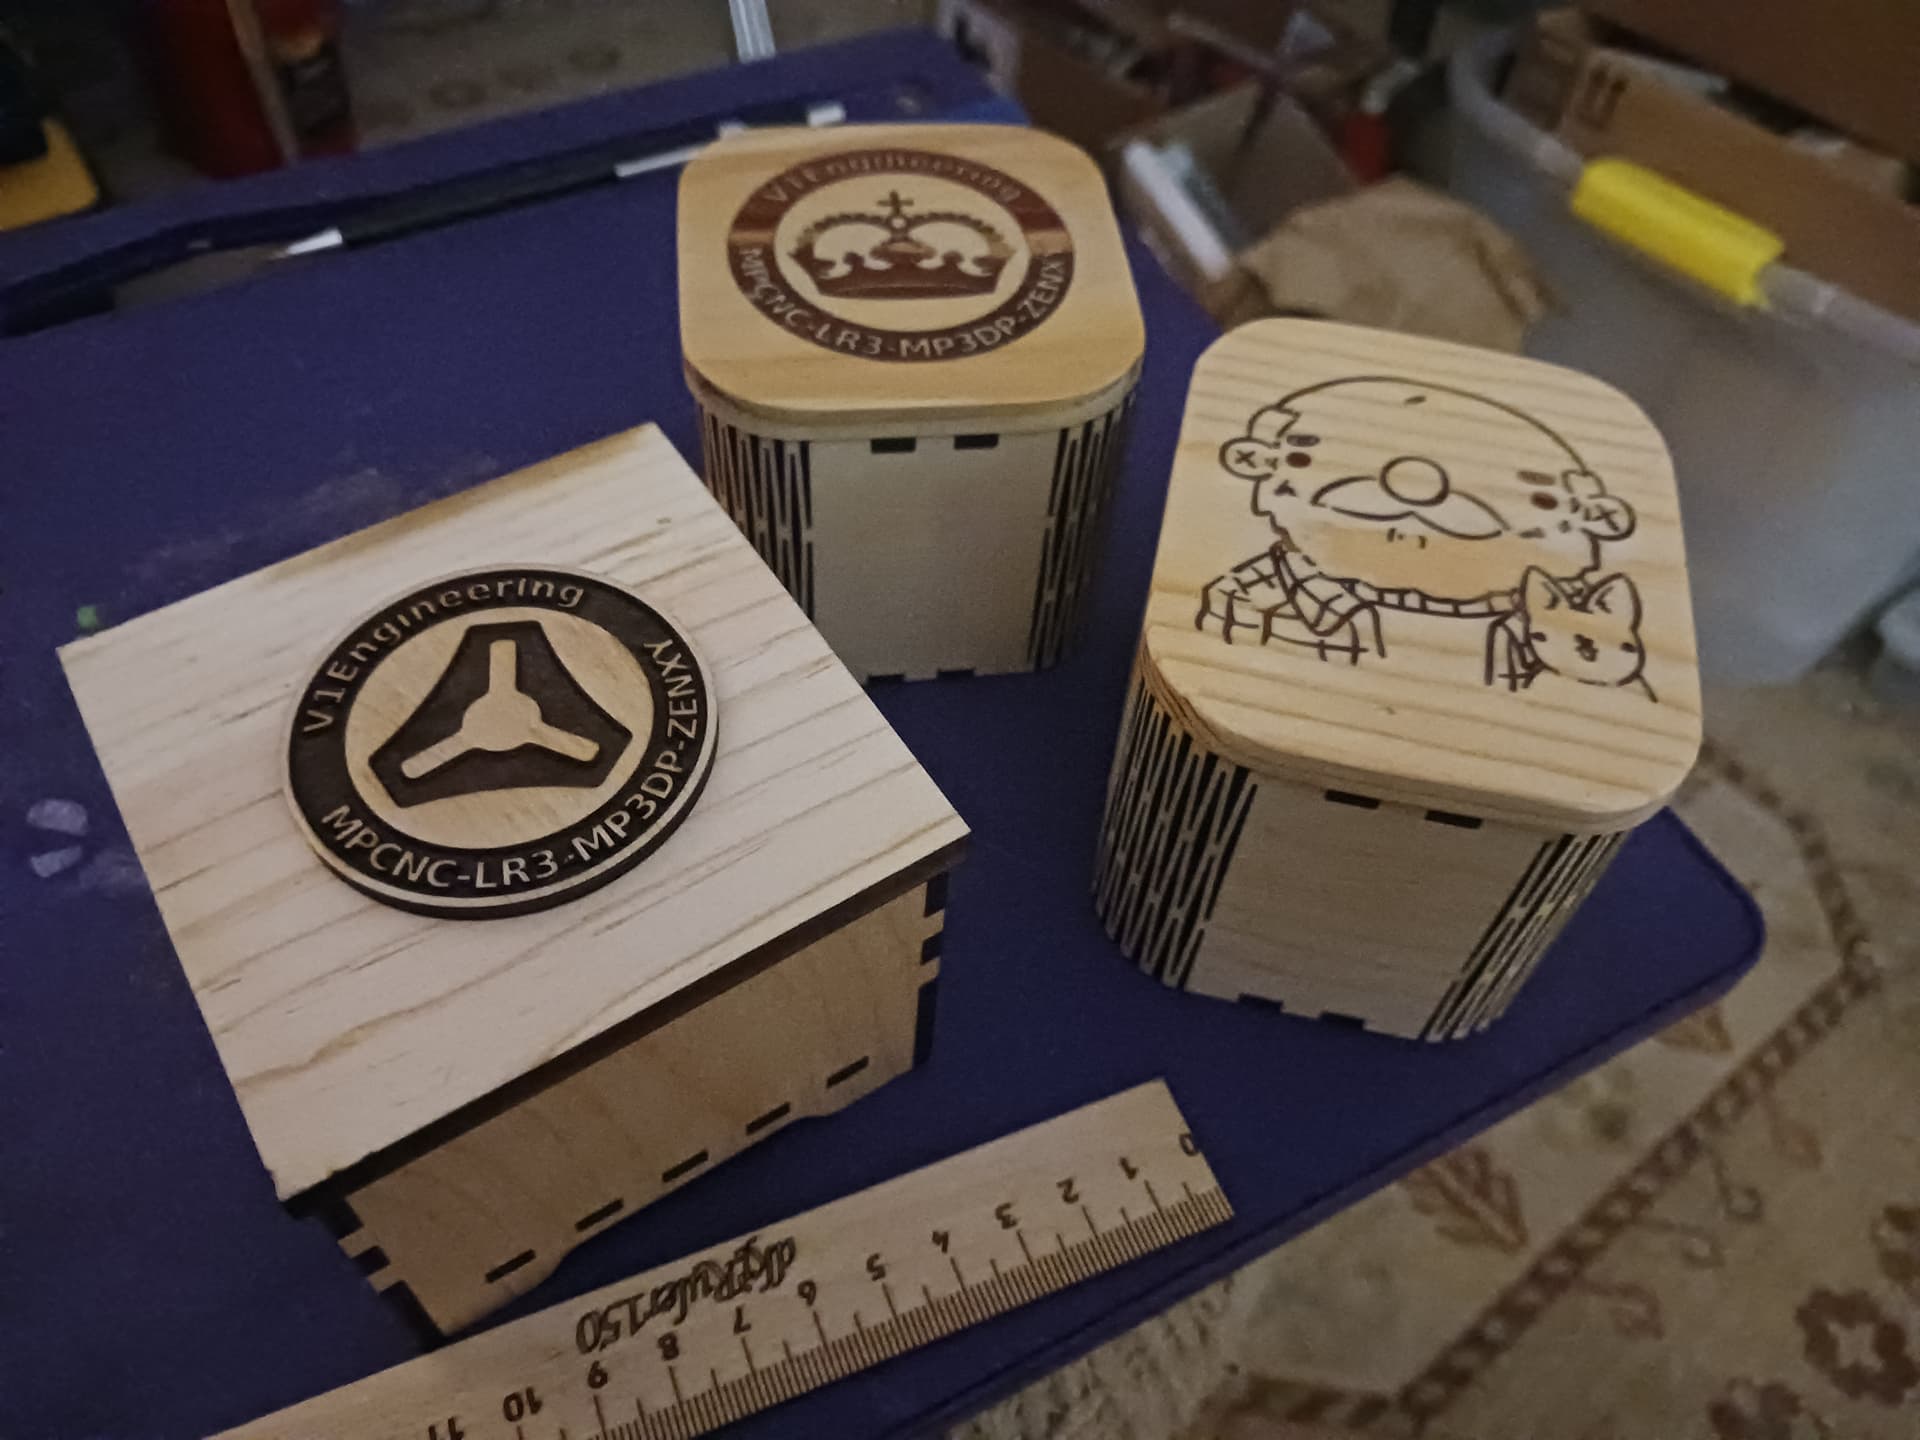
Hang on to all your little “test” pieces… eventually a way to use them will occur to you. I found that a box generator program like “boxes.py”, for example, will allow you to make custom-sized boxes that incorporate your test pieces in some way.
Again, congrats! Thanks for sharing… you’ve really made my day!
– David
4 Likes
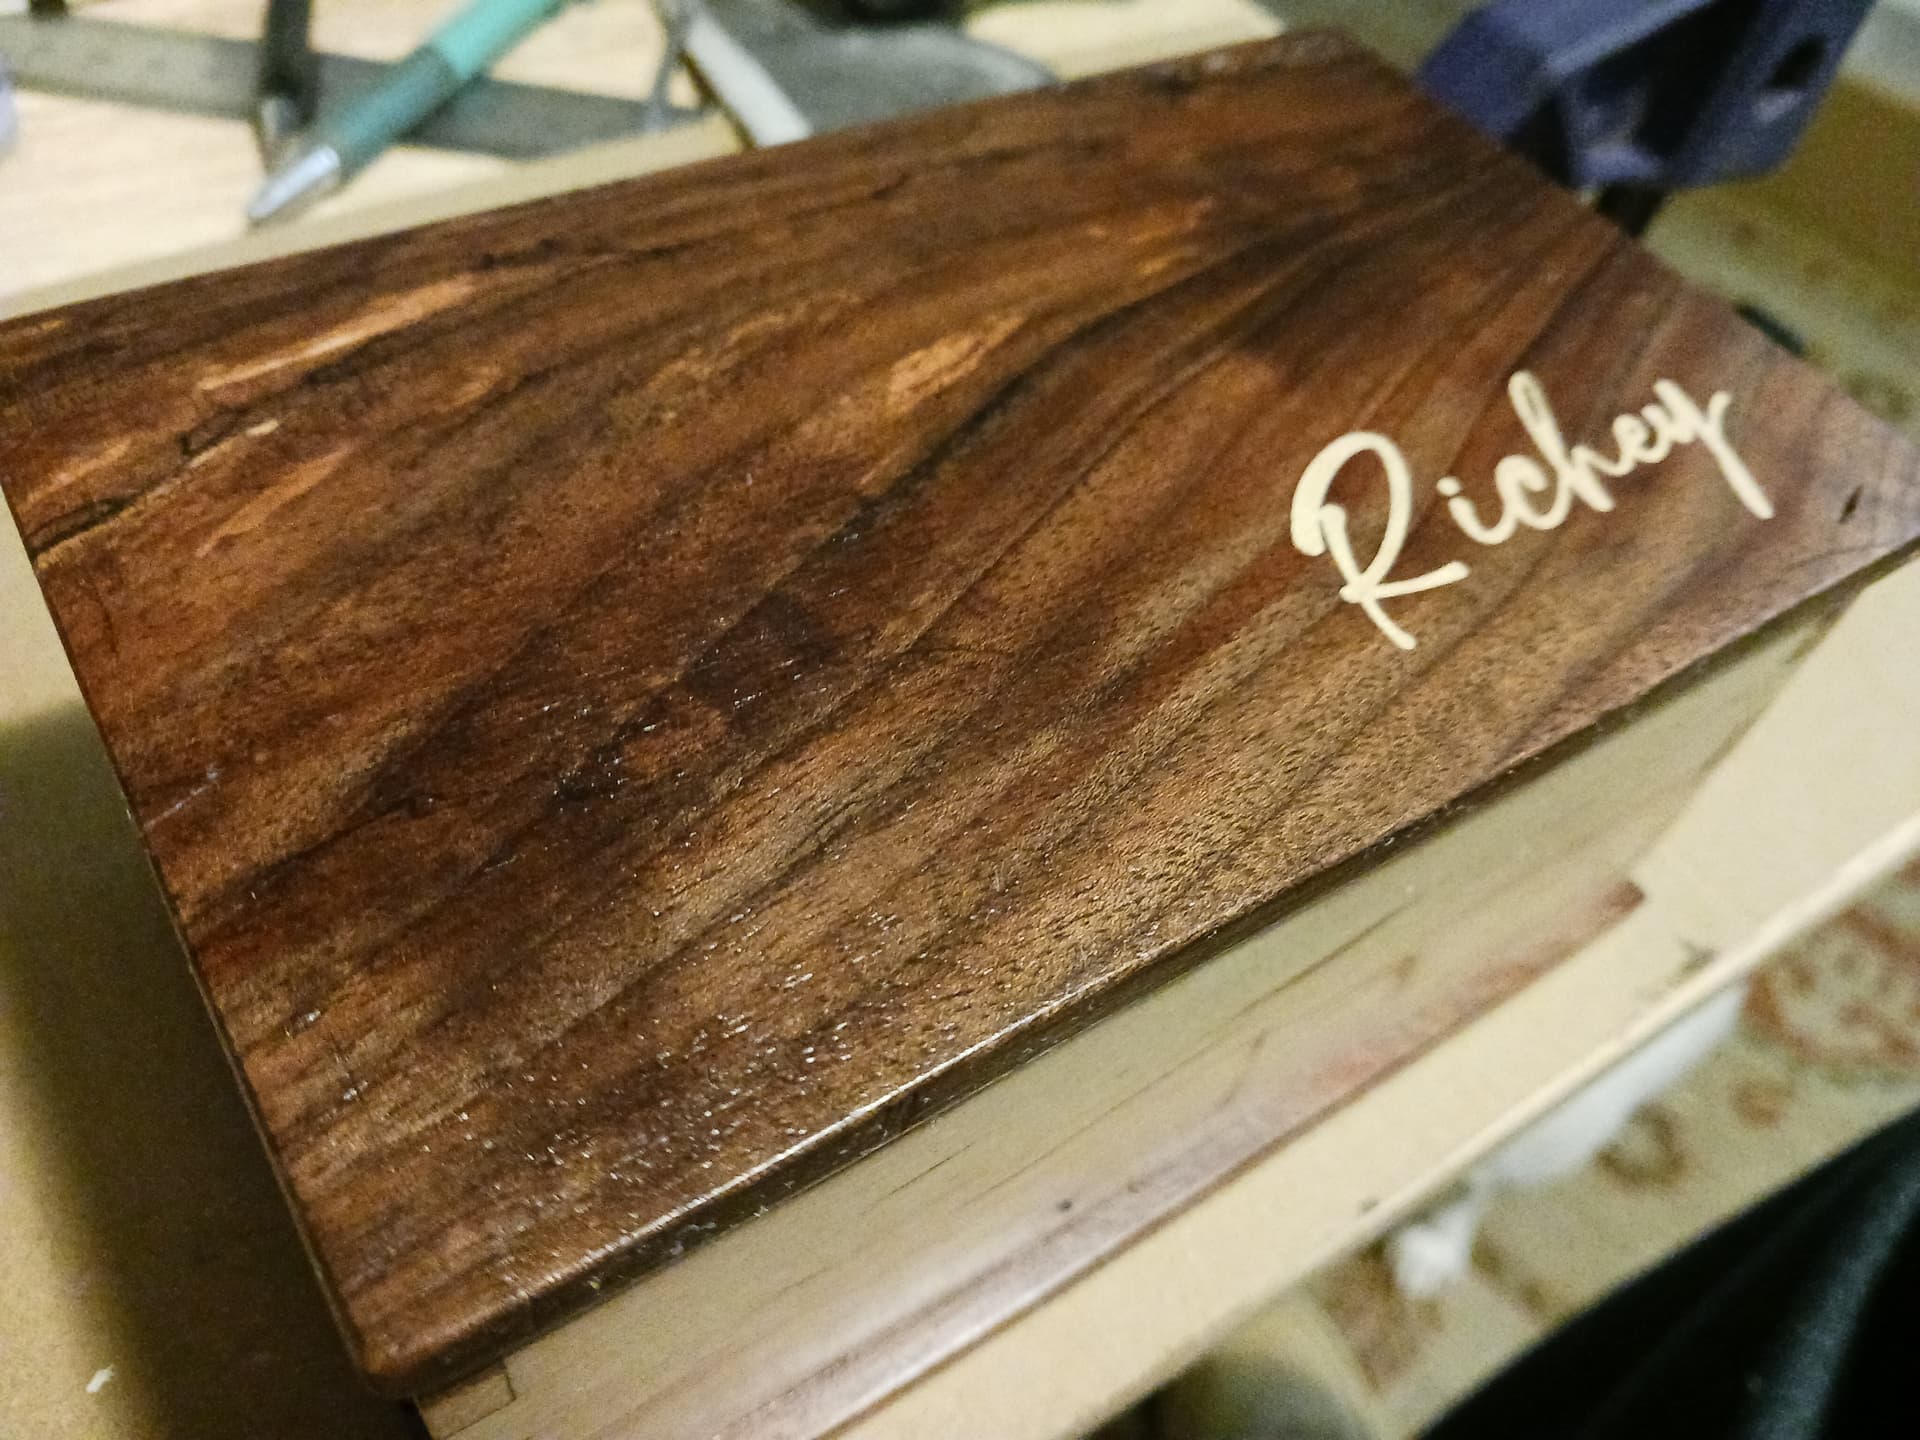
More progress on the Family Christmas boxes…one down, two to go!
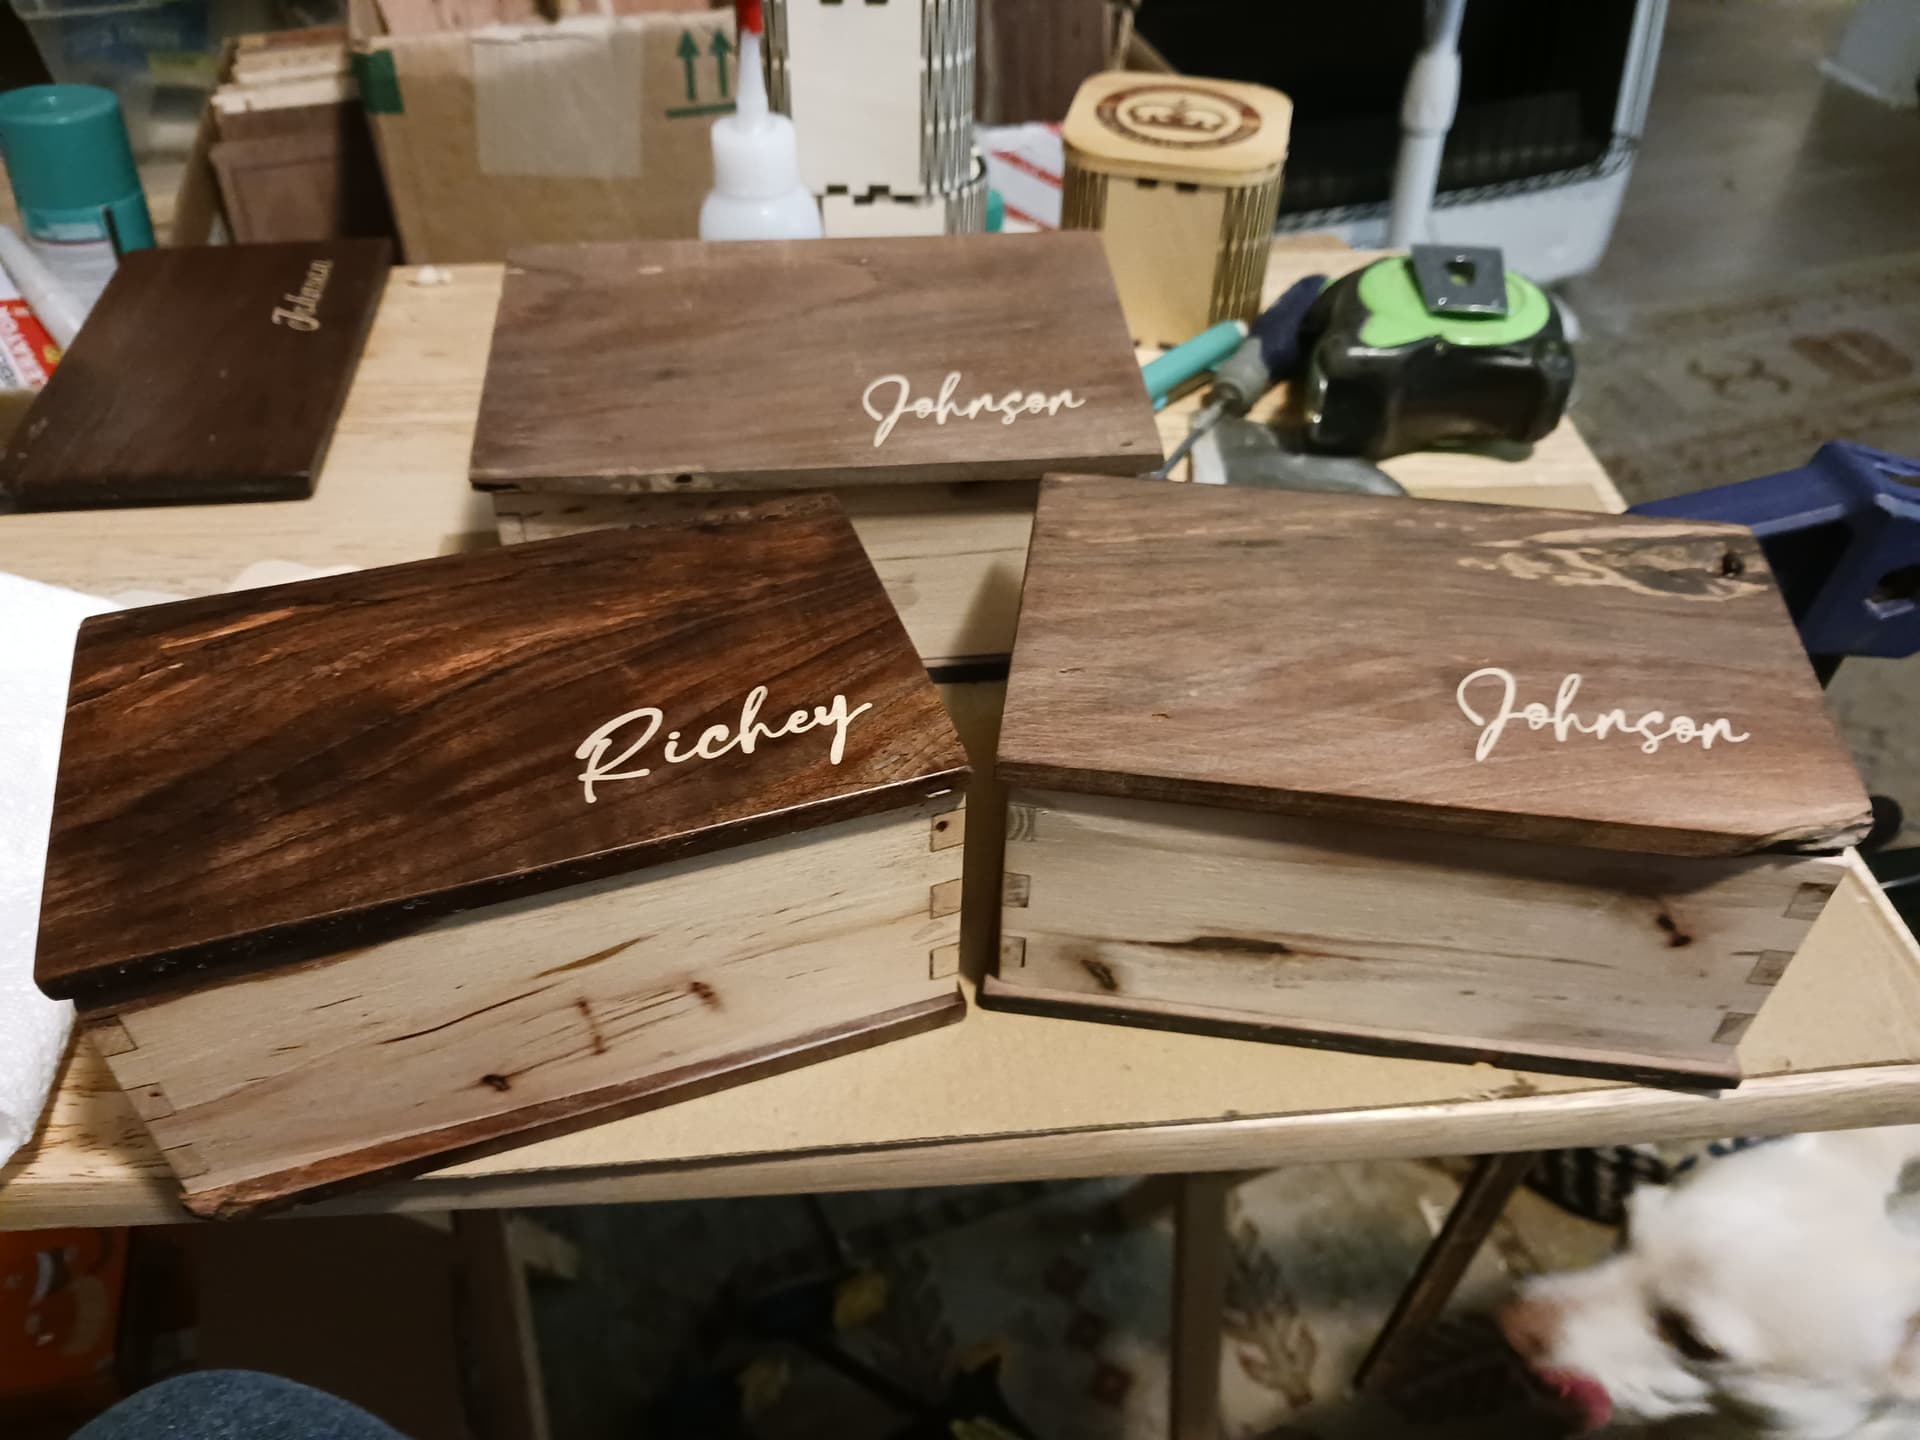
Wormy pecan and ratty walnut with maple inlays. I’ve also been watching a bunch of Rob Cosman YT videos and trying out his small box finishing technique… 3 light coats of Deft Clear Wood Finish (Satin). I think I like it!

I know… it’s hard to believe HD and Lowes doesn’t carry this prime box-making stuff. Sadly, I’m down to my last few pieces of the walnut…
Plenty of inclusion-rich, wormy, pecan, however…
Grandkids Christmas-money boxes are next… similar to this. Not nearly so time-consuming to make as the family boxes…

It’s been a long time since I’ve worked in my woodshop. I’m enjoying the journey!
Later…
– David
10 Likes
David,
Really like your finish.
I’ve been meaning to make time to experiment with two finishes that I’ve run across.
- Superglue, used as one type of the finish for wooden rings as an example.
- Polyurethane glues, like gorilla glue. “Ask this old house” was in Hawaii, and showed a guy working with Kona wood, that was using gorilla glue as a finish. If memory is functioning correctly, he was doing boxes as well, which is why this reminded me.
Sadly one of the many things on a list that grows faster than I cross things off.
2 Likes
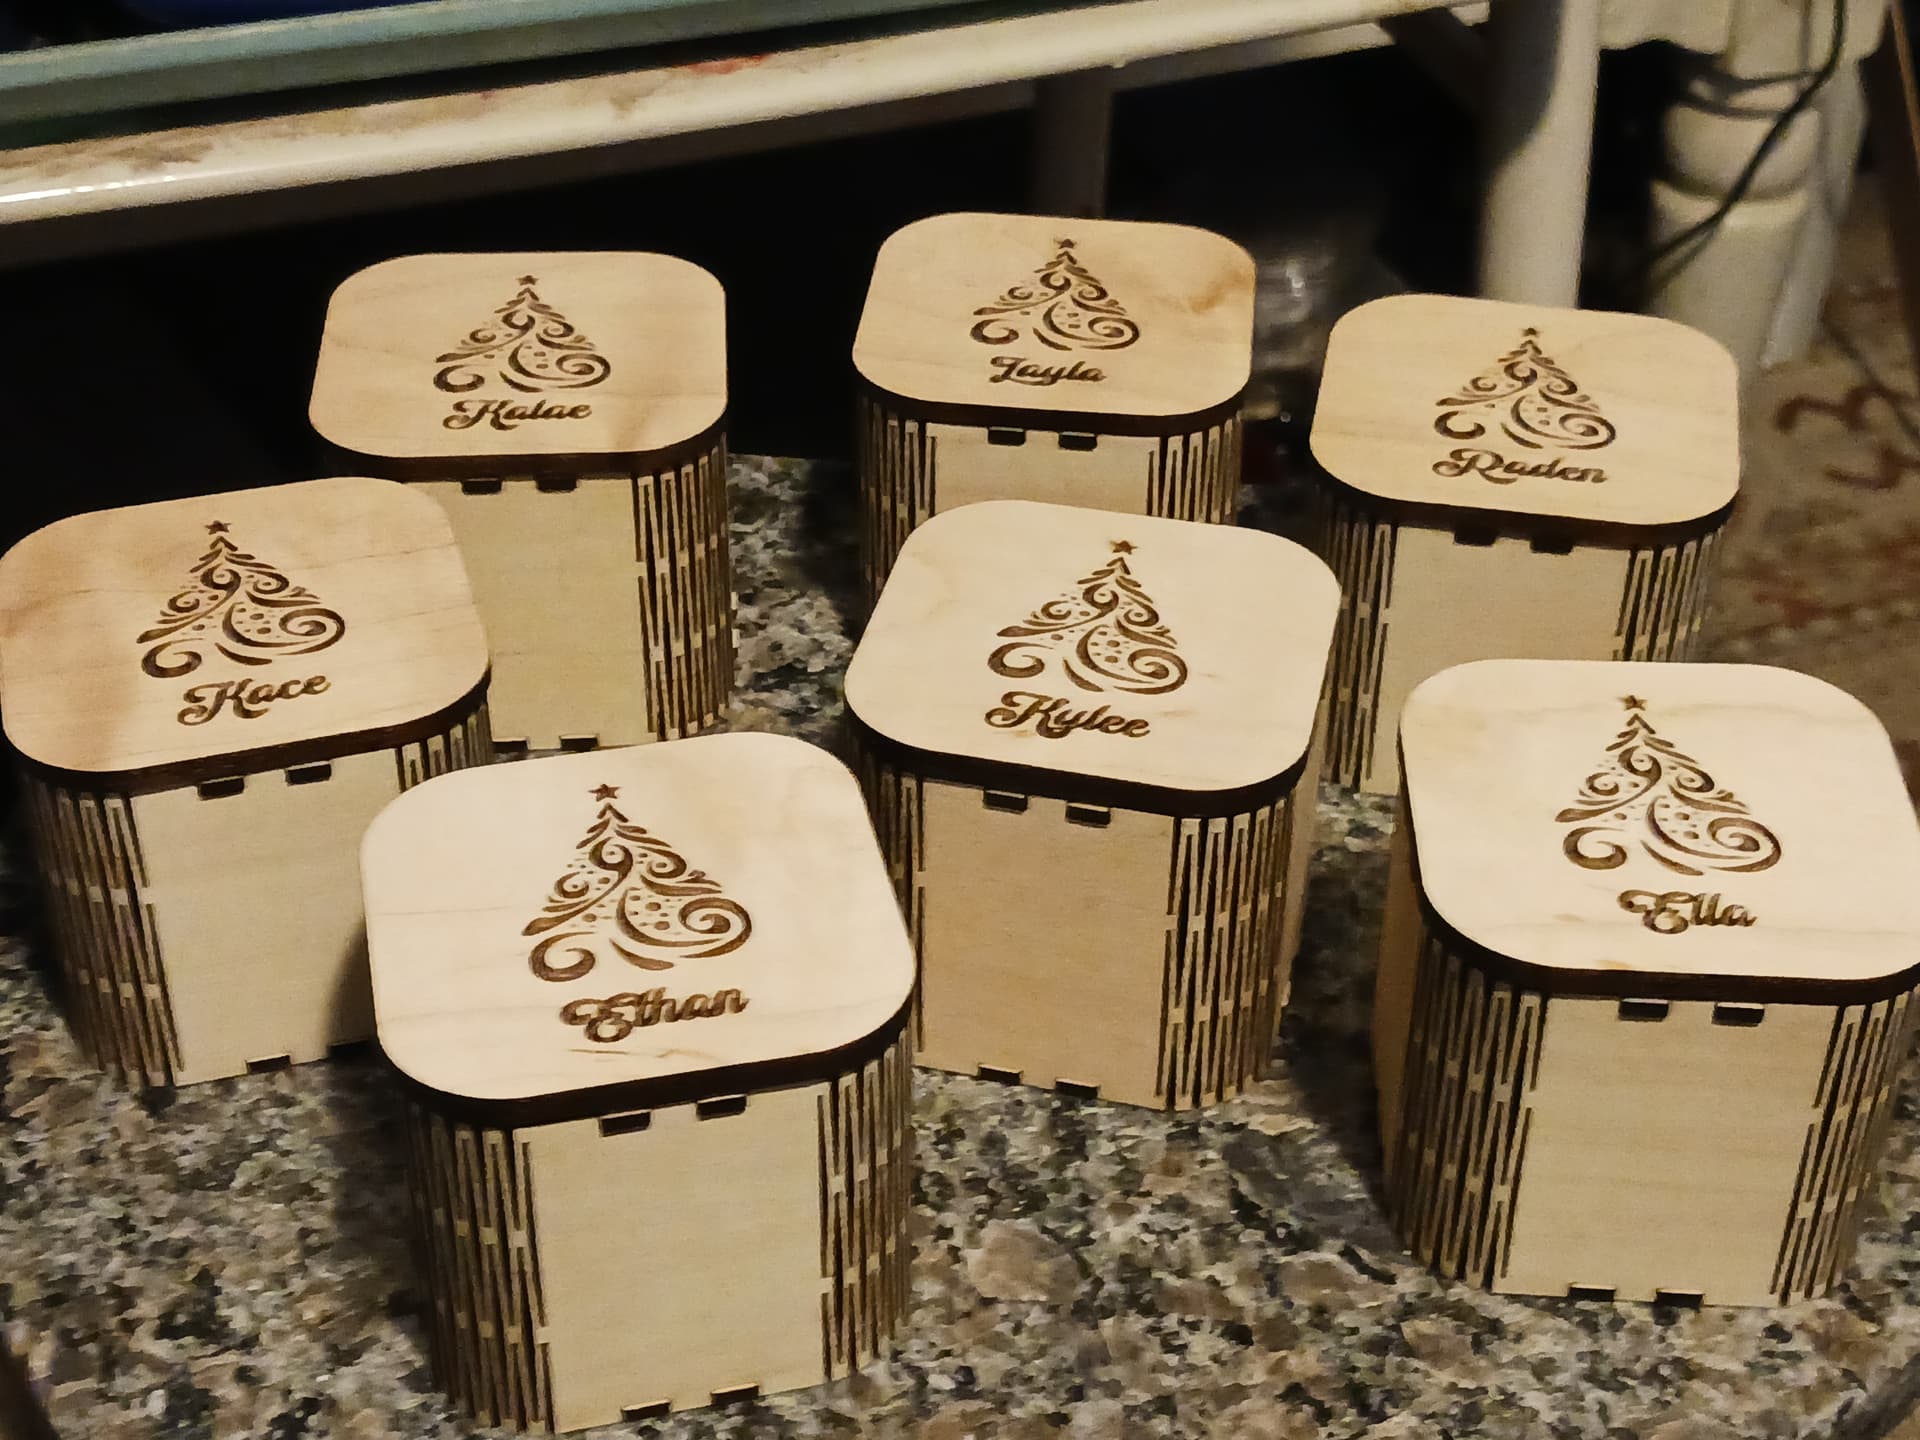
Got Christmas gifts done by Thanksgiving! Three family boxes for kids… seven gift boxes for grandkids. The family boxes have the inlays I’ve shown ad nauseum… and the gift boxes are 3mm birch ply with engraved solid maple lid. The Christmas tree is one of Robert’s (@robertbu) Midjourney shares and I managed to find a fairly nicely matching font to add the grandkids names.

Just sitting around, twiddlin’ my thumbs and contemplating my navel now… a bit embarrassed that it took me so long to do what appears should have been a fairly straight-forward task. Not sure what to do now…
– David
11 Likes
Well I am blaming you for spending more money on one machine since I bought the Festool Domino, so I am hoping you’ll keep the inspiration going!
1 Like
Shame I couldn’t get you to the CNC inlay side, not even with my instructional video. ![]()
3 Likes
Take the boxes to the next level - trick boxes. You have to pull tabs in a certain order for them to open, or uncover a hole that you have to blow air through in order to open the lid, hidden mazes that you have to solve before opening, etc. and self design if you want to make it harder.
3 Likes
I see that this is possible… I just don’t fully comprehend exactly how that is accomplished.
3 Likes
If you have a 4" side and a 8" side. And all sides are 3/4" thick, you start with a blank that is 12" long and 1.5" thick.
You resaw down the middle to make two blanks that are 3/4" thick. Then cut the sides like this:
---- --------
-------- ----
Rotate the small sides counter clockwise and you have this:
--------
|      |
--------
The corners all match up and the grain flows around the whole box, but two sides are actually mirrored (book face matched).
(For the math. I ignored kerf sizes and the loss to smoothing on the planar/joiner)
4 Likes
Ah, got it! So easy to comprehend once you see it spelled out. Thanks!
2 Likes
Quite a while back I read your OP and made a mental note to come back and re-read for full comprehension. Just did that. I’m now armed with new knowledge, and I’m highly confident I can make this happen. First step would be to do the “19 sections 20 nodes” cut to find out my laser’s exact kerf width. Thanks for being awesome!
2 Likes
Tbh I just winged it and went with a .1mm offset and it just worked ![]()
3 Likes
Sounds good… not terribly far from the 0.08mm I’ve been using.
![]()
1 Like
Since I’m likely to be on my CO2 instead of a diode, I will probably do the calibration.