The night is young !![]()
2 Likes
With the warmer weather, I’ve only recently started revisiting my box-making projects. My brother has a 75th birthday coming up so I thought maybe I could use that to get motivated again. I’ll show that in a different post. But speaking of grain-matching all four corners of a box…
Jeff has explained it pretty well with his incredible ascii art skills but I’ve been meaning to show a couple of photos that might help others visualize it as well. As a small limb (here catalpa) is planked out to rough thickness, adjacent planks can be opened up to reveal the “bookmatched” pattern.
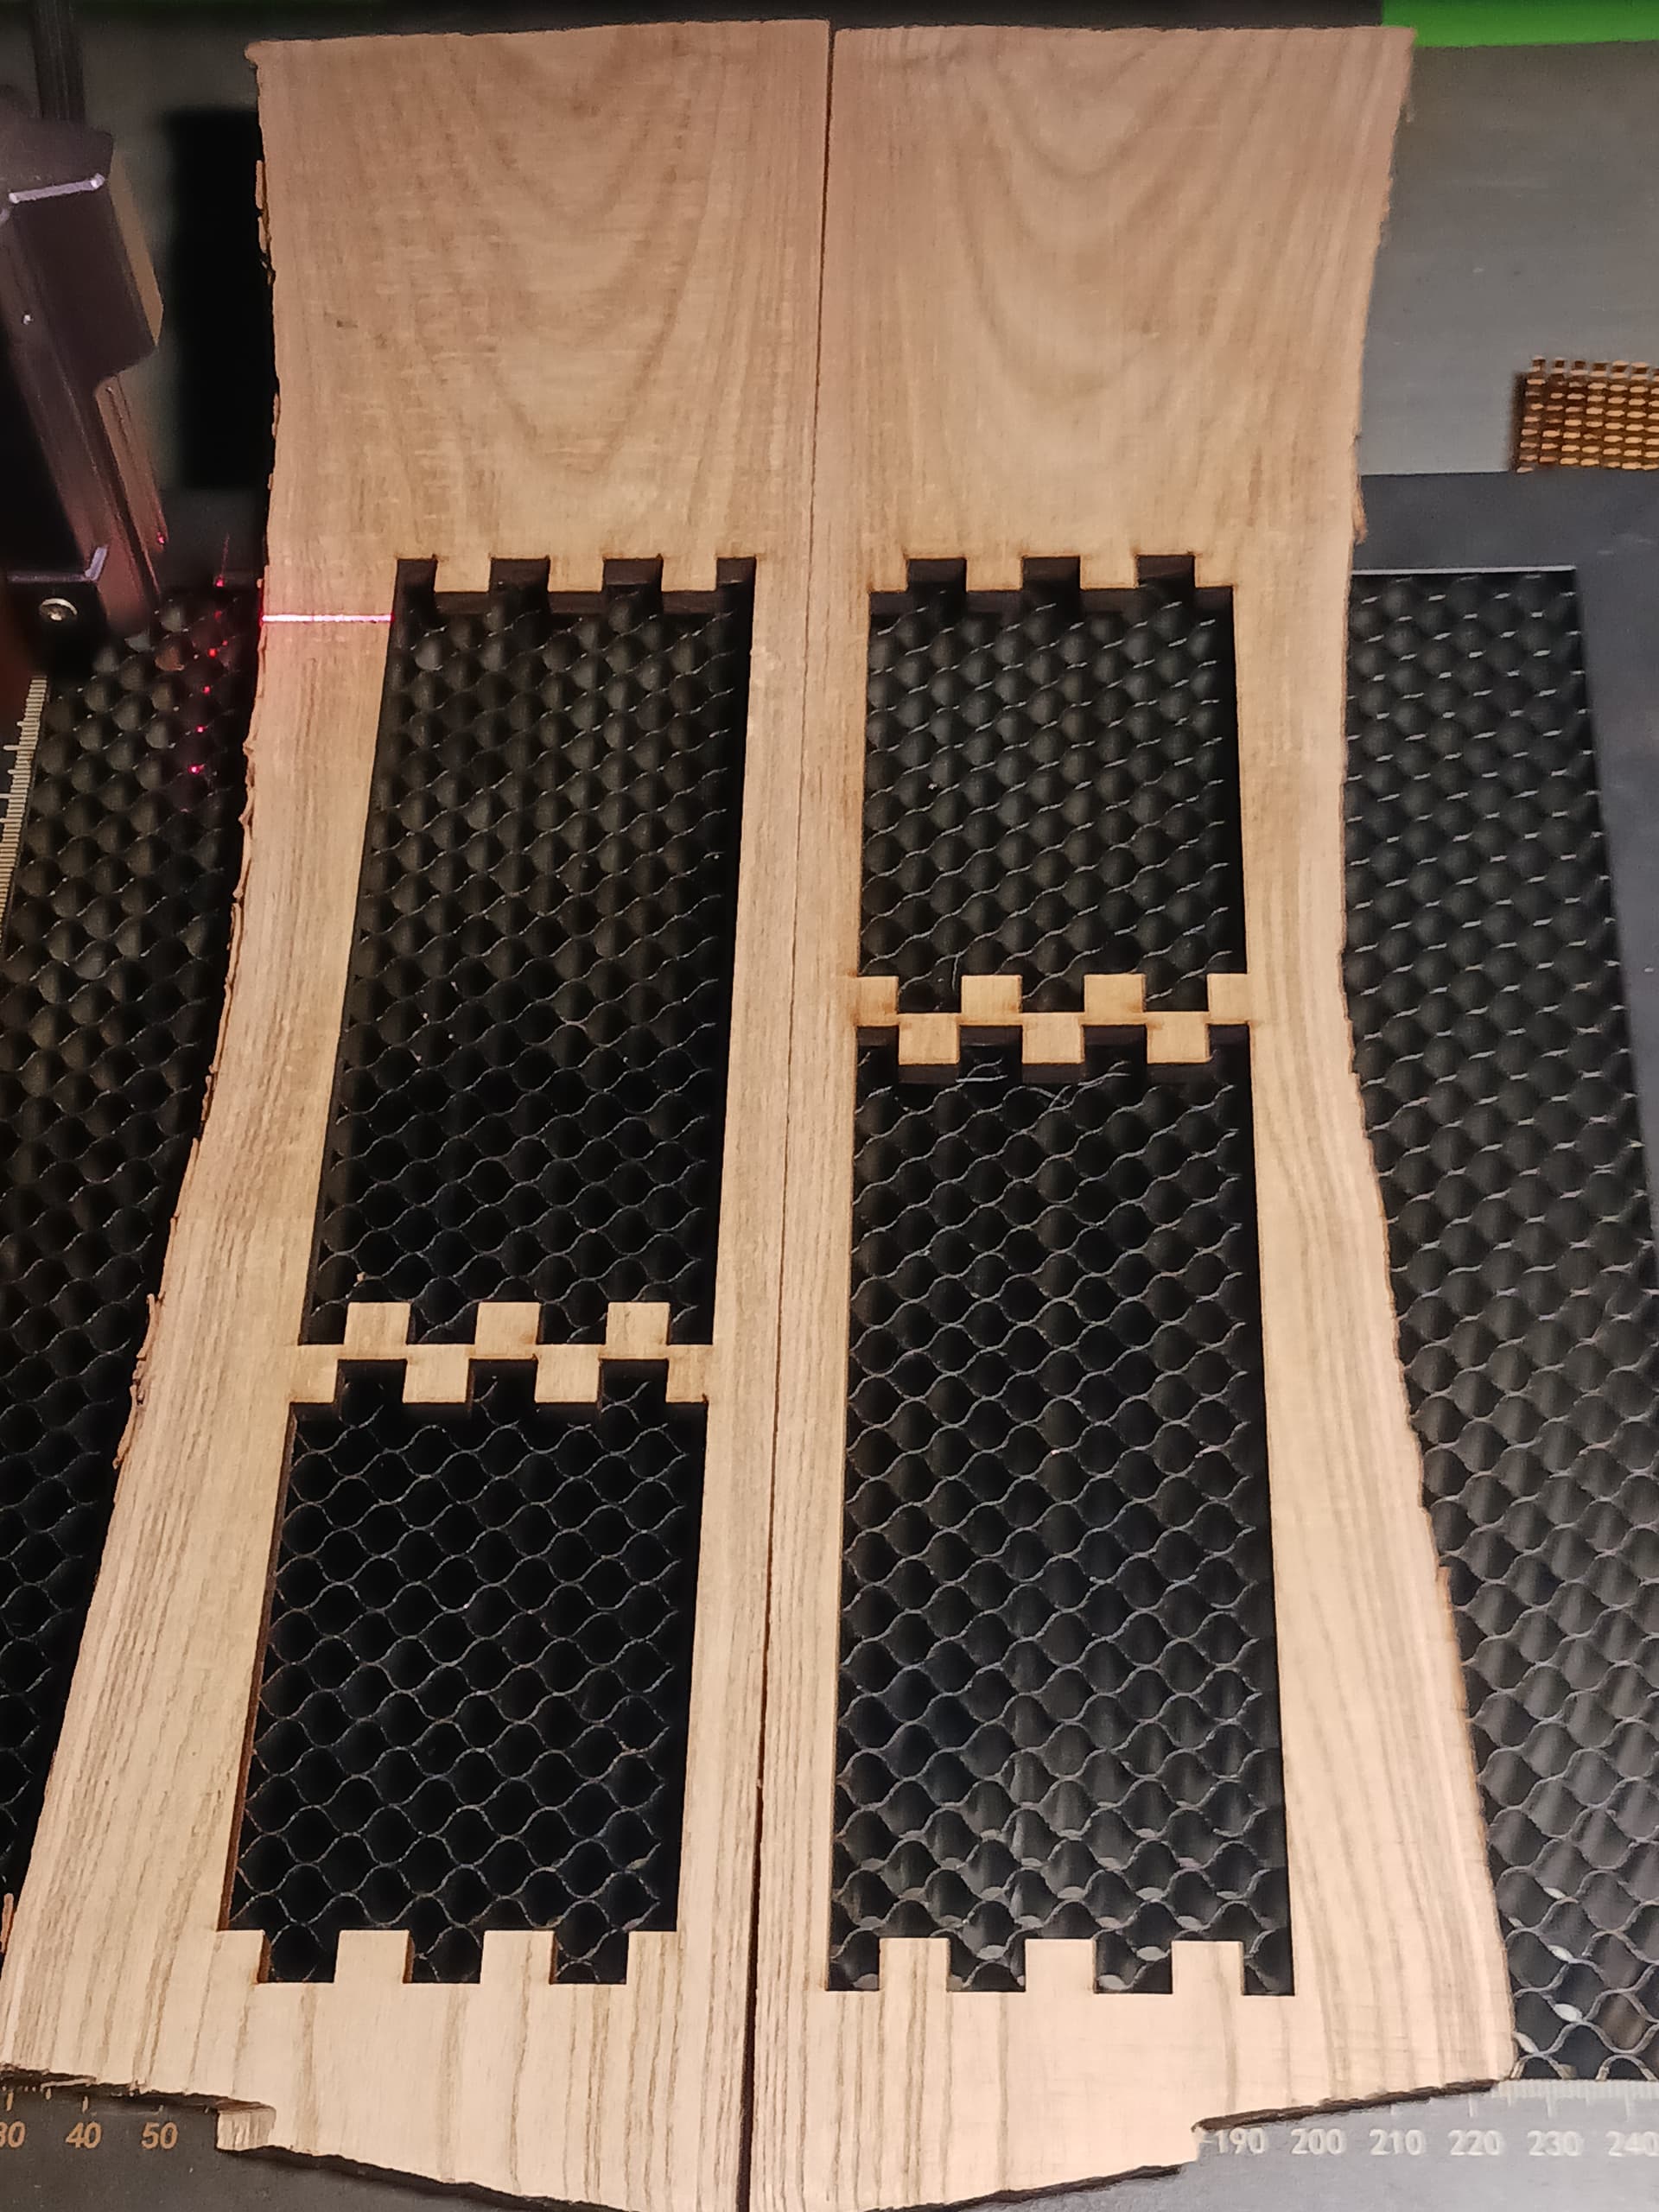
Cut/laser the sides and ends as shown and ensure the bookmatched faces become the outside faces of the box, in the order shown (or as Jeff described), to match the grain at all four corners of the box.
It’s less apparent (but still pleasing) with finger-joints as shown here but mitered corners can really be made to closely match.
– David
7 Likes
As I said in my previous post, my brother turns 75 years young soon and I’ve decided to build him a box similar to the Christmas boxes I’ve shown previously.
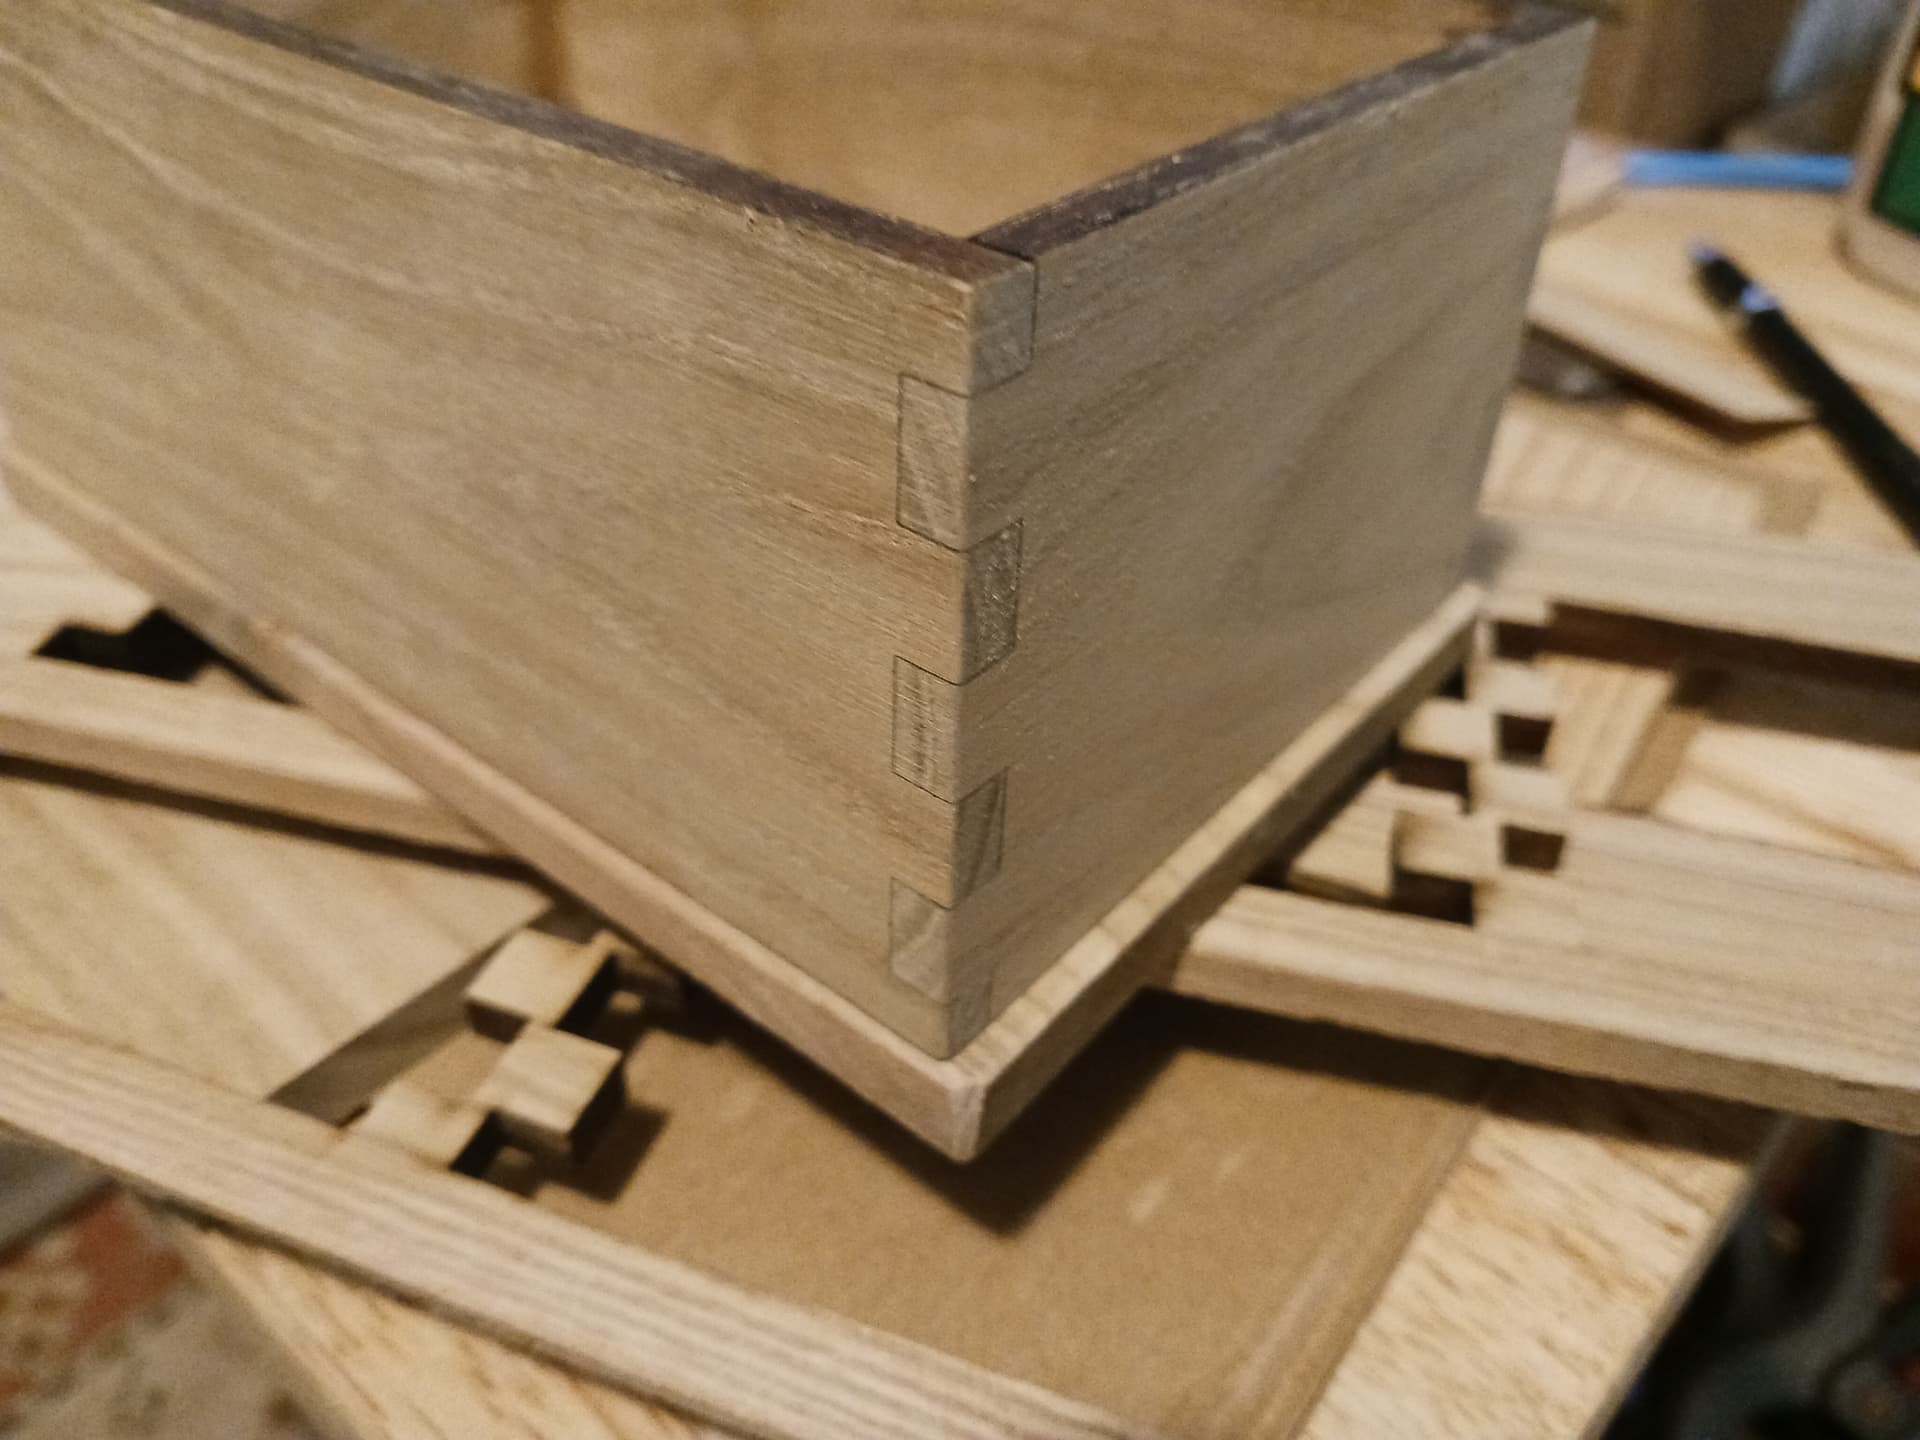
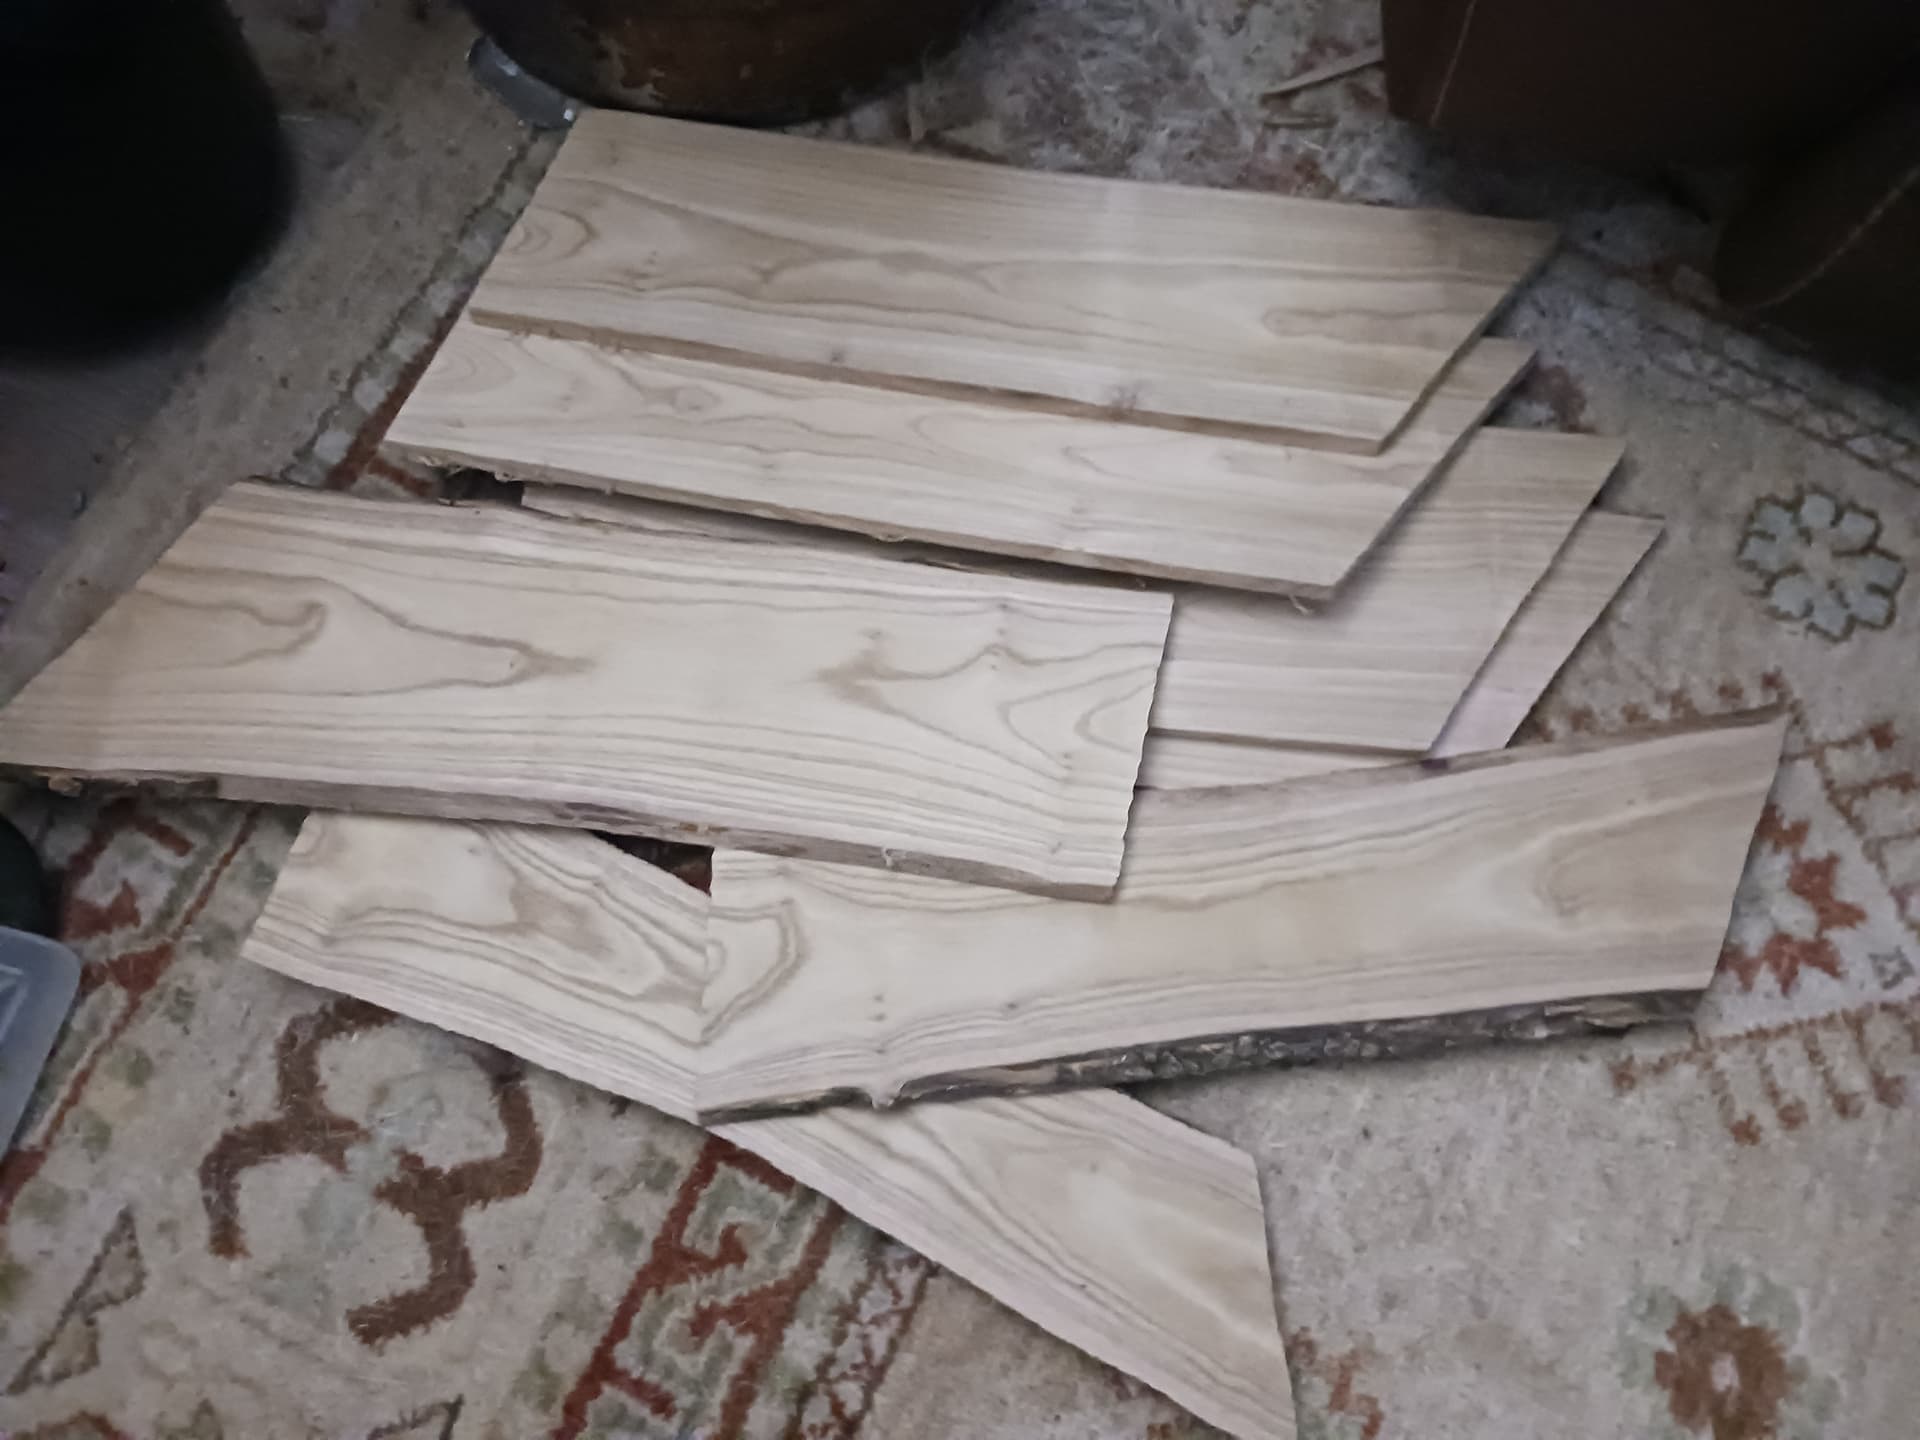
I planked out a couple of small catalpa limbs harvested from trees on my property with my bandsaw and then used the cutting scheme I shared in my last post to laser cut all the box sides and ends with my Atezr L2 36W laser machine. I used my tablesaw to cut the top and bottom (could have used the laser) because I chose to also rabbet the lid to make it one piece vs two.
It’s also been a while since I’ve done my “easy inlays” and engraving. I had to do quite a refresher course to figure out the inlay process and Lightburn all over again.
Pocket and black walnut inlay pieces are laser cut…

Glued up…
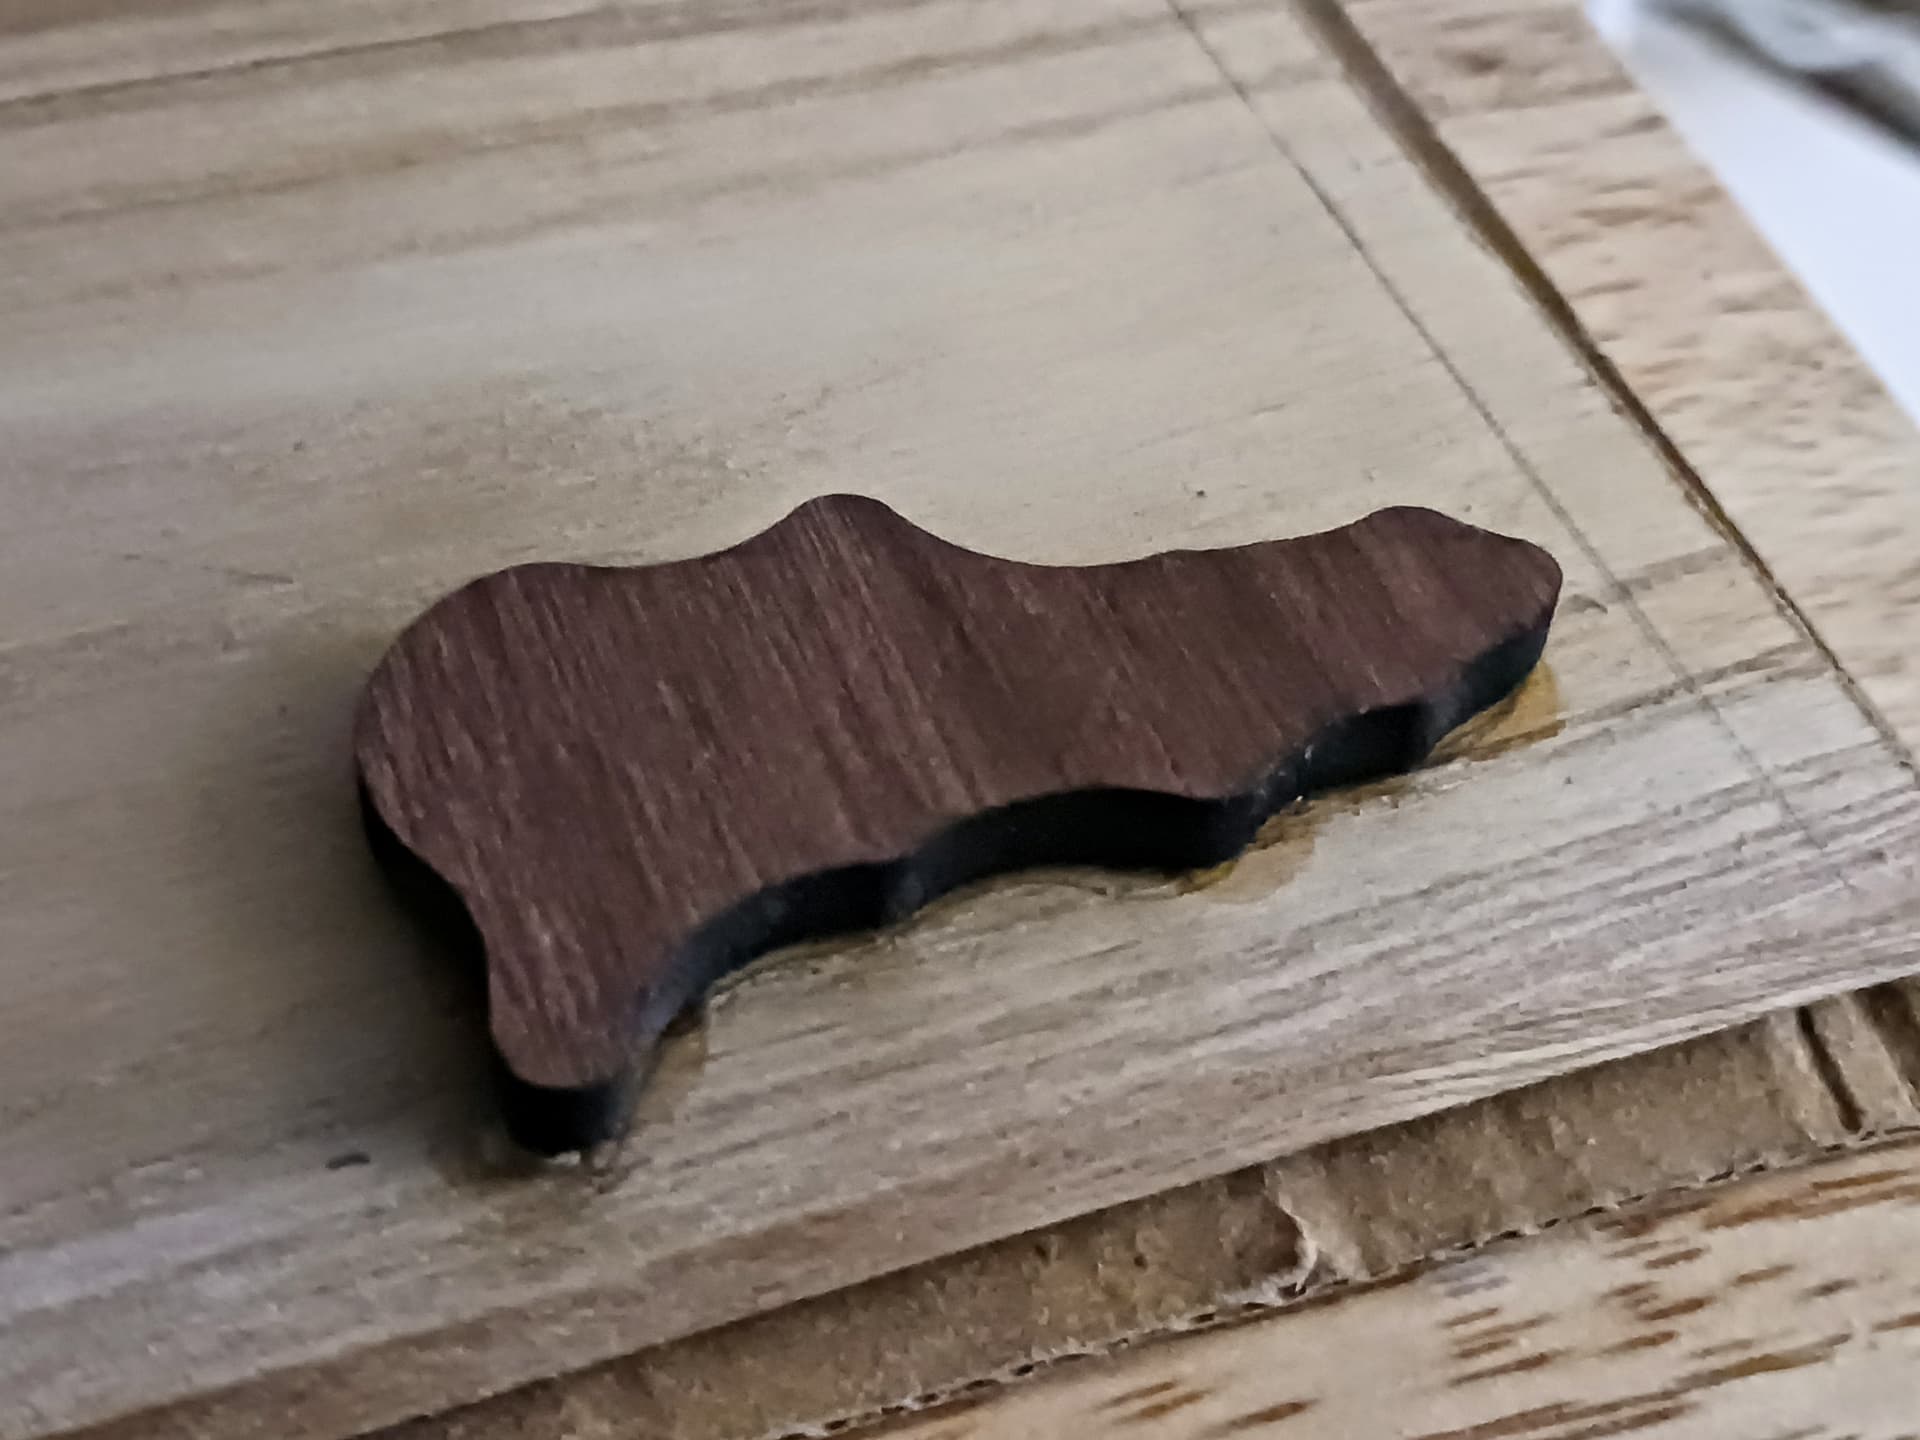
Sawn off and sanded… catalpa with black walnut inlay.
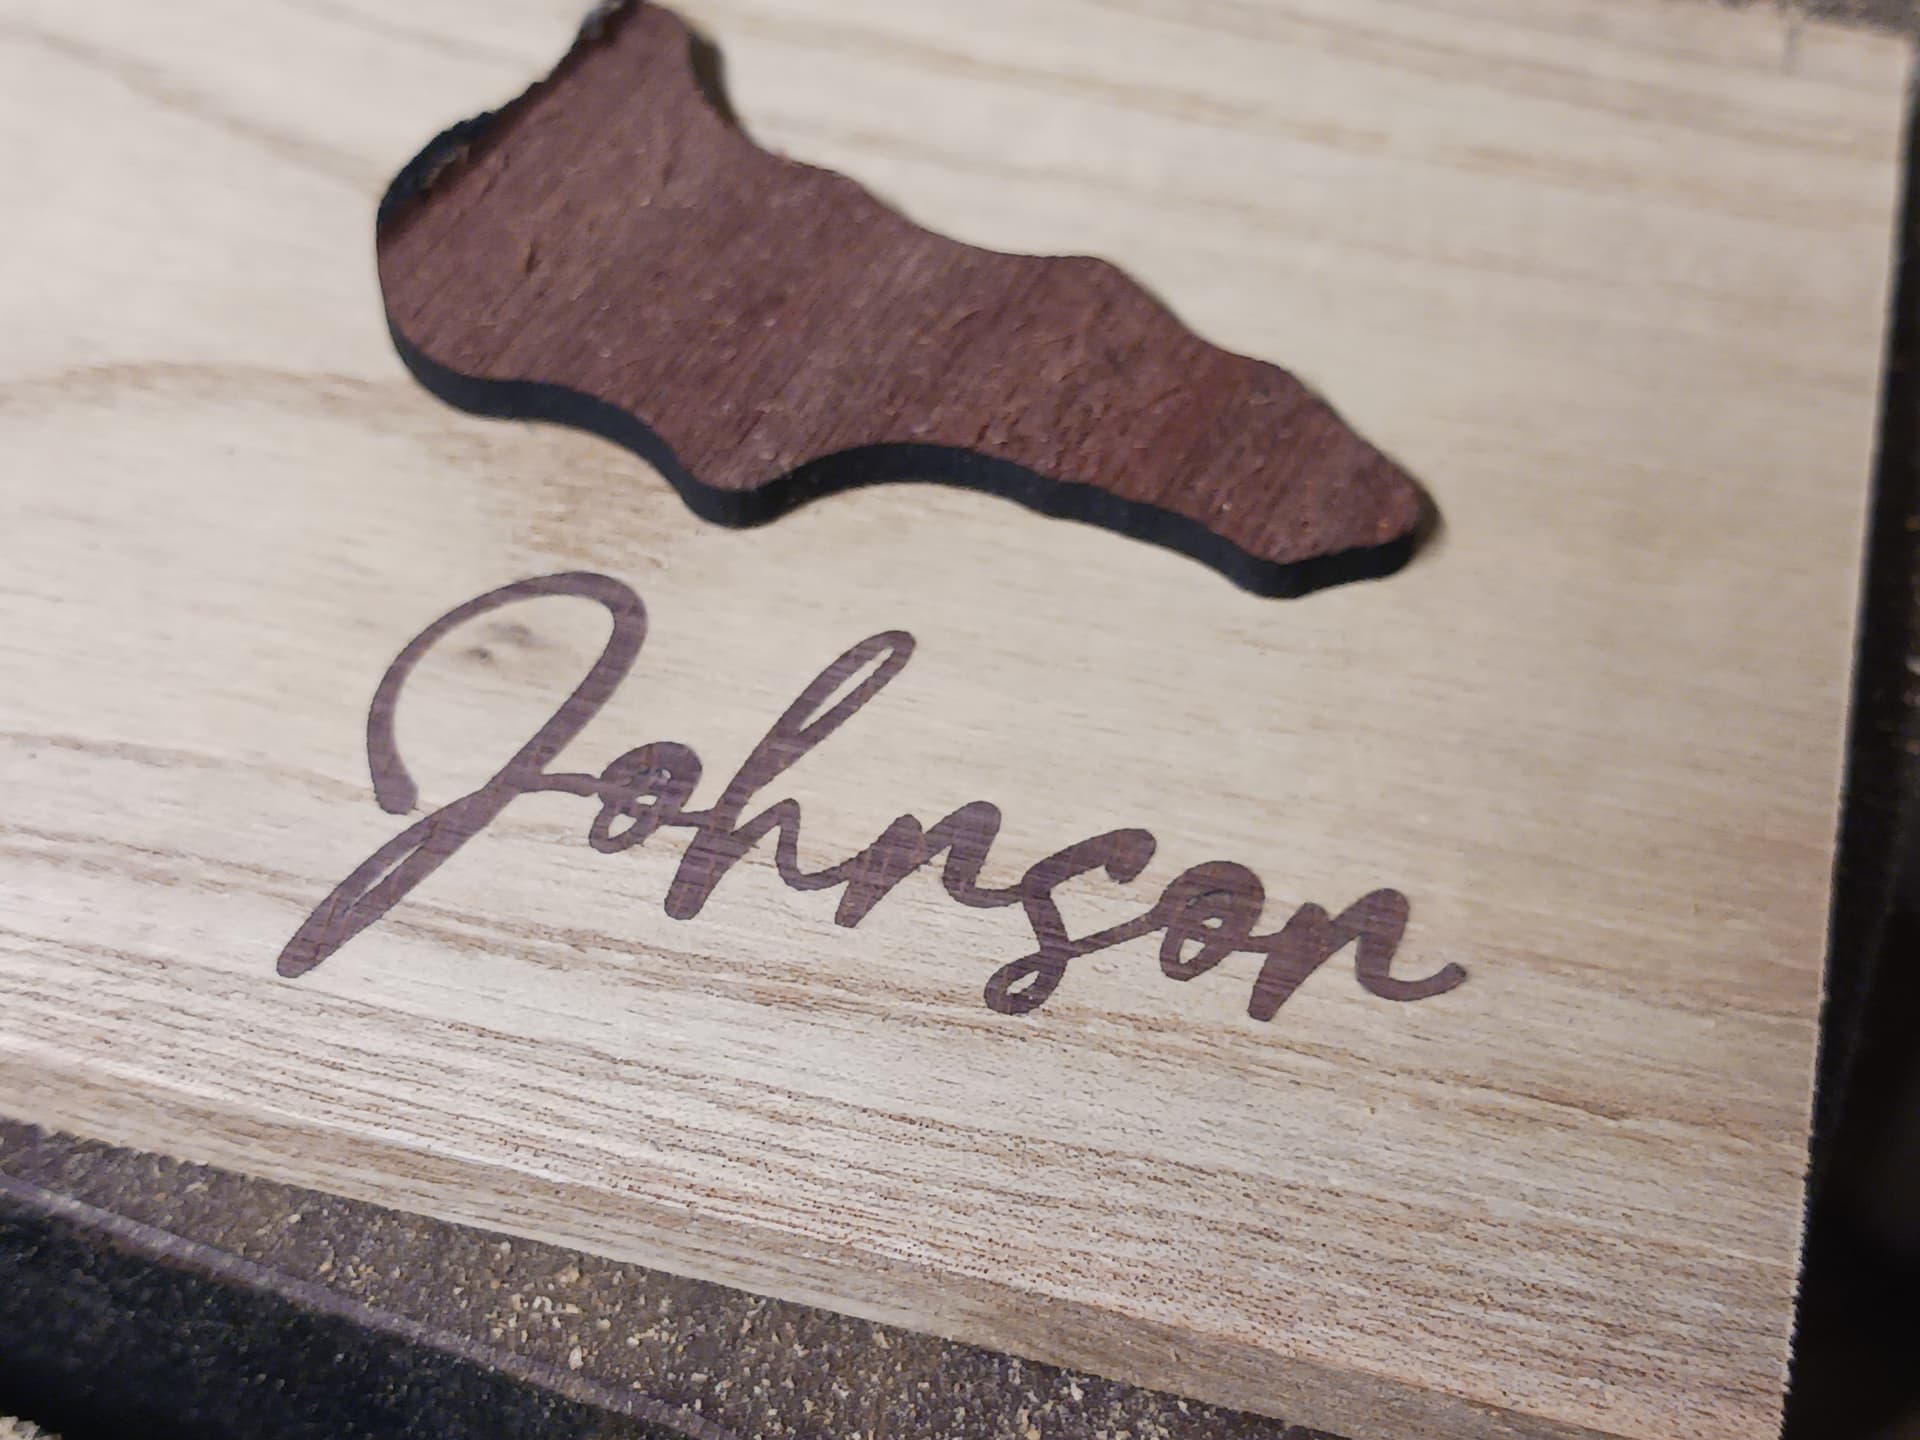
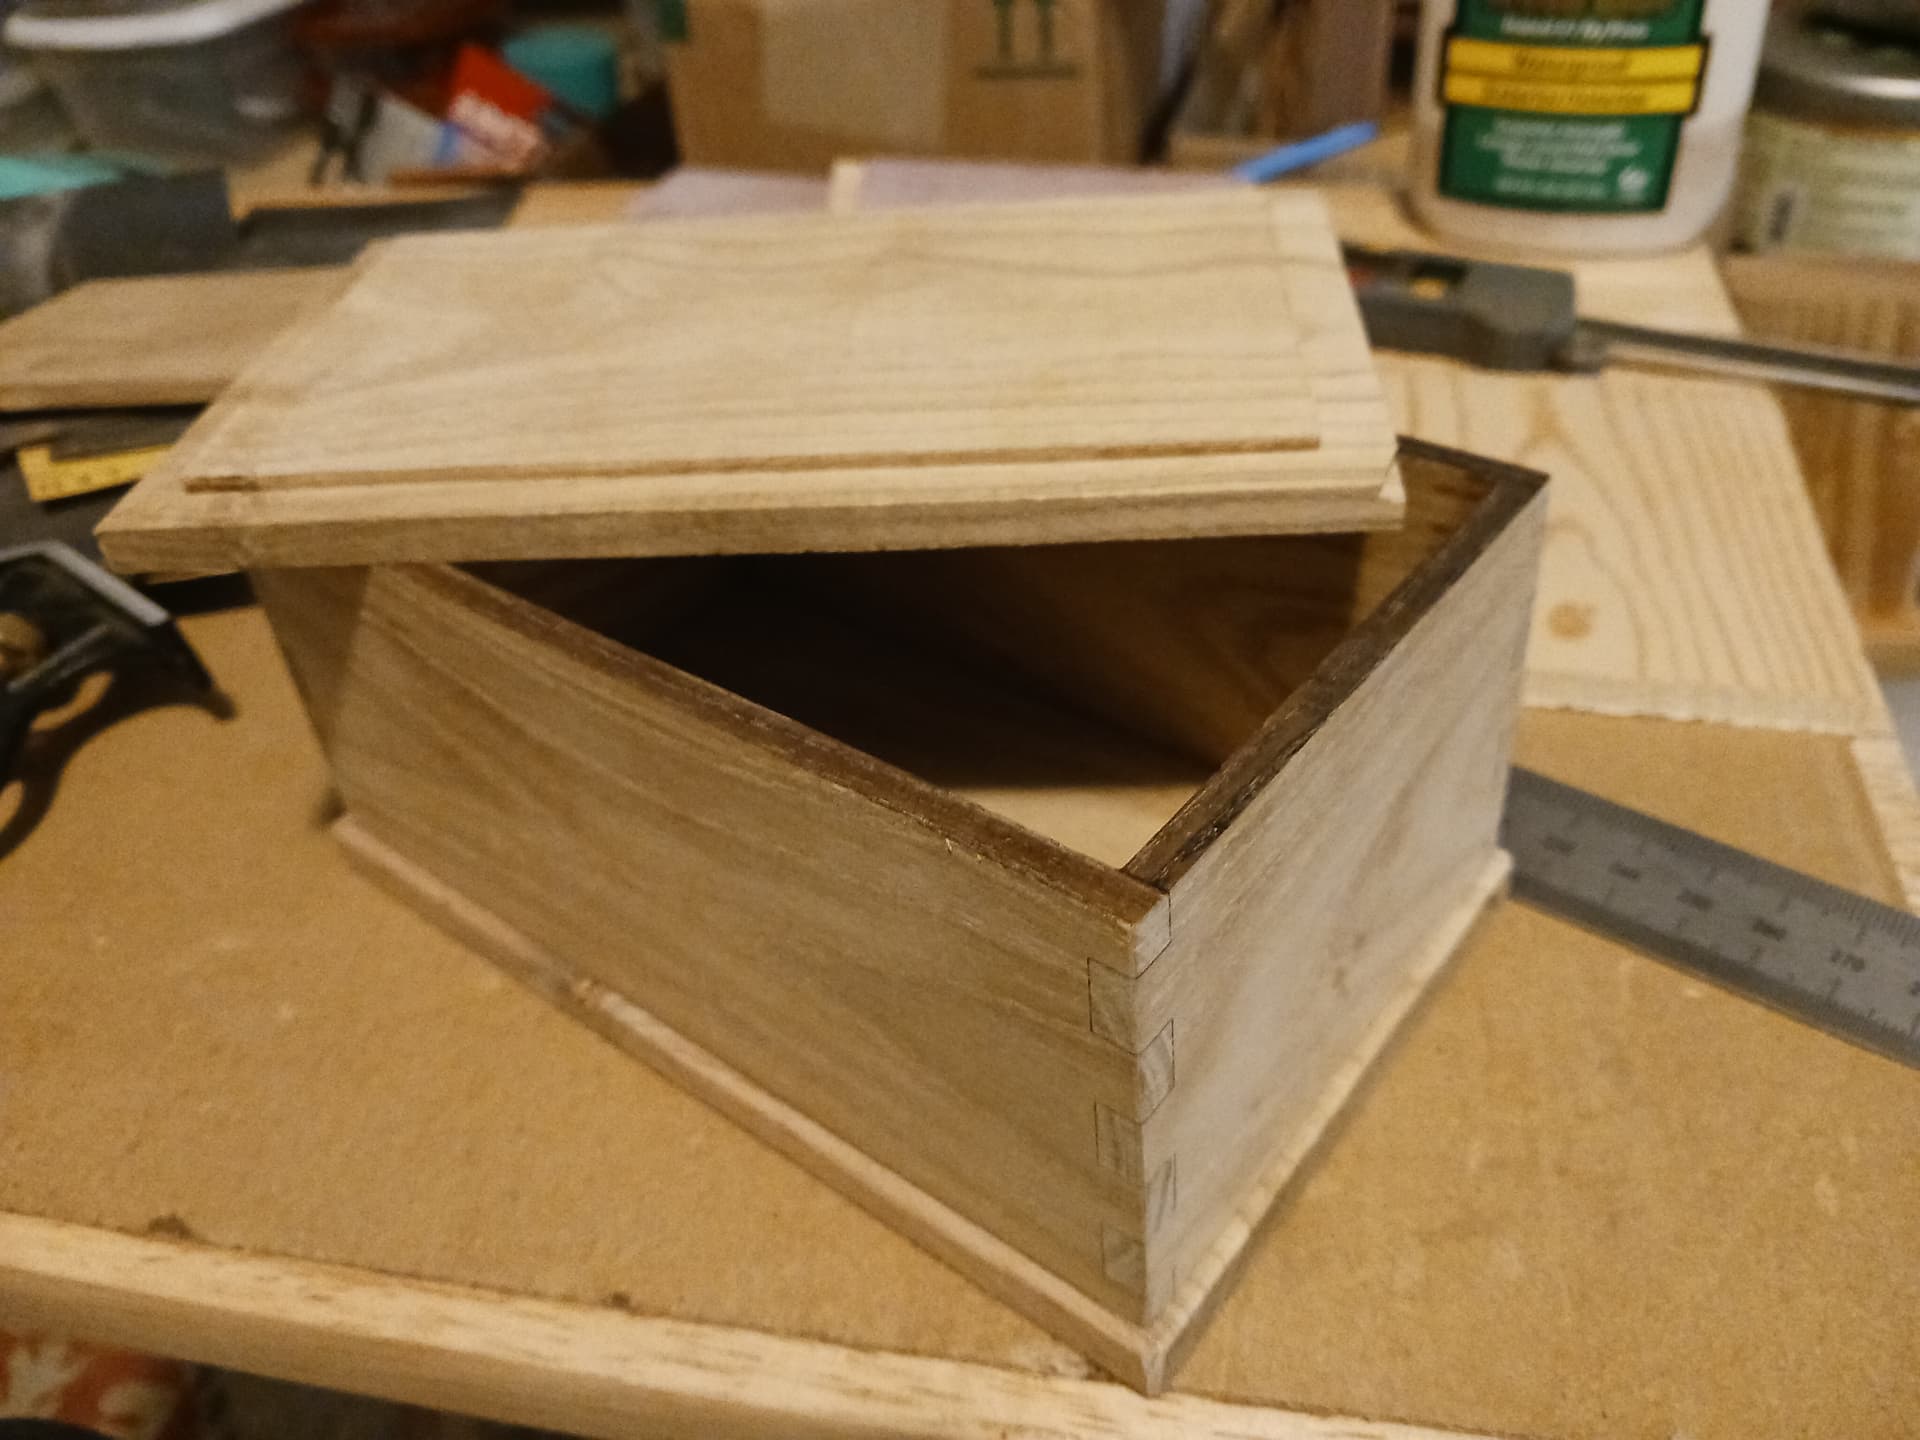
So, the box is assembled pretty much as I’ve previously described and a couple of engravings are added… before sanding and finishing. Catalpa, though fairly soft, is actually quite attractive IMO…


That was a fun project. I also learned that catalpa laser cuts beautifully. Hopefully I stay motivated for a while and can do some more of this. It’s amazing how quickly I forget stuff… I had to really study hard what I had previously done with those inlays.
Later.
– David
14 Likes
That box turned out great David.
2 Likes
awesome job!!
1 Like
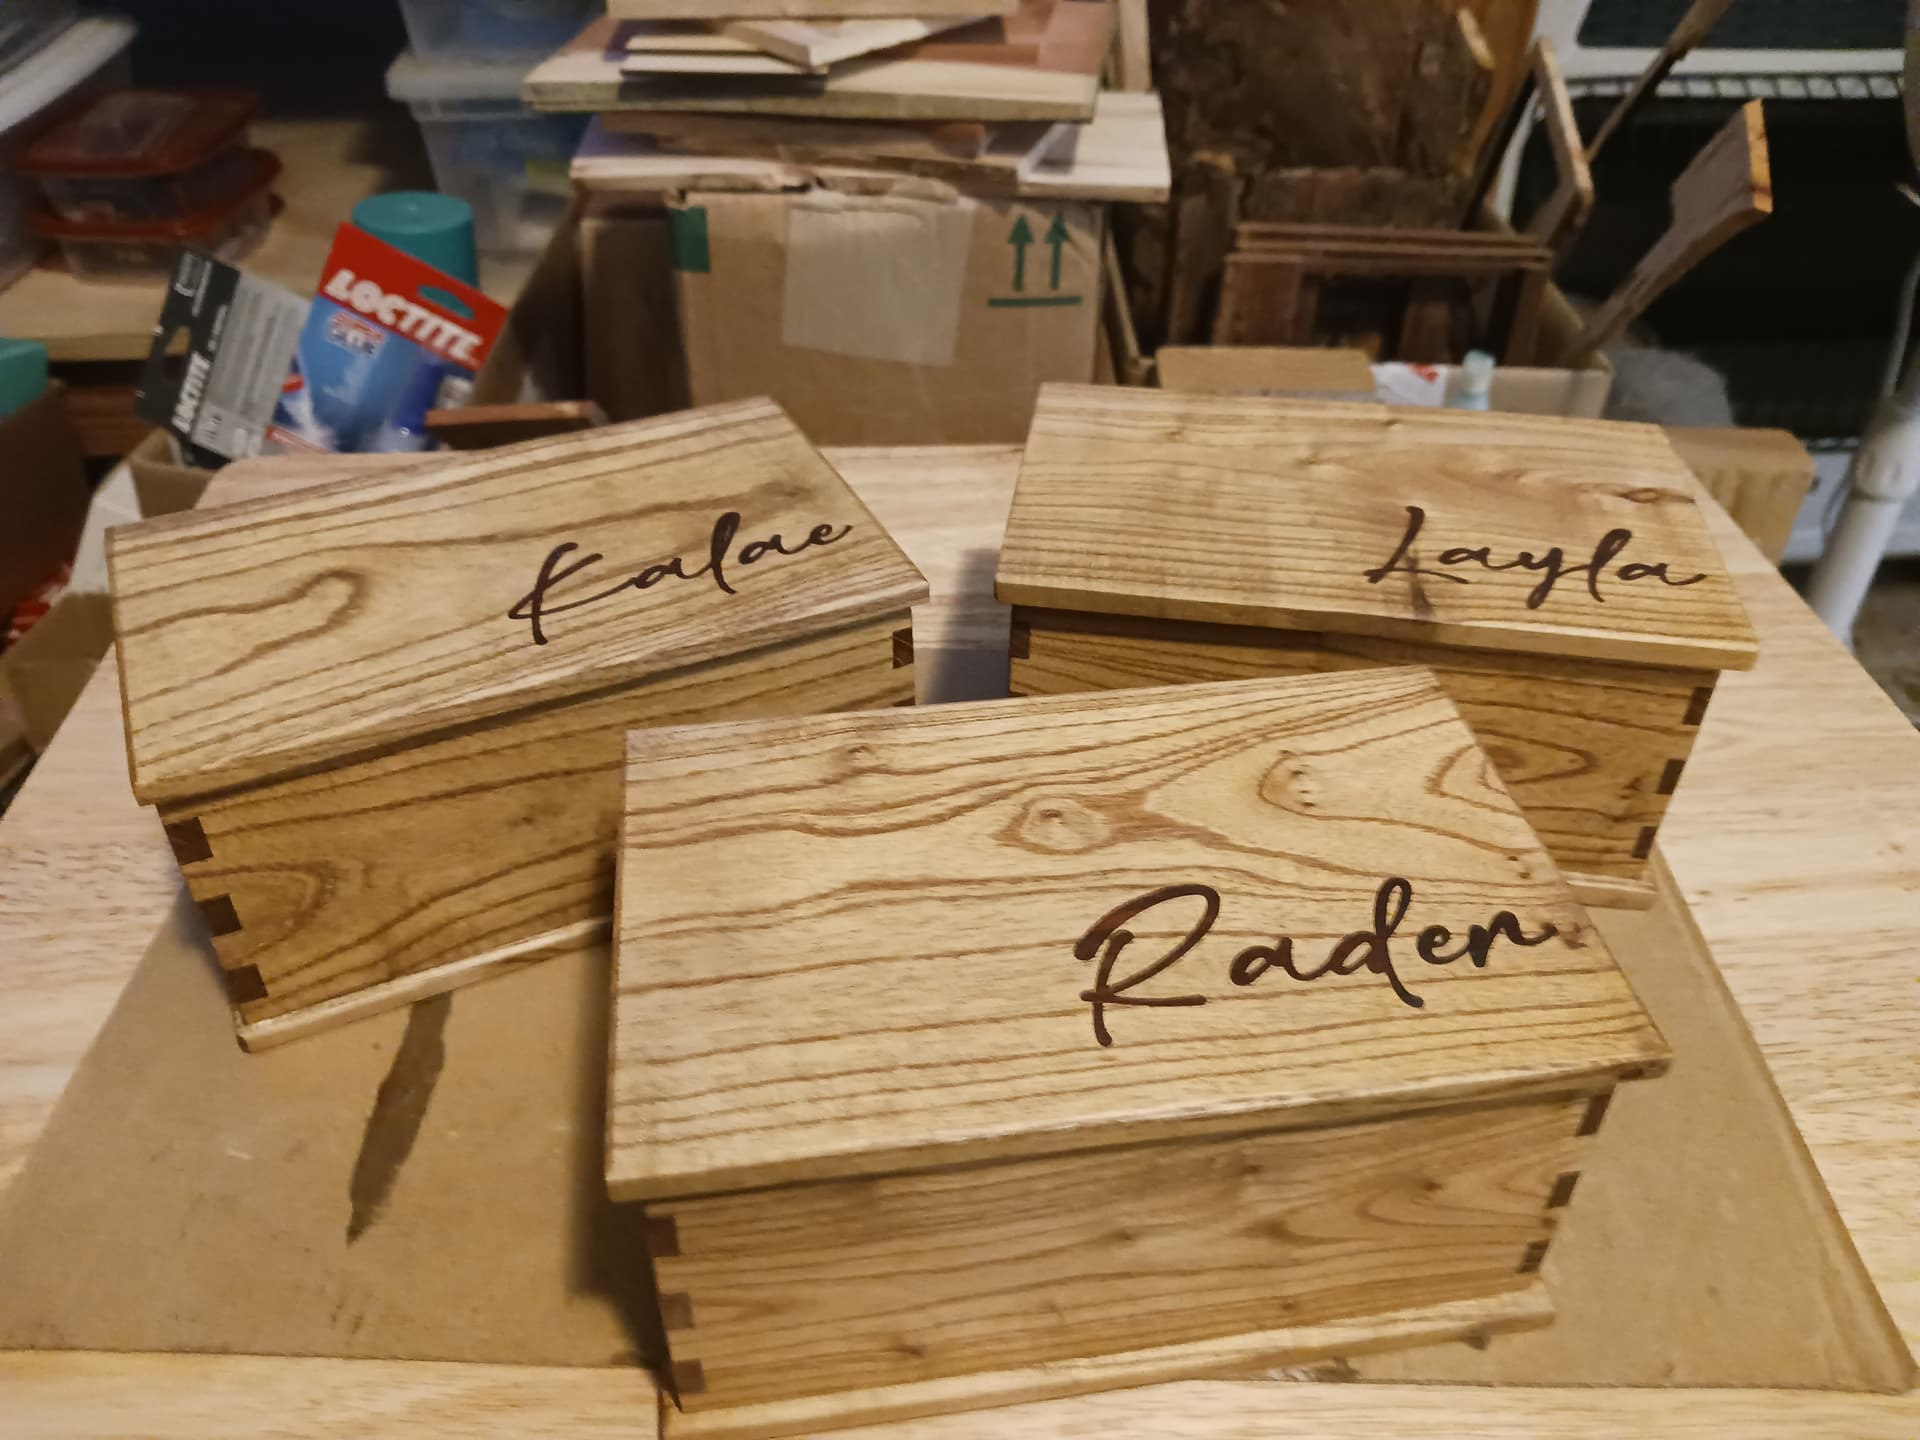
After doing my brother’s birthday box, I had enough catalpa cut up to do three more boxes. Simple Danish Oil (natural) finish and then wax finished.
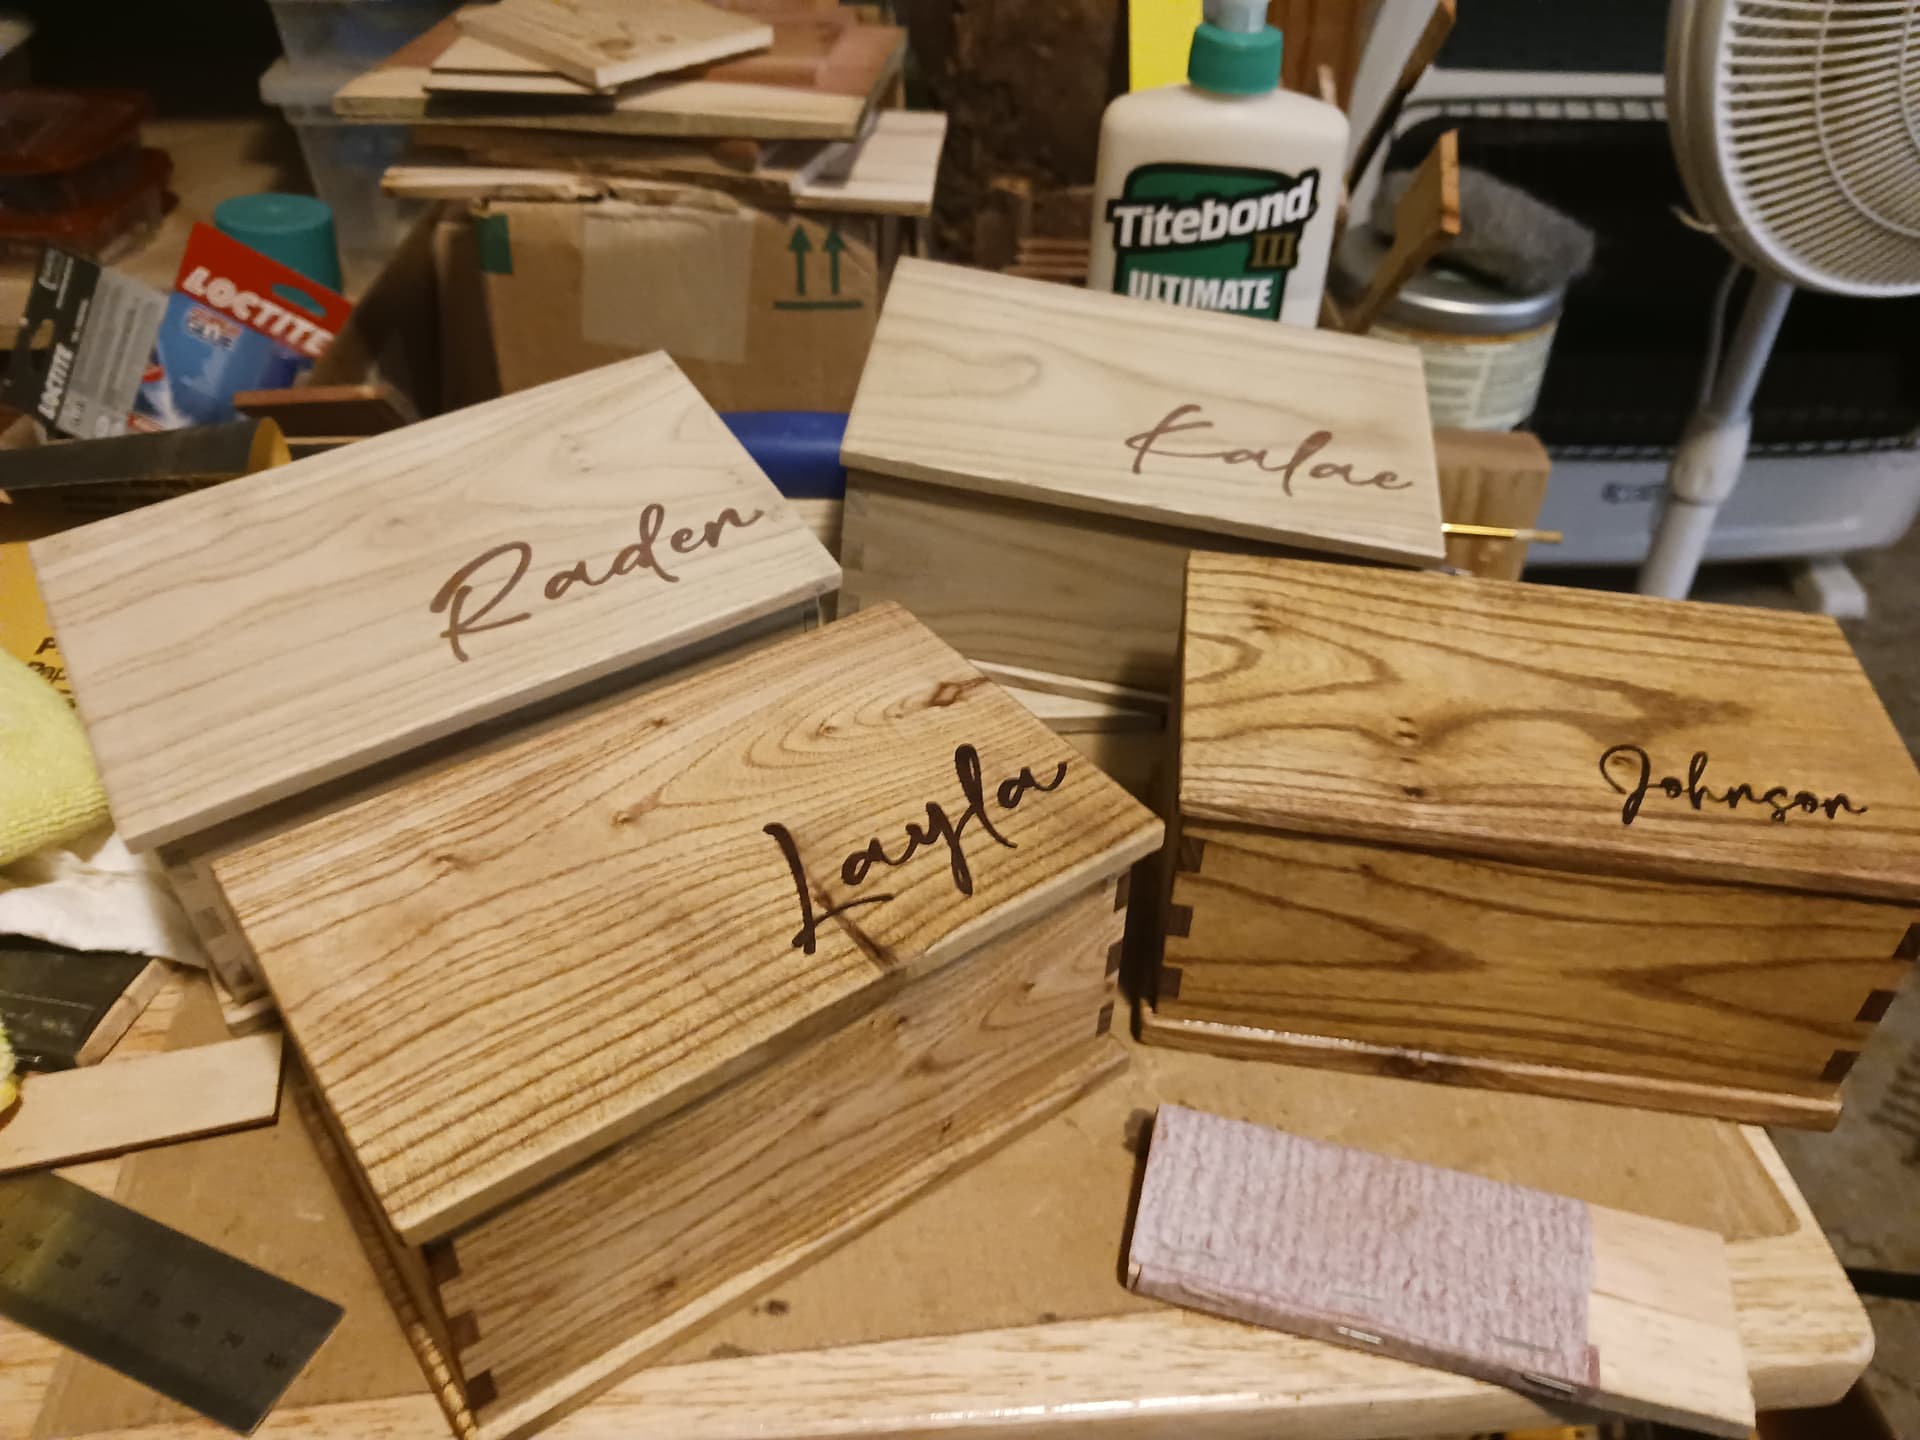
Inlays continue to be one of the easiest steps of the process. Lightburn makes it easy to create the pocket and inlay gcode… no more than 15 minutes or so per name.

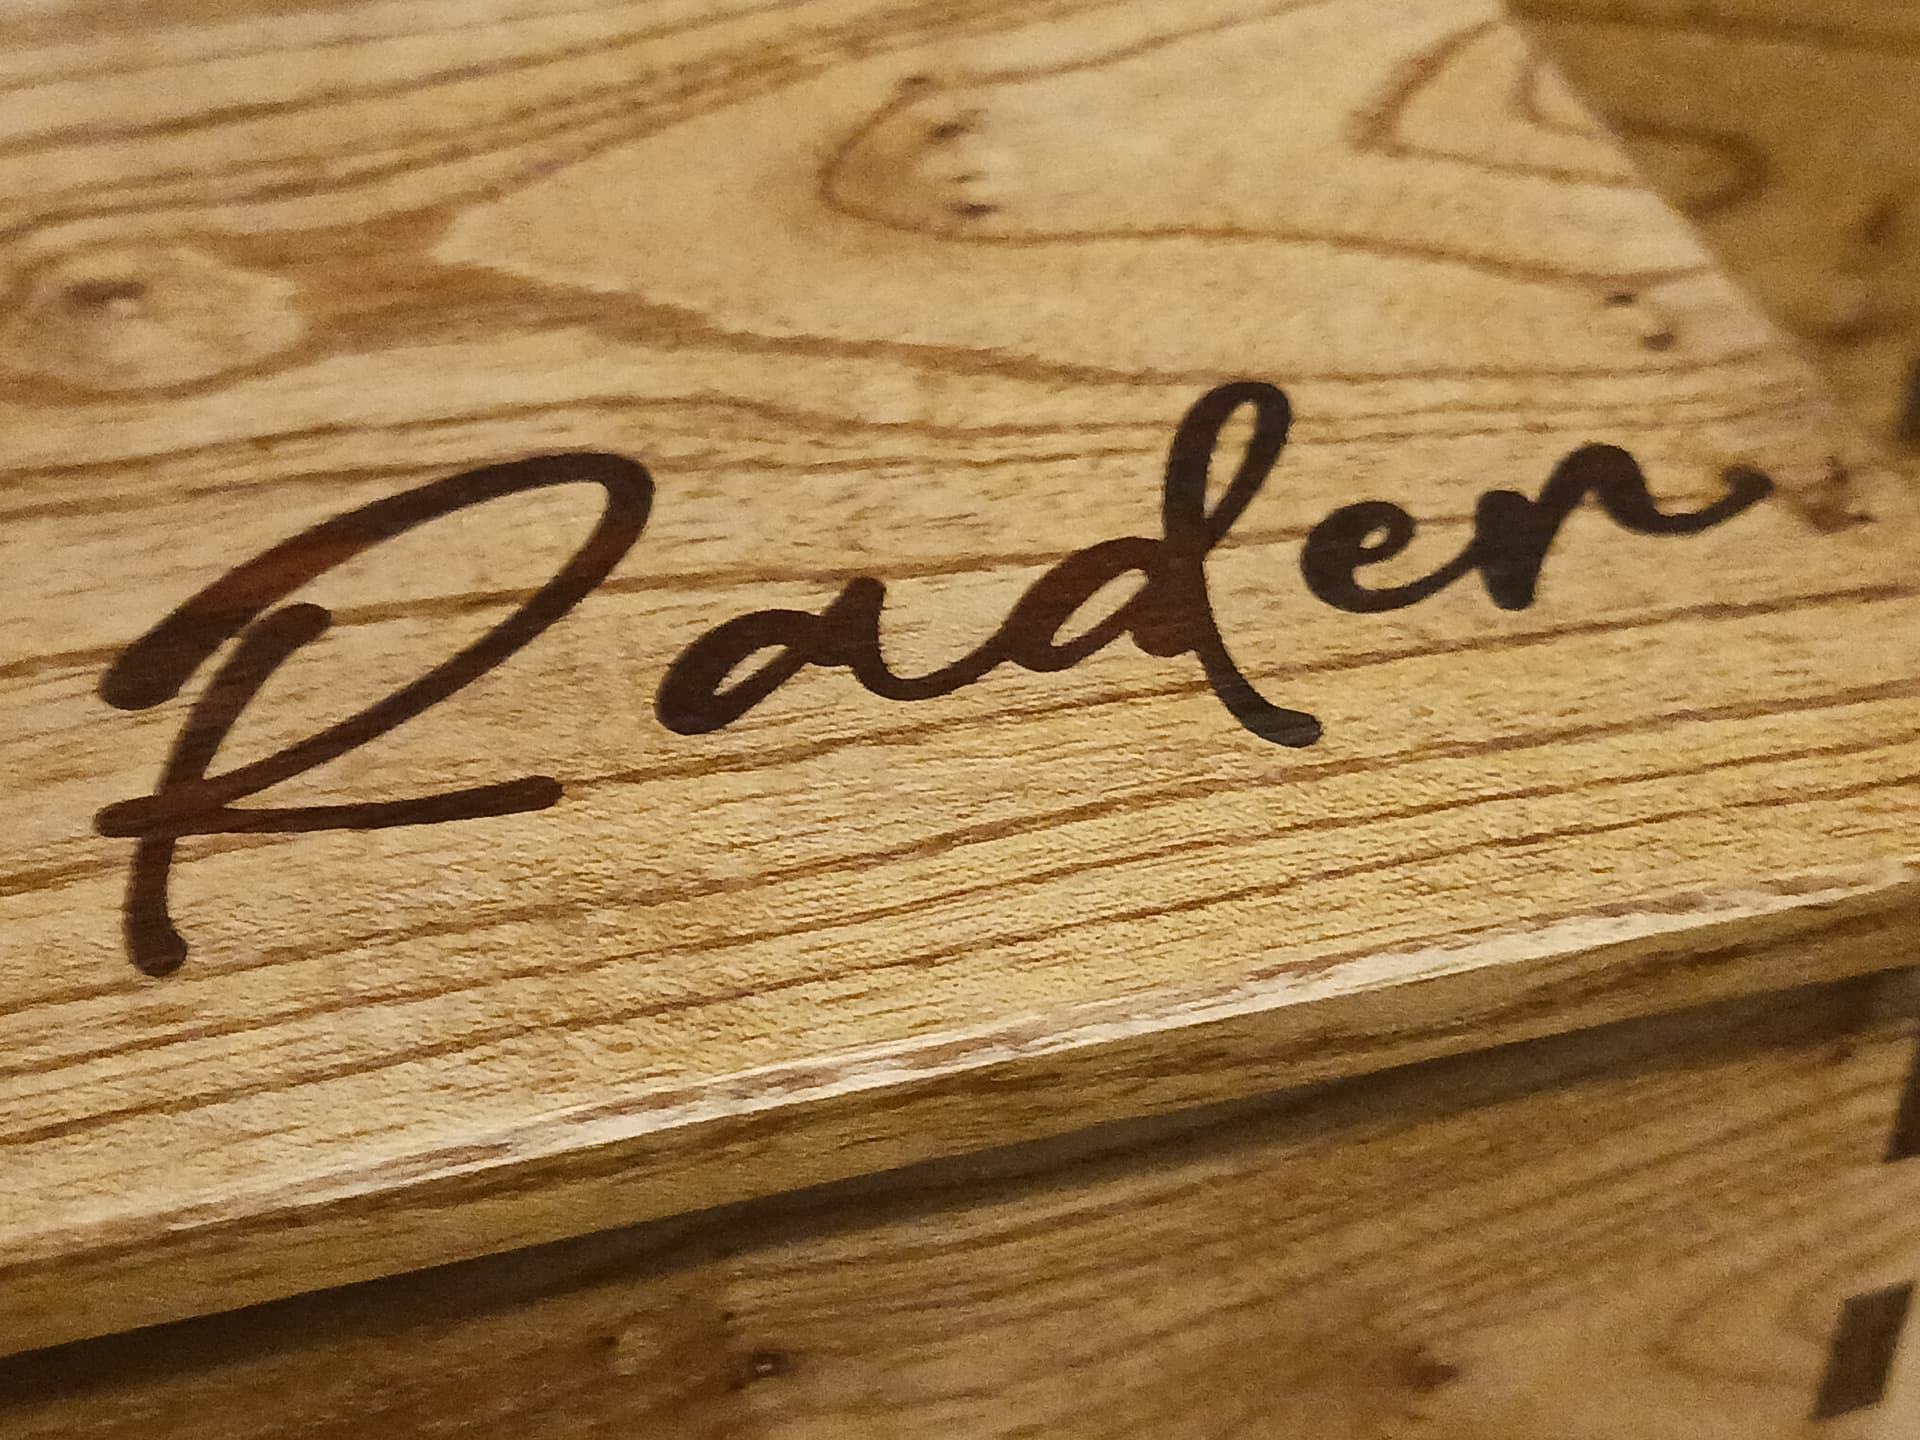
A scrap of walnut is lasered a few millimeters deep to become the mirrored inlay piece…

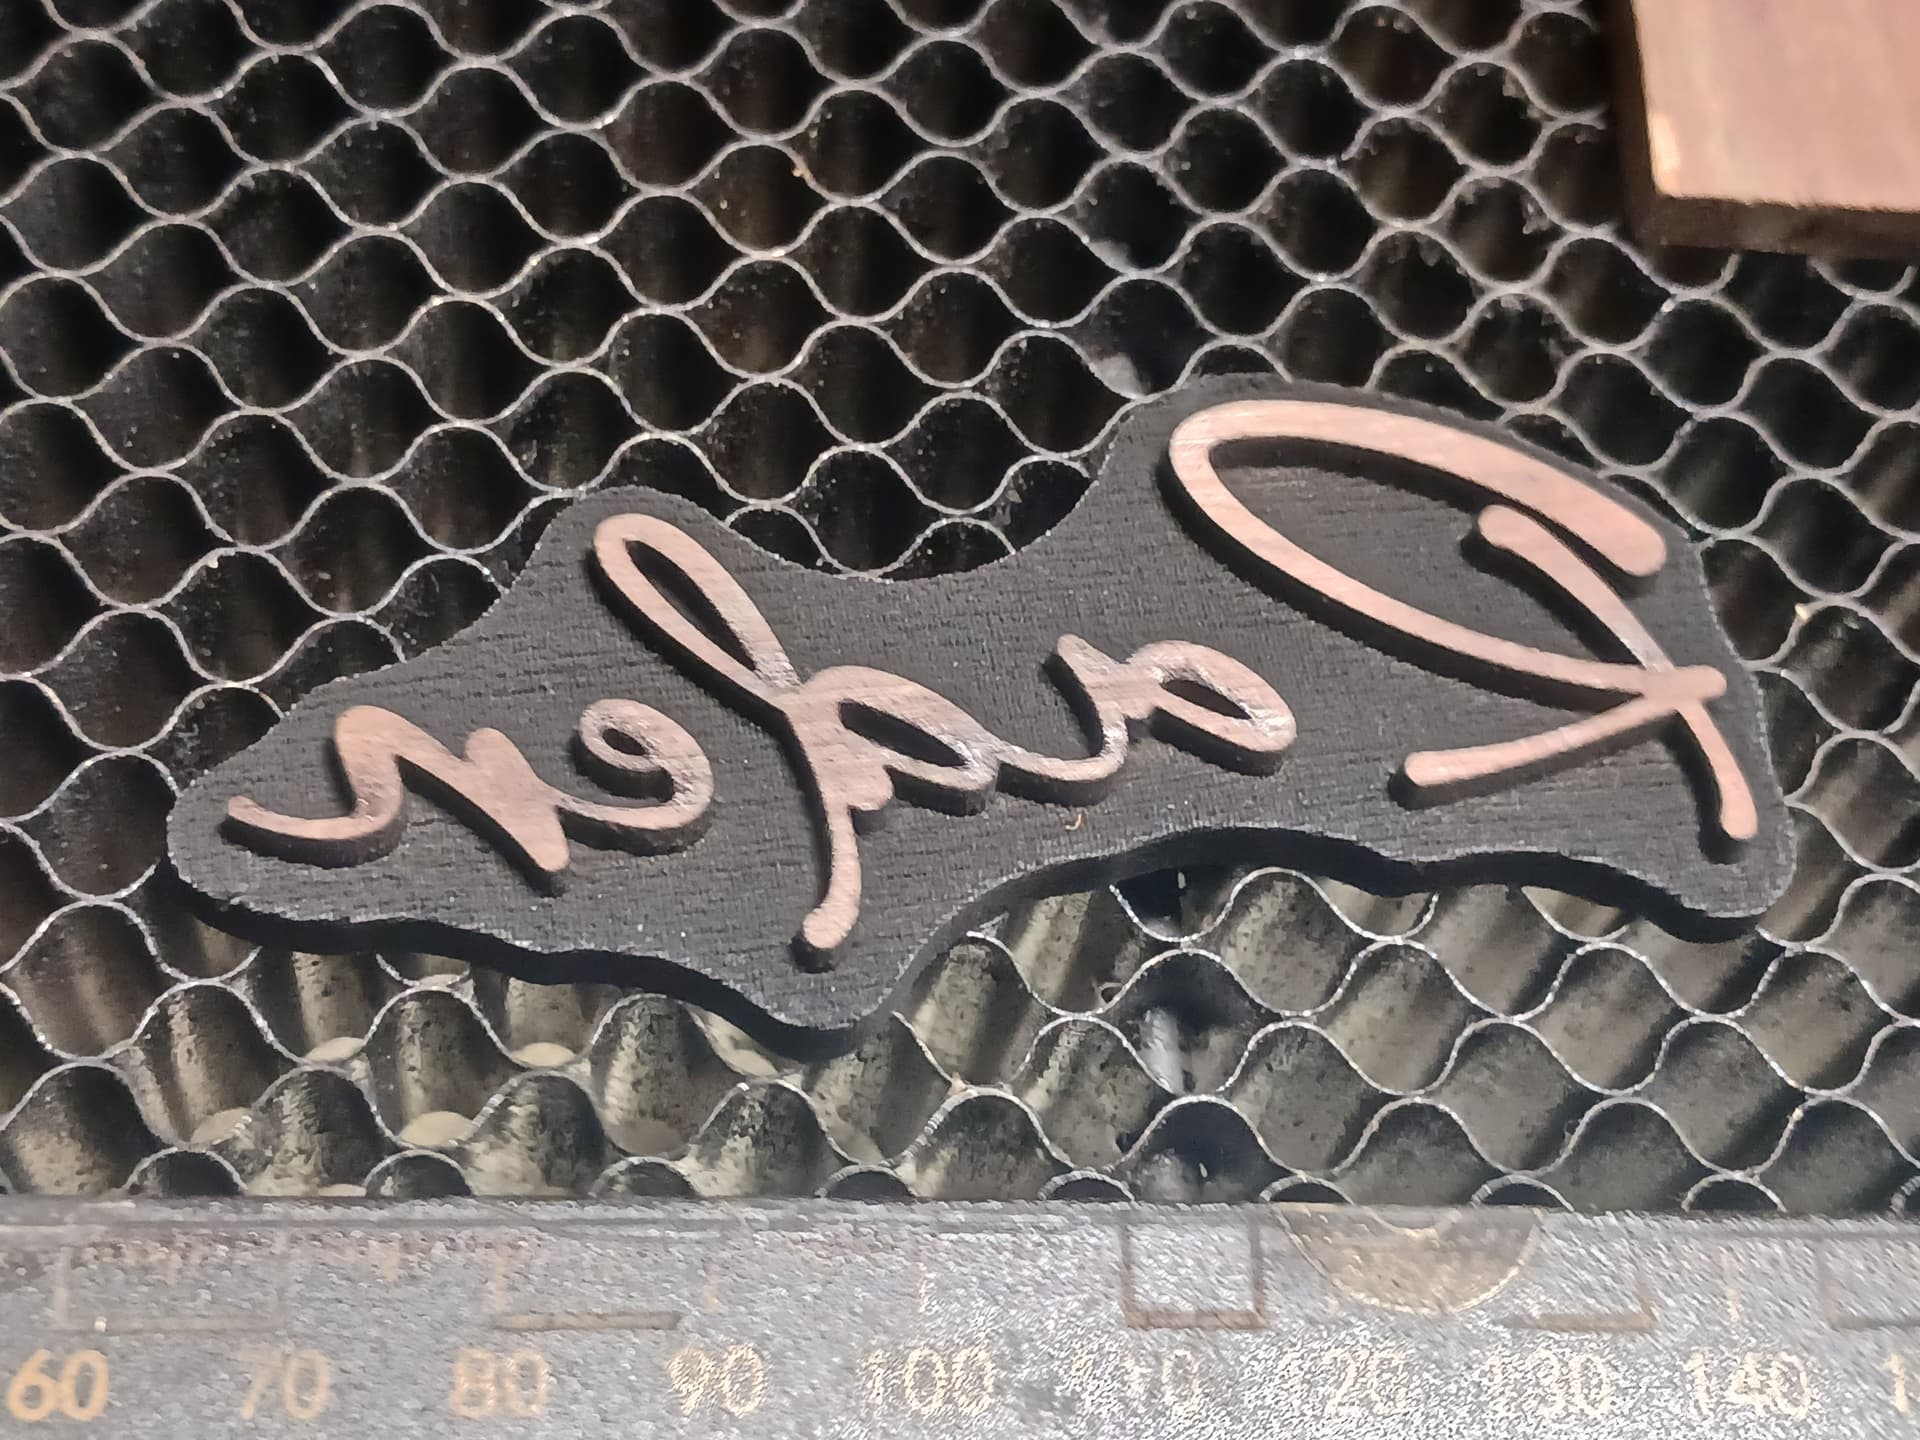
The pocket is simply a ~3mm deep engrave into the base material. I lightly dry-fit and outline with pencil to help with alignment after glue is applied, slather on glue, and fit the inlay piece into the pocket. I apply clamps and set it aside. These pieces are glued up straight off the laser… with max air-assist during lasering there is no debris to clean in my experience.
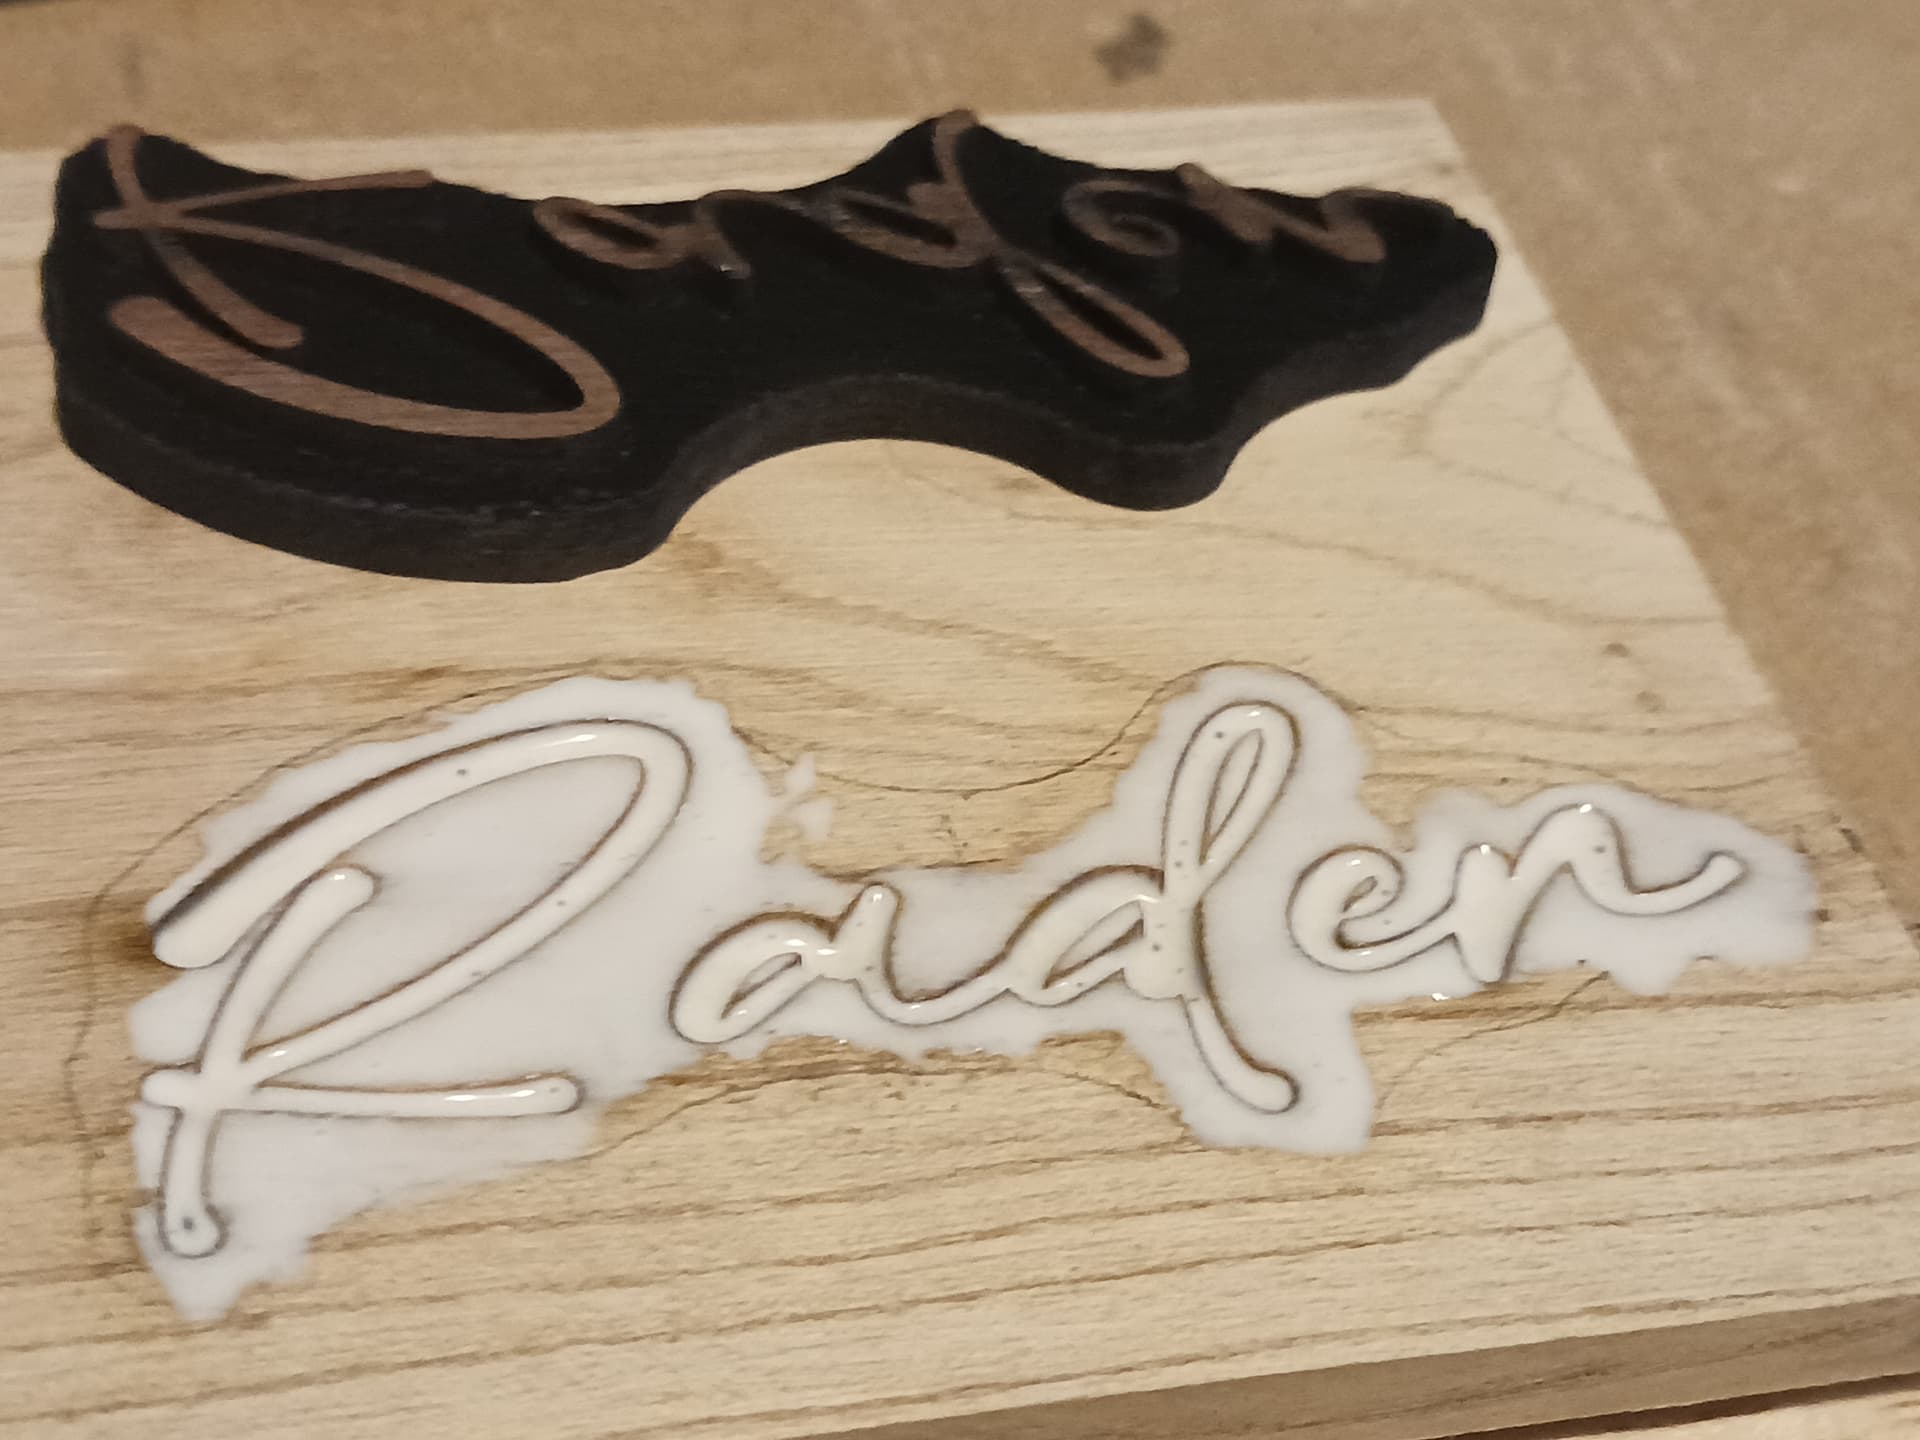
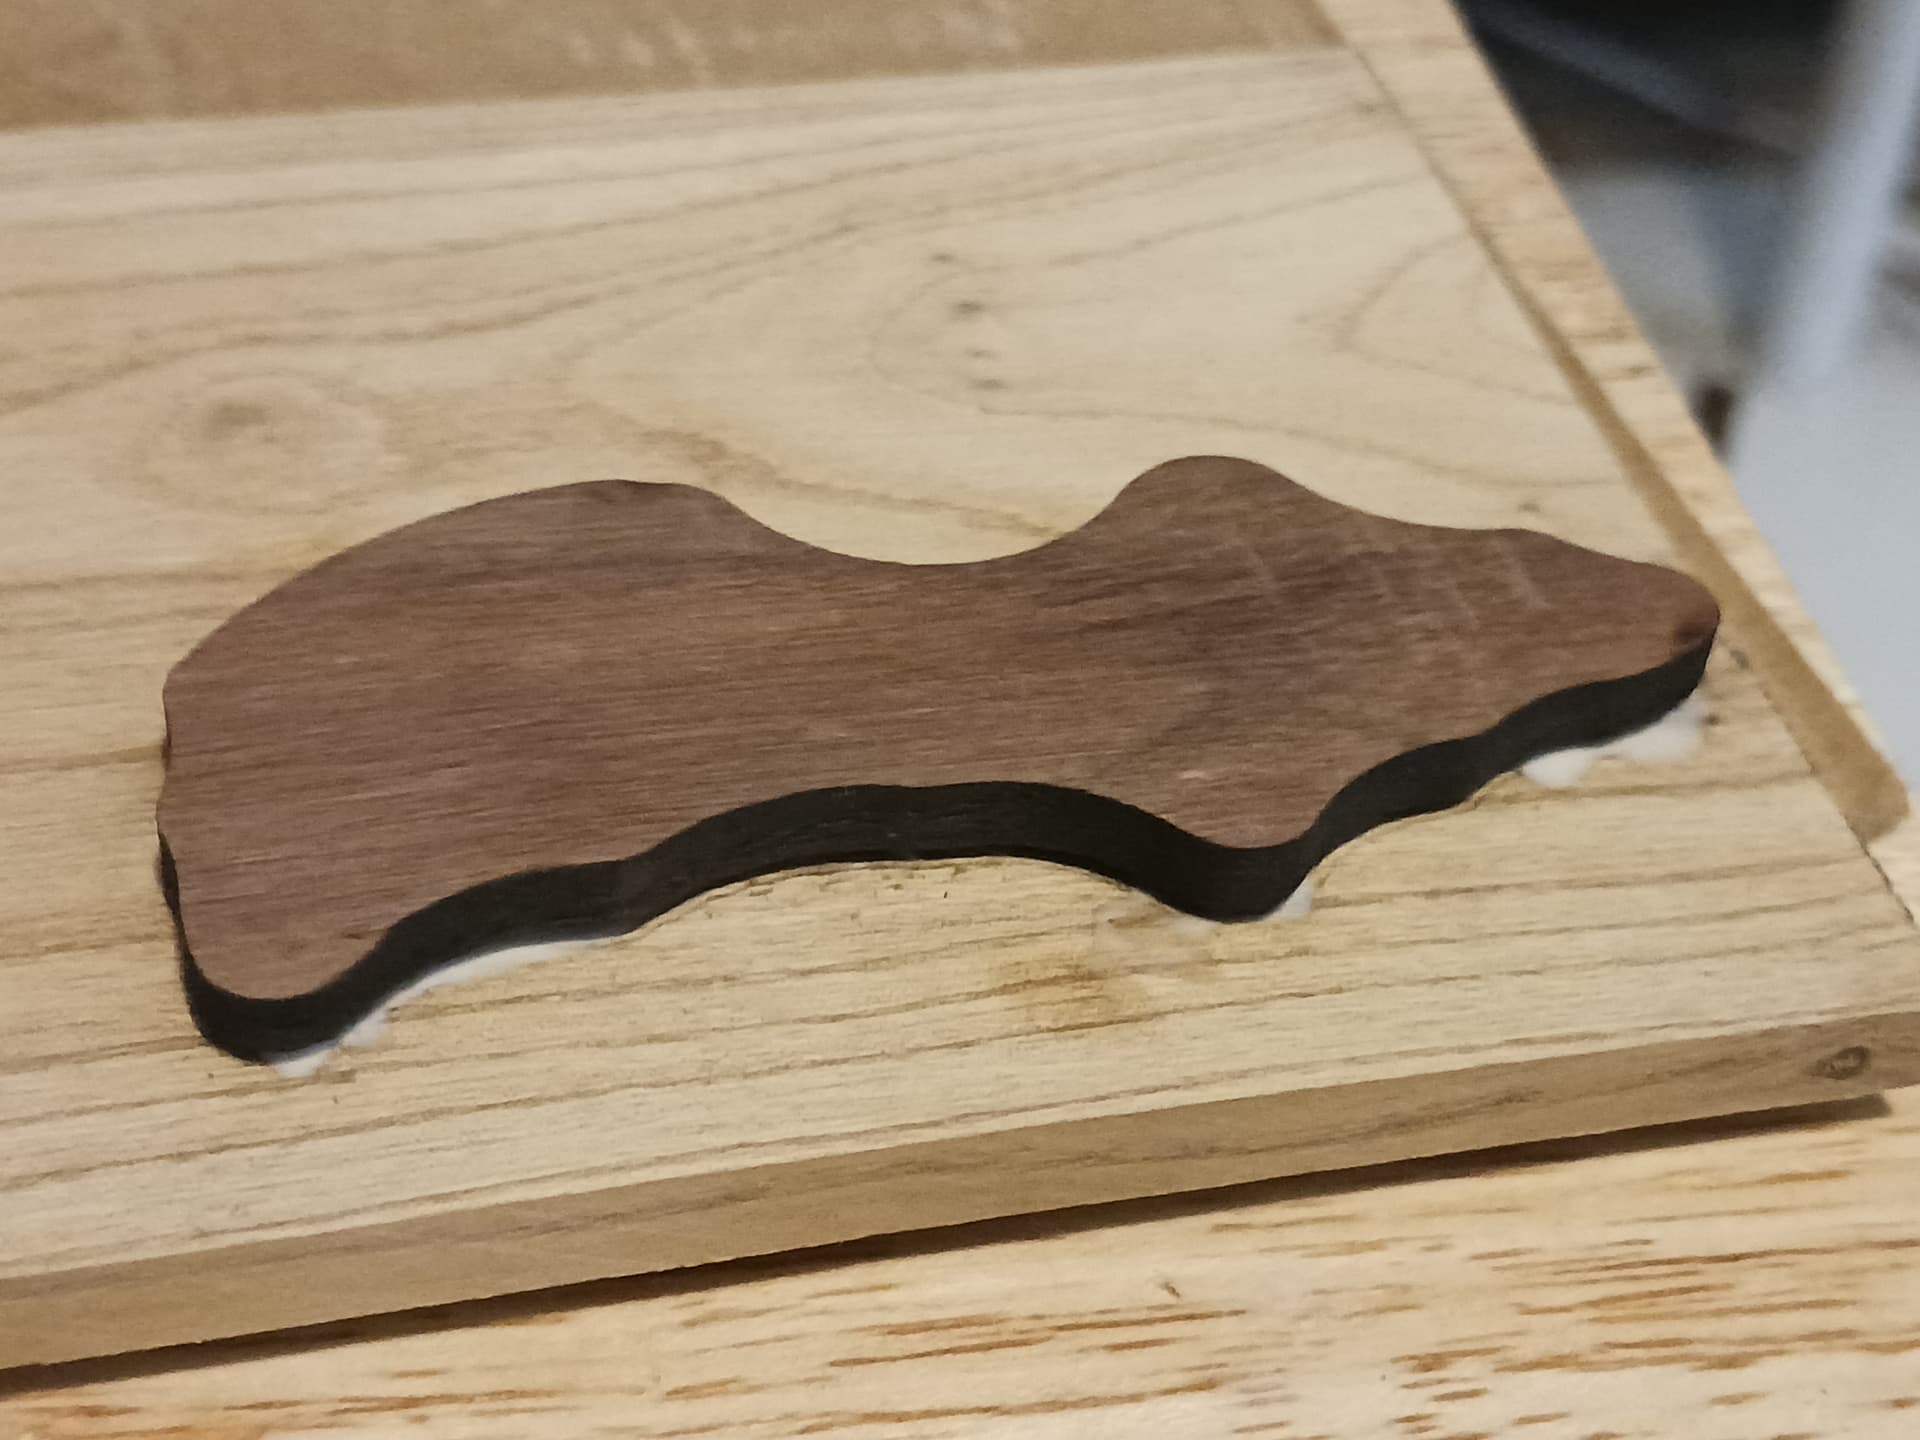
After a few hours to allow the glue to dry, the walnut inlay piece is flush-cut or bandsawn away. A quick hit on the belt sander reveals the clean inlay… sand smooth and apply finish.
I suppose I should do a few other box designs but these suit the material (limbs) I currently have to work with and have been fun to do. I’ve still got a few grandkids to go and I suppose I should try to beat the summer heat.
Later.
– David
8 Likes
Those look great as always David.
1 Like
“Quick” one I need today
It’s not perfect as I kinda rushed it, but it’s not too bad…
There’s a hole in the lower loop of the G but the L’s are pretty good
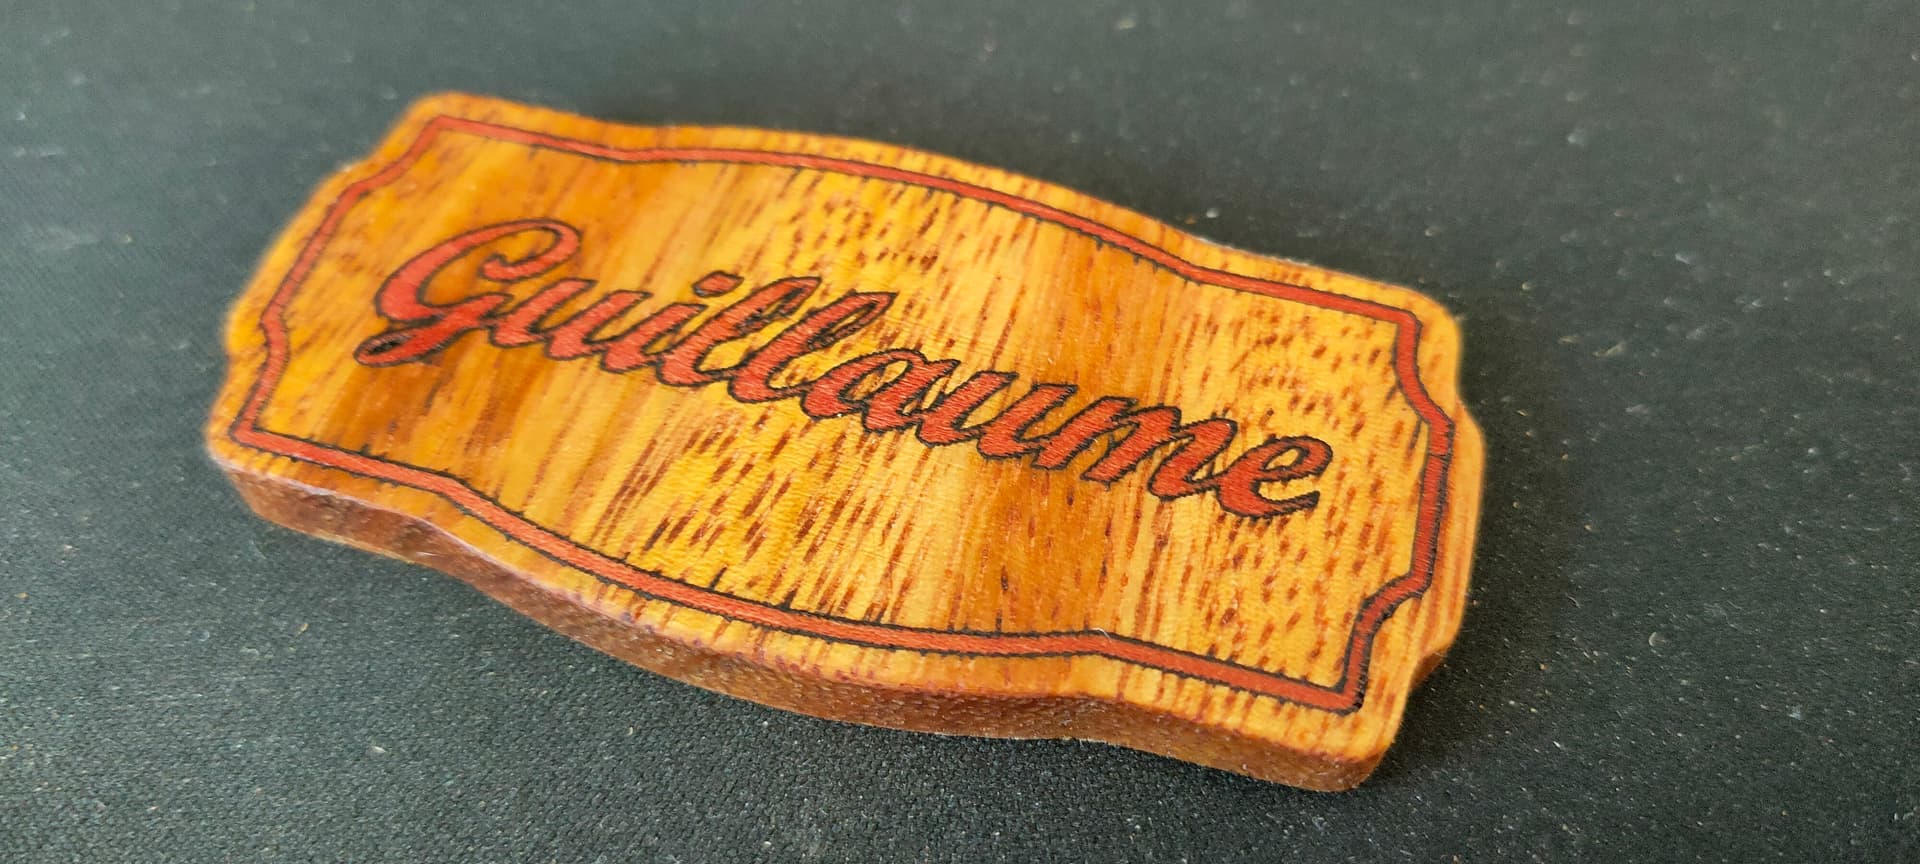
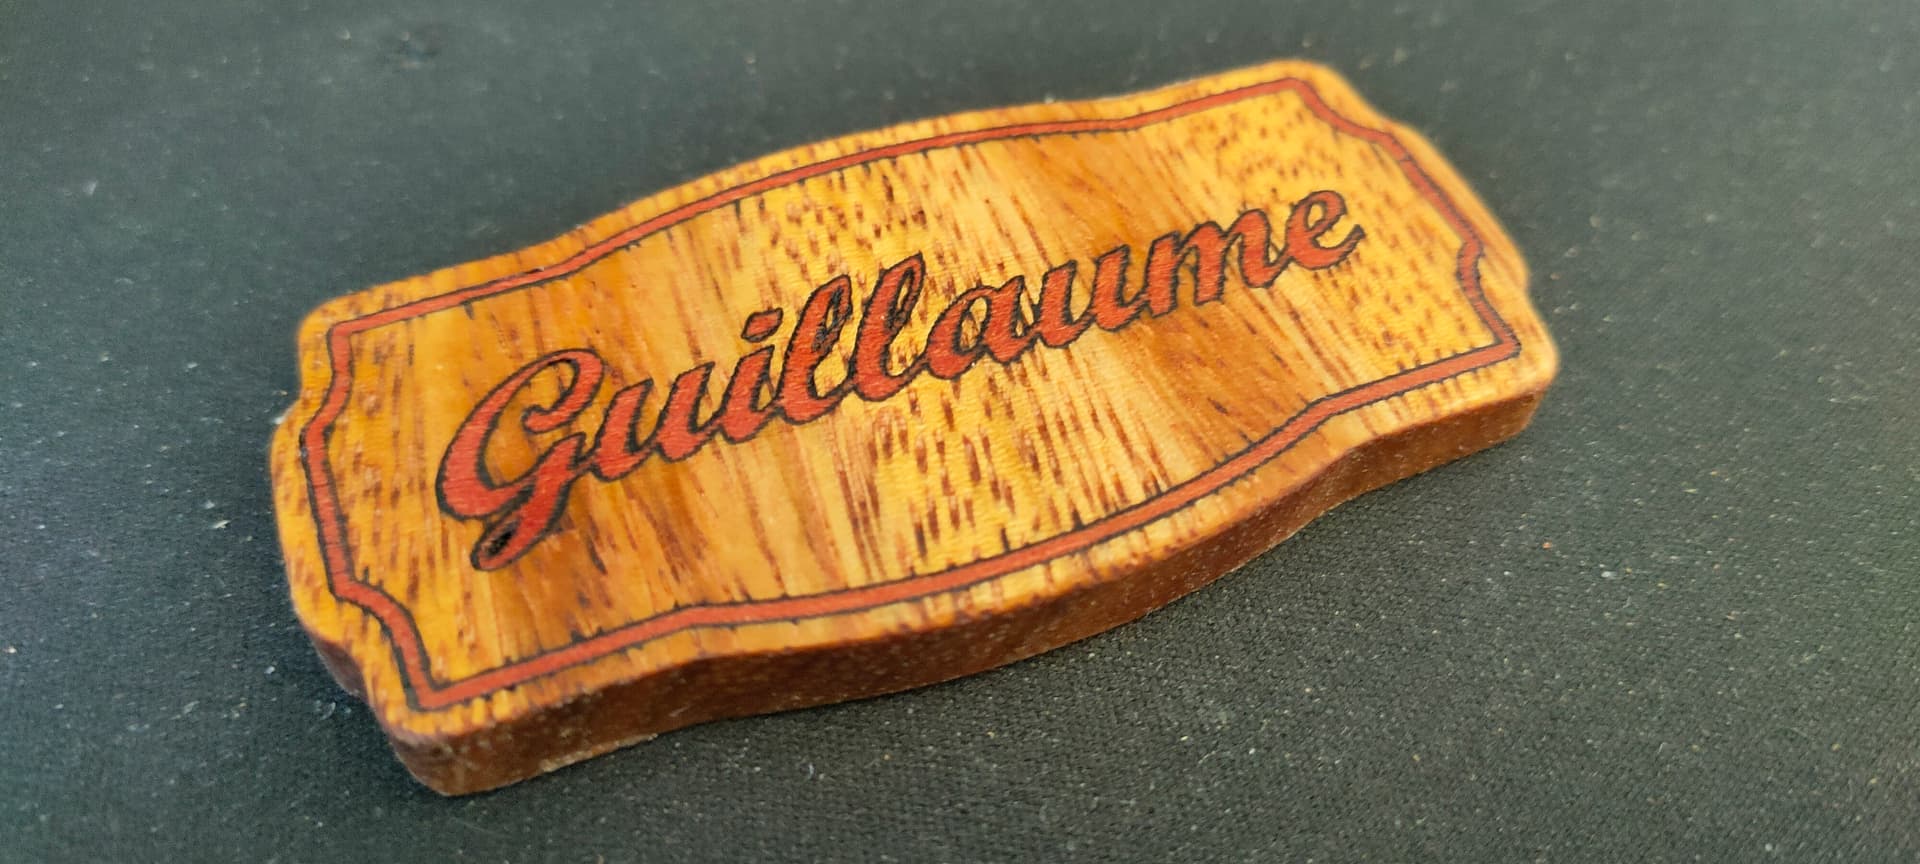
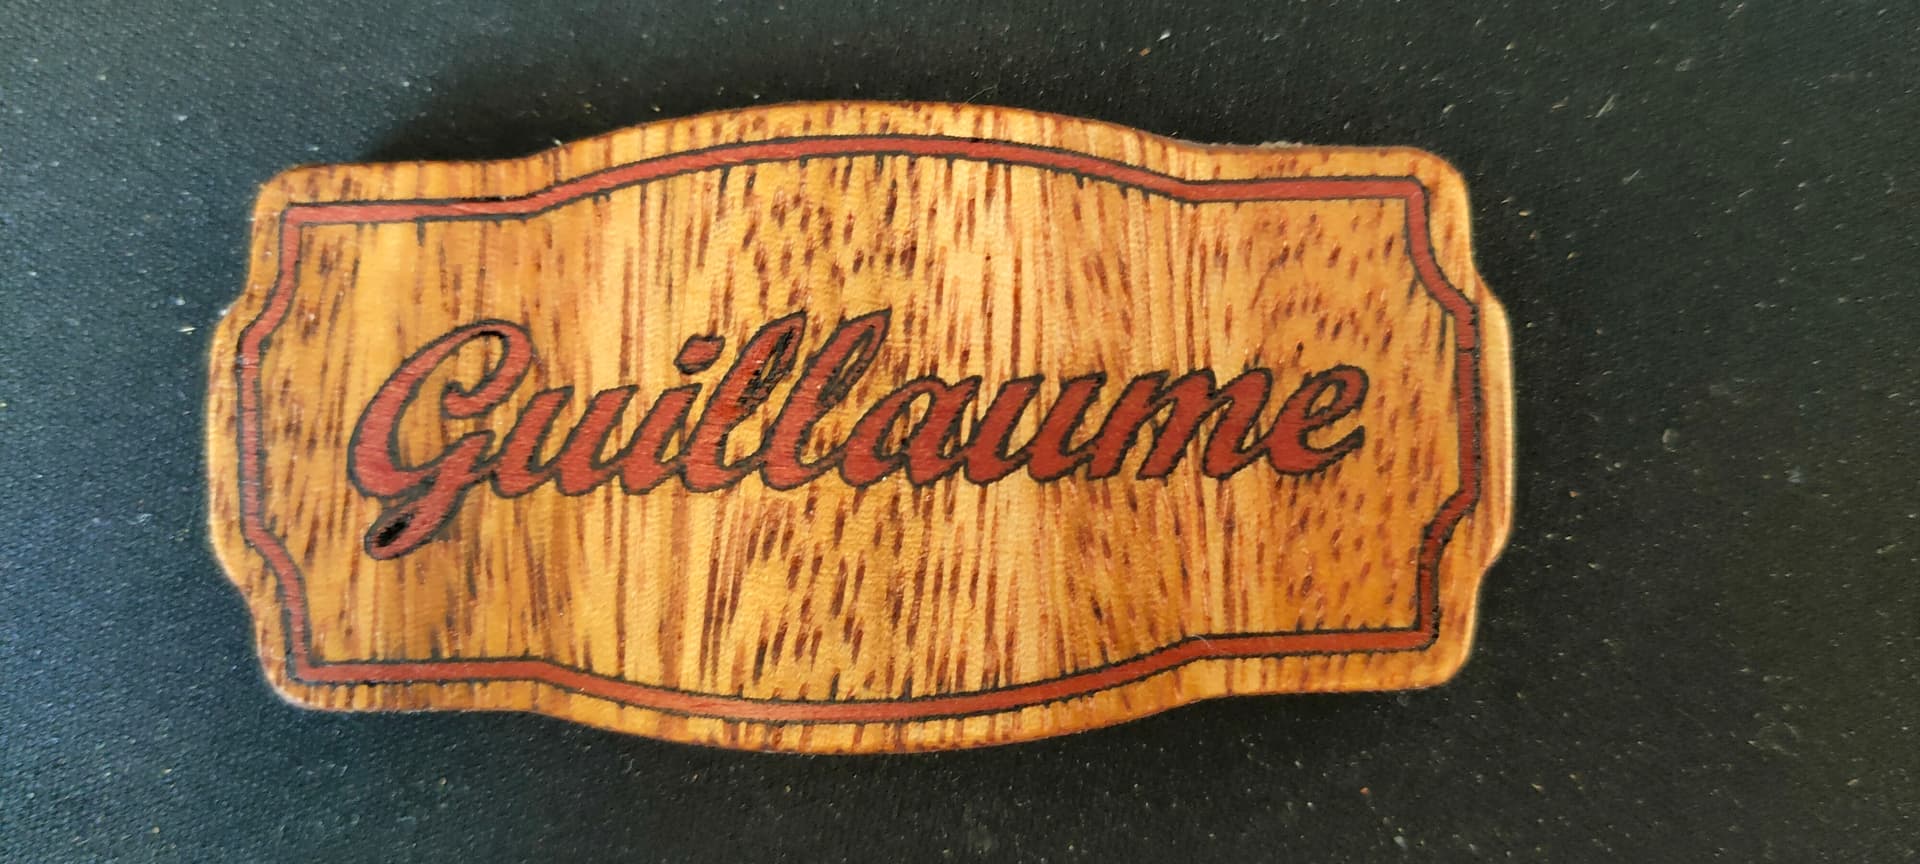
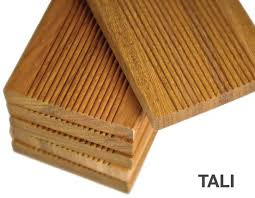
74x38mm, Tali (nameplate) and Akola (text)
9 Likes
Wow! That looks fantastic, Fabien! What striking colors… tali and akola wood?
1 Like
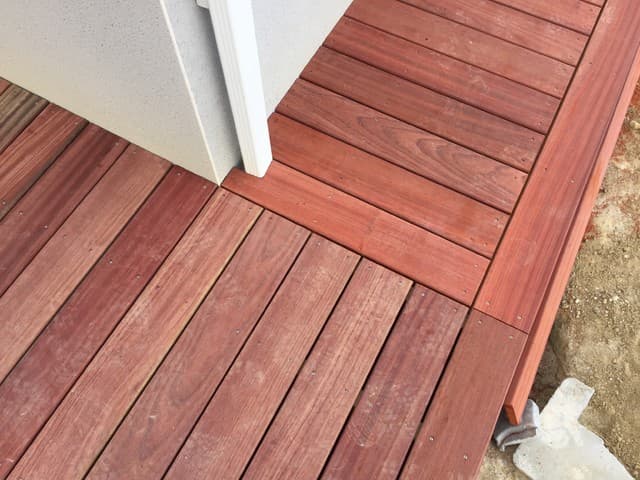
Both wood are from decking boards, so it’s pretty easy to source and not too pricey
Buying maple, ash, or walnut here is not easy nor cheap
They do match up pretty well, I’m not a fan of Akola’s color but it’s very nice as a small accent
Tali
Akola
Akola is a mess to work with, though… The dust is very irritating, and the board I have wraps a lot, plus I had lot of charing
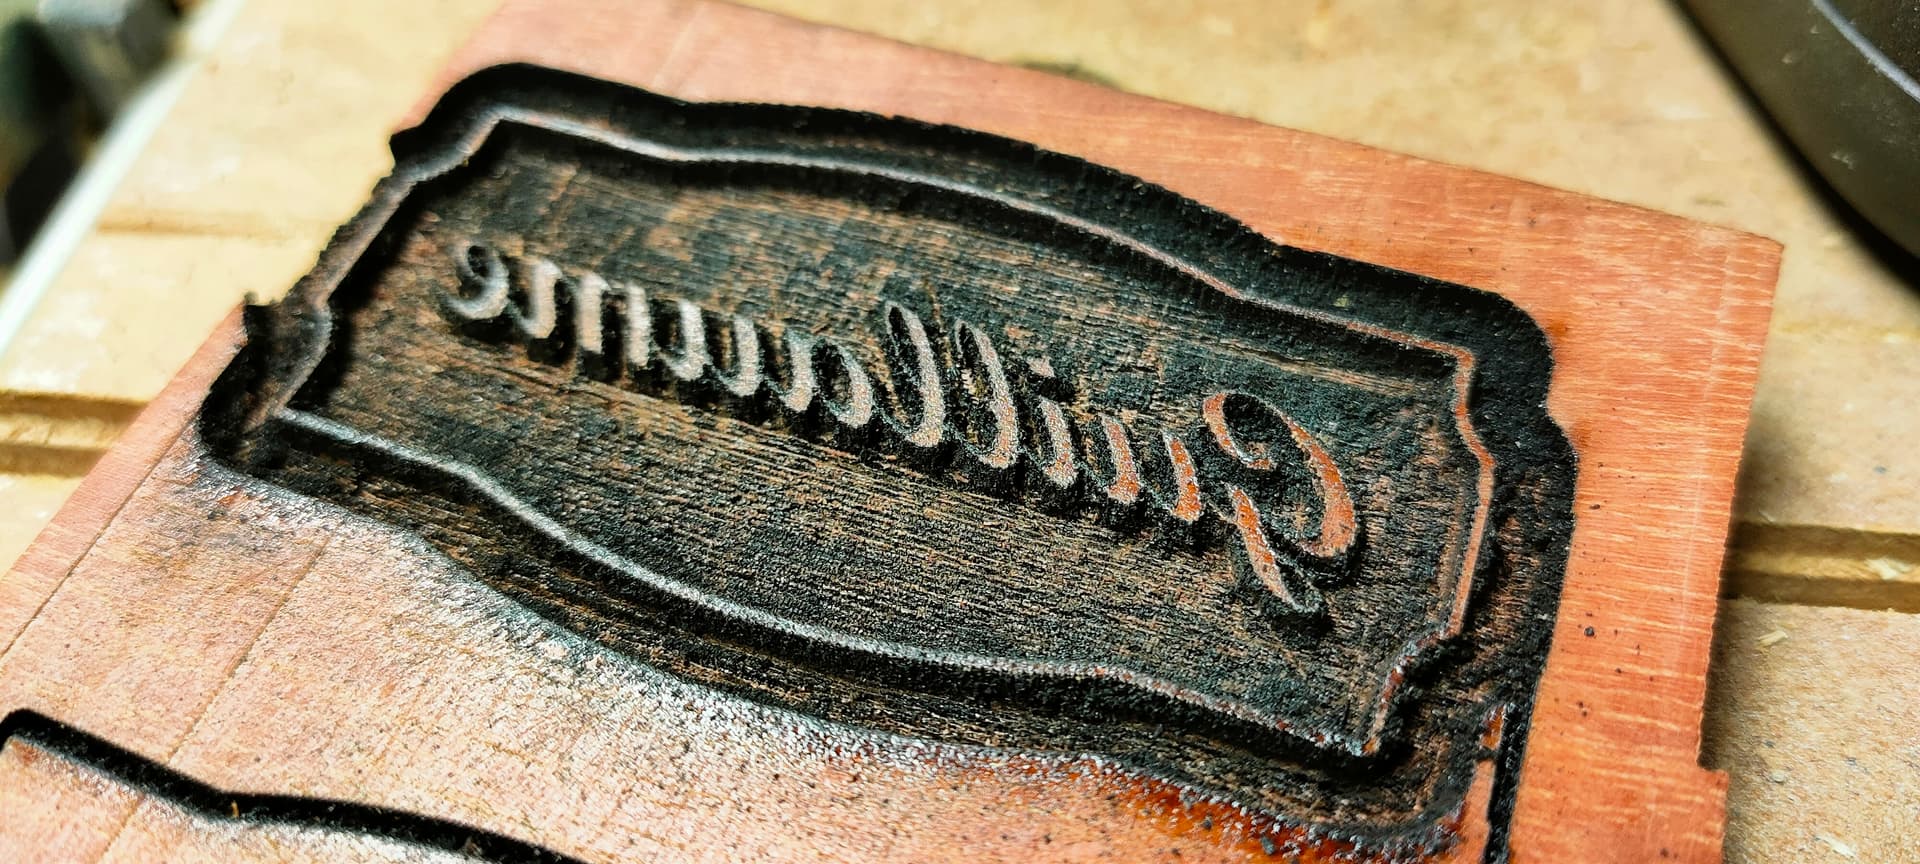
(this is after cleaning with an utility knife)
Also , concerning this inlay technique, I was wondering about the faint black line I get
It does look good for this particular project, but how would you get rid of it?
Is it the offset setting that is too wide, or is it related to charing?
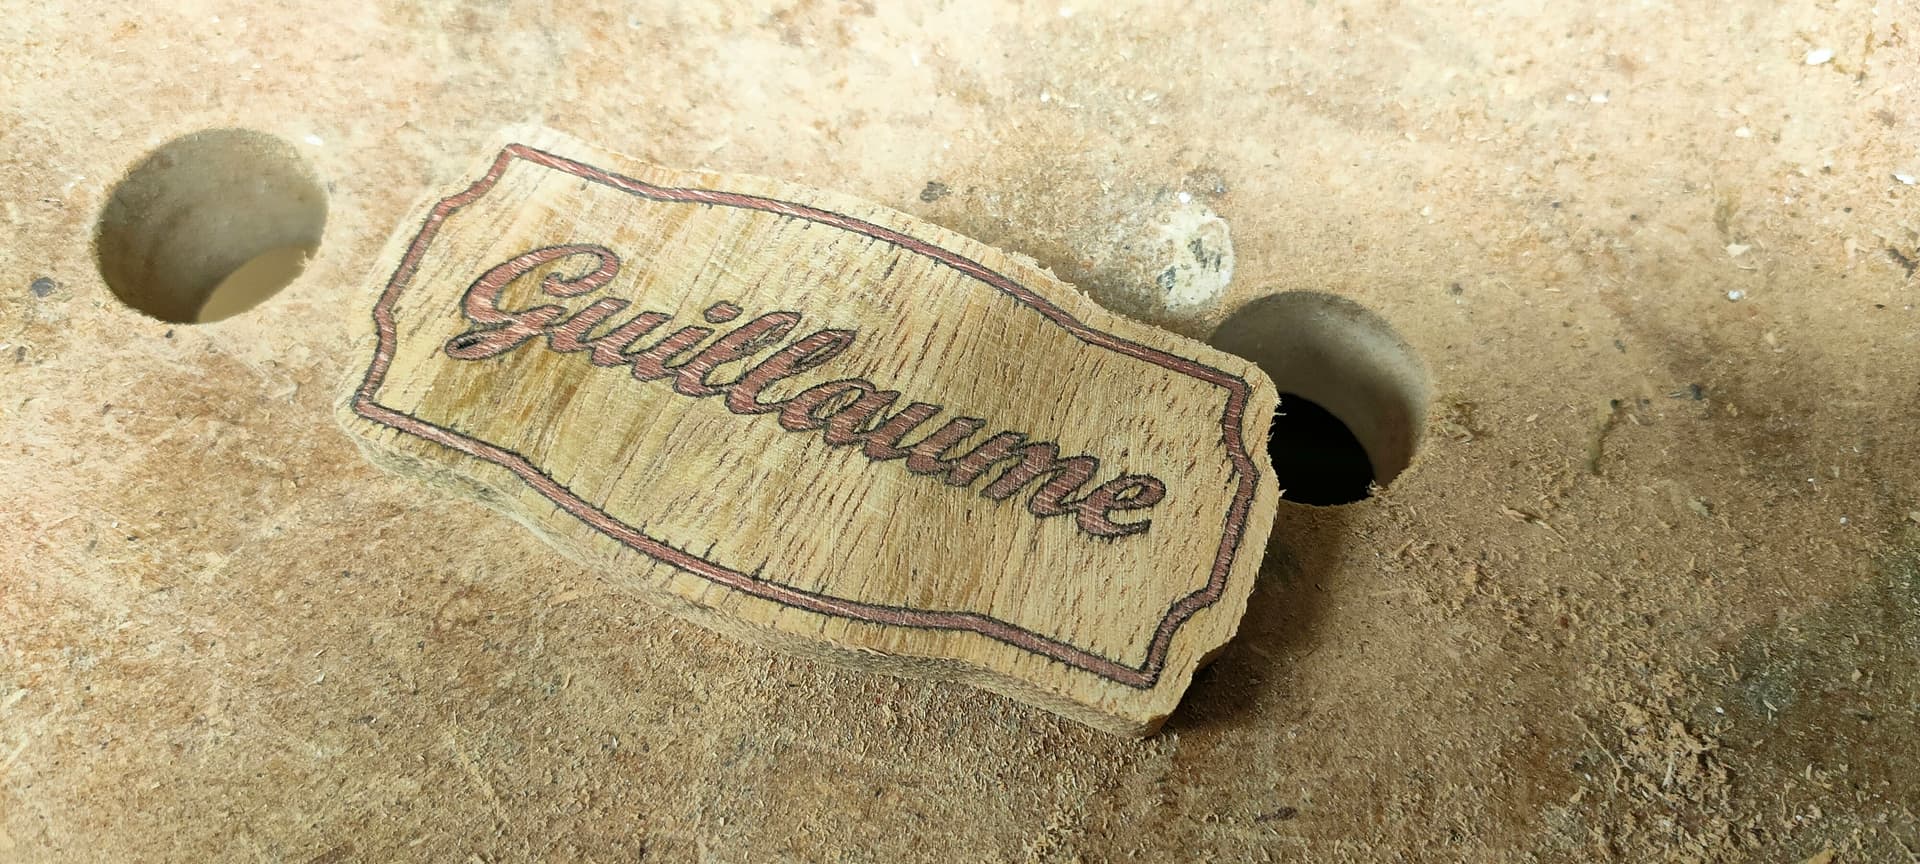
Again, thanks for the awesome technique, this project was a little gift for a friend and he loved it!
1 Like
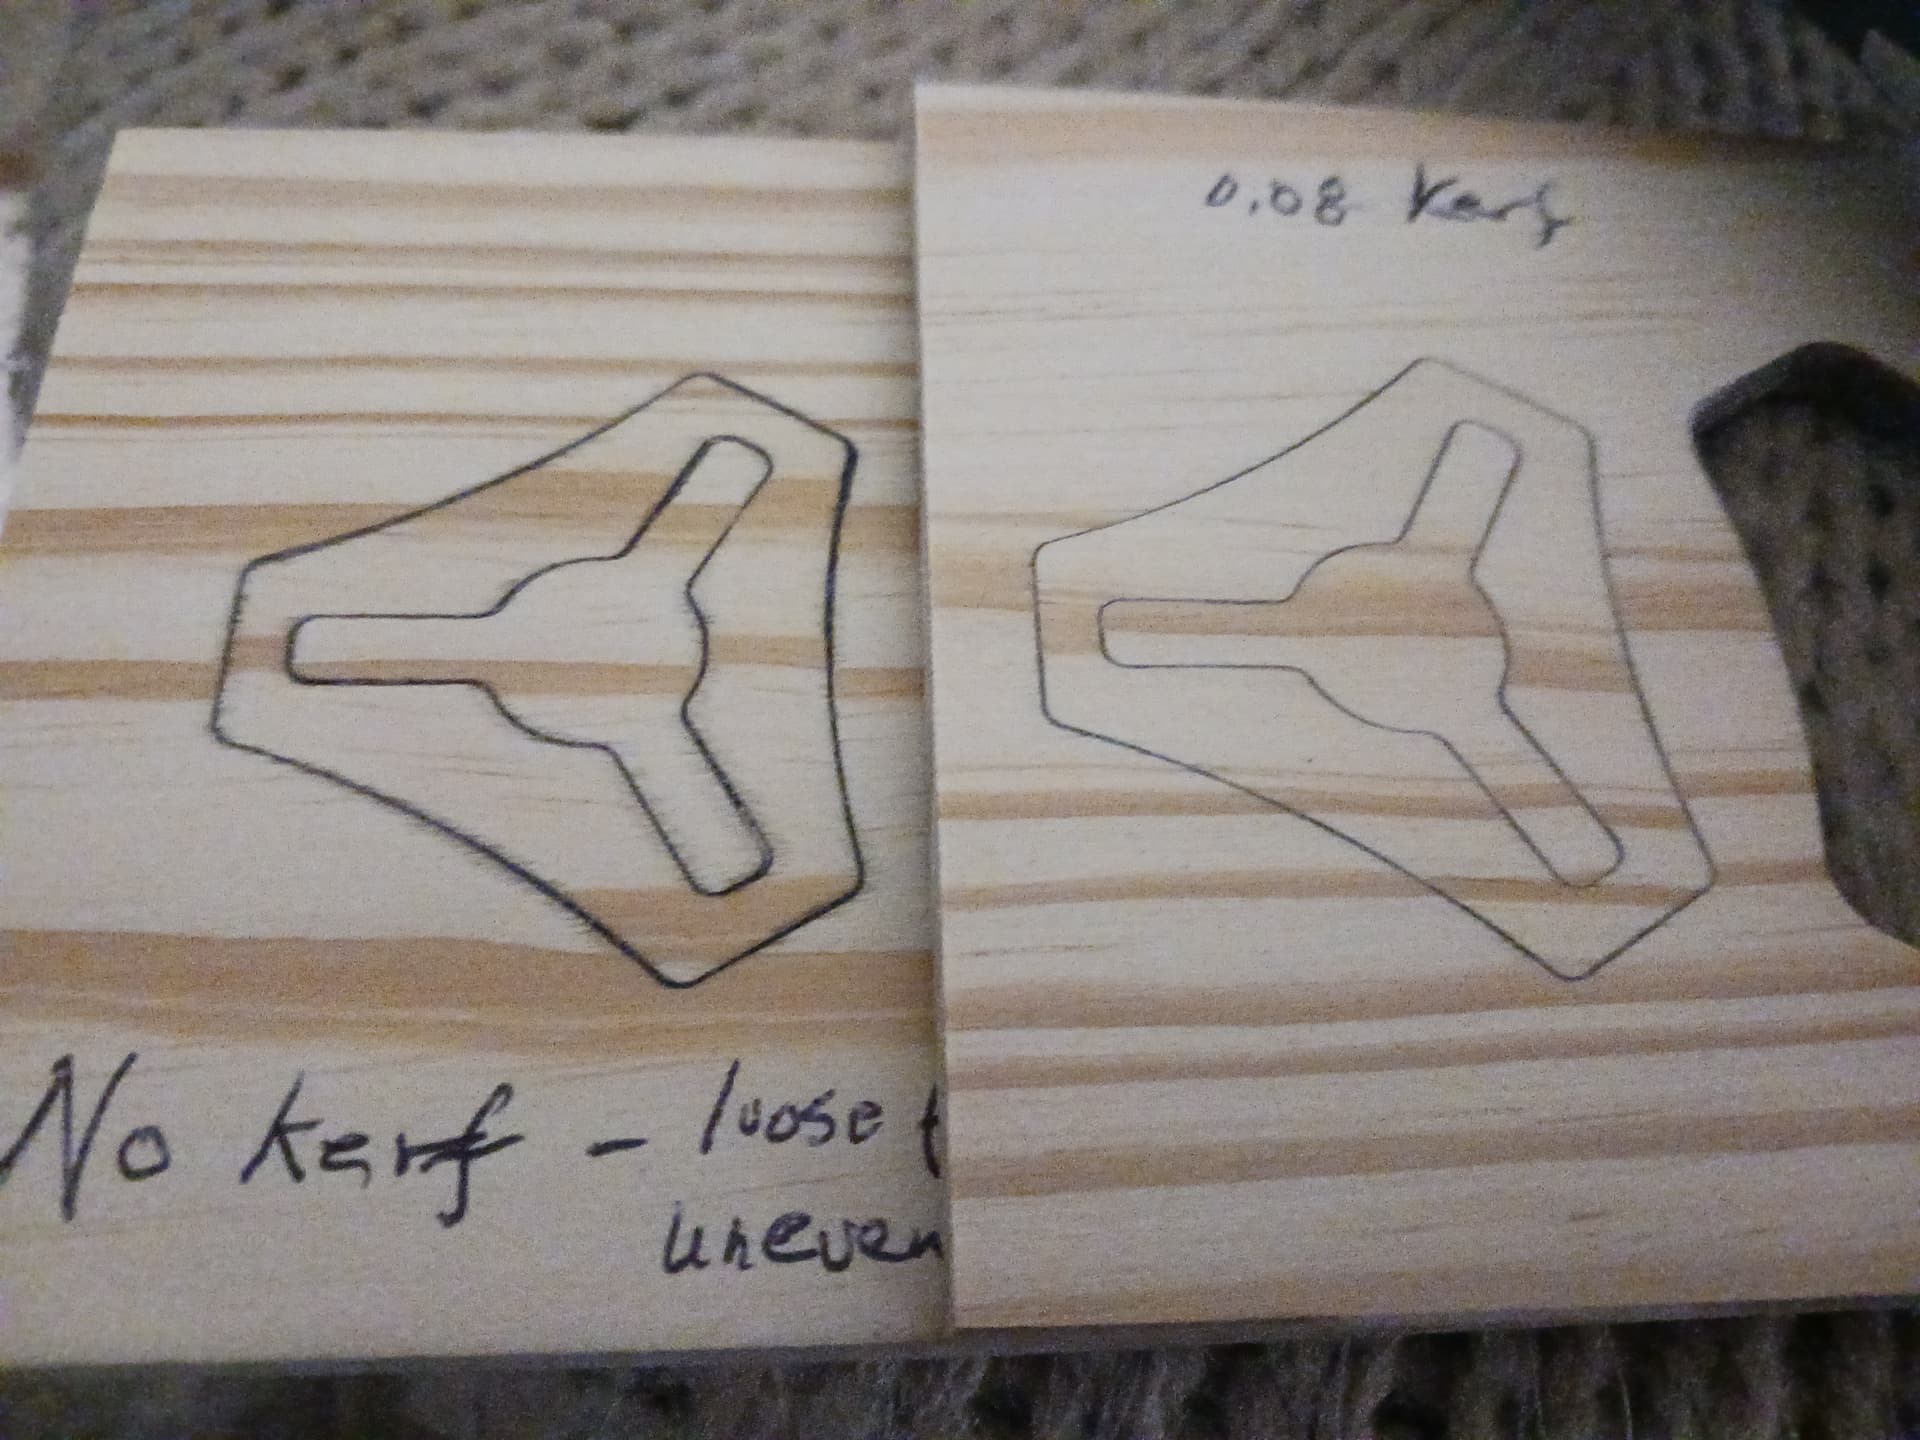
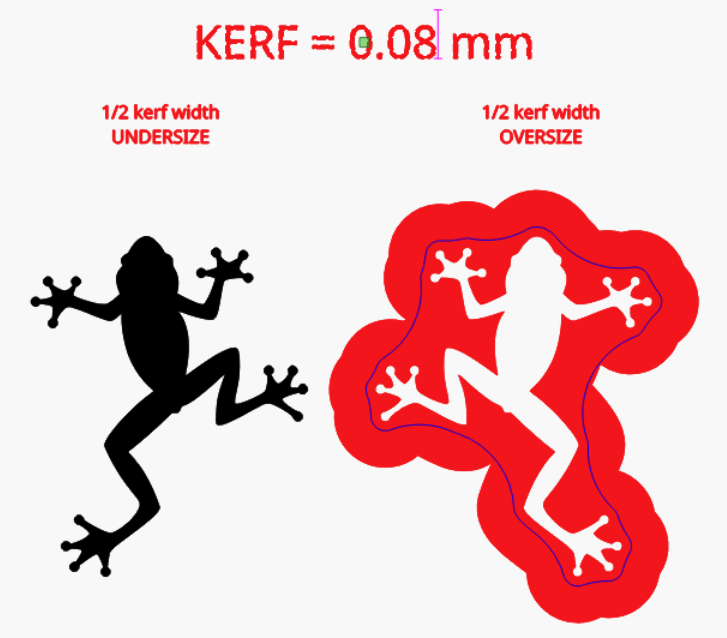
I believe the first offset operation and charring will both affect the “faint black” kerf line… but the color of the woods used will as well. Here, in early kerf testing (described below), this “pine on pine” (light on light) inlay shows the wider left-most kerf as both visible (non-contrasting wood) and “quite objectionable”… whereas the right-most image, with smaller kerf, is lighter and “less objectionable”.
If contrasting (dark and light) woods are used, the kerf line can become almost invisible.
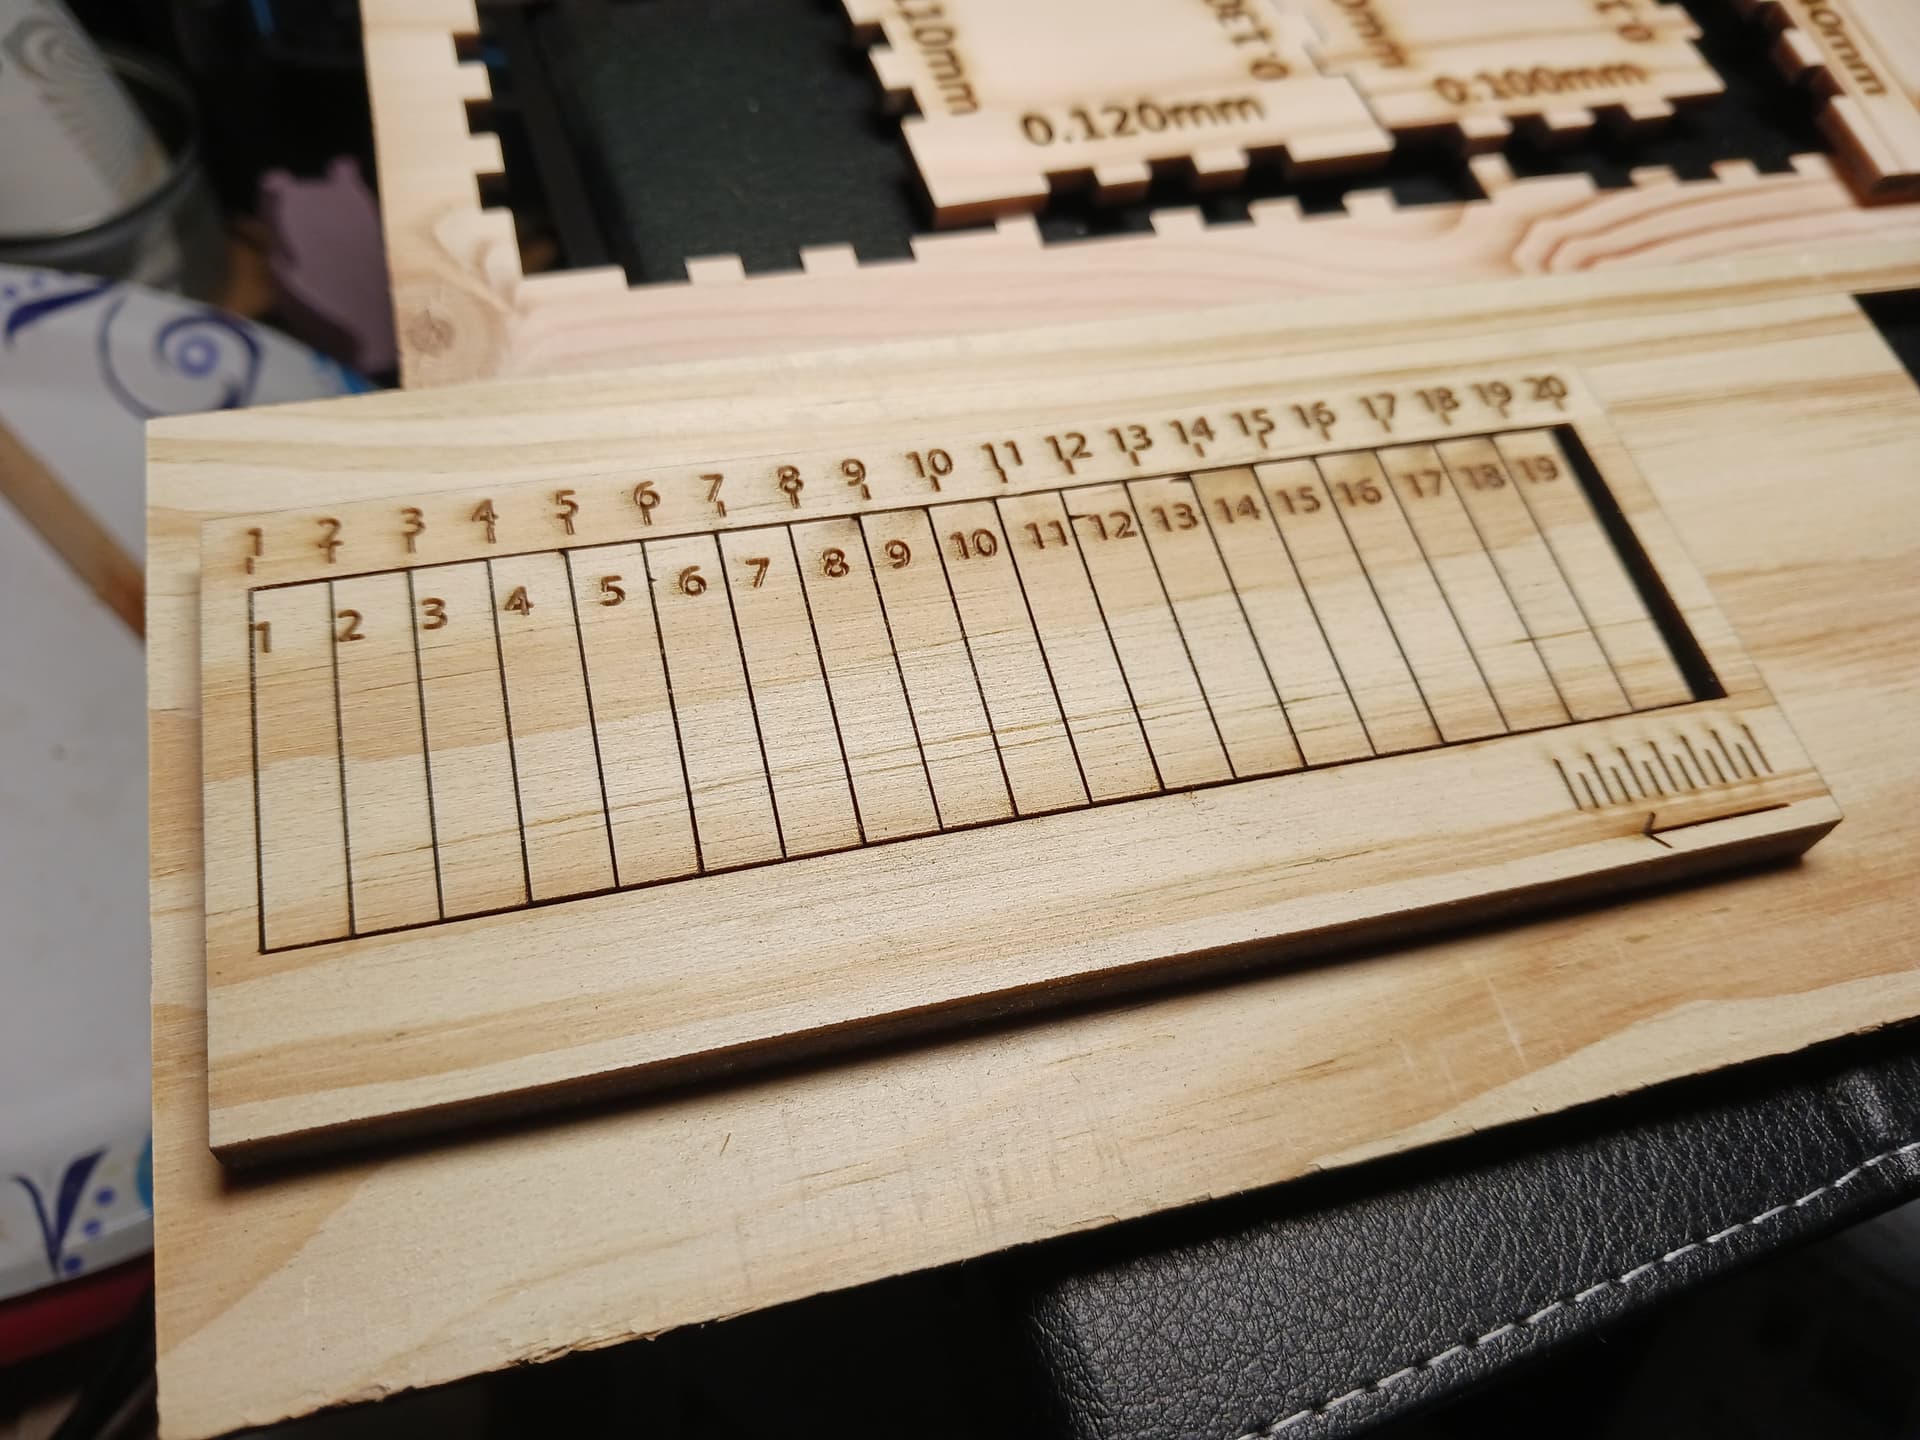
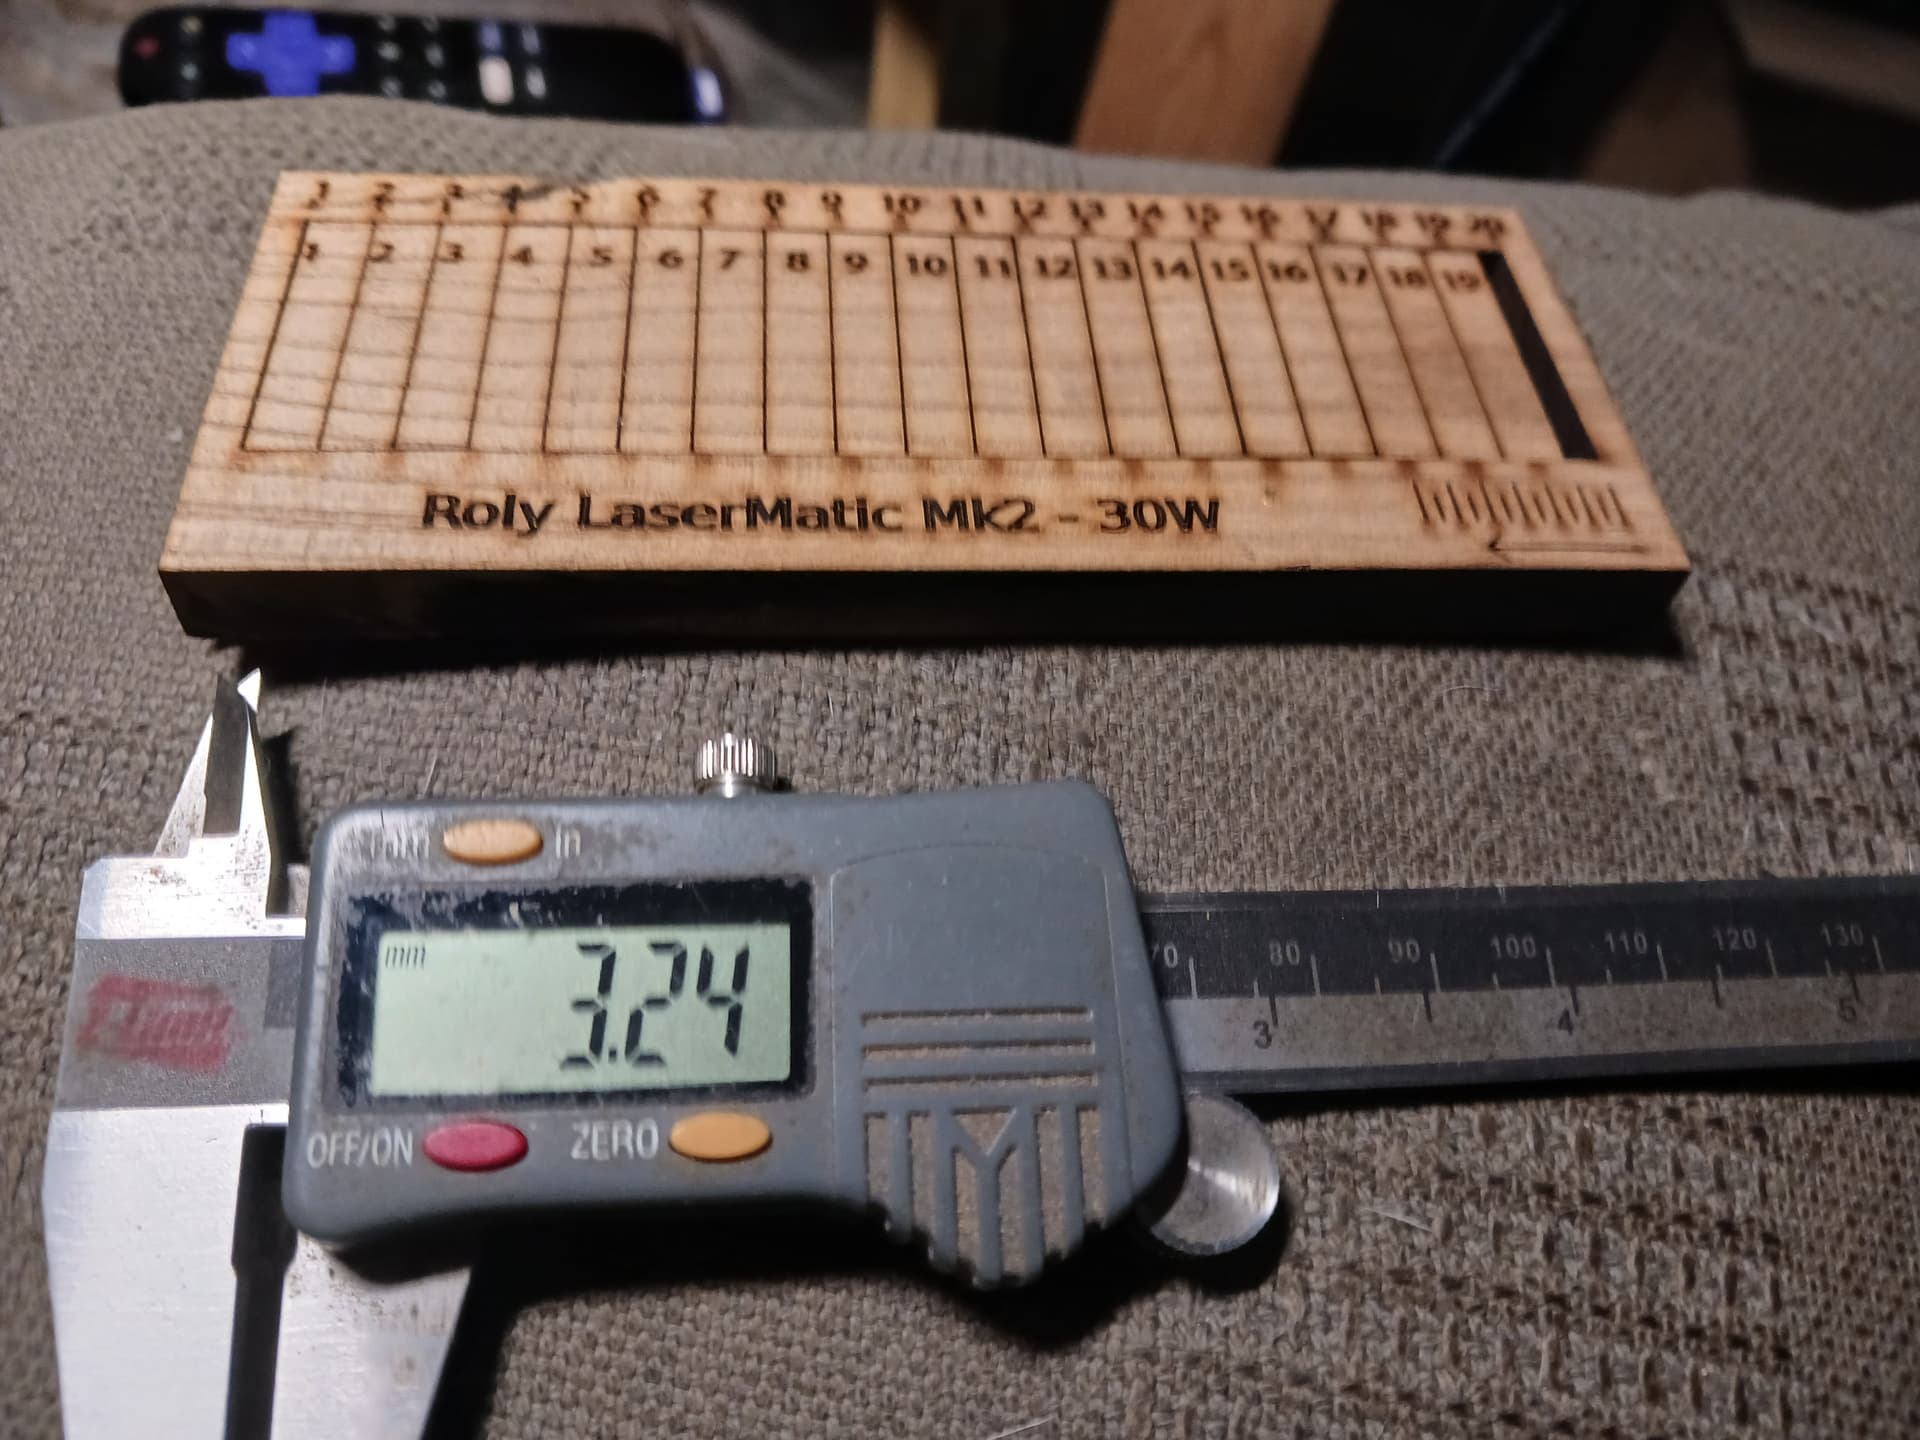
I measure the laser’s kerf on two different ~30W lasers using a “20-kerf/19-segment” test. You single-cut 19 segments, resulting in 20 kerfs, and then slide all segments to one end. Measure the gap at the other end… here ~3.24mm and then divide the result by 20; i.e. 3.24mm/20, or 0.162mm for my full-kerf. I’ll use half the full-kerf (~0.08mm) in the first offset operation when using the “easy inlay” method described below.
In LB, I scale my design as desired and devote 2 layers to “pocket” and “inlay”… and temporarily both set to “line” mode. Select the entire design and for the first offset operation, offset all lines by one-half kerf (0.162 / 2 = ~0.08mm) in BOTH directions. This looks similar to 2-lane roadway… center line and road-edges. Be sure to delete the center-line (original object) when you OK the offset operation.
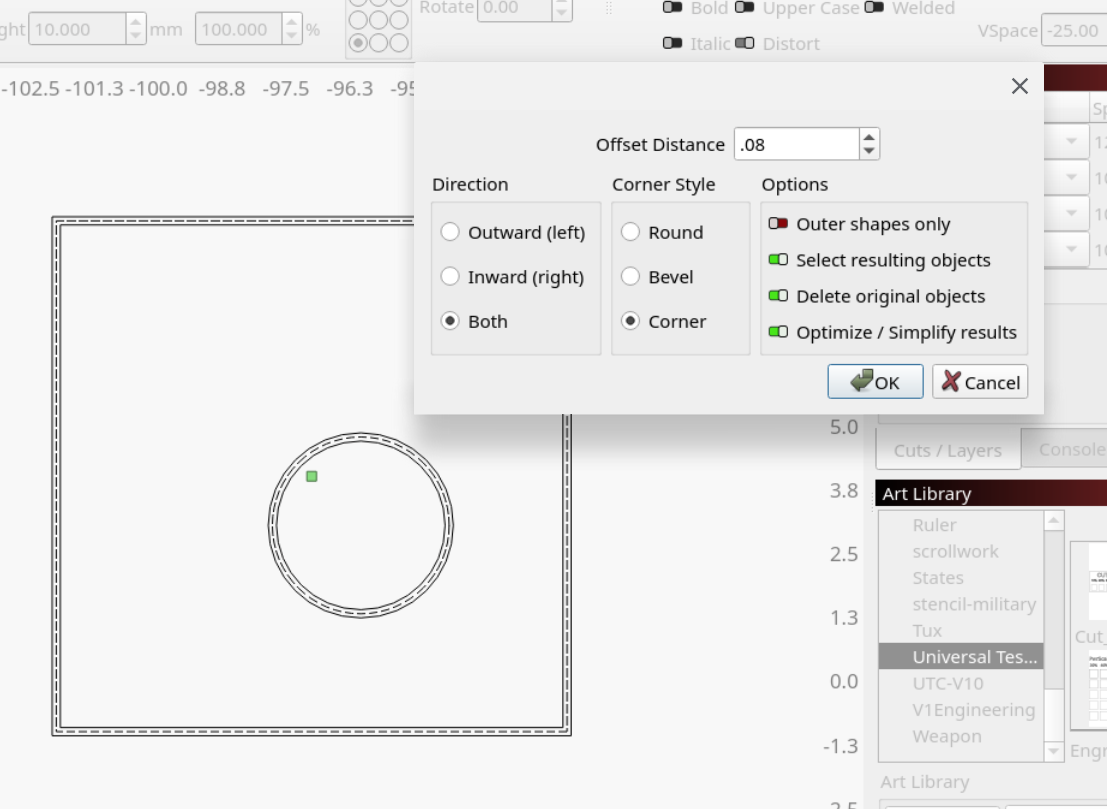
Now select all the “inside” lines (go to an outermost shape and select the inside line… all inside lines will selct!) and put on the “pocket” layer and then select all the “outside” lines and put on the “inlay” layer. Slide the selected “inlay” lines to the right, MIRROR them horizontally… and continue the offset operations to complete the “inlay”. Note that the “pocket” and “inlay” pieces are one full-kerf different in size.
Your inlay had quite a bit of charring which you scraped with a utility knife. I don’t know whether it’s the akola wood, the settings you used, or maybe your air-assist. Here’s an inlay piece straight off my laser… walnut, etched 2-3mm deep, and I used full air-assist. As you can see it’s quite clean. I try to remember to give it a blast of compressed air to be safe… though I sometimes forget.
I do sometimes see small specks of charred debris in the glue during glue application but with contrasting wood and after sanding I can’t see it in the final product. To be safe I should blast both the pocket and inlay with compressed air before glue-up…

I hope this makes sense… and helps rather than confuse.
– David
12 Likes
I’ve done a couple of test inlays but my kerf correction mustn’t be right yet, the black line is too pronounced. Still, that’s what these tests are for!
6 Likes
I think one of the reasons for why the line is showing is how the soot bleeds into the wood. Had this issue when I tried to make laser cuttings+engravings in cheap veneer. Things got a looot better when using better wood. I can’t say much about kerfing though…
2 Likes
I don’t know what laser power you have but my higher-powered lasers all have a similar full-kerf… 0.160-ish to 0.170-ish millimeters. If you’re using a 20W to 36W laser and the “easy inlays” method I’ve described in this thread… you could use something like 0.08mm (about 1/2 the full-kerf) for that first offset step I described and probably improve on what your photo shows.
If you’ll measure yours as in my last post hopefully you’ll see what yours needs to be… modify this LB file to suit.
Kerf_Test-AtezrL2.zip (28.3 KB)
– David
4 Likes
This is where my technique differs, I call mine “Just-wing-it laser inlays”
I just offset the shapes by .1mm (because the laser specs say.08mm kerf and, well, I’m just lazy) and hit start… ![]()
But from what I get, I’ll have to tweak this to get rid of the black soot line ^^"
Looks an awful lot like actual woodworking, I’m not sure I want to do that ![]()
8 Likes
Heavens forbid you start making inlays with an endmill, like a savage. ![]()
10 Likes
Bwahaha!
3 Likes
Actually, comparing the two methods, if you do want a black outline on your design, the laser might be a lot easier
If I need to make the same design again but bigger (this is a boat’s name), I might try your method ![]()
3 Likes
The next step on that slippery slope is a chisel, a really sharp knife or three, and a lot of practice! ![]()
5 Likes
Up front, I have loved @Tokoloshe’s logo from the first time I saw it… and knowing the honor Philipp affords to his grandfather’s memory makes it all the more special. Please check out Philipp’s YT homepage for the story behind his logo and his inspiring videos. And please know I don’t mean to intrude or offend… only afford my greatest respect to Philipp and his grandfather’s memory.
To the “savages” (and “savage wannabes”) lurking… I’m giving it my best shot ![]()
My endmill must have been dull and I had to revert to laser… “pew-pew” ![]()
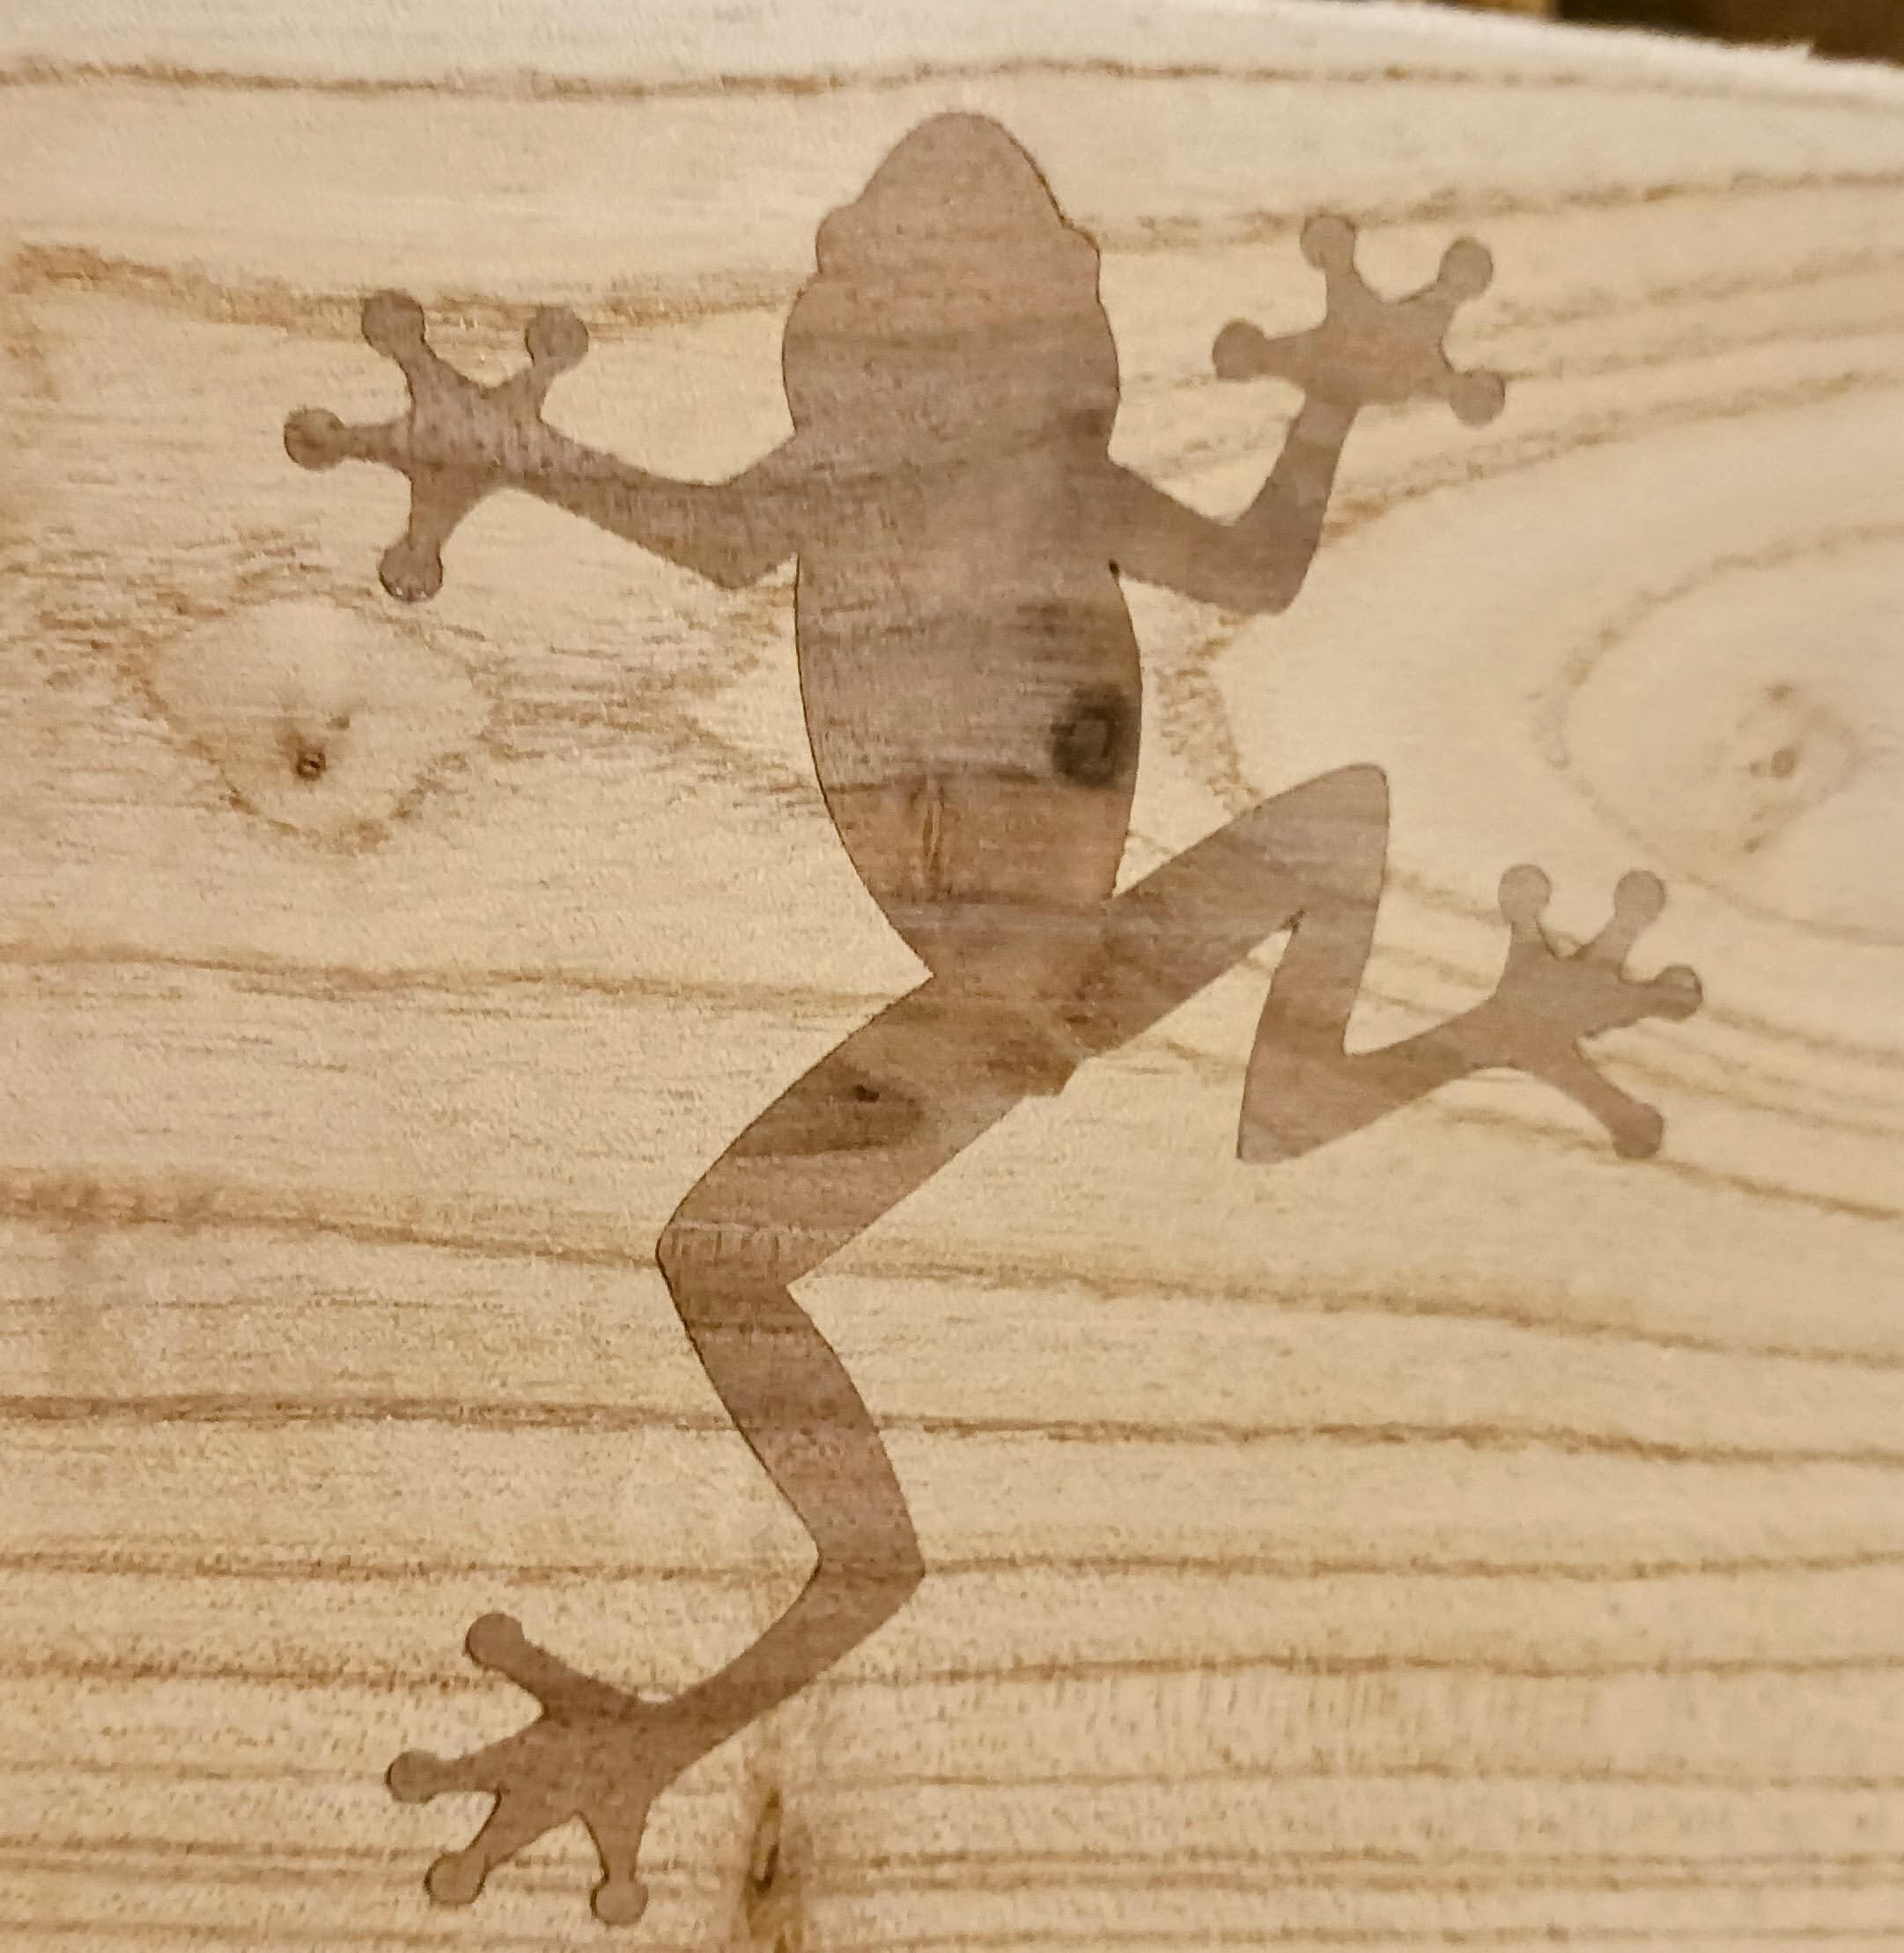
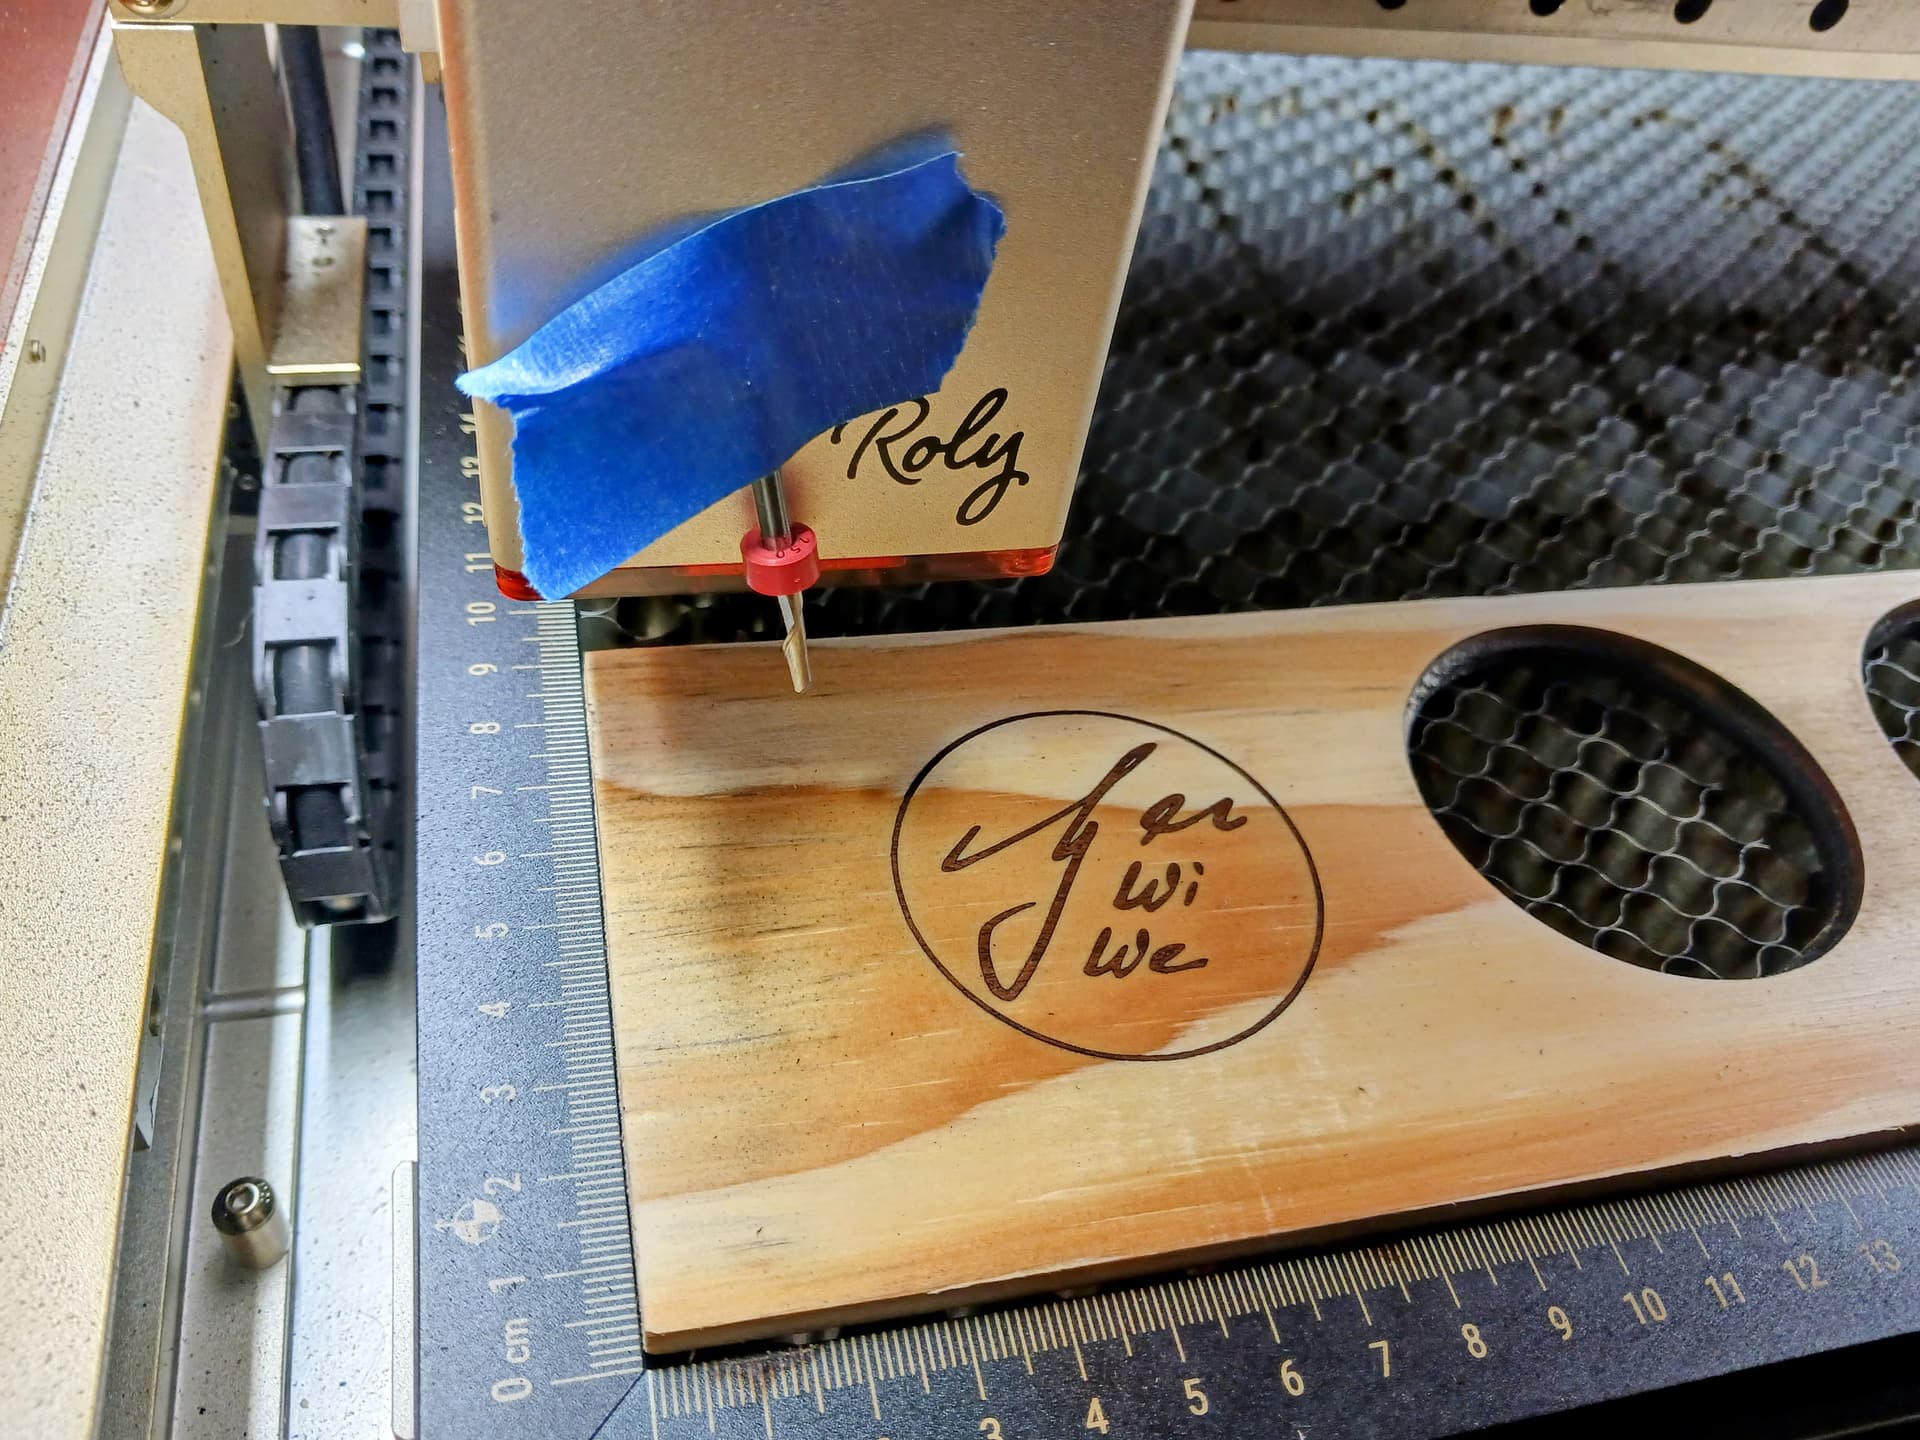
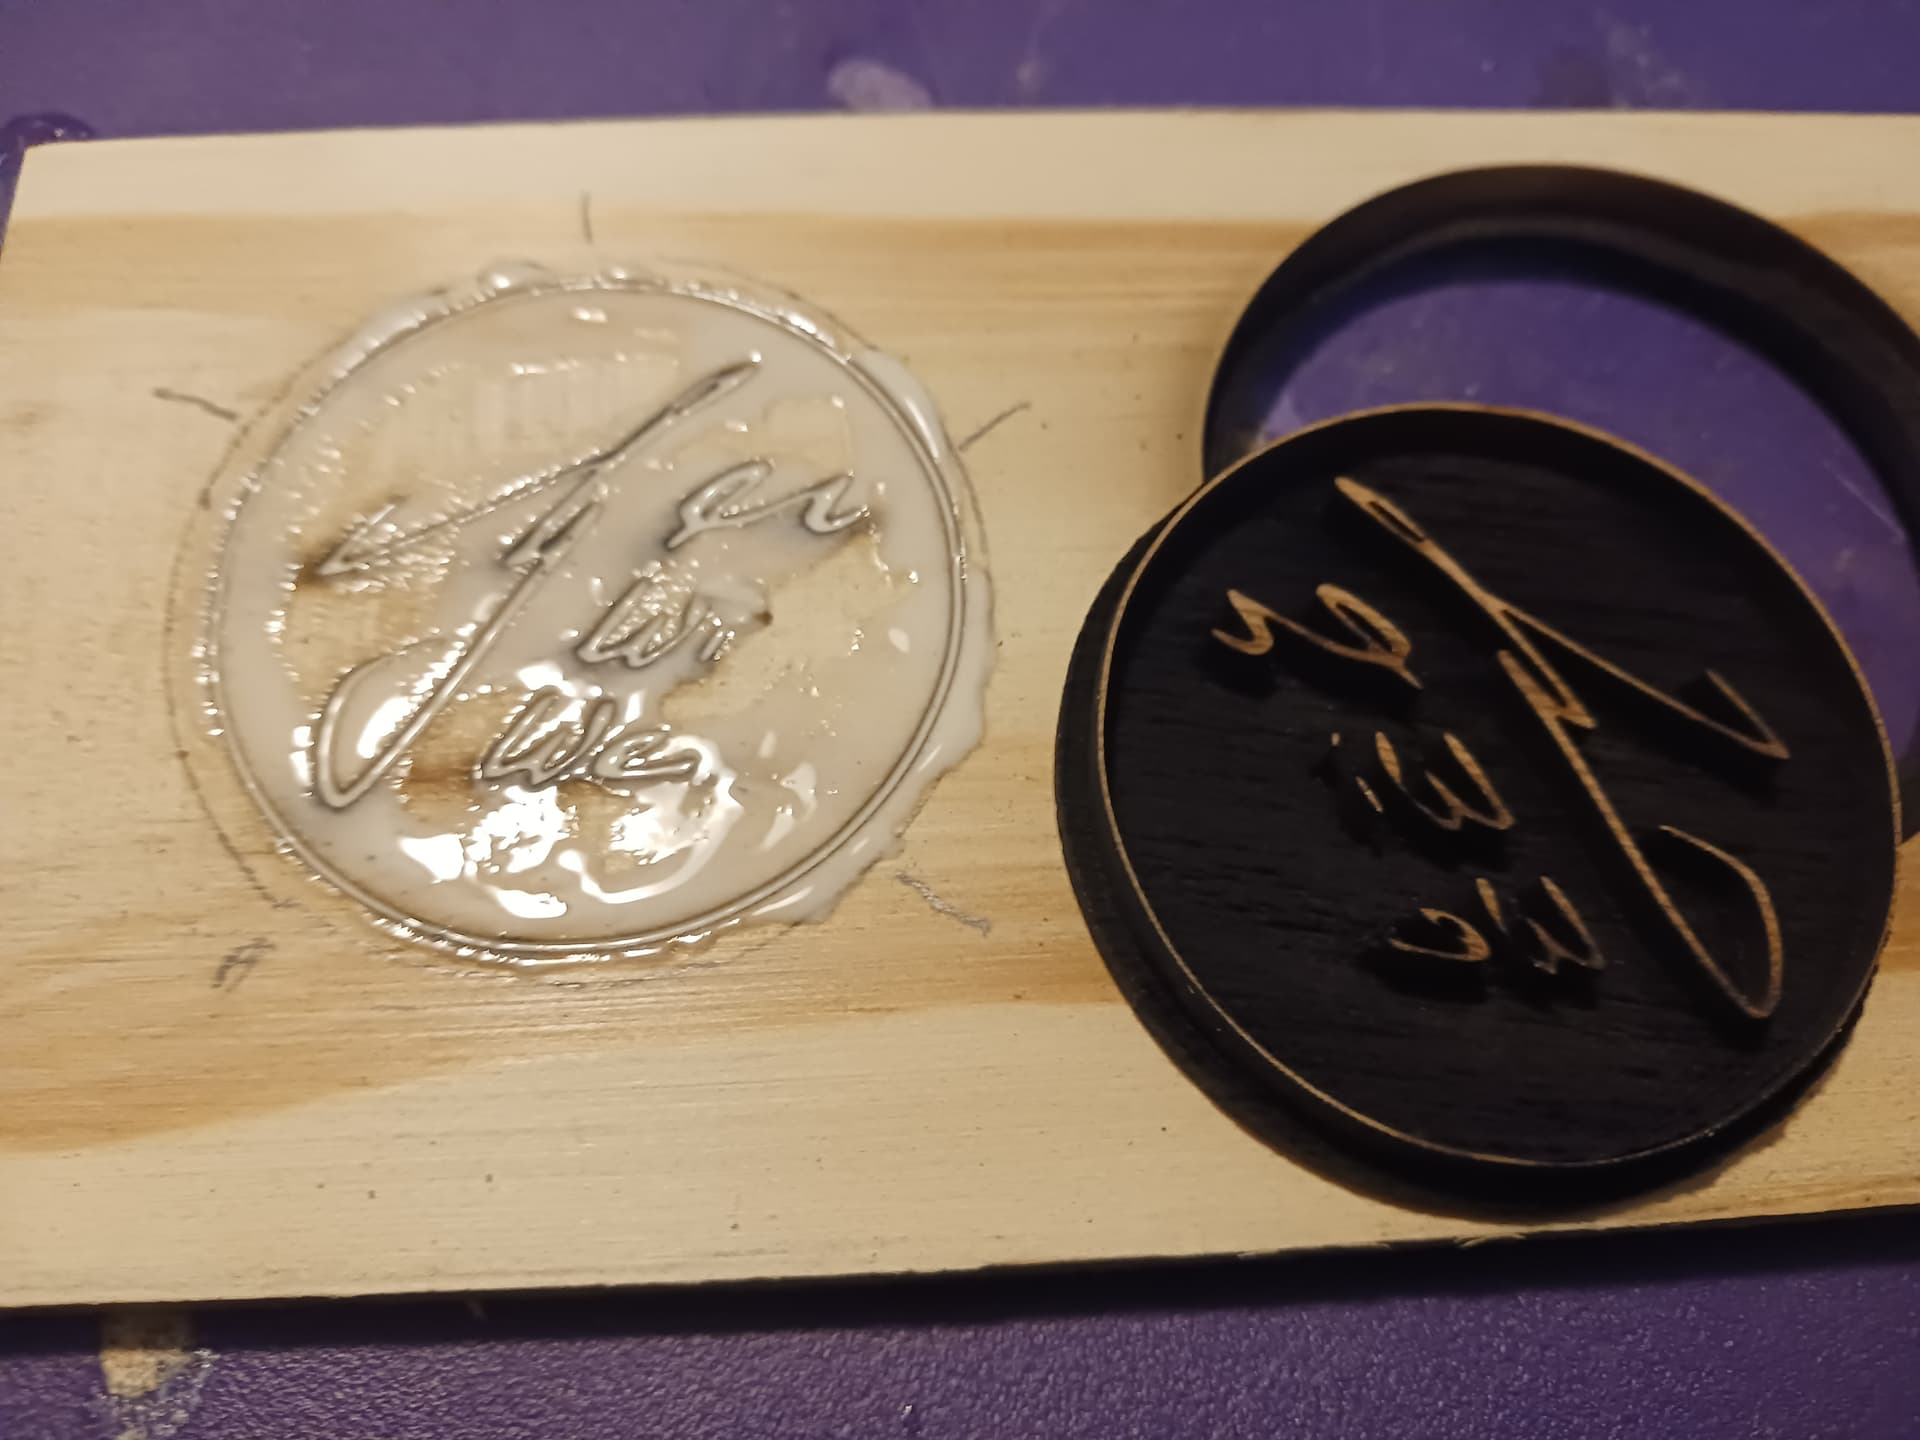
Also note that it’s quite easy and convenient to do both a “pocket” and “inlay” piece in each spieces of wood… to get TWO finished inlays, one light-on-dark and the other dark-on-light.
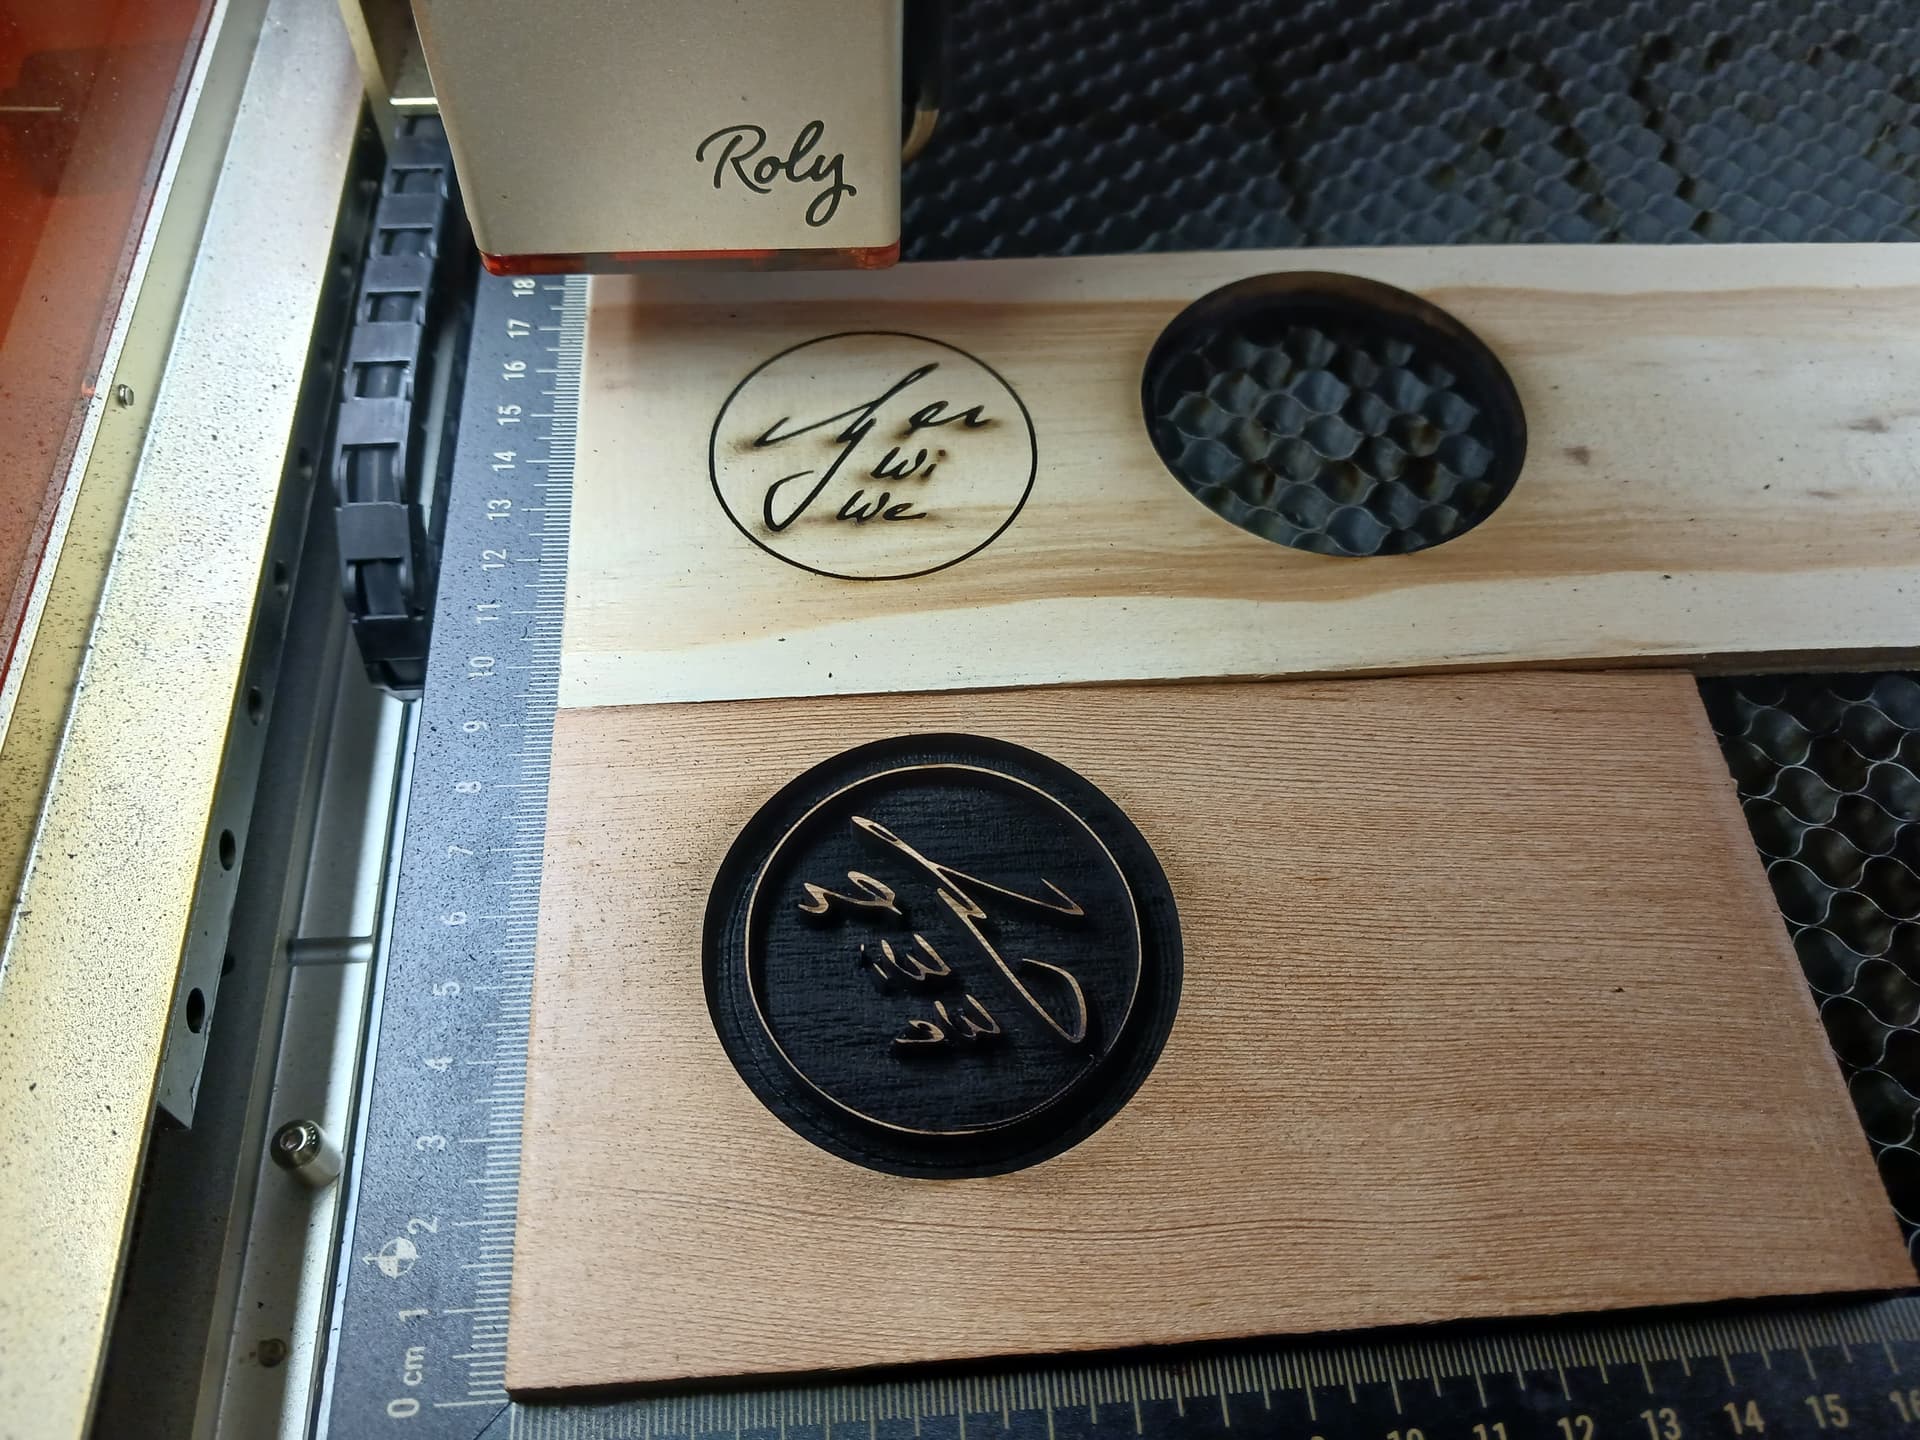
For these ~51mm diameter inlays, the “pocket” and “inlay” pieces take about 5-10 minutes and 15-20 minutes, respectively. The following two photos are from a different run using hardwoods… just to illustrate the “easy inlay” method.
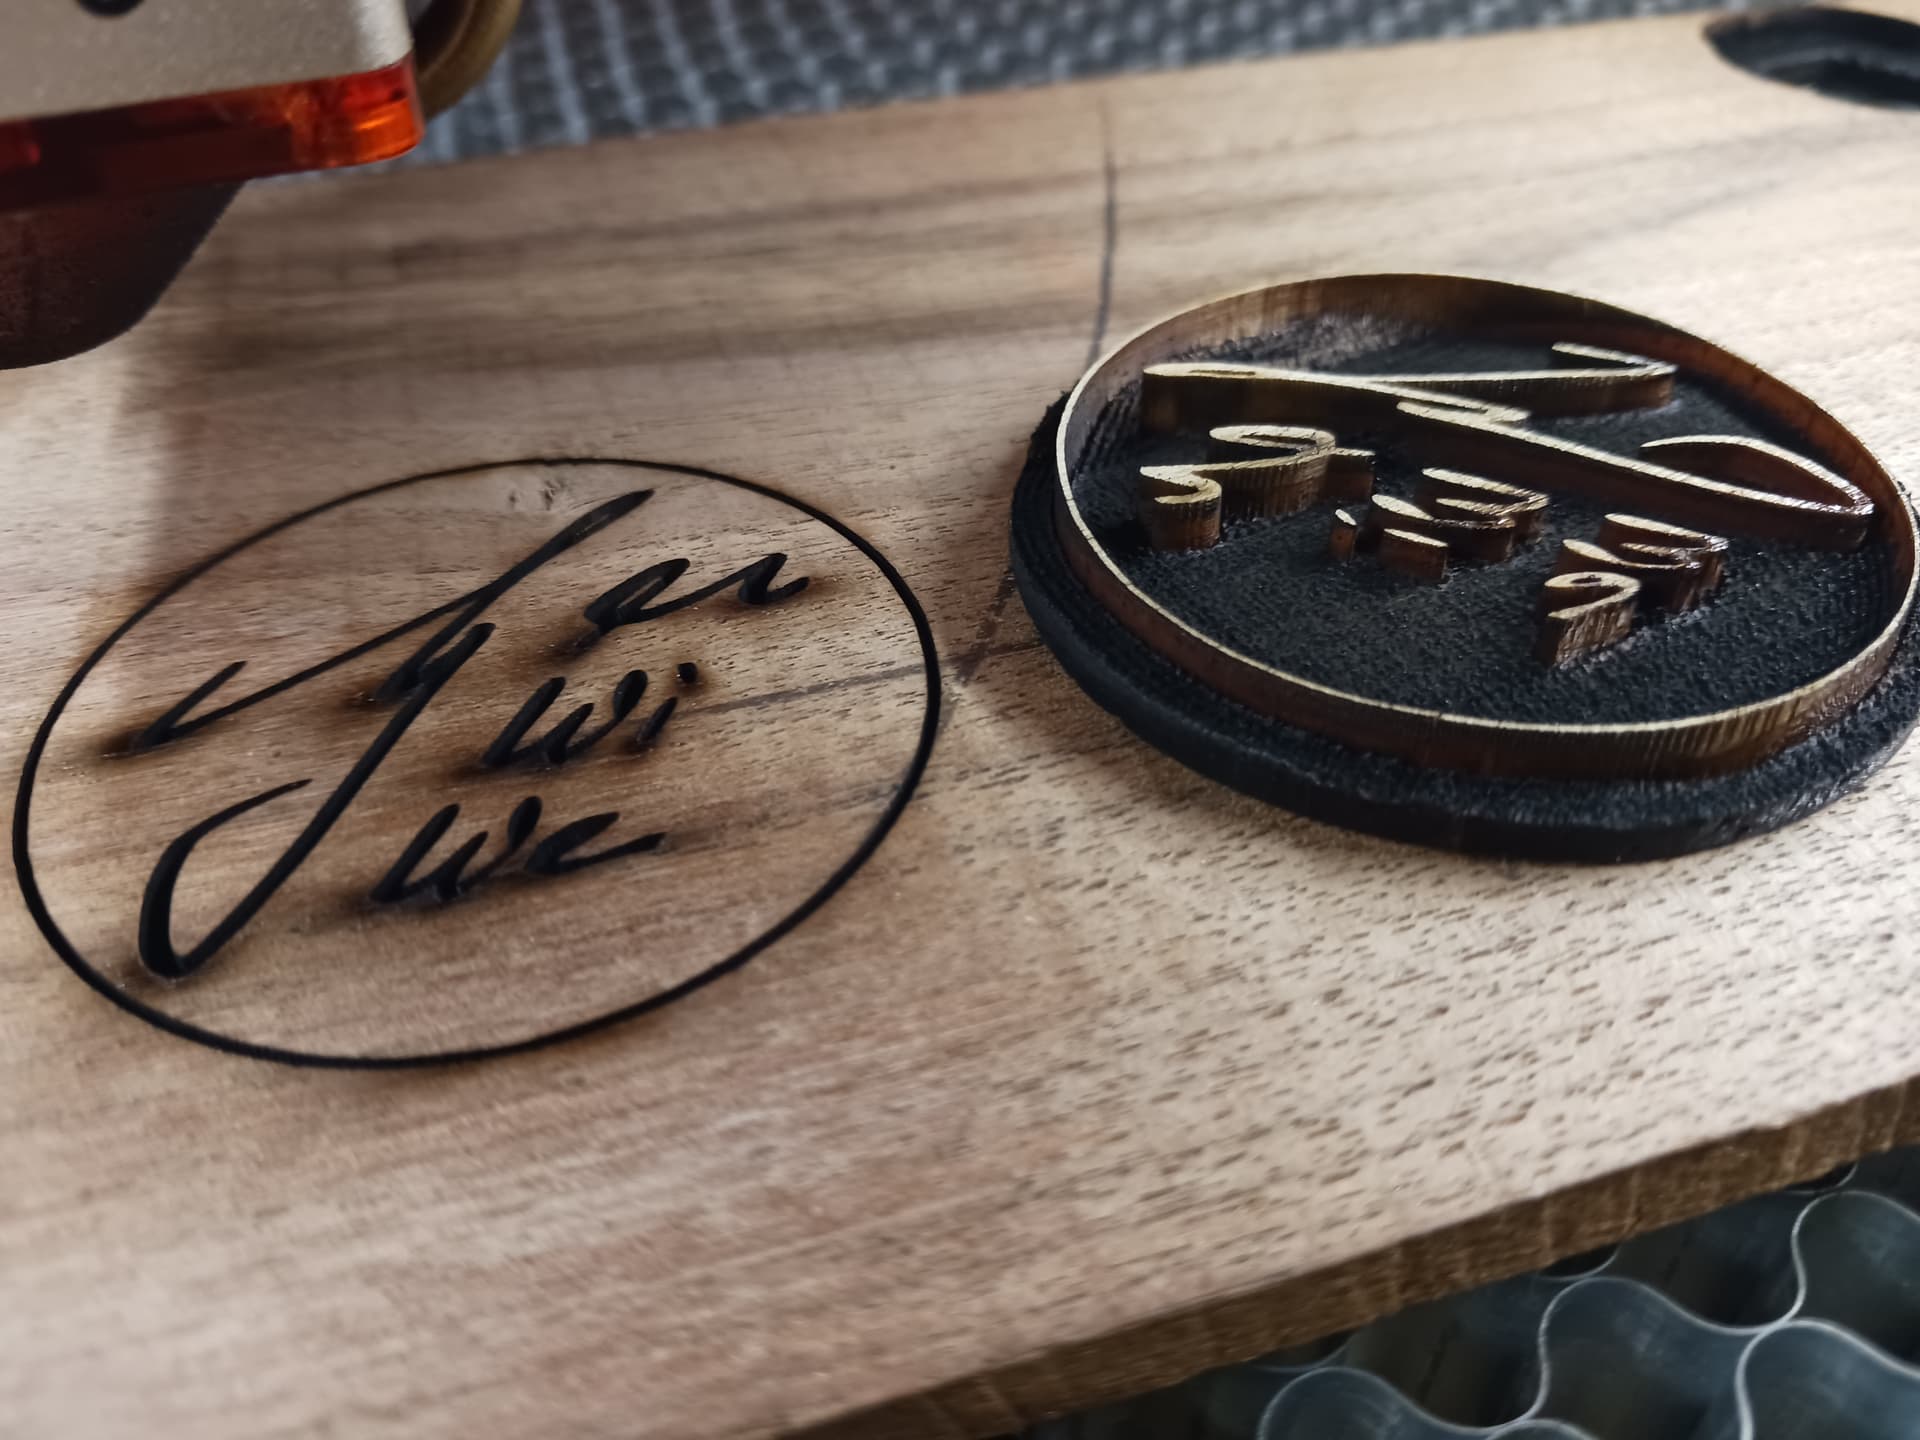
All the waste goes up in smoke and soot. I still haven’t figured out how the sidewalls aren’t as charred as the “floor” of the inlay piece. Is it because a “line after fill” sequence in Lightburn acts like the “finishing pass” you “savages” do?
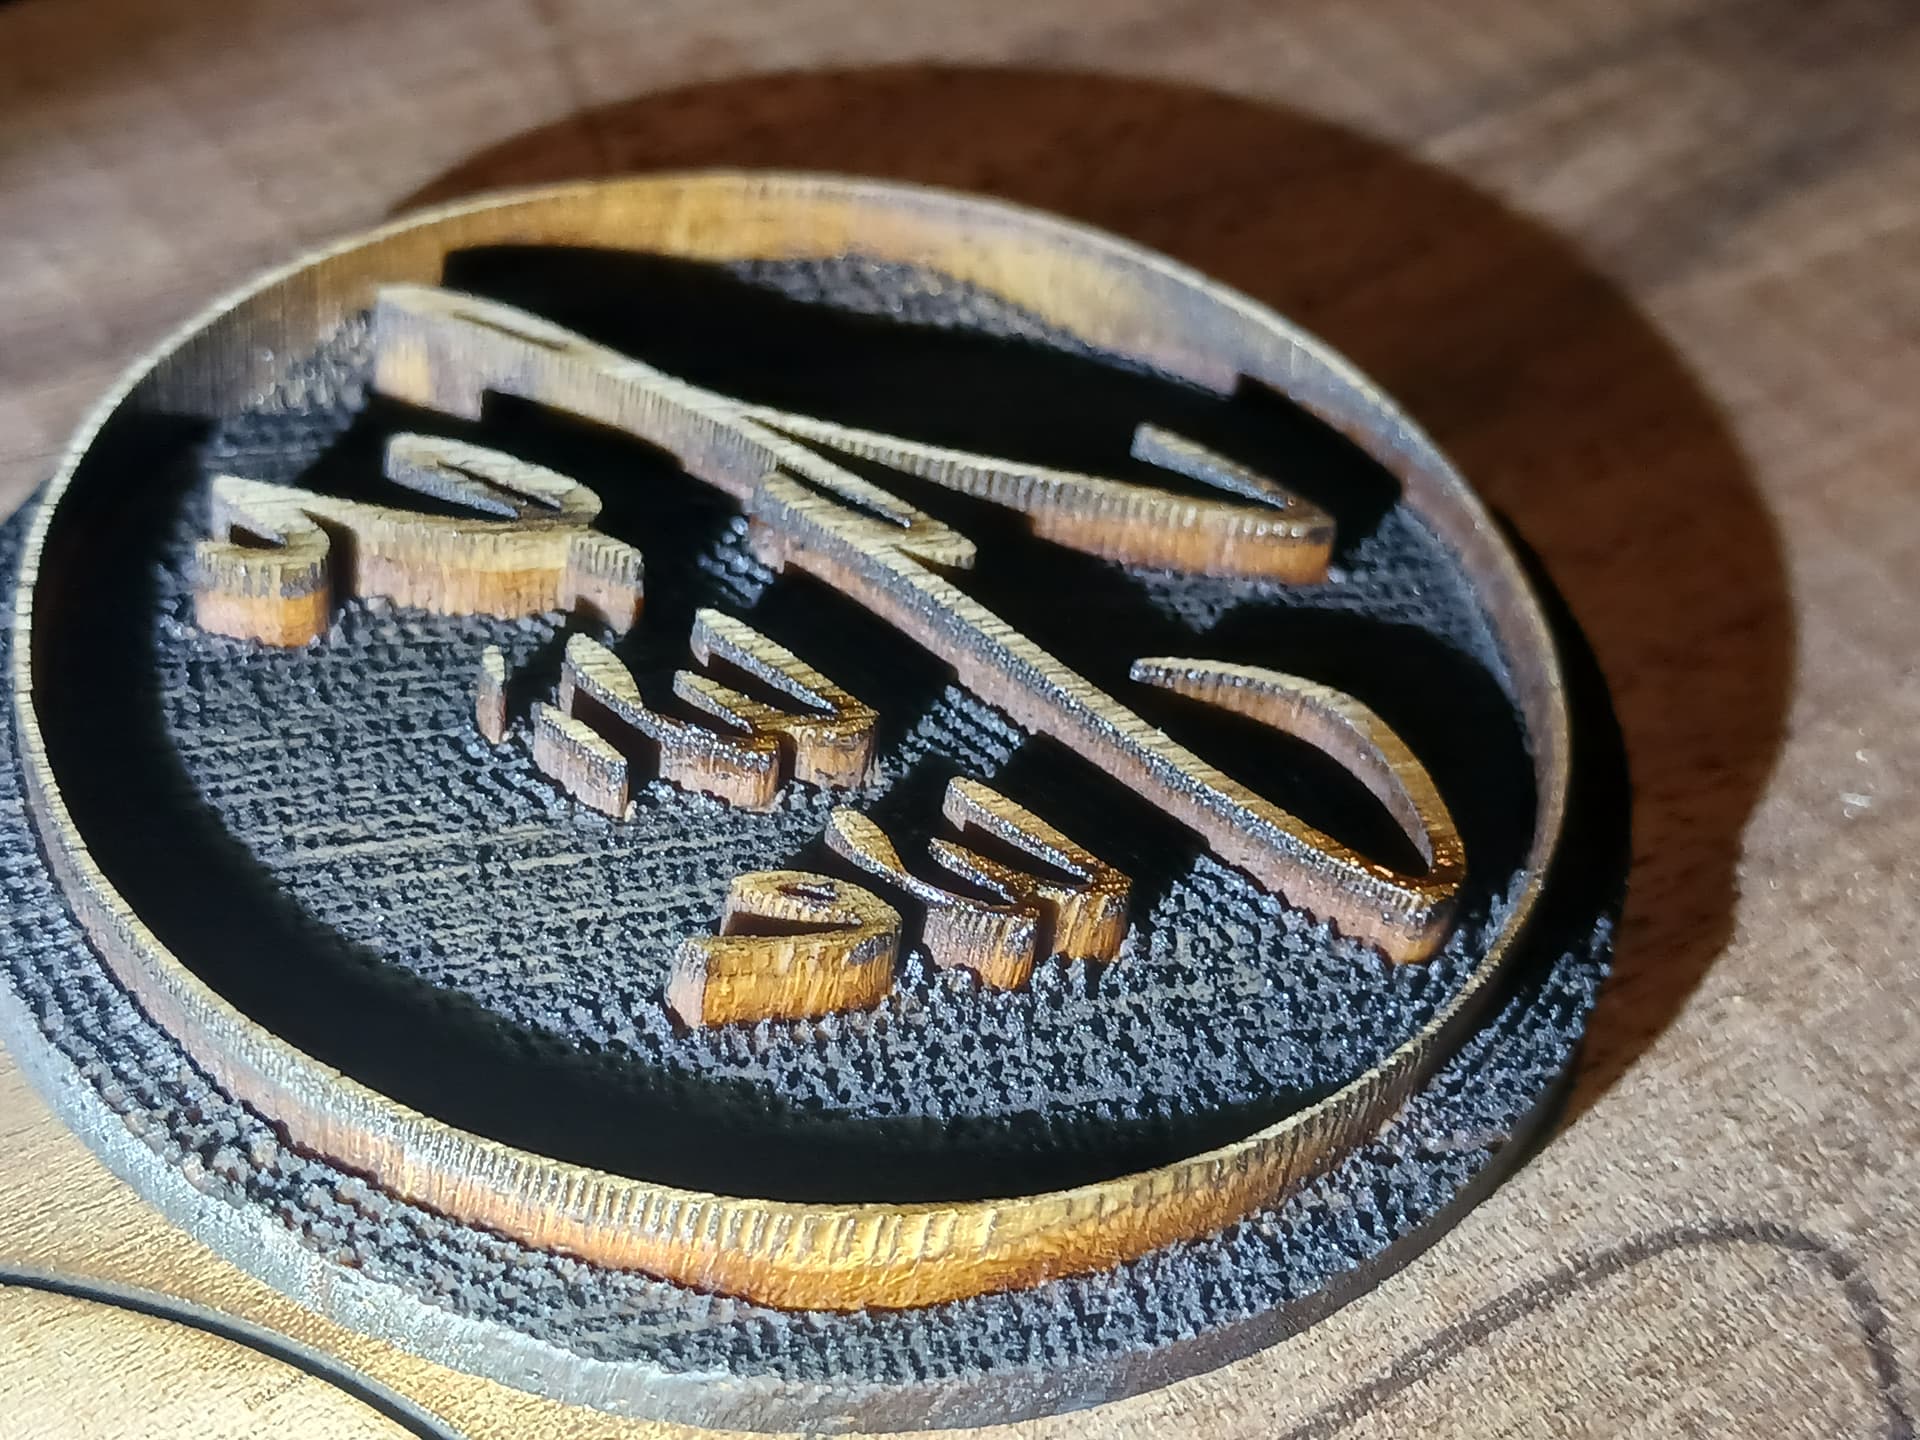
I realize now that I probably should lightly sand the pocket piece before glue up to remove any soot… to hold down on discoloration of the glue. This inlay is done with yellow pine and Douglas(?) fir…
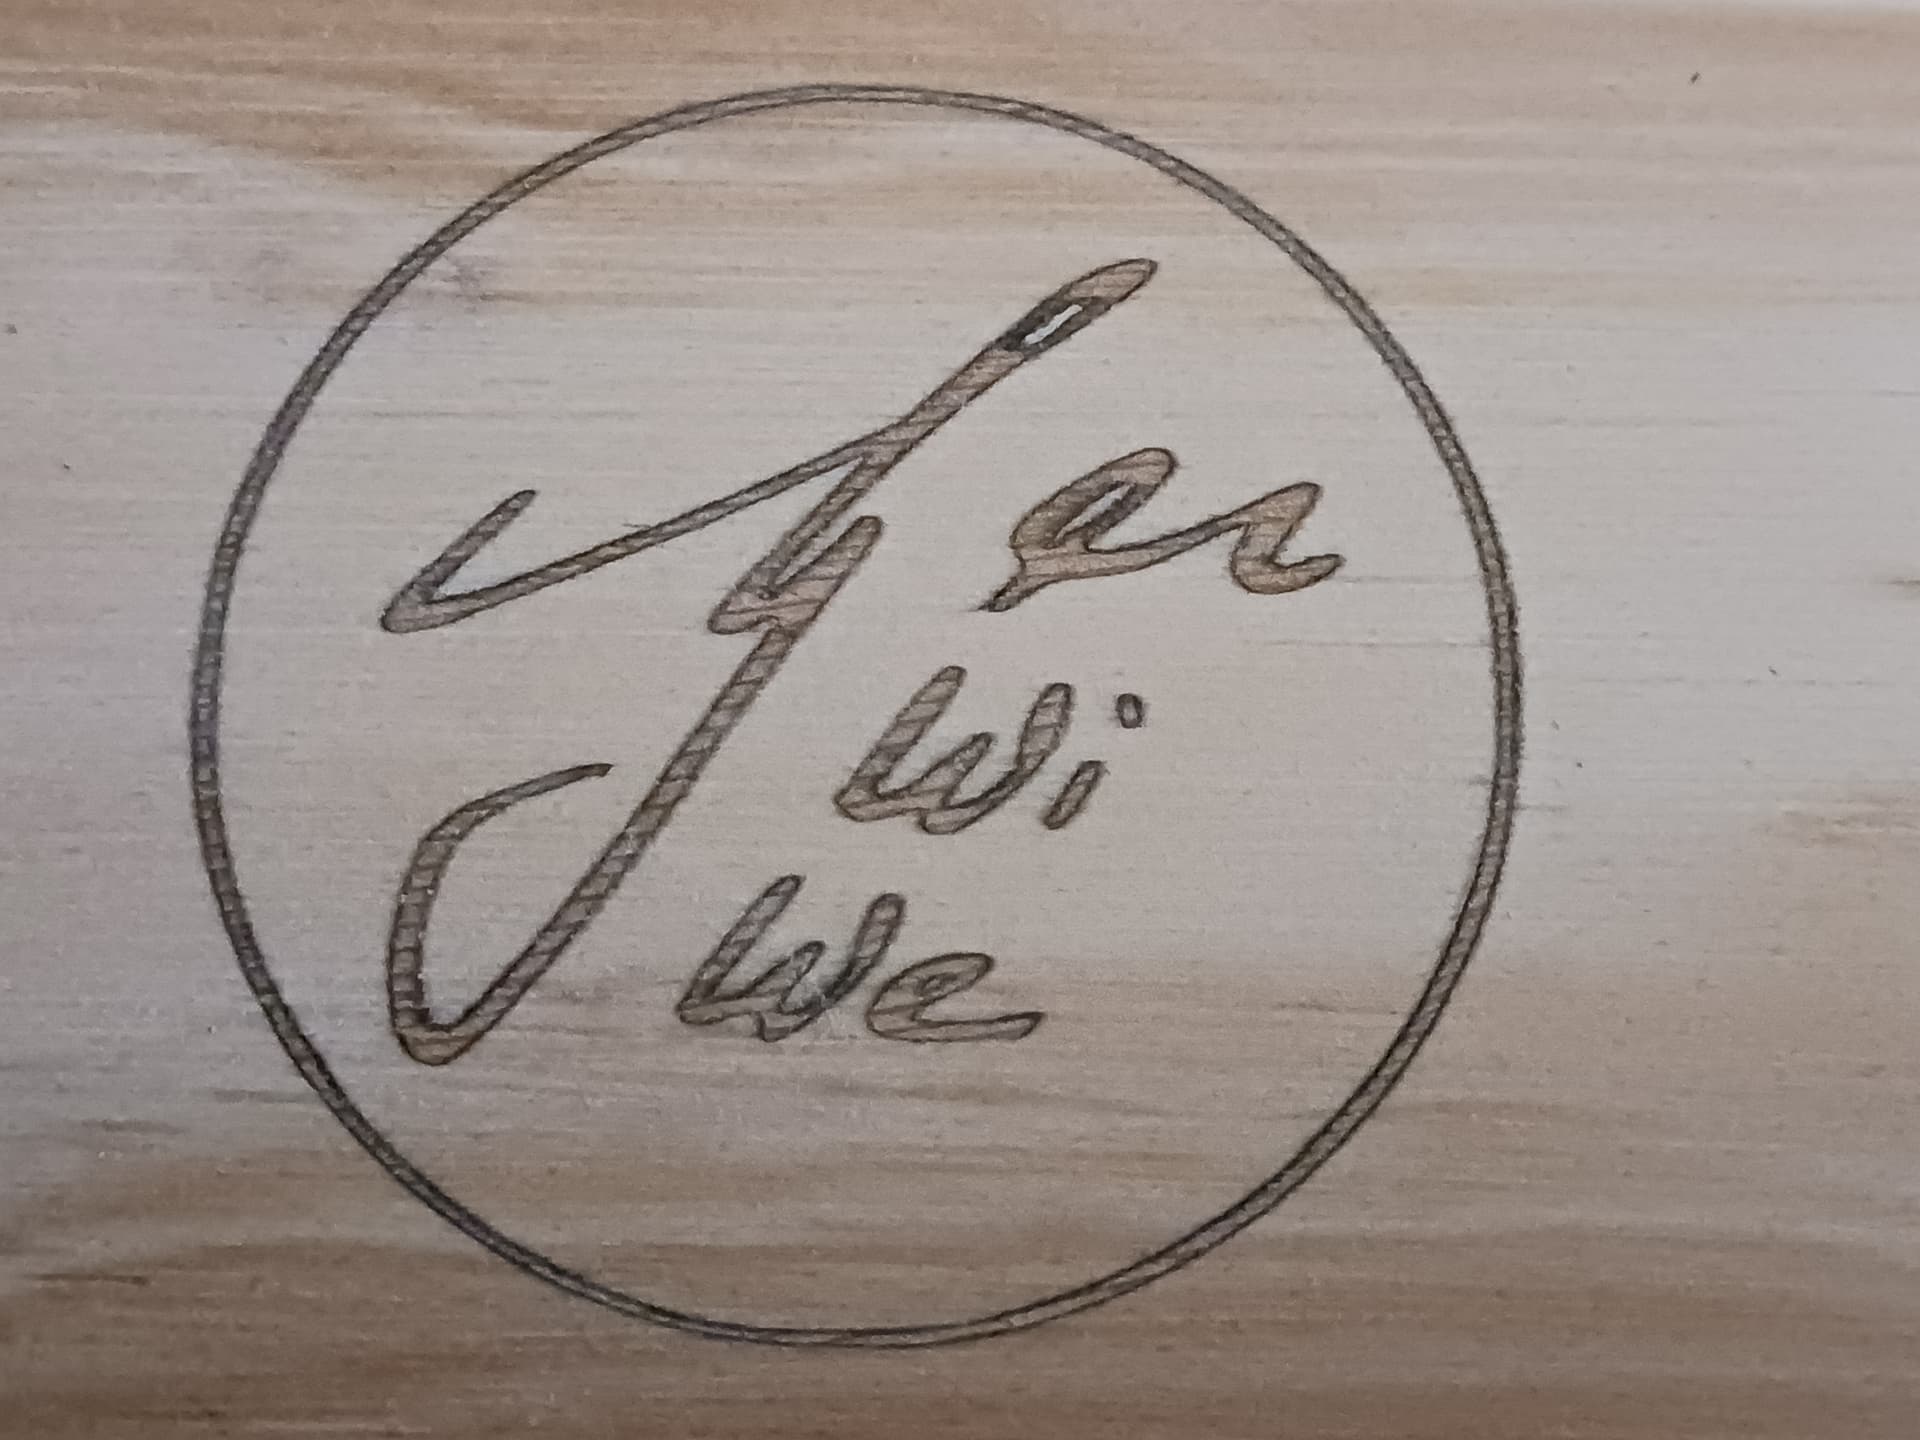
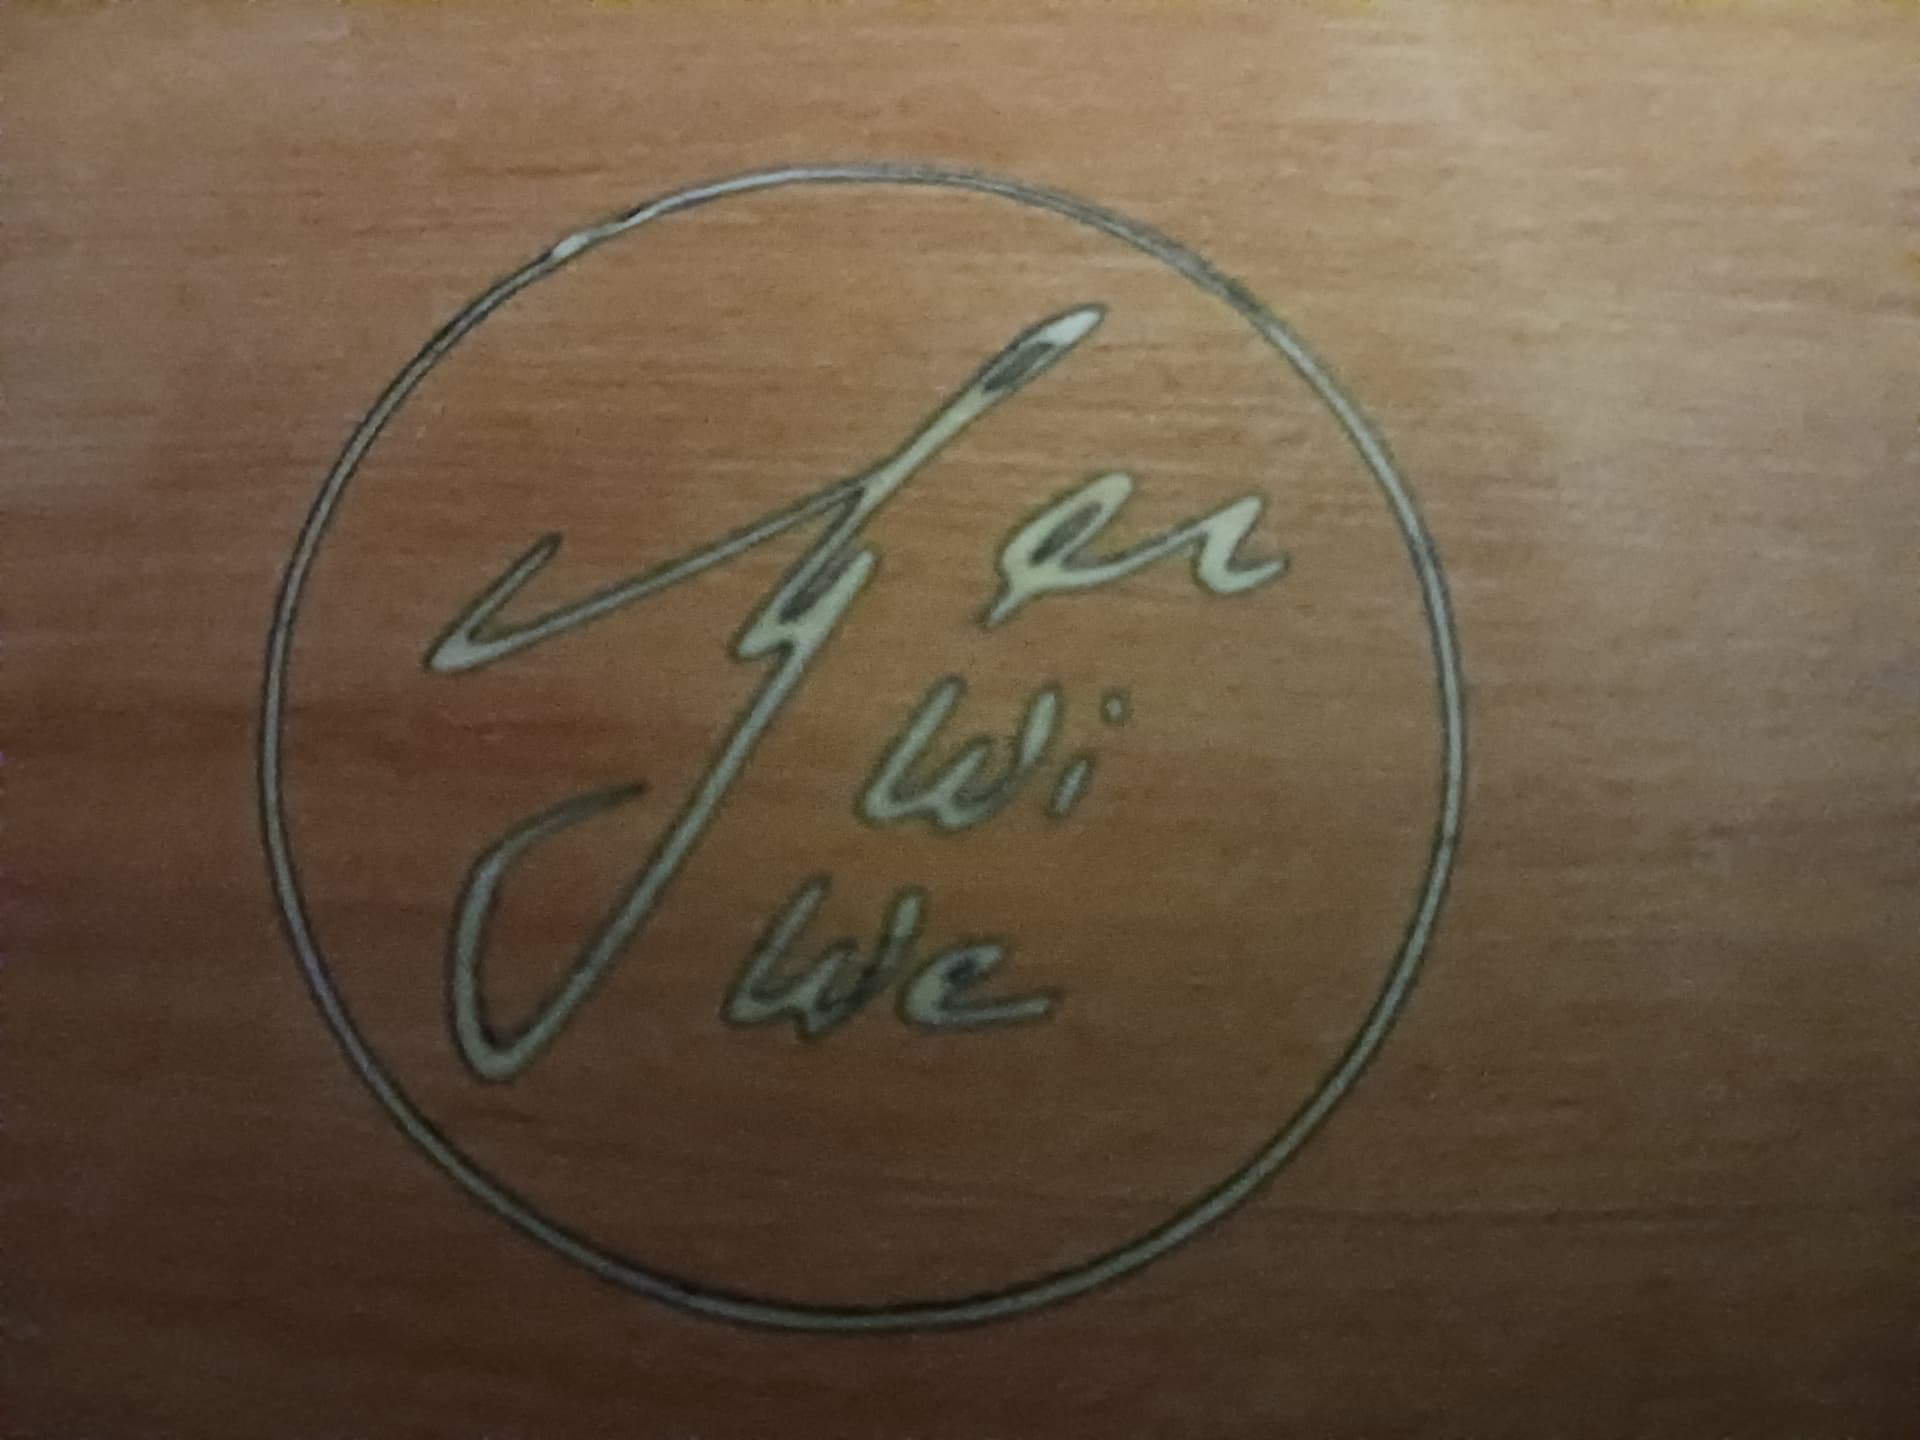
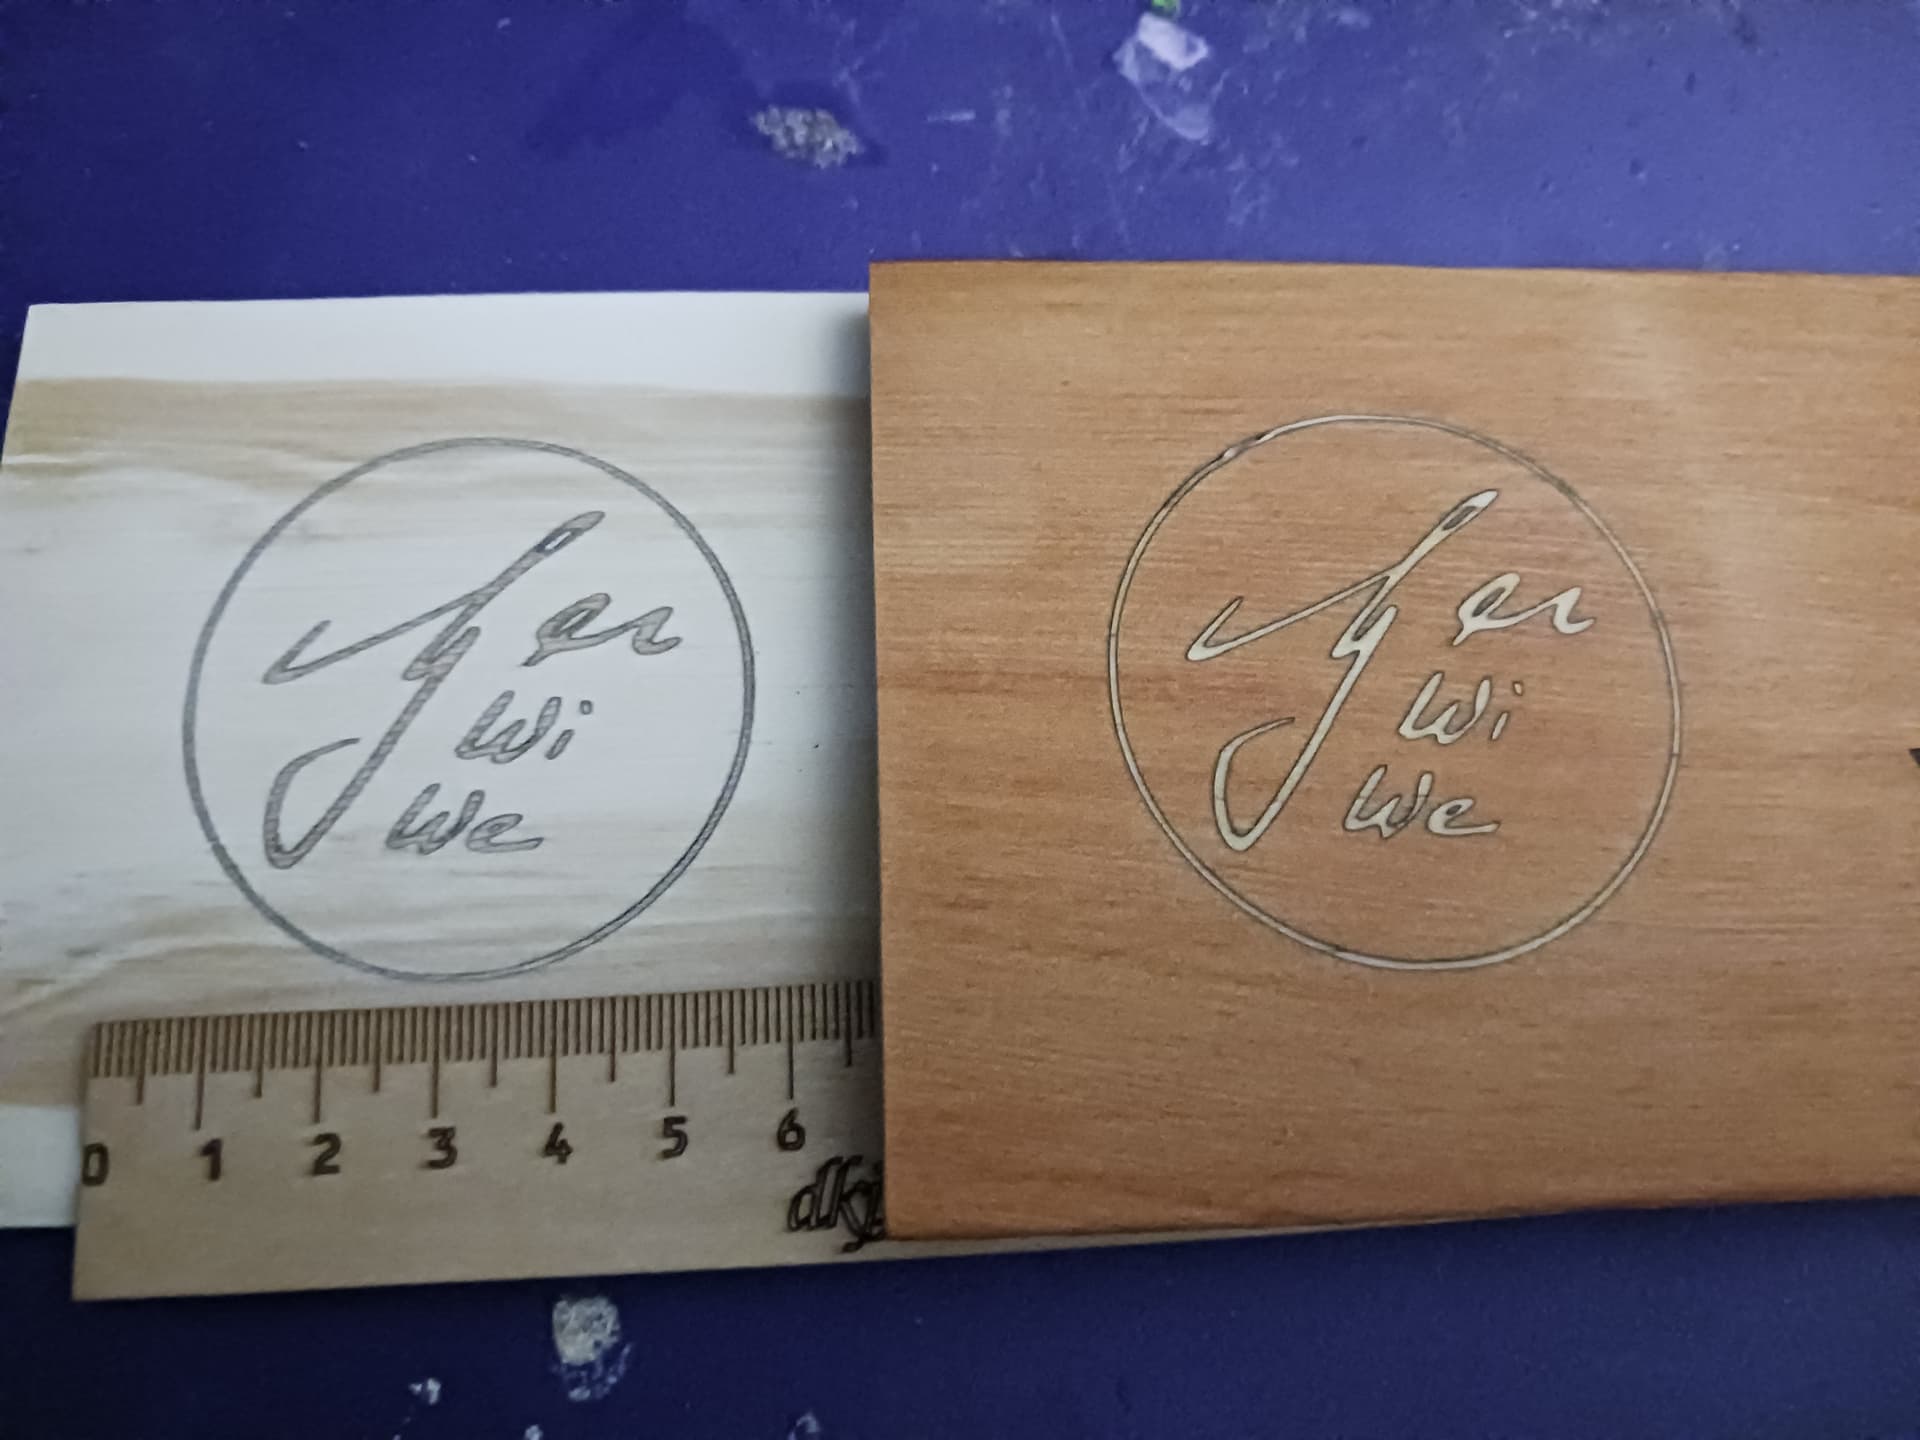
I’ve used Philipp’s logo only for test and demonstration purposes… to illustrate further the “easy inay” method described in this thread. Thank you, Philipp.
– David
10 Likes