Good idea there! If I did that the only other thing I’d have to do is delete the extra m4. I plan to redo the plumbing on my spindle to help control air bubbles better. That will be a good opportunity to add the needle cutter control wire while I’m at it.
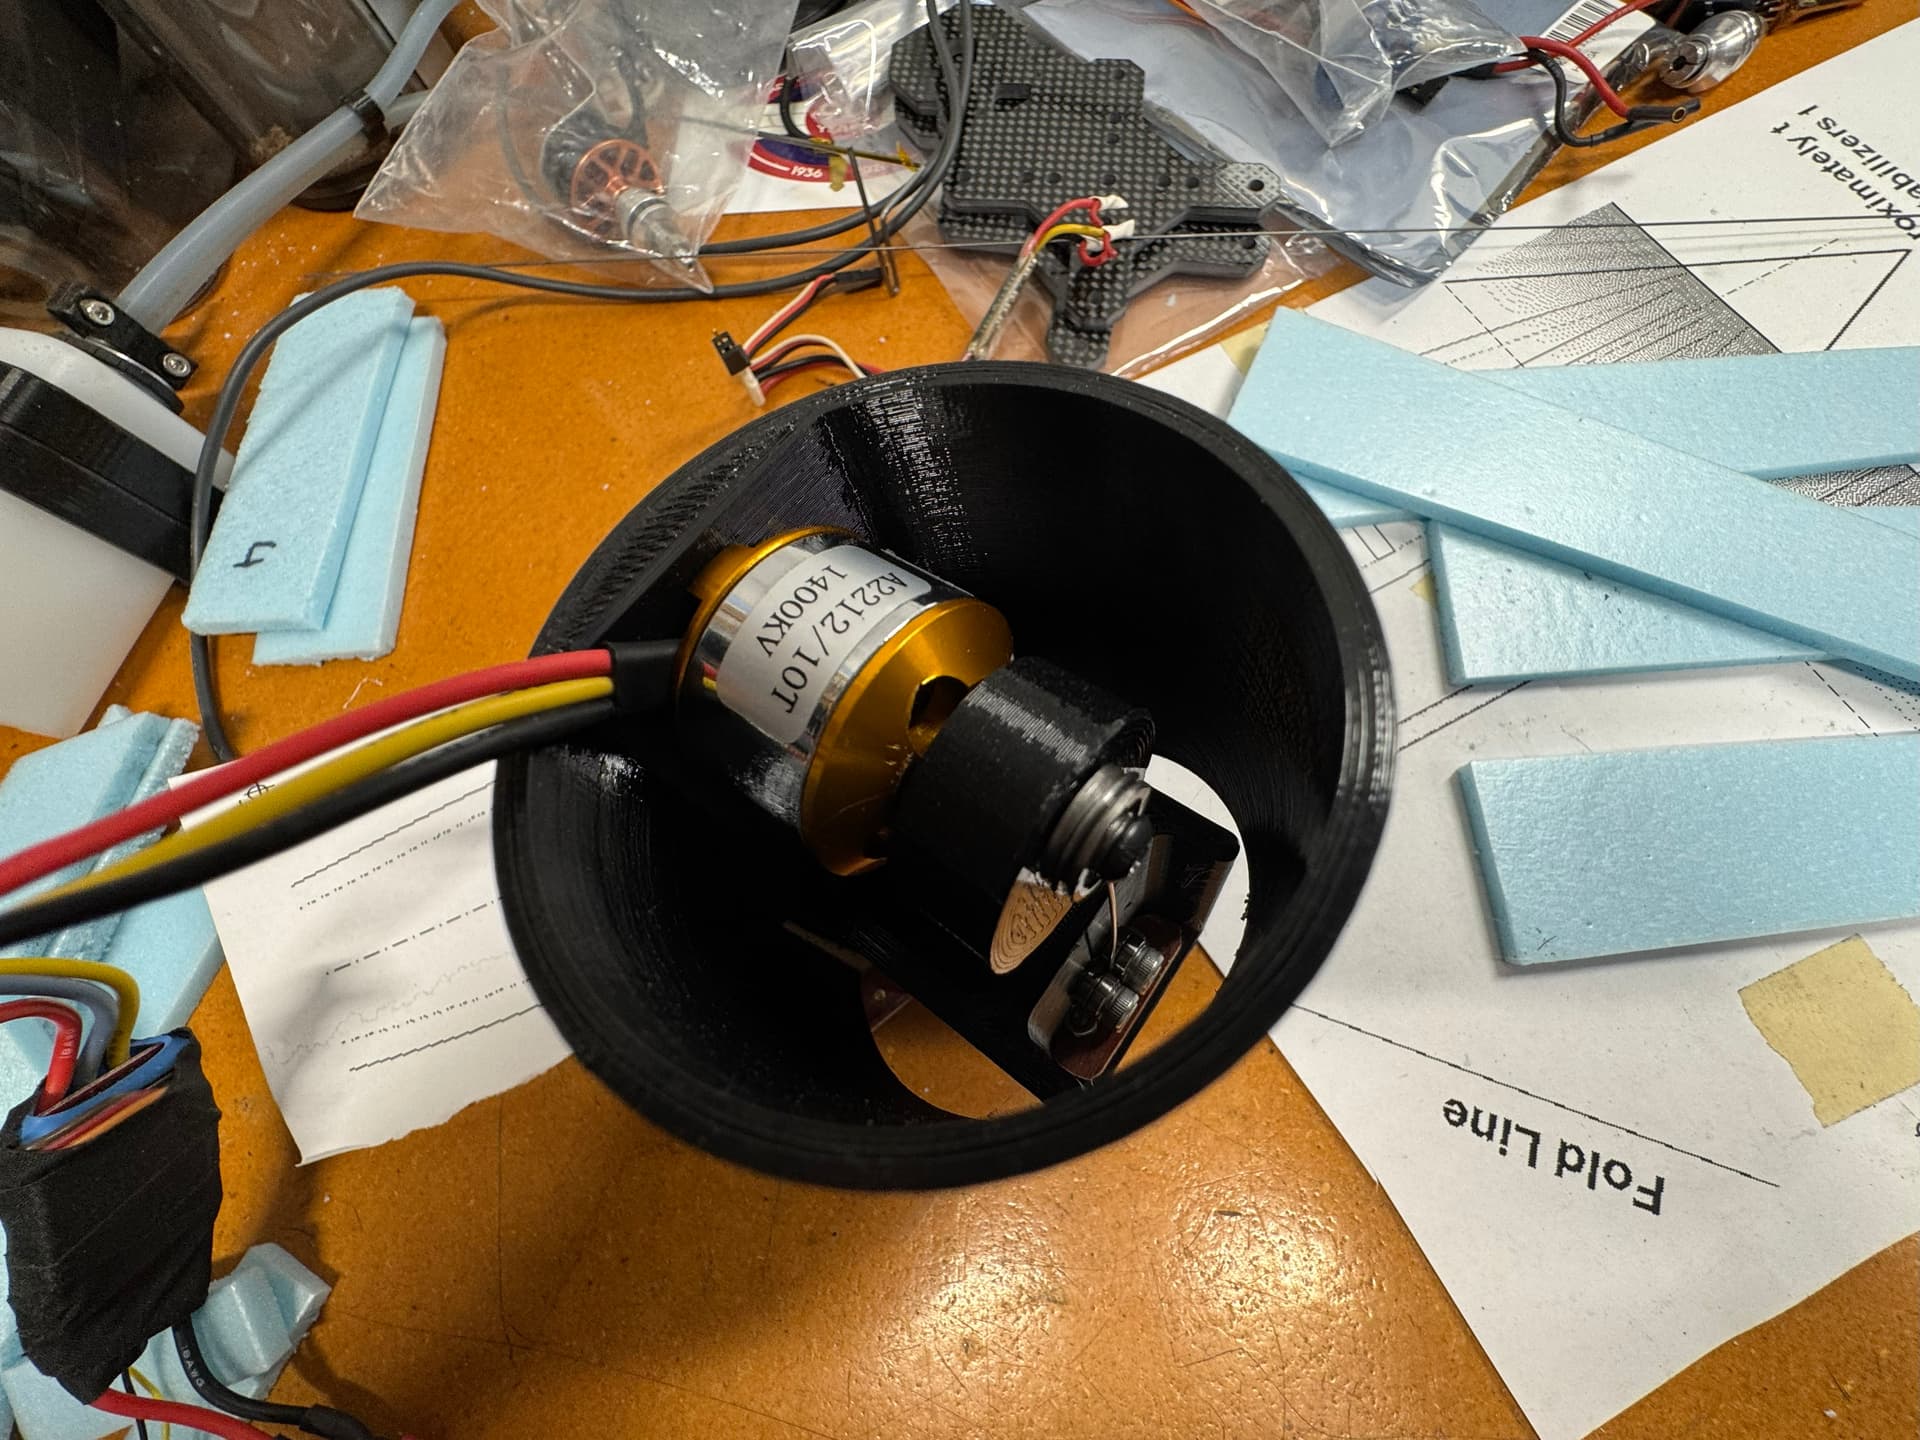
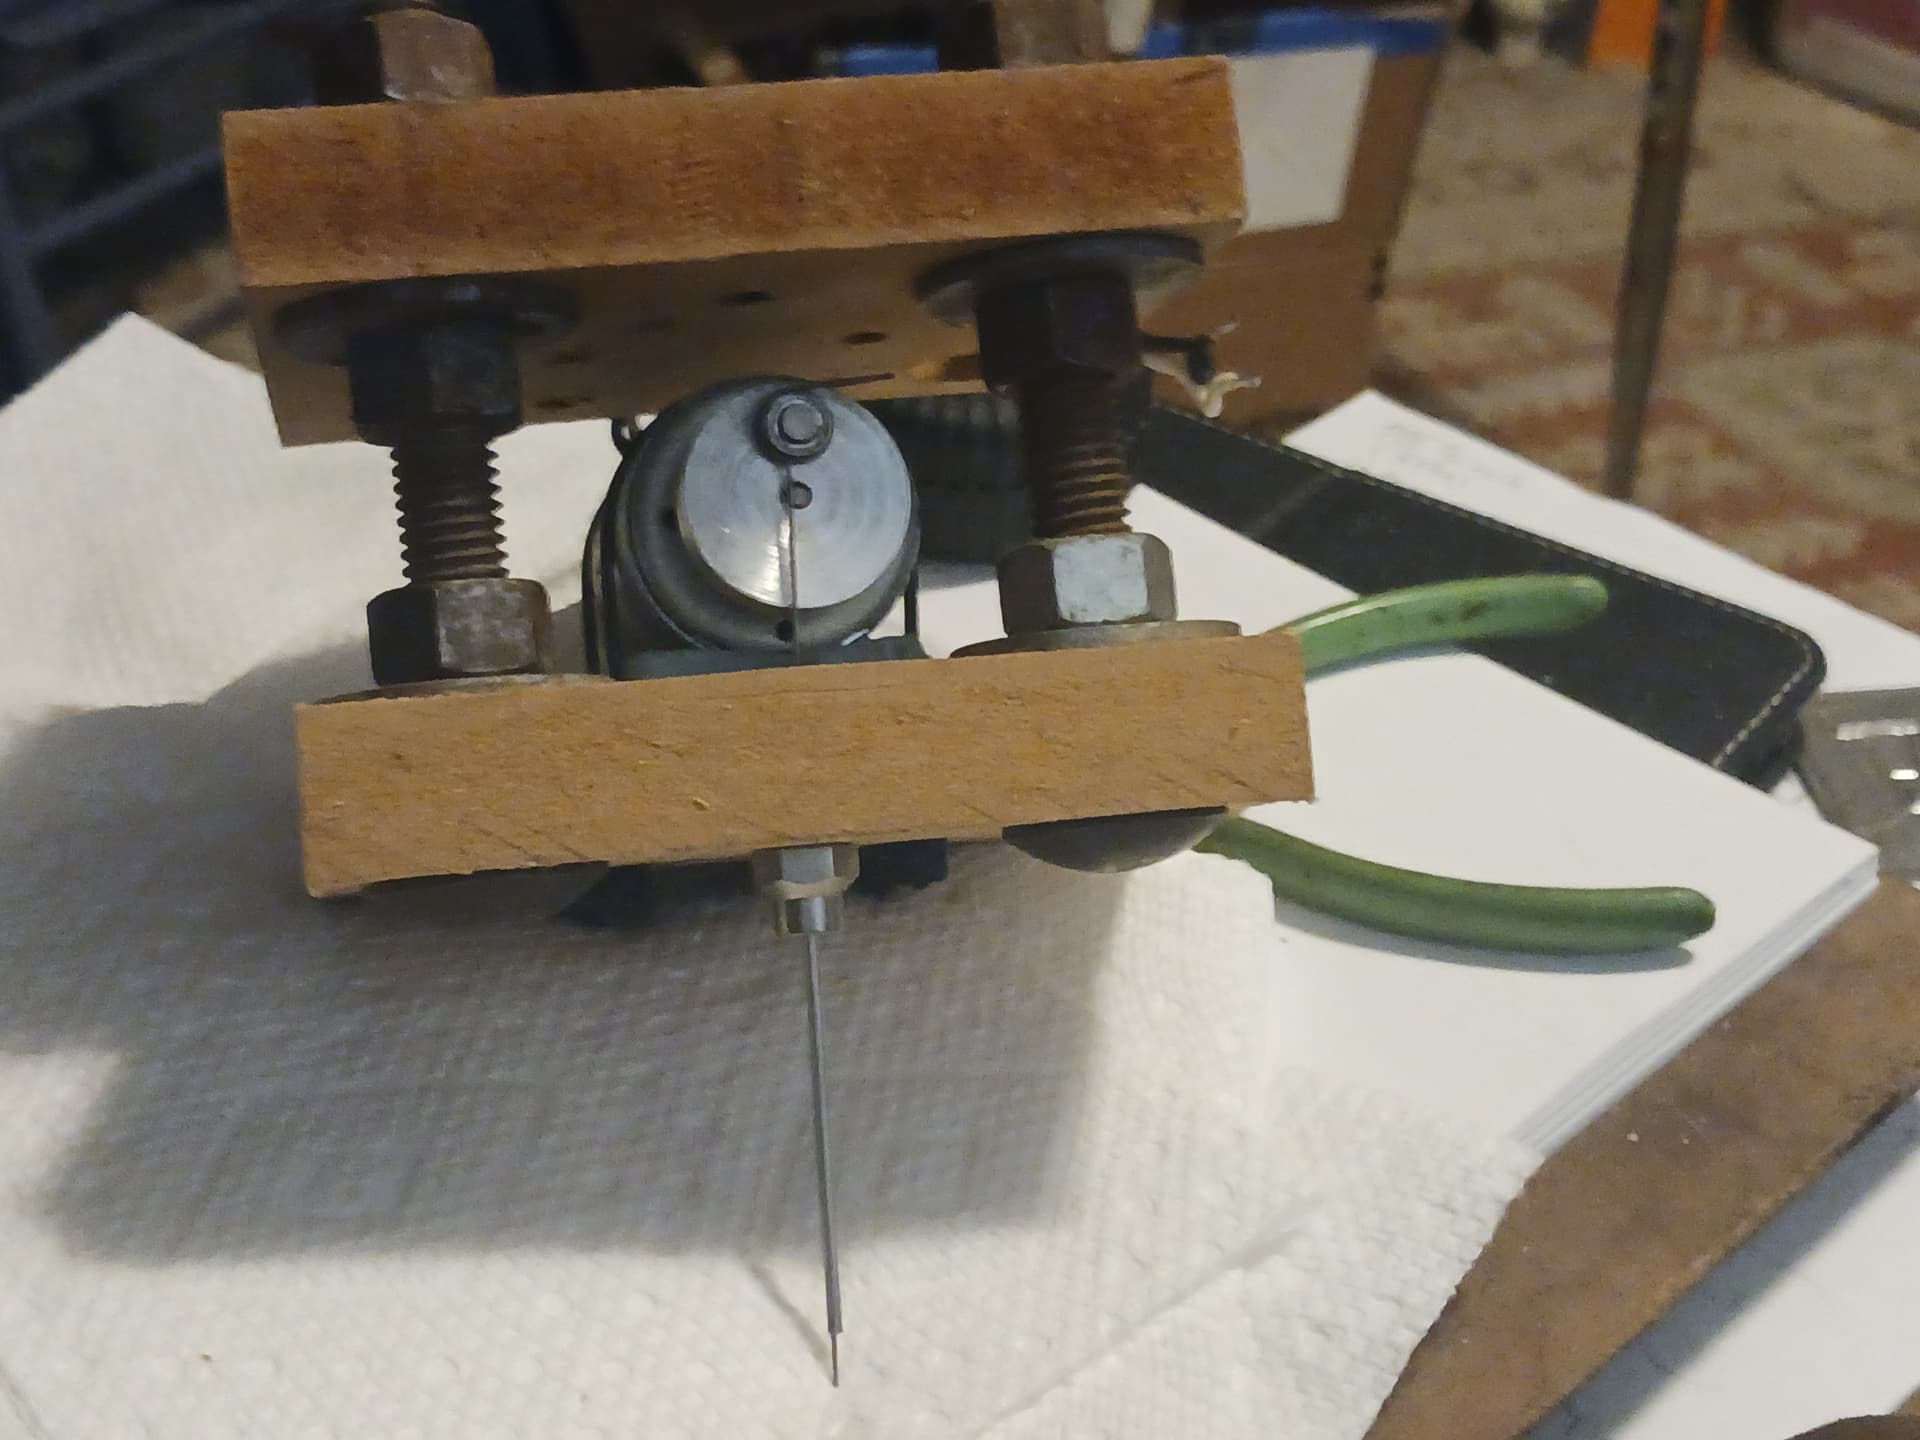
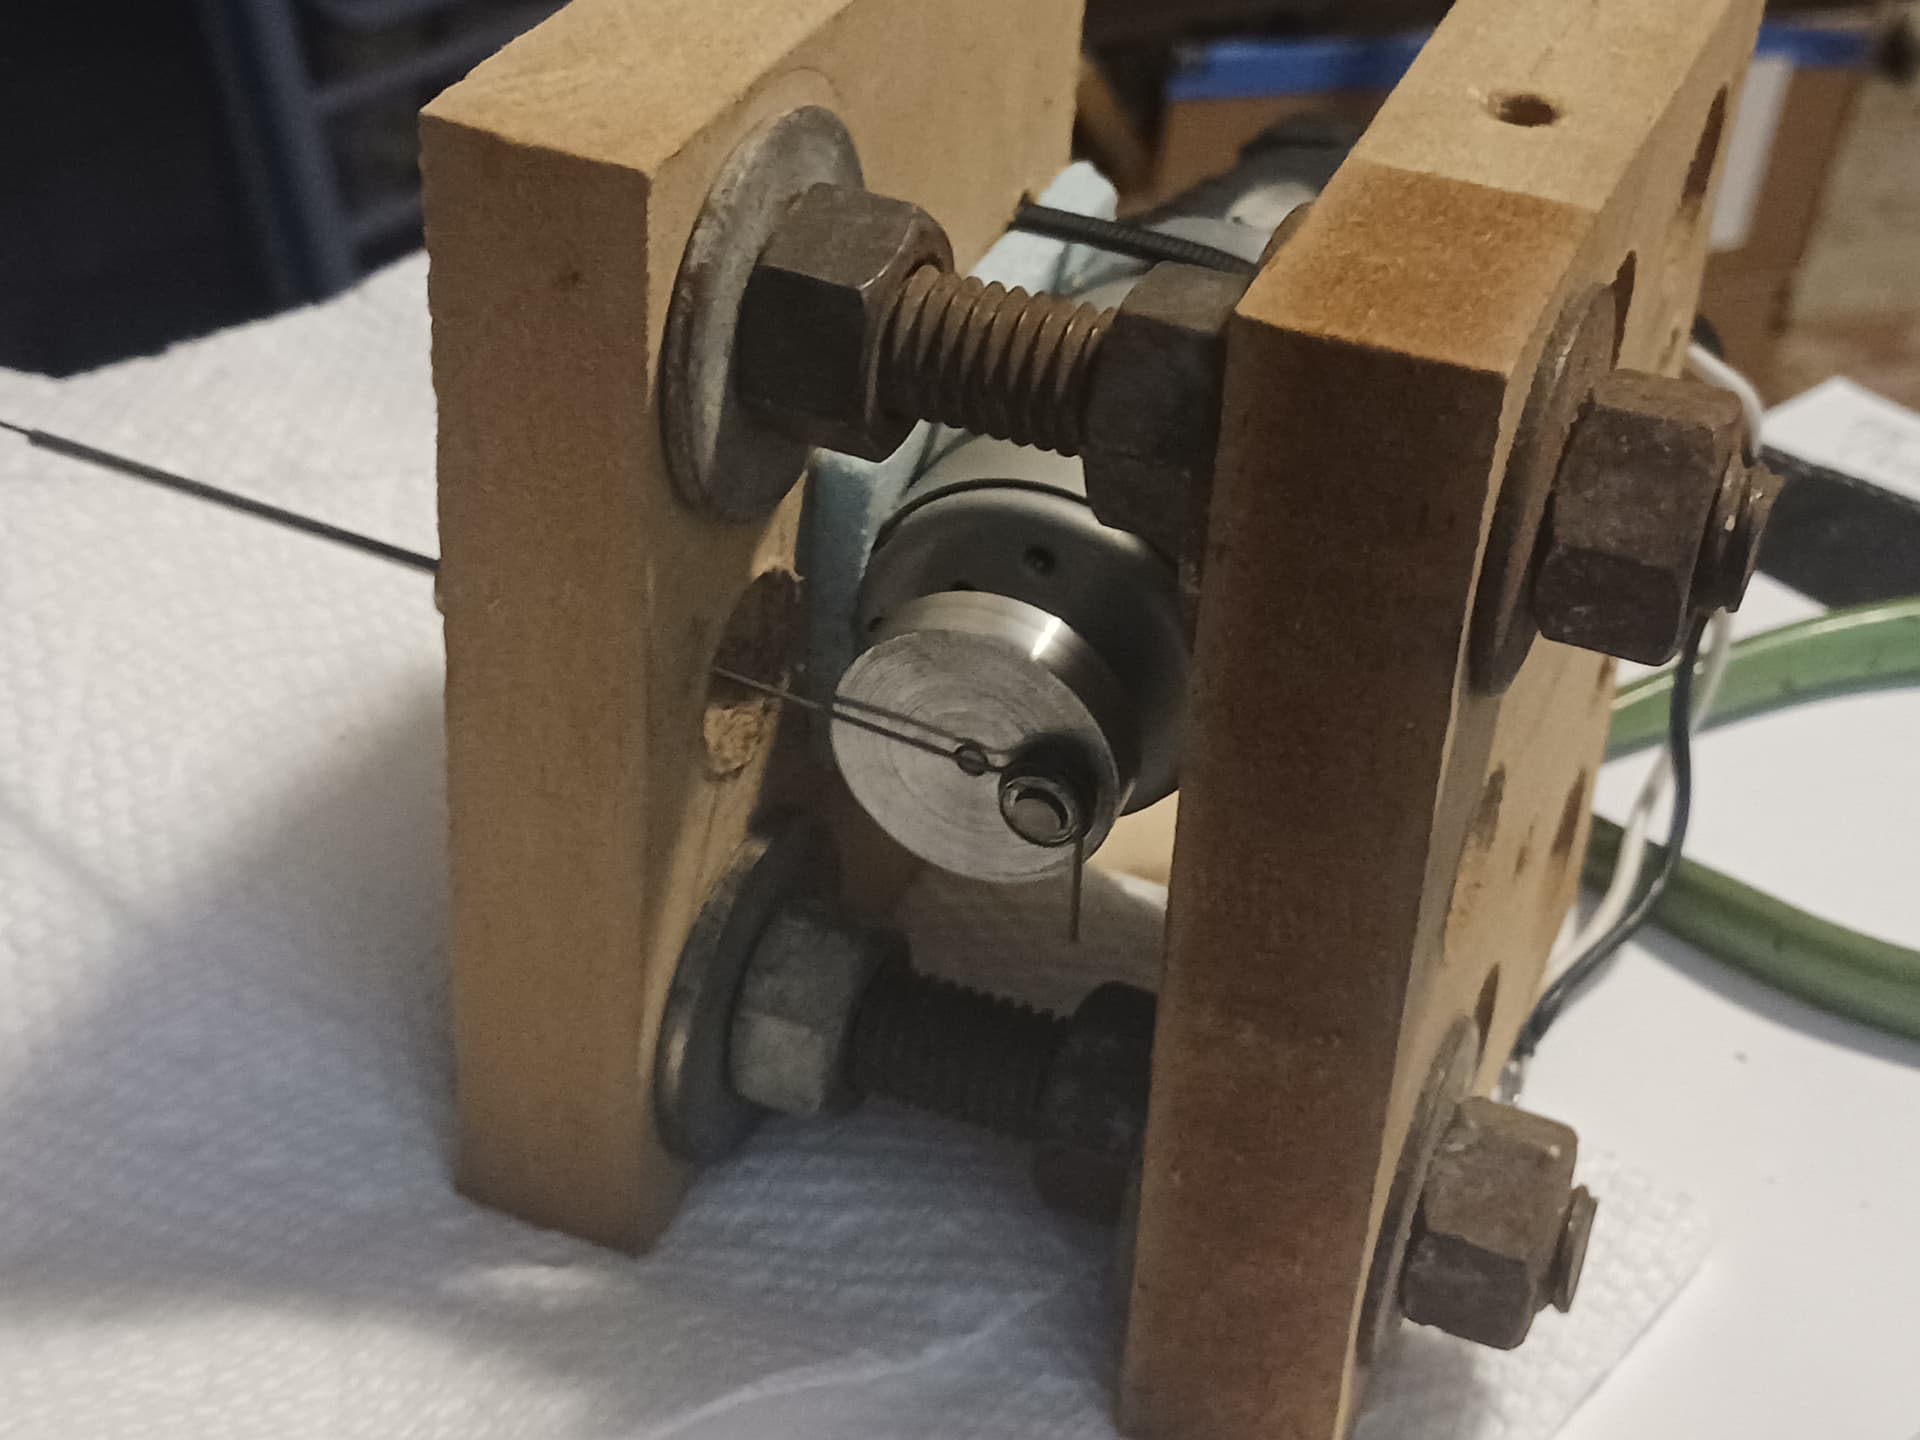
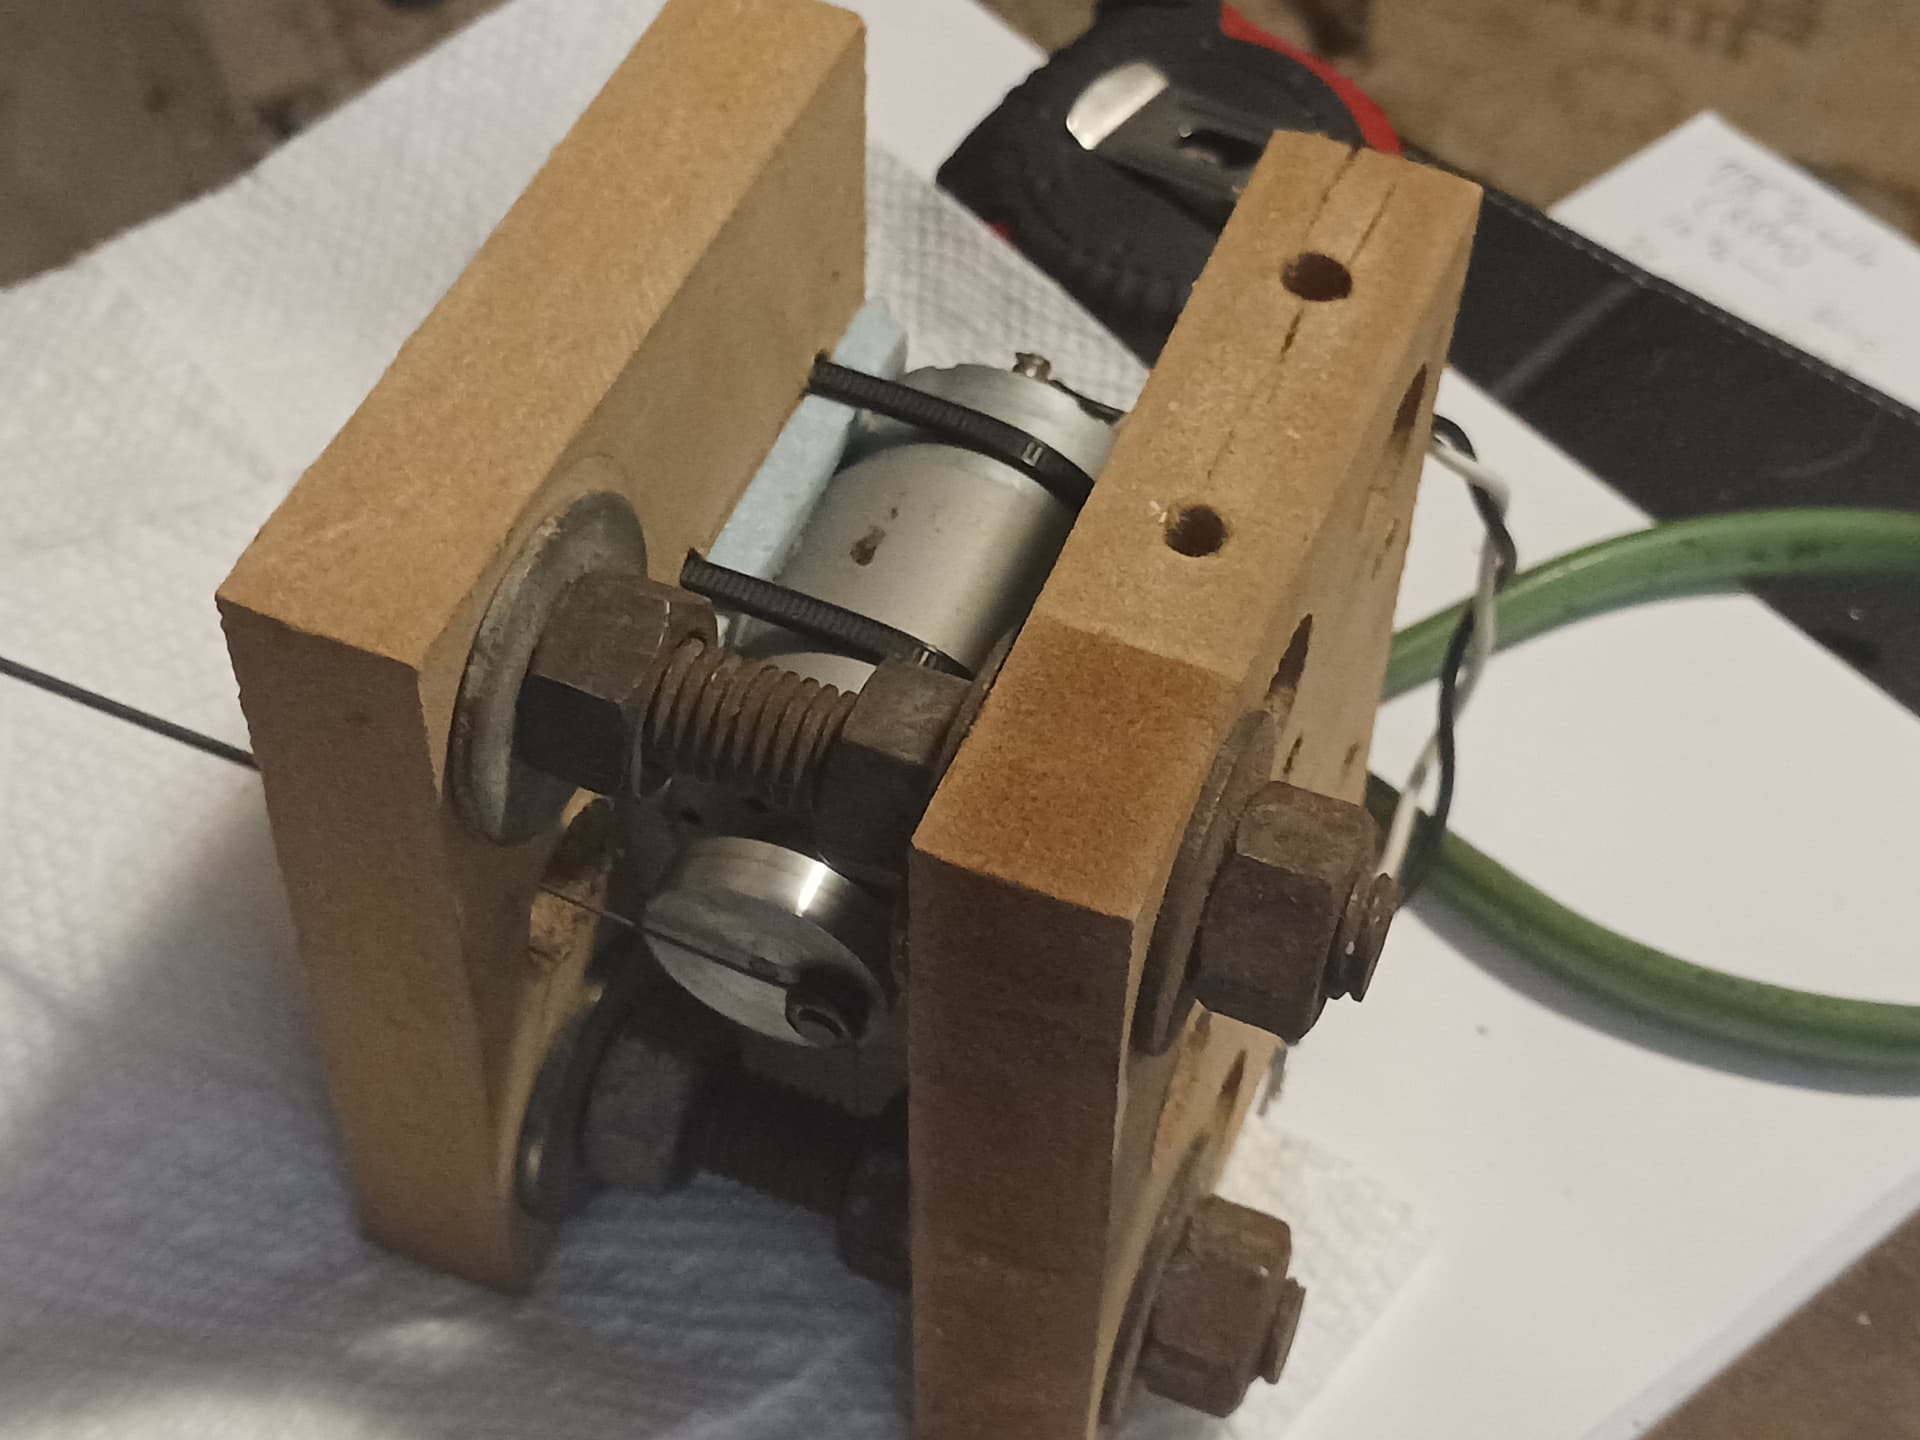
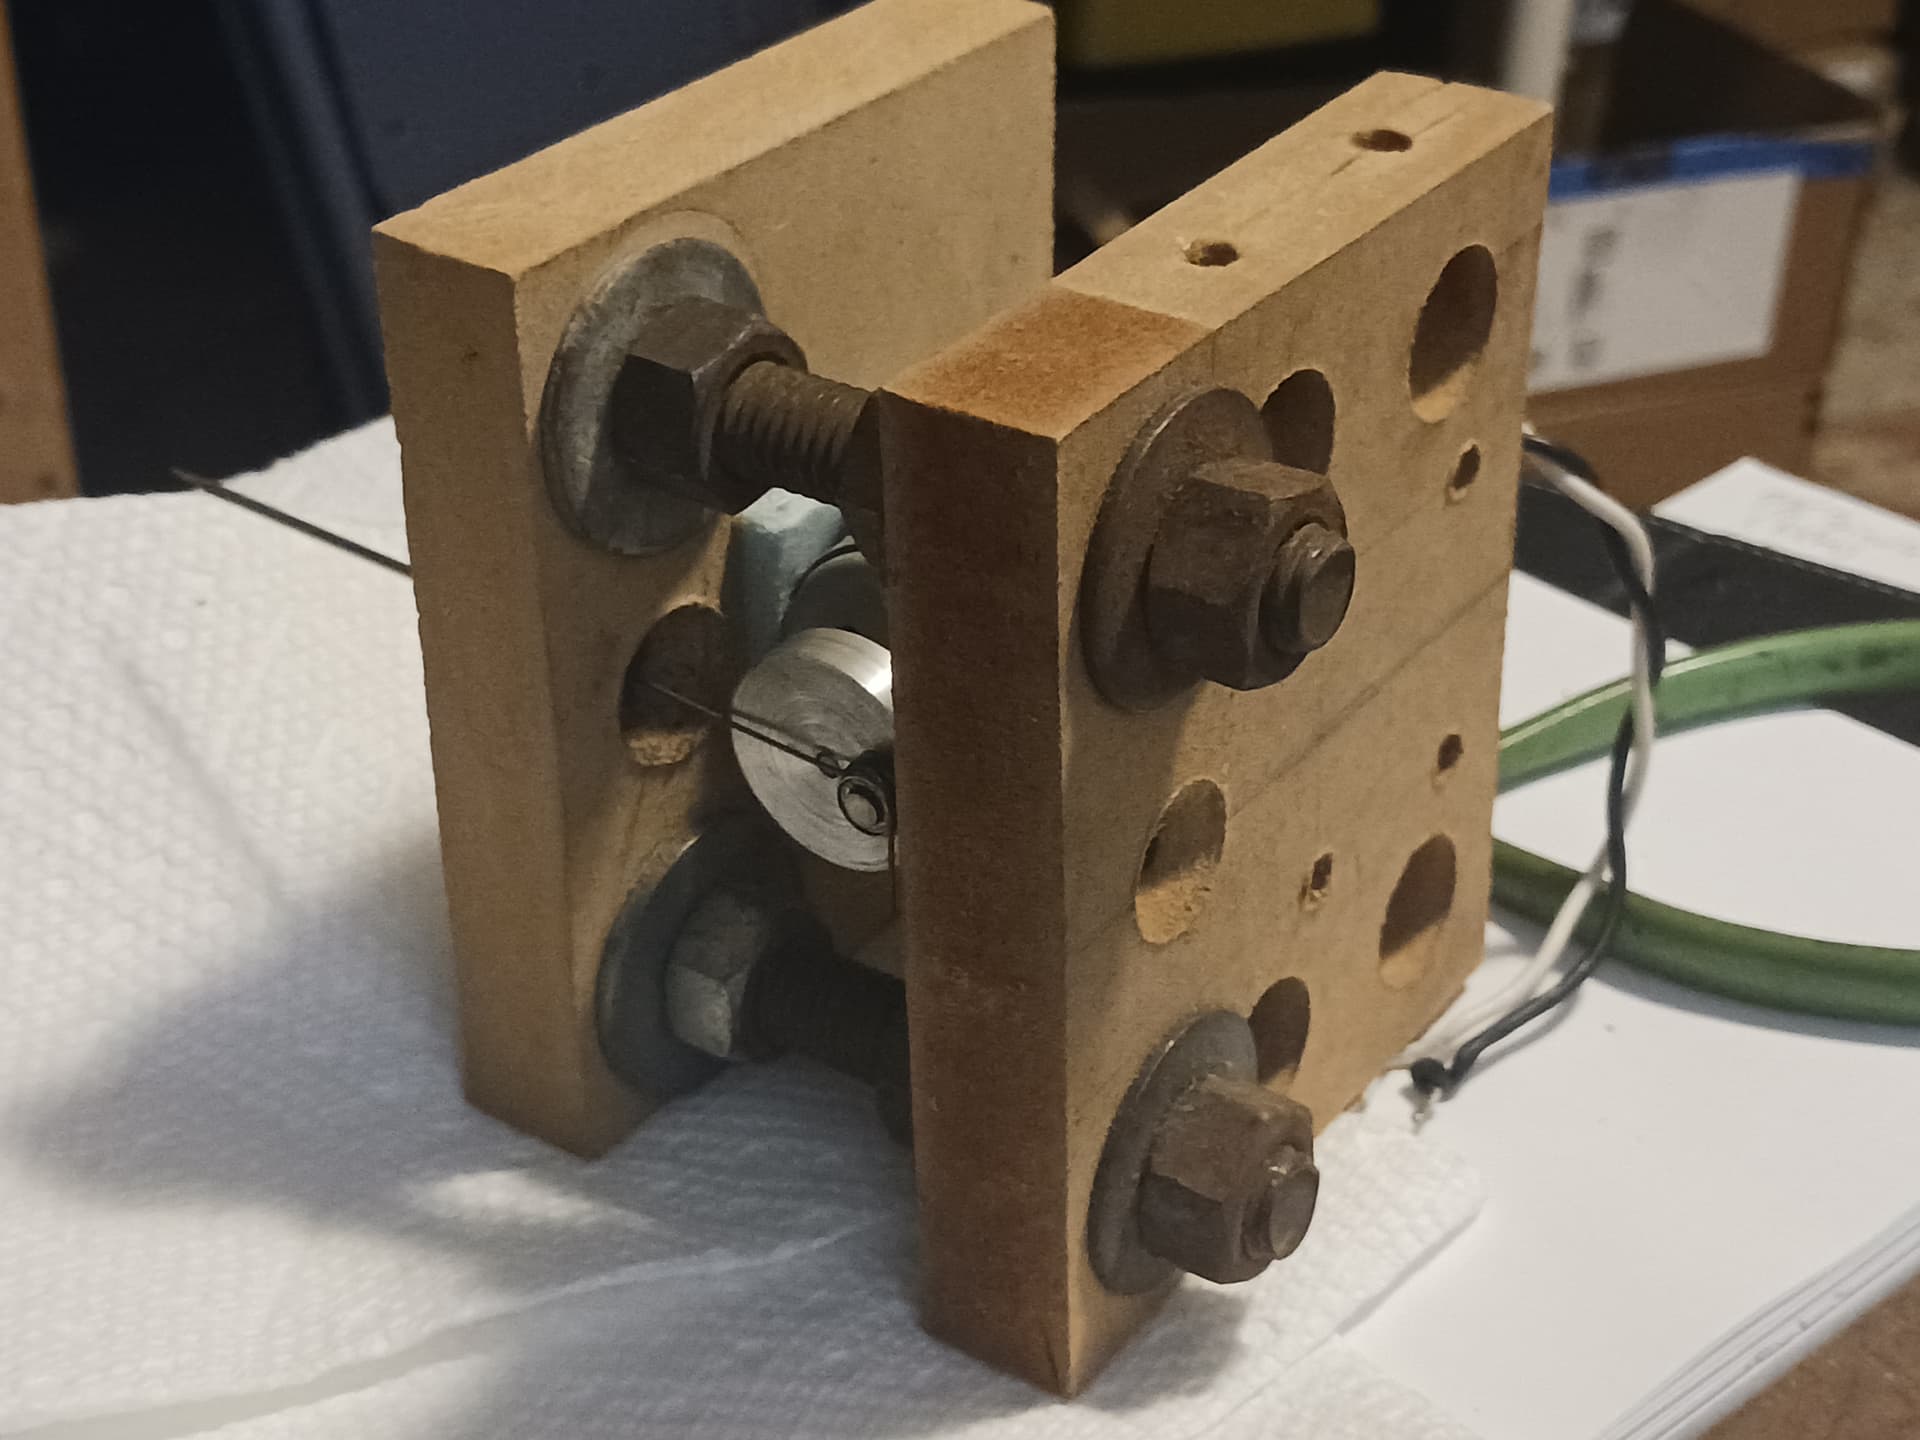
No problem, here are some photos of my current setup. I did grind the barb off the tip after cutting to length. I did this with a dremel sanding drum, rotating it so it sands from outside to in, to prevent any burrs. This worked well on that clothes pin setup so figured it was a good way to go still.
If you look on the sides of the first photo, you can see some really rough cut parts to the bottom left (top left are hand cuts), and smooth cut parts on the right. Those rough cuts are from a previous design, but my current design is still doing this. It’s just not as bad, and only happening in one direction.

I could try using a wetstone to get the tip even cleaner. I imagined though, the roughness of the face of the needle wasn’t so important. I figured as long as the tip is pretty square and burr free it should punch through clean. I haven’t tried sharpening to a point, assuming that could result in weird behavior, but I’m new to this.
2 Likes
Your needle cutter looks good and should perform well.
I’ve always preferred a symmetric conical point on the needle… like a sharpened wooden pencil. It should generate little or no debris and leave consistently clean cuts. A blunt point “punches” its way through the foam and blows out material on the backside, creating more debris and a less-clean cut.
Think “rapier” vs. “bullet”. A rapier blade pierces soft material like a needle and leaves a clean wound without actually removing any material. A bullet OTOH mangles and displaces material all the way through, creating both a nasty wound channel and exit wound.
This is super cool! If you have any issues with LightBurn, please shoot us an email to Support@lightburnsoftware.com or I’m sure our forum would love to see what you’ve done as well (not trying to poach from the V1e gang by any means.)
If you haven’t tried it yet, take a look at the Custom GCode device profile - it’s designed with this sort of application in mind: Device Settings: Custom GCode - LightBurn Documentation
1 Like
I like the bullet analogy… makes a lot of sense to me. I sharpened and polished my needle and it defnitely made cuts cleaner in all directions. While I was at it I decided to actually set RPM using an oscope. Looks like my RPM was a little low around 6000 and I was using a feedrate of 10mm/sec. That fits the 10:1 rpm to feedrate some folks mention, but I wanted to try 8000RPM since that a lot of you more experienced needlers seem to like. After sharpening the tip and correcting the RPM, test cuts looked absolutely beautiful. It looks like I finally have the silver bullet for cutting foam kits!
Thanks again for all your help here!
3 Likes
I’d try the custom gcode device thing, but my lightburn license expired at version 1.1.03, which unfortunately does not have a ‘Custom Gcode’ tab available. Really the only issue I’m having with 1.1.03 is it adds M4 in the gcode header before M3 when I use ‘constant power mode’.
1 Like
I found a way to workaround the M4… I just added a fake direction_pin to my needle cutter config file for fluidnc, lol. I happened to have a spare GPIO pin to do this with though. Not sure if fluidnc would allow this hack if I didn’t. Now gcode output by lightburn works great without any edits.
1 Like
The following video demonstrates how I always set up and started a job… taking far longer here to demo than it will actually take once you know all your speed settings; i.e. it should all take less than a minute.
In the first part of the video I’m setting up my DTFB “vacuum stack” using a shop-vac powered by a router speed controller… minimum speed/vac worked well. At ~1:10 minute mark, I set in ~8000 rpm no-load speed using a no-contact tachometer… and noted/marked the setting on the servo tester. I then lowered the needle cutter to just barely “tickle” the surface of the material (distinctly heard) and set in the job’s Z=0. Starting the job and you hear the cutter rpm drop by a few hundred rpm as the needle plunges into the foam and starts cutting. As long as I use a feedrate of 600-700 mm/minute and start with 8000 no-load rpm… that insures I stay in the 10 - 12 perforations/millimeter range that gives clean cuts in DTFB with the paper on. Un-papered fanfold insulation foam should cut even easier.

1 Like
@truglodite , why did you make one of these if you already had a laser? Is it mainly related to being able to cut thicker material without tapered cuts? Or was there another reason?
Thanks for sharing the vacuum hold down idea. Even my 24”x24” primo gets a lot of lift in the middle of a sheet, especially with FFF. I got away with it having a 12mm stroke and cutting 5mm foam, but it’s far from ideal. I already have a vacuum table with alum grid for my laser… I’ll cut some holes in my spoil foam to adapt that laser table for use as a hold down.
I did try using my old school GloBee brand photocell tach, but there wasn’t enough light/contrast for it to work. This is how I did no load rpm with my smaller scope for convenience… my bigger scope would have been more precise but I think it’s accurate enough (~550uSec period w/ 14 poles):
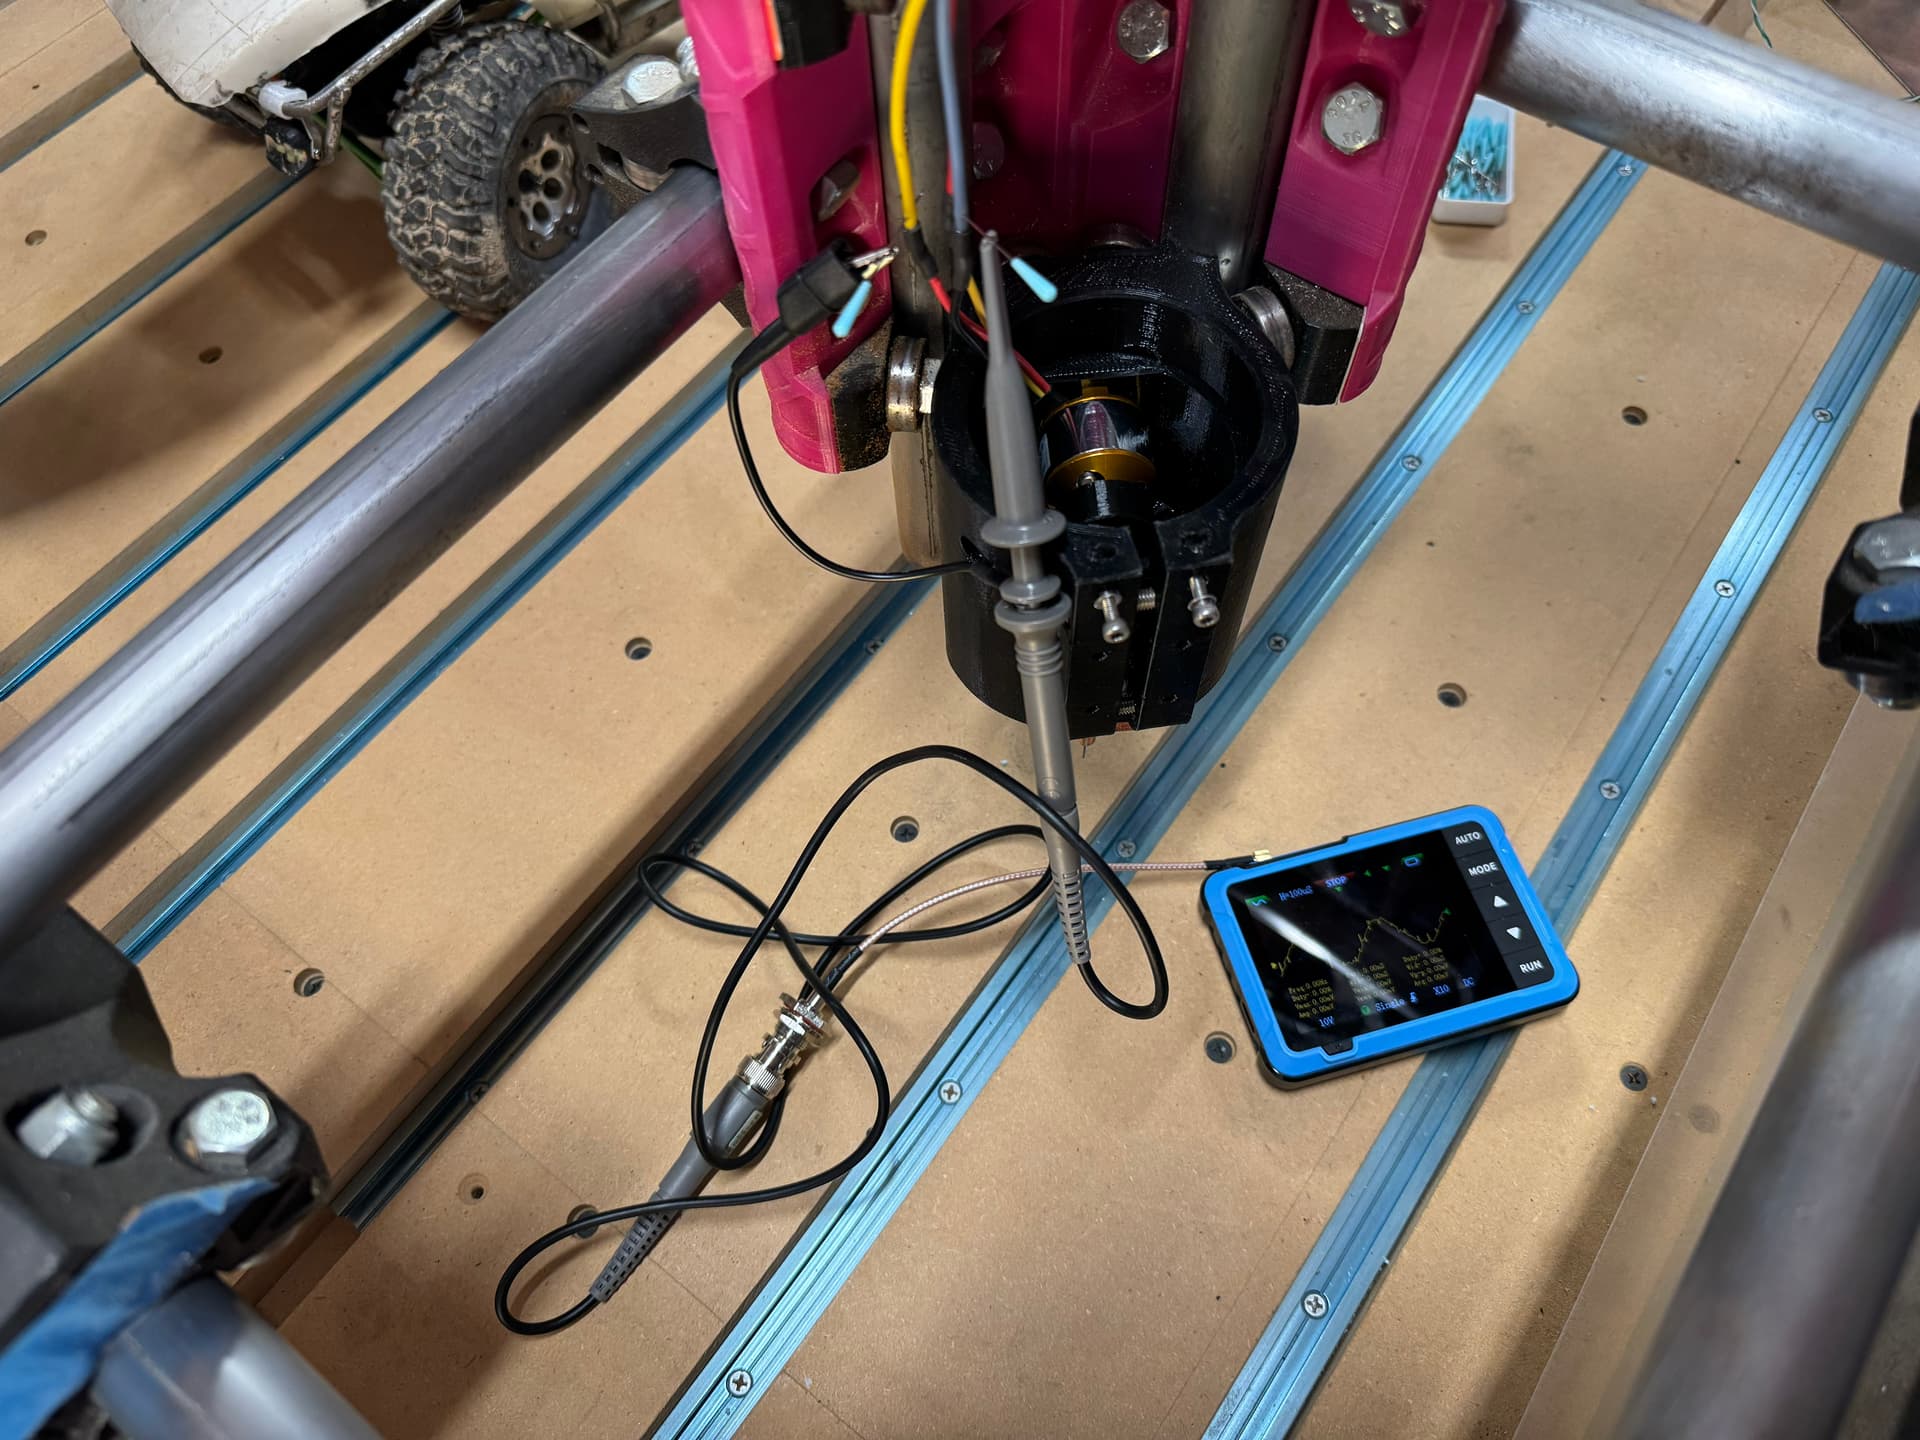
For reference, my 1400kV at 12V needed 85% of WOT.
It’s great to know I shouldn’t have issues cutting that gnarly paper backed foam. I’m a bit of a ‘weight weenie’ when it comes to my planes though. So I’ll try and peel that paper off before cutting.
1 Like
My 40W diode laser made garbage cuts in 5mm foam. I heard lasers work somewhat OK on darker foams, but all the stuff I build planes with is light colored and melts way too much. The cuts don’t end up tapered so much as they end up melted in the middle (sort of a “C shaped” cross section cut).
2 Likes
Diode lasers don’t cut well in light-colored or white foams such as DTFB or fanfold bluecore foam. It’s a wave-length thing.
The FliteTest folks use a CO2 laser to cut all their kits… and make all the planes for their videos. CO2 lasers can cut transparent acrylic and light-colored foams easily. The only “issue” with CO2 laser cuts in DTFB is the slight undercutting/melting of the foam between the paper layers… but with the hot-glue construction methods used for assembly that poses no real problem.
1 Like
Definitely.
I used a diode laser for mine, but I have black foamboard where the paper and foam alike are black. The diode laser works very well for this, but of course, you end up with a black airplane. Maybe not a problem, though the white is nice because you can “paint” it with colour sharpies. Or at least use less paint with an airbrush. I opted to go with fewer colour options for the convenience of laser cutting.
I did make a needle cutter, but mine isn’t very good…
2 Likes
Correct on the wavelength, but a CO2 laser is something I just don’t have the room for in my garage… for now. I wonder if a YAG laser would make better cuts on DTFB?
[edit: Hotglue gets heavy really quick. I understand using that in the context of FlightTest, but it’s not something I’d do myself. Planes always work better when built lighter (without compromizing required strength of course). Also if it’s built light, you can always make it heavy again by adding more functional weight, like a larger lipo or motor. Lightweight airframes are a win-win in general.]
1 Like
I have painted a blucor plane in black before. Having black foam for that might have been lighter, and certainly would have been less work. What was it that made your needle cutter not so good?
I agree. Epoxy takes time which adds to the build time, but youbcan use less of it and it js more rigid, which is also a llus when building. Carpenters glue is lighter yet, but much slower. I have used that in wing spars where I could leave it to dry overnight. Definitely agree that lighter is better, all else equal.
All my own fault.
Instead of a brushless motor/ESC i used a simple DC motor with a PWM modulator. This itself actually seemed OK. A bit less power, but a simple circuit and decent control. The problem was a plastic gear as flywheel/crankshaft. The DC motor had a 2mm shaft. Perhaps with a larger shaft I would have had better luck with a crank to drive the needle.
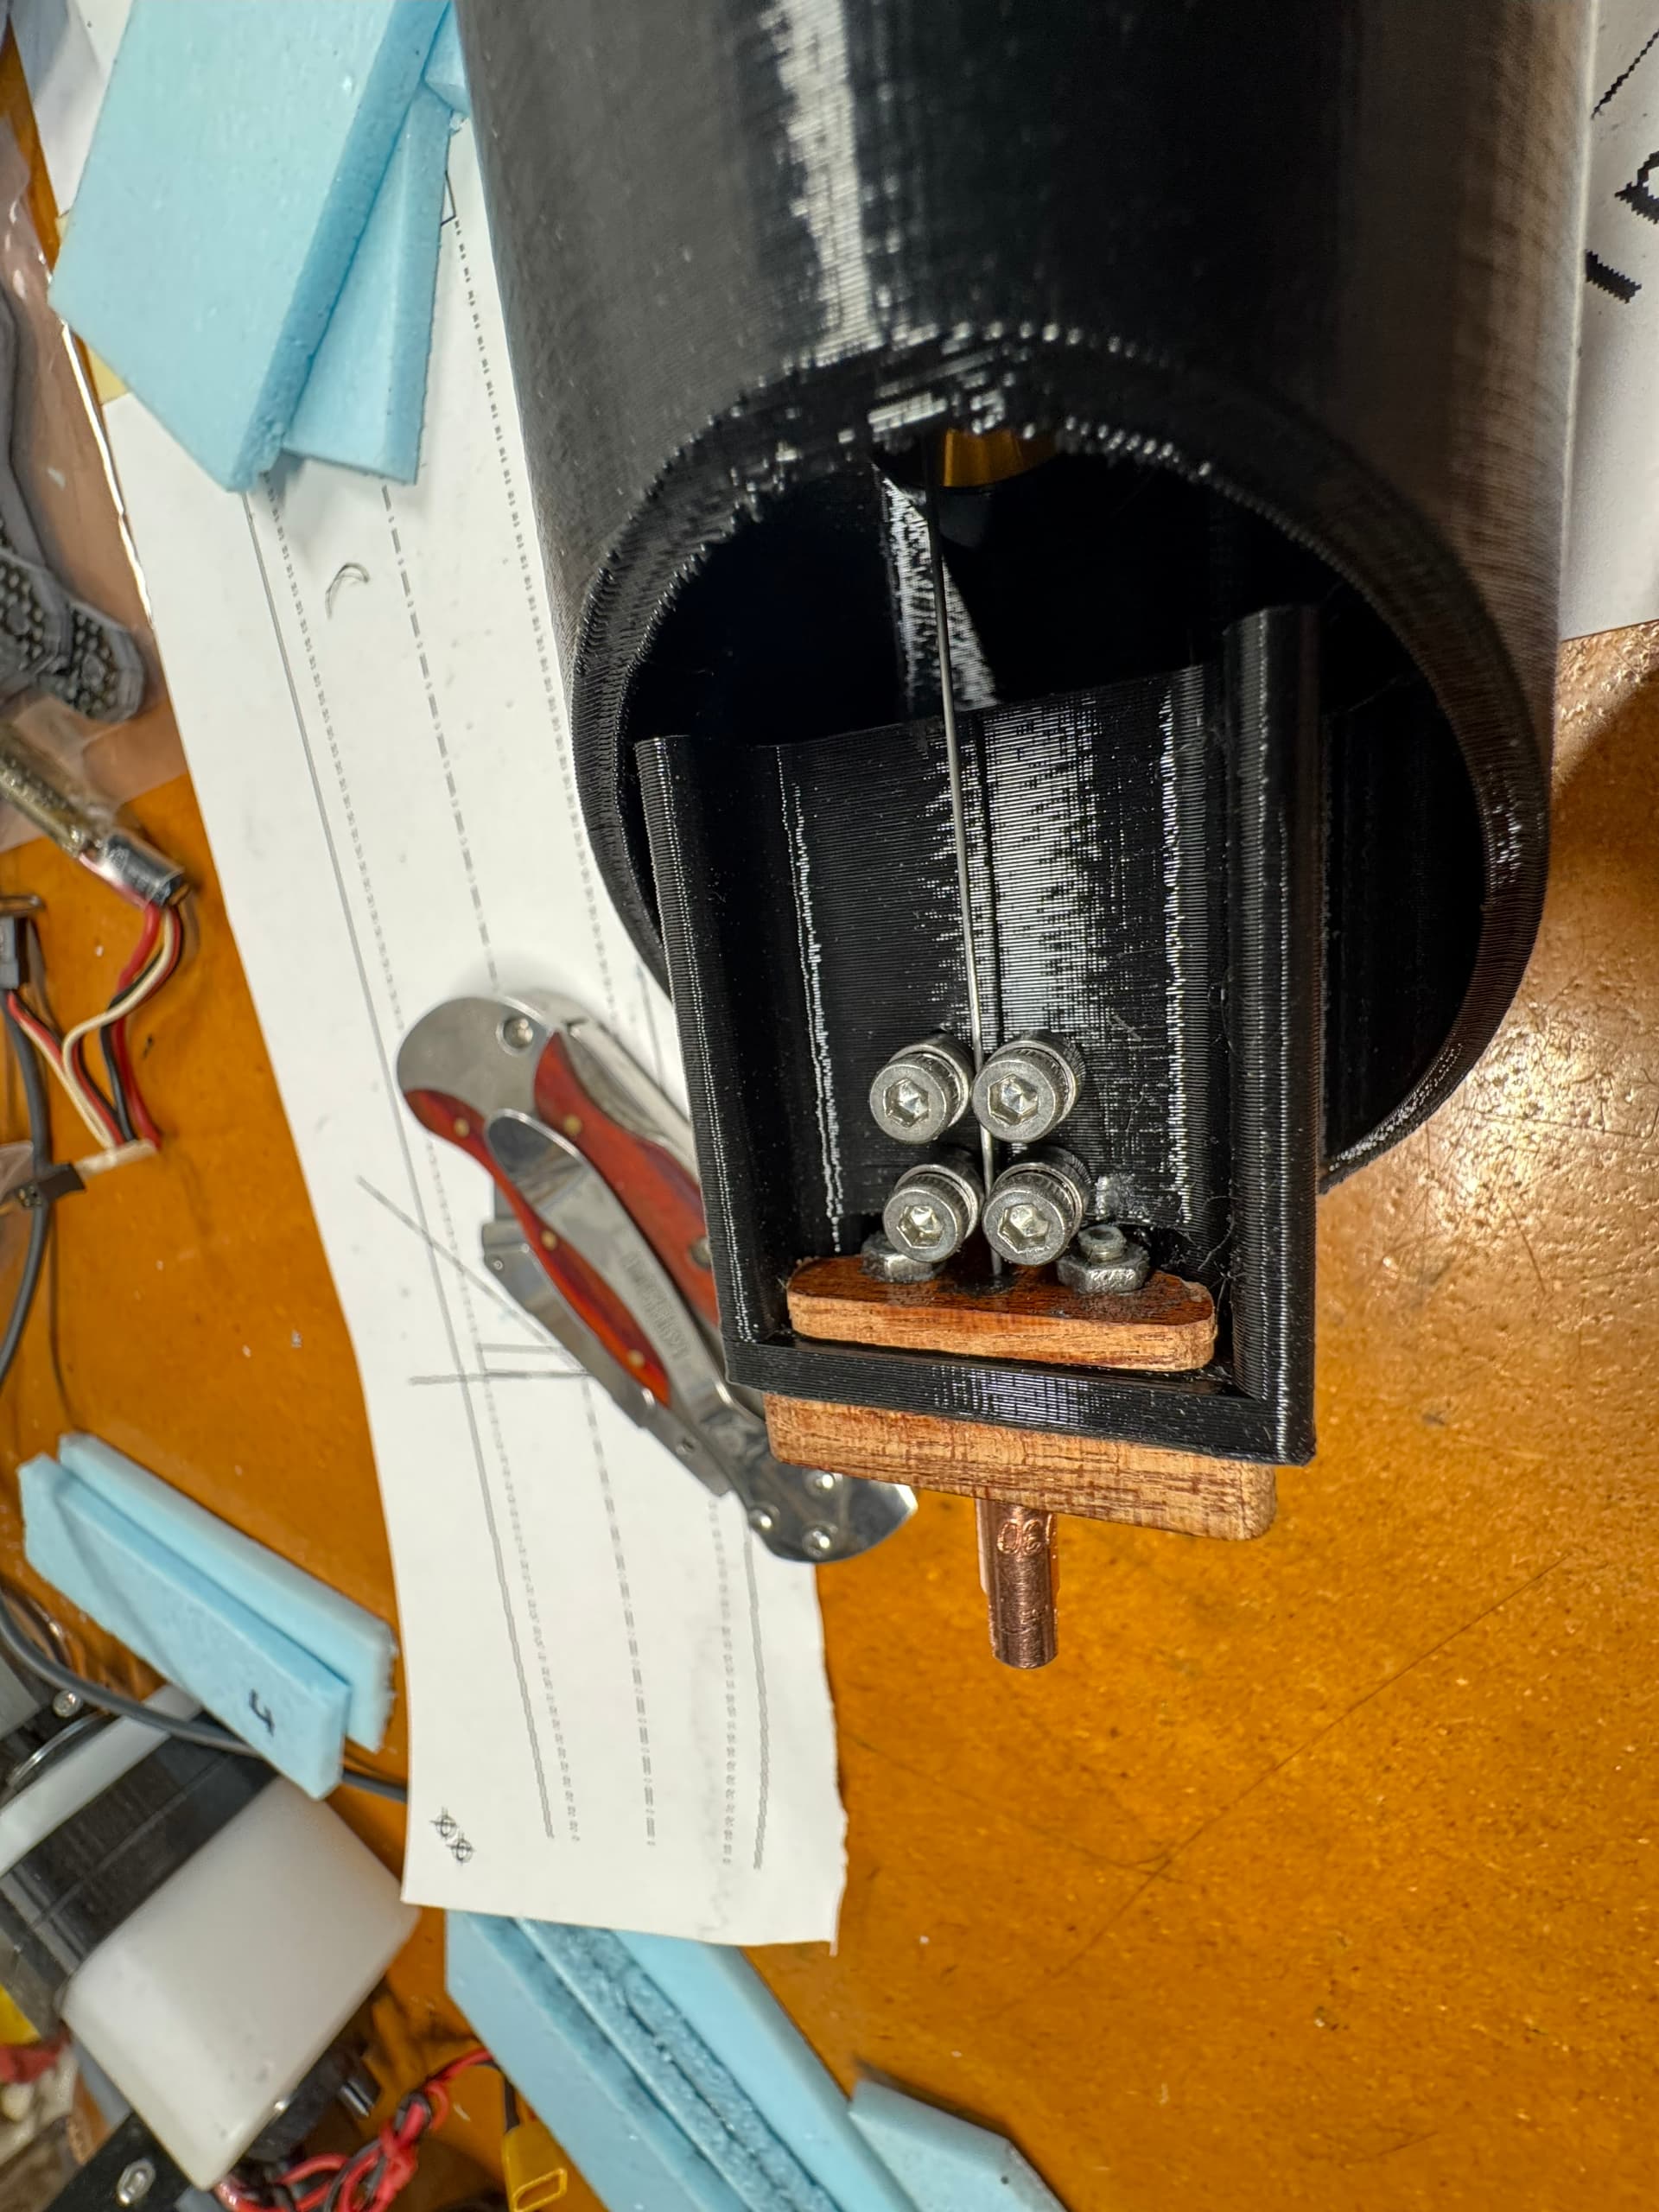
I used a brass tube soldered onto a brass plate as a needle guide. With caveats, this could also be okay, perhaps with some lubrication mechanism. The brass plate was meant as heatsink, as well as a means to hold the tube to printed plastic, but the oscillation of the needle still wore the 0.35mm ID tube.
All this ended up with an inconsistent stroke over time and not good enough control over the point position.
I will.probably make a new needle cutter at some point, with lessons learned.
Not trying to talk you into getting a CO2… just saying what works with common white DTFB and light-colored foams. I have a CO2 laser but I detest messing with it. I prefer my diode lasers for laser stuff. So. here the CO2 sits… unused for at least 4 years.
Our pilot skills were so poor and crashes were so common in our “demolition derby” flying sessions in my pasture… our small and simple planes rarely lasted more than a session or two anyway. Field repairs and overnight replacement/rebuilds were part of the fun for my buddy and me… and hot glue was quick and easy for both these operations. The weight of the hot glue was never an issue for us.
My early needle cutters used DC motors scavenged from HP printers. I think they were 24V motors but running at 12V resulted in a nice speed for a needle cutter. I don’t remember how/when I fabbed the aluminum flywheel back then but I cut “miles” of bluecore fanfold insulation foam with this cutter.

Still have it in fact. Slightly different layout but same motor and flywheel. No plastic, no heatsink needed. It looks as though that’s a needle from a livestock syringe my grandfather would have used on his cattle… but I often used sports ball inflation needles as well.

1 Like
I was using the white foaming gorilla glue. Usually I could glue up a section and within 20 - 30 minutes it was set enough to work on.
I use the same PU glue, but recently I had a hard time finding white so I got the yellow stuff. I also recommend Foam Fusion glue for tight, well cut joints that don’t need much gap fill, or for EPP in general (since it’s more flexible than PU).
Both glues also happen to hold up really well over time with UV exposure. I have several foamies that are approaching 20years of age and are still holding up well with these glues. OTOH things I’ve made with Welder and UHU Por have had glue joints get brittle over time.
That said, hot glue or foam safe ca are great for quick build planes that are going to get lots of abuse and not last long anyways. A needle cutter and hotglue would make it possible to download plans in the morning, and have the maiden by afternoon. Perfect for combat etc.
@dkj4linux or anyone else who has used a vacuum hold down… I’m getting ready to make a vacuum hold down for my needle cutter, and was curious what kind of hole pattern you went with, and how did you construct it?
I already have a nice laser vacuum table I wanted to make use of, but of course the alum grid will be ruined with the needle. I planned on making a foam spoil board to tape on top of it, with some pattern of holes to provide vacuum area on the work piece. I initially thought of just cutting a ton of holes, but then thought maybe just some lines in one direction might give more exposed area (therefore more vac force). Not sure if that would be durable though. Thoughts?