Does it happen on all sides the same?
Yep, happens on all sides isn’t specific to A or B motors. Am going to look at circumference of my Biqu H2 V2S extruder gear, see if there’s a correlation, some offset gear within the extruder assembly/gearing causing periodic pressure waves? I’ll test various volume flows (diff line widths) to see what effect that has, to help confirm or rule out possible causes.
In my experience, when an artifact can be attributed to XY motion (motor, belts, pulleys) it tends to appear vertically. Yours appears to slant and unevenly at that.
- Your filament has a variation in diameter.
- Your extruder has an off center gear pushing the filament unevenly.
- Your firmware is making some odd rounding decisions based on steps/mm.
- Your slicer is making some odd decisions based on flow rate.
So if it happens the same with other filament spools, it’s (probably) not 1.
If it doesn’t change frequency with different layer heights, probably not 2. Maybe not 3 either? Not sure how to test there.
For #4 the worst I’ve seen is when the slicer makes X, Y, Z in absolute mode, but the extruder in relative mode. Most slicers I’ve seen have at least an option to put the extruder in absolute mode, and reset it on layer lines. This usually keeps the extrusion amounts correct over smaller travel lengths and avoids rounding errors.
2 Likes
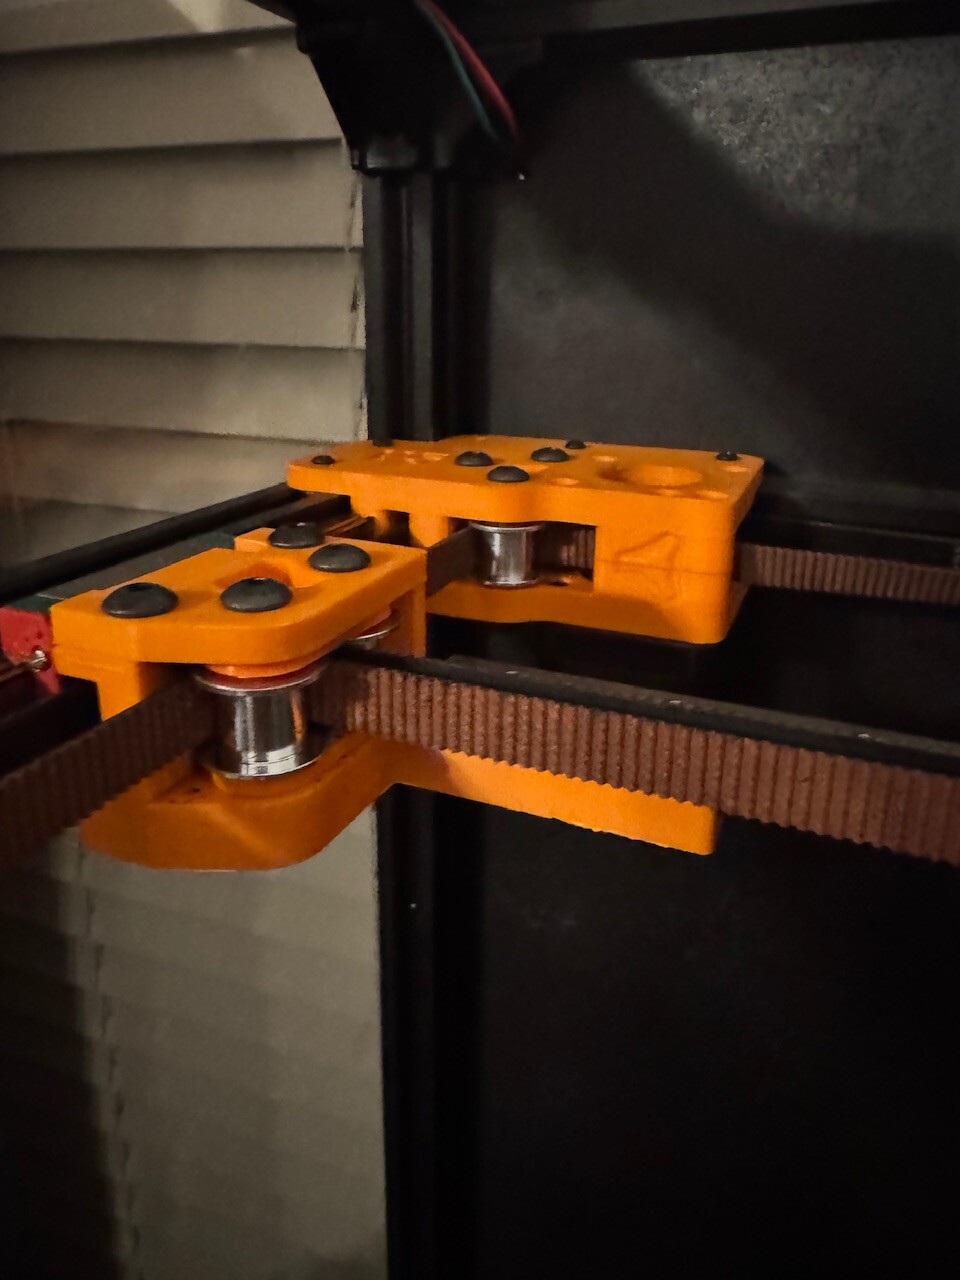
Thank you @SupraGuy! Think you’re right about extruder gear being off center… Looks like I unwittingly lost a bearing some time back. Only just discovered by chance while fixing a filament jam last night. Extruder’s definitely working much better now with all the intended bearings installed🤦♂️…

Video clip showing BIQU H2 V2S assembly internals and bearing that was unwittingly lost…

Sharing incase folks here are losing their bearings while chasing down cause of ripple/wavy prints…
4 Likes
At one point I thought mine might be the Extruder because BTT stuff has been proving to have issues, but the Orbiters were also showing it too…
1 Like
Sweet, your prints must be way better now?!?
Thread resurrection… In your klipper config file (assuming you are using it) do you have a hold current specified for x or y?
I was doing some light reading perusing the klipper documentation and came across a recommendation to not specify that because if the motor stopped during a print, changing the current could cause motion and then perhaps an artifact… I immediately thought of this thread and the curious artifacts you had been seeing. We all had seen them and the wondered if it is entirely attributable to belt teeth offset error or if this setting could be a contributor:
Most stepper motors will not obtain a significant benefit to reducing current during normal prints, because few printing moves will leave a stepper motor idle for sufficiently long to activate the
hold_currentfeature. And, it is unlikely that one would want to introduce subtle print artifacts to the few printing moves that do leave a stepper idle sufficiently long.
Found here.
Not trying to beat the dead horse, but hoping to add insight or eliminate an avenue. I don’y recall this being discussed specifically. If it was mentioned, ill go back to my basement.
No, I had removed it.
I came across the same thing, but it didn’t help.
At the moment, my printer hasn’t suffered much from any ripple effects, at least not that have been noticeable to me on the types of prints I’ve been printing.
This was after lots of re-work on the machine.
Including making 3D printed parts to replace all of the metal parts on the XY, fixing a pulley offset issue in the CAD, replacing toothed idlers with smooth idlers so that there was as few toothed features in the chain as possible, and replacing with belts that have more accurate spacing (see belt issue thread).
In the end, it’s not 100% gone, I don’t think, but definitely much better. If I ever decide to take it apart again, I will probably replace it all with genuine Gates stuff. I think it matters.
1 Like
@Michael_Melancon, looks like you tried a bunch of things including using smooth idlers against teethed side of the belts. Sounds like that combo reduced ripple/artifacts for you?
Am curious after looking at QIDI Plus4, Prusa Core One and Creality K2 belt setups.
Yeah… I changed A LOT of stuff…
I basically spent the better part of 2 months doing nothing but test prints, and changing out parts, etc.
I probably wasn’t scientific enough about it to give you a good answer as to what made the most difference…
But one of the last things I did, when redesigning the parts to work with ASA instead of the metal plates, was to remove all of the toothed idlers, and replace it with a “better” belt. The motor pulleys are now the only place where teeth interlock.
The plastic parts were made for 2 reasons…
- to see if that for some reason helped dampen any motor resonance to see if that had anything to do with the ripple
- I had found a slight discrepancy in the angle of one of the pulleys in the CAD that made one of the belt turns not be at 90º and wanted to bring it back in line, but also didn’t want to commit to making another set of metal parts.
Since my last iteration, I don’t know if I have really run the cube tests again to see how much better it is…
But in my “not a 45º degree turned cube” prints, I haven’t really noticed it.
My last ditch effort after that was going to be to chuck out some more money for all official Gates belts and pulleys… but it had gotten to the point that I had to start working on that Mandalorian costume I had promised to make… so I just went with it.
Since then, I think @vicious1 tried the Gates belts and got a pretty decent improvement as well.
3 Likes
Yeah, I think it’s telling that Creality appear to use genuine Gates belts. Obviously they’ll be getting a much cheaper deal on them than we can, but that’s still likely to be a pretty significant line item on the BOM.
Able to get same print speeds using just ASA, and no metal parts? Looks like you kept dimensions same and didn’t need to thicken the 1/4" thick ‘plate’ areas, guessing 0.6mm nozzle 3 walls, 3 top/bottom layers and 40% infill? Hmm, maybe the bottoms are thicker…
I thickened the bottom of this up because I was worried about that arm being too weak supporting the X rail, etc.
The rest I kept the same thickness and footprint.
Yeah, no difference. I get some different noises where I assume something must be rubbing somewhere, but I haven’t taken the time to investigate.
The Vorons are all ABS/ASA, so I wasn’t concerned about it holding up.
I printed it with 0.4 nozzle, maybe 0.28 layer height? can’t remember for sure. I’m about to walk out the door for the weekend, but I can look it up Monday if you’re interested.
1 Like
That’s great to know, thanks @Michael_Melancon. Am changing idlers to be smooth on my v4 based on yours and others observations/learnings. No rush, am not starting v5 just yet, am still figuring out material options.
Edit: Changing to smooth idlers on my v4 did result in minor improvement, less VFA but only if you look real hard under the right lighting.
The ripple pattern I was actually chasing remains, the ripple varies with print speed. Not seeing same ripple on my slower much quieter ender 3 max, so, am taking another look at XY stepper config details, and BIQU H2 V2S extruder stepper too.
Am blaming a recent neat super slow motion vid for inspiring me to take another deeper look into these minor quirks don’t actually impact print strength/functionality…

High fps in that video helps reveal things like bad micro stepping interpolation causing jitter motion or extrusion.
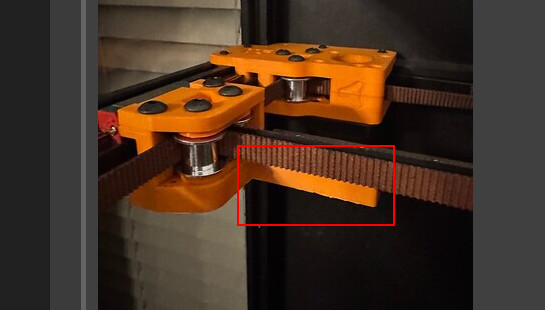
EDIT #2: Recorded bunch of super slow mo videos using highest fps possible with phones I have on hand, they’re no where close to the 1000 fps in the mentioned YT video. However, did learn/realize amongst other things, that my XY1 and XY2 belts have unequal tension (inferred based on how they wobble differently during various motion directions, also, they play different notes when twanged). My belts have unequal tension because I’ve been physically squaring the X rail using the bolt adjustable stepper mounts.
Instead, I’ll prioritize ensuring frame is as square as I can measure, then, ensure equal belt tension for both loops (some how?), then, address XY skew using firmware configured compensation based on Calilantern test prints.
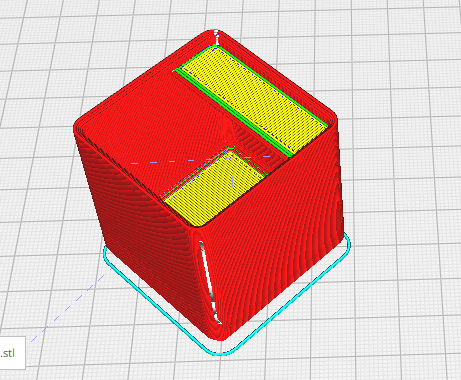
Rather than piss away filament on benchys am printing more useful 1x1x42mm gridfinity containers with each test iteration.
EDIT#3:
Tweaked more extruder and stepper settings.
Same behavior whether Gridfinity cube in default orientation or rotated 45 degrees (to help detect whether one belt is contributing to ripple more).
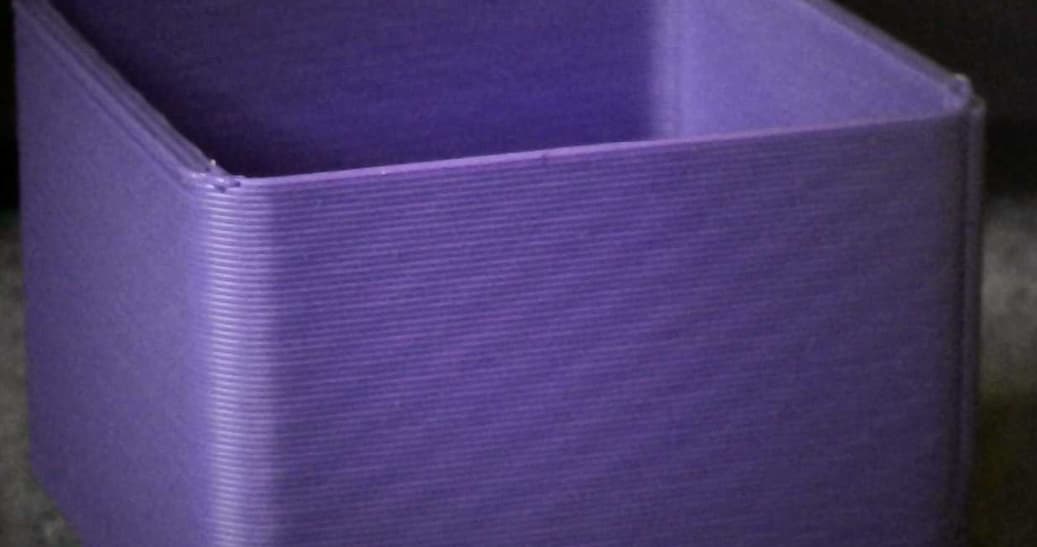
Closer look…
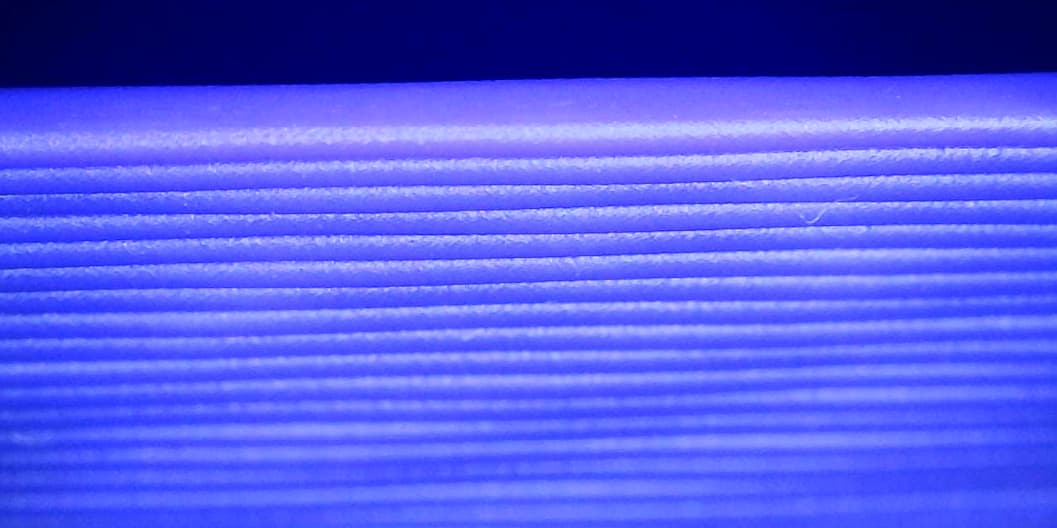
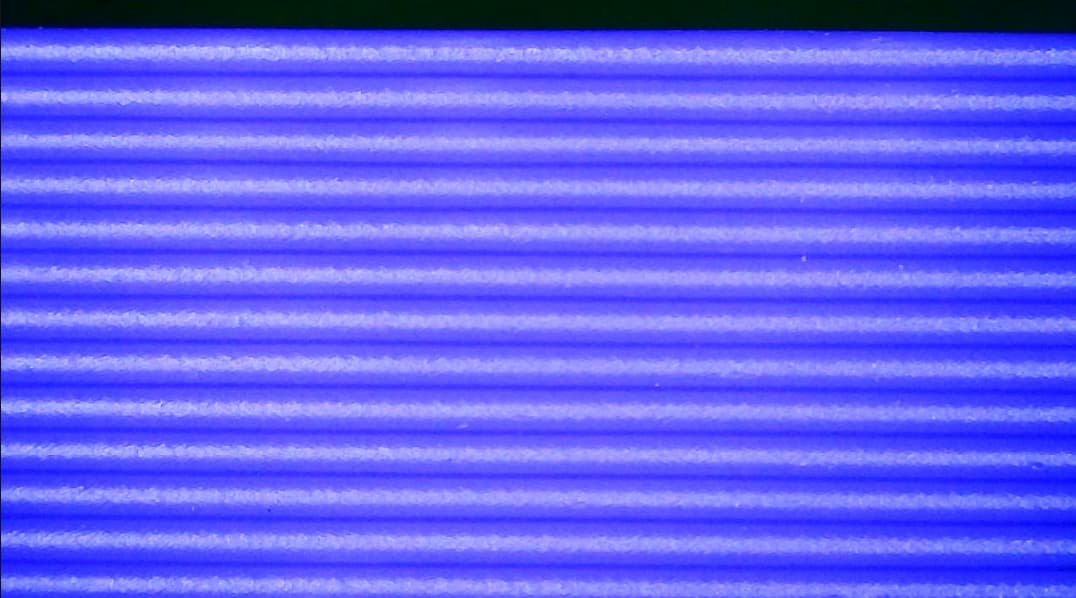
Overhead of 1 line wall looks like extrusion width periodically varies to me…
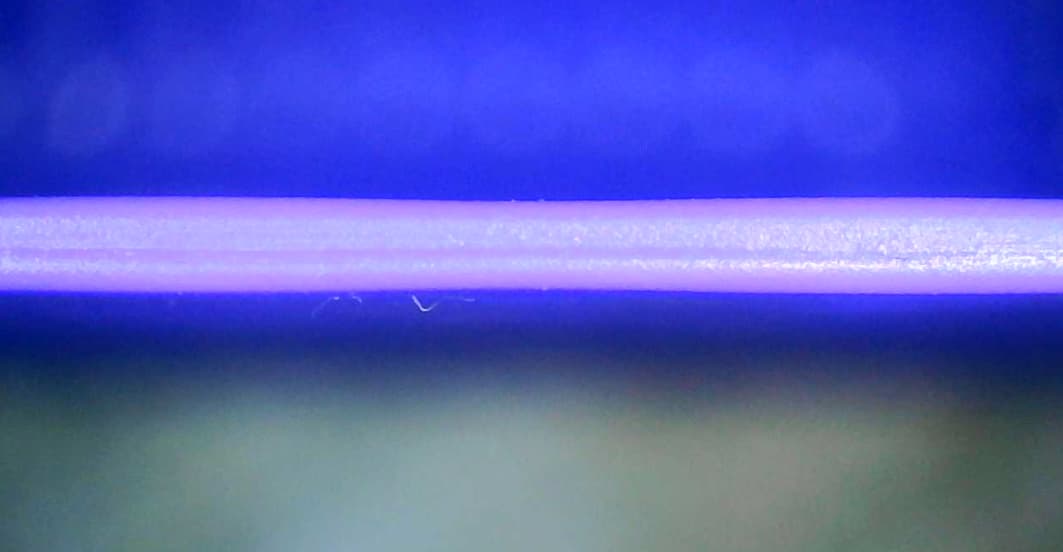
Ripple pitch period is more than 2mm, looks like ~3.5mm (measured ~12 ripples across 42mm surface), will see if any of the extruder gear/bearing internals match.
Will try adjusting tensioner and some other things based on misc guides (e.g. Ellis’ guide ) and ChatGPT suggestions. Failing that, will strip down and clean BIQU V2 H2S extruder down, again…
Also tried 400fps camera with Macro lens, still getting used to that setup, but haven’t learnt much from that yet. Much higher fps would be ideal, but haven’t found reasonably priced HW, prices go up fast. Would appreciate recommendations for 1000fps (or faster) setups that don’t cost $$$?
Checked g-code line segments are simple straightforward runs, so am not blaming splicer.
1 Like
Doesn’t shaketune help characterize your system resonant frequency and allow you to work around it?
1 Like
@Michael_Melancon, curious what extruder you’re currently least unhappy happy and running with? Am watching to see how Mike’s Dragon burner hotend assembly turns out.
Are you using PowGE RF-Brown or something else?
Am trying out BIQU’s Belter Belt Tension gauge Unfortunately their calibration spreadsheet seems to be configured for 6mm belts, but we’re using 9mm or 10mm ones. So, with wider belts our measured deflection will be less for the same force. That’s my limited ChatGPT assisted understanding.
Cheers!
I’m still using H2 V2S Lite. @Jonathjon would probably tell you Orbiter 2 is best…
I don’t think the H2 V2S Lite is practical for multi-material unless the insertion problem is solved, at a minimum…
but I’ve barely had time to even look in the general direction of my printer in the last 2.5 months… so I didn’t make any progress there.
I’m using this that was recommended by someone in some forum somewhere as something they use in their Vorons with success
https://www.amazon.com/gp/product/B0CLFSNKV9
but honestly, if I was building a new printer today, I would probably just suck it up and buy the genuine gates…
2 Likes
V2 is my current top pick. With the V3 coming in second to that. Only because I prefer the separate hot end that is better at being a hot end than the one on the V3. I also have more troubles feeding in filament to the V3 than I do the V2
2 Likes
Cheers for the belt suggestion, will try those.
In the meantime, a pic that may help @niget2002 feel better about their v4 woes…
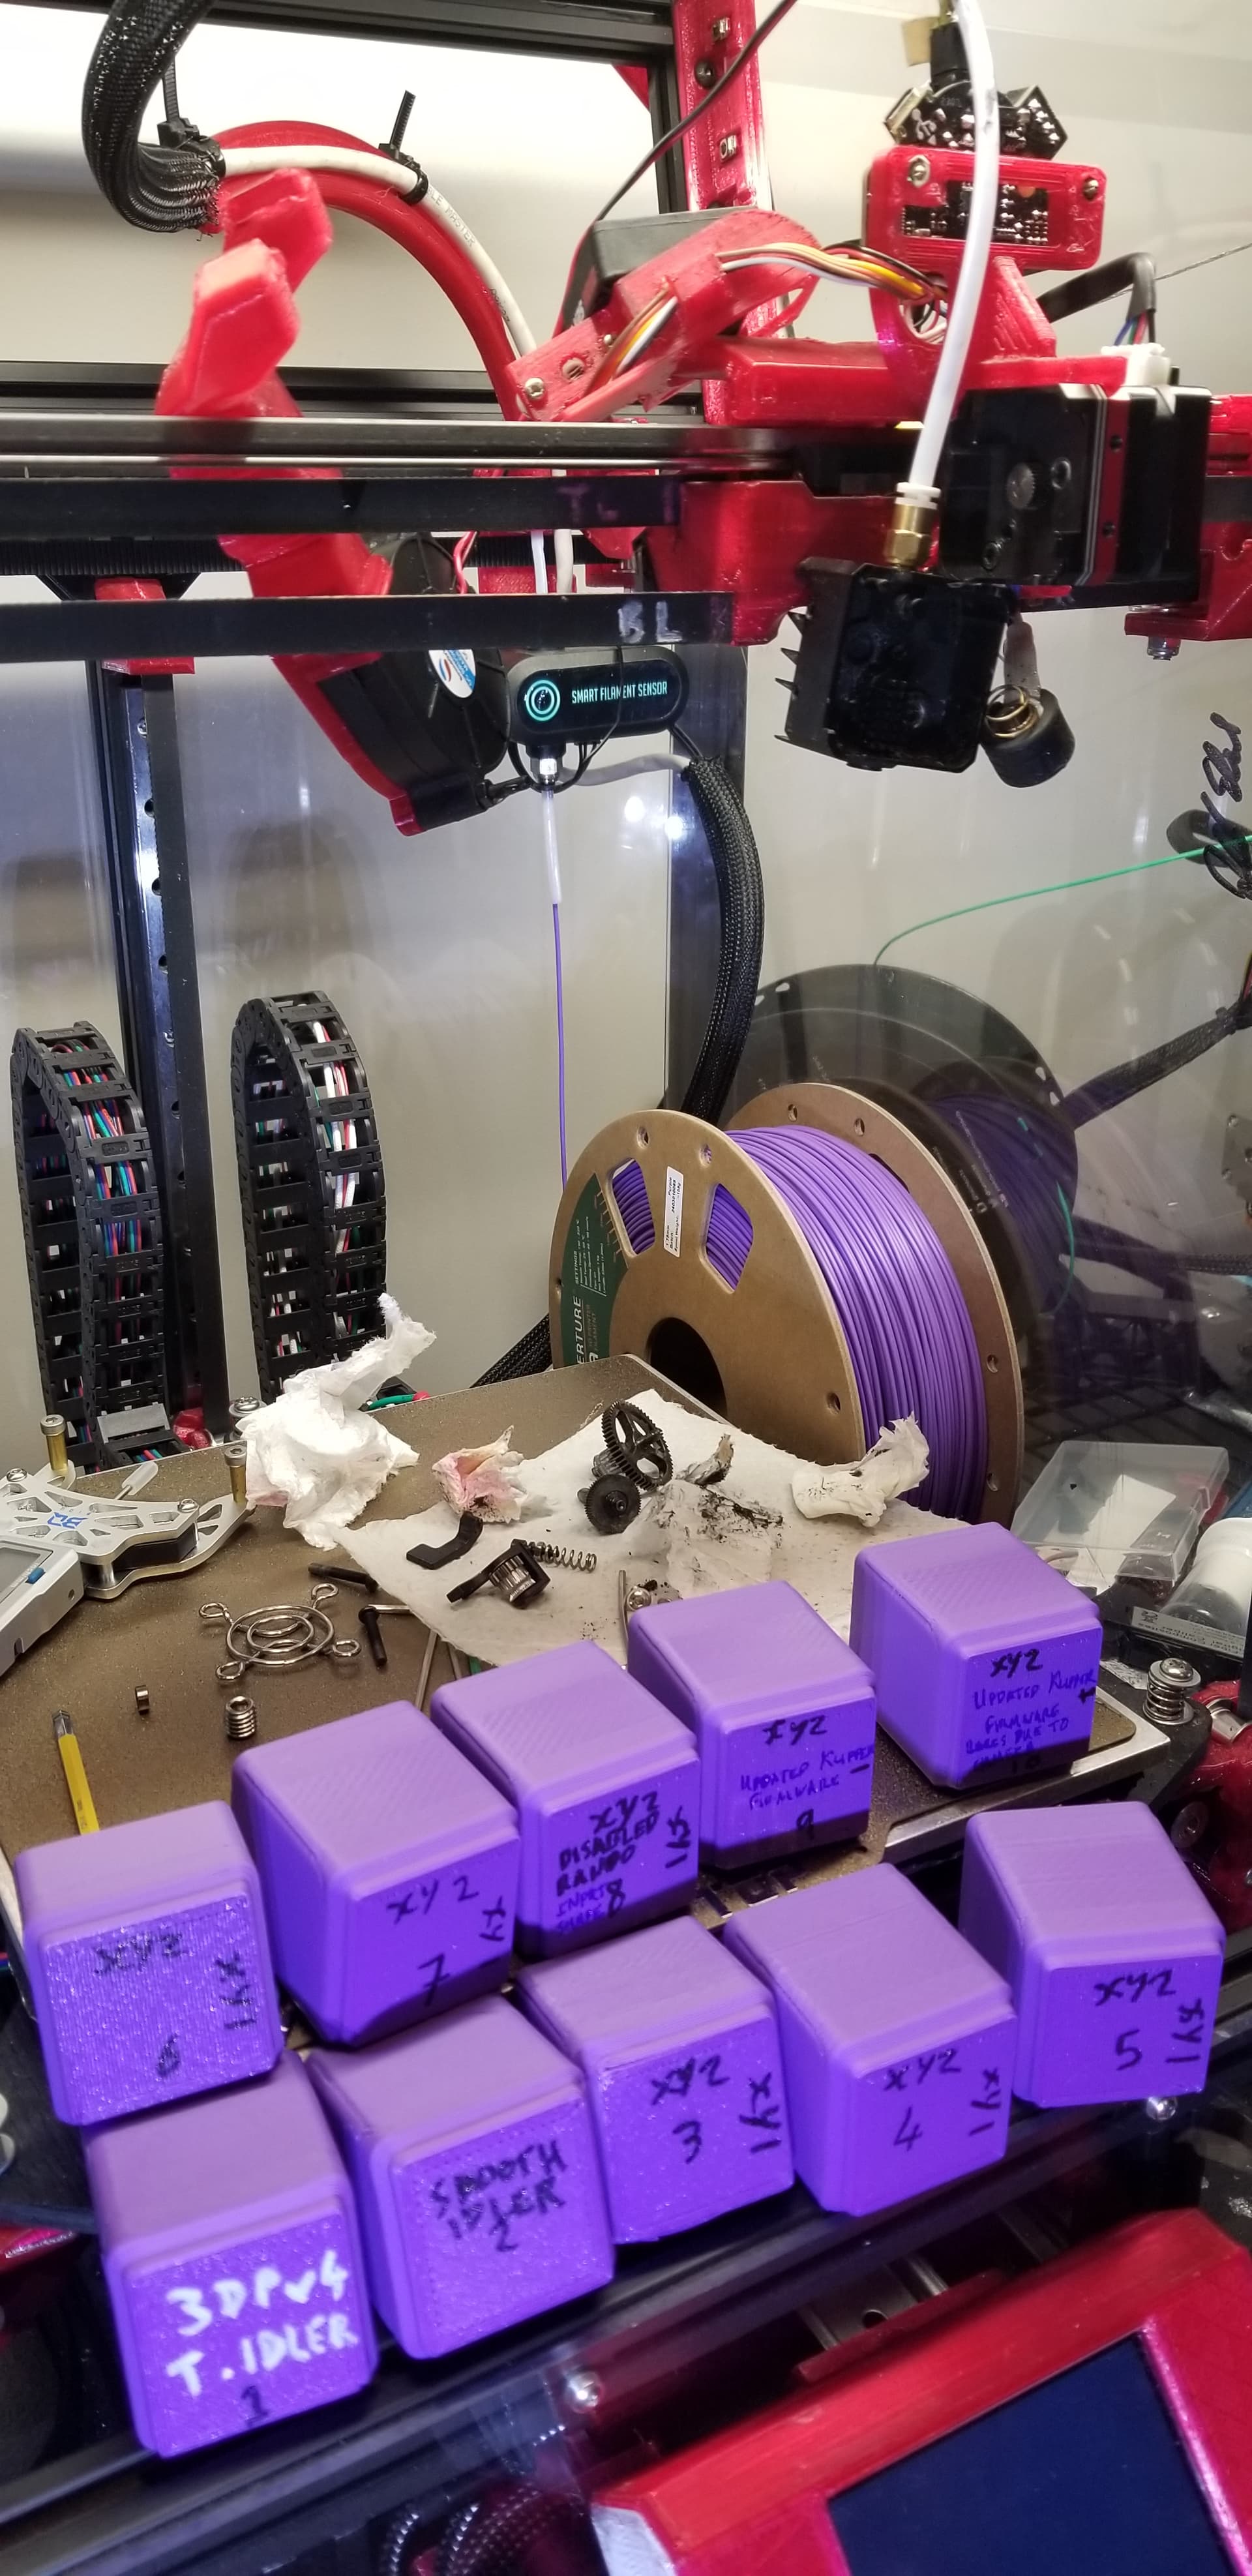
Found more metal grindings than expected inside BIQU H2 V2S, but I don’t know what normal wear 'n tear looks like relative to other extruders. Internal bearings seem very small to me. Asked BIQU if replacement internals can be purchased. Am deep cleaning, greasing, then trying more test gridfinity cubes (1x1x42mm using Jamie’s script).
Checked frame, made bunch of klipper config/firmware and belt tension changes (using BIQU Belter tension gauge ), runs much quieter which is nice. But, the 40mm/s ripple remains… Input shaping next.
@Jonathjon noticed your XY steppers are 0.976 Amp, did you use TMC autotune or something to find some magic Current value that minimizes resonance for your specific build?
I cant remember if it was Autotune or if I ran it thought the excel calculator to get those numbers. Its been several months since my V4 ran. Well since it ran correctly. Been one issue after another (electronics related not V1 Printer related) and I just have stayed busy working on other things. I actually messed with it quite a bit here the last few days and still don’t have a working printer. I believe my H2V2s Lite has ![]() the bed. But I have not taken it apart to verify yet.
the bed. But I have not taken it apart to verify yet.
Personally I wouldn’t waste a single penny on replacement parts. I would upgrade to something much better suited.
2 Likes