Calling all 3D printer experts.......HELP!

I’m starting this thread because, well, to be honest, I’m at my wit’s end with this one…and I hope someone here has seen something like this before and can maybe point me in the right direction.

Since finishing my MP3DP v5 build, I have been chasing my tail on an issue, and I have taken apart my XY motion system multiple times already trying to figure it out.

For reference, there are 4 of these machines currently alive, and mine seems to be the only one with this issue.

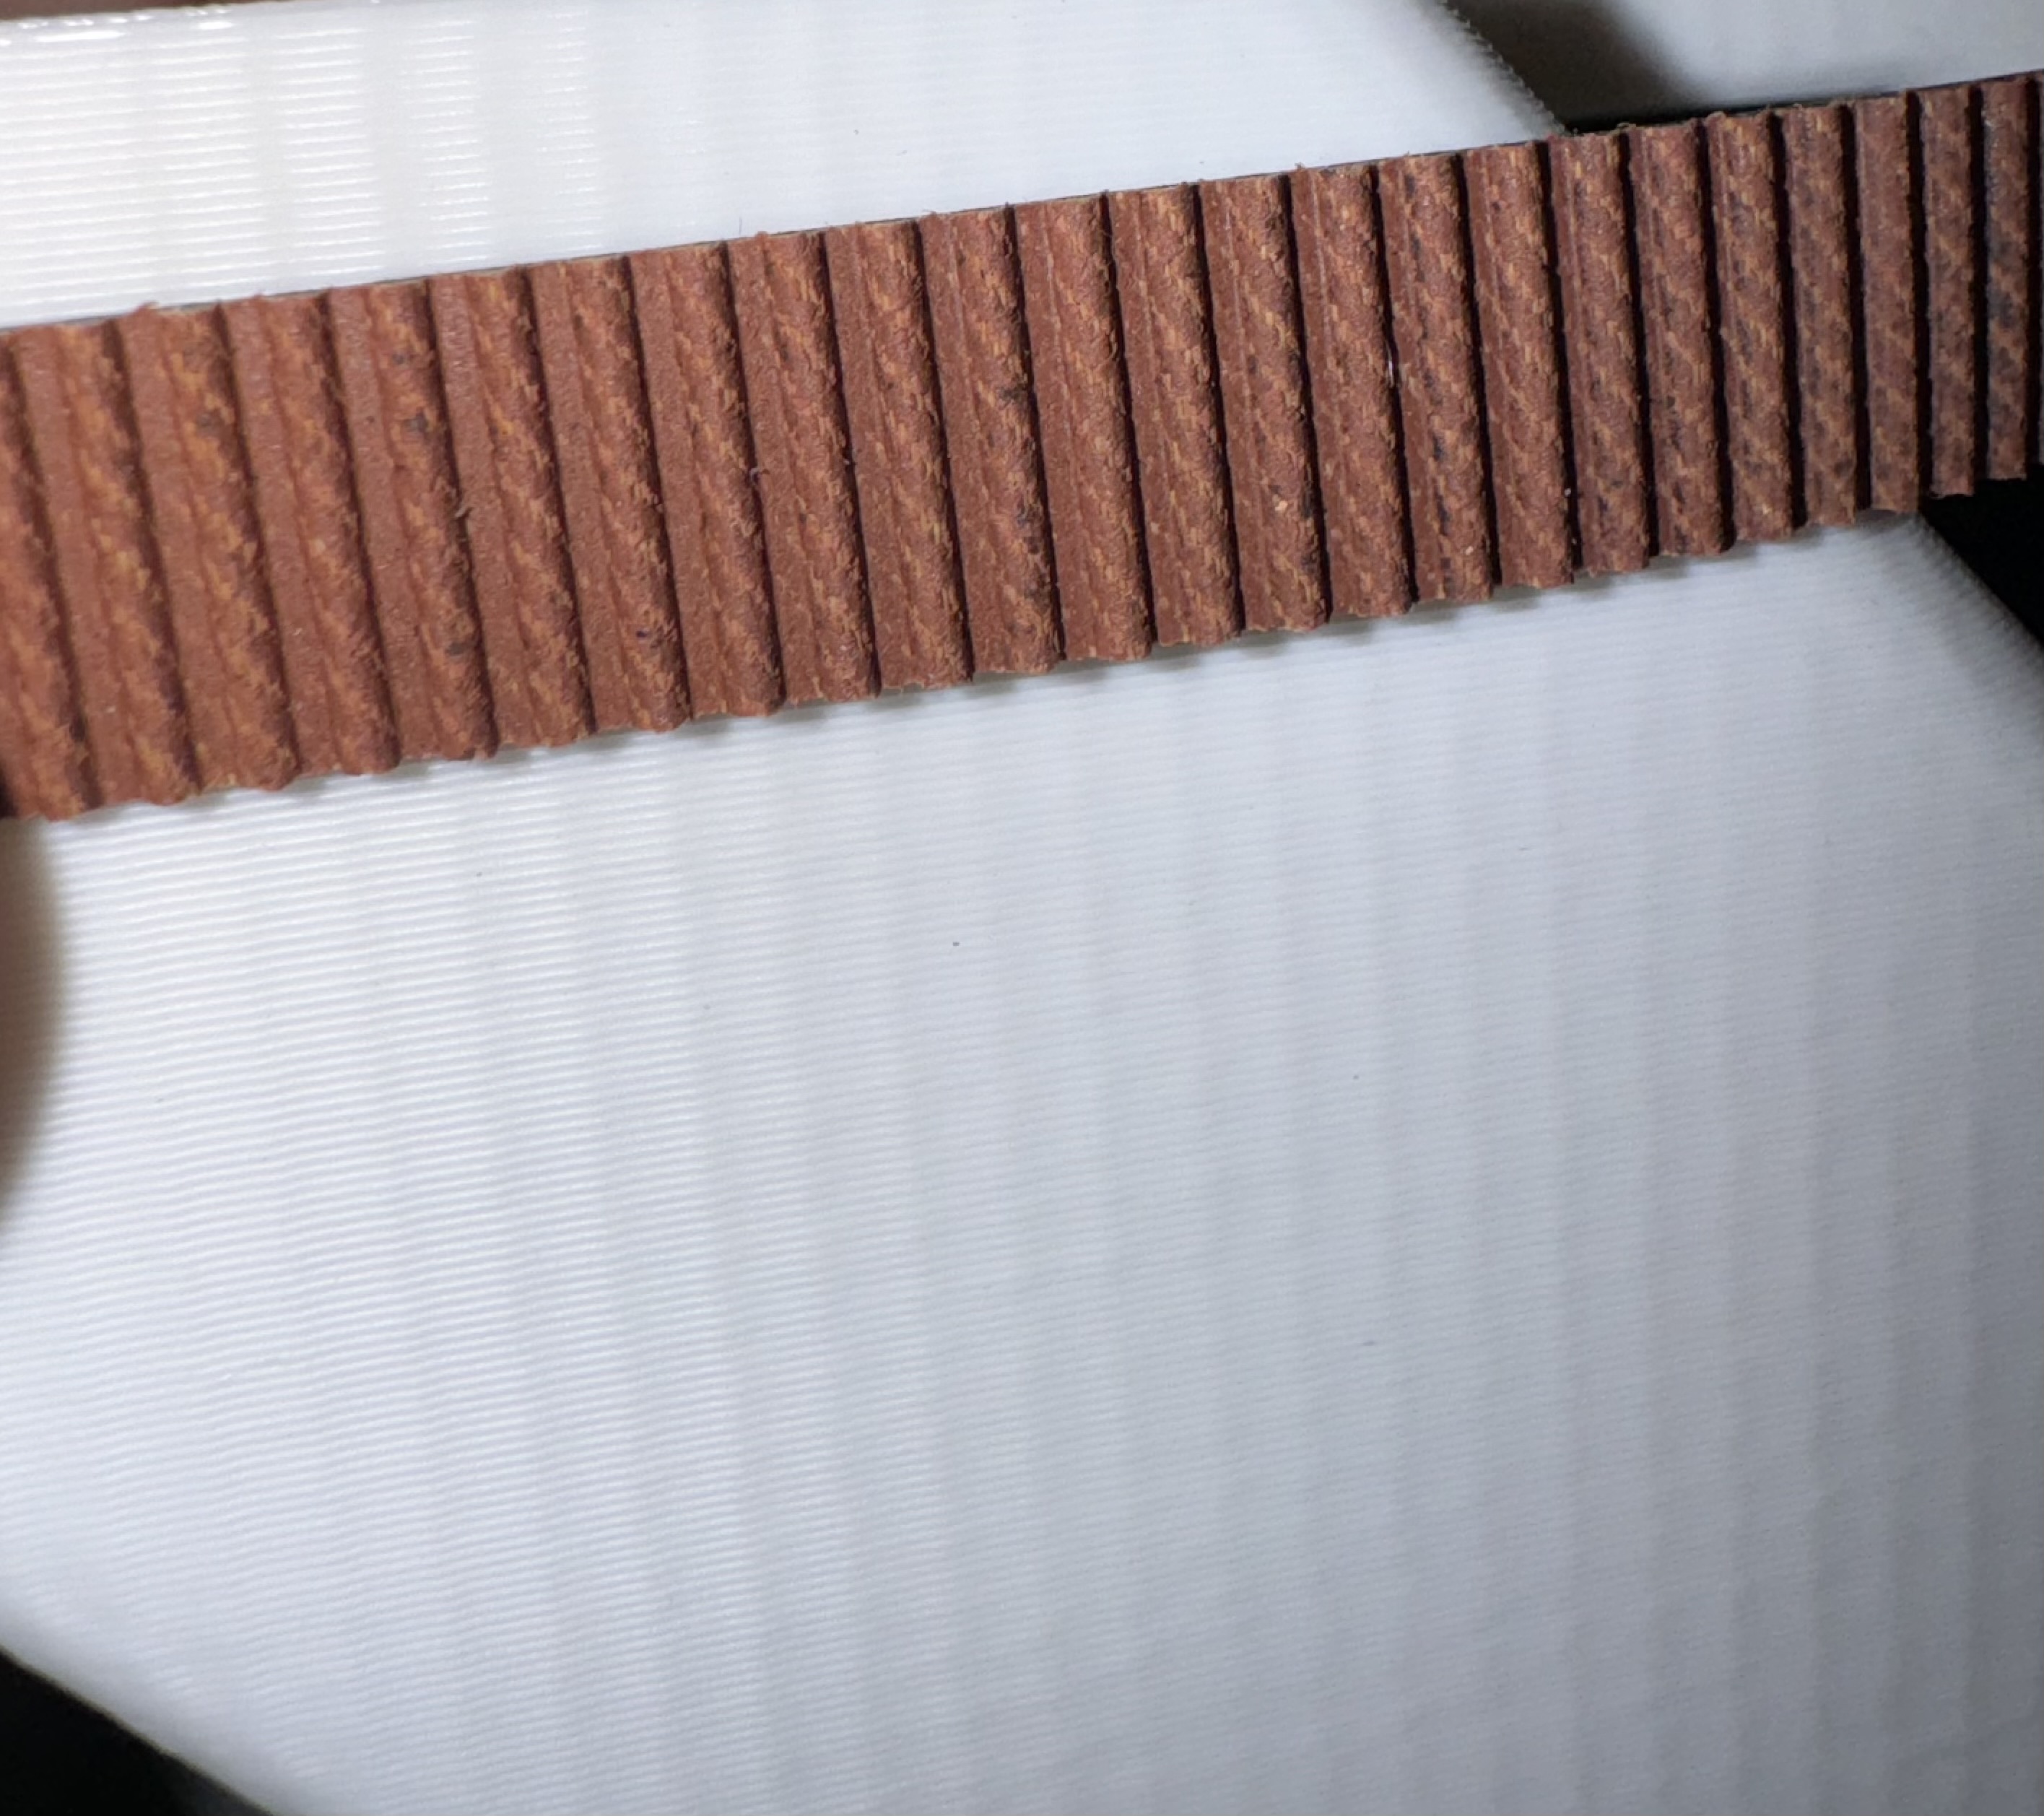
Here’s the issue when I print:

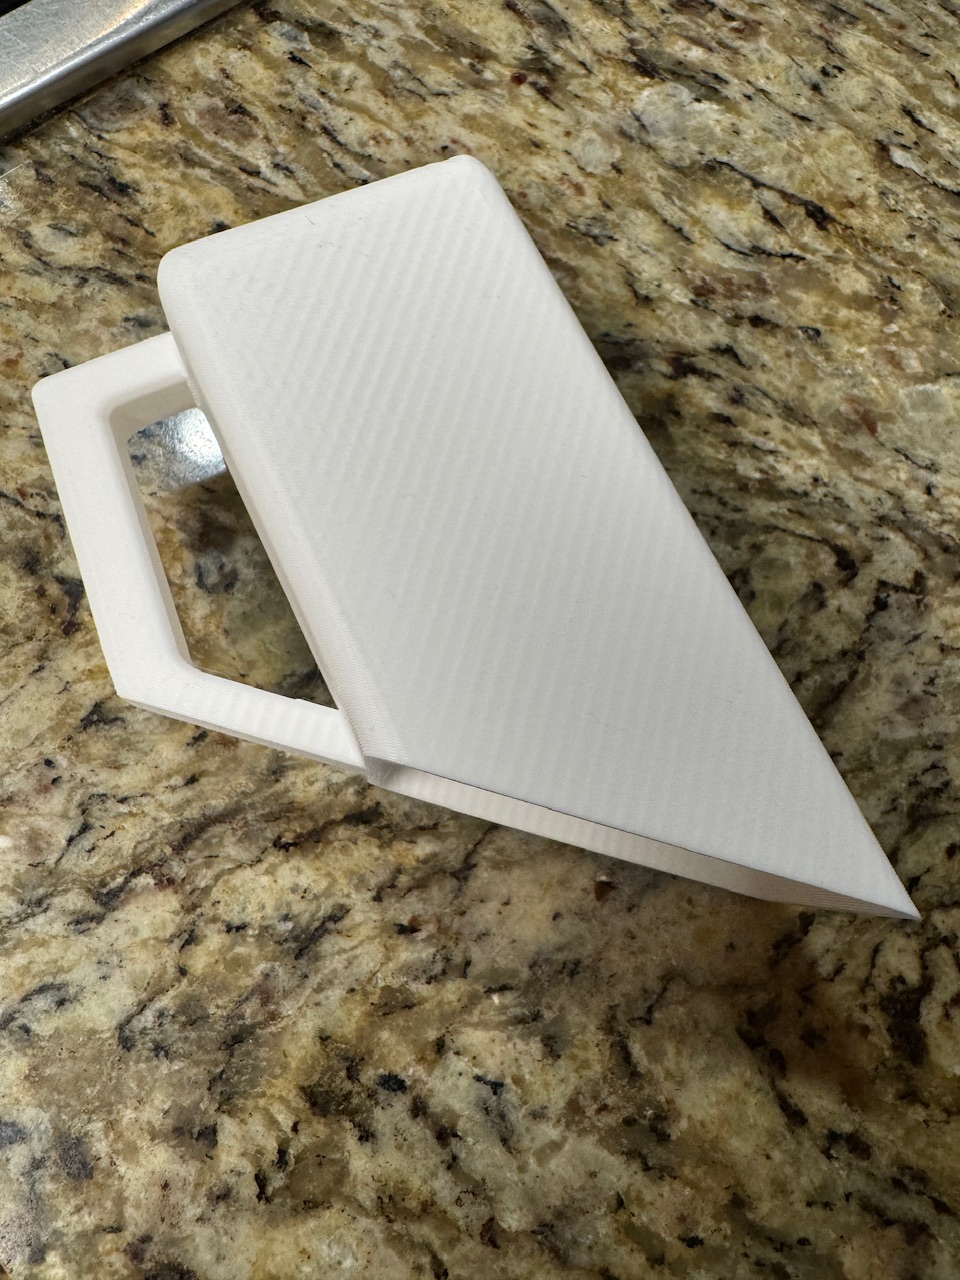
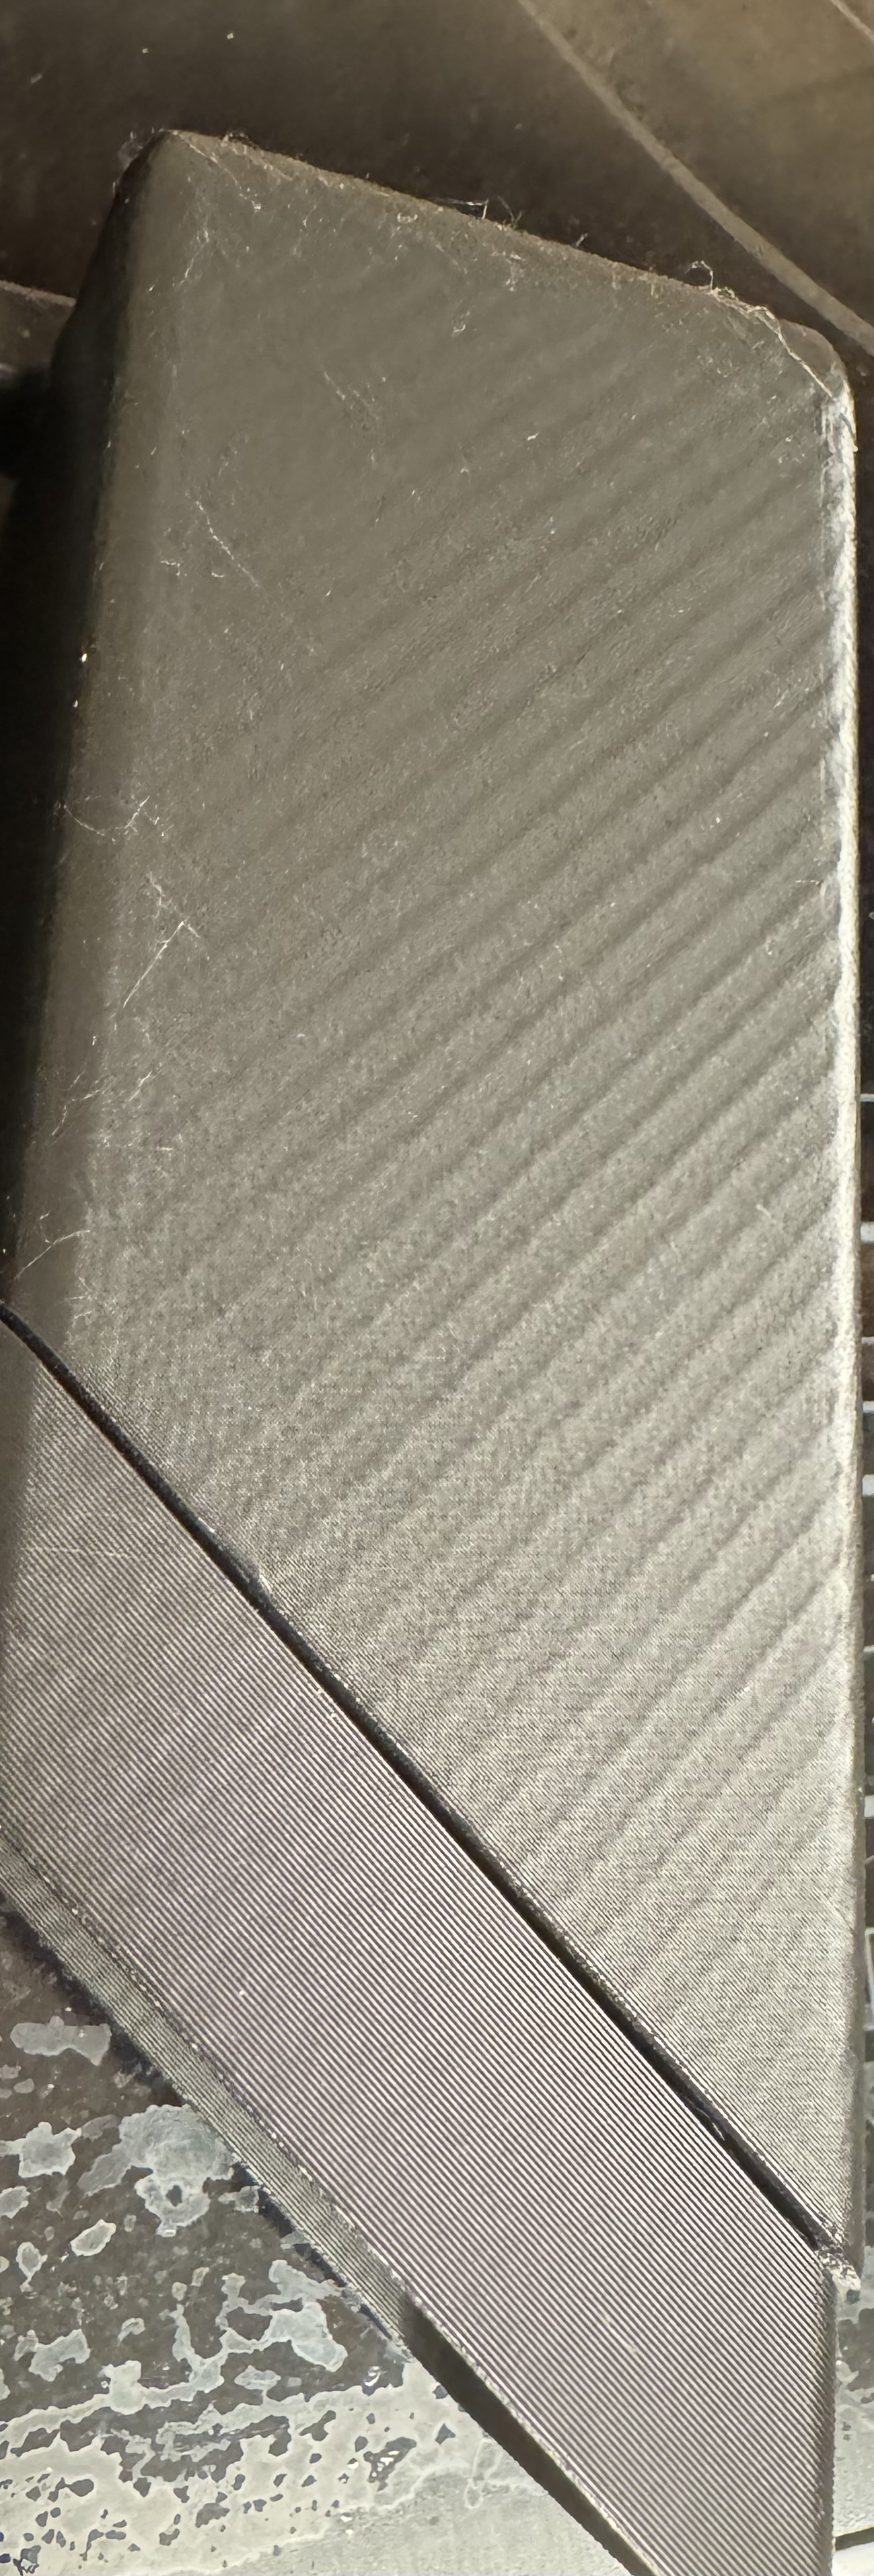
This vertical wave pattern appears

This was printed at a 45º angle. The pattern only appears on the side that engages the B belt path. The A belt path doesn’t have the same artifacts.
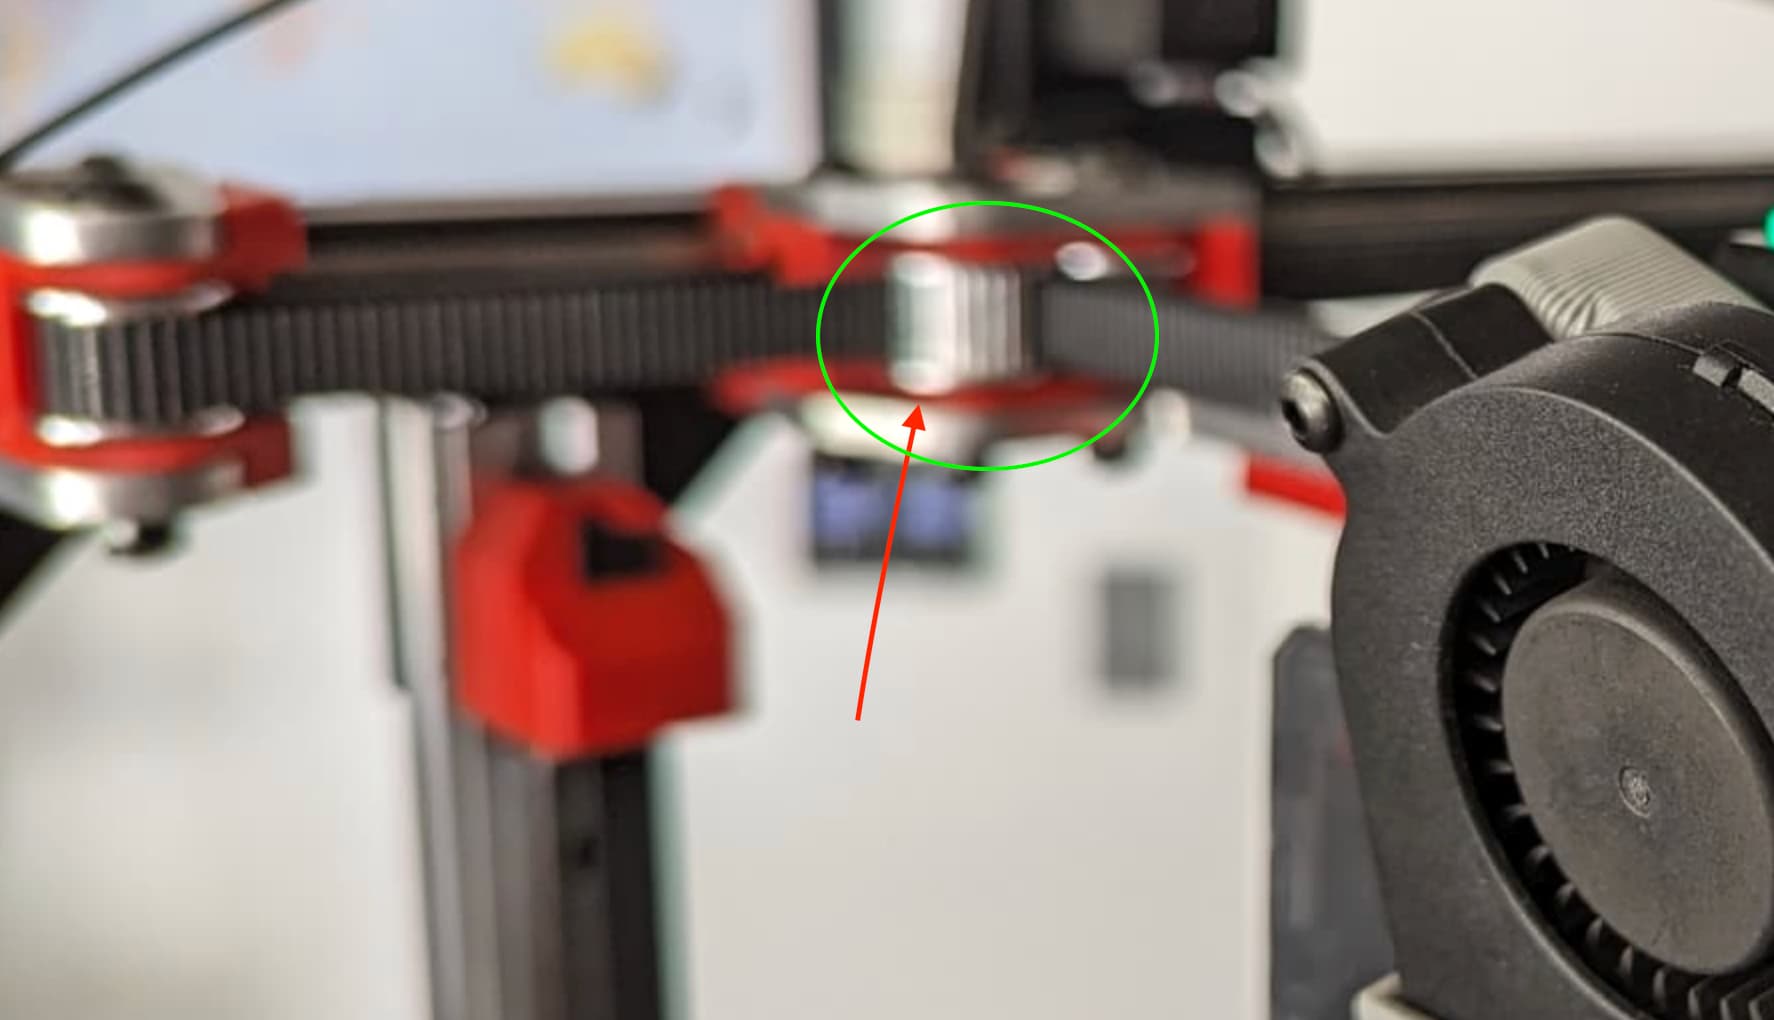
What I have tried

  • Disassemble and clean the rails. they are very smooth when the belt is off.
  • replaced the belt
  • replaced some idlers that looked like maybe could have an issue.
  • printed an alignment block for the motor mounts to ensure that the top and bottom plates are aligned properly
  • tightened down all screws ( these came loose on me once when they weren’t tightened all the way)
  • ensure the belt has enough tension on it.

I’ve been back and forth between thinking I had it solved, and then not, over and over for the last few weeks.

When I loosen the belts some, it gets worse. My belts are currently probably slightly over-tightened just lessen the effect some.

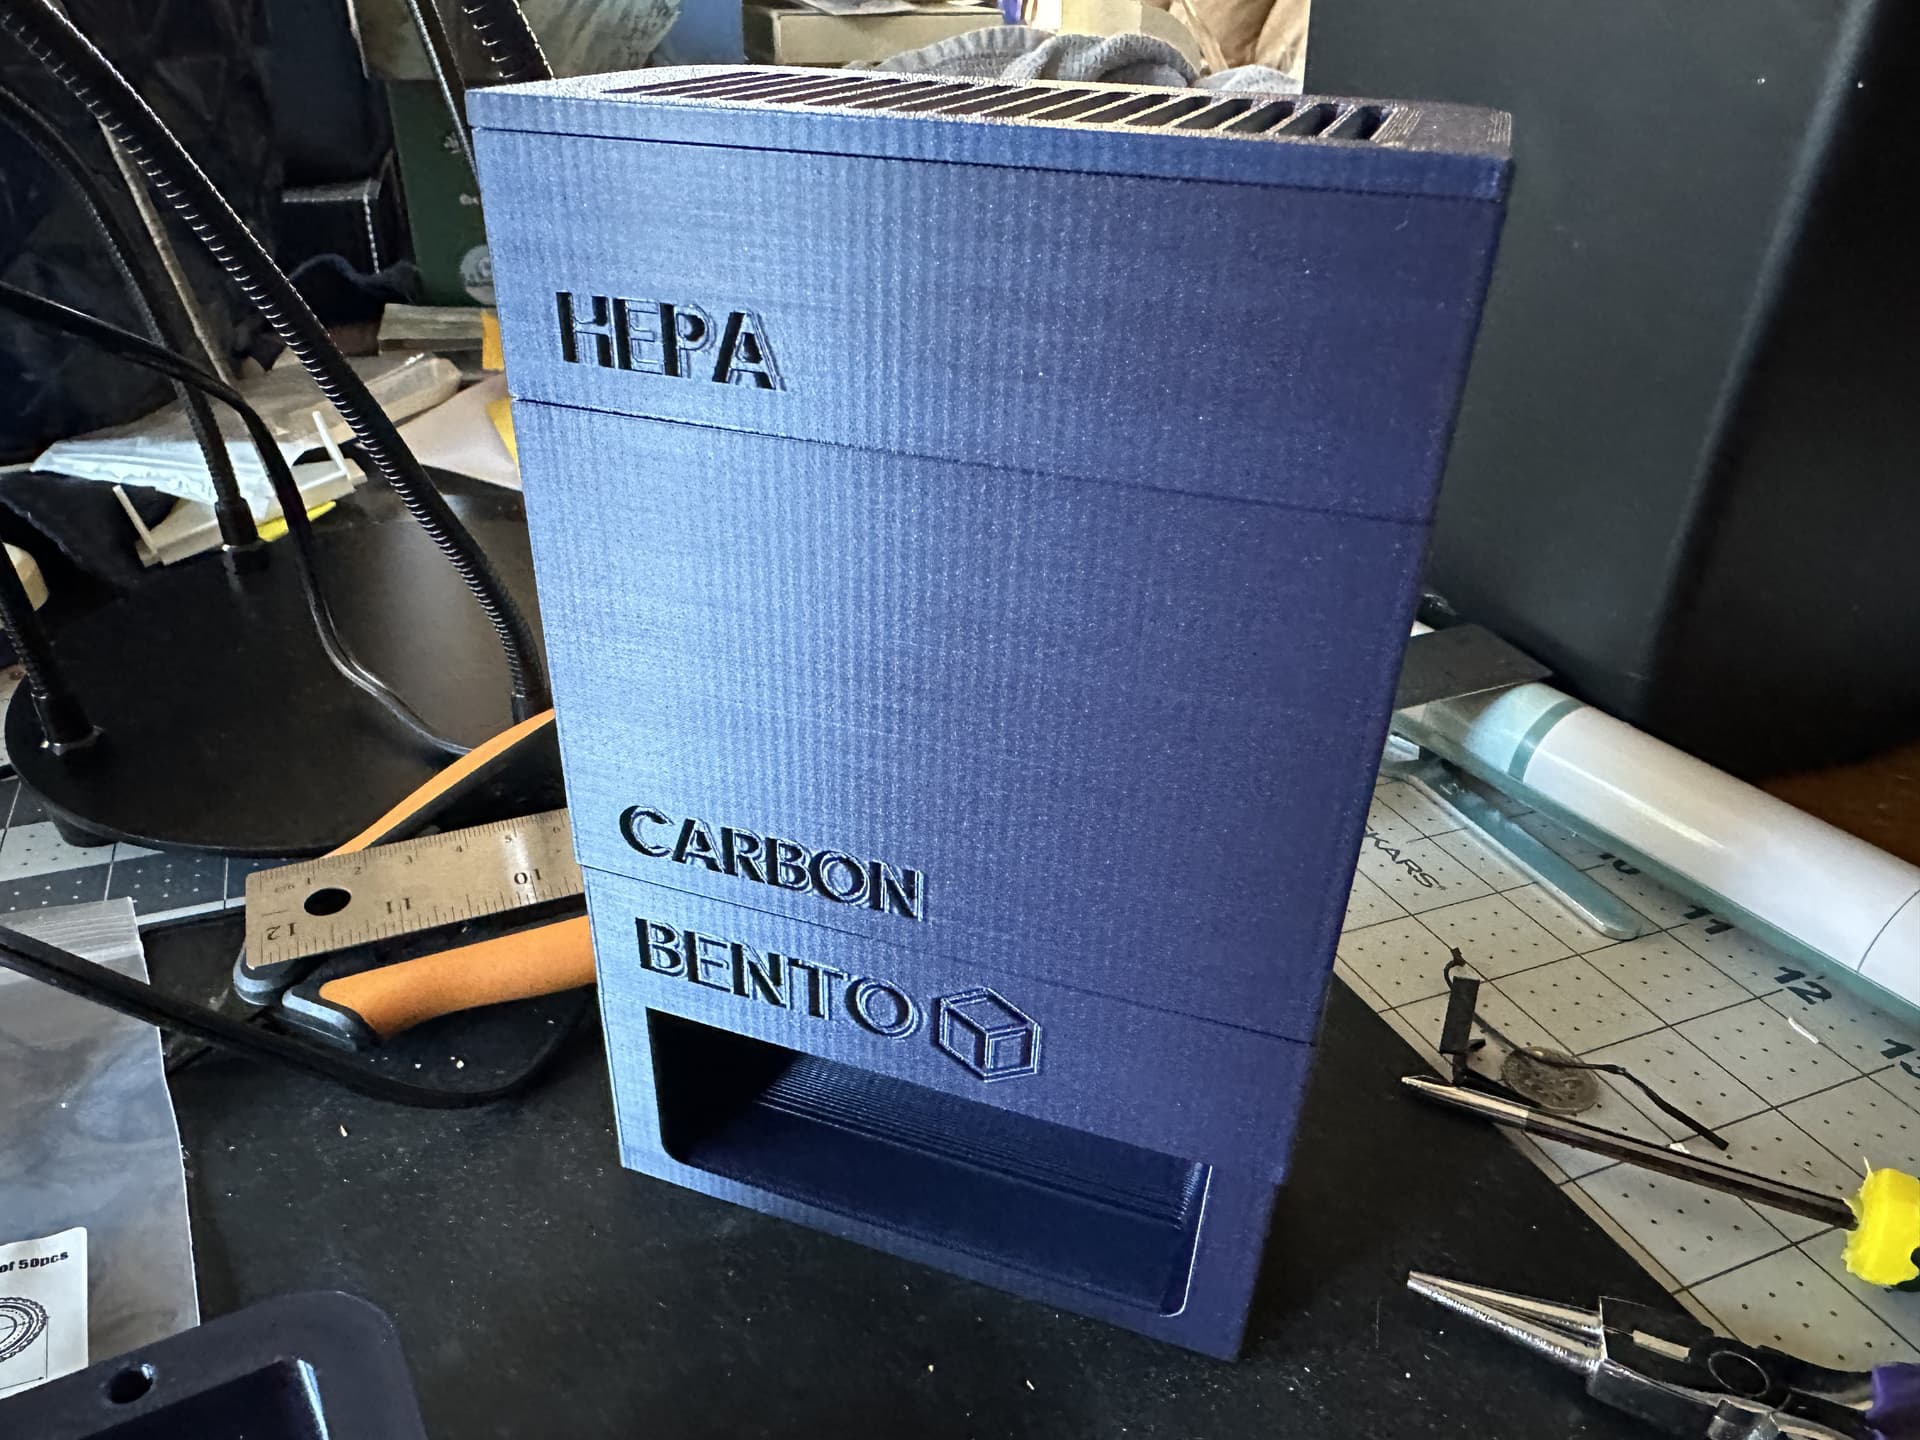
When I print with larger layer heights, the it gets better…

For this picture, the top large print is at 0.2 layer height, and the bottom section is at 0.3 layer height.

This is all being printed at 110mm/s and 4k accels.

Input shaper tuned using the tuning tower.(Klippain-shaketune does not produce good results for me)

I have tons of other details, some of which may be important, that I might be forgetting, but just ask and I can provide any other information that might be important…

I don’t remember ever coming across this online with anyone else’s printer, so I have no more ideas at the moment, short of replacing all of the pulleys just in case? Pulleys were all originally bought from Ryan

I have not tried a different extruder.

I wonder whether some vibration somewhere might be causing it, and maybe the smaller layer heights just aren’t able to hide it as well? But the fact that it is such a consistent pattern…I don’t know.

Hopefully someone out there has seen something like this before and maybe has a clue.

2 Likes

As a troubleshooting step, you could try to print at different speeds and accels and see if it changes.

That might help to differentiate between something in the hardware like an out-of-round pulley, something hardware+software like a resonance issue or something purely in the software like a tuning issue, perhaps?

Edit: It might also be worth trying to print something smaller as a ‘reduced case’ to make diagnosis quicker. You know what it’s like on a big part. Does a small 20mm cube exhibit the same issues?

Another thought is that you could print it with cubic infill and see if all paths exhibit the same effect or whether it’s just walls? Not entirely sure what that’d tell you, but it seems like a good ‘poke it with a stick’ method of information gathering.

Have you tried swapping the stepper and pulley between A and B?

I have printed an assortment of things and I “think” it has shown on all of them, but I’ll have to go check.

I was just starting to do this now.

I’m about to try printing it with the accel down at like 500 and see how it goes. If that does nothing, I’ll half the speed too.

It definitely seems to be with the B belt path, because the A side is pretty smooth, even at 0.2

2 Likes

I think speed might be more telling than accels. It looks like a pretty long flat side that’s there so I suspect the head will be at max speed for that entire run, perhaps?

Varying both in isolation is probably a decent idea, thinking about it. High speed, low accel. low speed, high accel. Low both.

If you’re changing things, it’s always good to do a base double-check case, too. That way you’ve got a ‘this is what it was like before I tried the next thing’ type print to compare it against.

So I’d make a 20mm cube or whatever, print it with my normal defaults, then print it again changing one thing at a time.

No. The steppers don’t have plugs, so at the moment to swap them I’ll have to pull all the wiring all the way out.

I’m currently considering putting inline disconnect plugs in my cable trays so I can remove the steppers more easily.

2 Likes

I was thinking about doing something similar to my V5 build as the inaccessibility for component maintenance/troubleshooting had me worried. (I worry more about my ability to build it correctly than I do about the soundness of the design)

It was a problem for me. That’s why I’ve been thinking about it.

I disassemble those back corners twice in the last few weeks and didn’t like my motors just hanging there…

And then it hit me how much of a pain it would be if I decided I wanted to take the whole thing apart and rebuild it… so I need to check how big the holes in the panel I put are. I know it fits the 4-pin dupont, but would like to have something that clips…

Otherwise, I guess I could 3D print something wavy to hold them together in the tray :grin:

1 Like

For reference, that print in the picture is about 60mm long on the side.

I did try the same with a 20mm cube a couple days ago, and got the same effect on the walls.

2 Likes

That’s good to have as a comparison. I’m just thinking that it makes sense to have a direct comparison between things that are quicker and cheaper to print. I’d be mowing through them changing things, re-doing tuning, mucking with stuff, just trying to find anything at affects it.

what’s the spacing between the ripples?

Pretty close to the belt spacing…but not exact…

Looks like 2.05-2.1mm

2 Likes


We get that on railcore printers. The current theory is the belt alignment at the hotend is slightly off. We know ours is out of alignment by about a millimeter.

One of the guys got it mostly gone by cranking belt tension up to about 100hz. That’d rip a printed printer apart though.

That’s how mine has gotten a little better. Increased belt tension…

1 Like

We’ve also seen less tension kinda hide it. Can’t go as fast though.

Are those waves in yours deep enough that you can feel it?

When it’s bad you can feel the grooves when you rub your finger back and forth?

This is the first CoreXY printer I’ve ever messed with…so I’m just learning how all this stuff affects each other…

Any ideas on what a solution would be? Or why I only get it on one belt and not the other?

Does it make sense that increased layer height also hides it?

1 Like

Are you using belts, idlers and pulleys from V1E Shop, or did you self source?

It was all from V1. The belt has been replaced with a non-V1 belt, but that was to try to get rid of this issue as a test to see if it was the belt

1 Like

Is there anywhere in your belt path where you have the belt either able to walk on/off the idler GT2 Pulleys or where it isn’t seating properly? I’ve seen mis-machined idlers on other CoreXY kits, and misalignment where the belt wasn’t fitting the pulley properly.


(out of focus shot of one that doesn’t have this problem; for reference)

1 Like

You mean whether the belt is perfectly seated within the teeth?

I’m not sure I can tell that for sure…

None of them seem to slip when I move them by hand.

If you know of a better way for me to test it, I can, I’m just not sure how to know what’s going on on the back side

1 Like