There is a version that allows Mainsail and Fluidd without adding Klipperscreen to the LCD, and another version that adds Klipperscreen. This is Klipperscreen running on mine.
I like klipperscreen. Once I learned how to have prusaslicer generate a graphic in the right printed color when it slices, it made it so I can select a picture of what I want to print rather than remember the file name from the screen. So I can slice en masse and upload while it is printing. Then when it is done after clearing the bed, push the print button on the screen to start the next job by selecting the picture of what I want to print and there is no sneakernet involved.
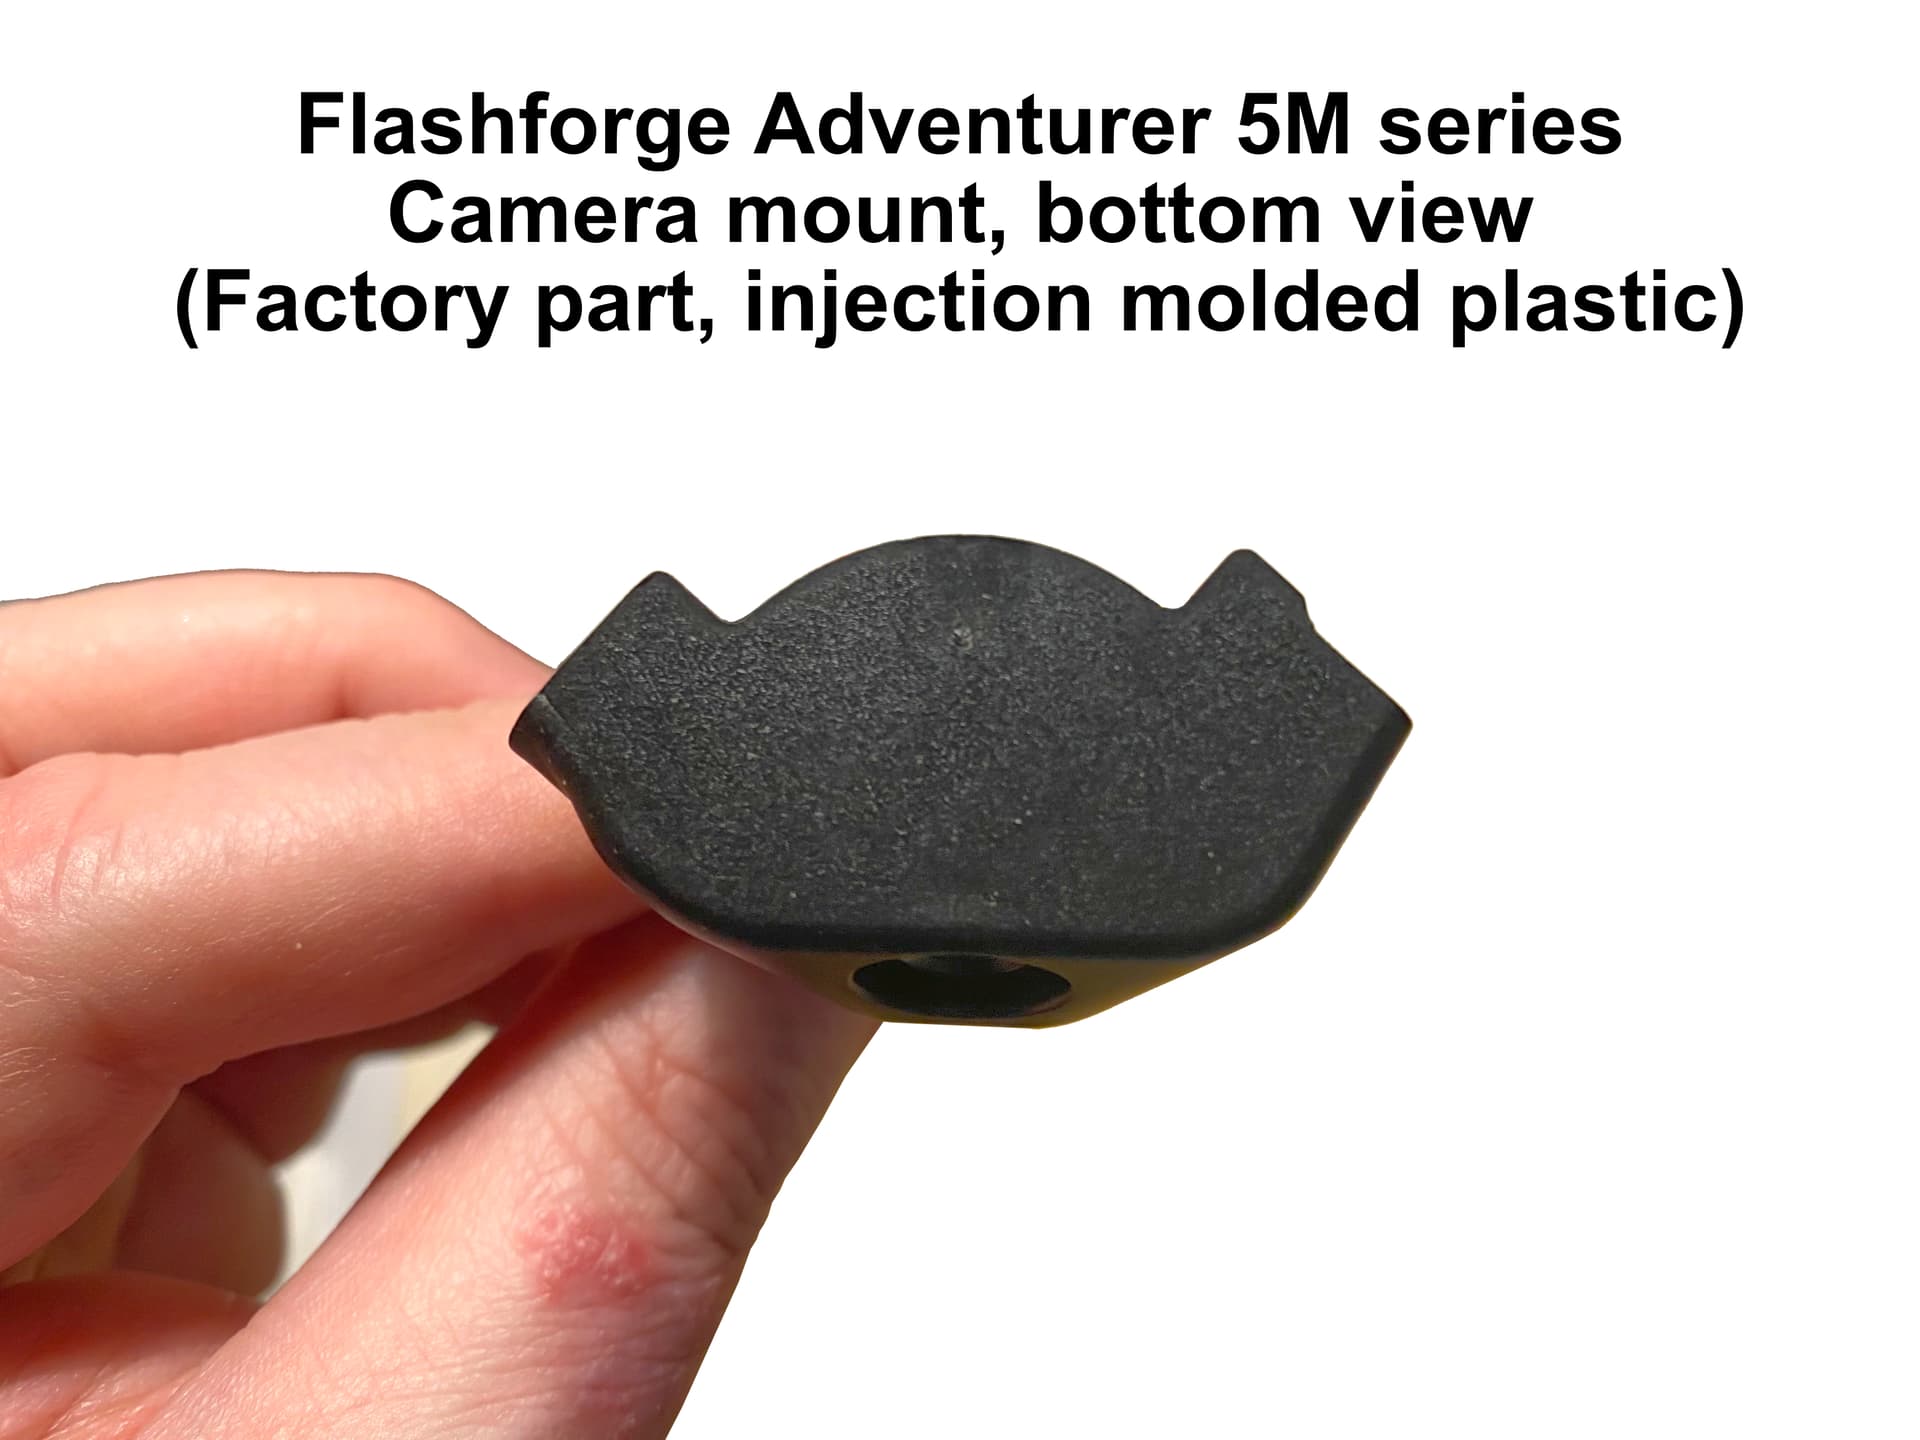
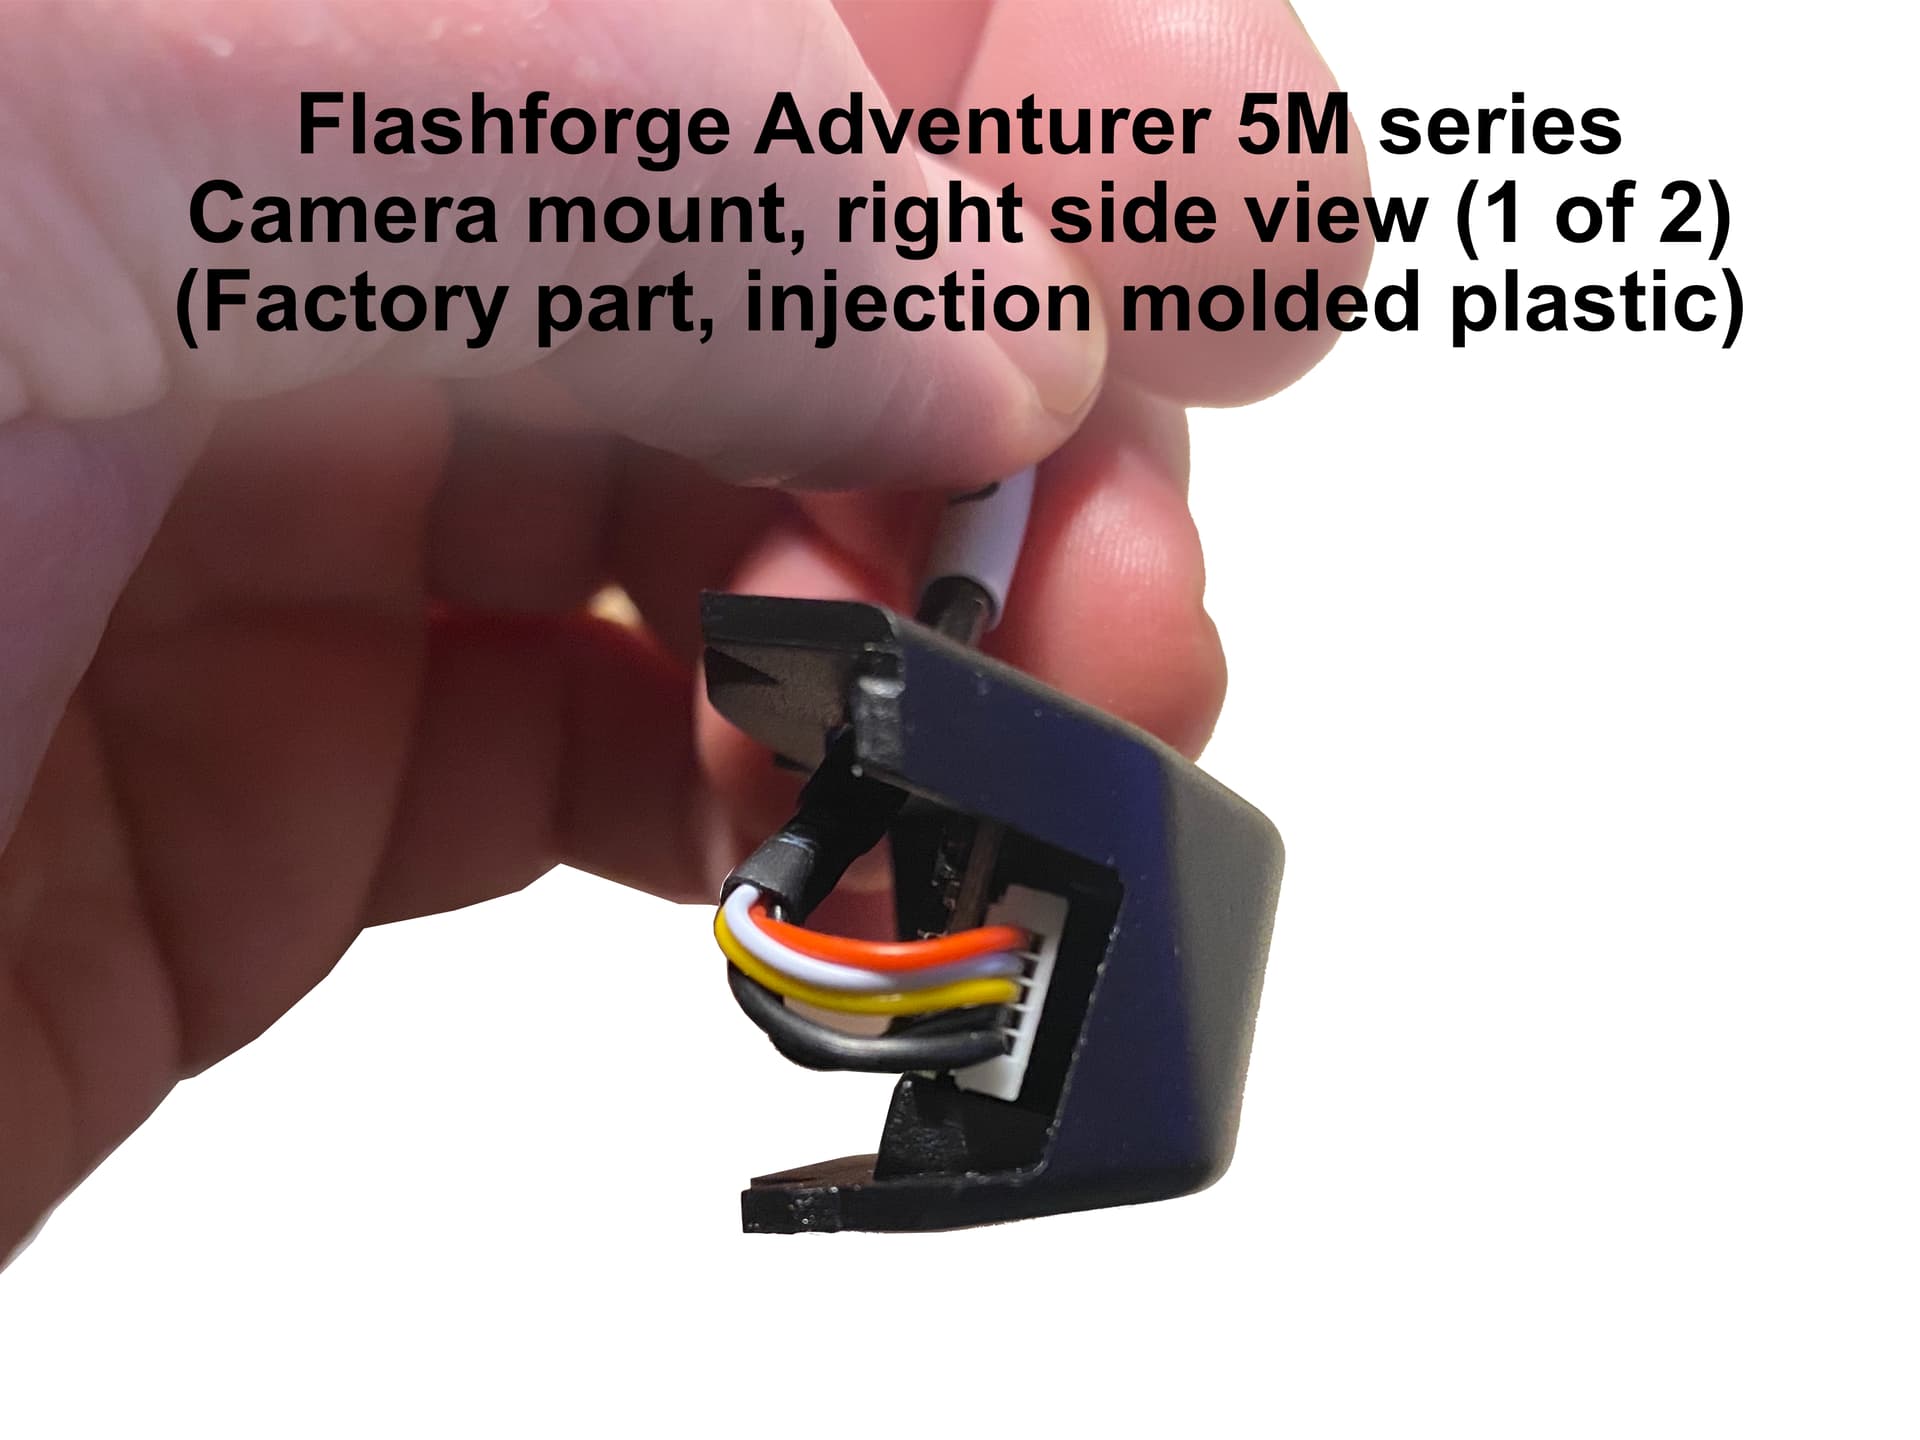
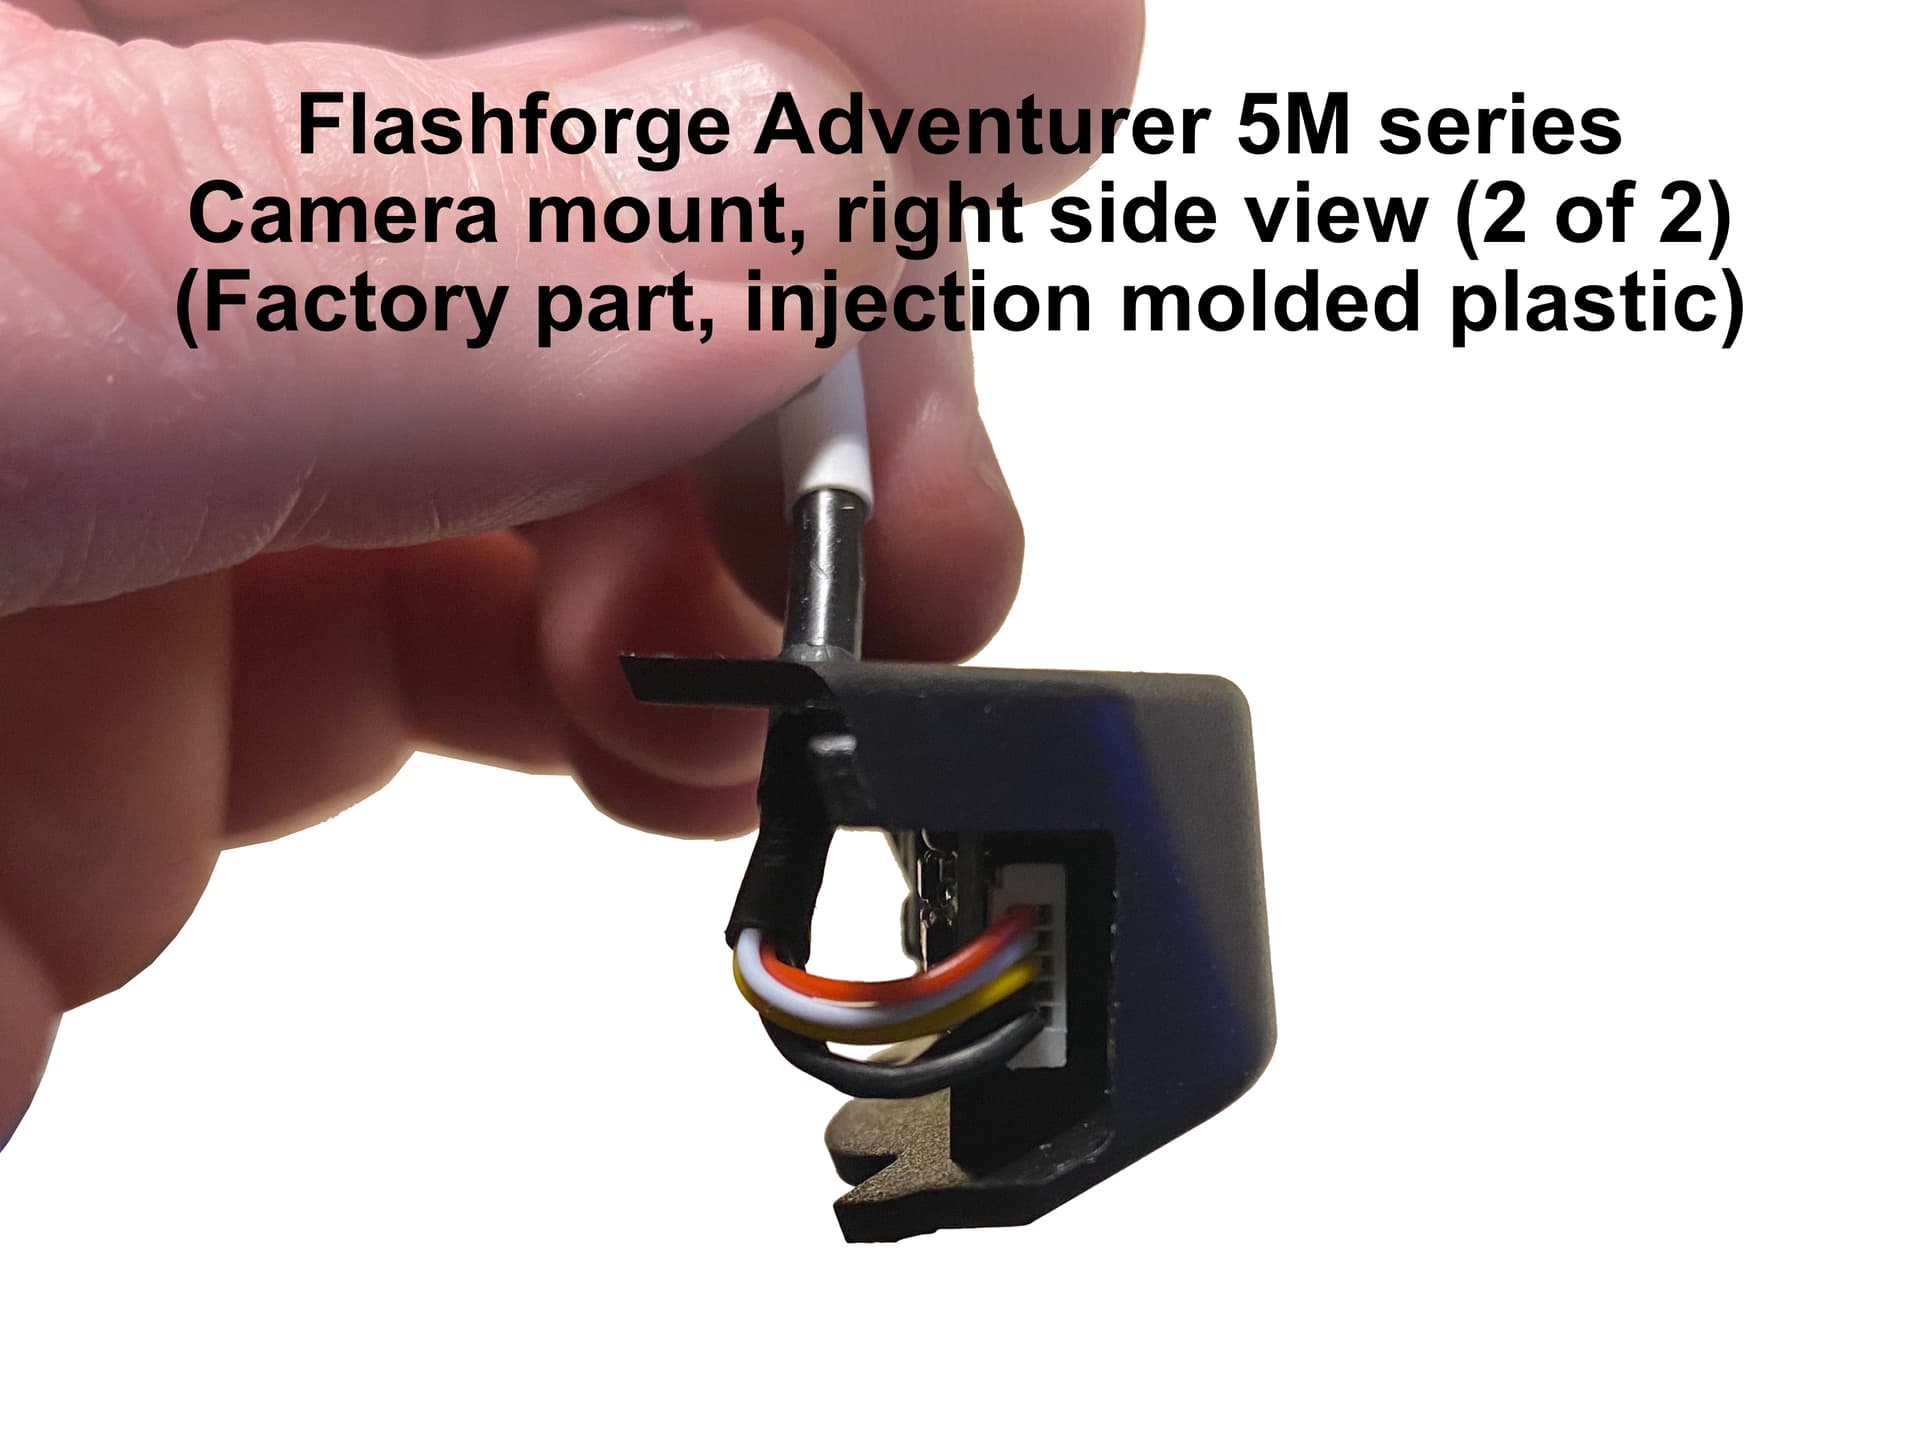
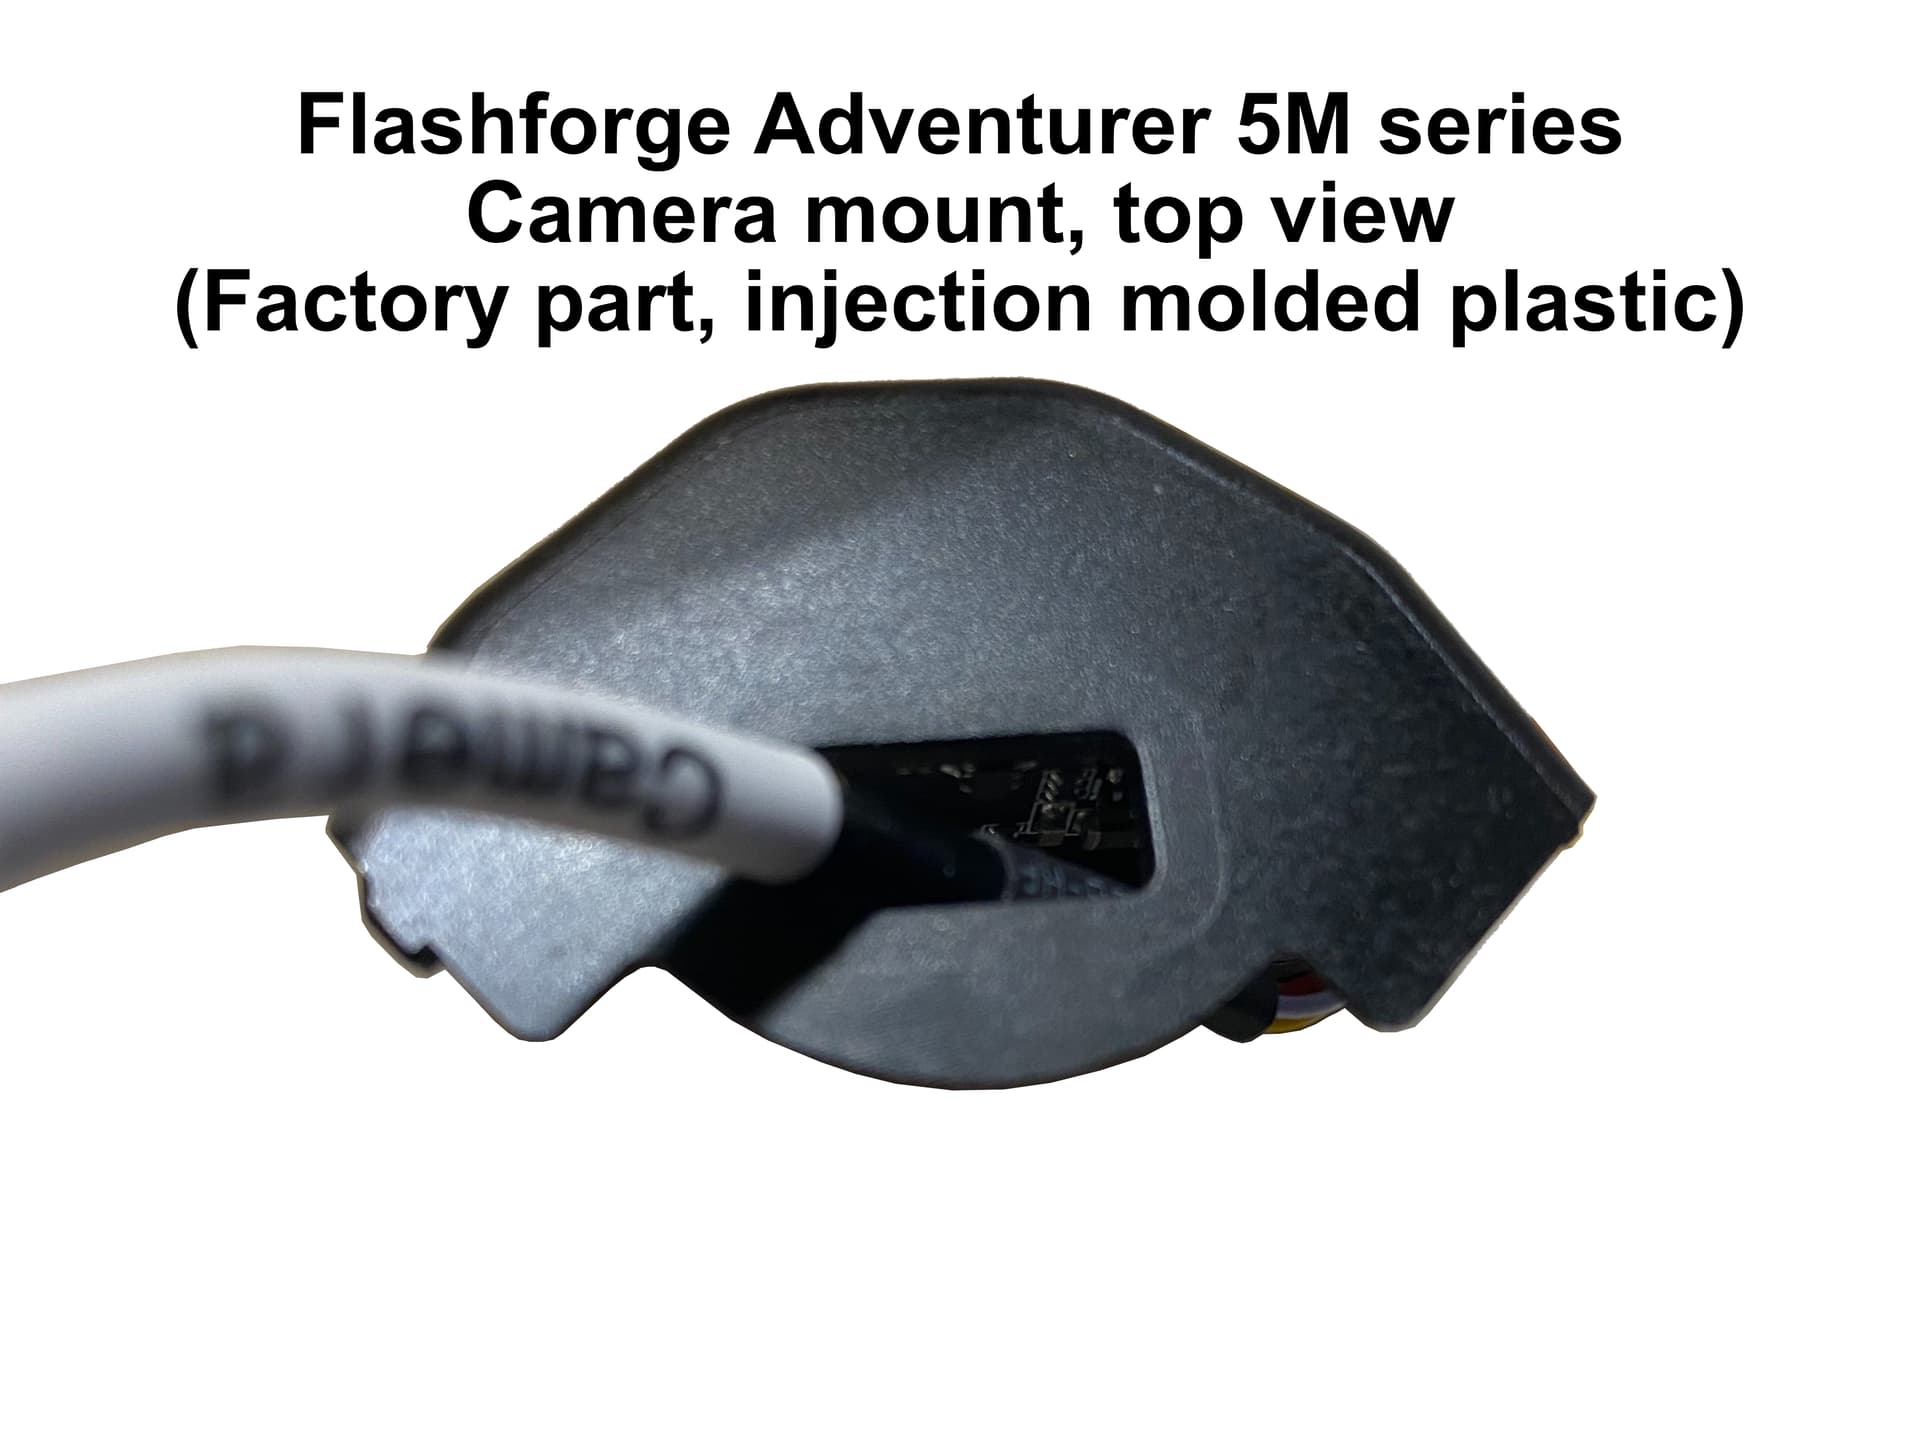
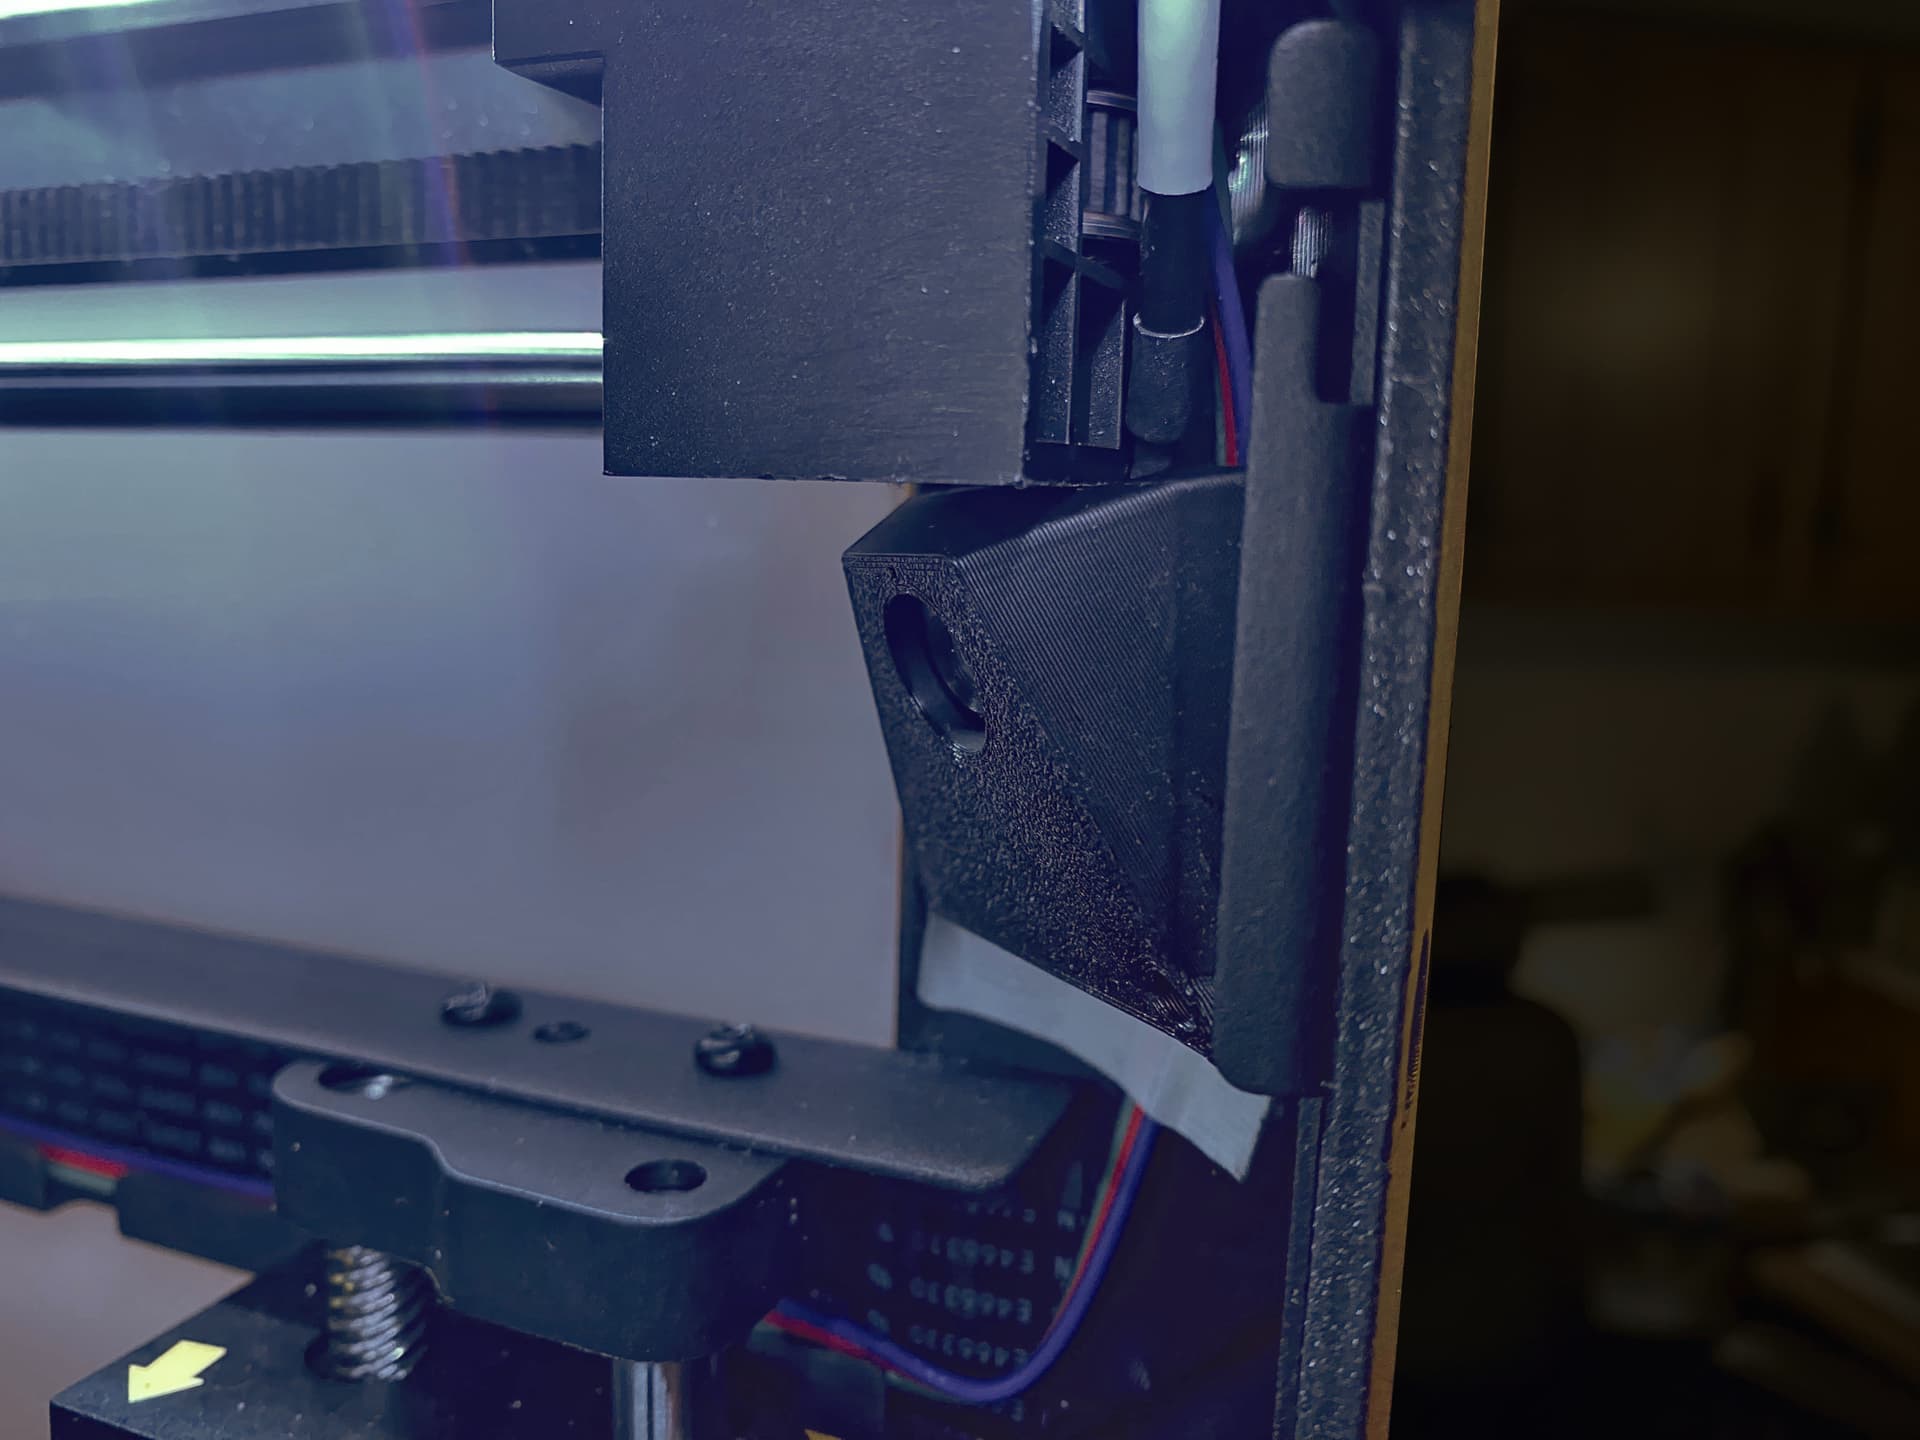
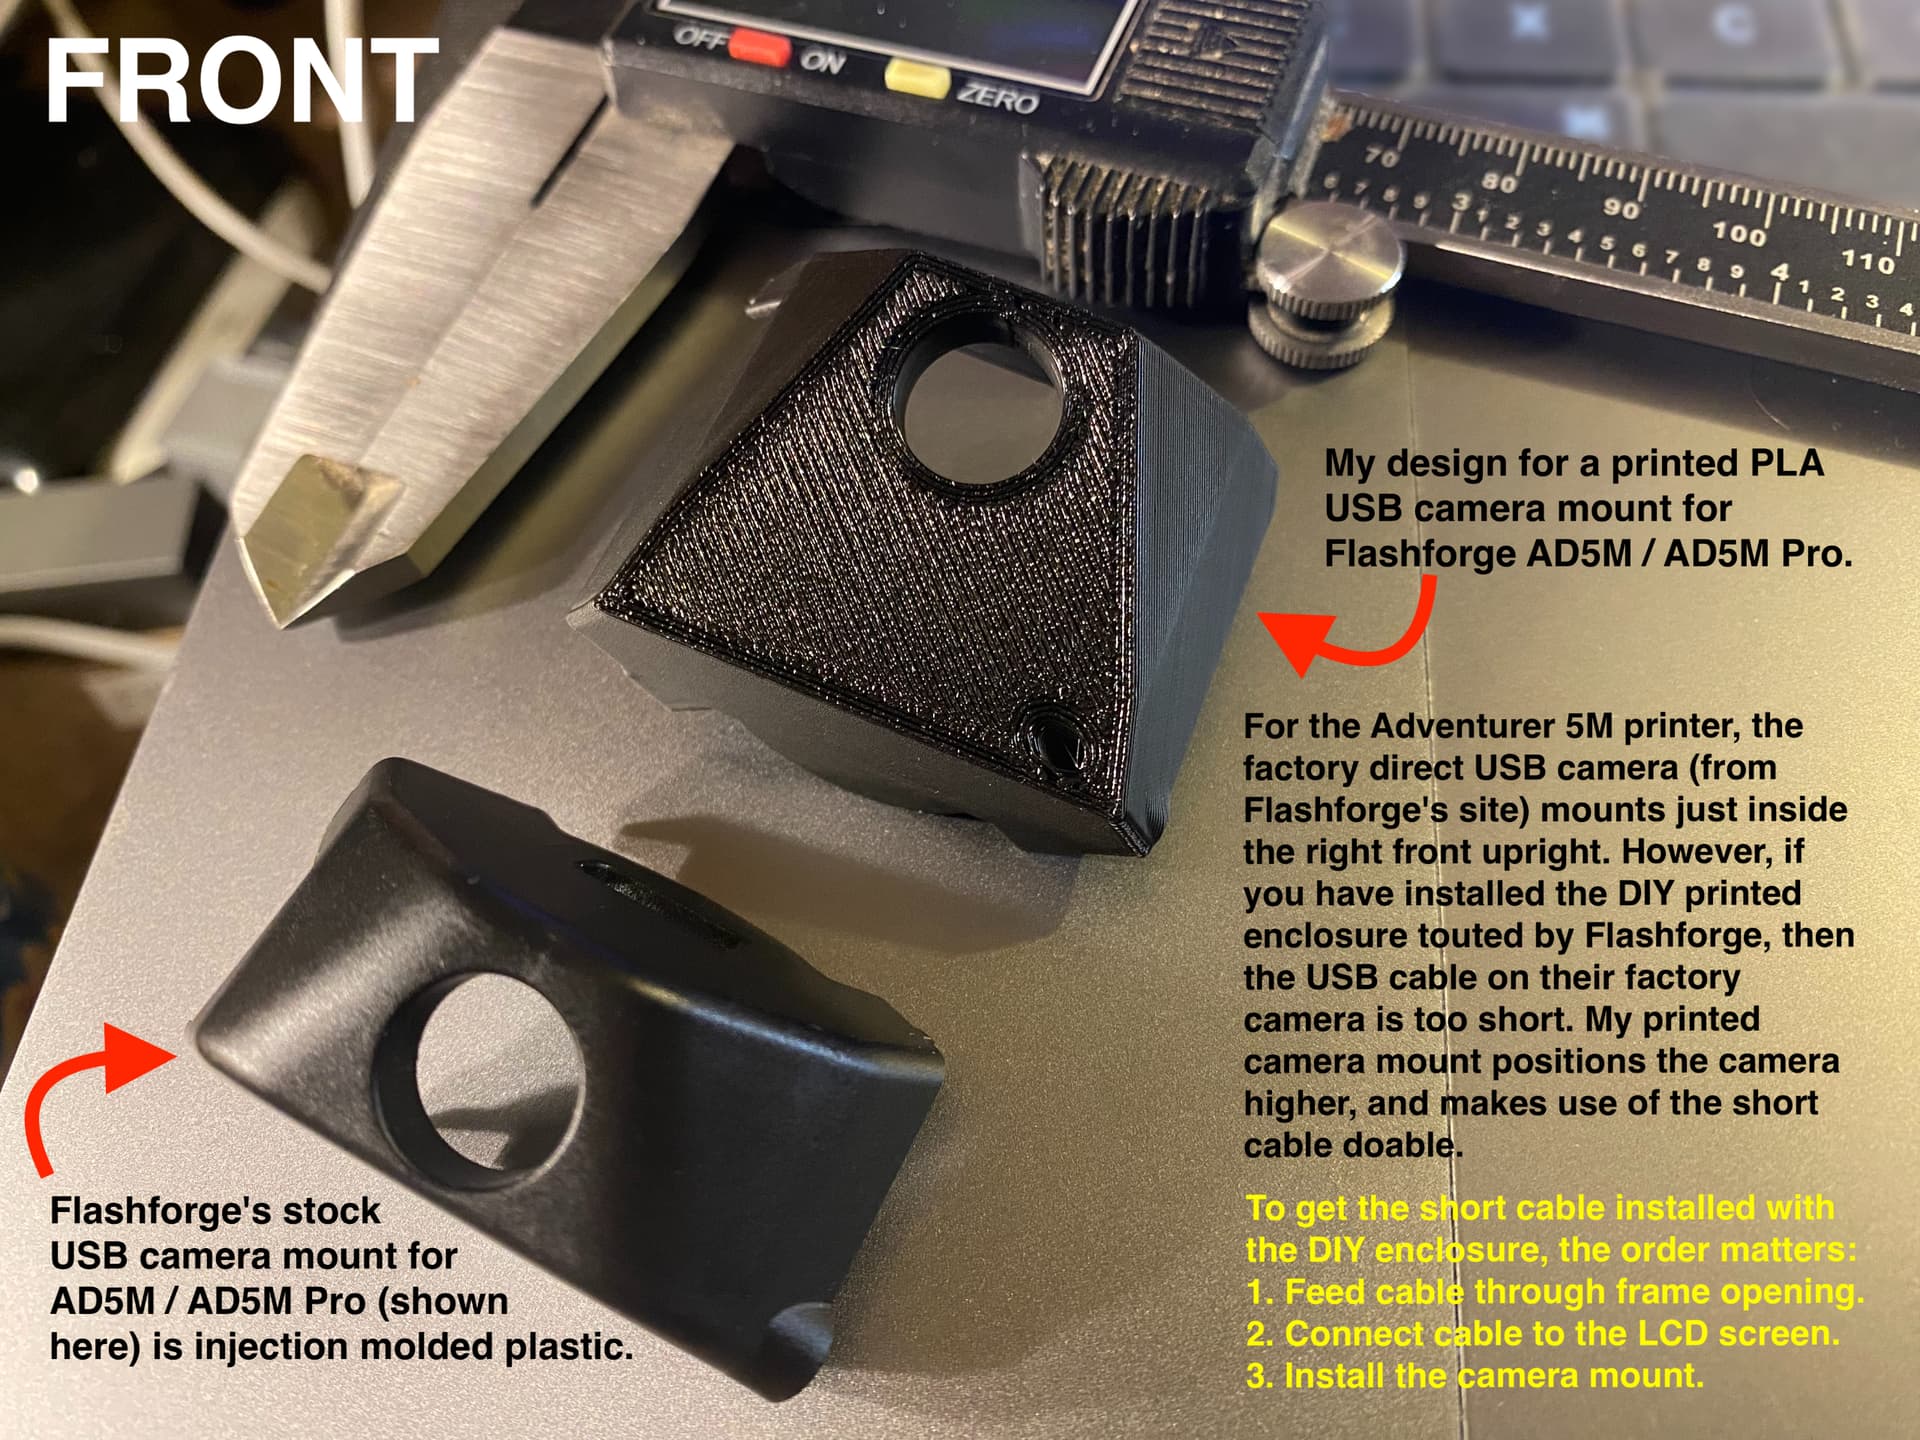
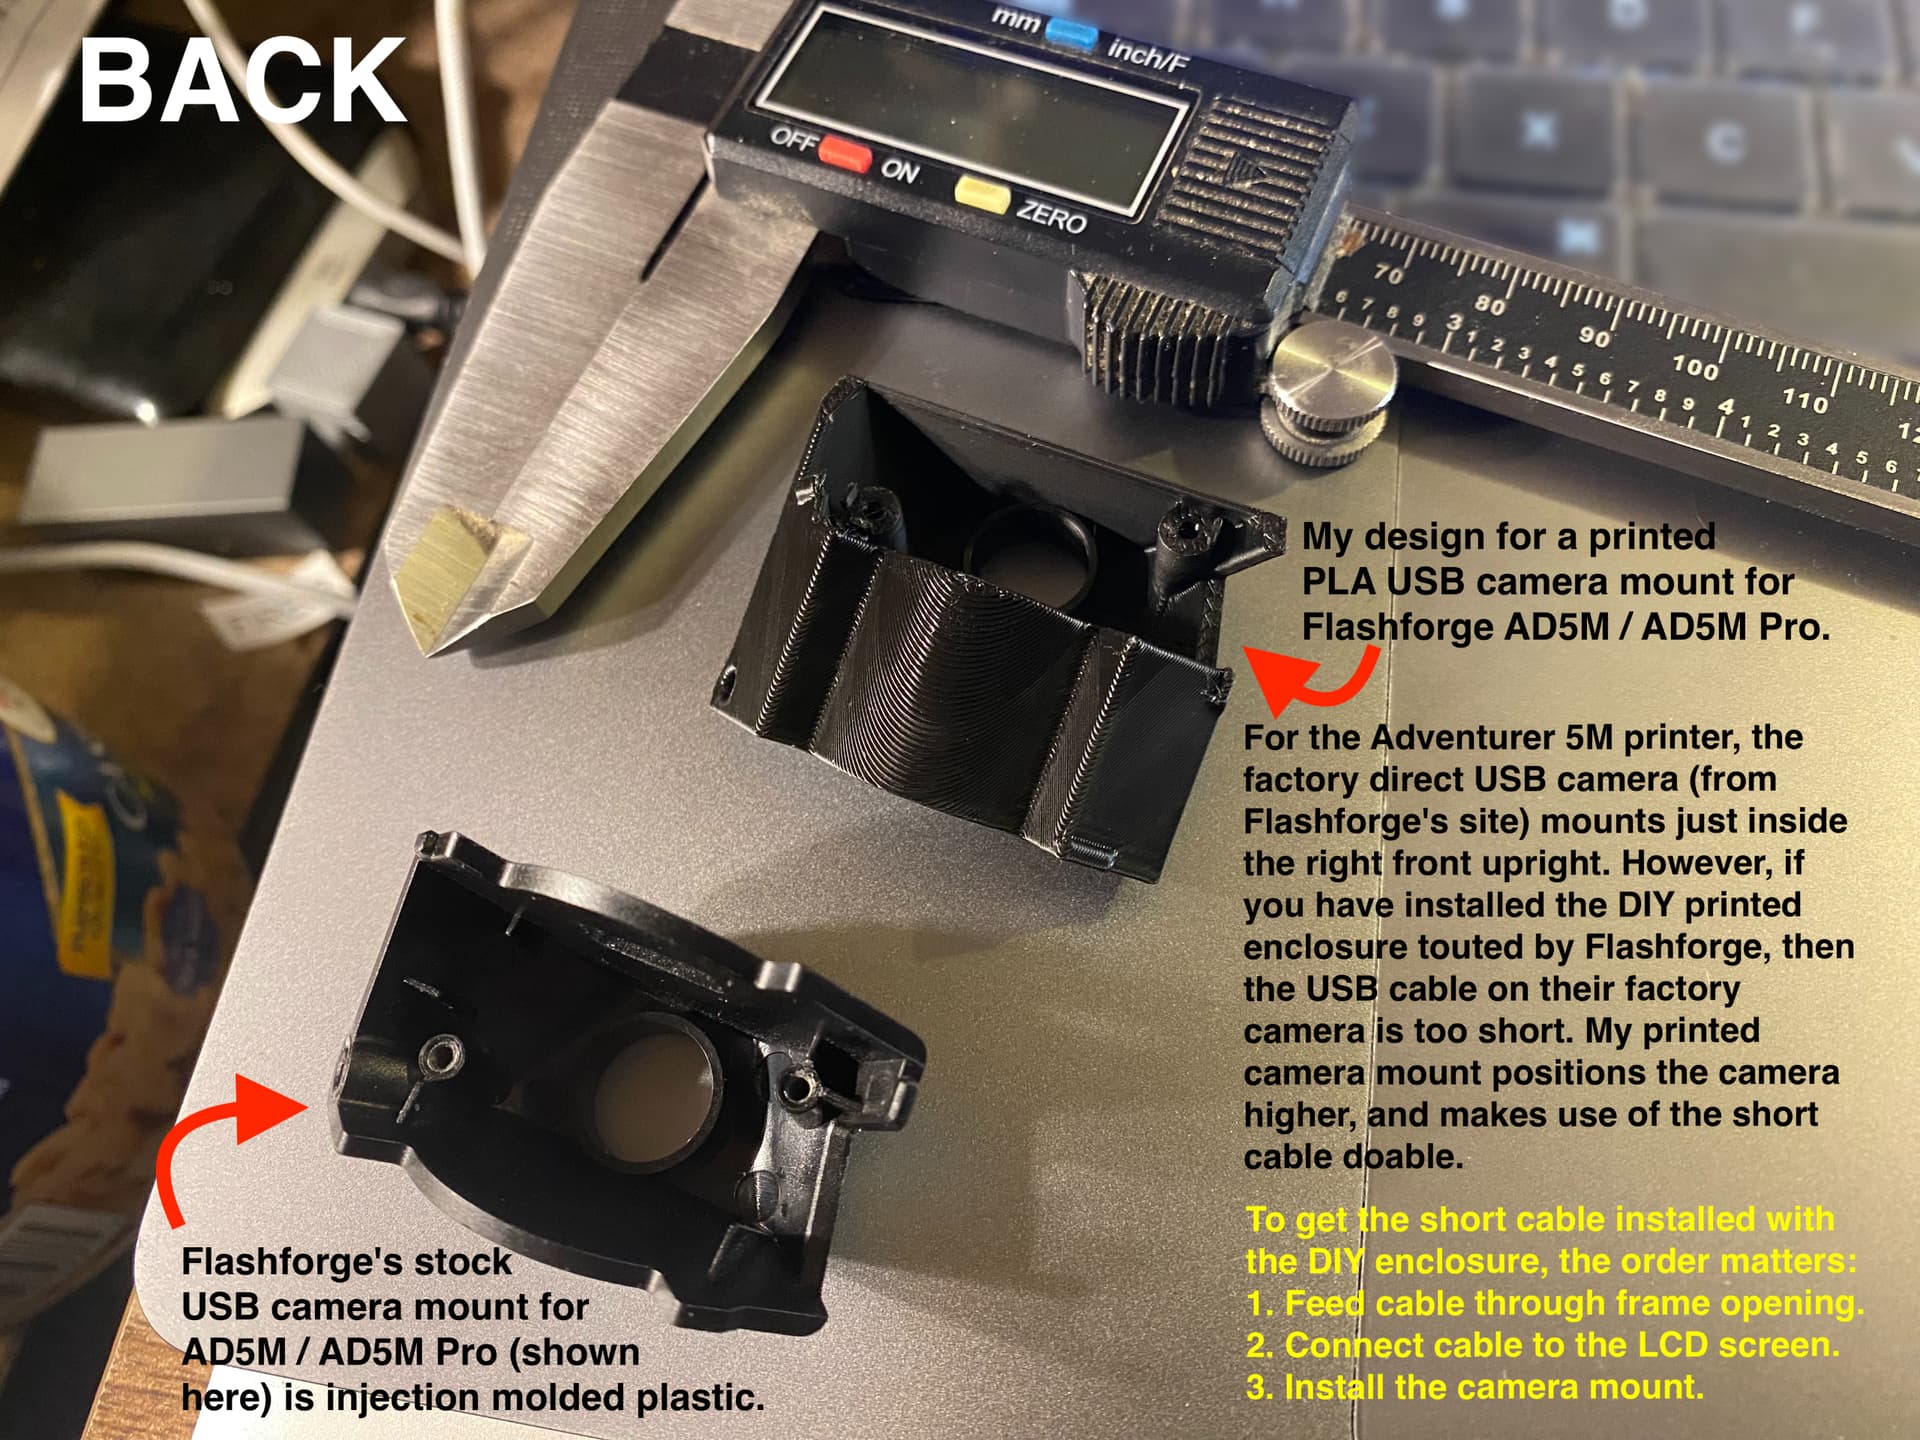
The camera I ordered from Flashforge for this printer… was initially out of stock, but it finally arrived. One hiccup is that the DIY printed enclosure they offer files for, raises the LCD up some, and the USB cable on the camera is not long enough to reach to the new location. However, I was able to model a printable mockup of their injection molded camera holder, and then make a modified version of it, that raises the camera up just enough to make the USB cable long enough. Klipper is working great with Klipperscreen, Mainsail, Moonraker, Fluidd, etc.
I also worked out a modified print profile for the one and only brand of PLA that had trouble at the full speed settings, so now I’m getting good results with all the filament I already had, and almost all of it prints at the super fast settings.
Above, I mentioned I designed an extended camera mount that allows the too-short USB cable to reach the LCD even when the DIY printed enclosure is installed. I’ve now published the design for that on Printables: Printables
I checked the link in the first post and these were $299 still. So of course I had to grab one to mess with. Thanks for all the great information Doug!
Yes, right after I bought mine they raised it to $349, but some time later that reduced it to $299 again.
It prints amazingly well, and especially considering that price, it’s neat that I have Klipperscreen on the LCD, and I have control access via Mainsail and Fluidd, etc. Granted its not a Raspberry Pi and its resources have very little left over — but it runs, it runs well, and I have no issues. For $300 and a little DIY time, I’m very pleased.
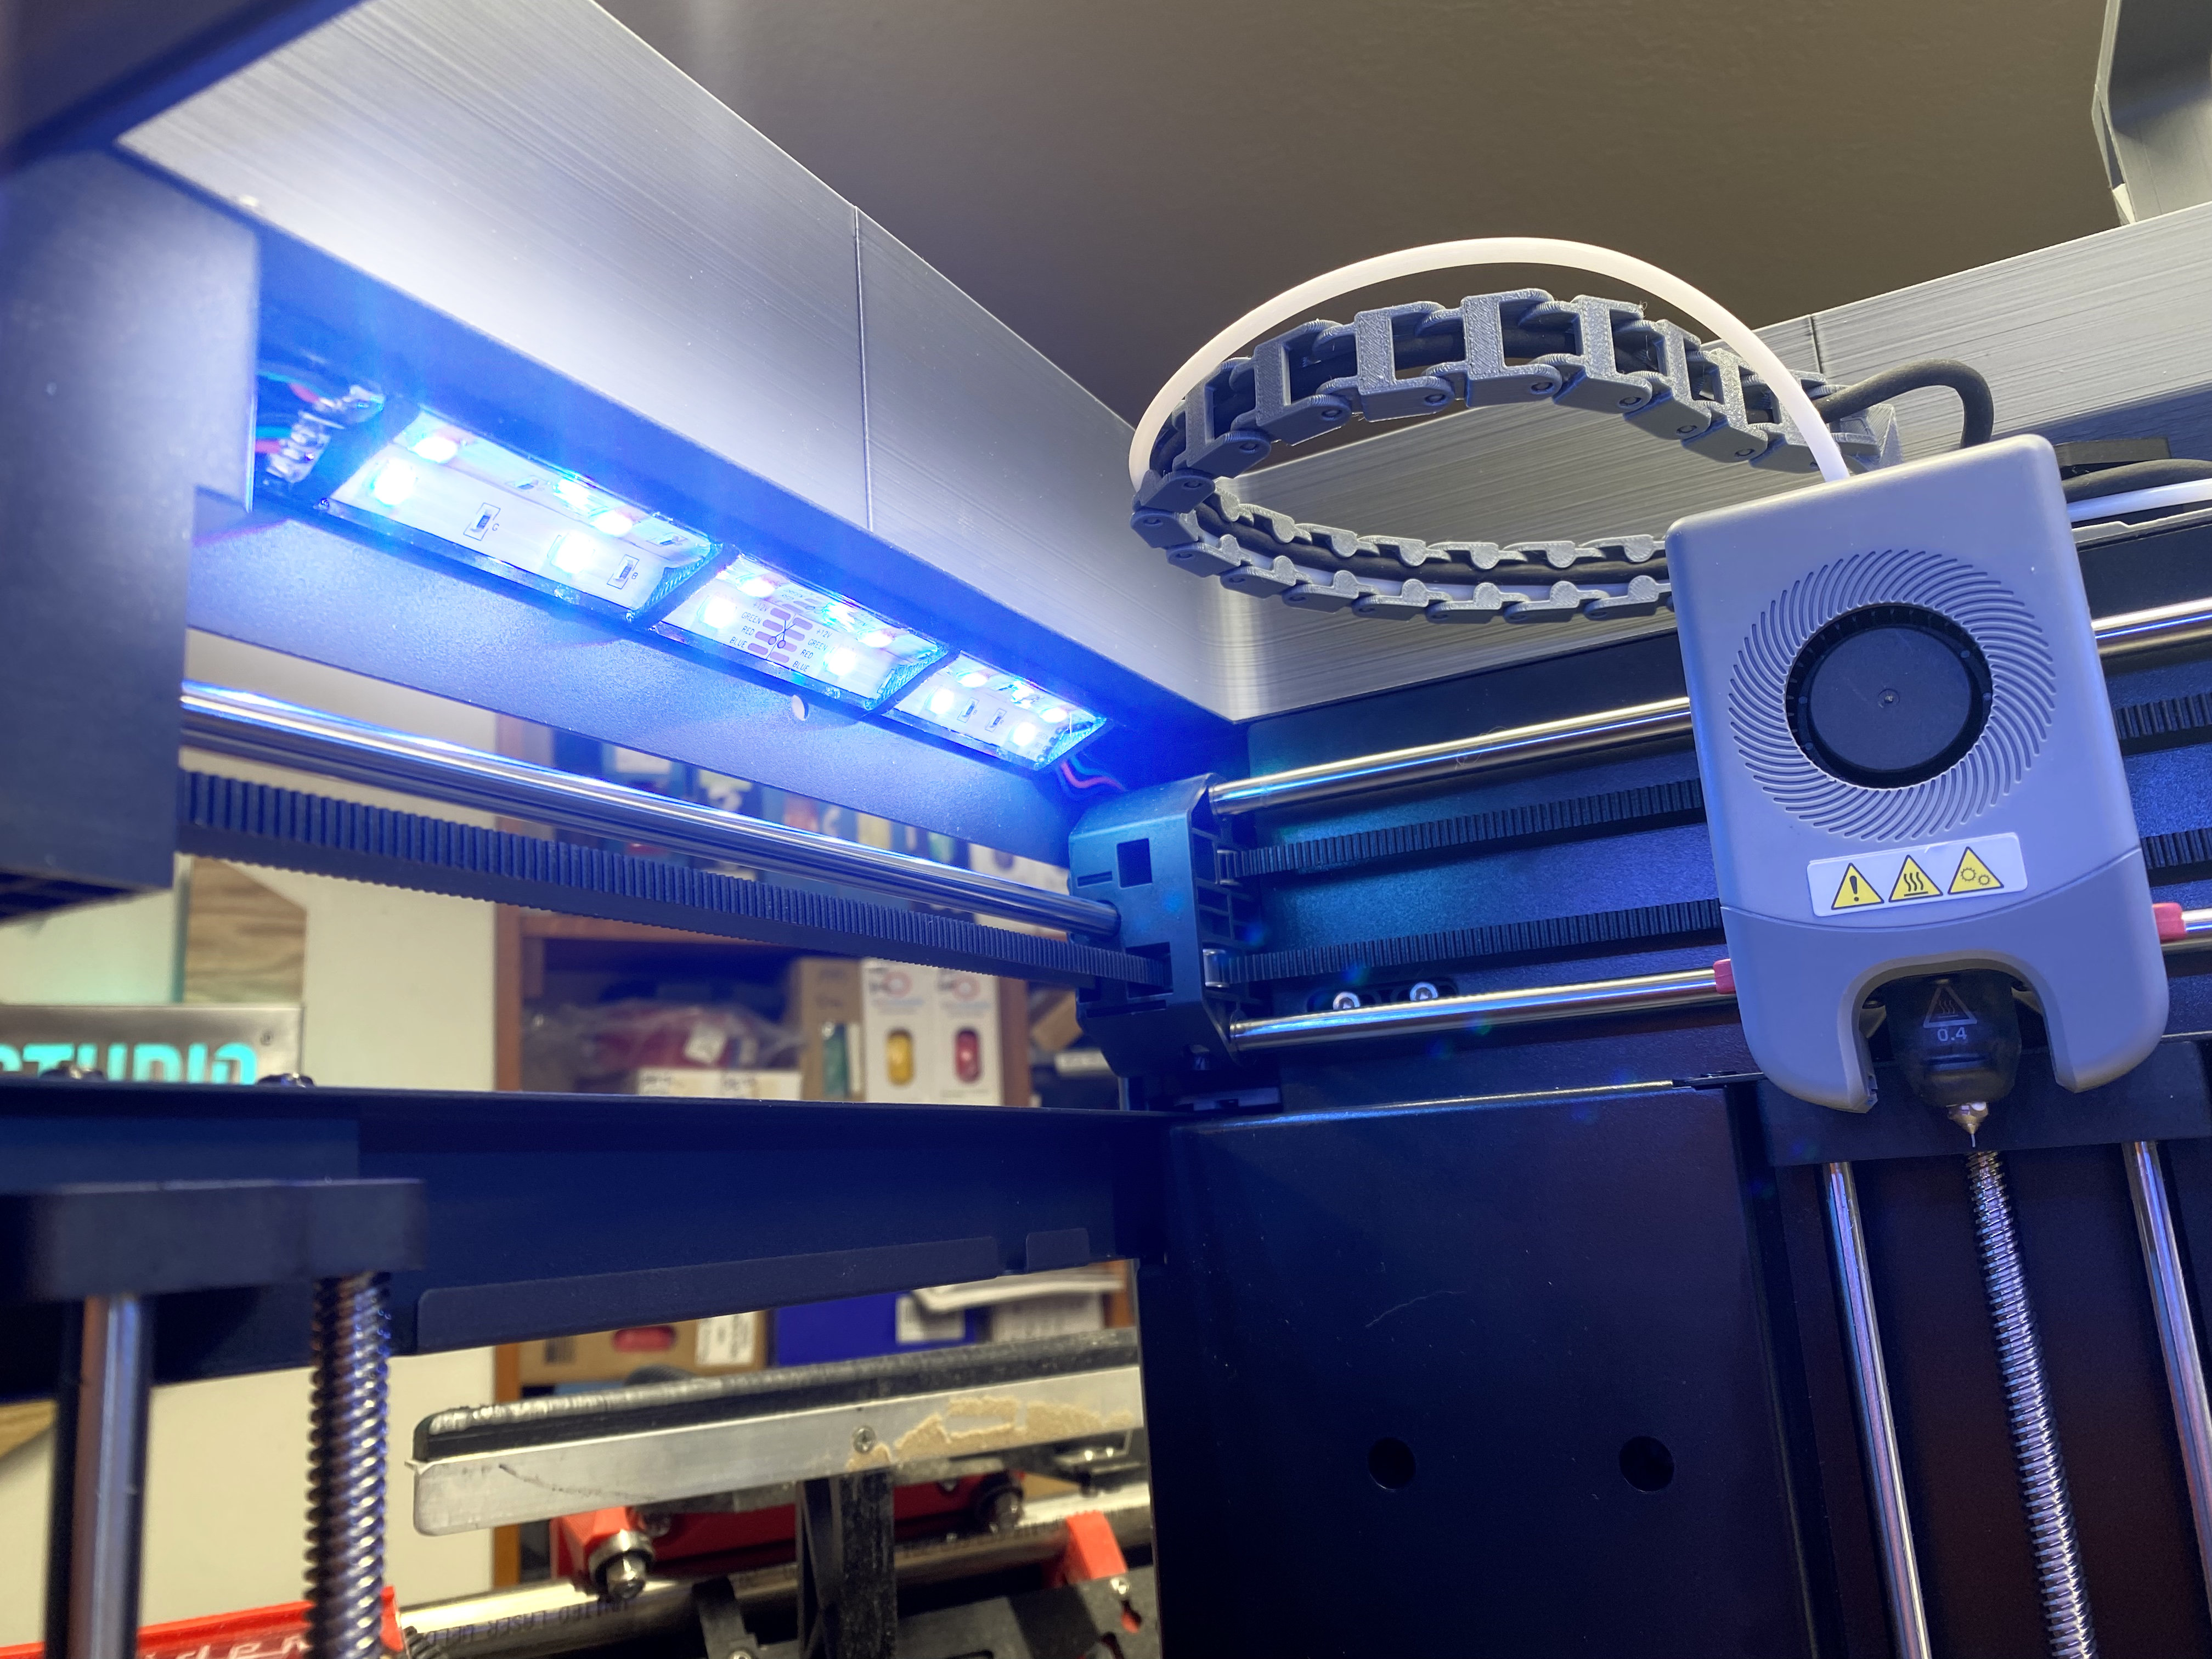
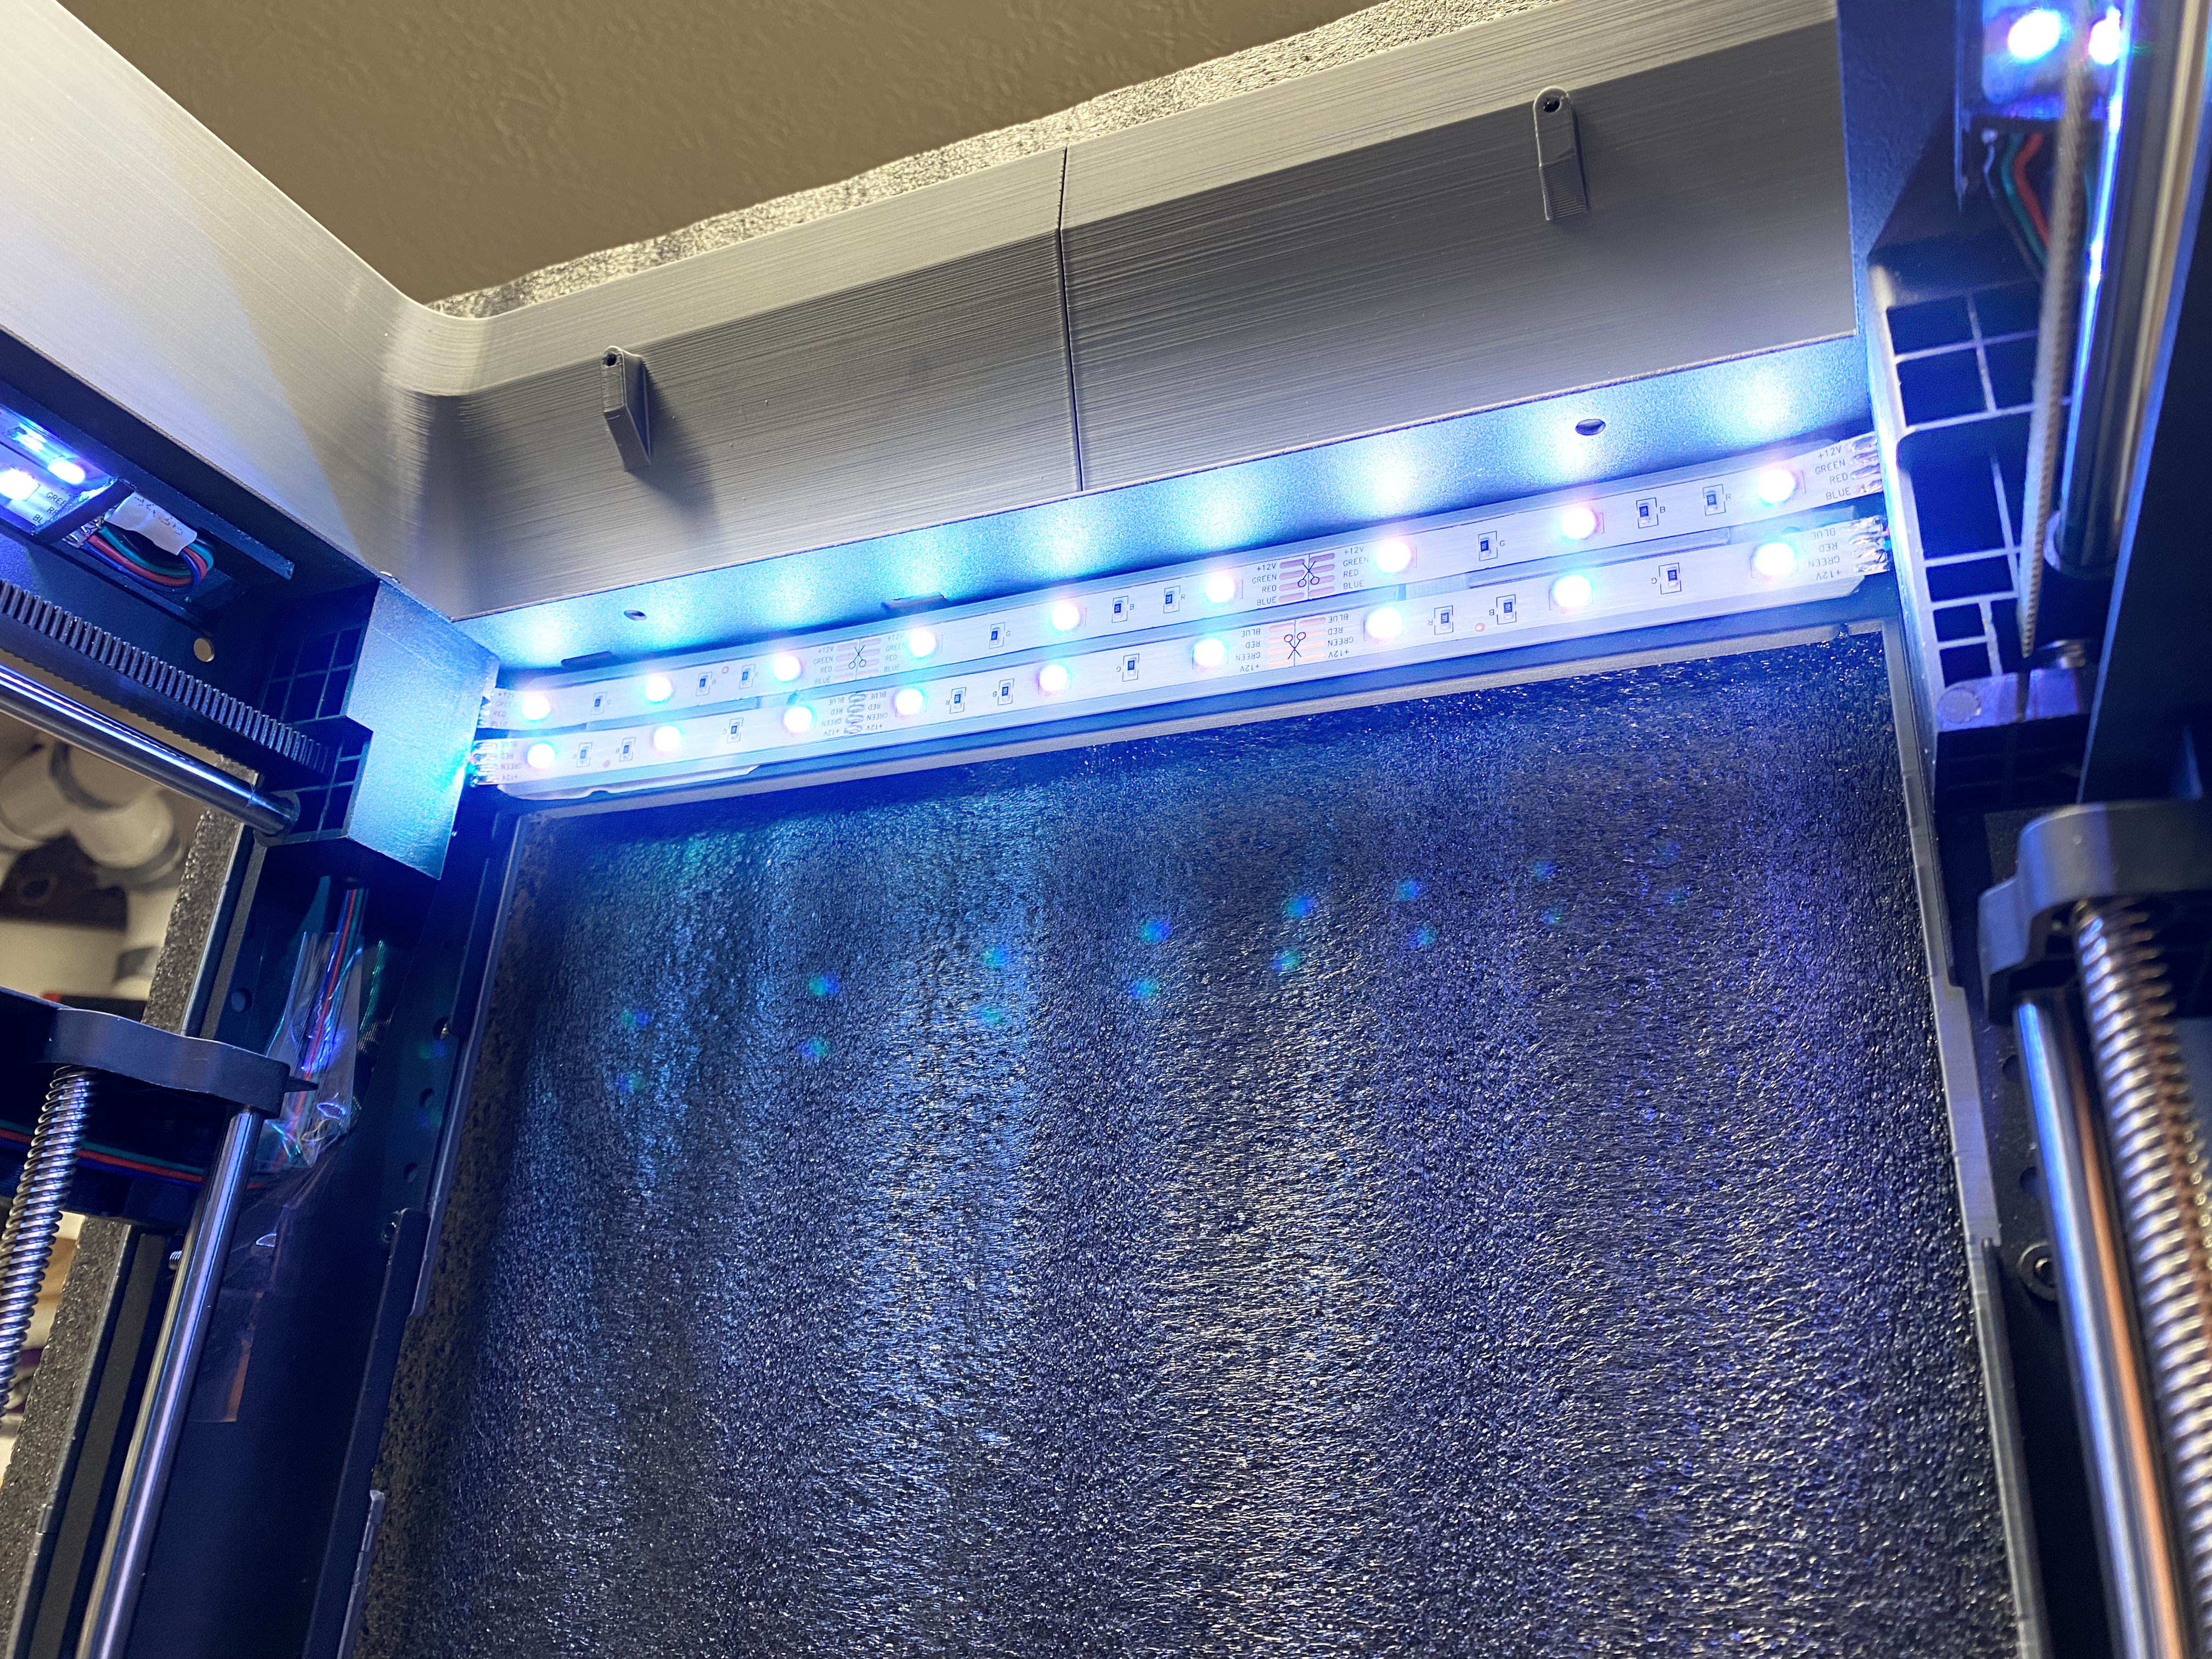
Speaking of DIY time, I’ve added LEDs to mine on front and both sides, and I had to DIY a mount to get their USB camera installed. But really like my setup. Only thing I wish I had done differently was use “warm white” LEDs. The ones I had laying around here and used, are a cool white, and it puts a bluish tint on everything. But at least I can see in there.
I was looking at theses as well. Since you have one can you answer a question? Can you just change the nozzel( metal end only), or do you have to replace the entire removable part?
The AD5M printer comes with the 0.4mm nozzle as stock. The Pro model comes with both 0.4mm and 0.6mm.
When I ordered my AD5M, I ordered separate 0.6mm and 0.8mm nozzles to have also.
If the question you are asking here is, “If the nozzle end of this removable quick change assembly needs replaced, can I replace only the nozzle and keep the rest still intact?” then I don’t know the answer to that, and I have just now posed that question on one of the listings (this one: https://www.flashforgeshop.com/product/0-4-mm-nozzle-kit-for-adventurer-5m-series?cID=31).
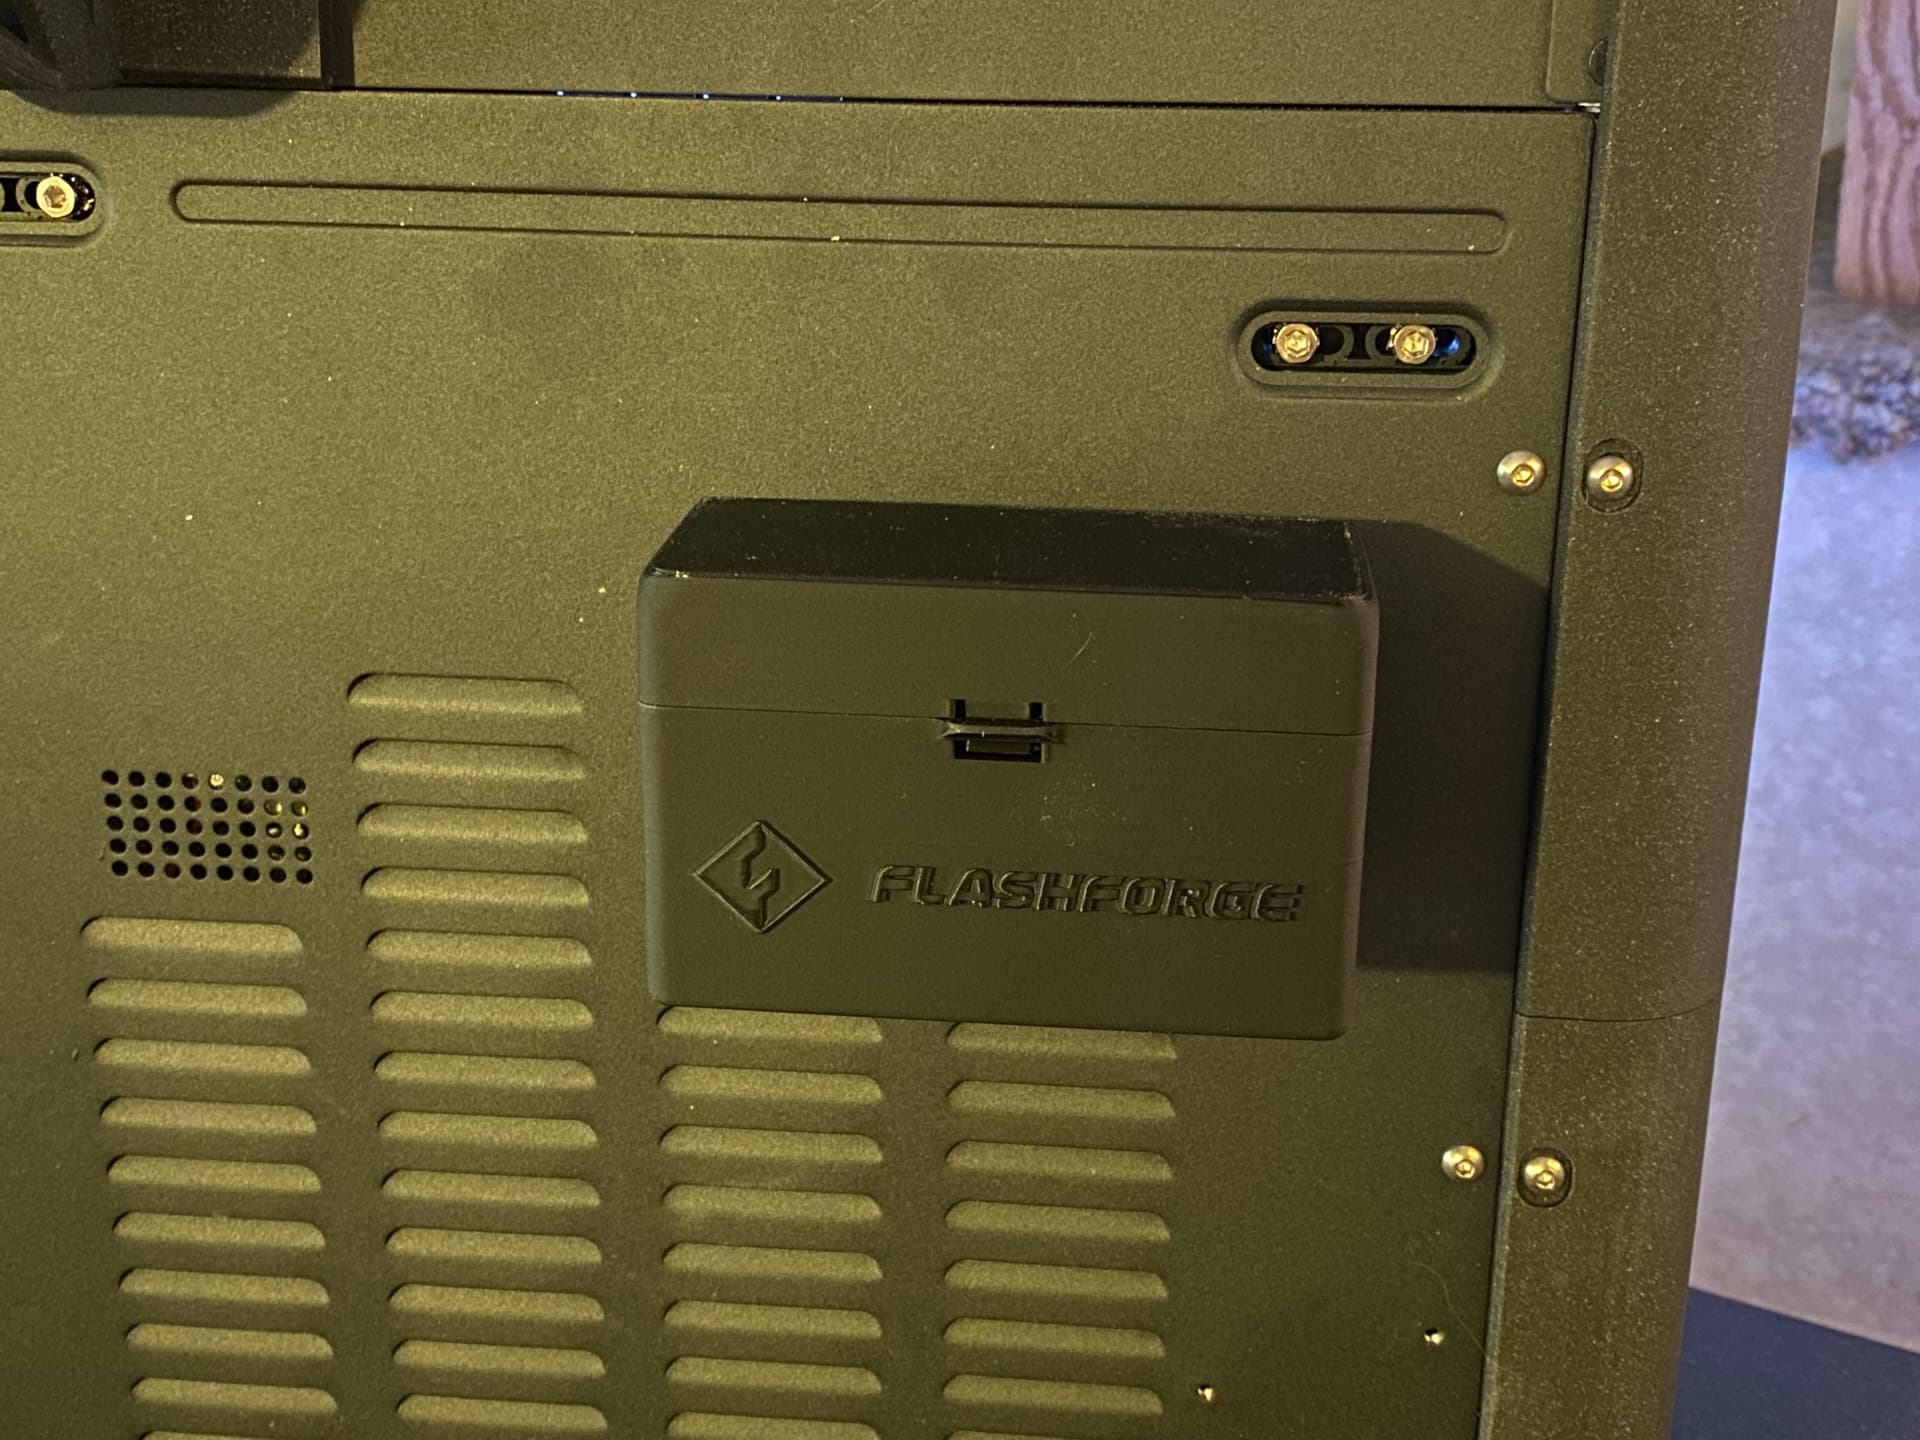
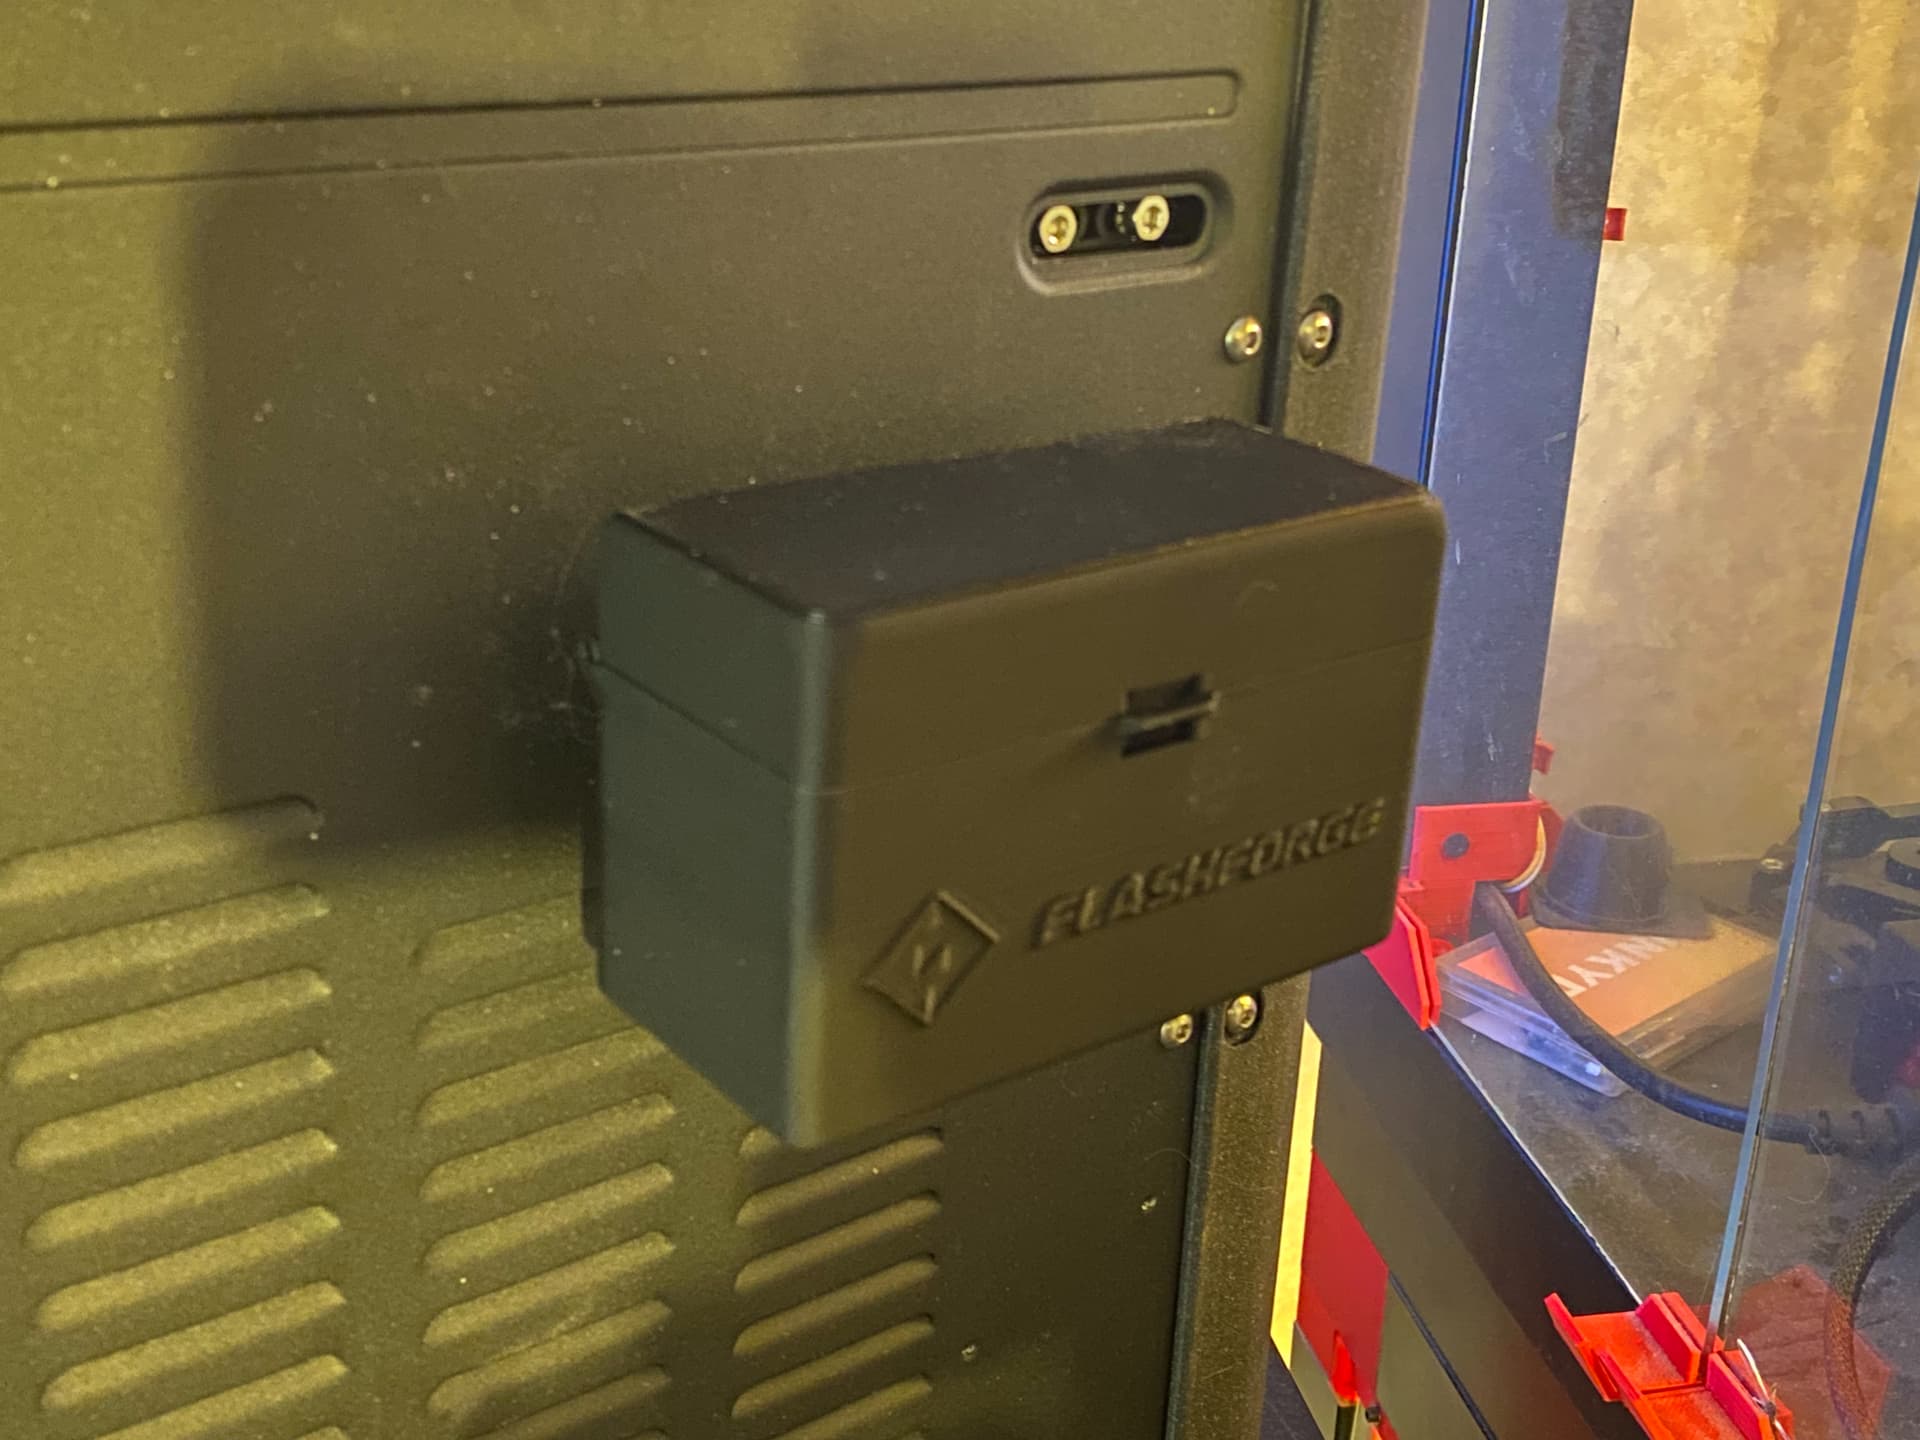
Flashforge Adventurer 5M (AD5M) Nozzle Storage Box - two to choose from, including one that attaches to back of printer v1.0
This short video explains everything:
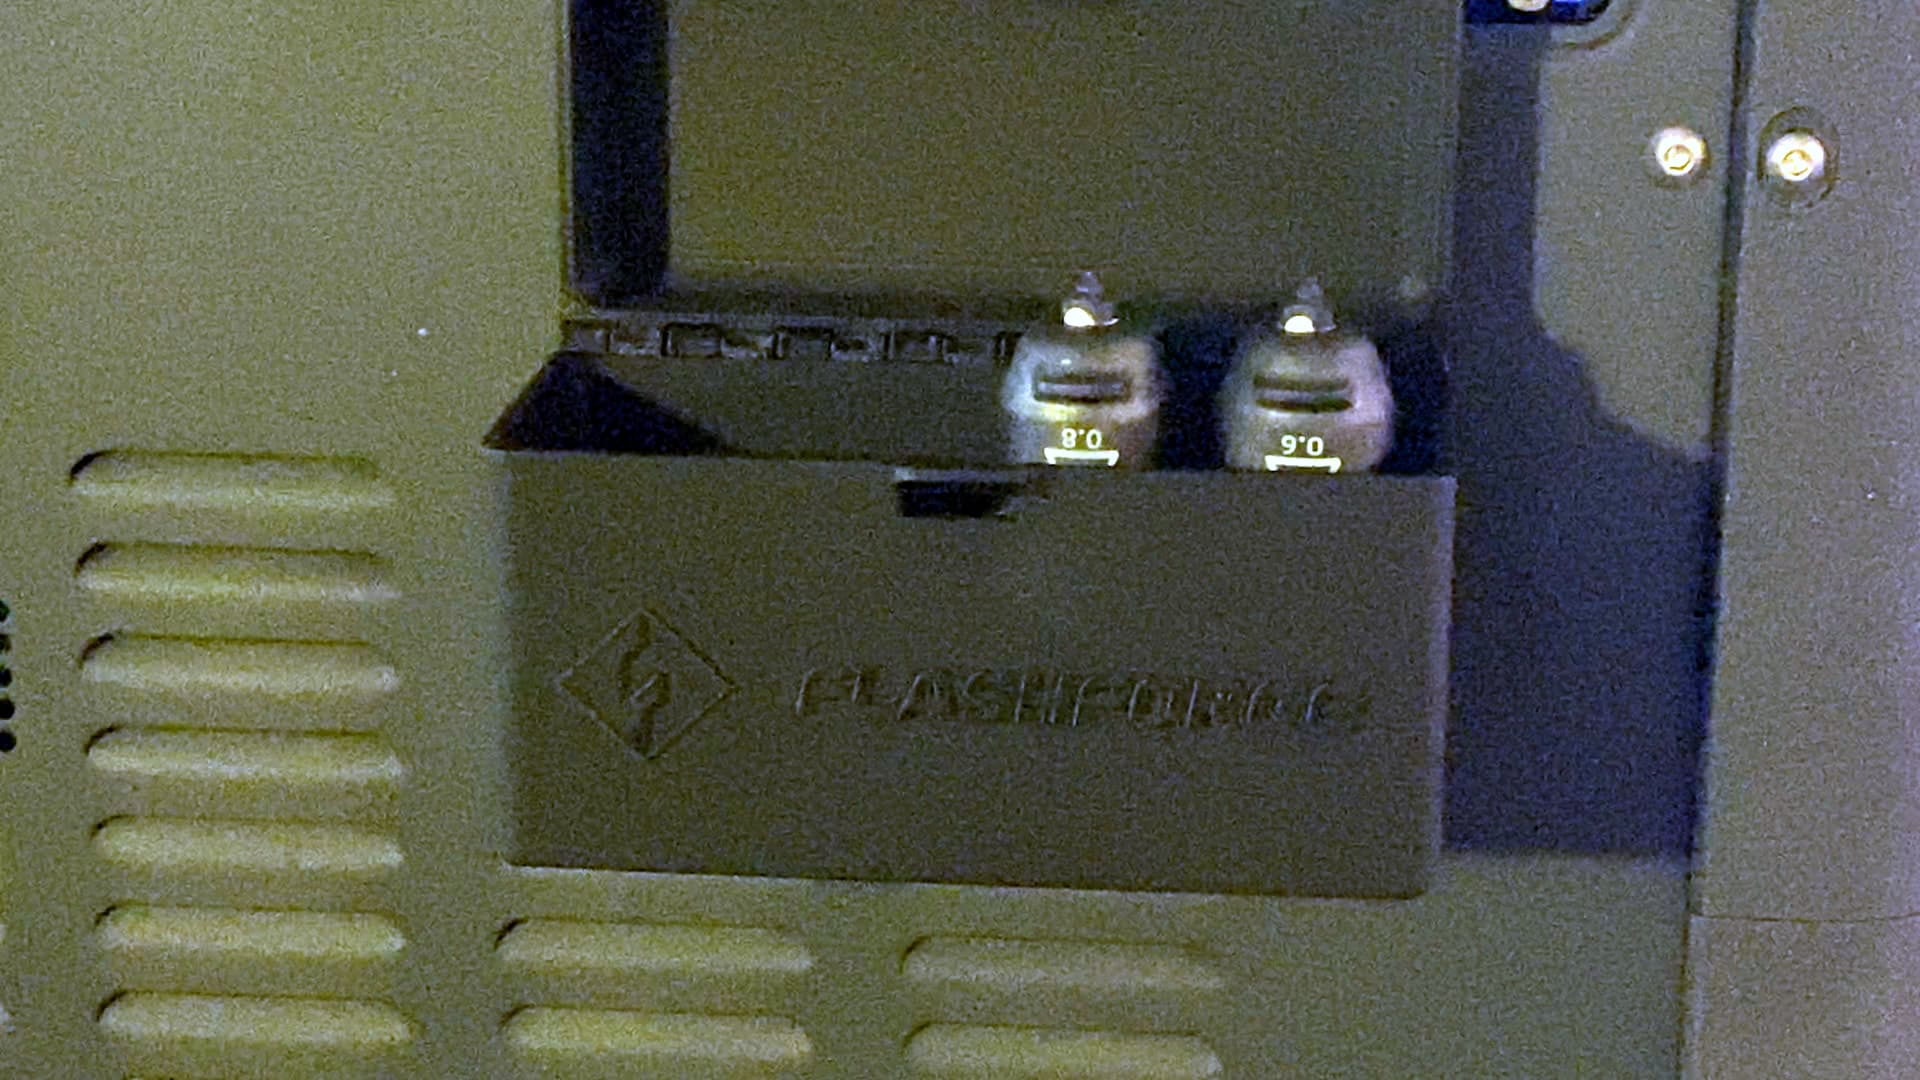
Cool storage for four nozzles for Flashforge Adventurer 5 (AD5M).
Uses 1.75mm filament as the hinge pin.
Two options to choose from:
Box and lid
Box and lid that mount onto back of AD5M printer, whenever the DIY printed enclosure is in use. The enclosure mounts the spool holder in a different spot, which frees up the two screw holes that formerly attached it. The mount in this design is intended to attach by using those same screw holes. Attach the mount with two screws, then slide the box base onto the mount.
Print settings
Print as oriented. Prints without need of supports. I used 10% infill on the lid, and 15% infill on the base and the mount. I used 2 perimeter walls, with a 0.4 mm nozzle.
Other cool options for the AD5M
You may also like my other AD5M related design work:
Also, please forgive the fact that I in accurately described how I got around the Wi-Fi issue. I can have struggles with forgetfulness. Anyway, I later realized that I was mistaken. I don’t think I solved it by typing the password in the Klipperscreen. I think I solved it by connecting an ethernet cable, and then probably I added the password etc to a config file using either SSH or the Mainsail text editor thing.
Thanks for all the great info Doug. I did the Klipper mod as soon as I unboxed mine. Had a pain getting wifi enabled and was only able to resolve it via ethernet and ssh. Outside that, I’m halfway through printing all the stuff needed for the enclosure.
At this point I’m really debating on buying another 5M or just spend a little more and get the Pro model…
I had the same Wi-Fi issue and also was able to solve it with an ethernet cable. I can’t remember if I used SSH from there, but I think I simply used the Mainsail config editor to get going from there.
Being that I could still get the regular model for $299, I pulled the trigger on ordering a second one. It’s already arrived. Already have the Klipper mod installed, and I now already have almost all the parts printed to wrap it in the DIY enclosure.
Just an interesting note: earlier I said I had only one roll of PLA that would not work in this printer. Turns out, it was not PLA, it was PETG. It prints just fine when I used the included PETG print profile. I need to label that roll so I don’t forget again.
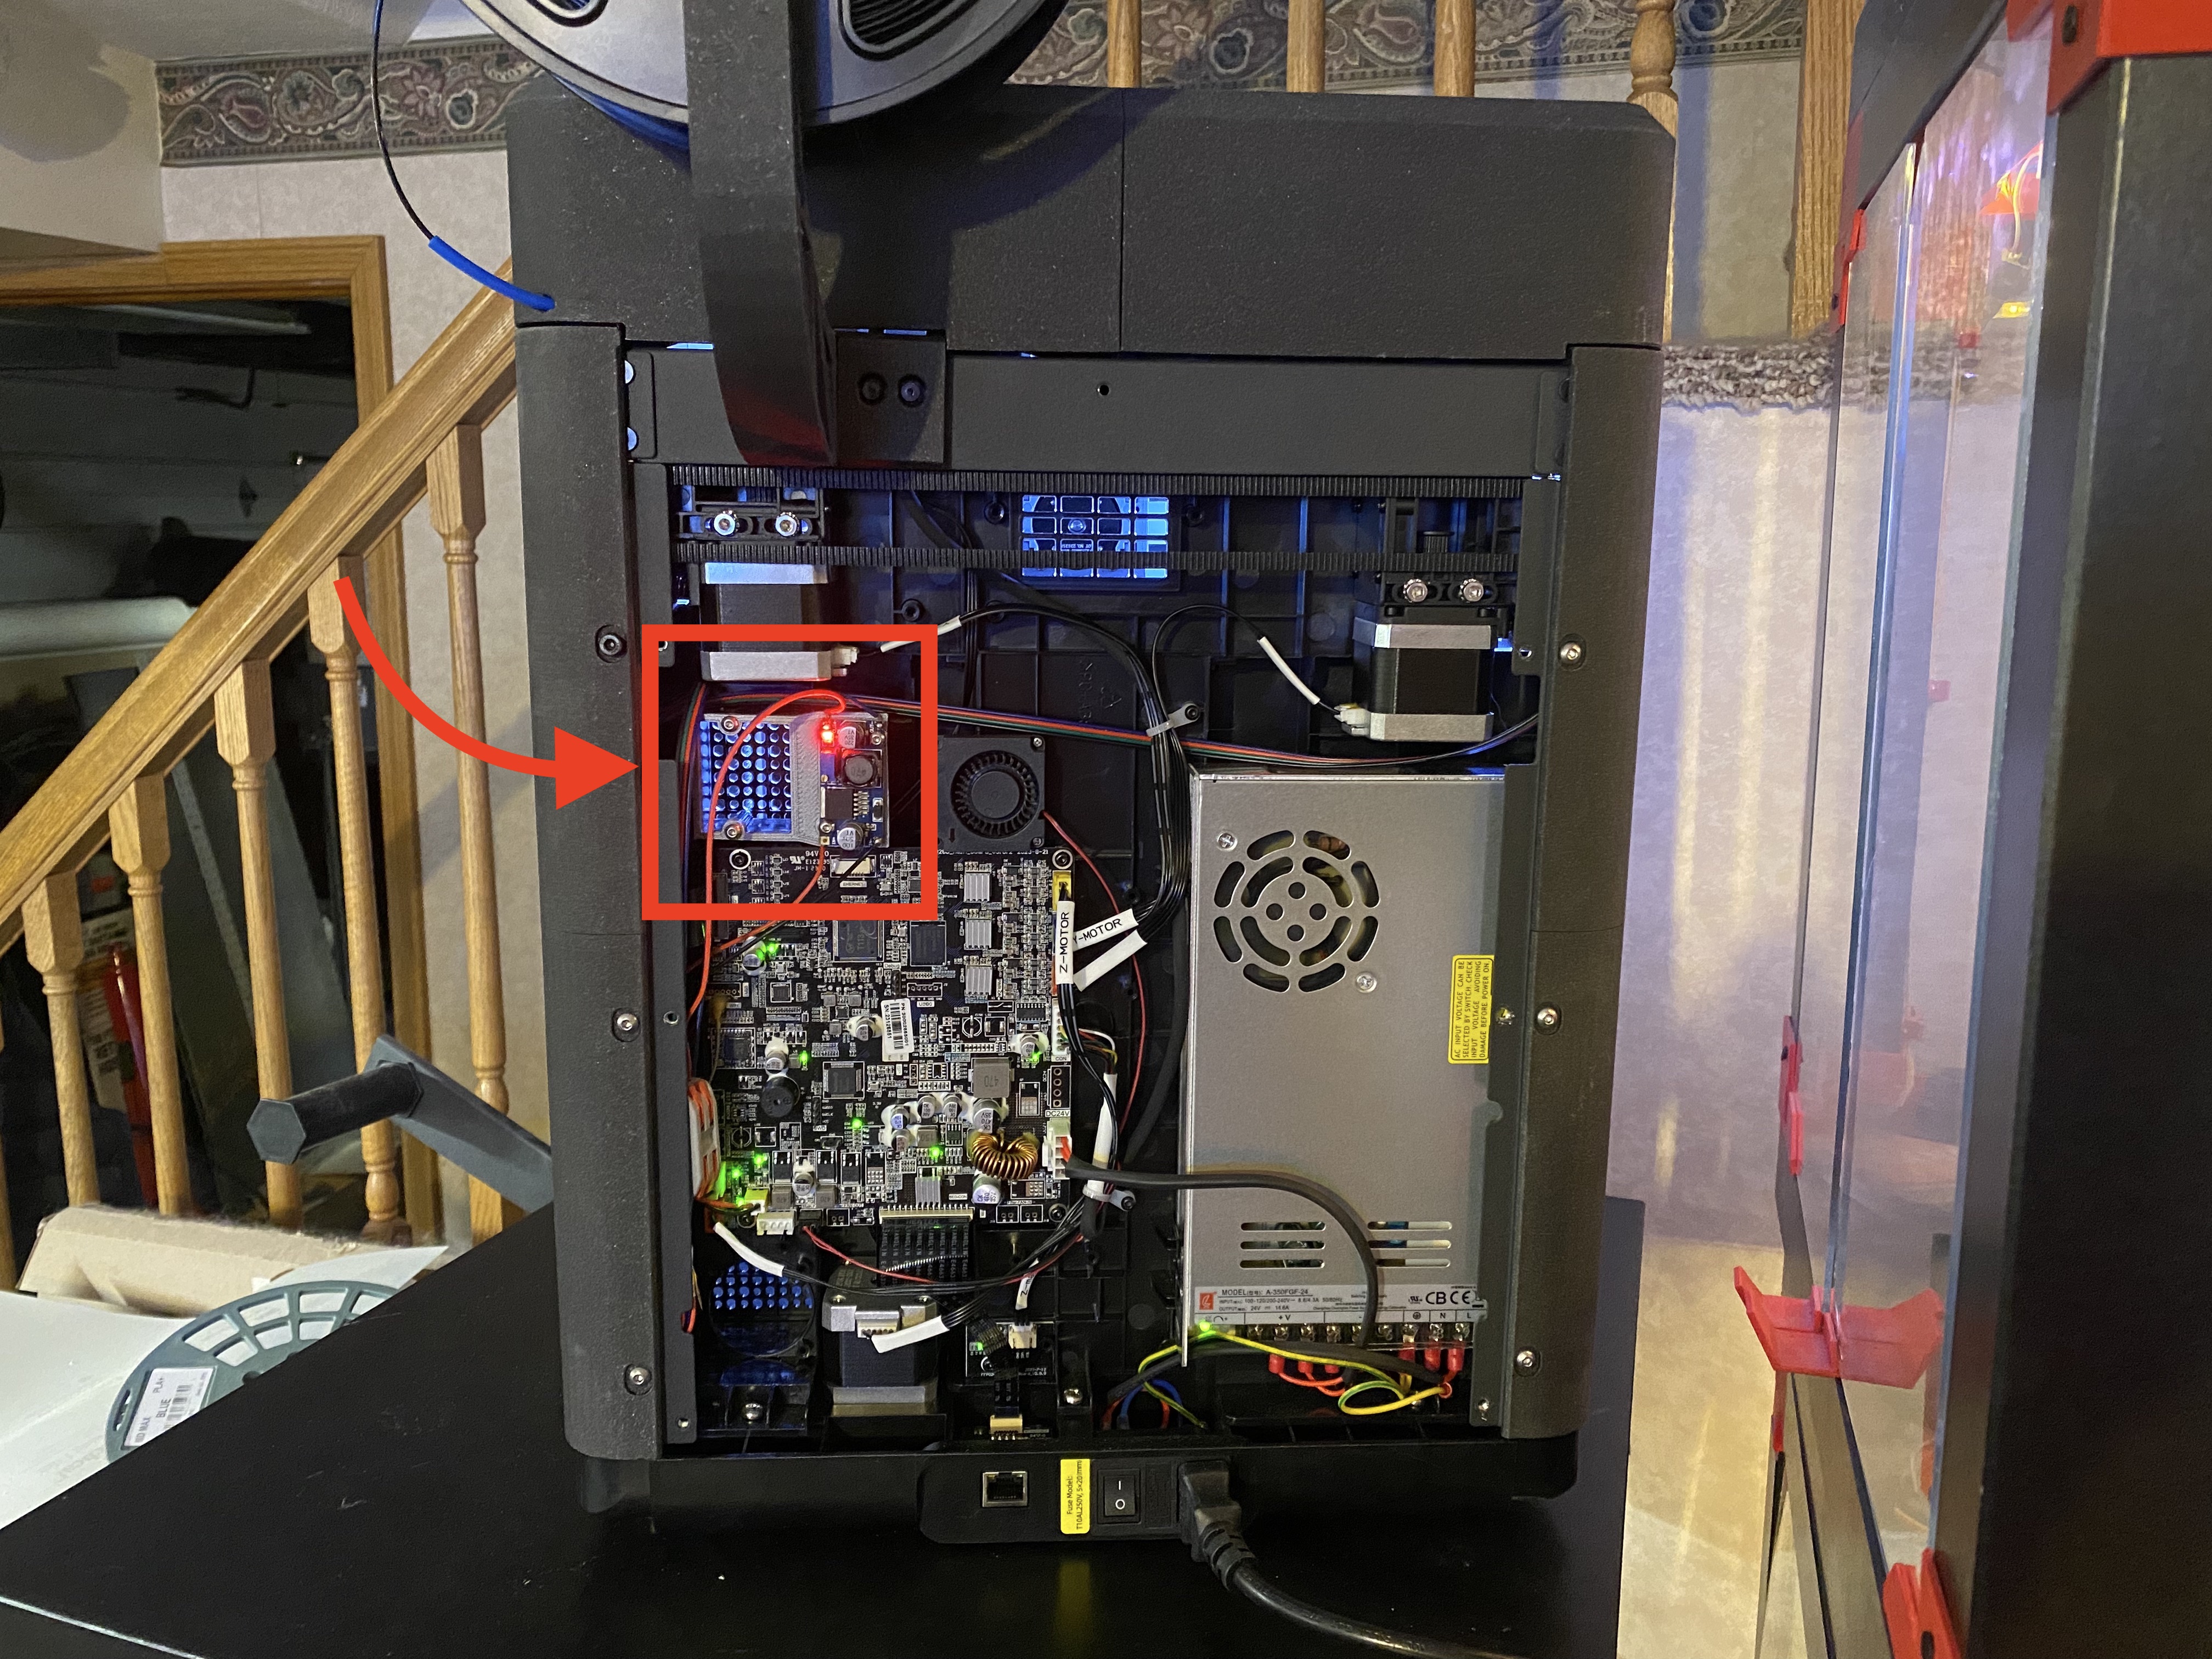
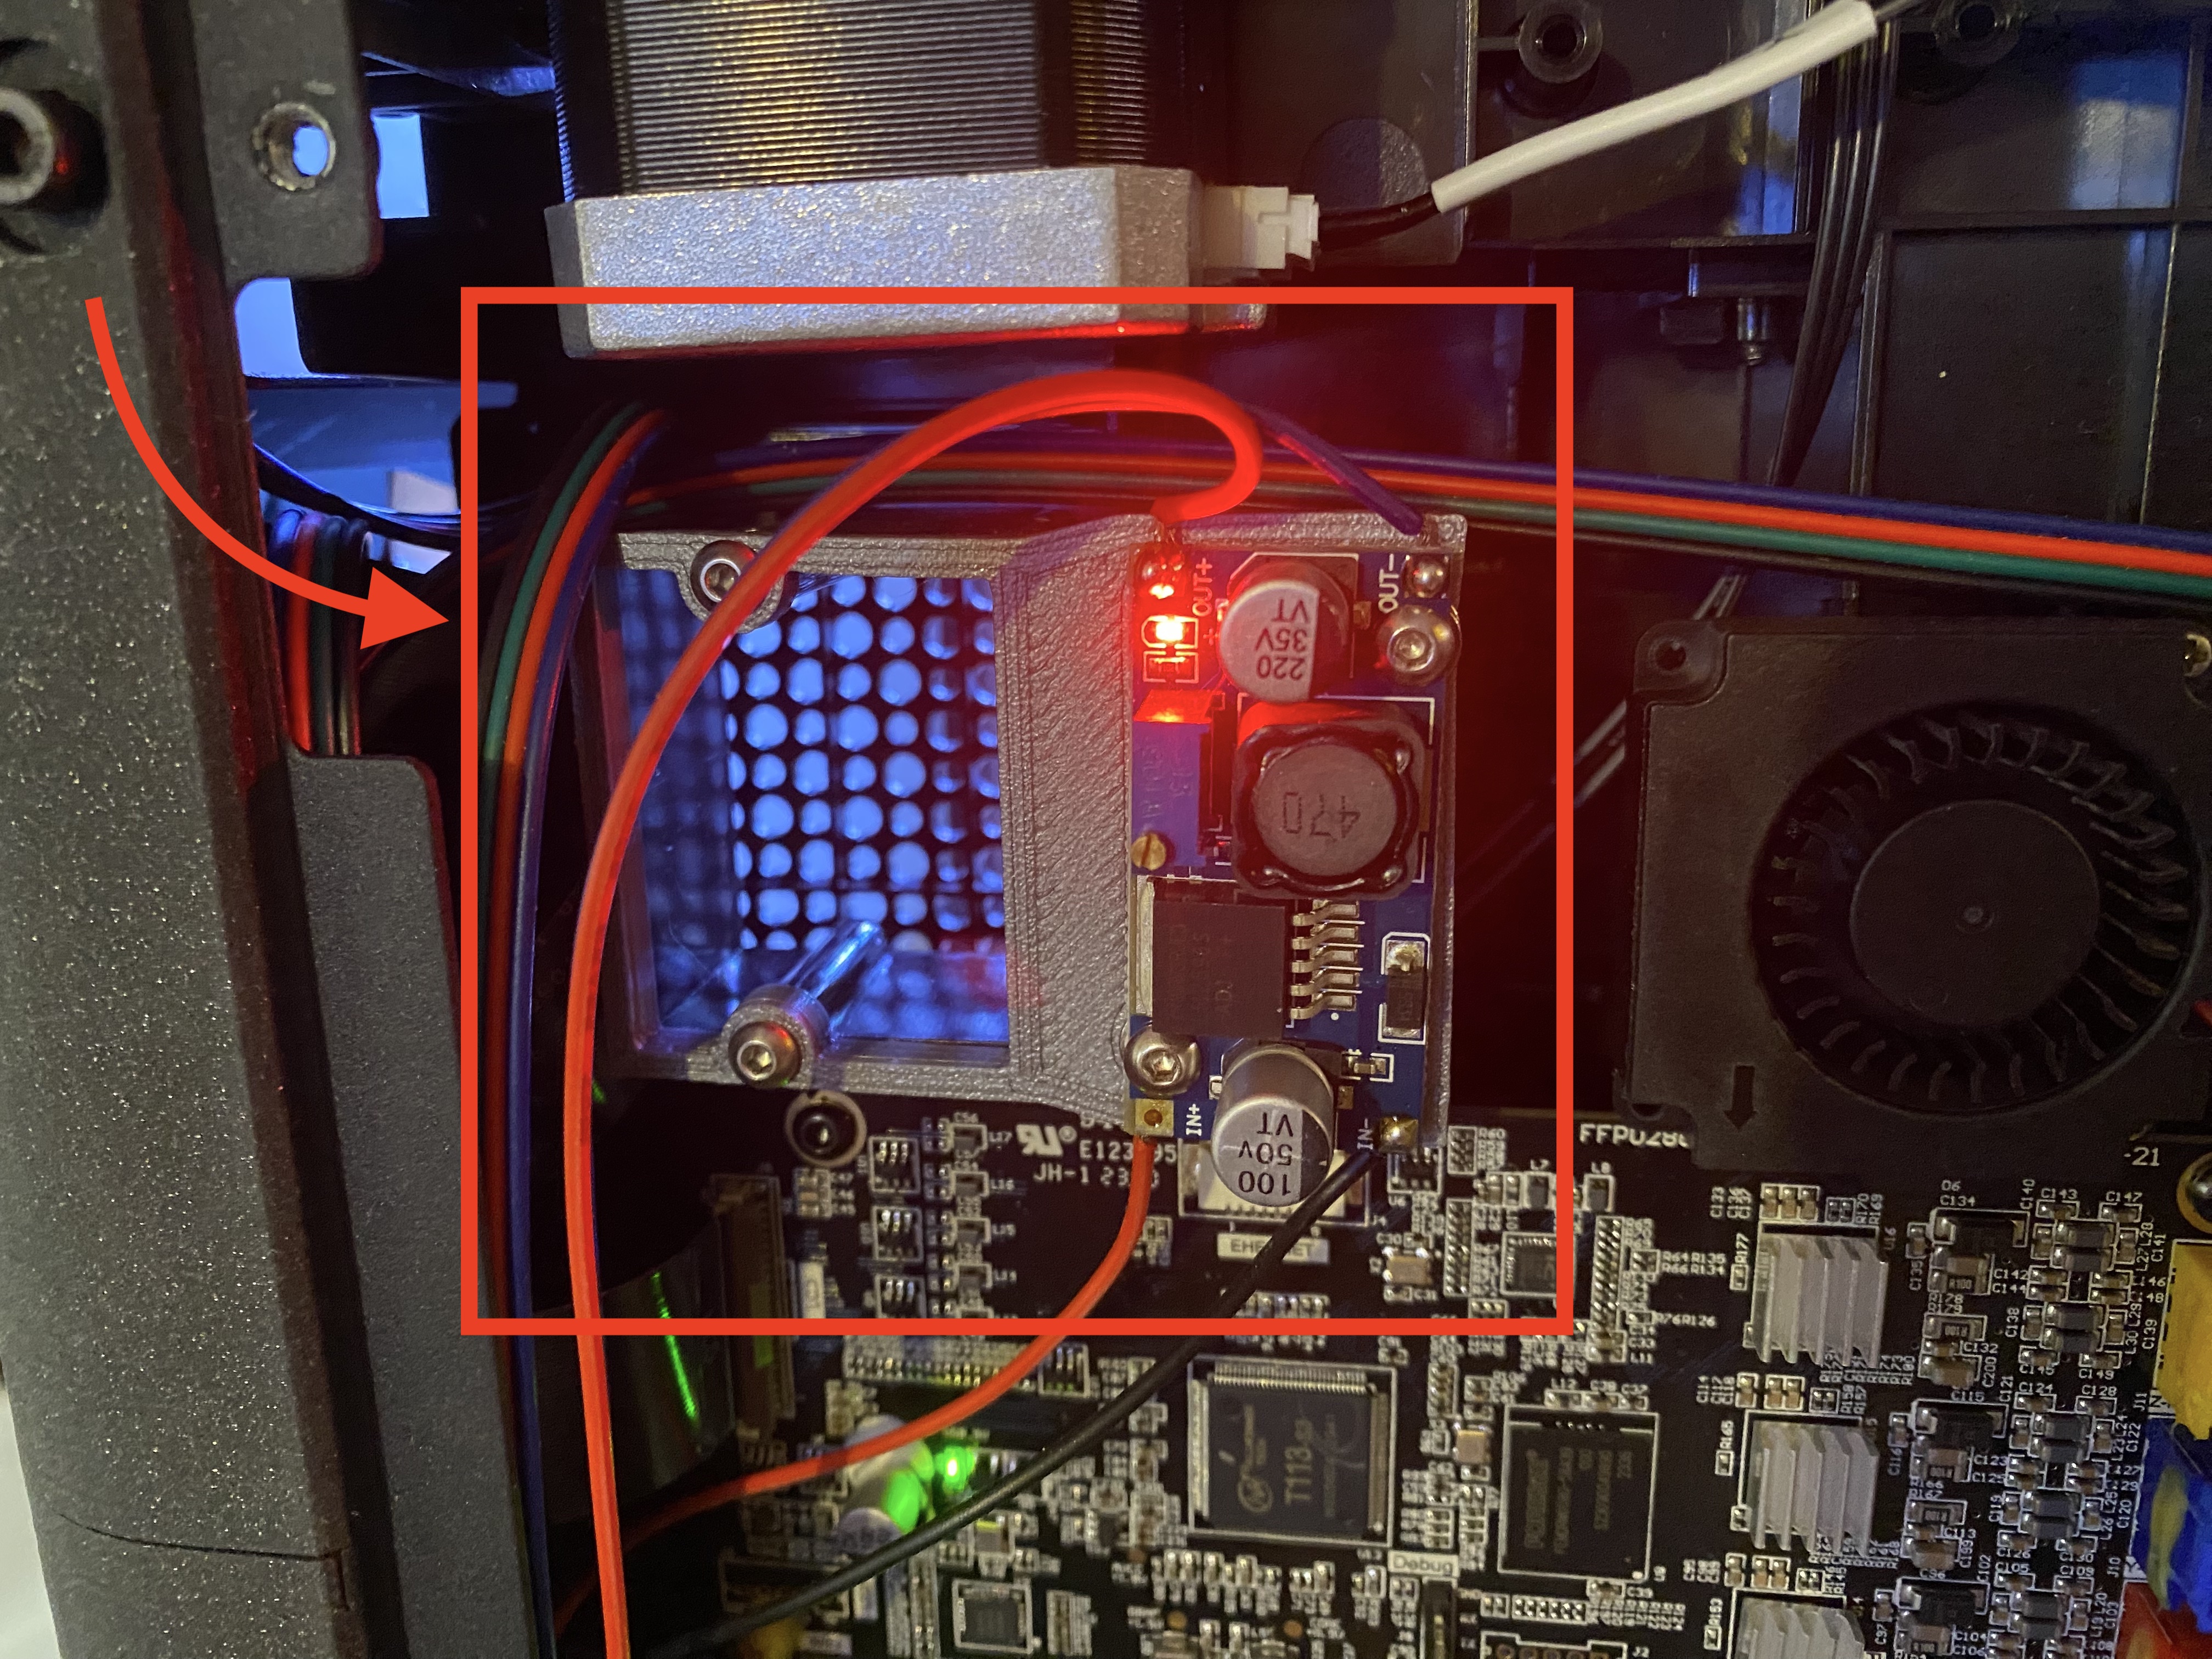
For adding LED lighting to the non-pro version of the Flashforge Adventurer 5 (AD5M), you must either buy 24v LEDs, or use a super affordable buck converter to knock the voltage down to whatever your LEDs on hand need. I had gobs of 12v LEDs in stock from previous projects. This LED mod accessory makes it easy to mount the buck converter inside the back of the printer, just above the main board, by using the screw holes on the upper of the two unused air filter fan tunnels.
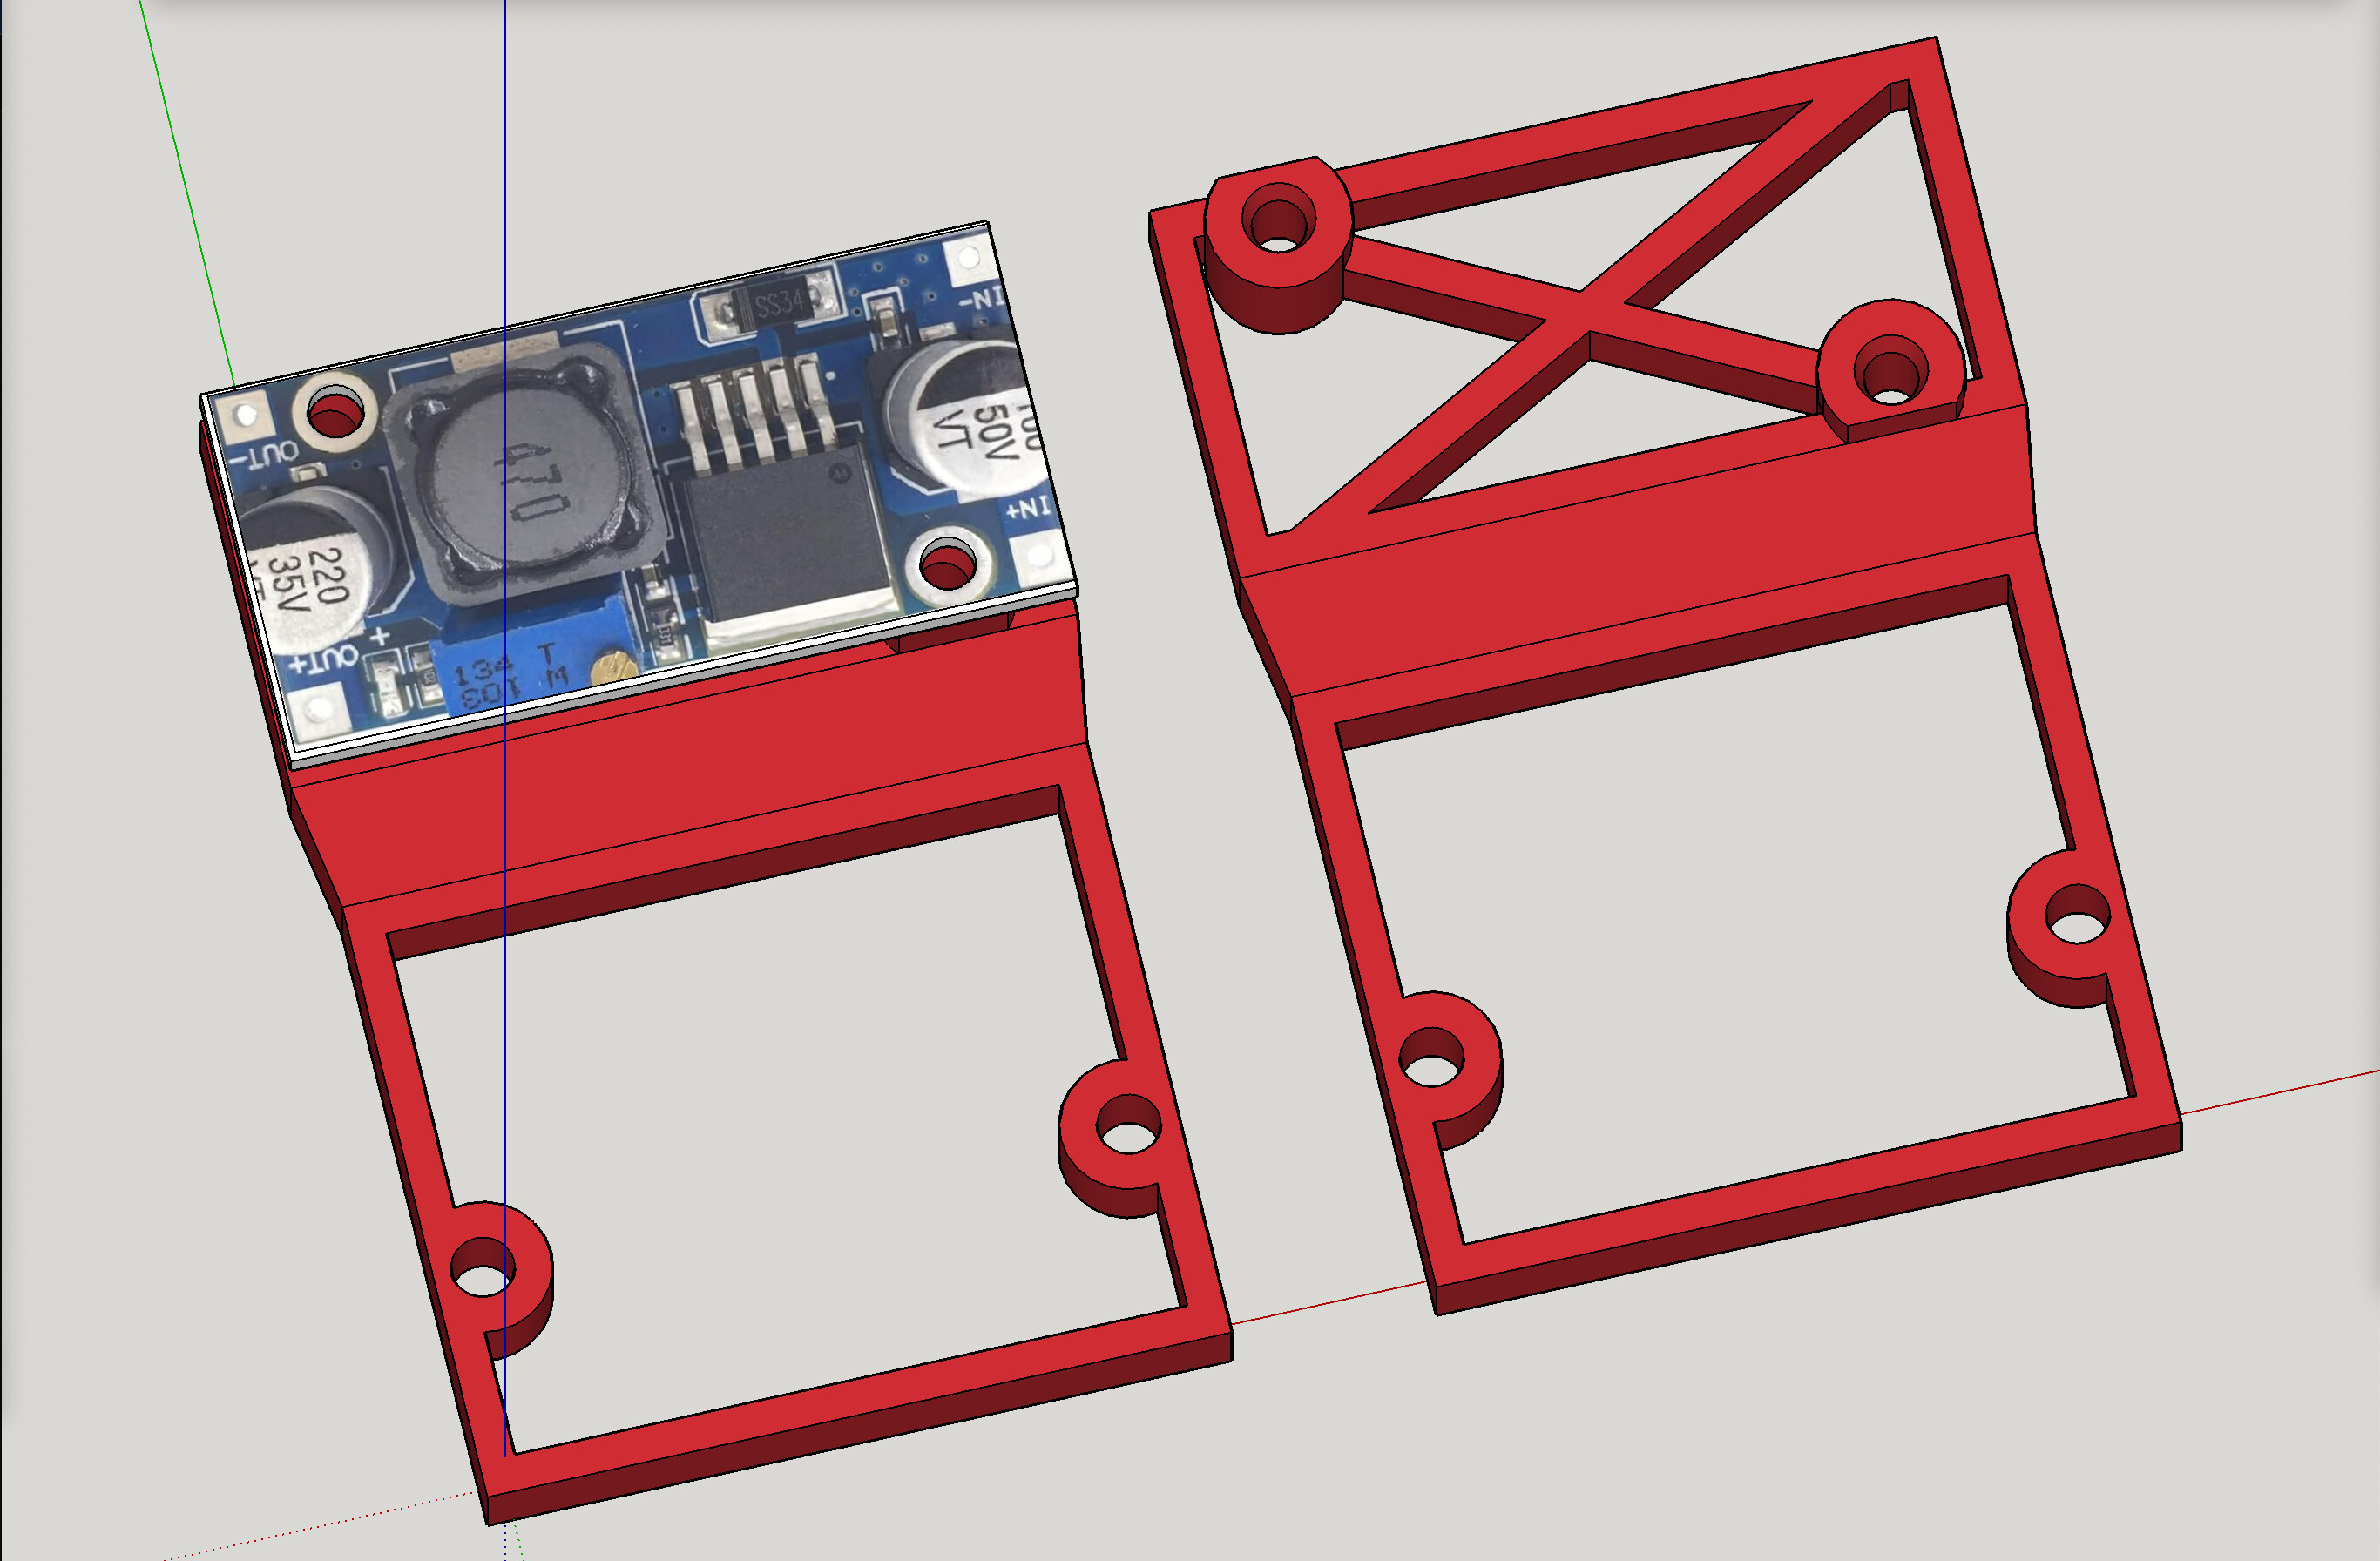
Printed mount for affordable buck converter to use 12v LED’s in your AD5M (or 5v LEDs or whatever).
Prints as oriented. Prints without any need of supports.
This mod leaves the air filter fan tunnel open, and it’s possible that a mod to add a filter and fan could be used in conjunction with this mod (no guarantees).
Has 3mm stand-offs on the mount, to give a little air behind the buck converter’s PCB to hopefully help with heat dissipation.
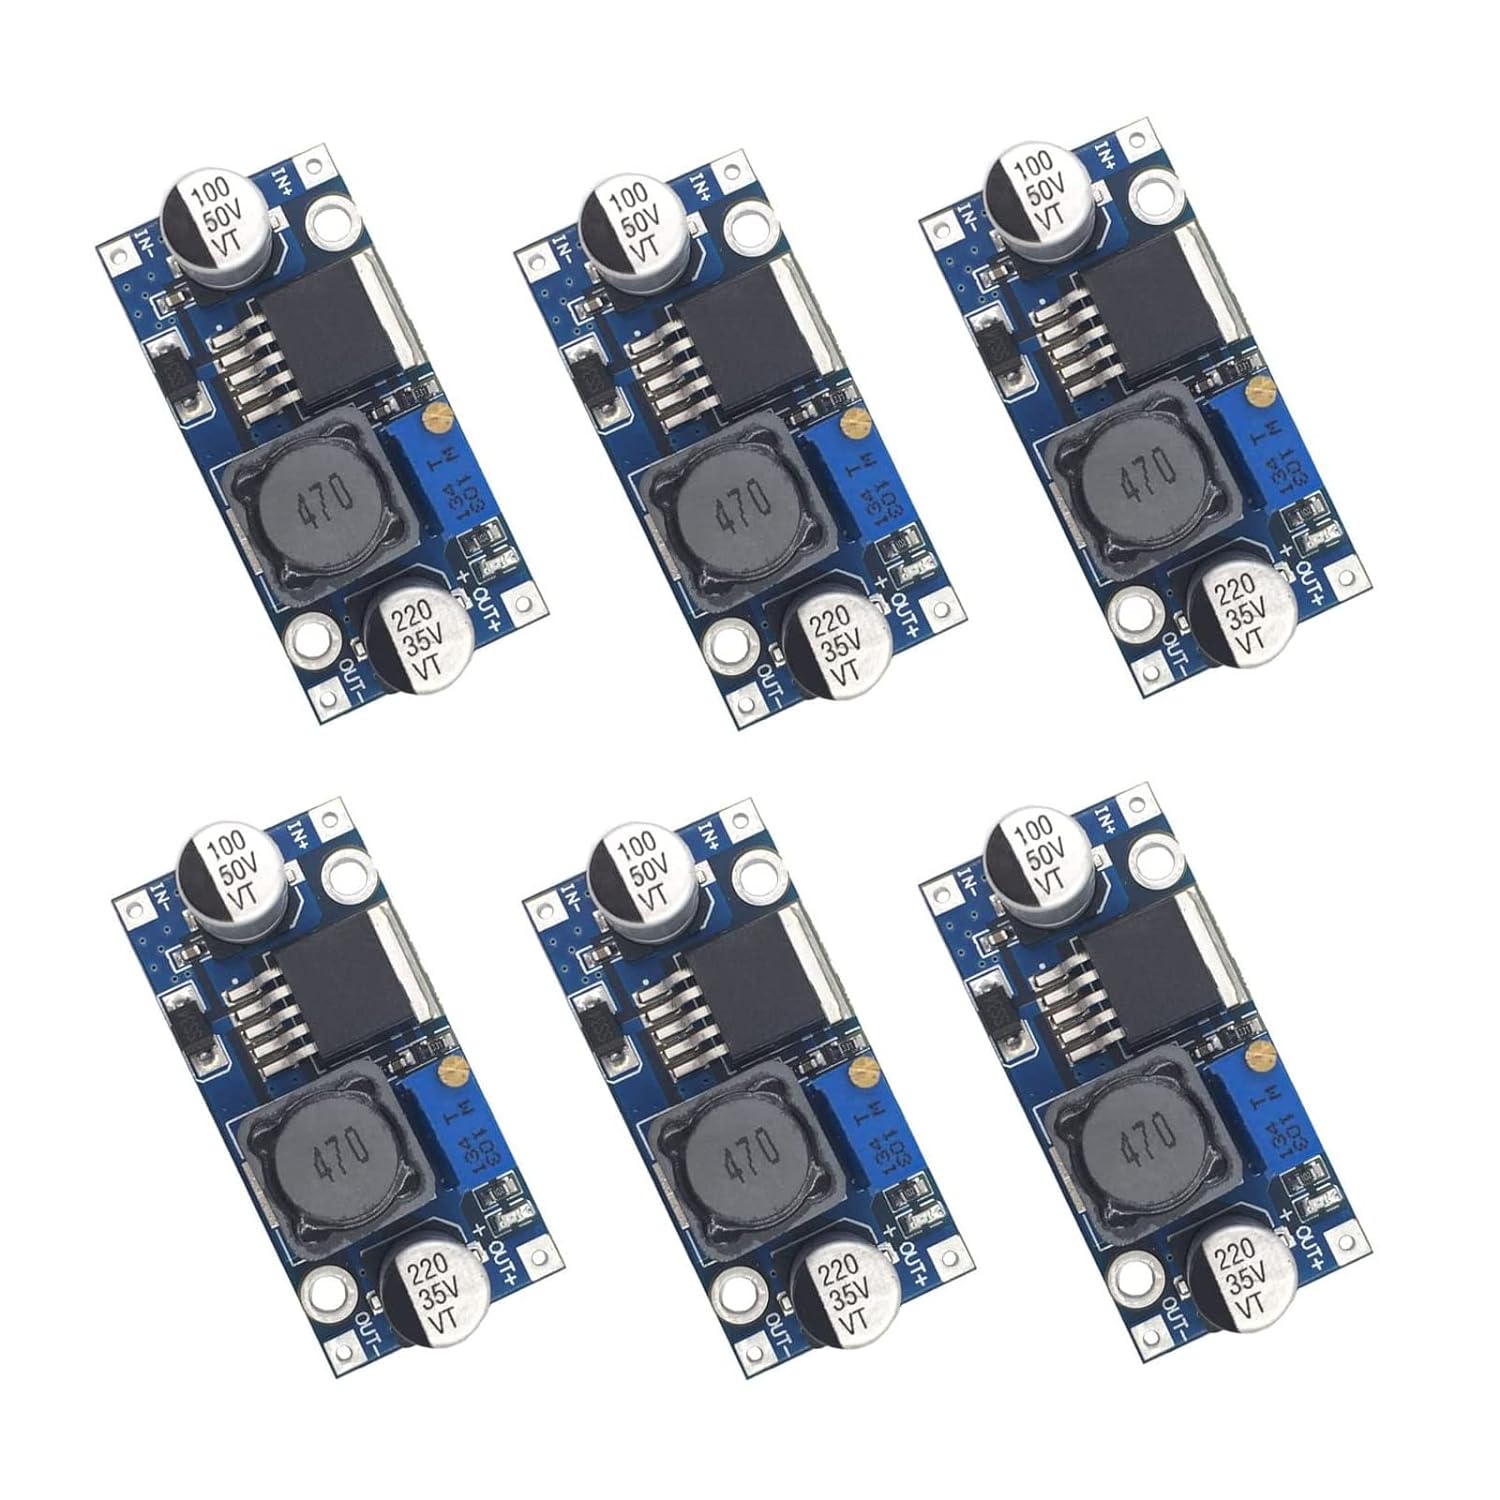
NOTE: this was made for these buck converters (affiliate link - adds nothing to your price, and may give a small percent to support my channel):
These are printed accessories for adding LED light bars to the Flashforge Adventurer 5 (AD5M) printer.
Printing info:
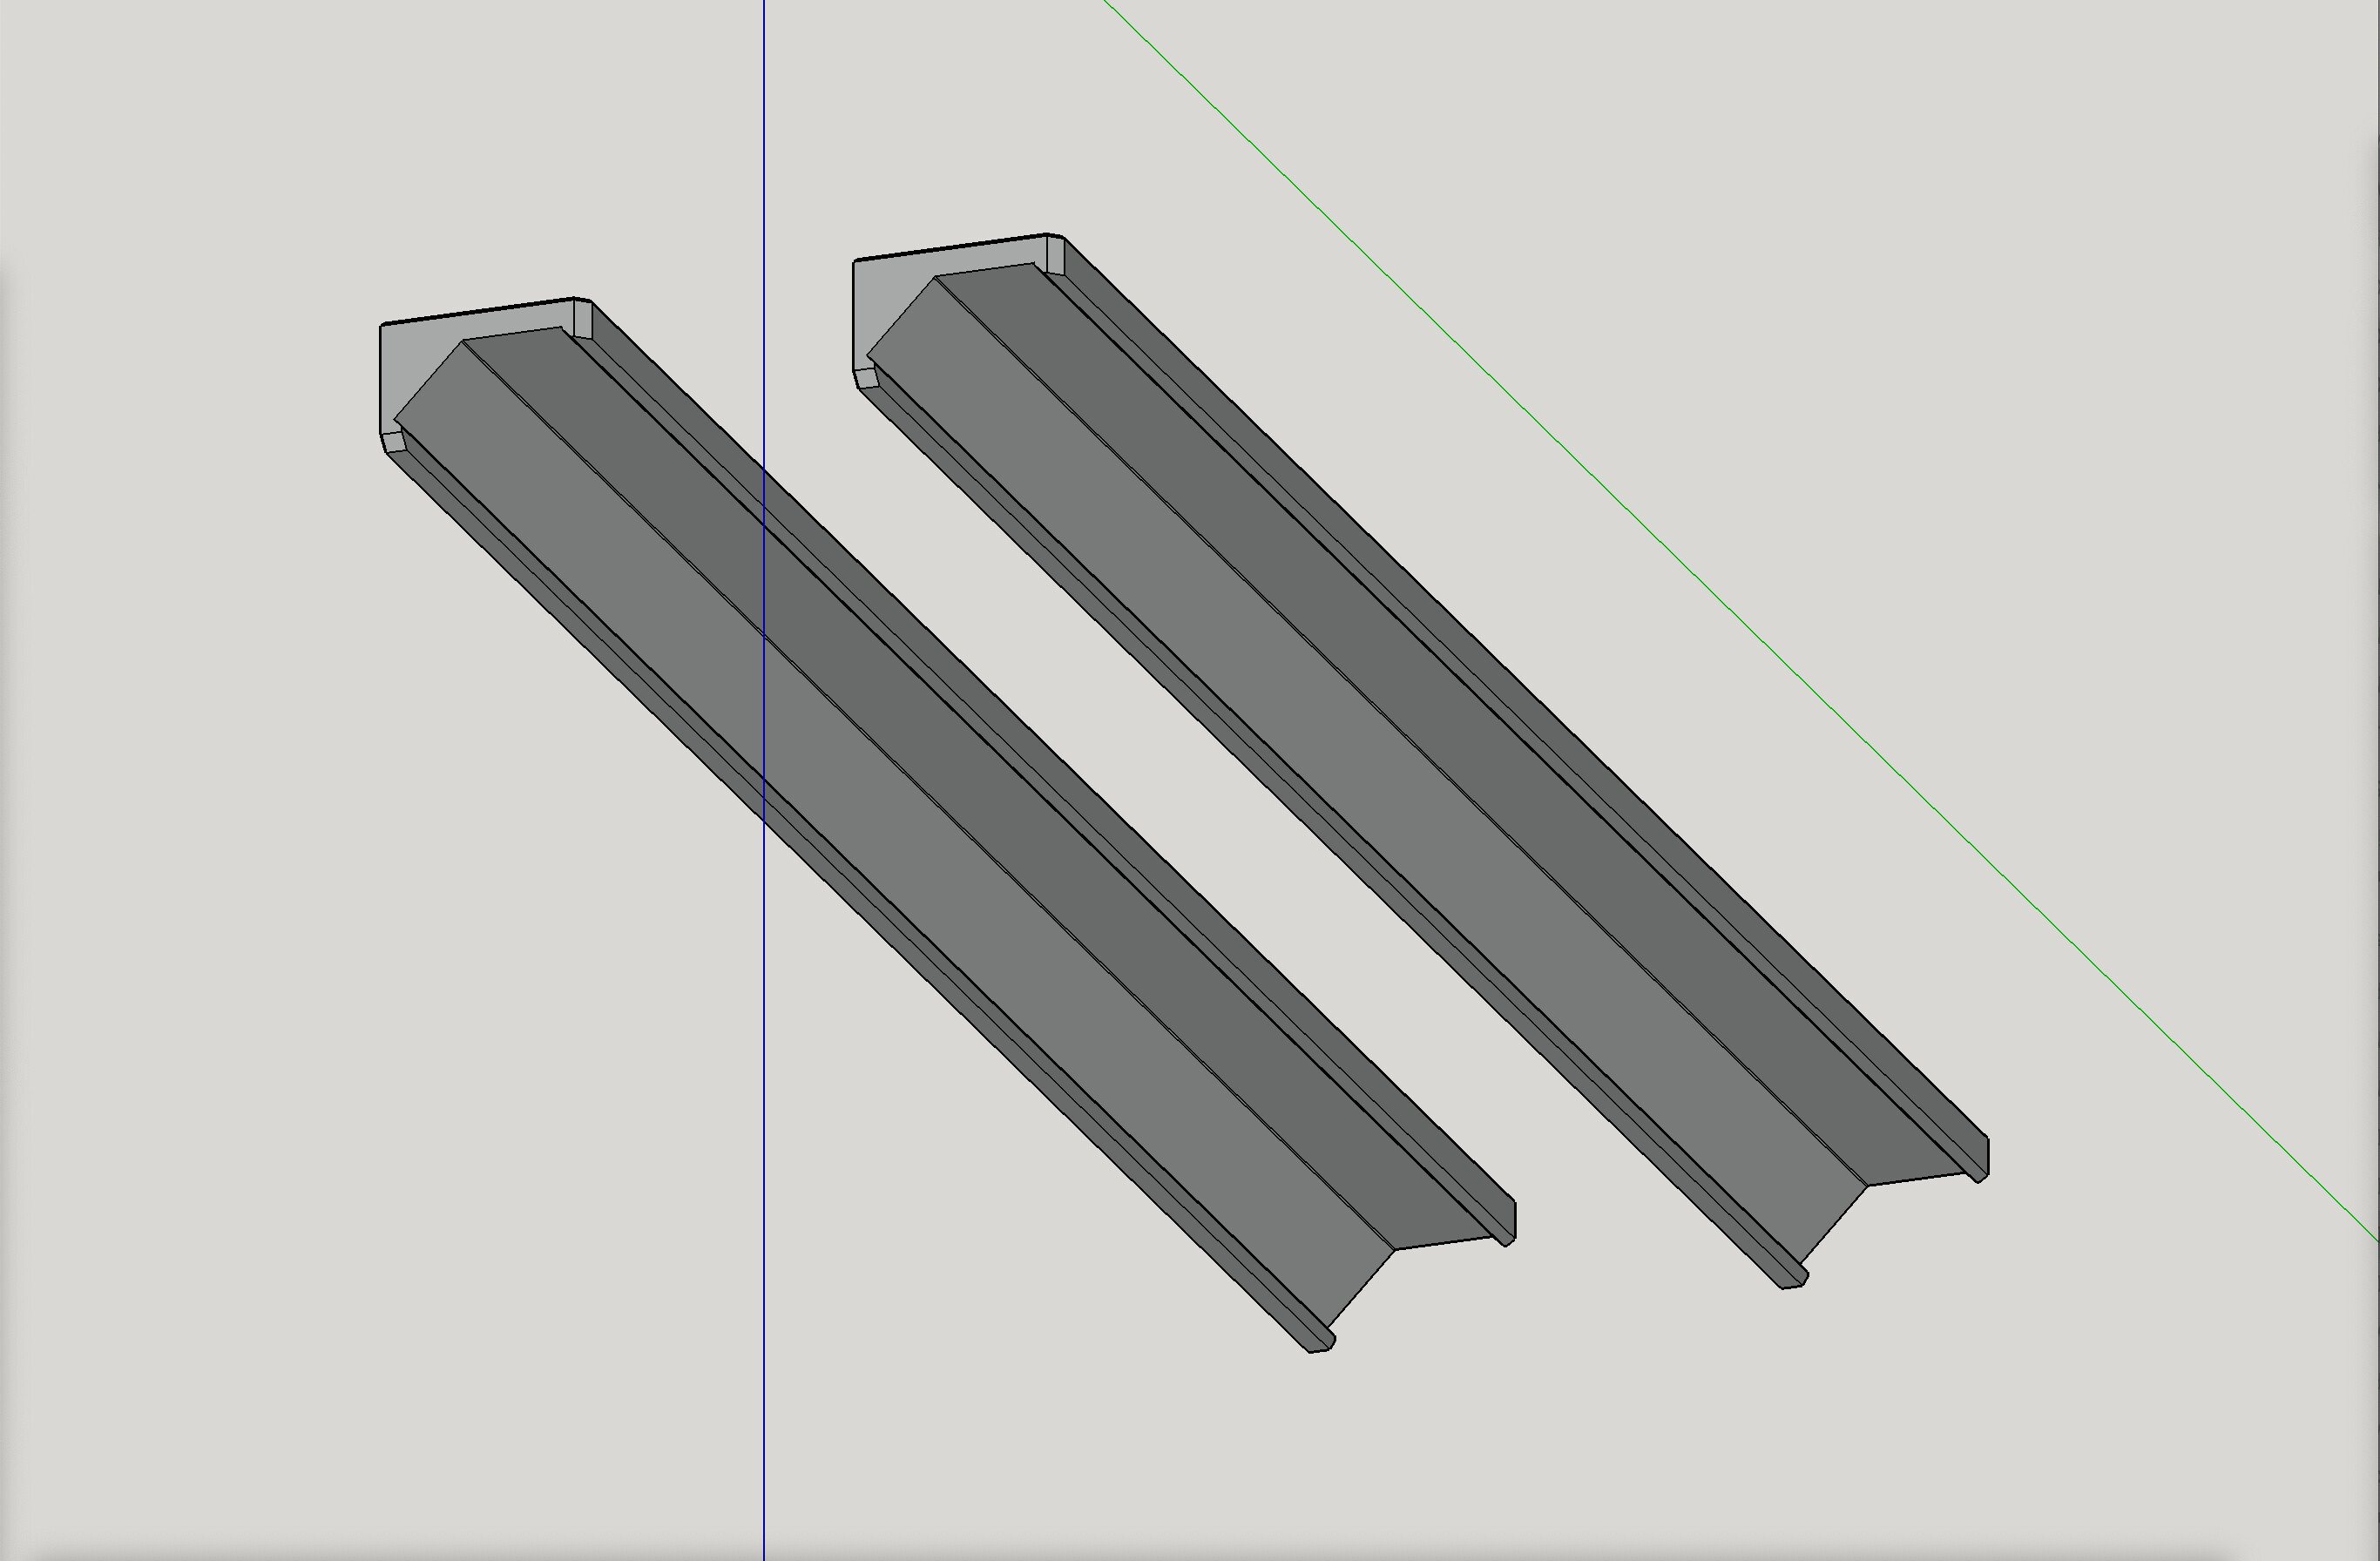
Print as oriented
No need of supports.
Installation info:
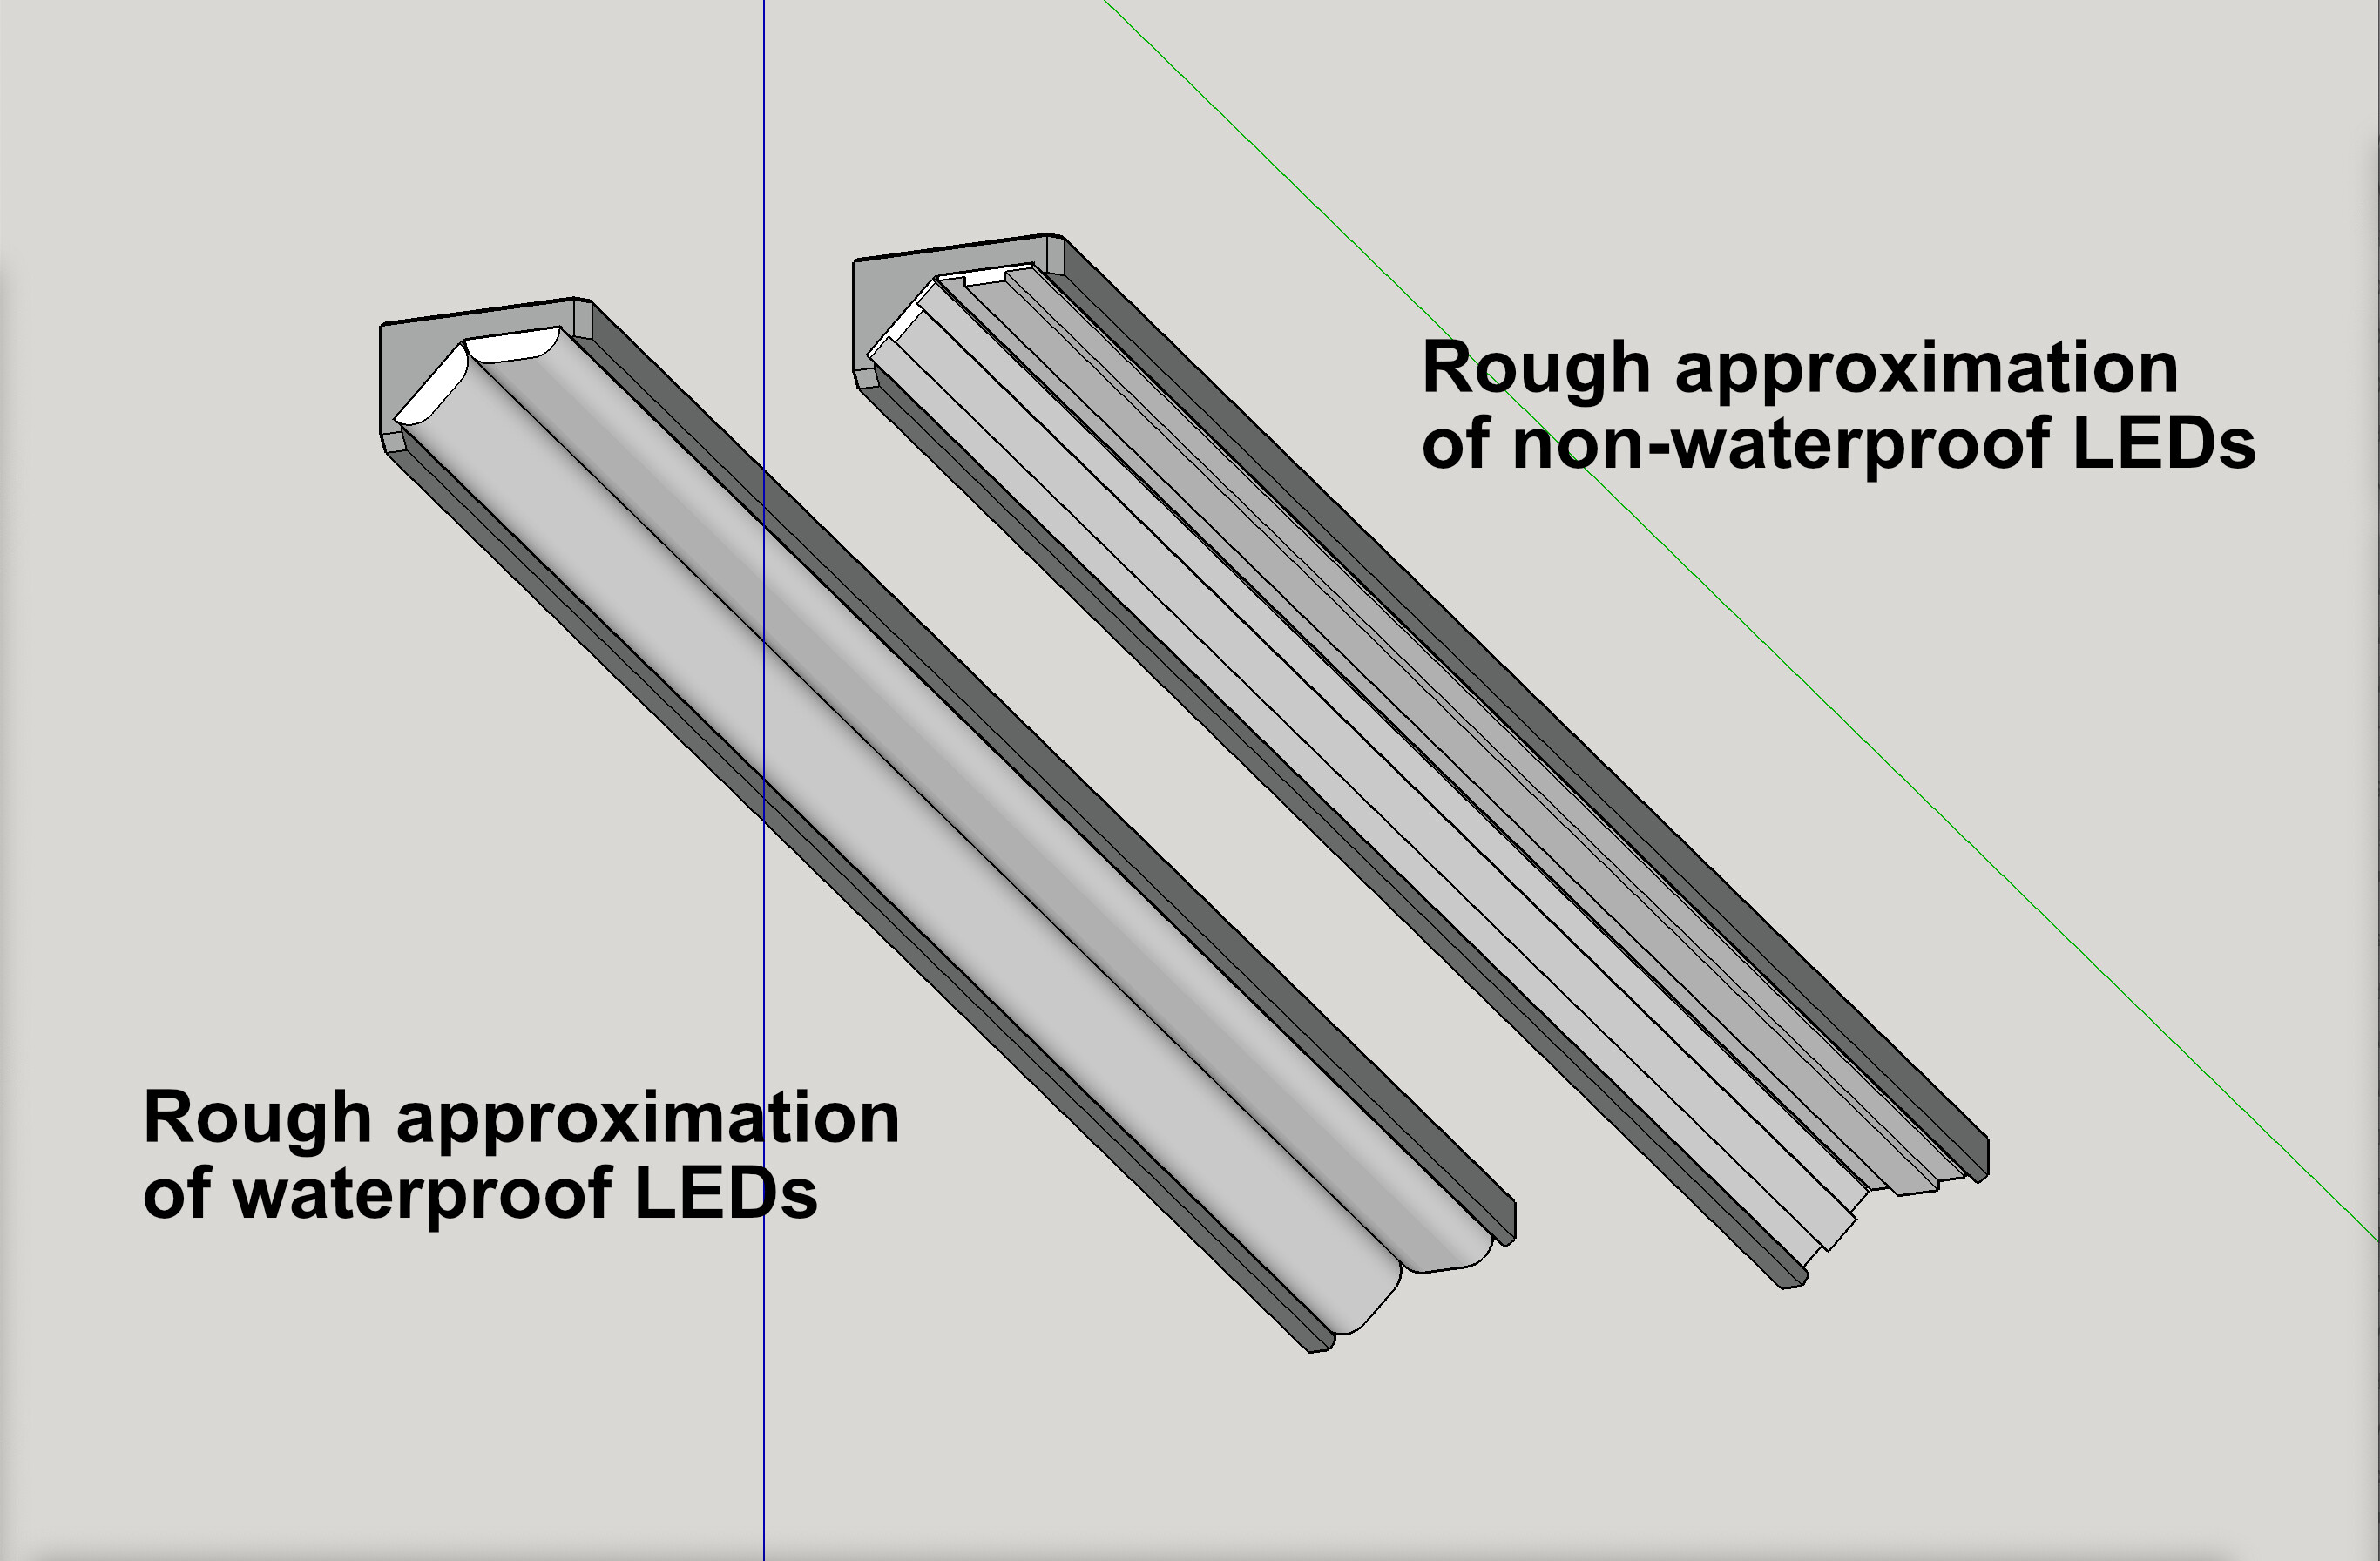
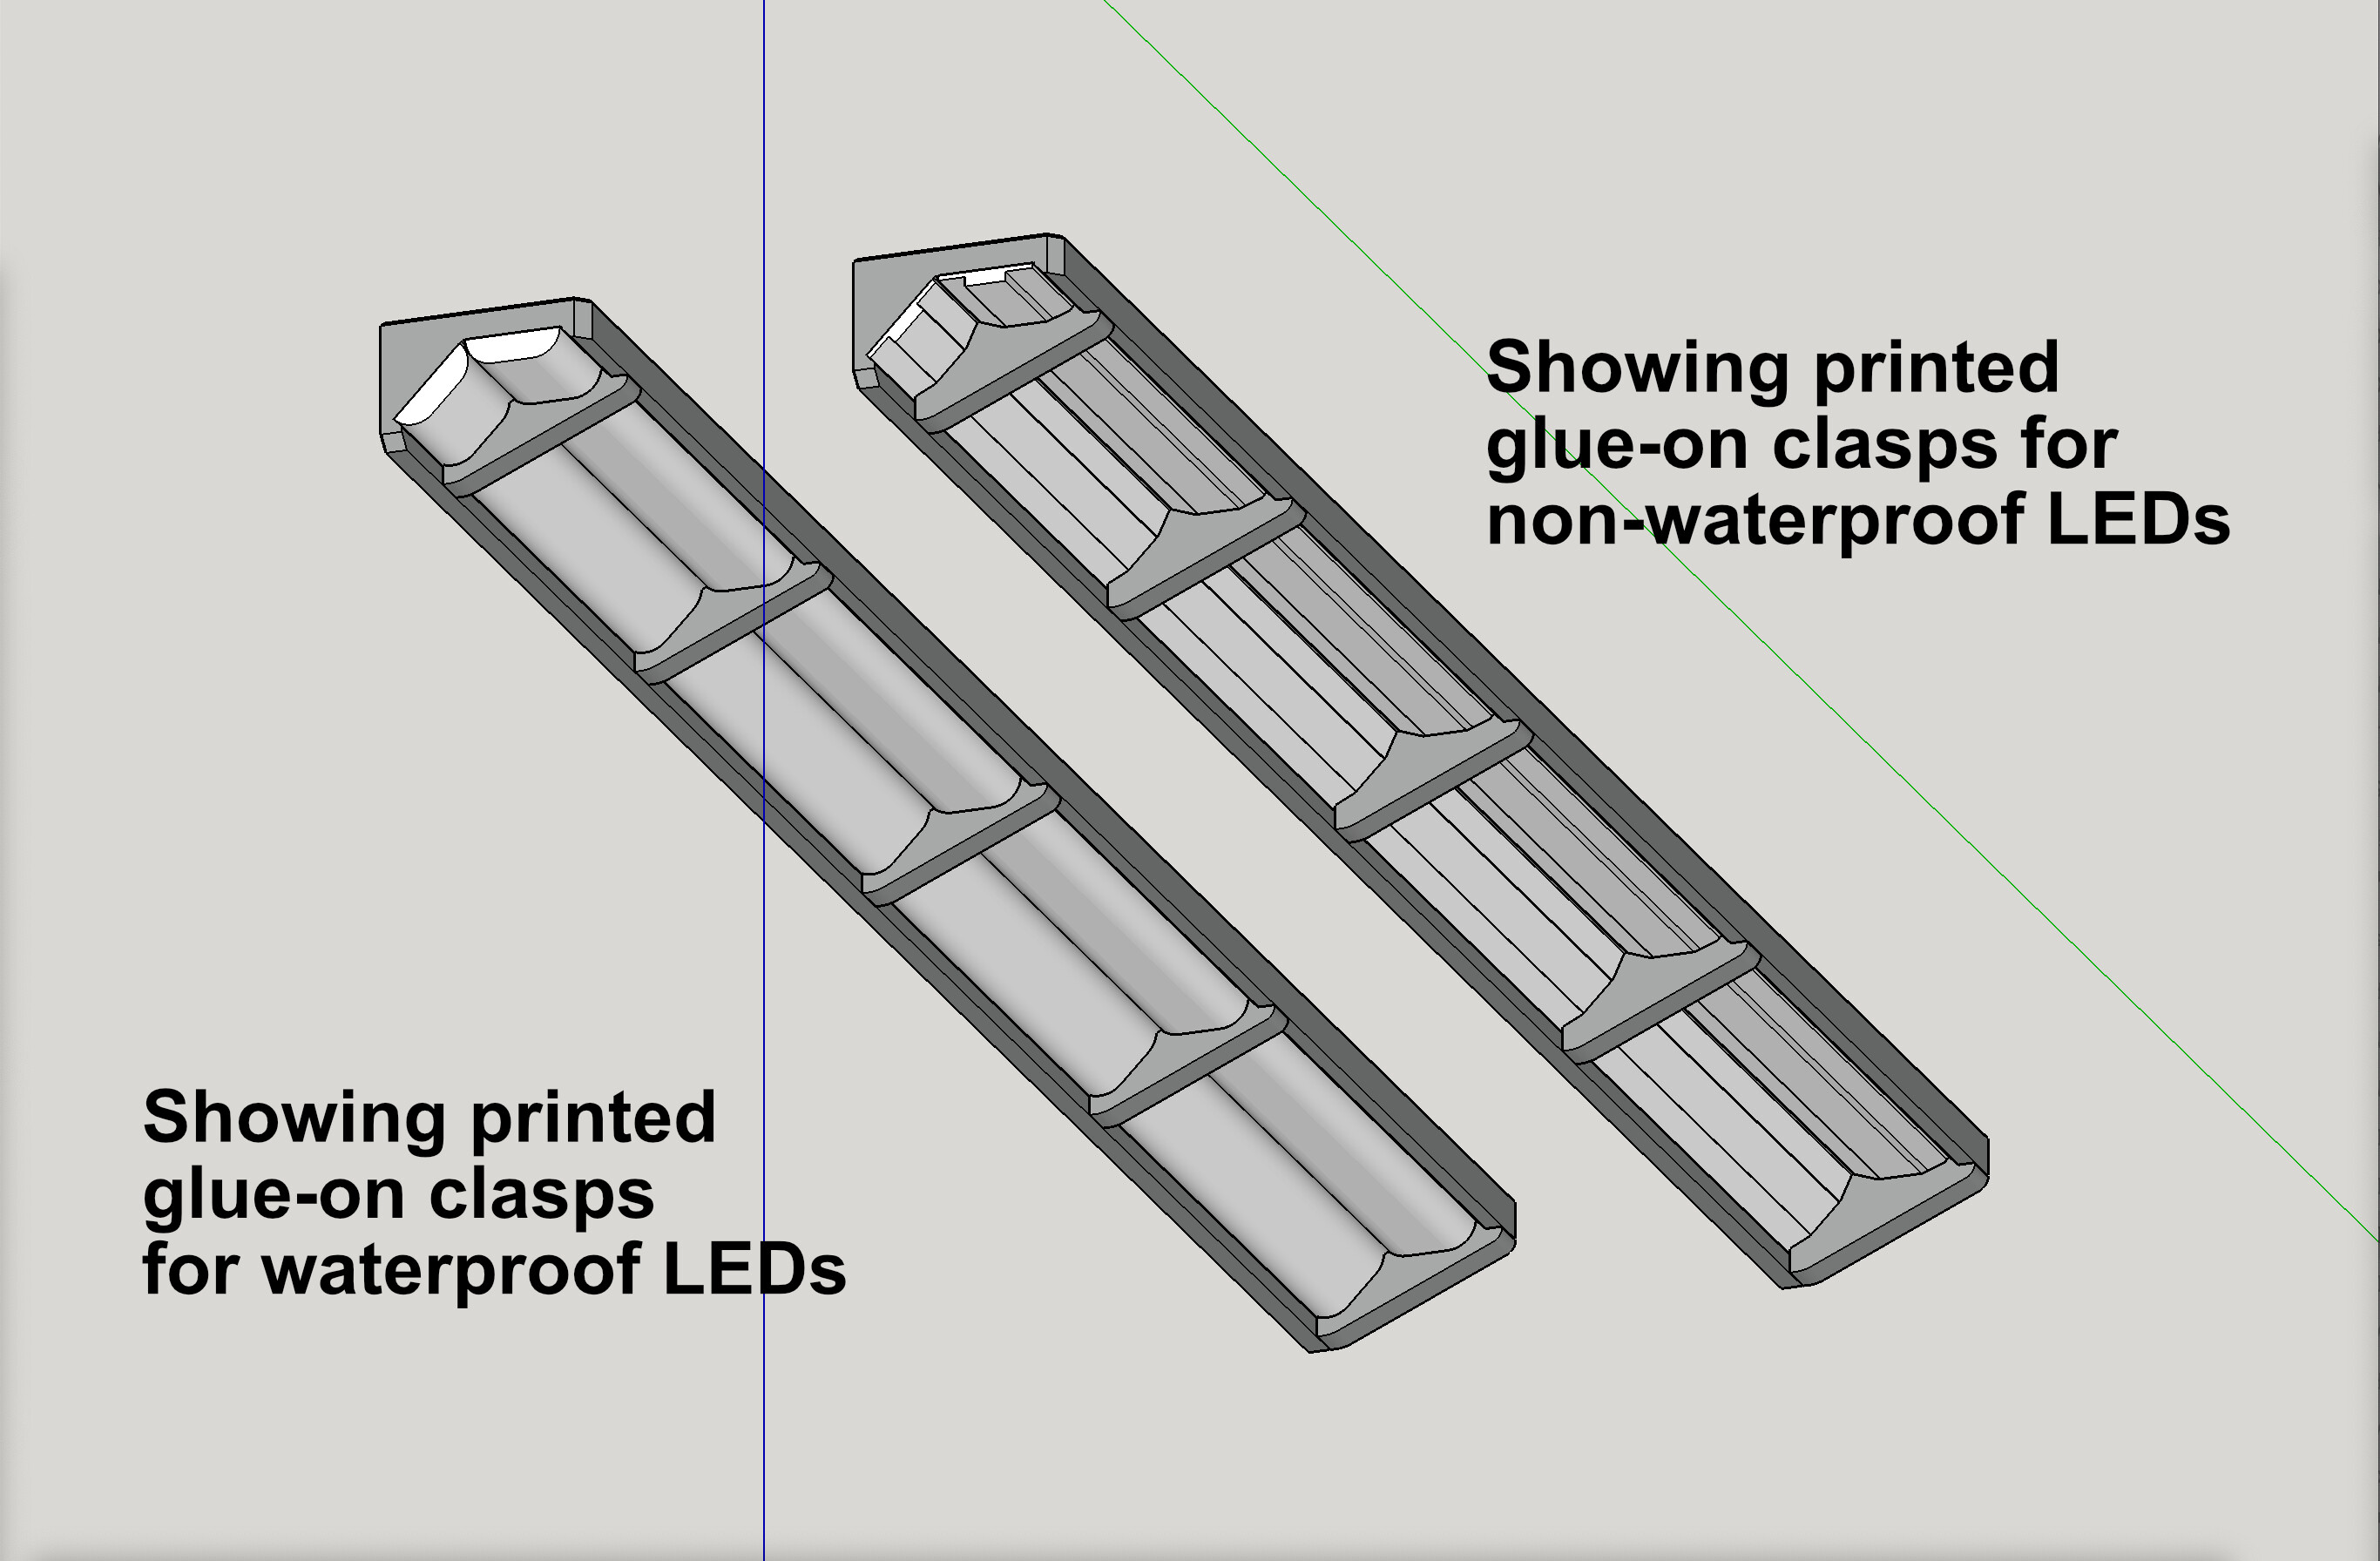
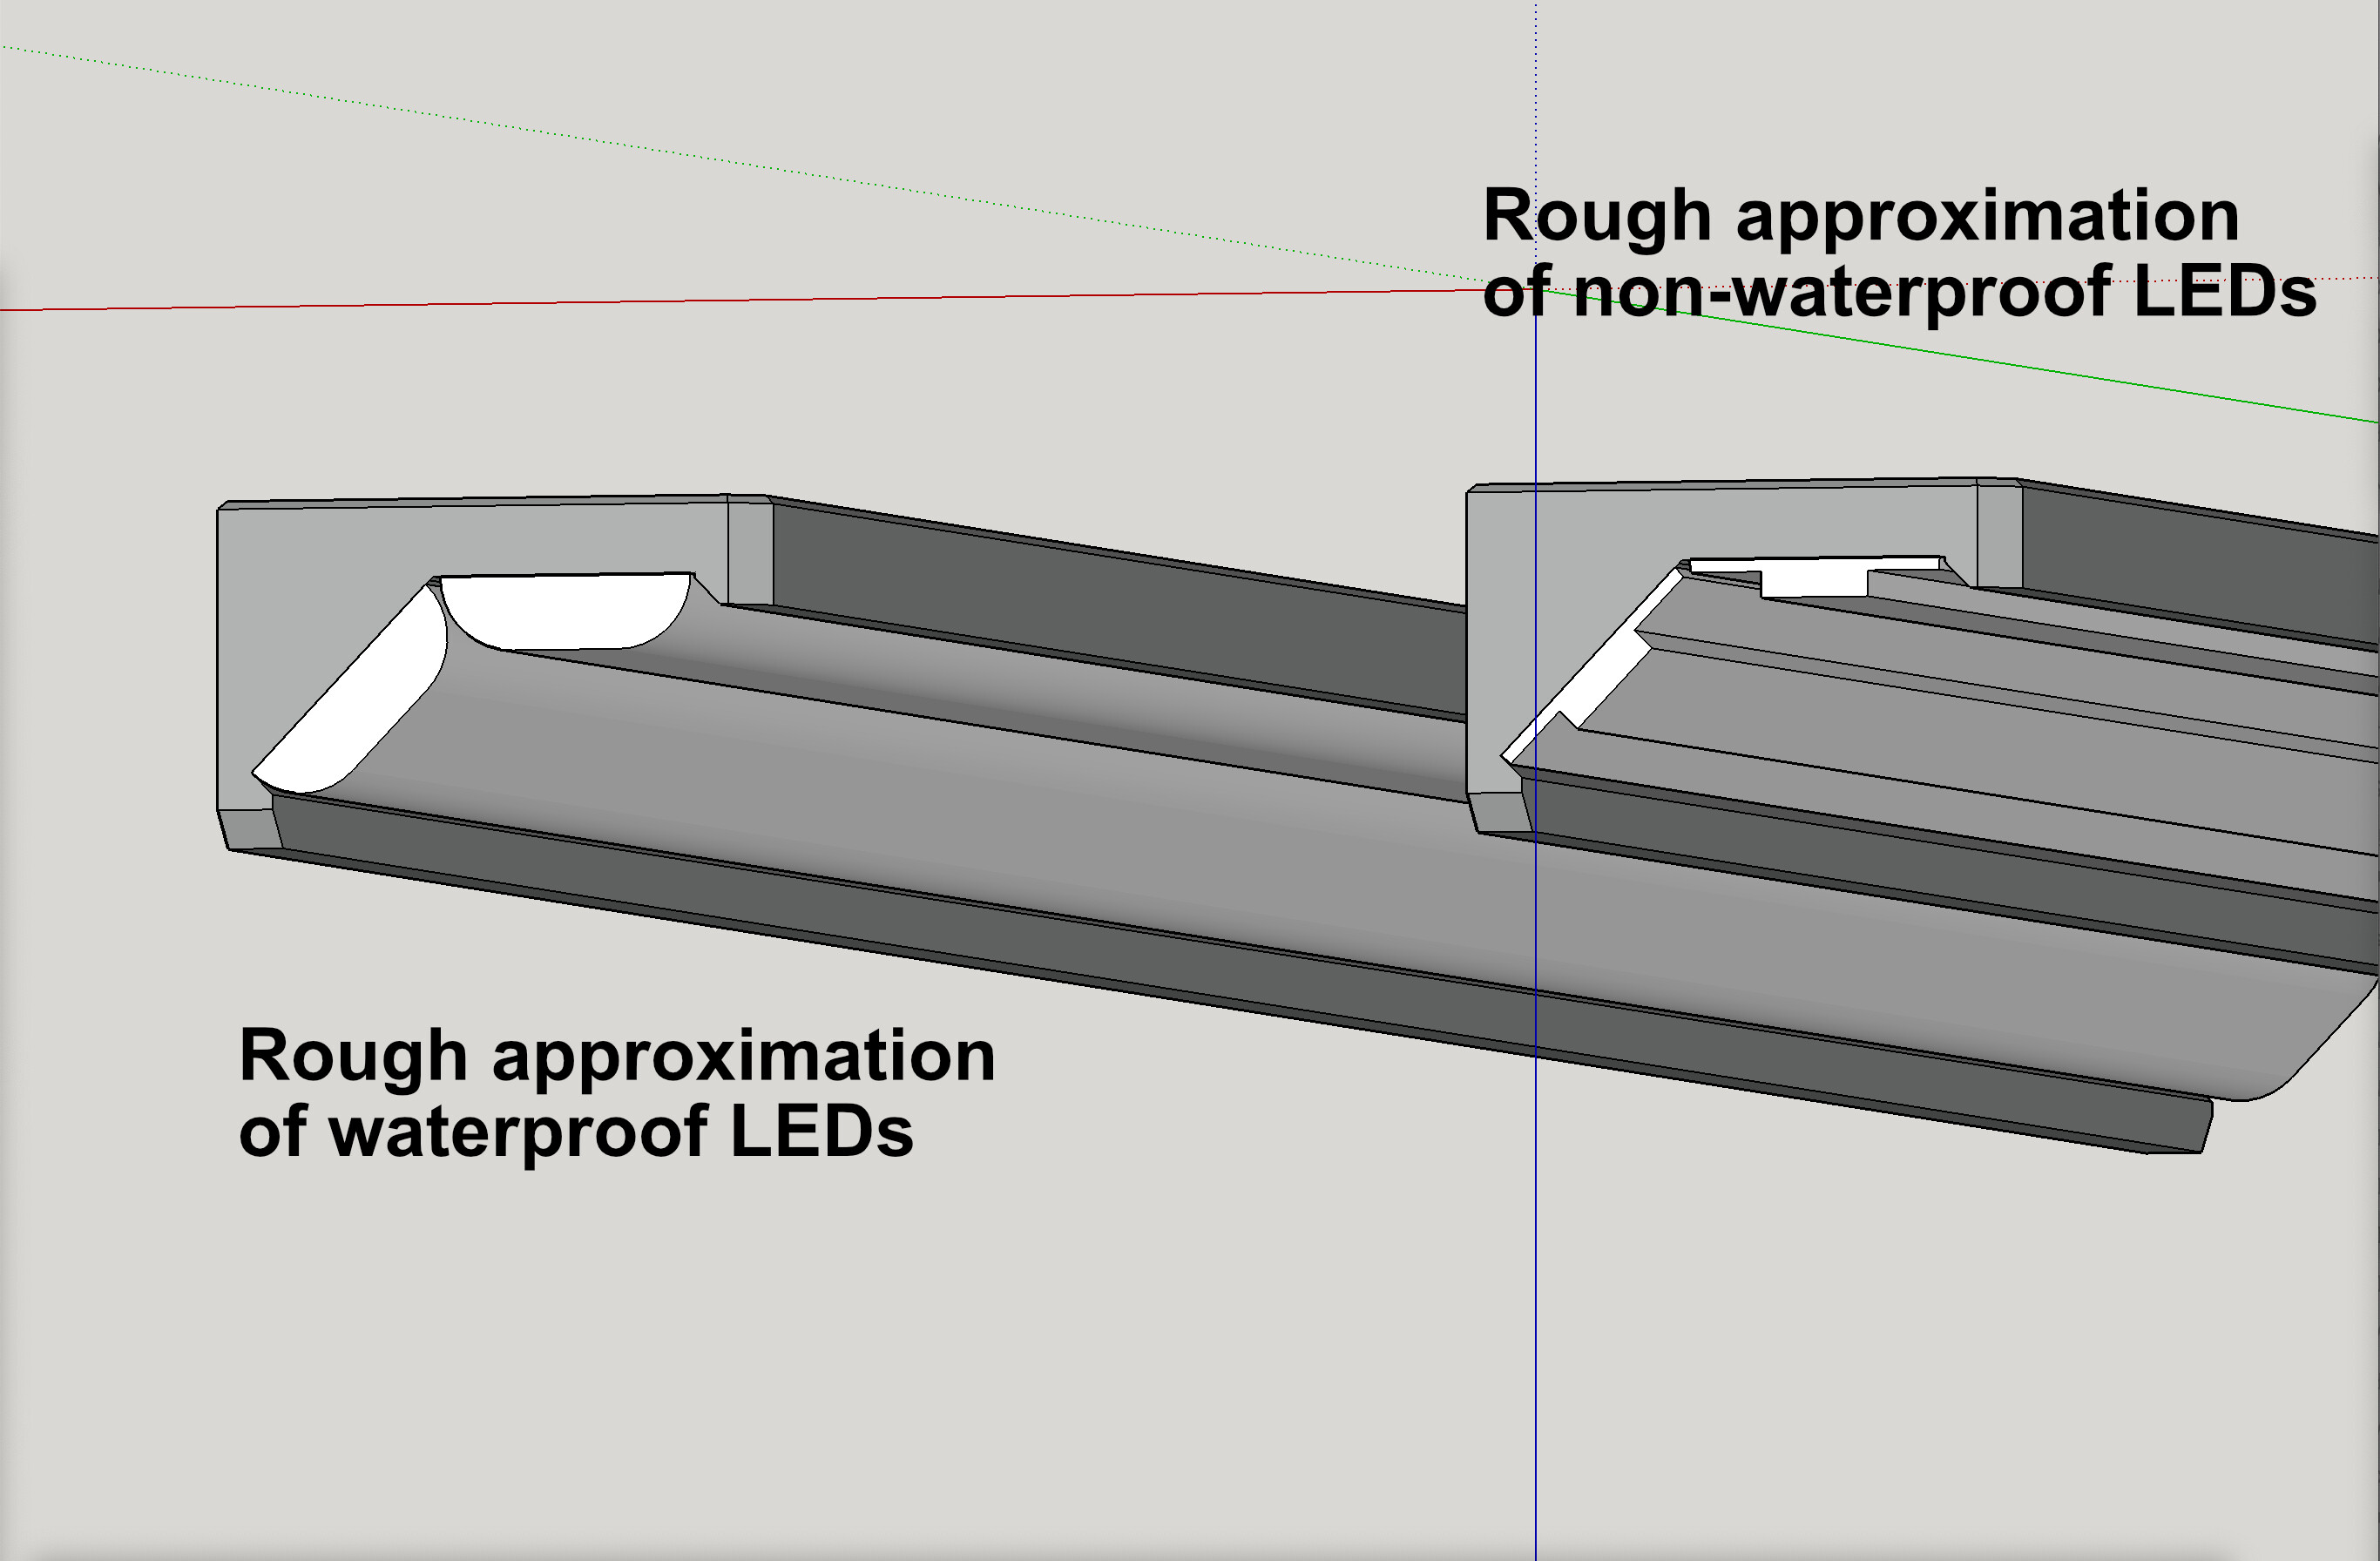
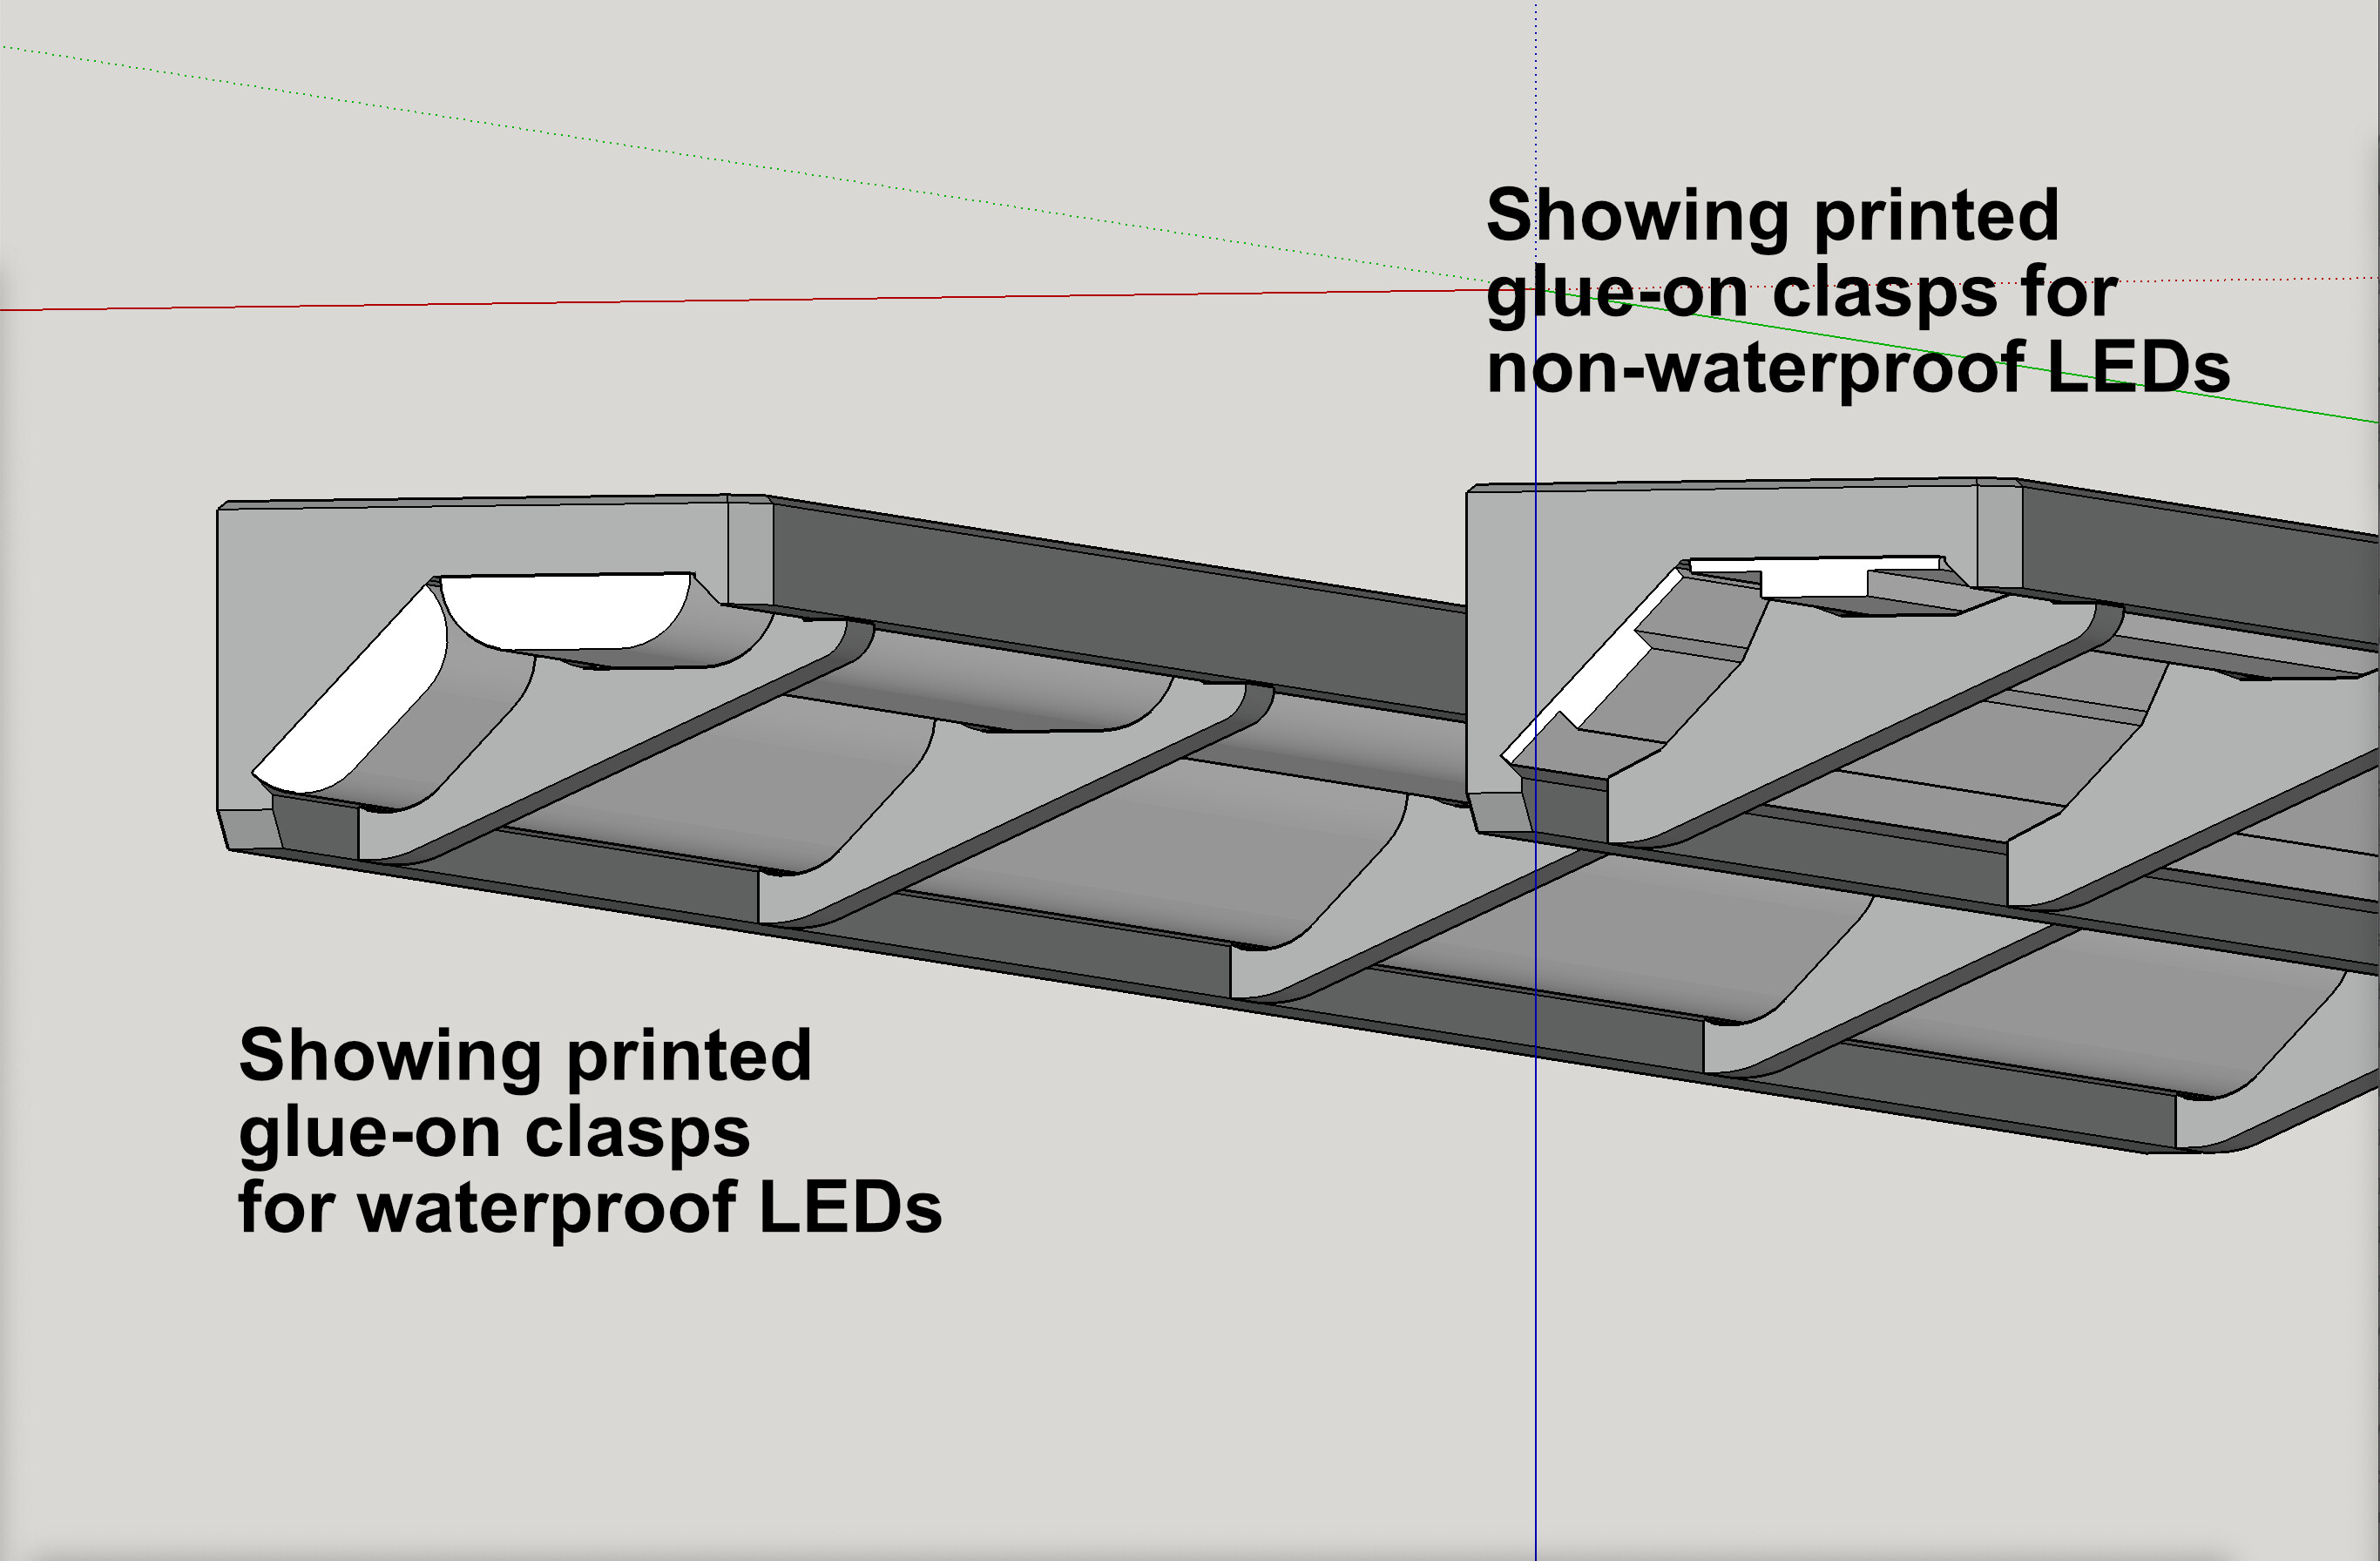
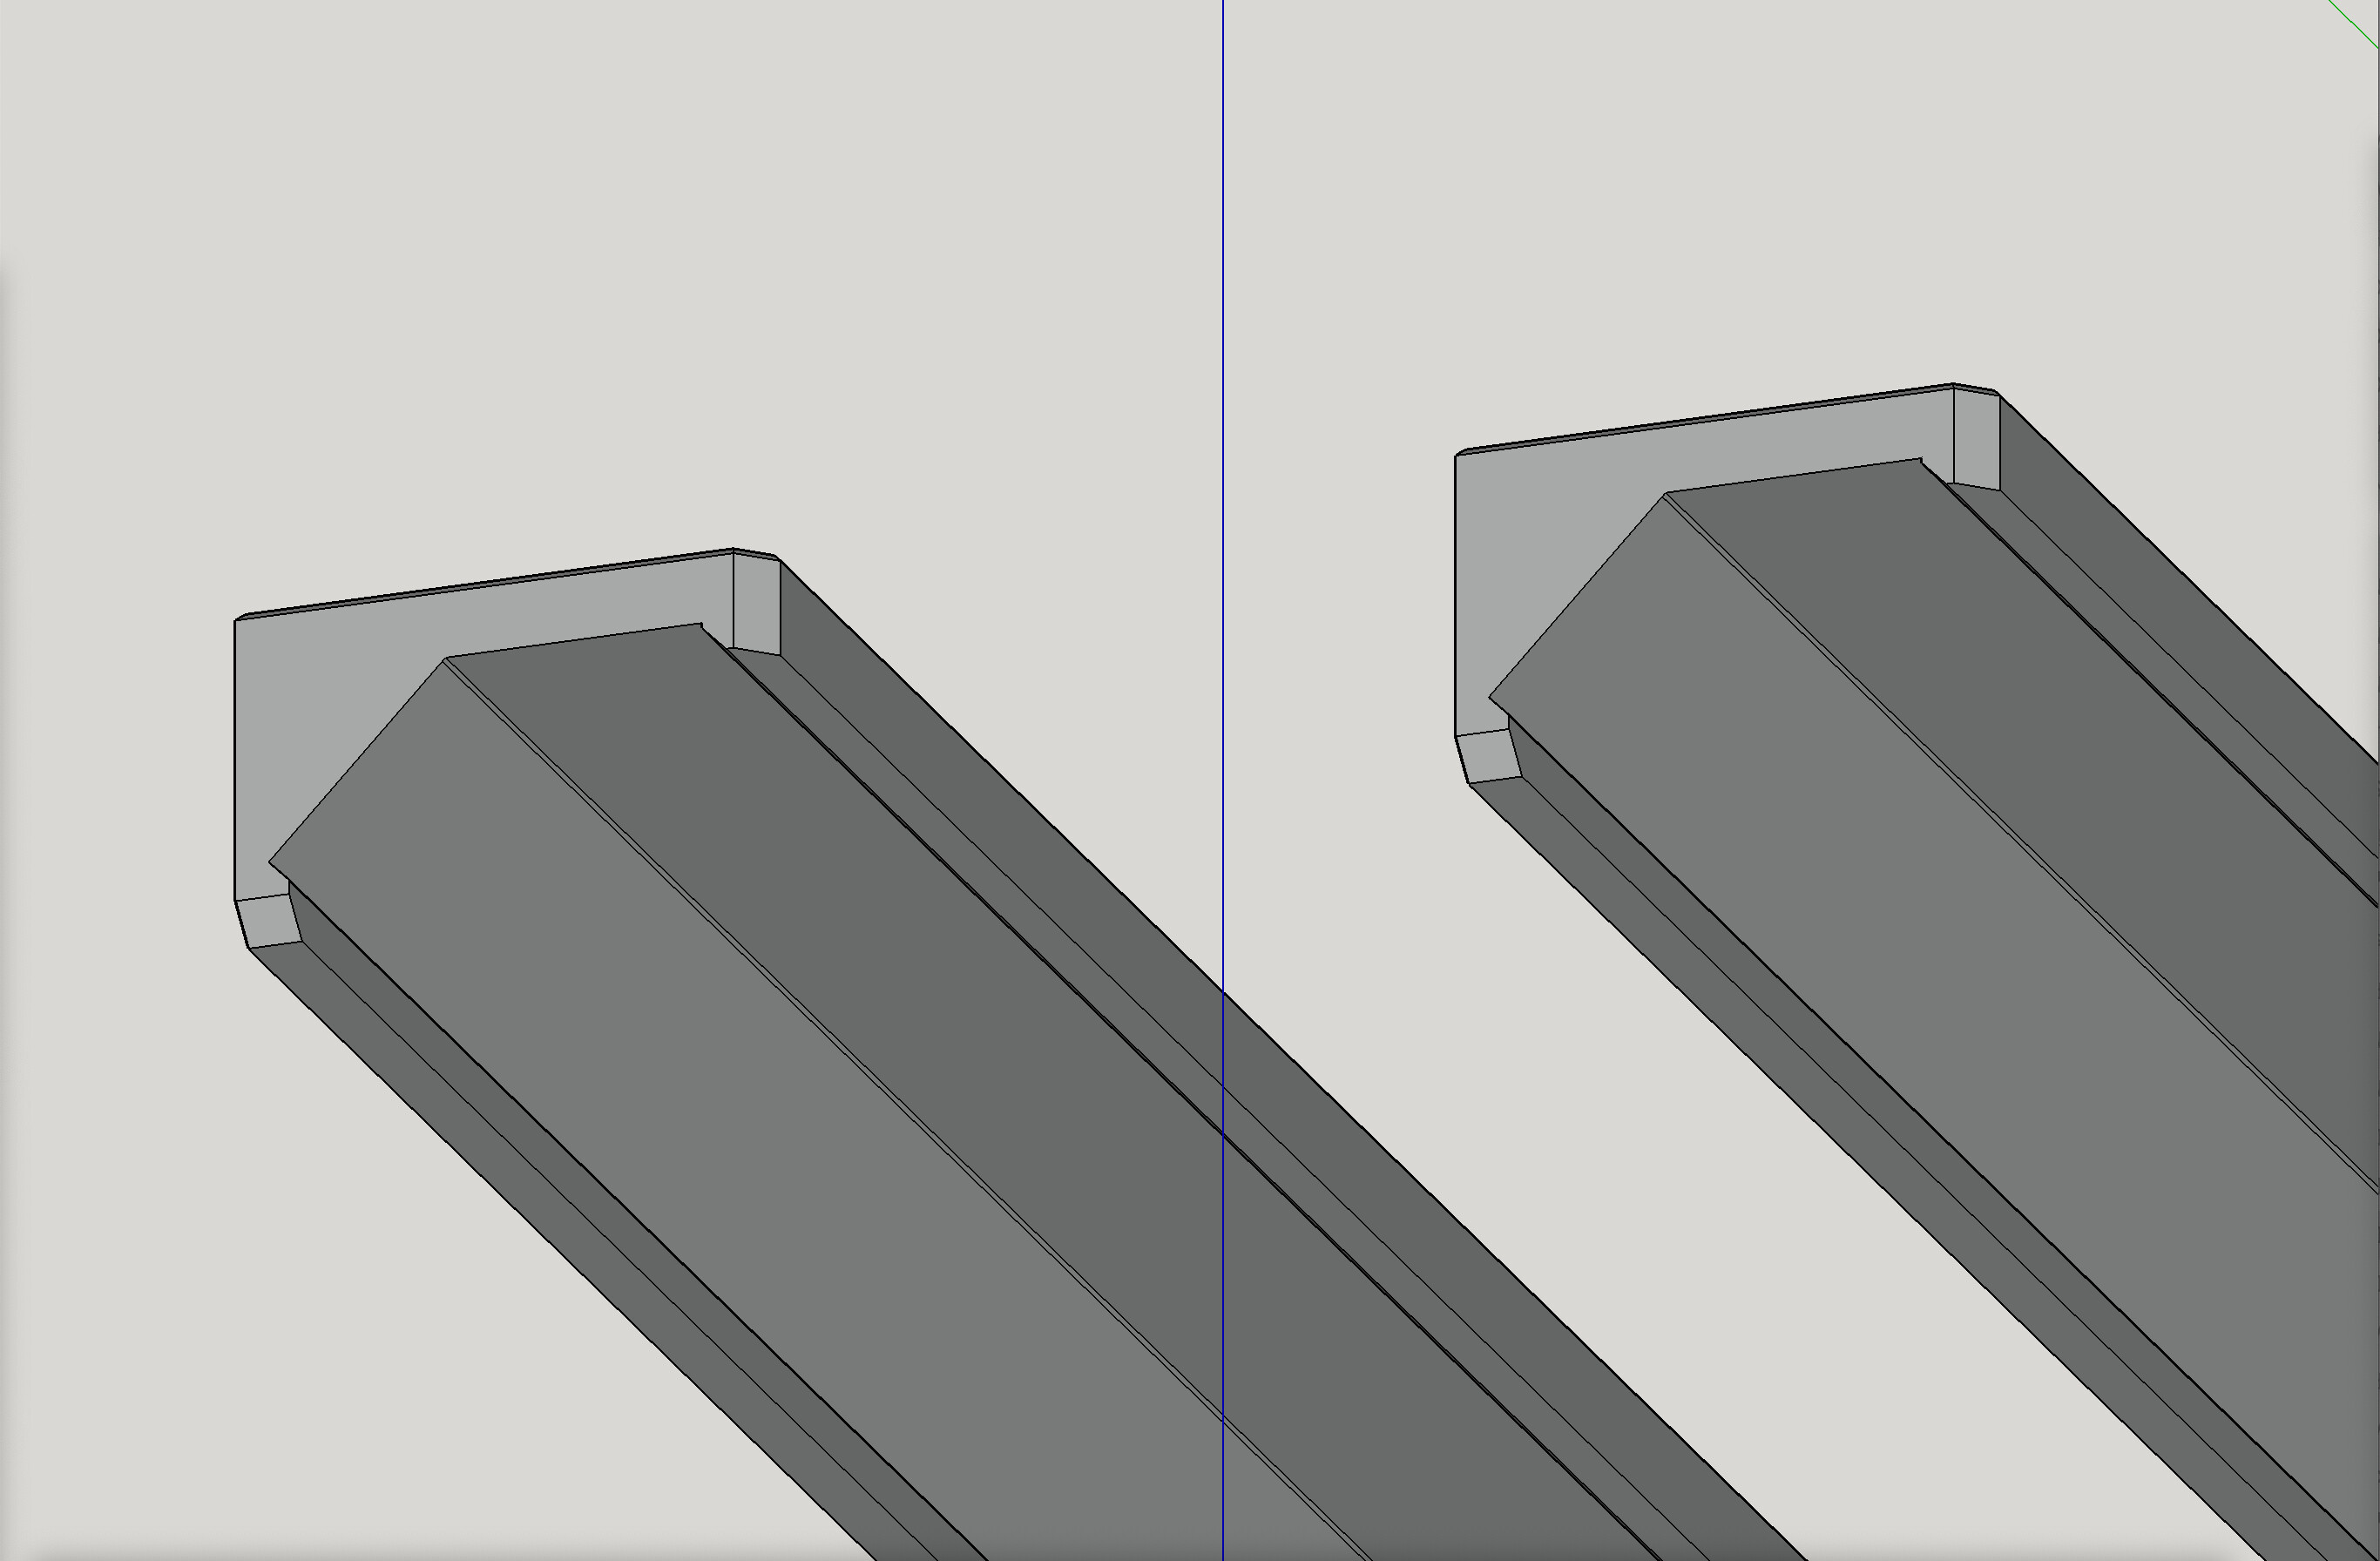
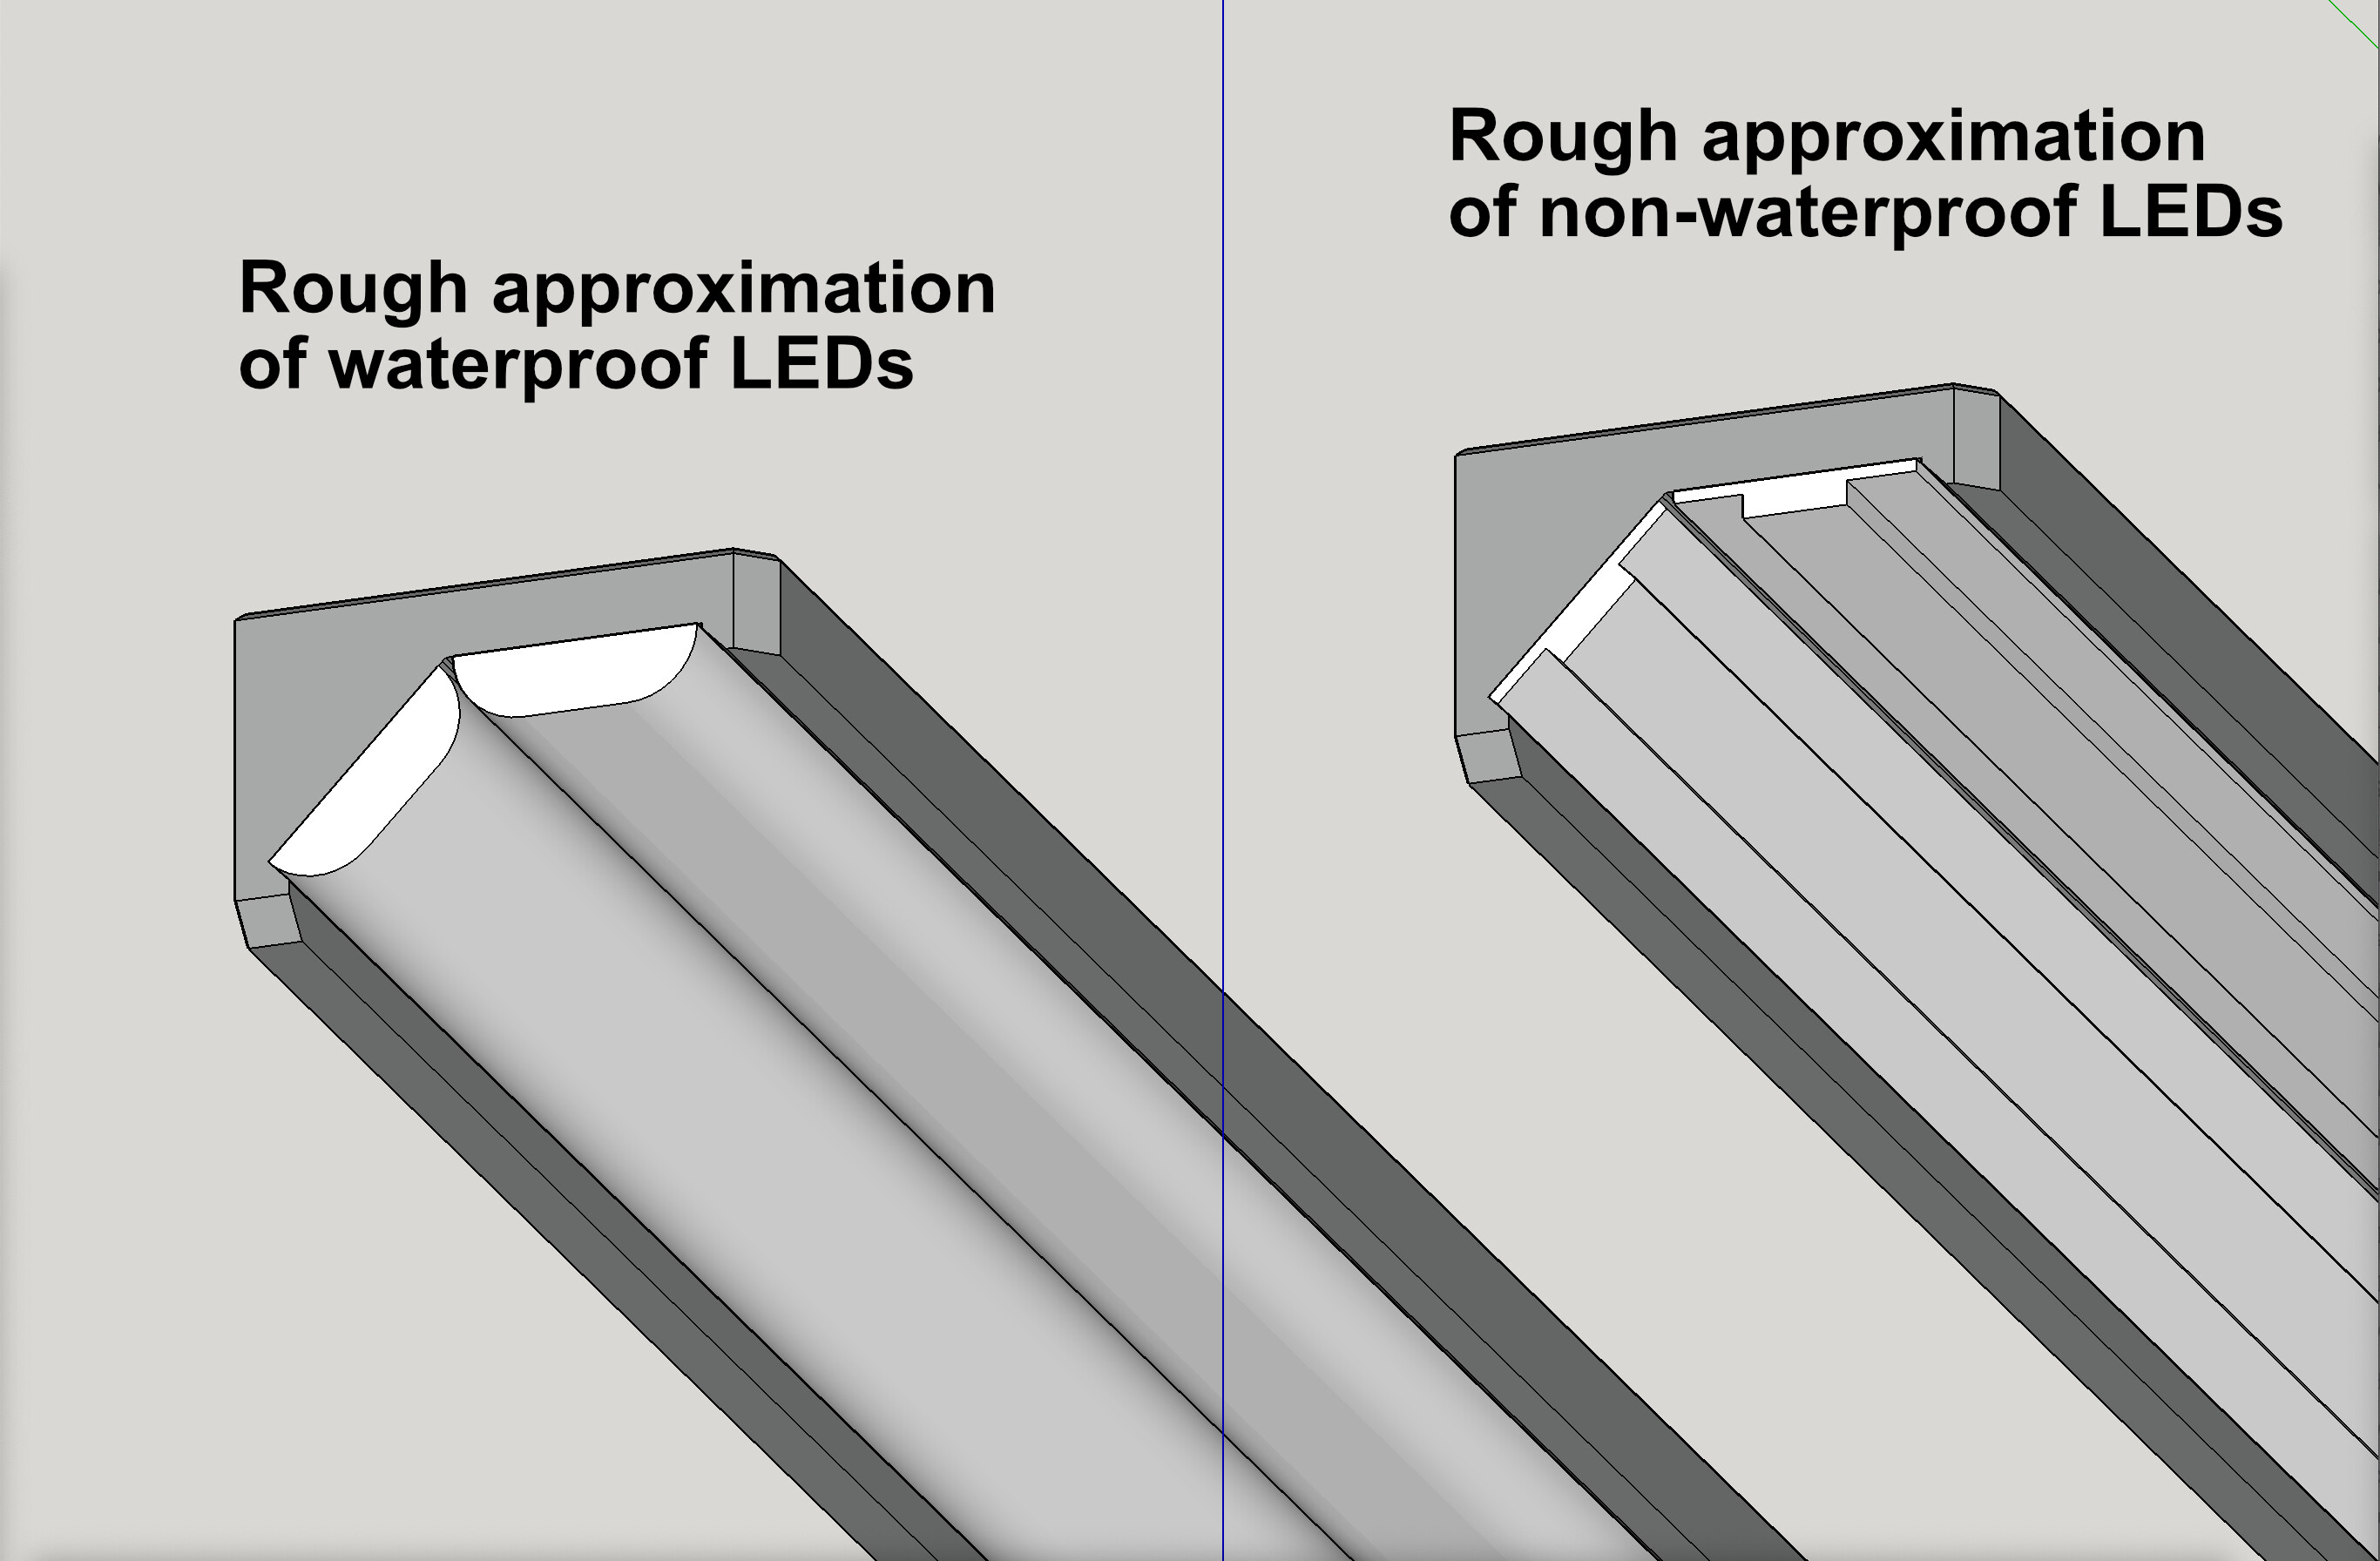
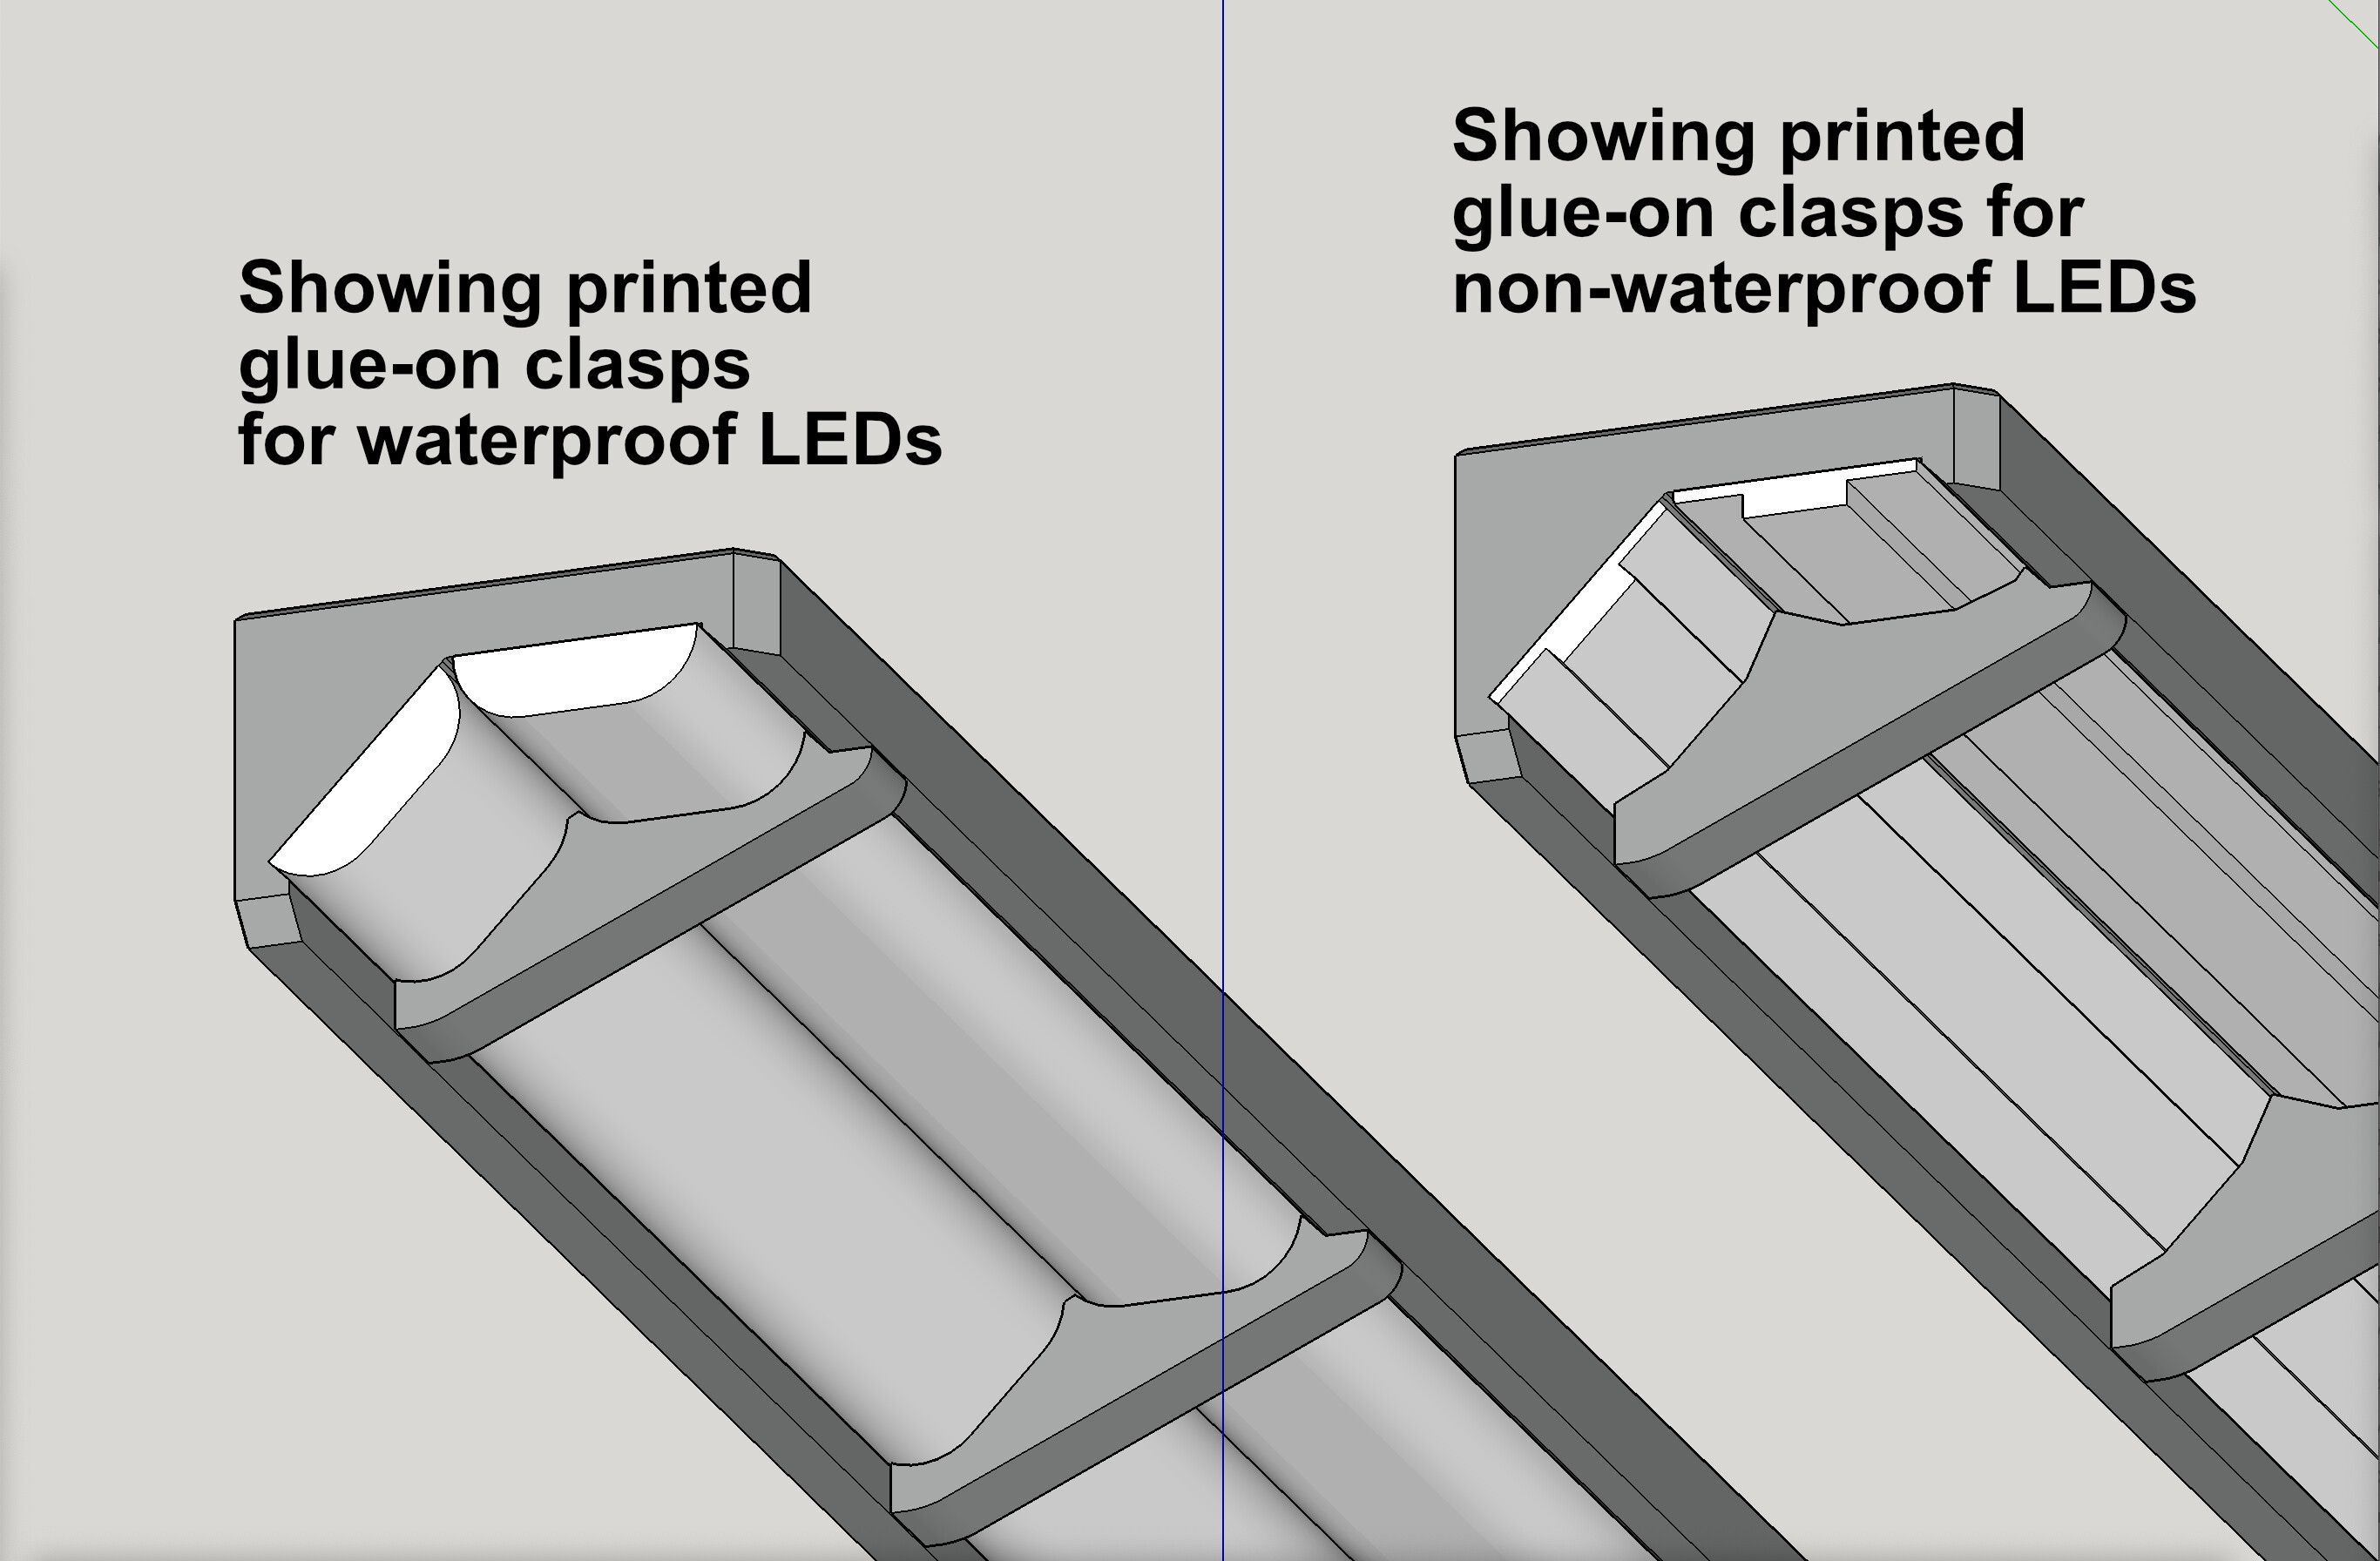
Use these printed mount to add two strips (per mount) of 5050 LEDs to the front and both sides. I recommend use of non-waterproof LEDs, or removing the waterproofing layer from the strips, especially on the front. The space allowance on the front is very tight. The waterproofing layer can be OK on the sides. I’ve provided two variants of the “LED Strip Clasps” for the sides: one is for LEDs with the waterproofing layer still in place, while the other is for non-waterproof LEDs, or for waterproof LEDs that have had that layer peeled off.
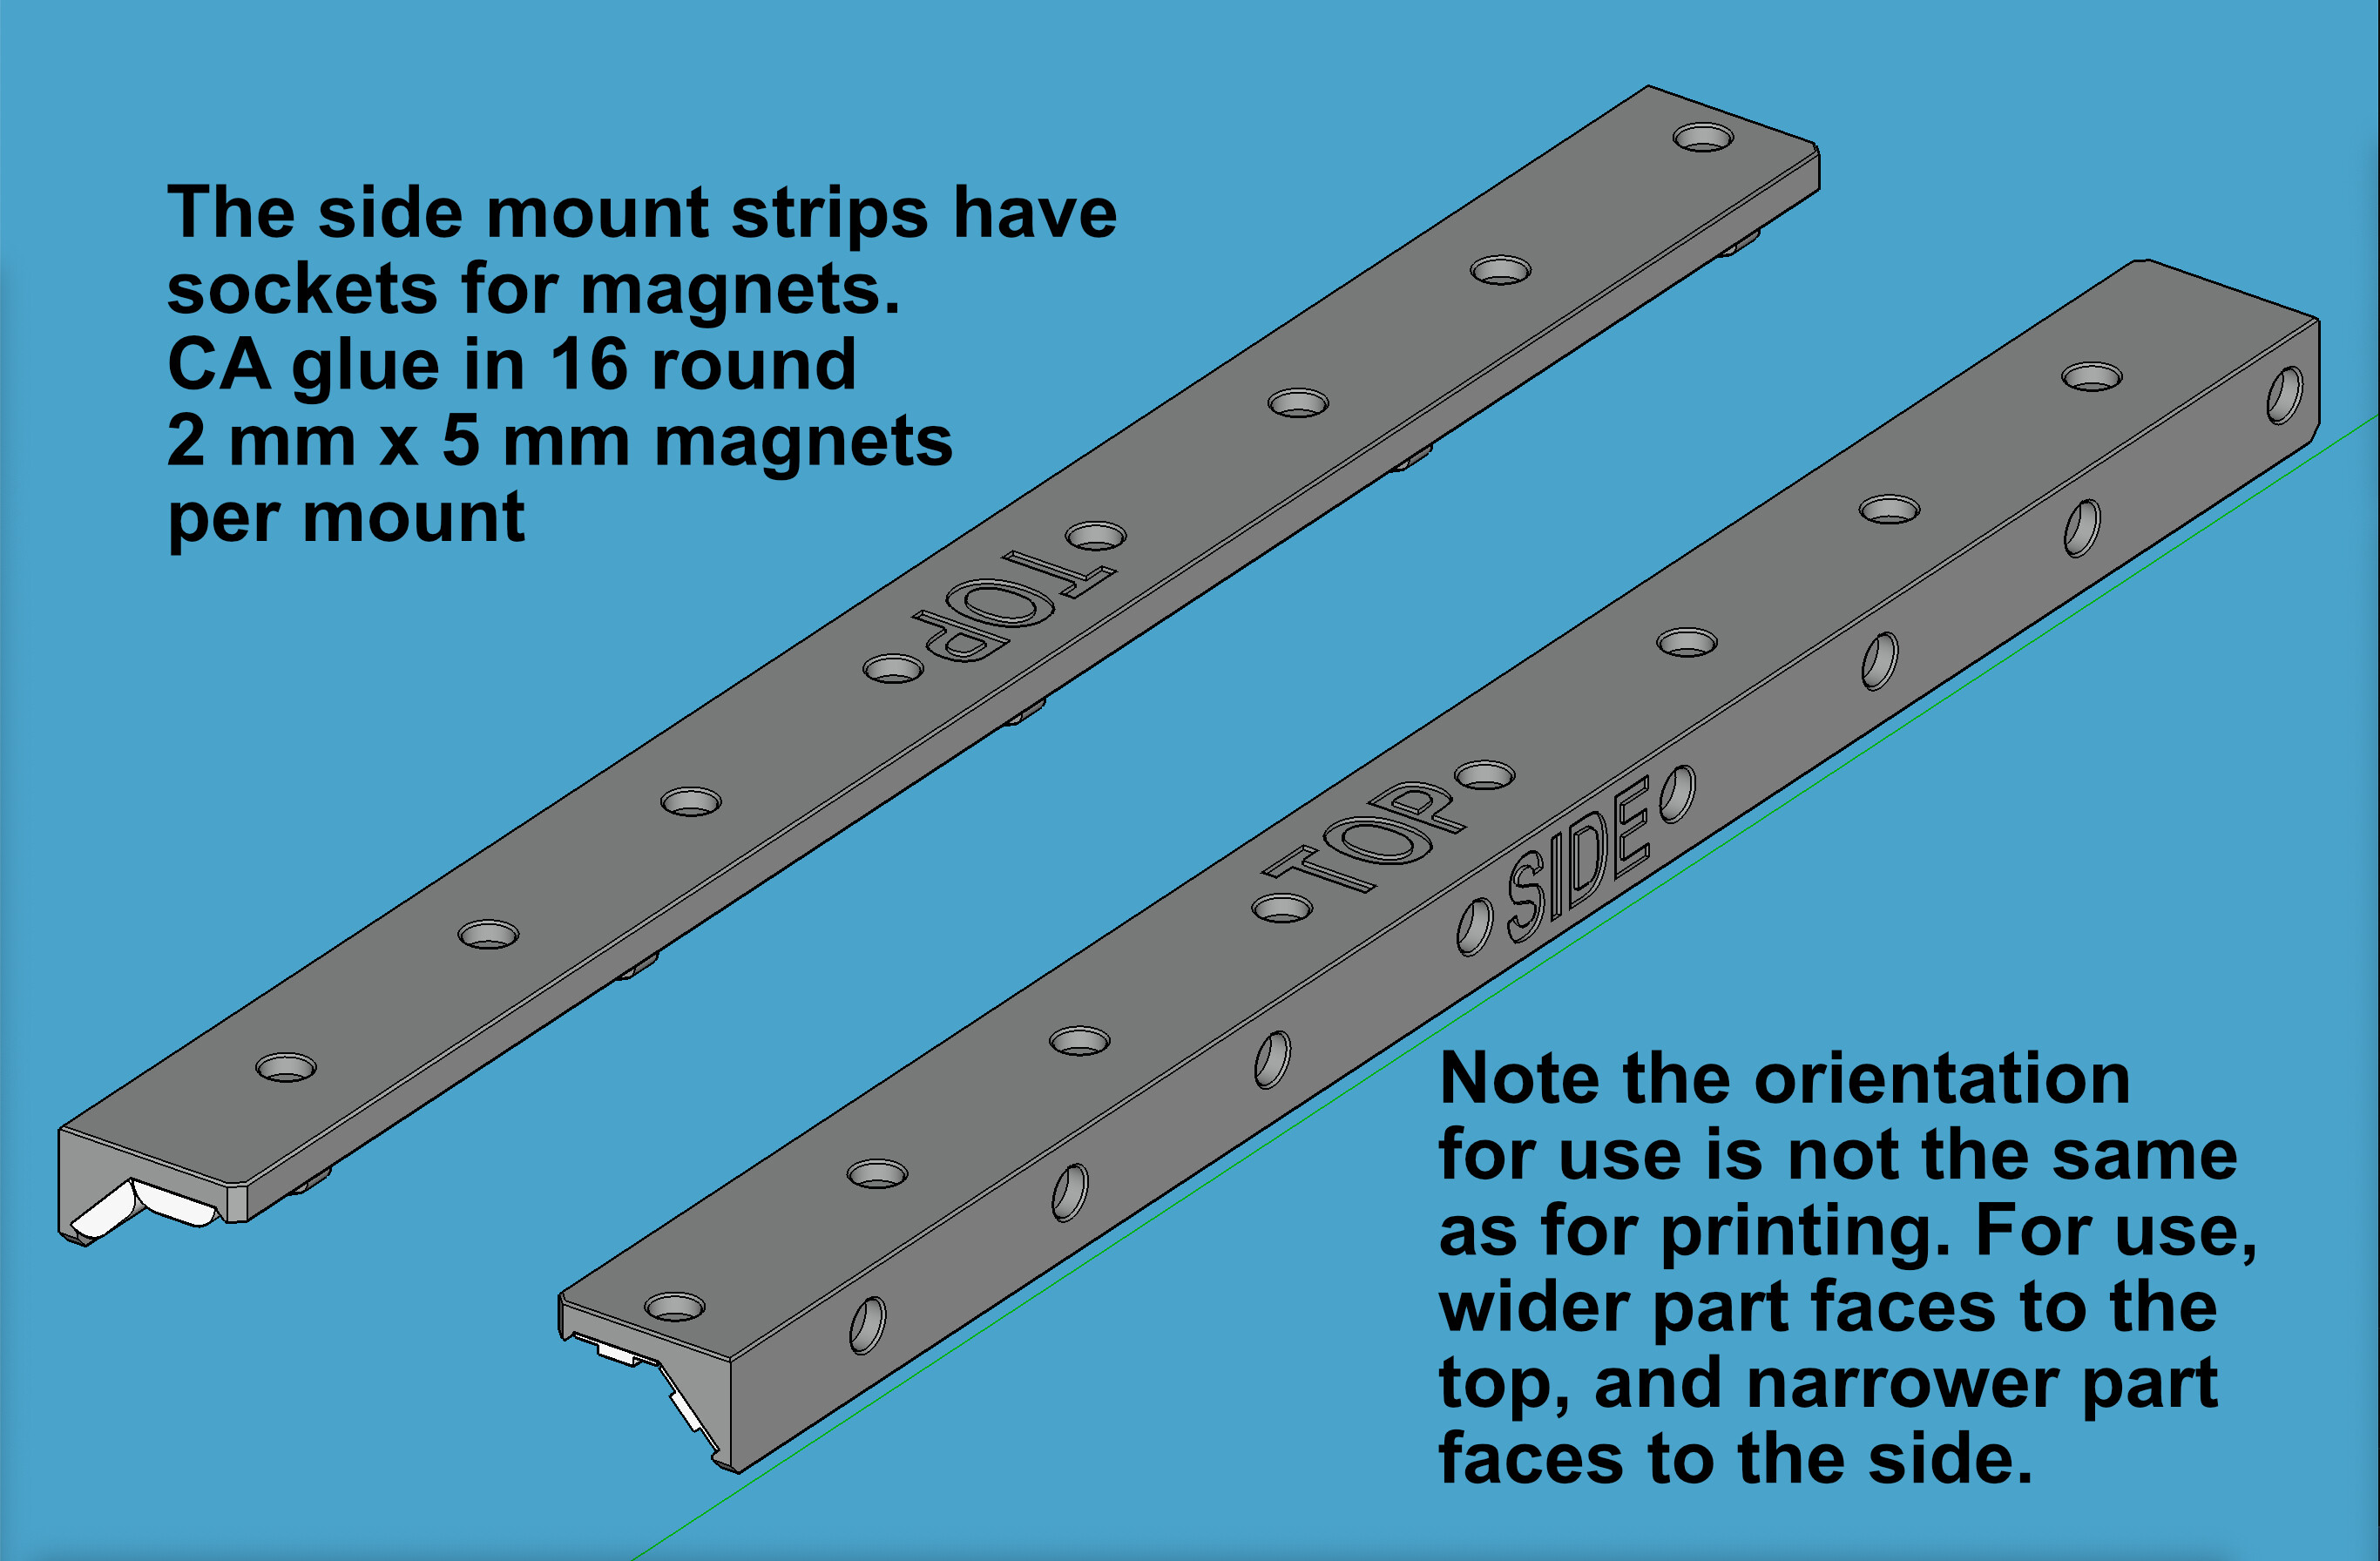
The side mount strips have sockets for magnets. They can be attached using magnets, or if you could choose to use double stick tape. The front needs to be attached with double stick tape, because there is not enough space for magnets in the printer regarding the front. If using magnets on the side mounts, CA glue in 16 round 2 mm x 5 mm magnets per mount.
Note the orientation for use is not the same as for printing. For use, wider part faces to the top, and narrower part faces to the side.
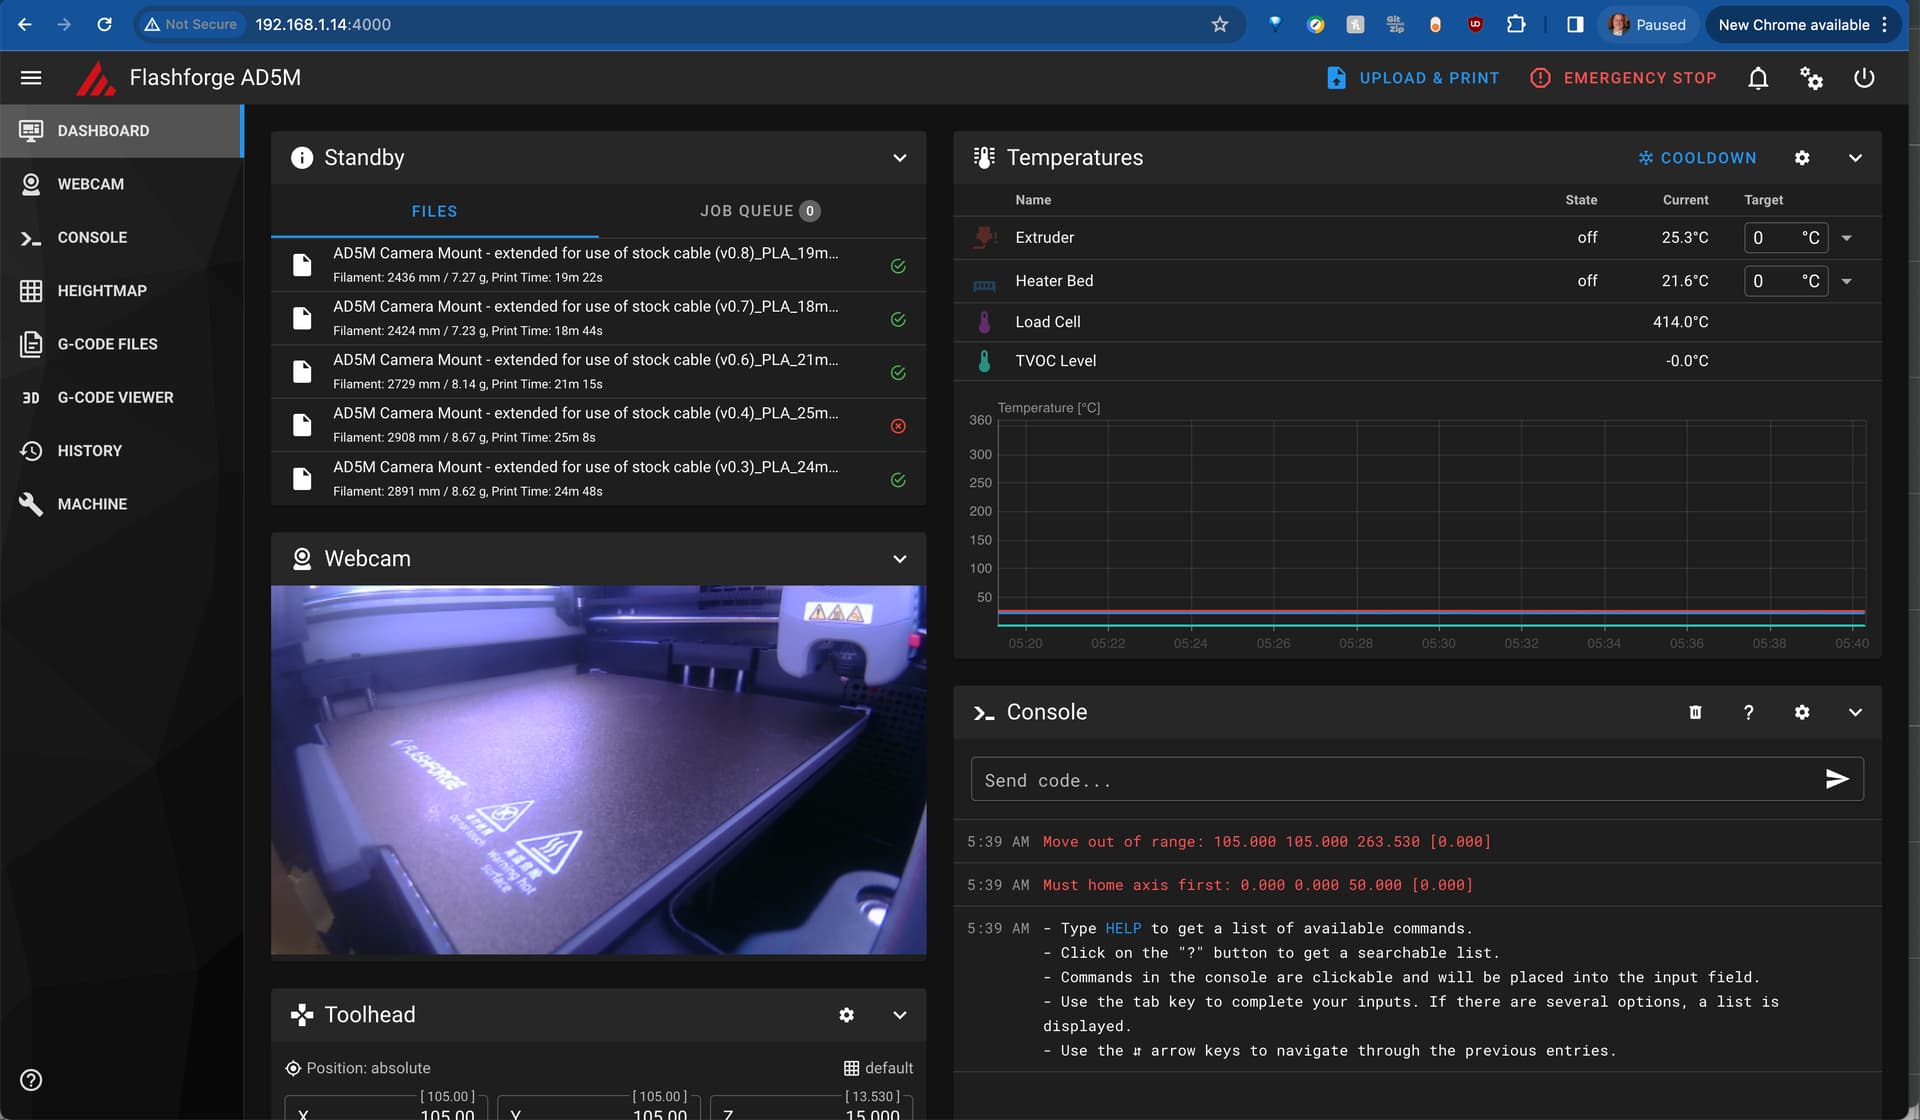


! Moonraker, Mainsail, Fluidd, & Klipperscreen +WIFI!")