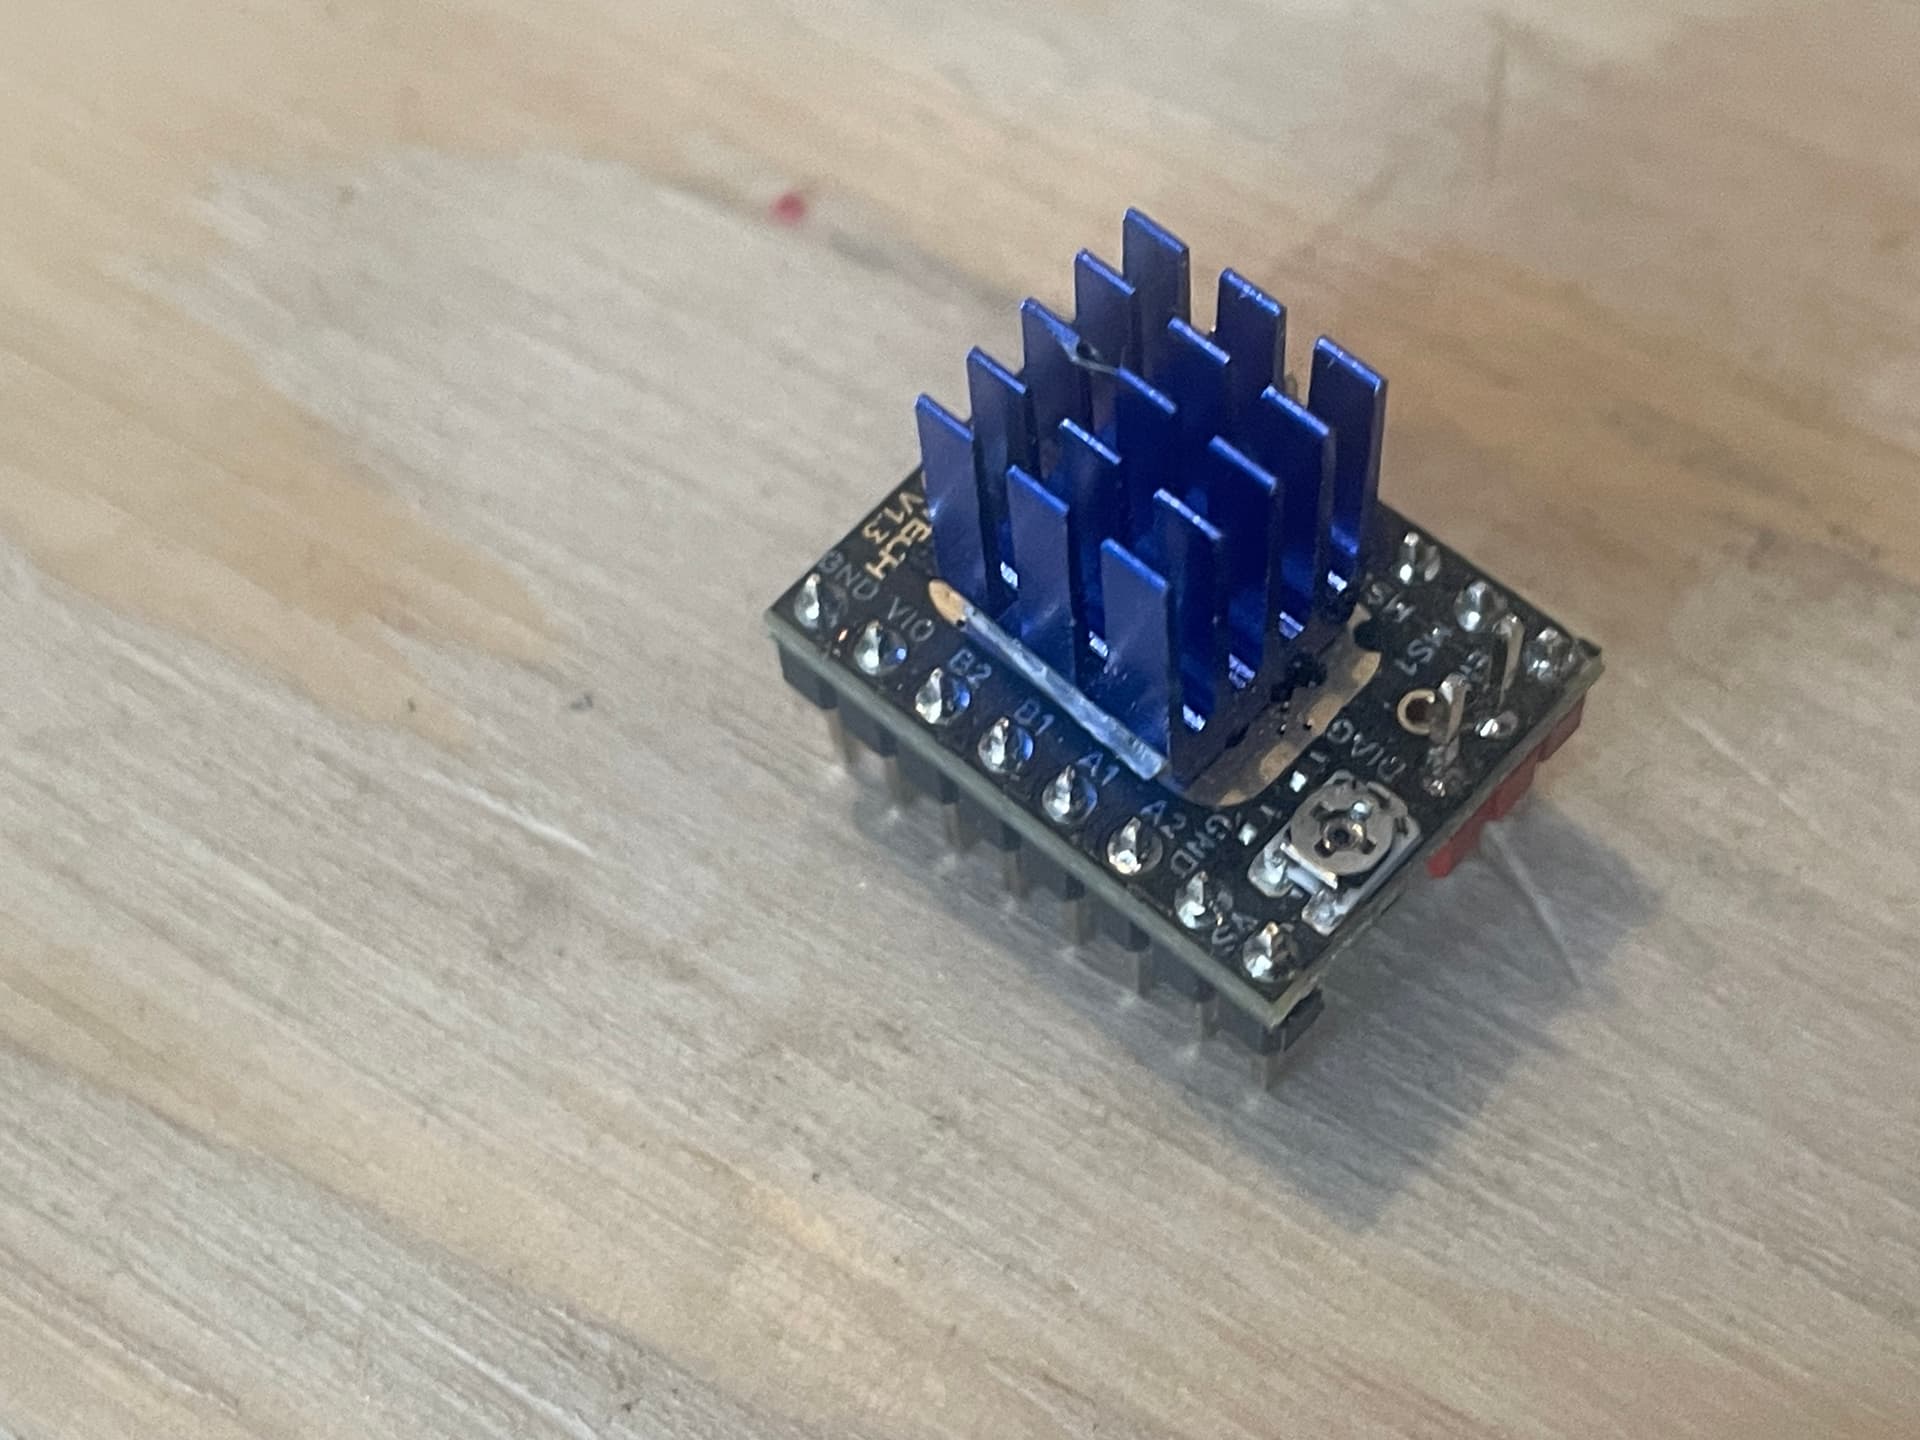
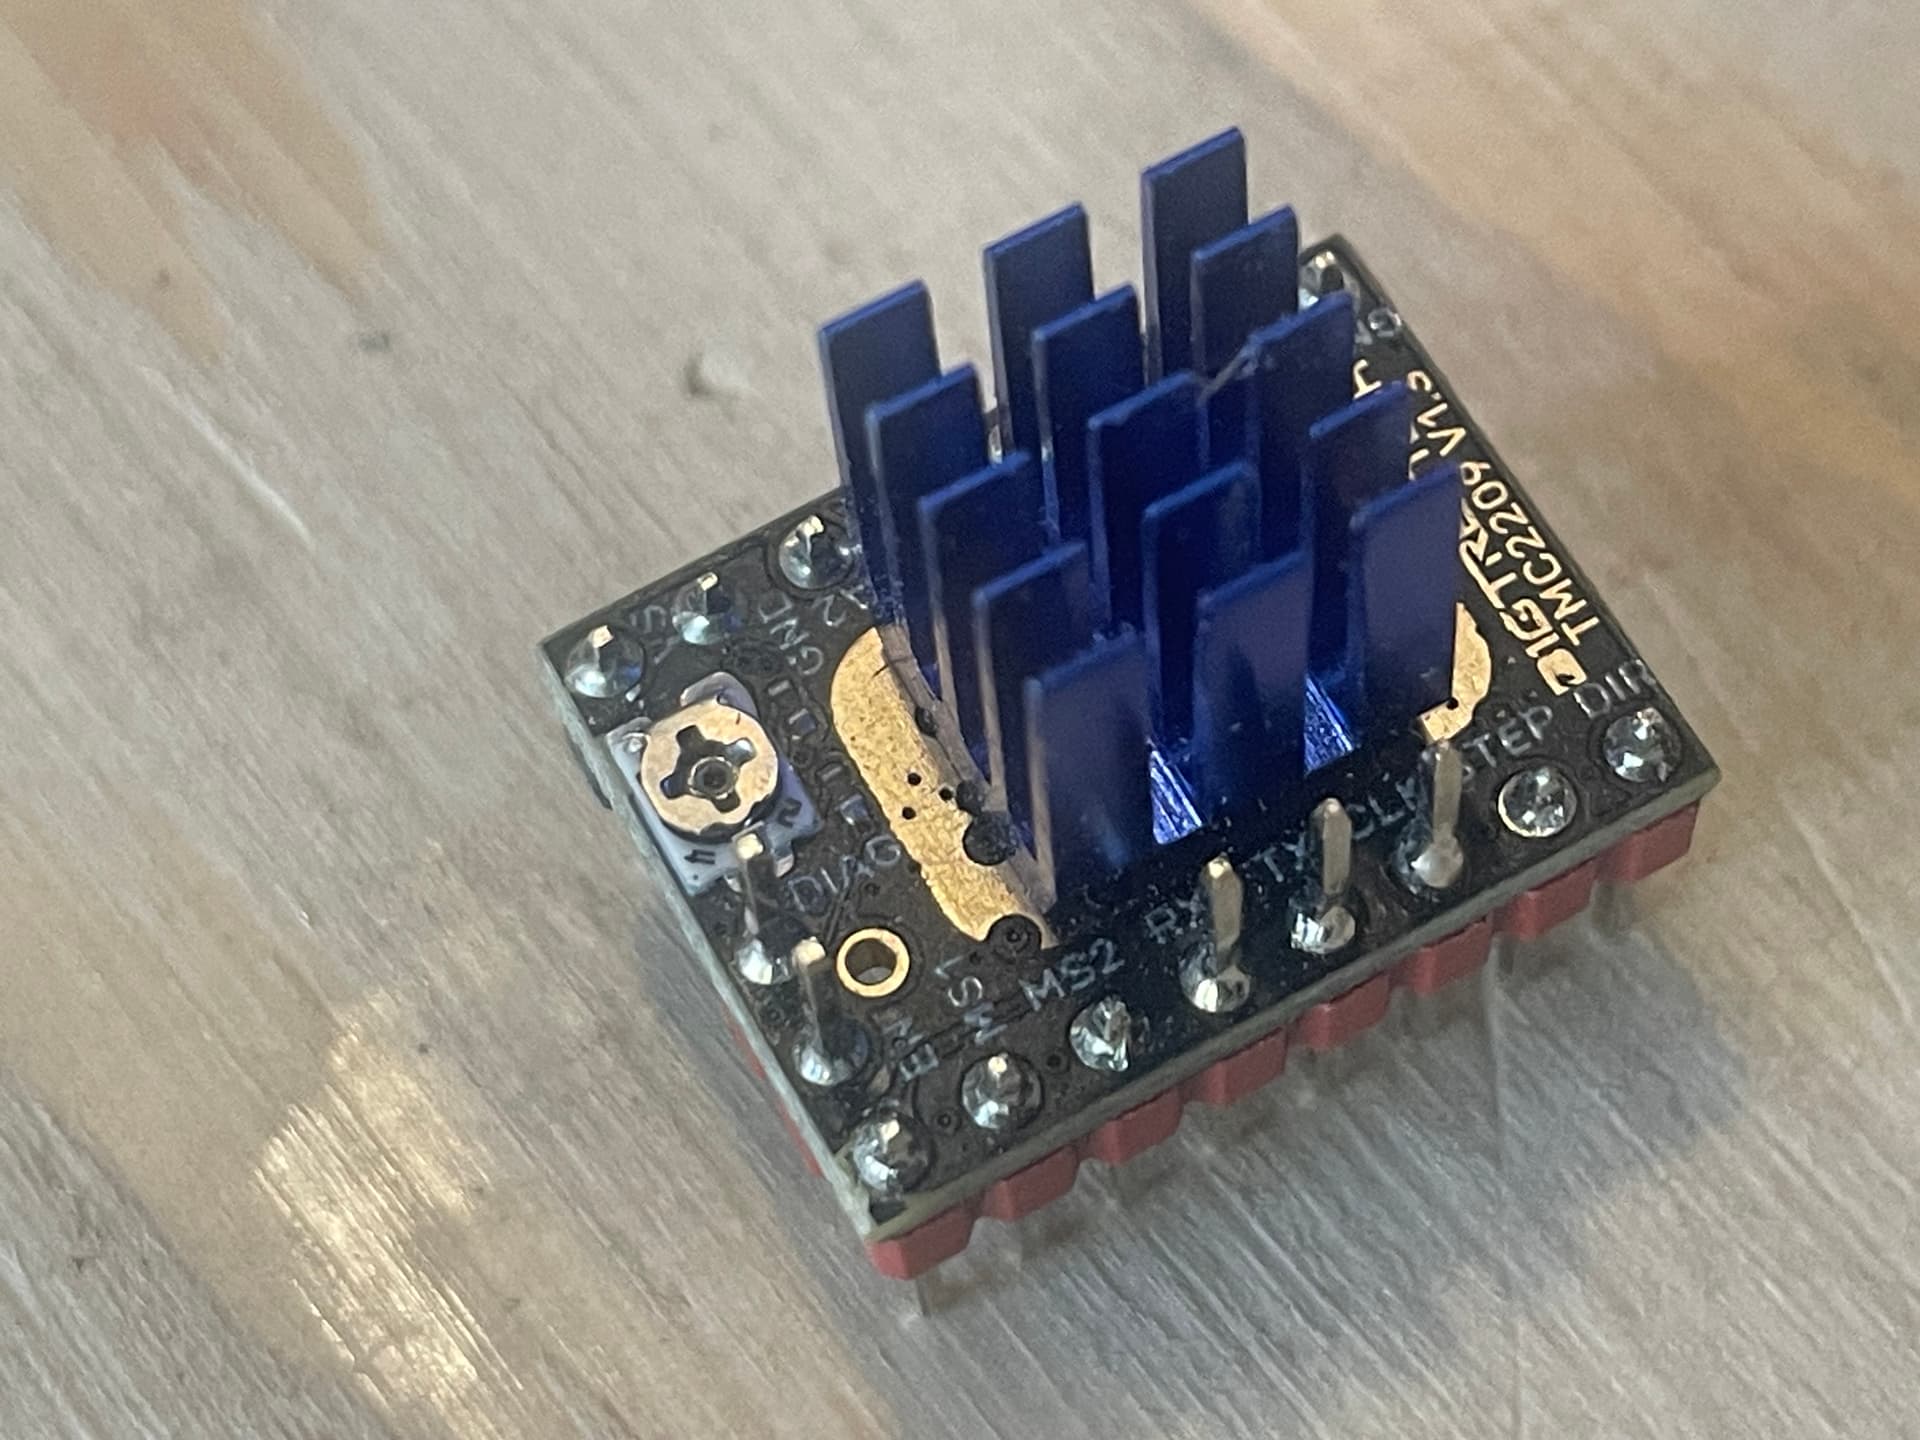
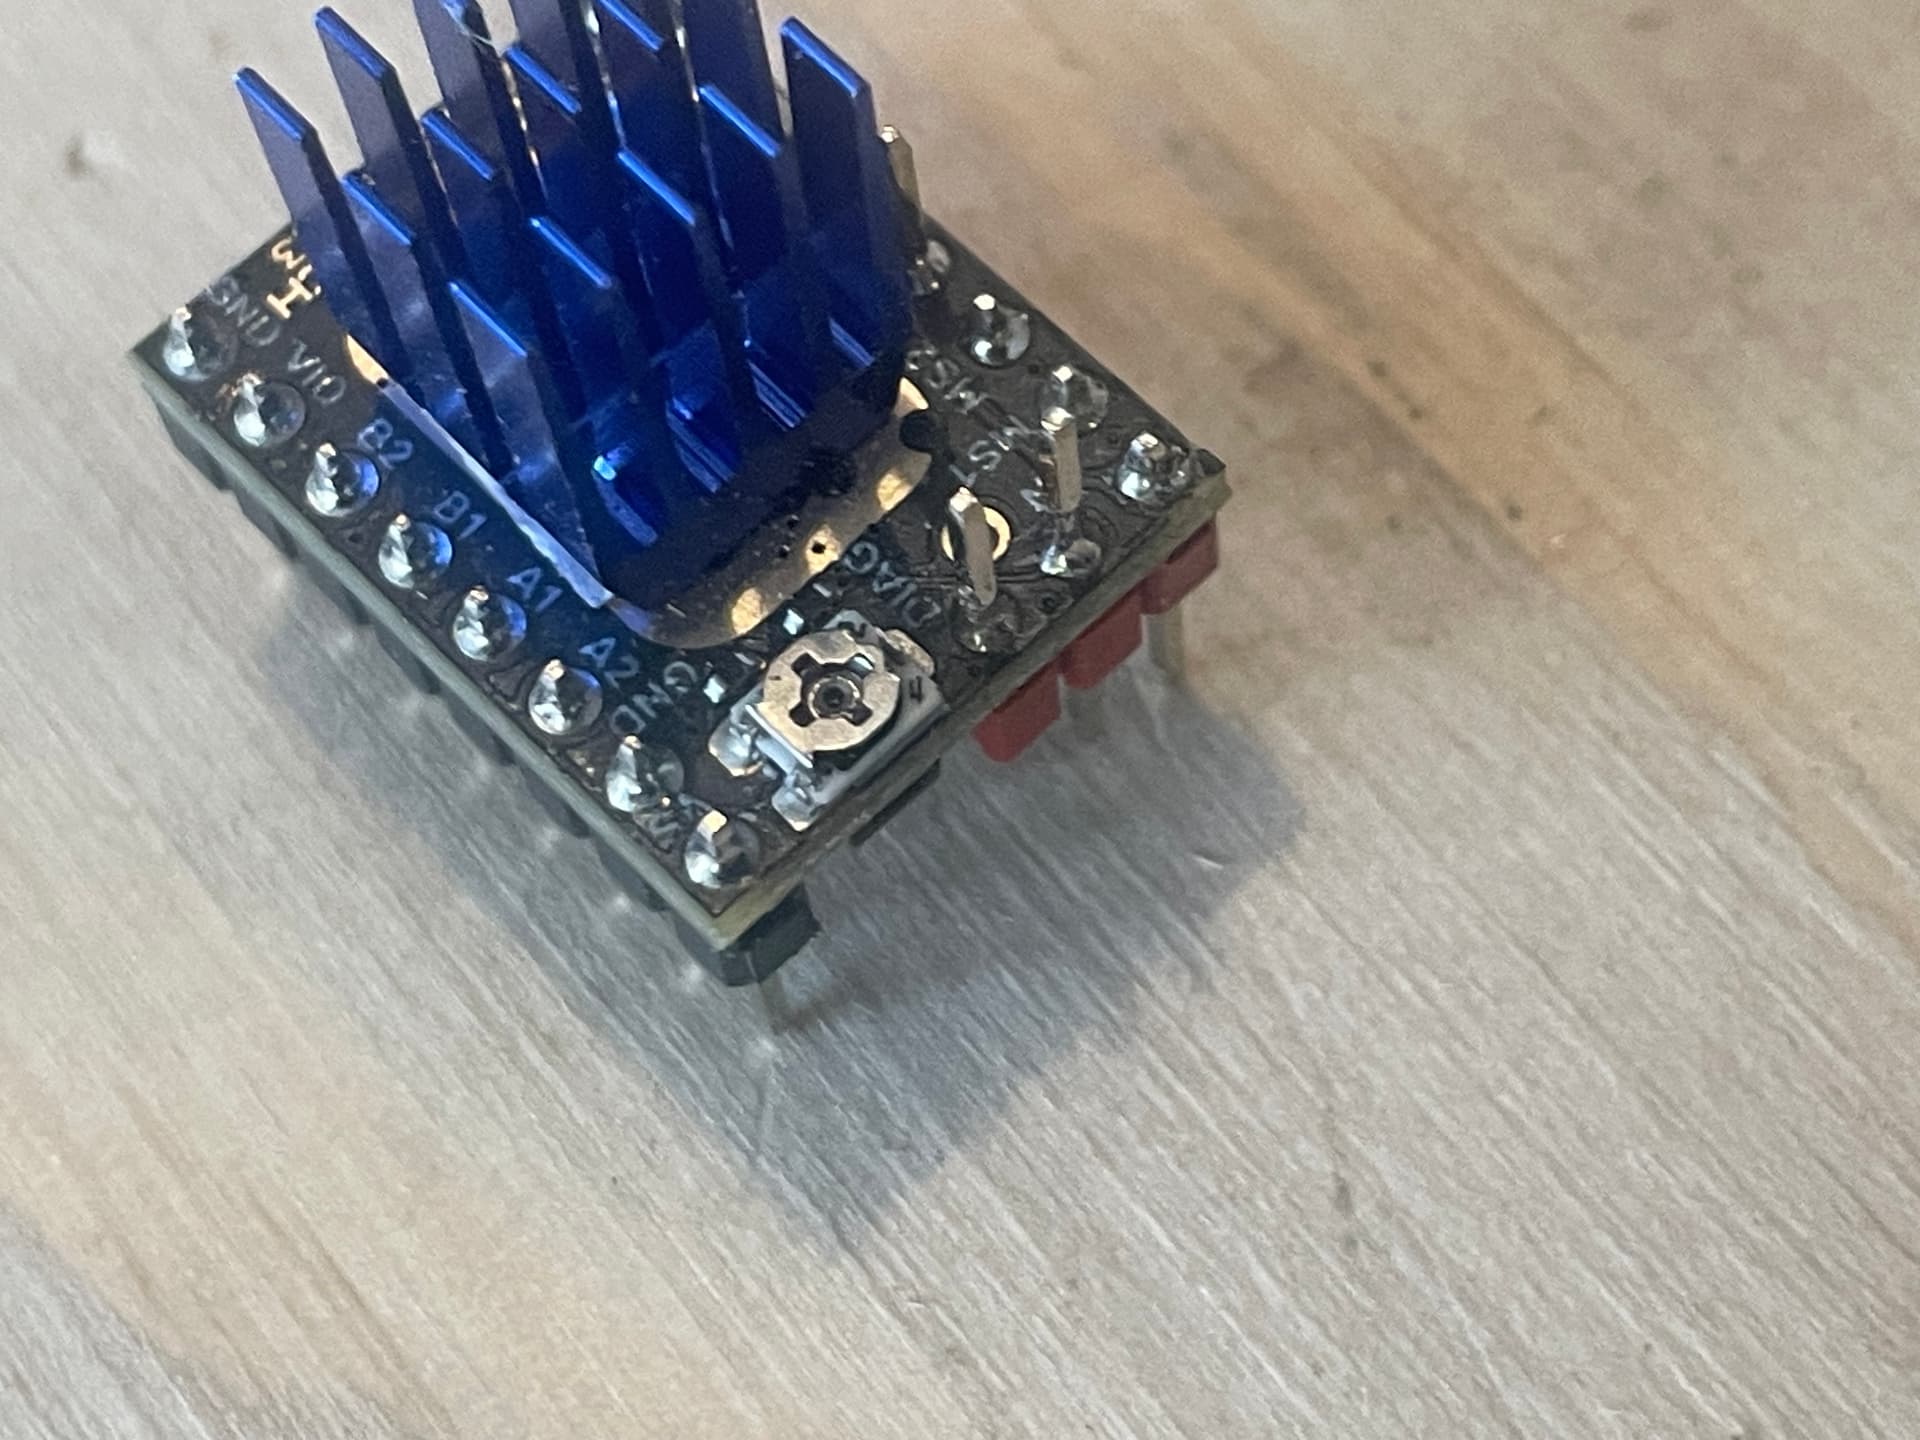
Picture of the bad TMC, top and bottom?
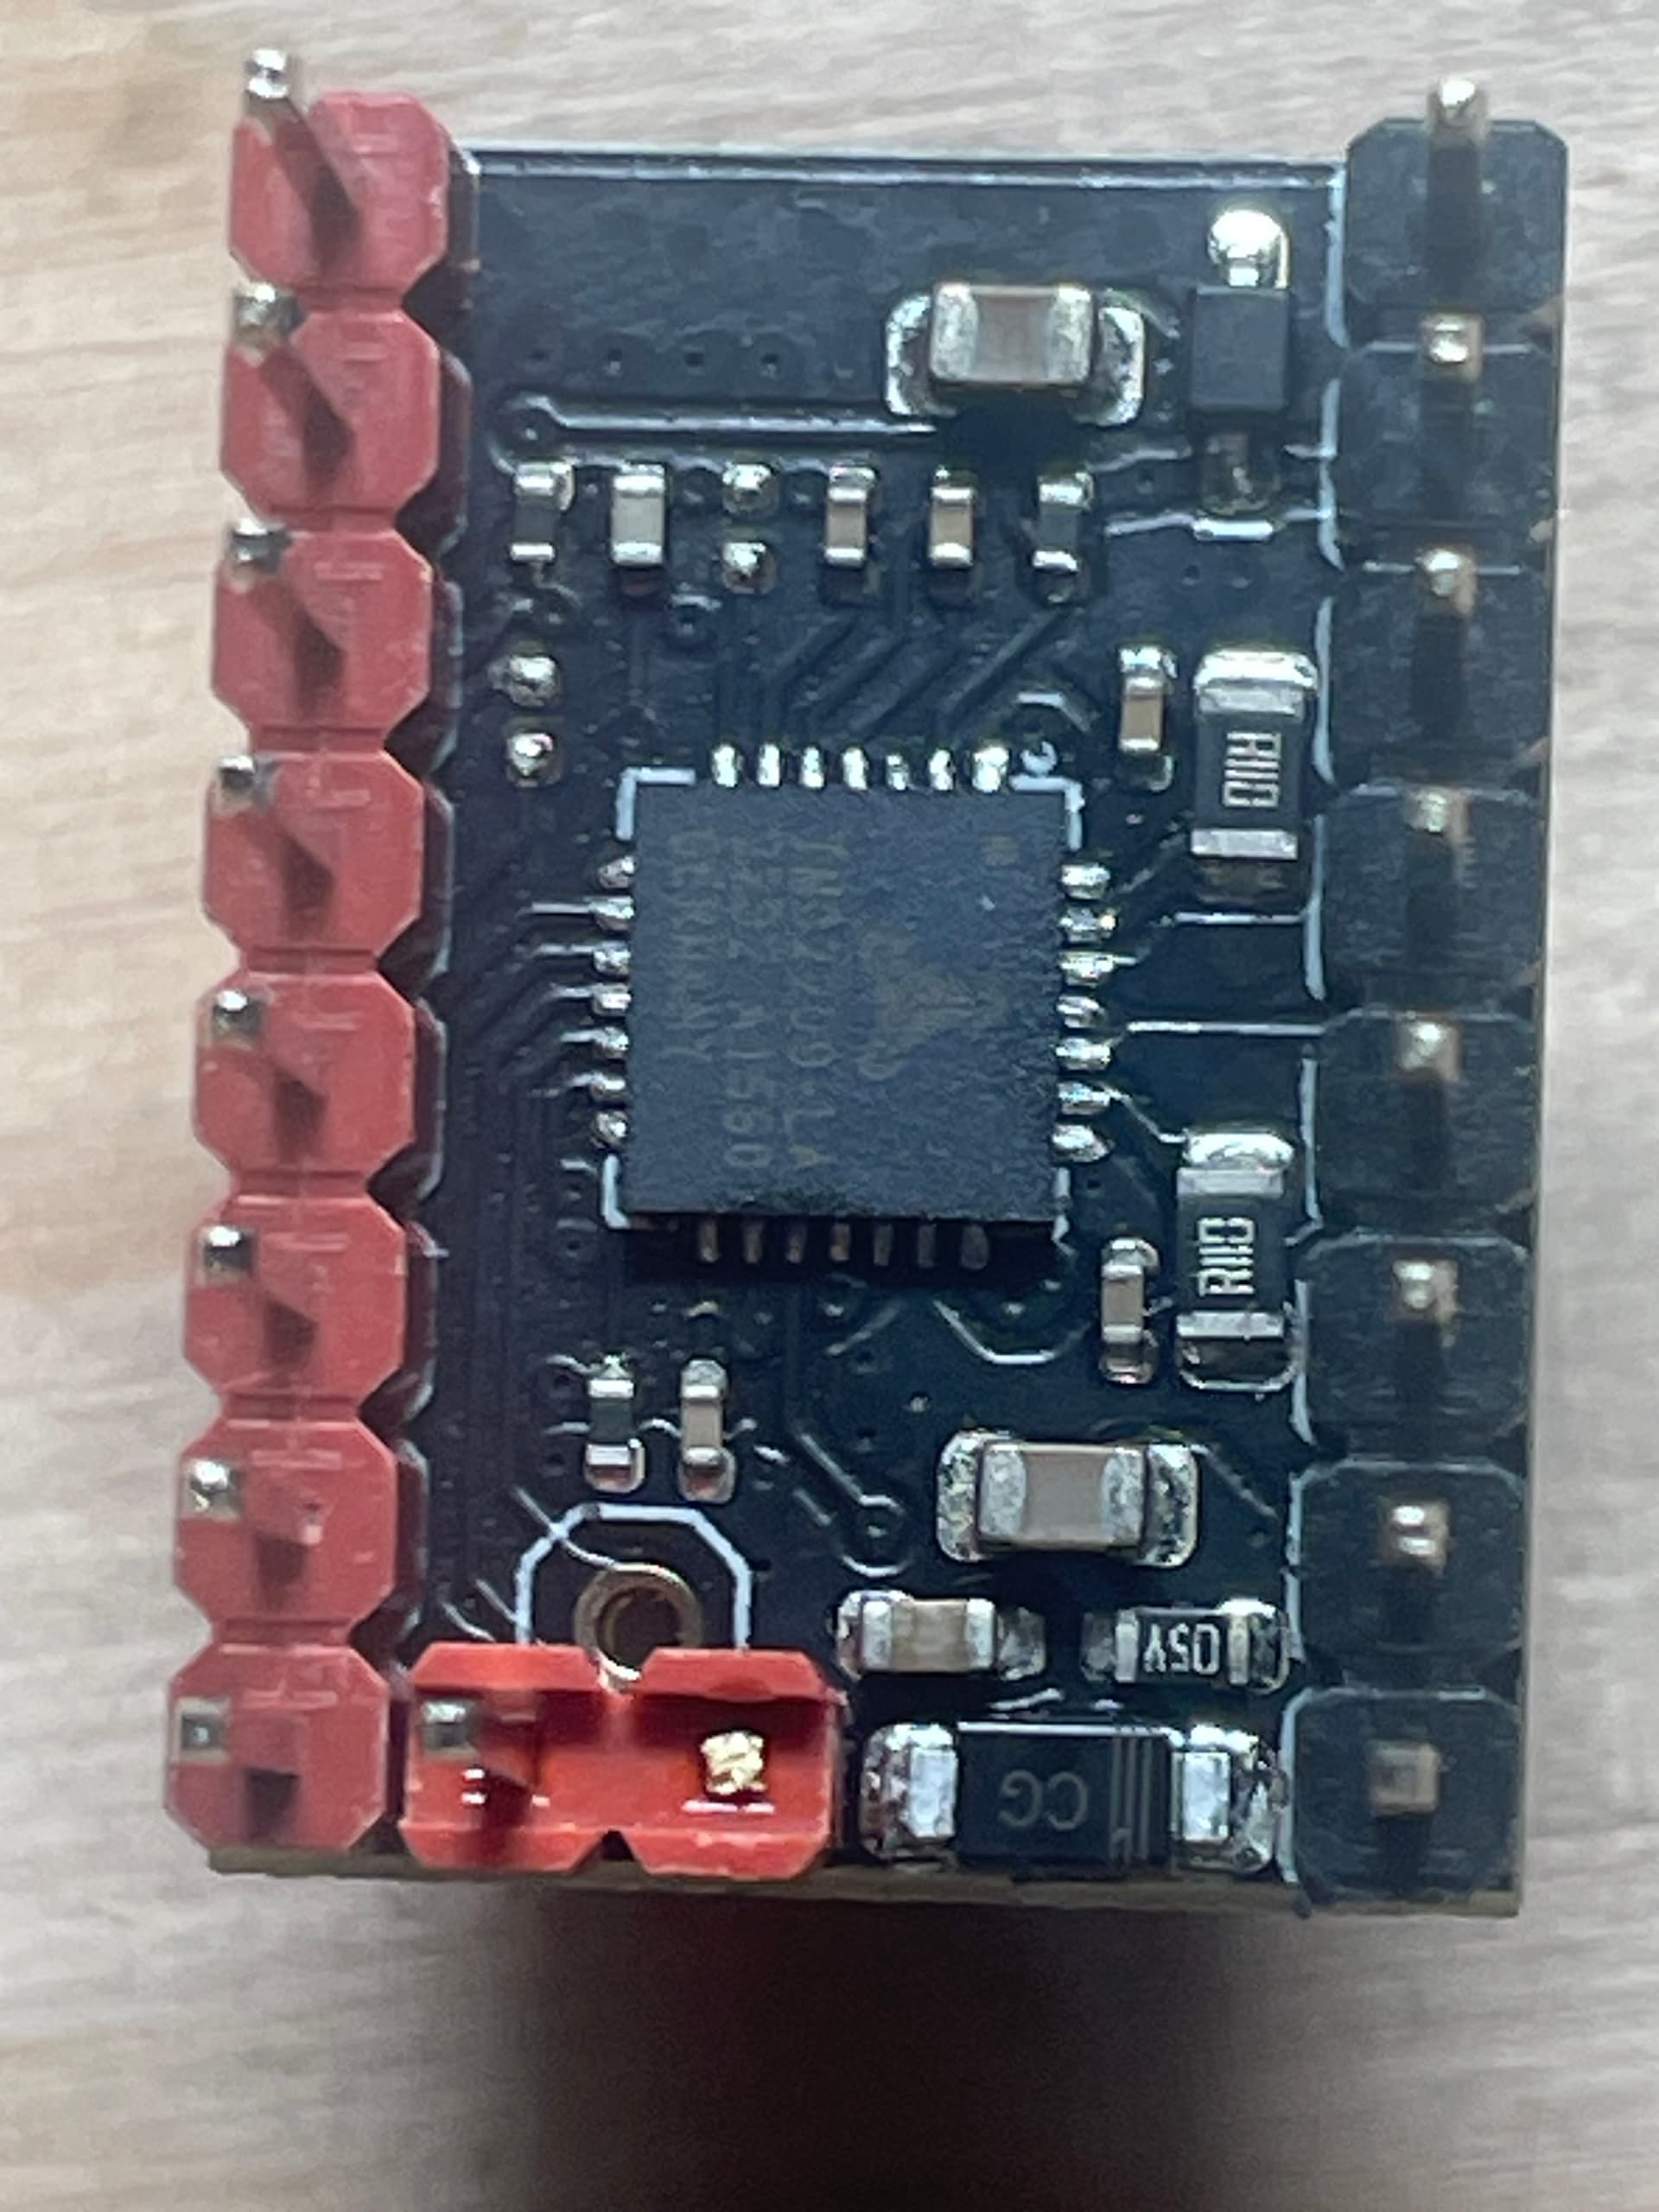
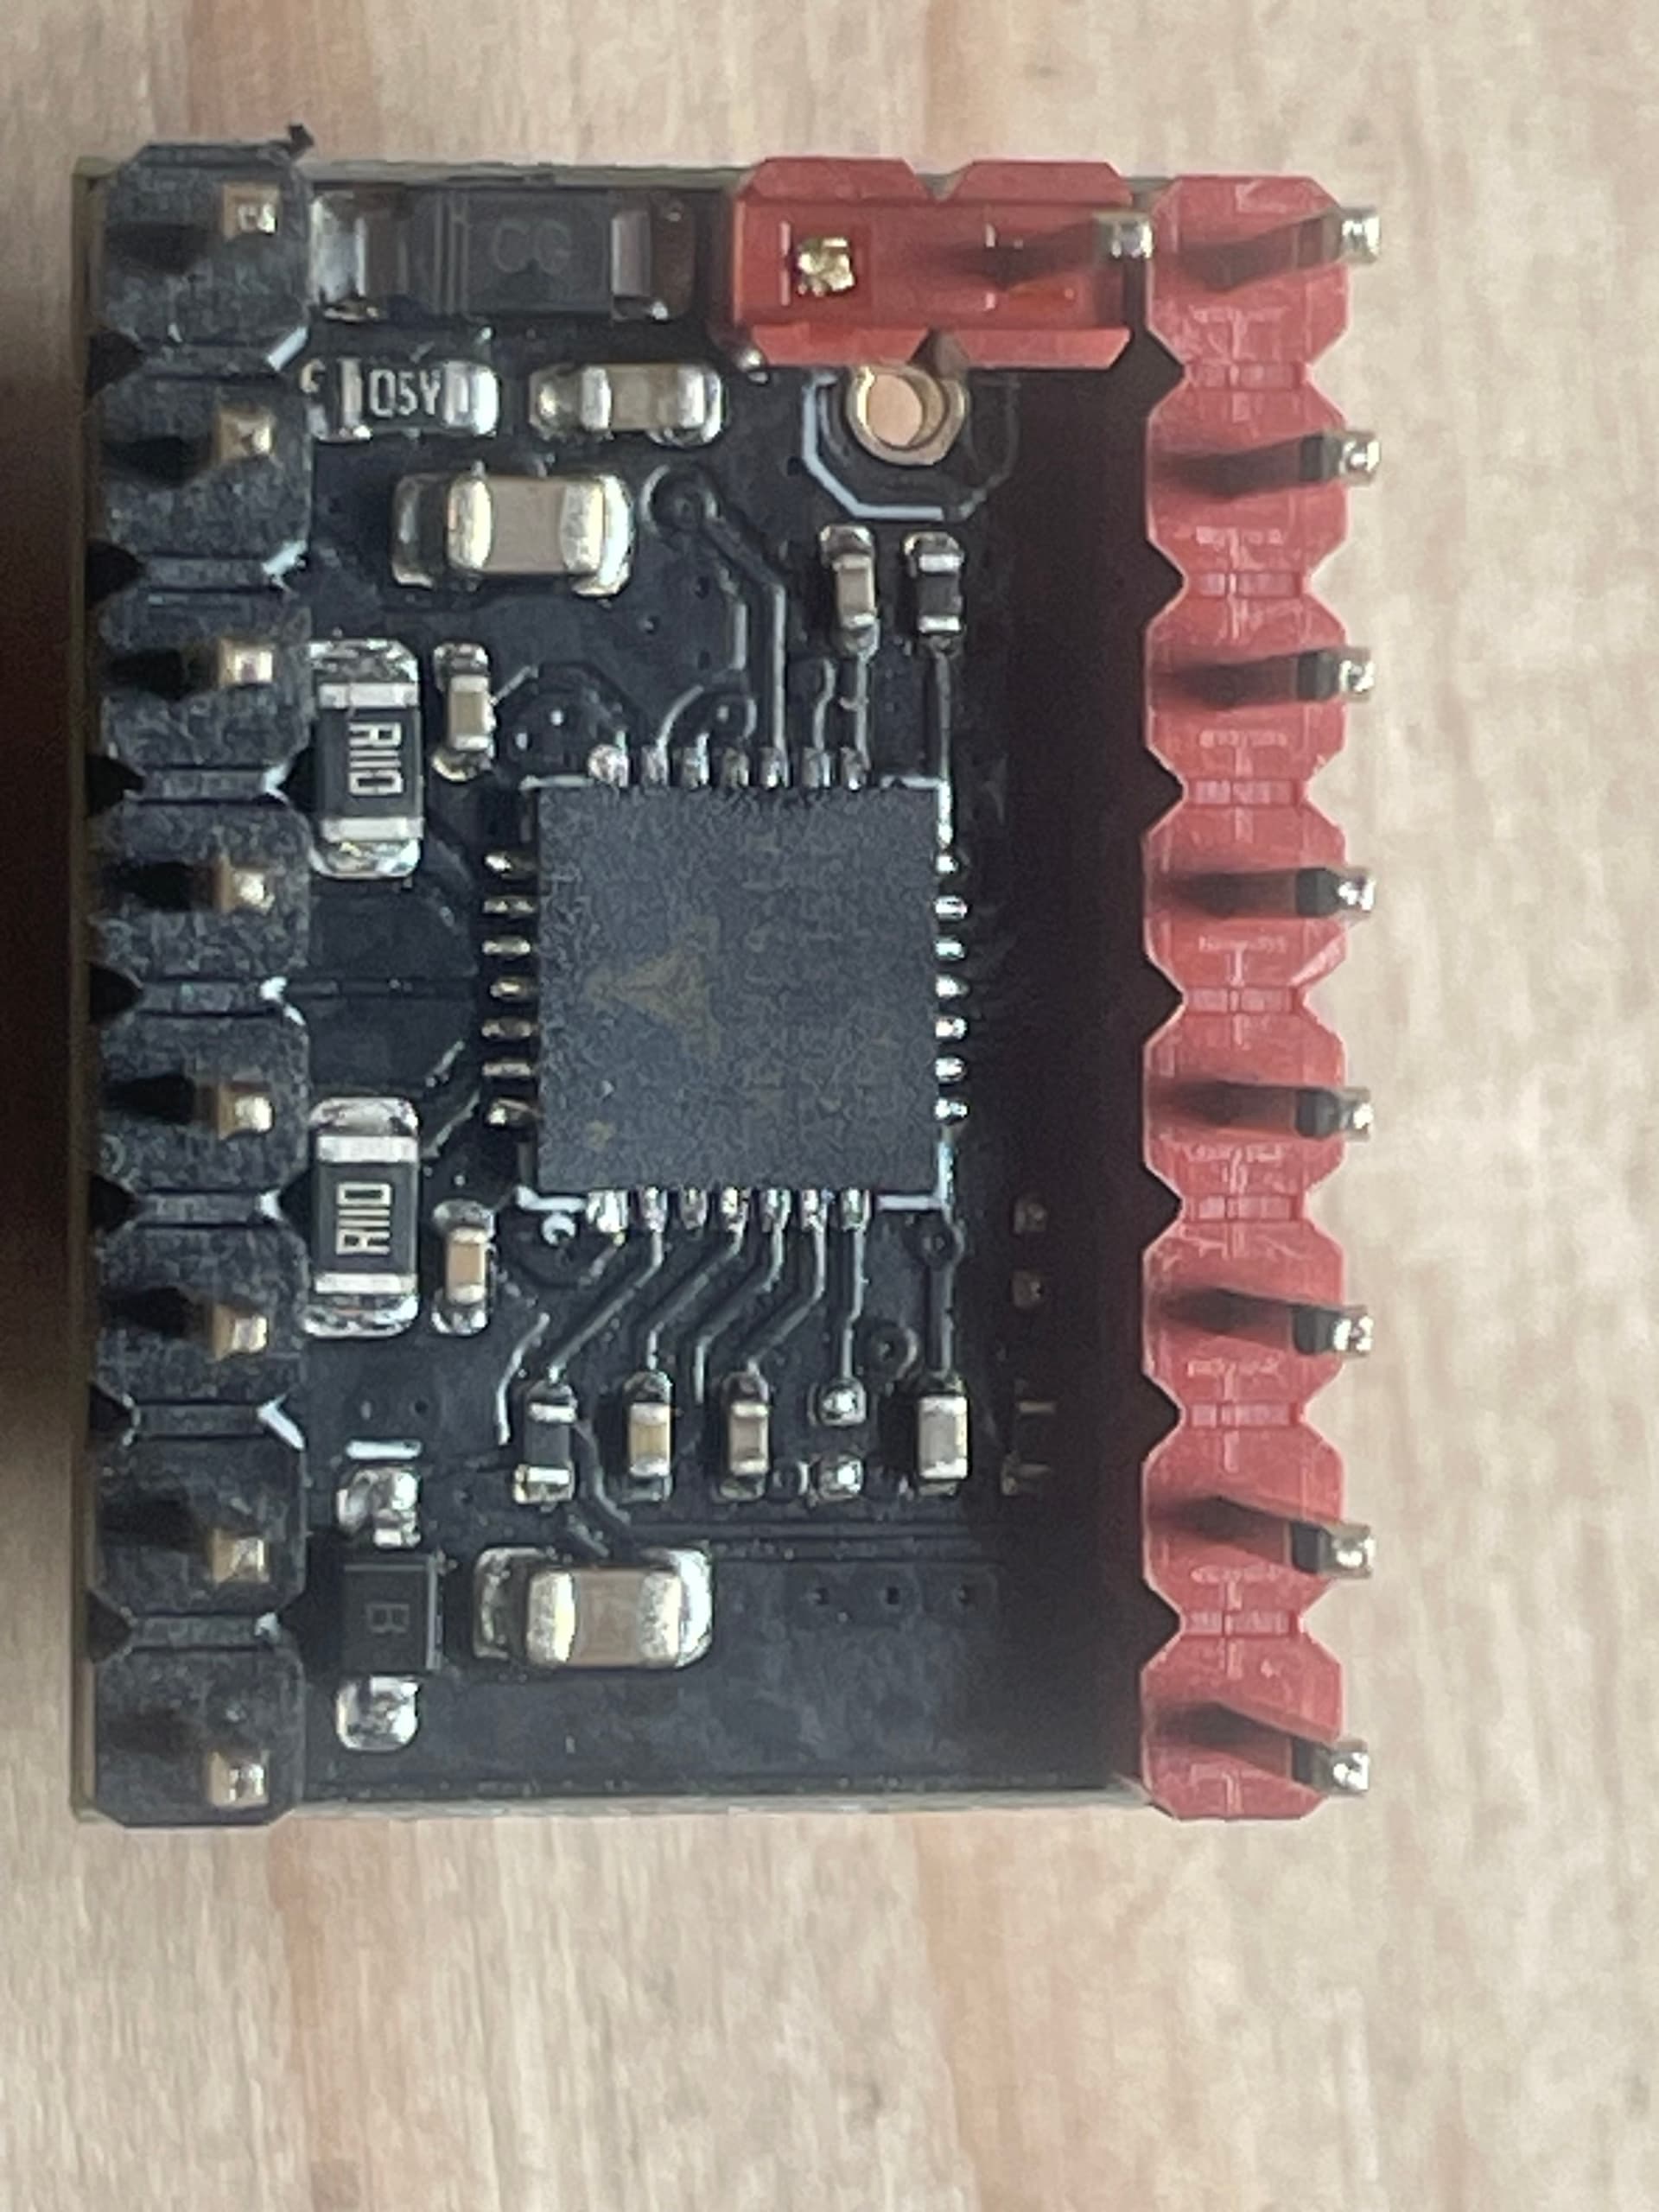
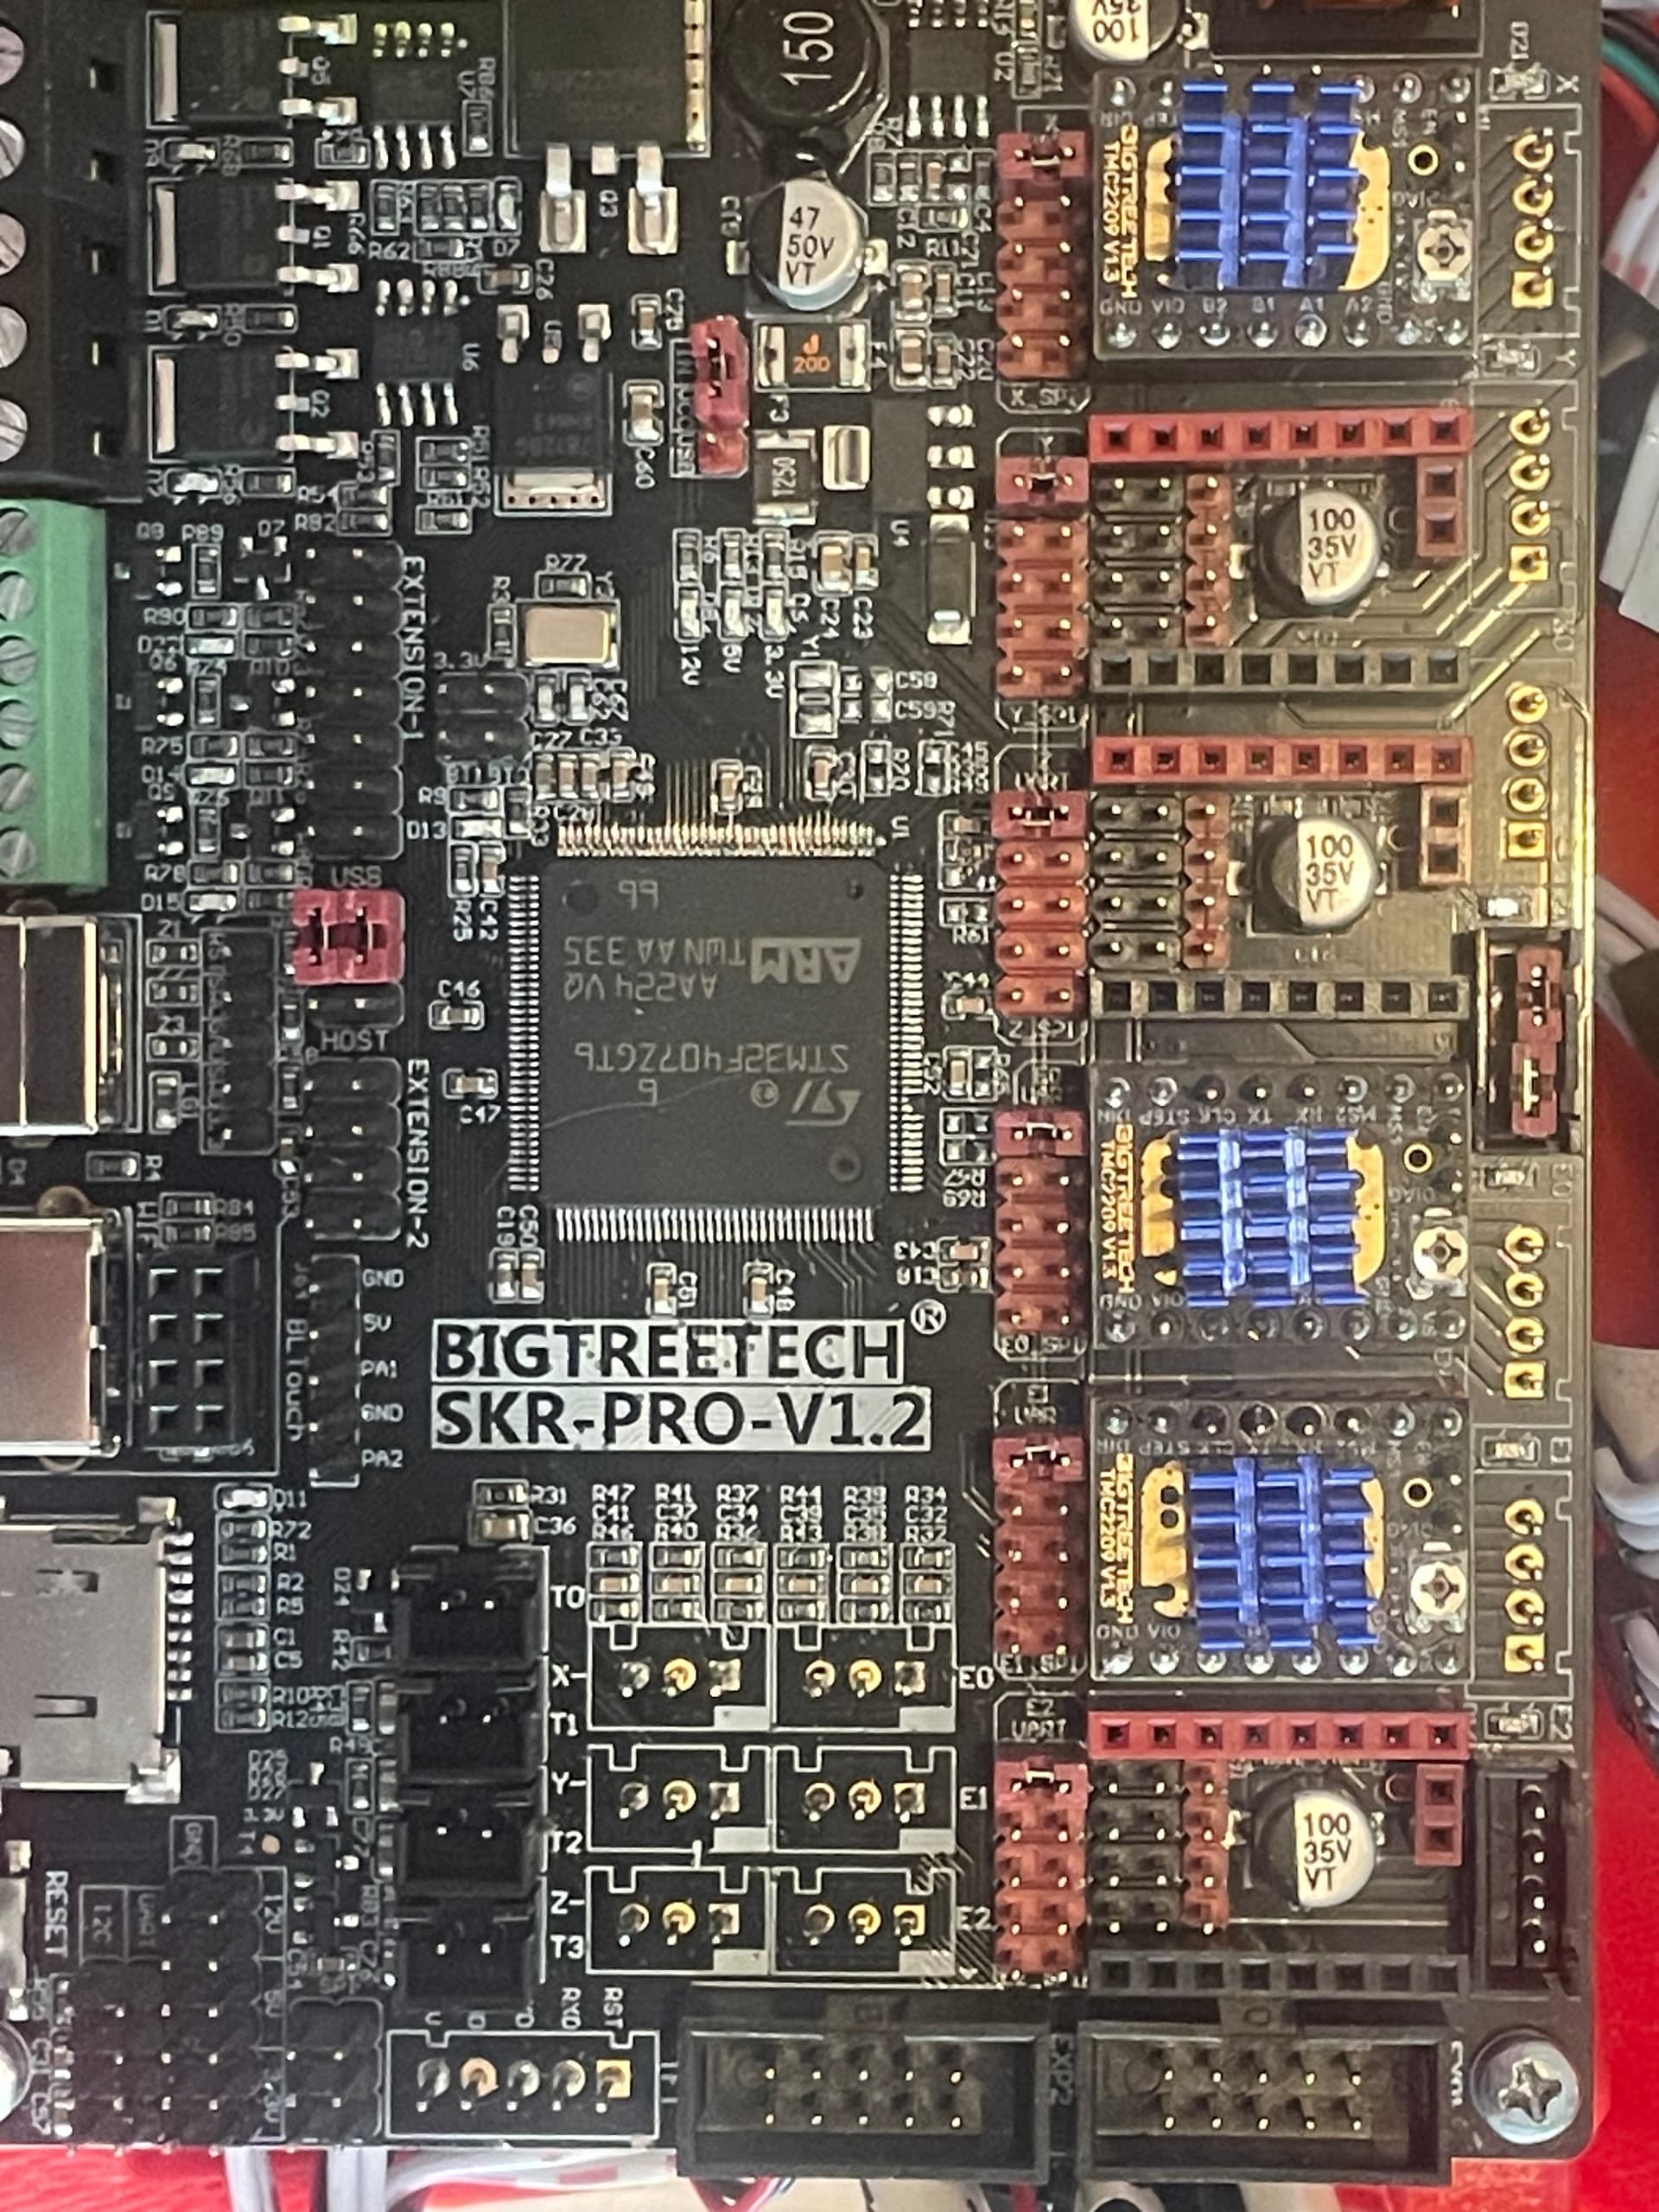
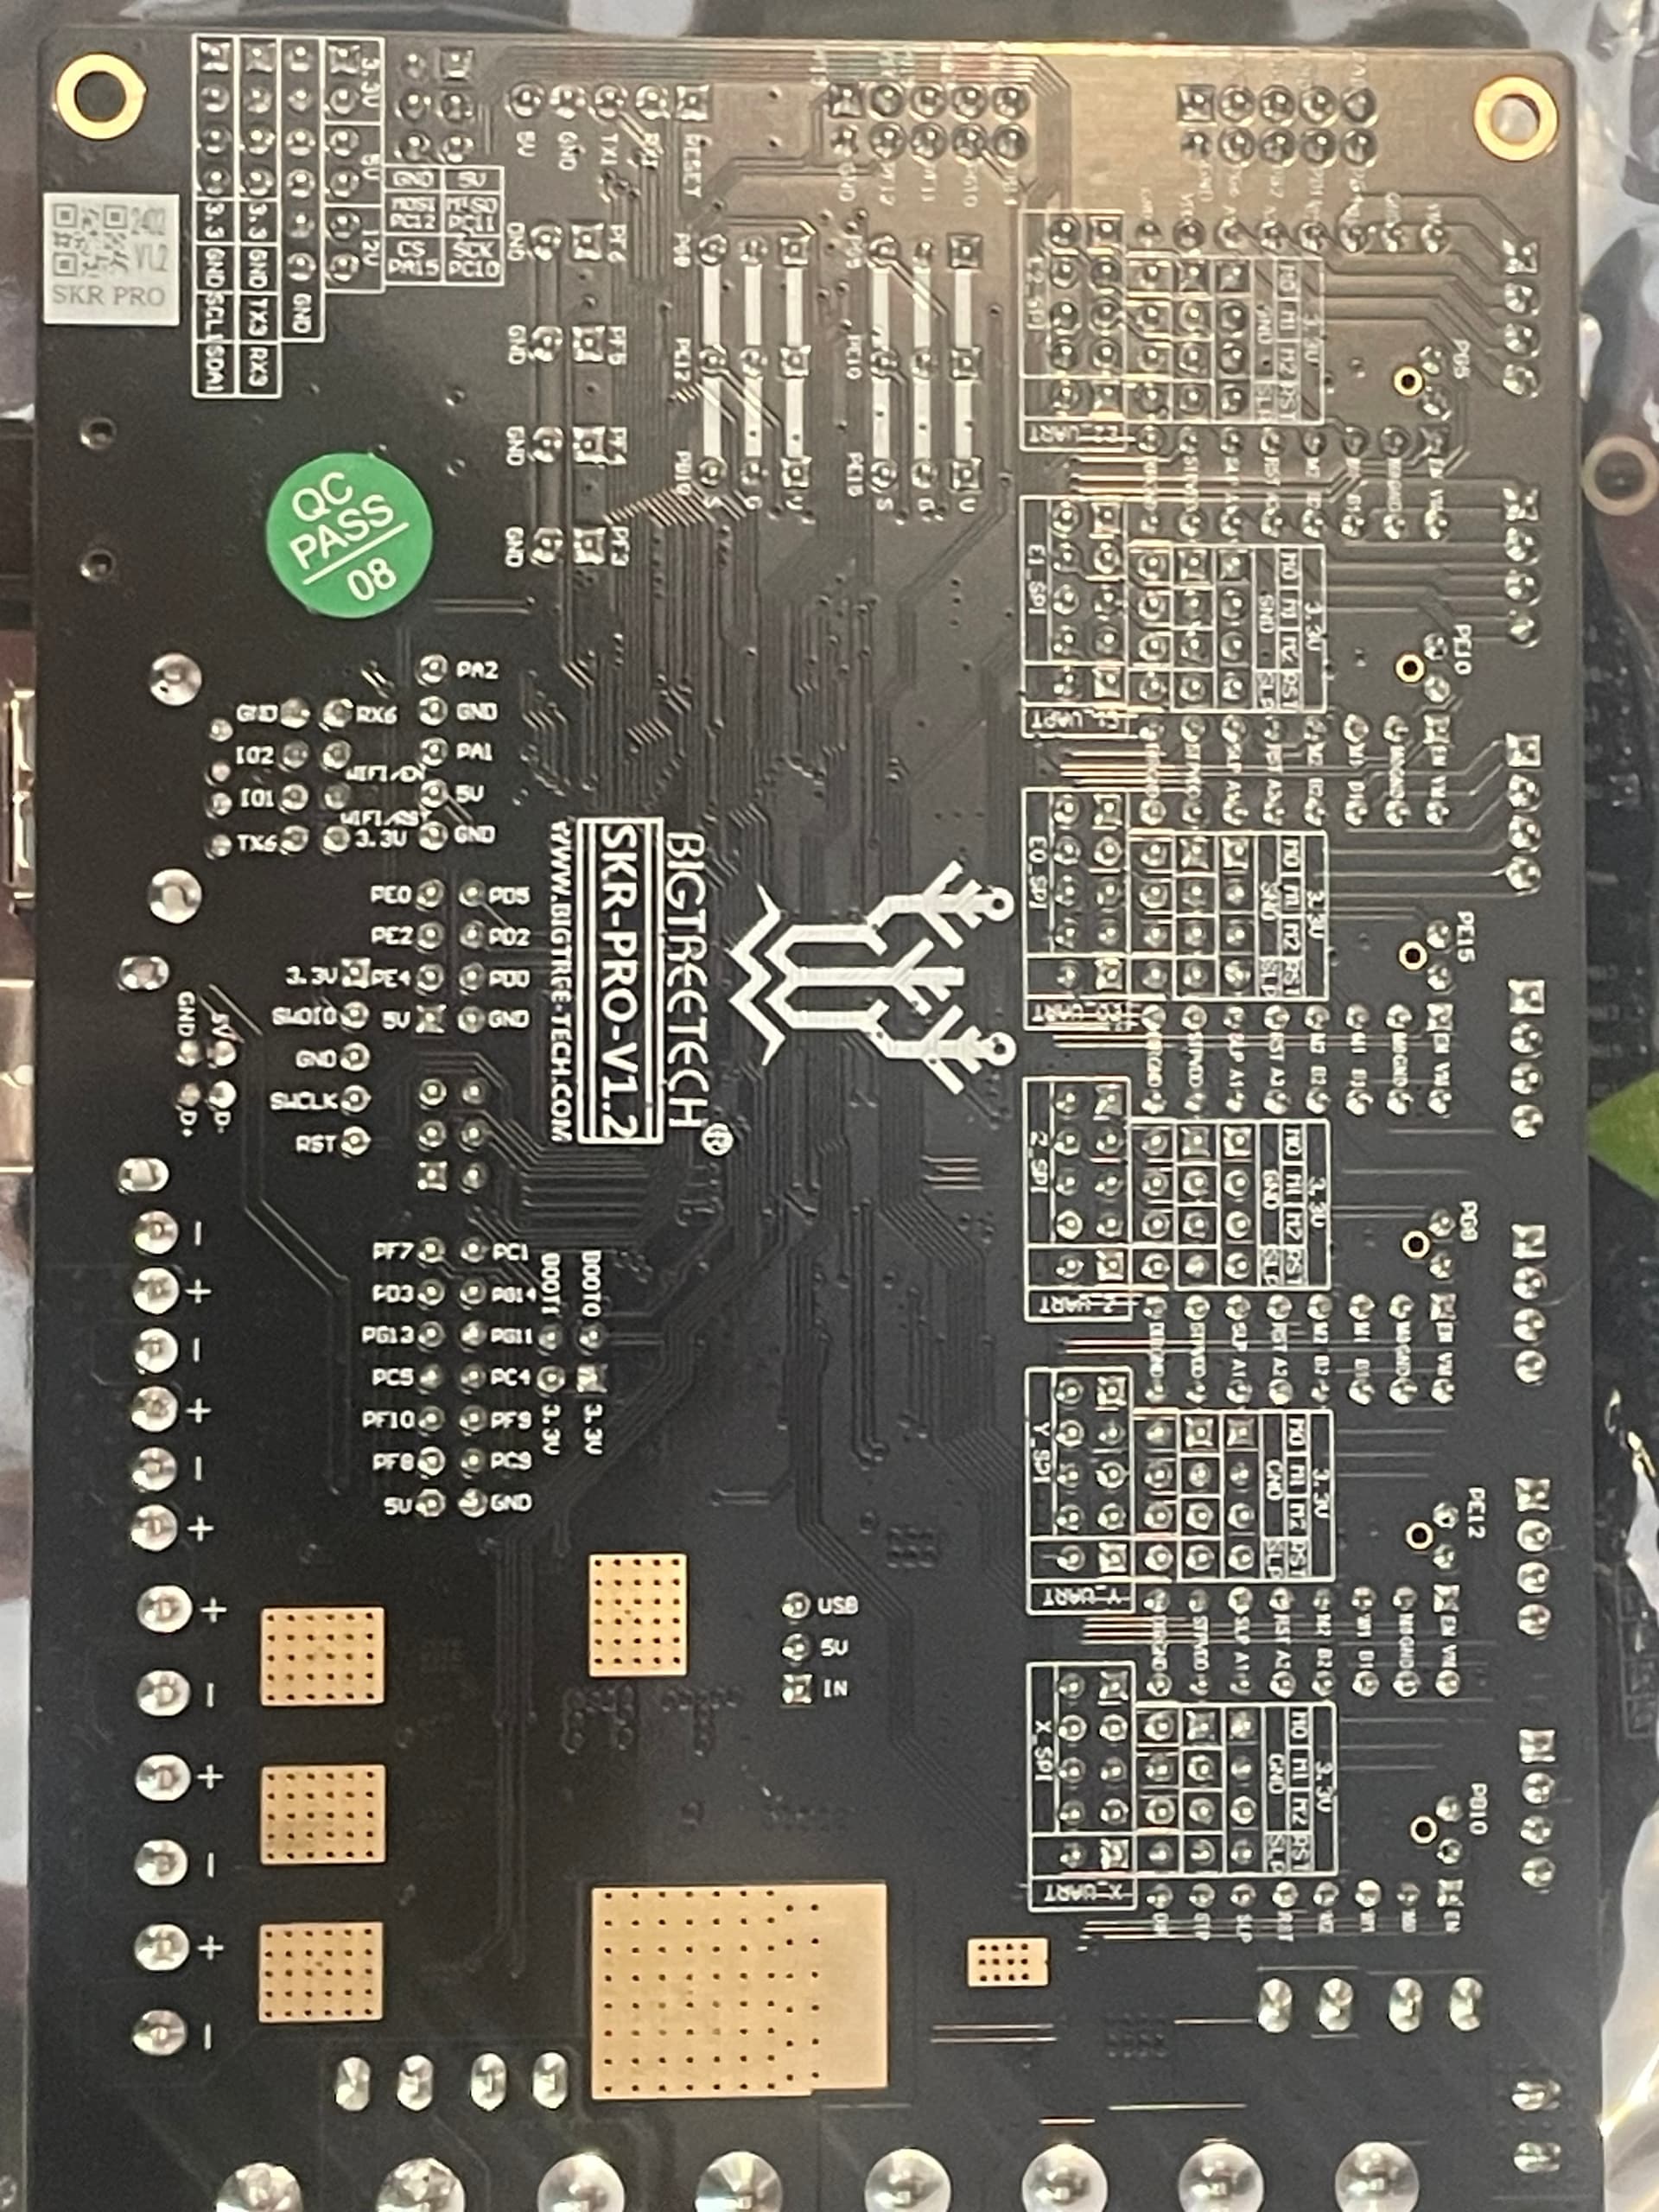
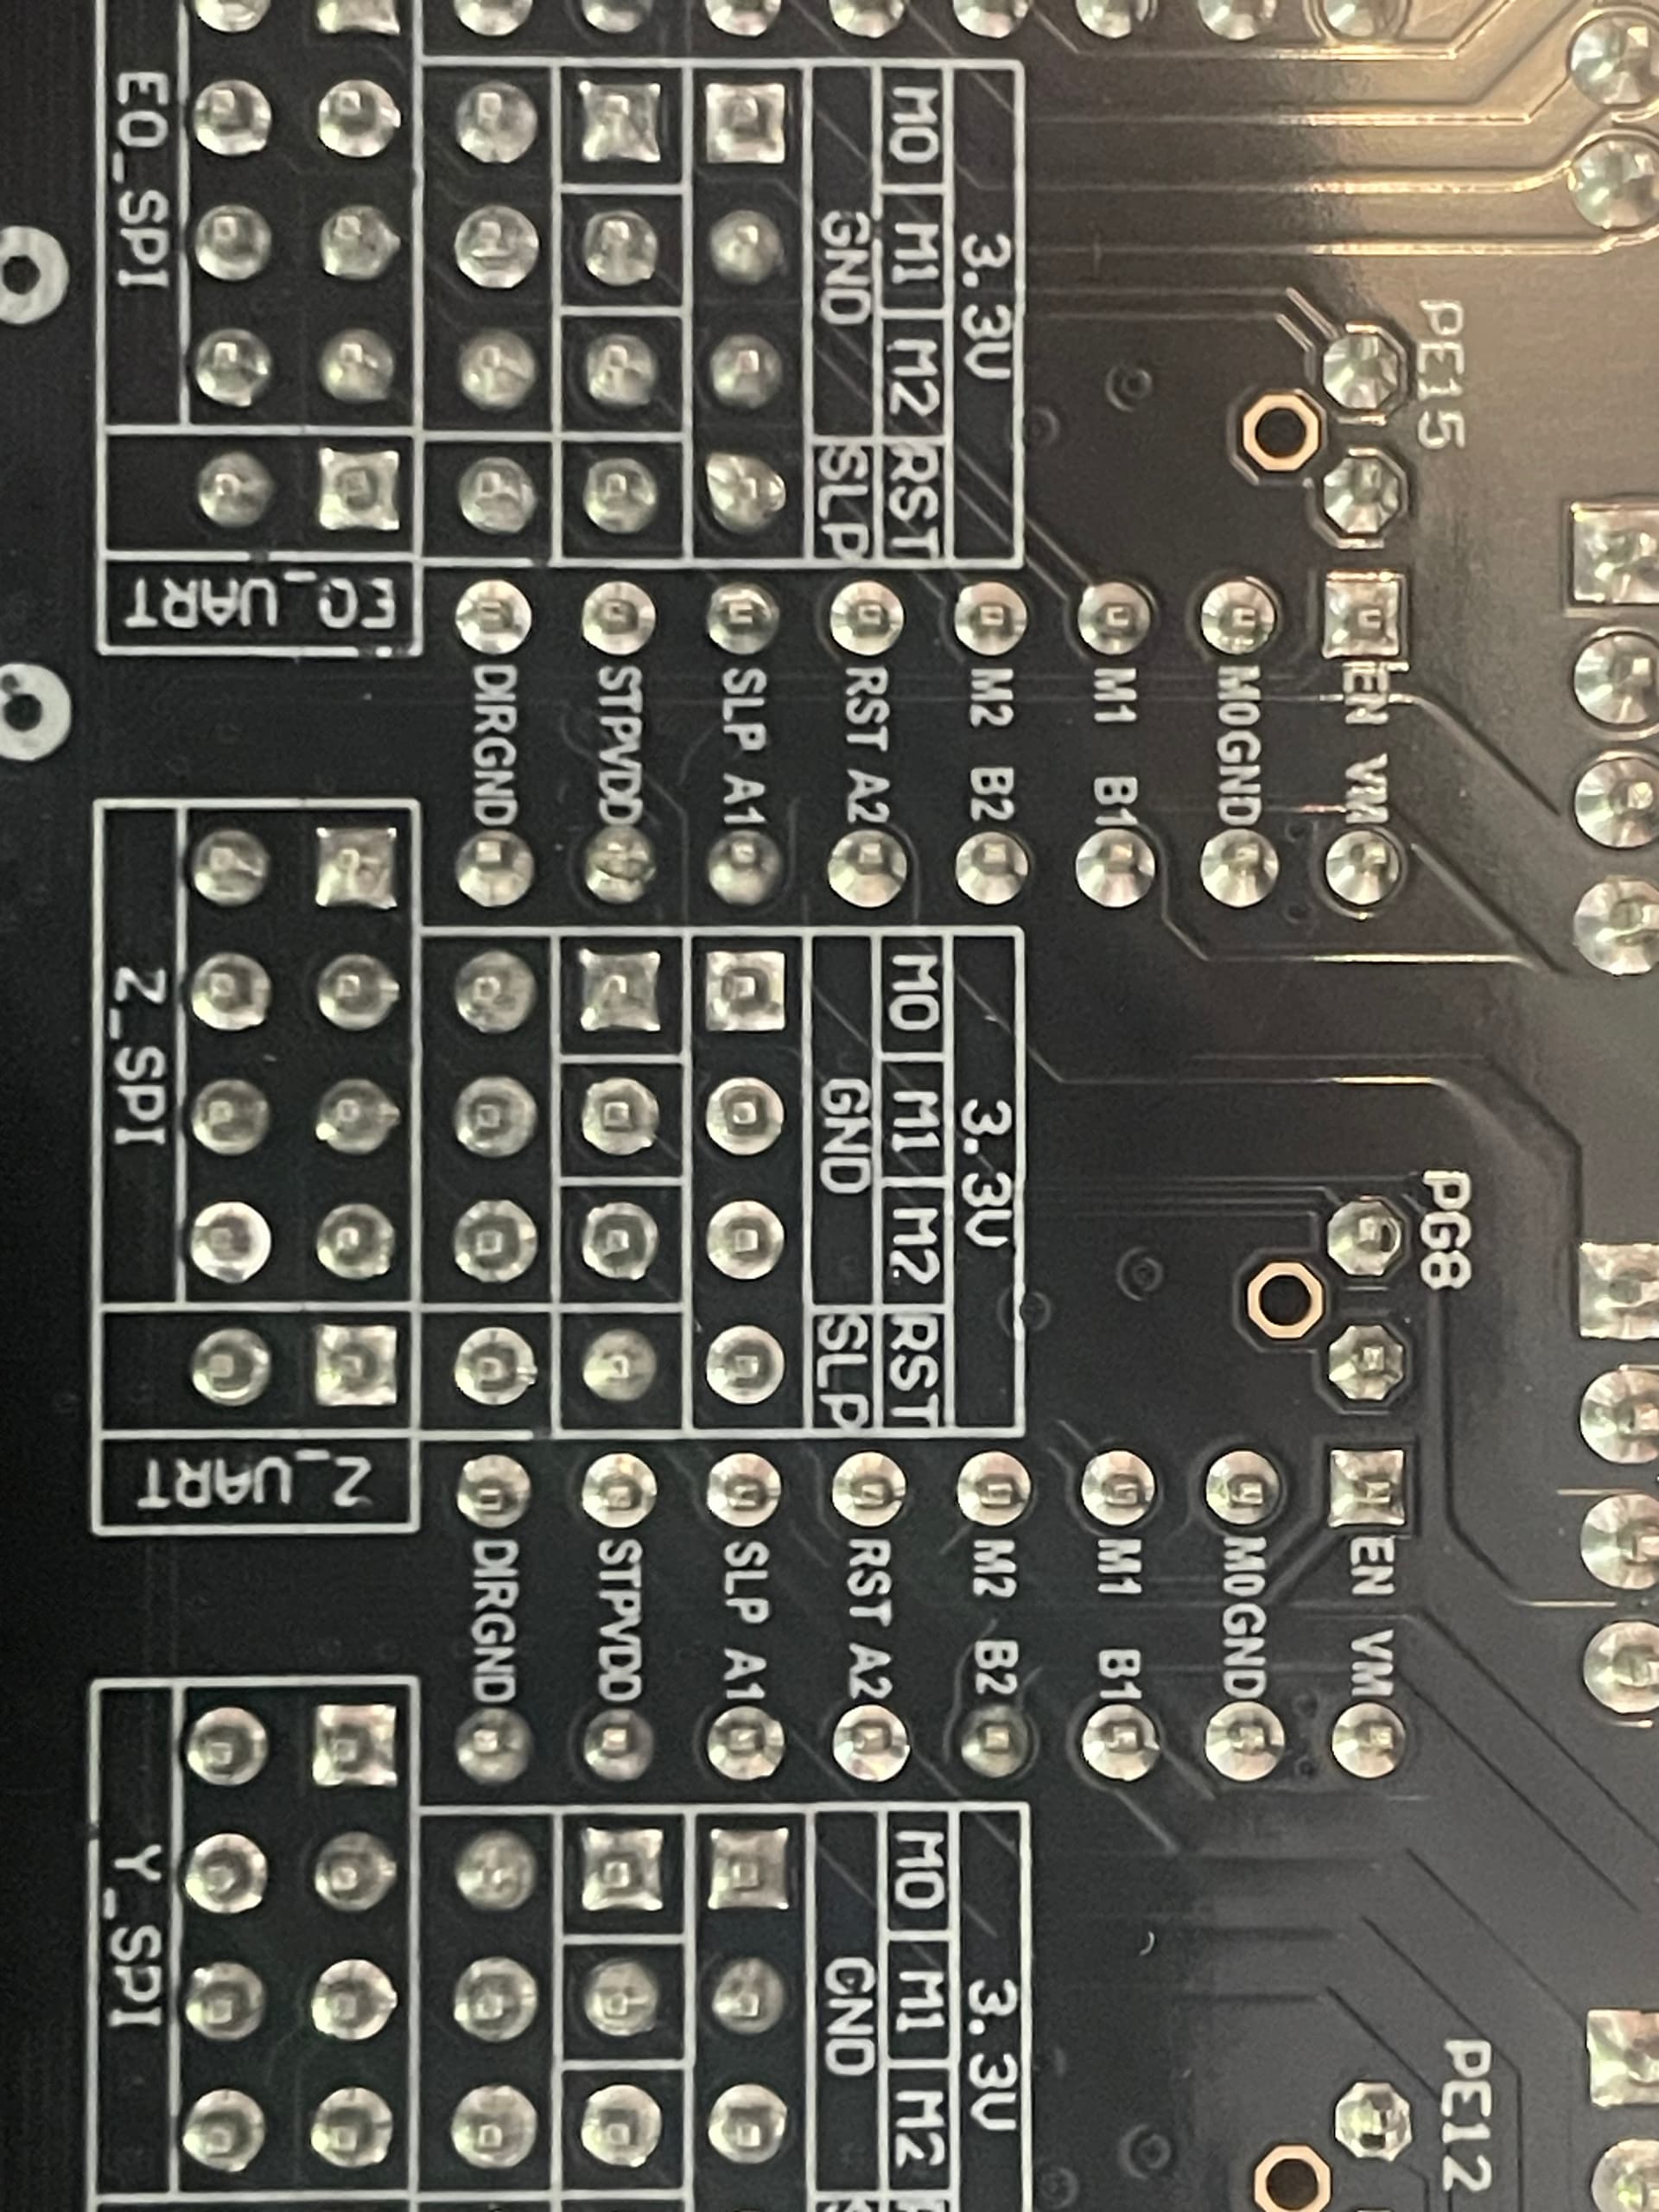
Can you post hi res pictures of the top and bottom of your SKR?
Picture of the bad TMC, top and bottom?
Can you post hi res pictures of the top and bottom of your SKR?
One pin on the 2209 controls direction. Check for a short, you might be able to fix that.
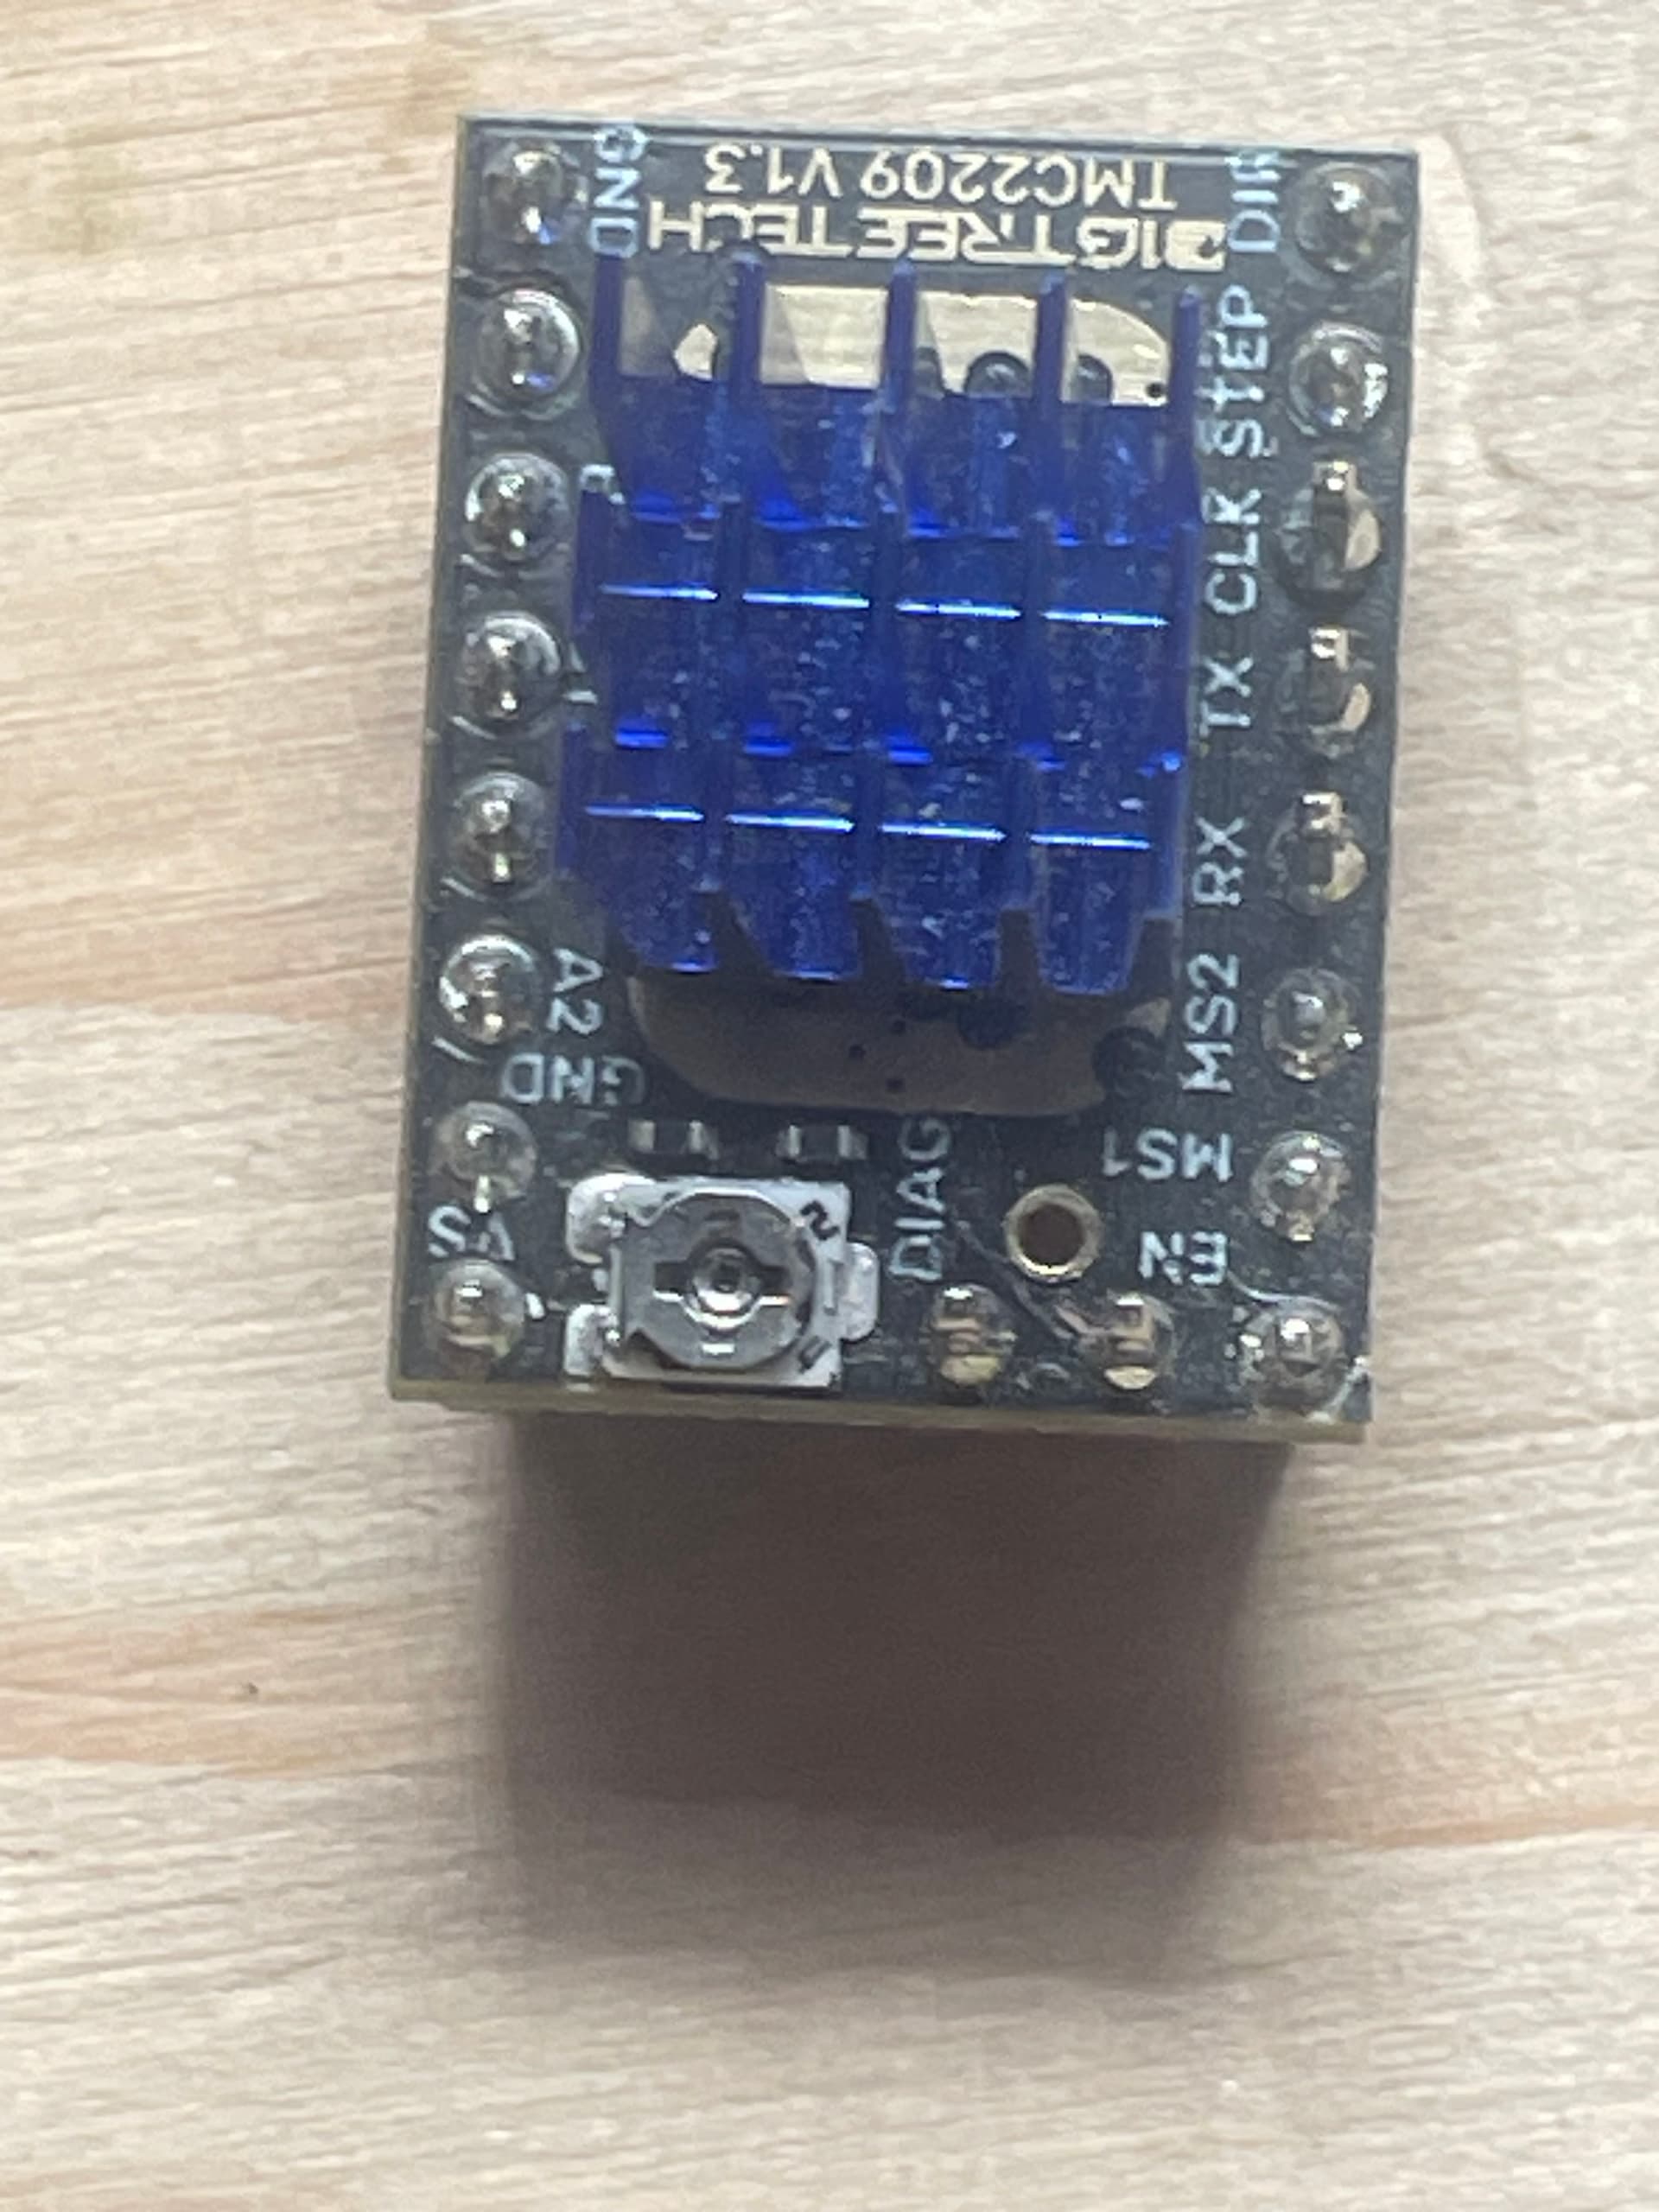
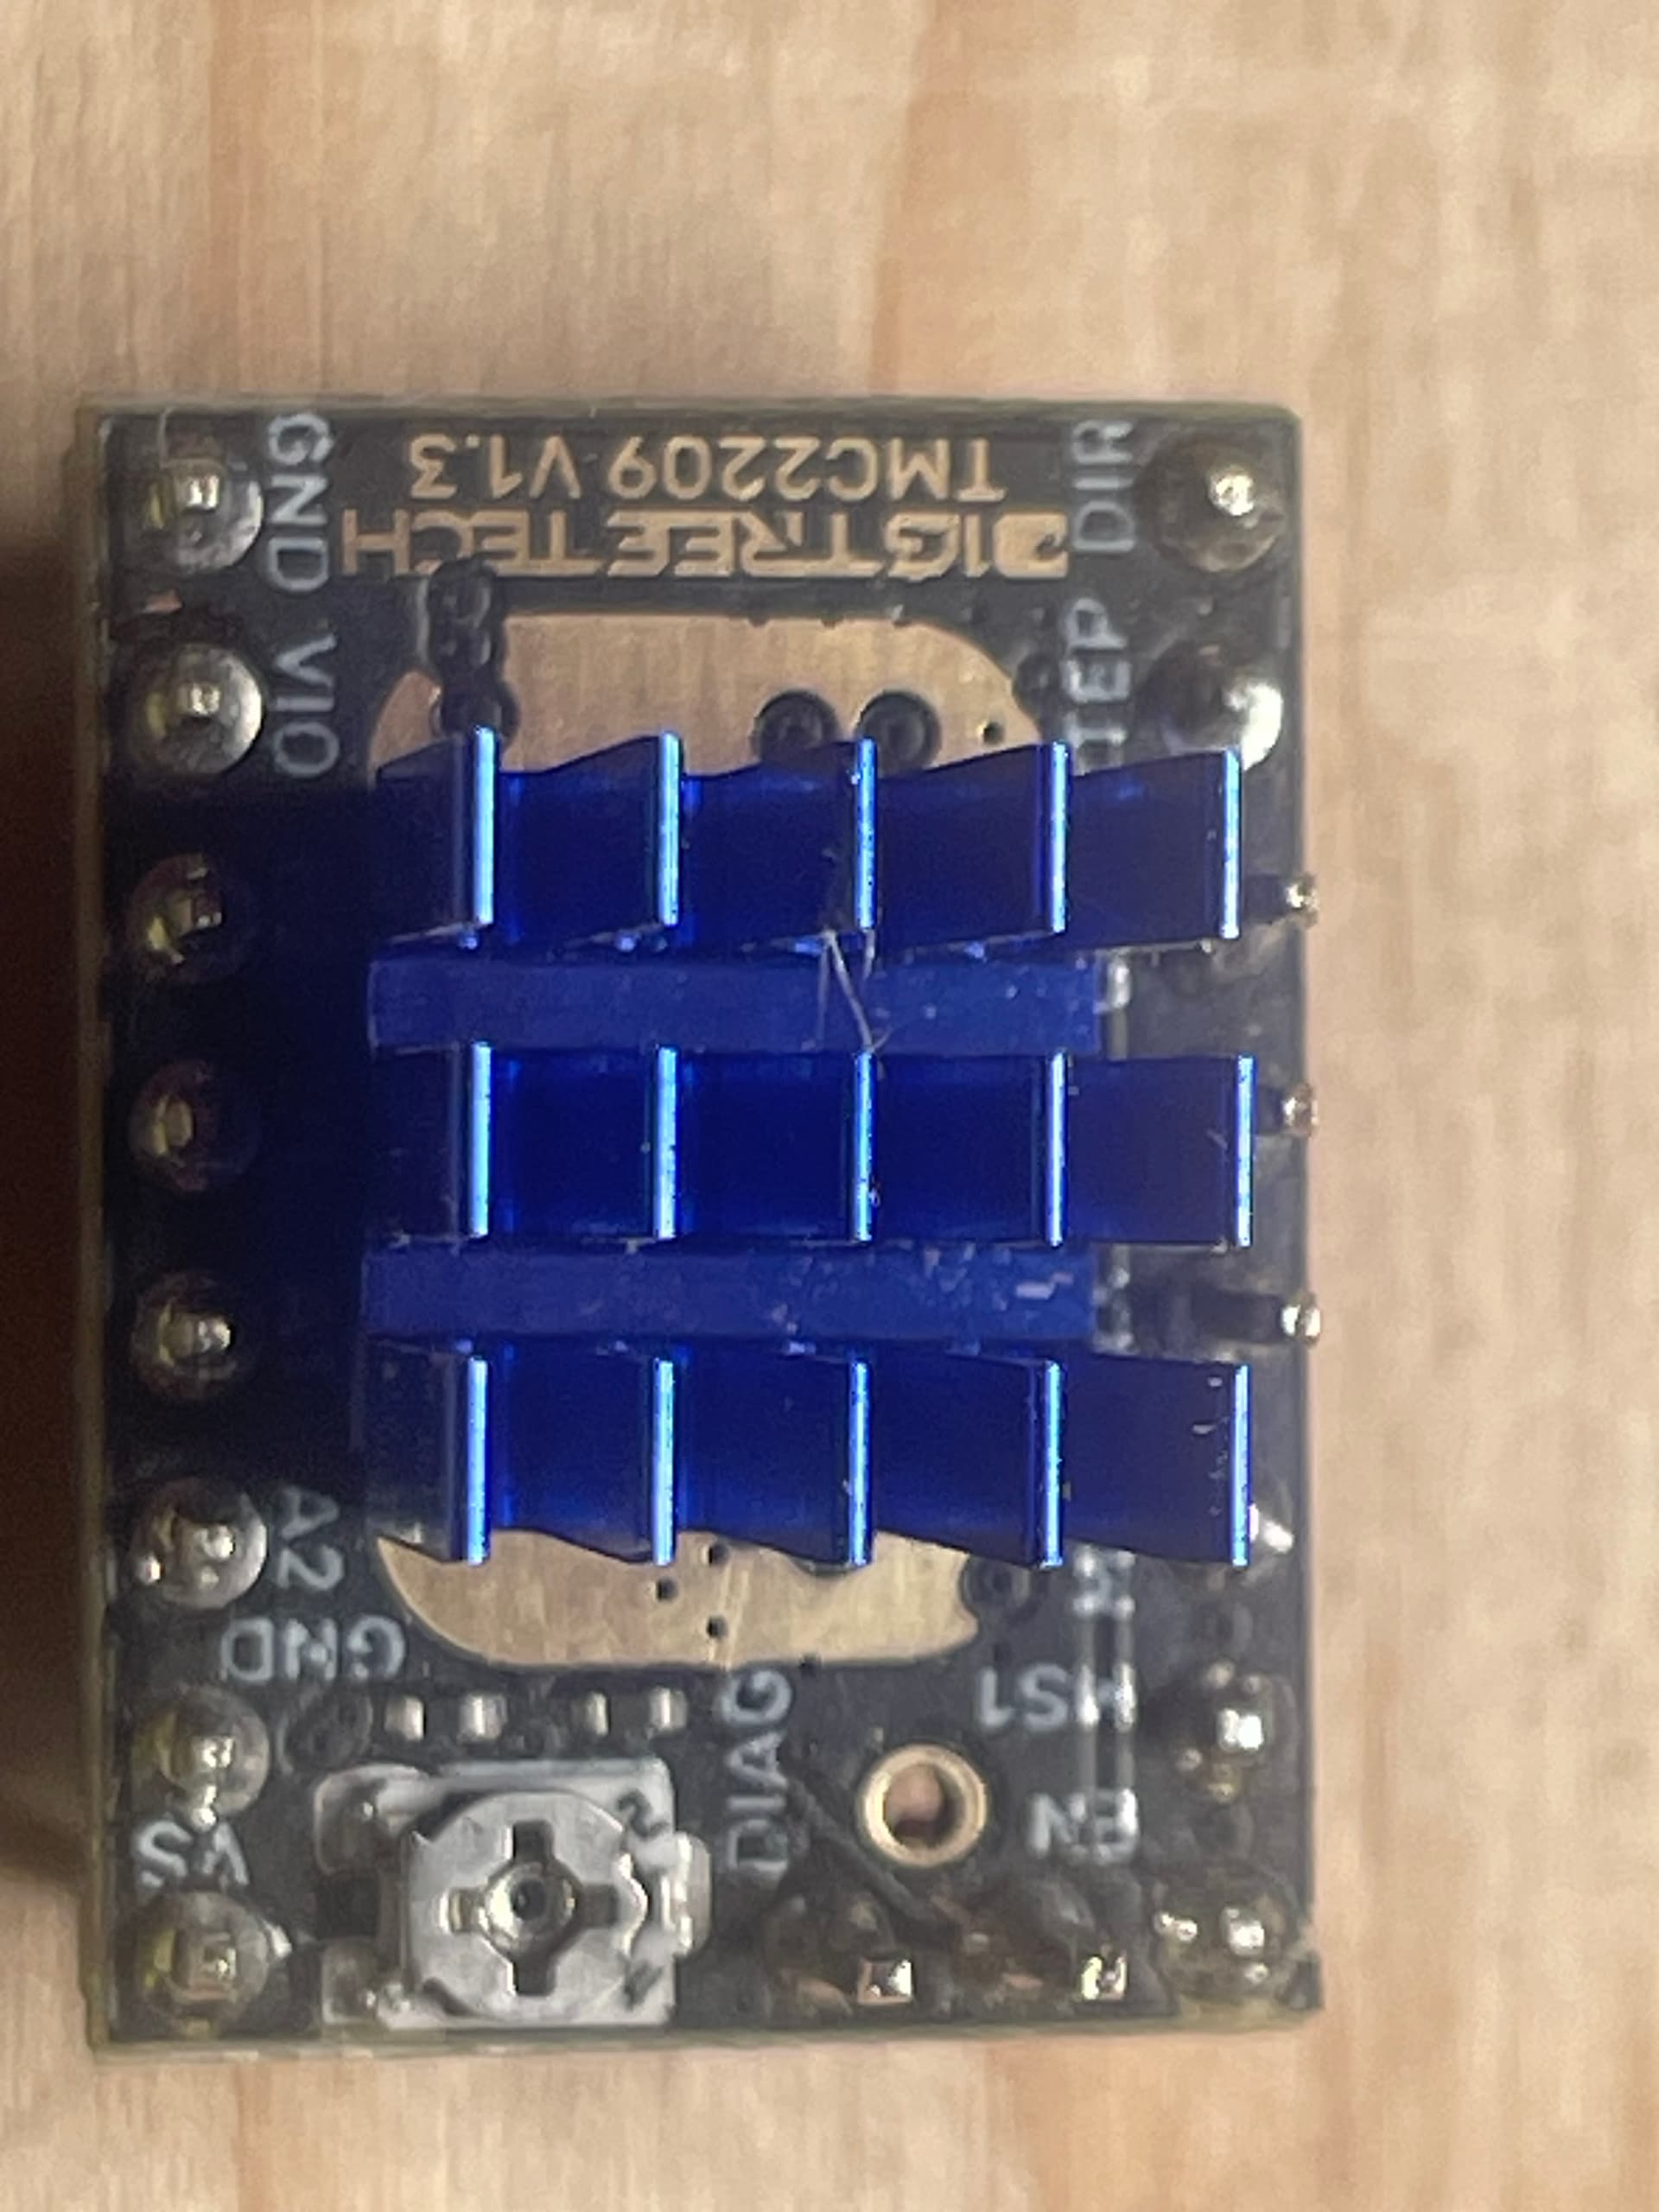
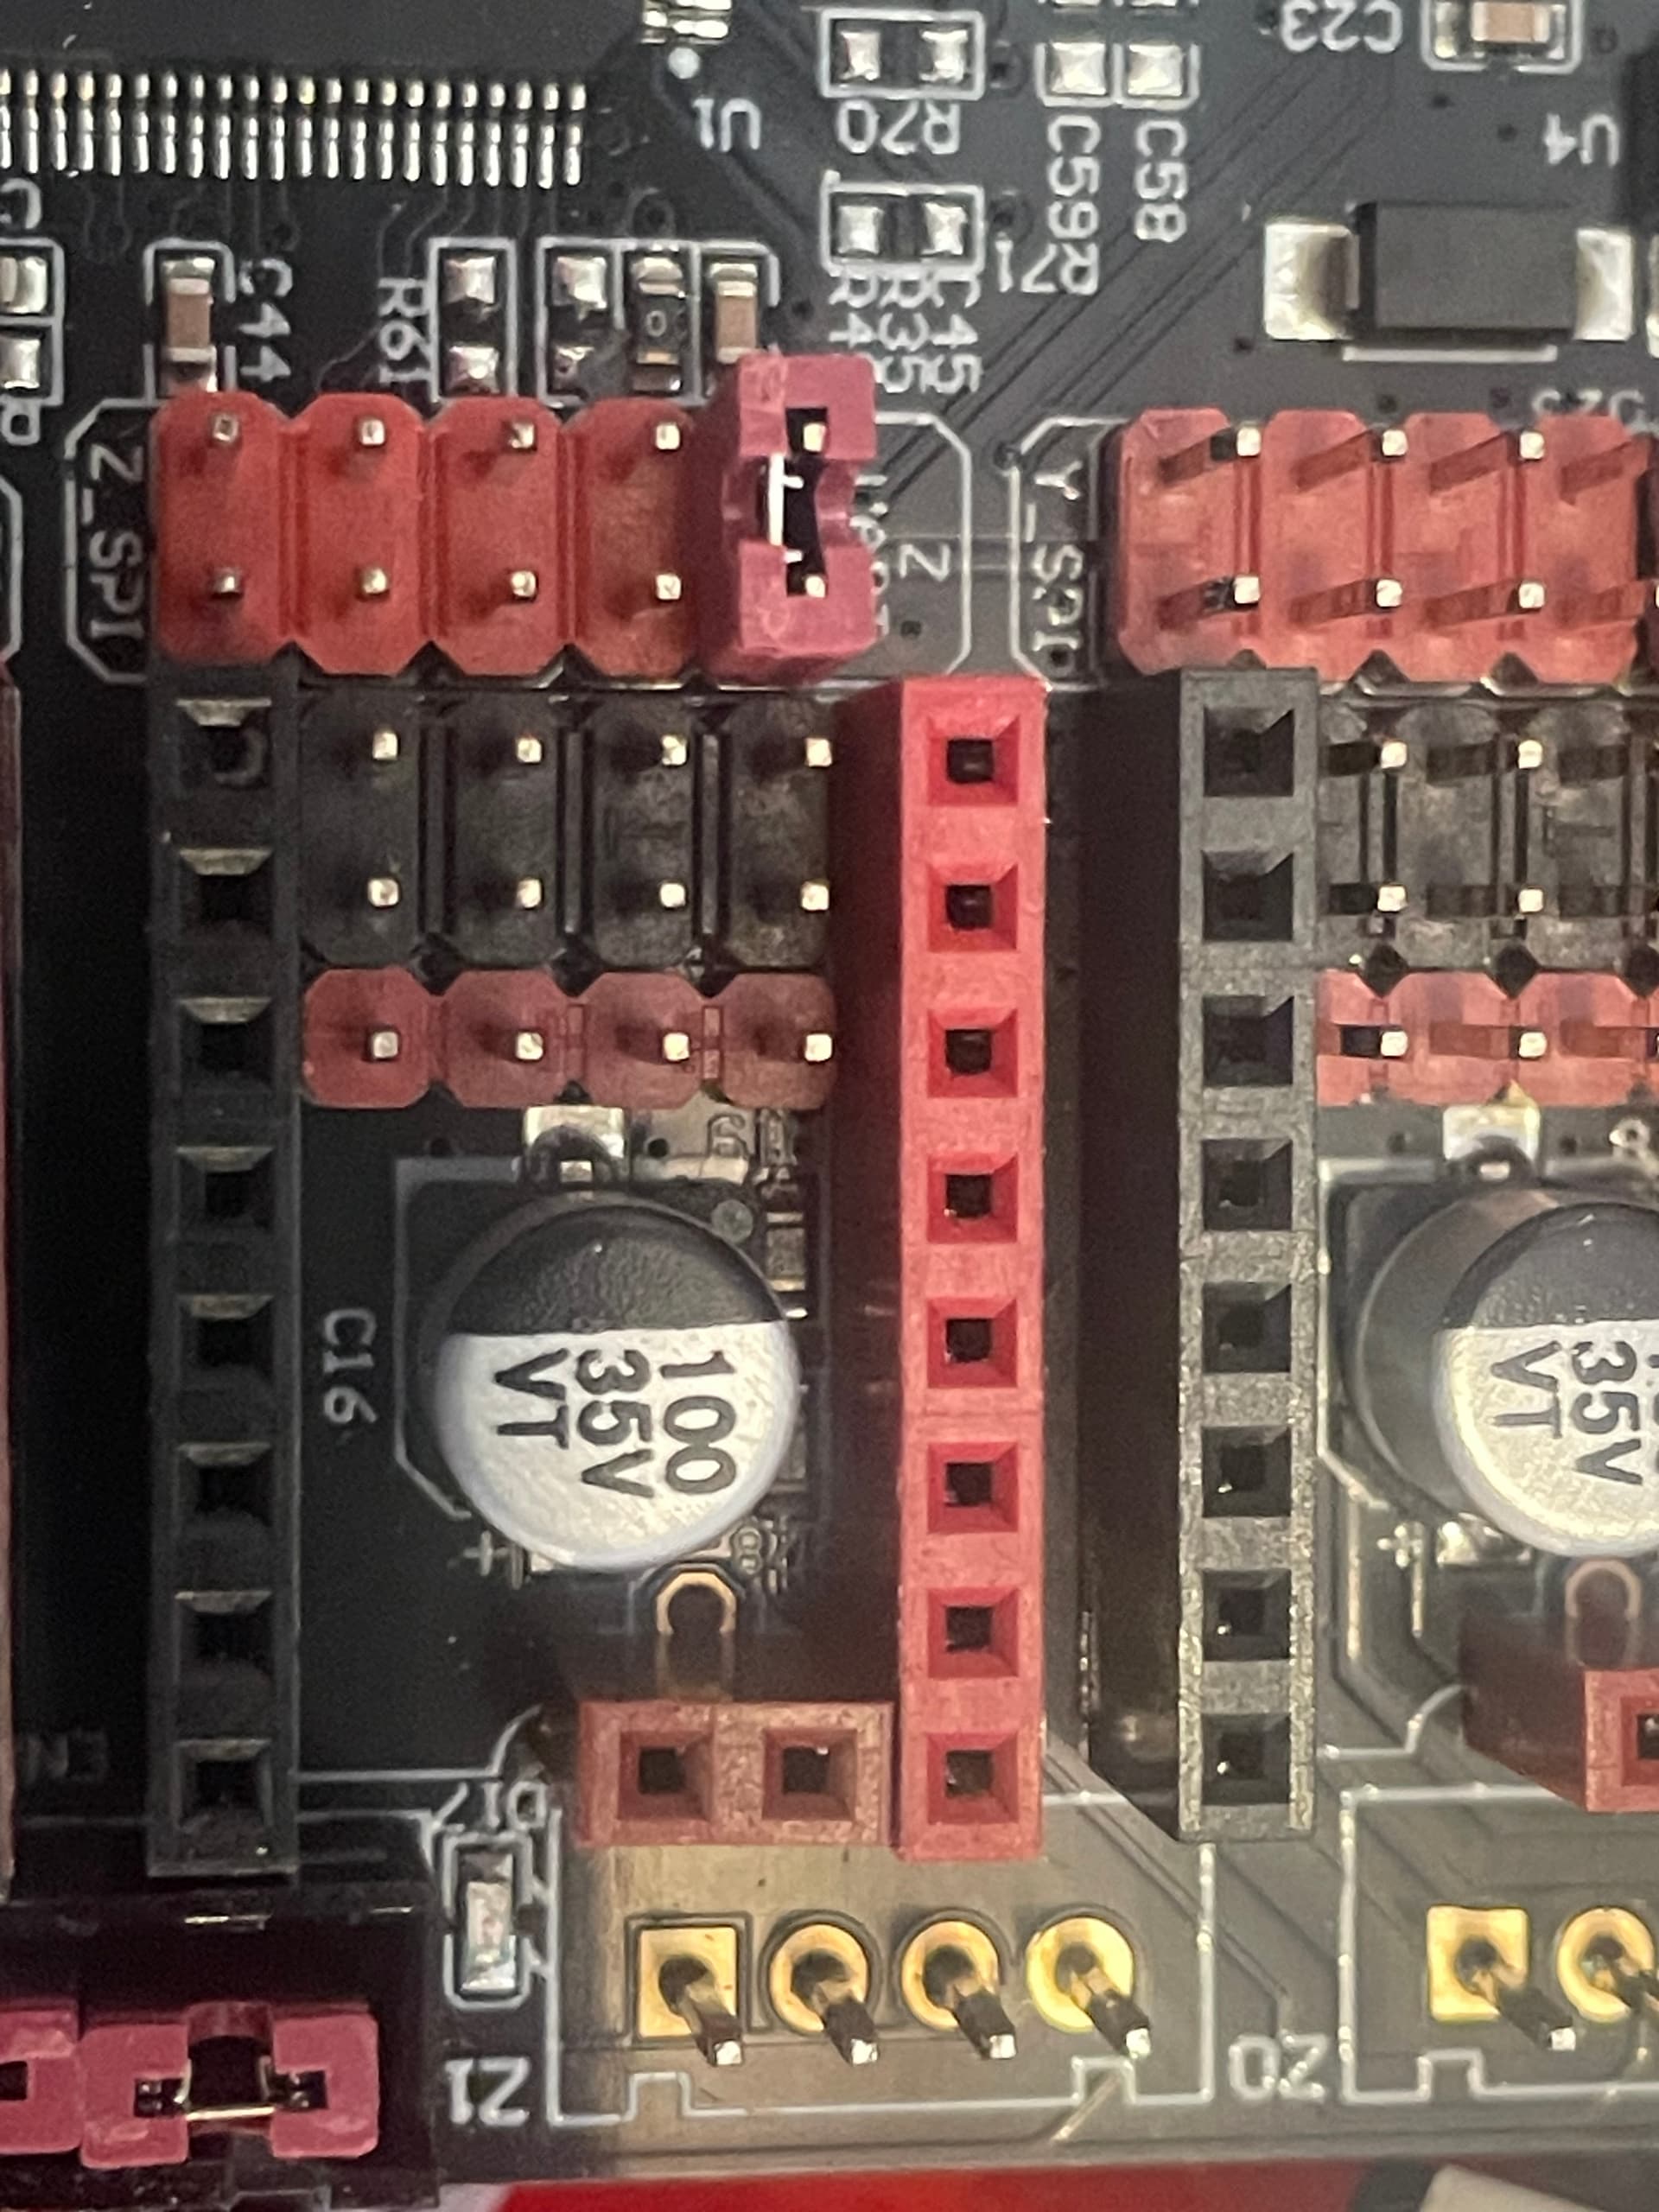
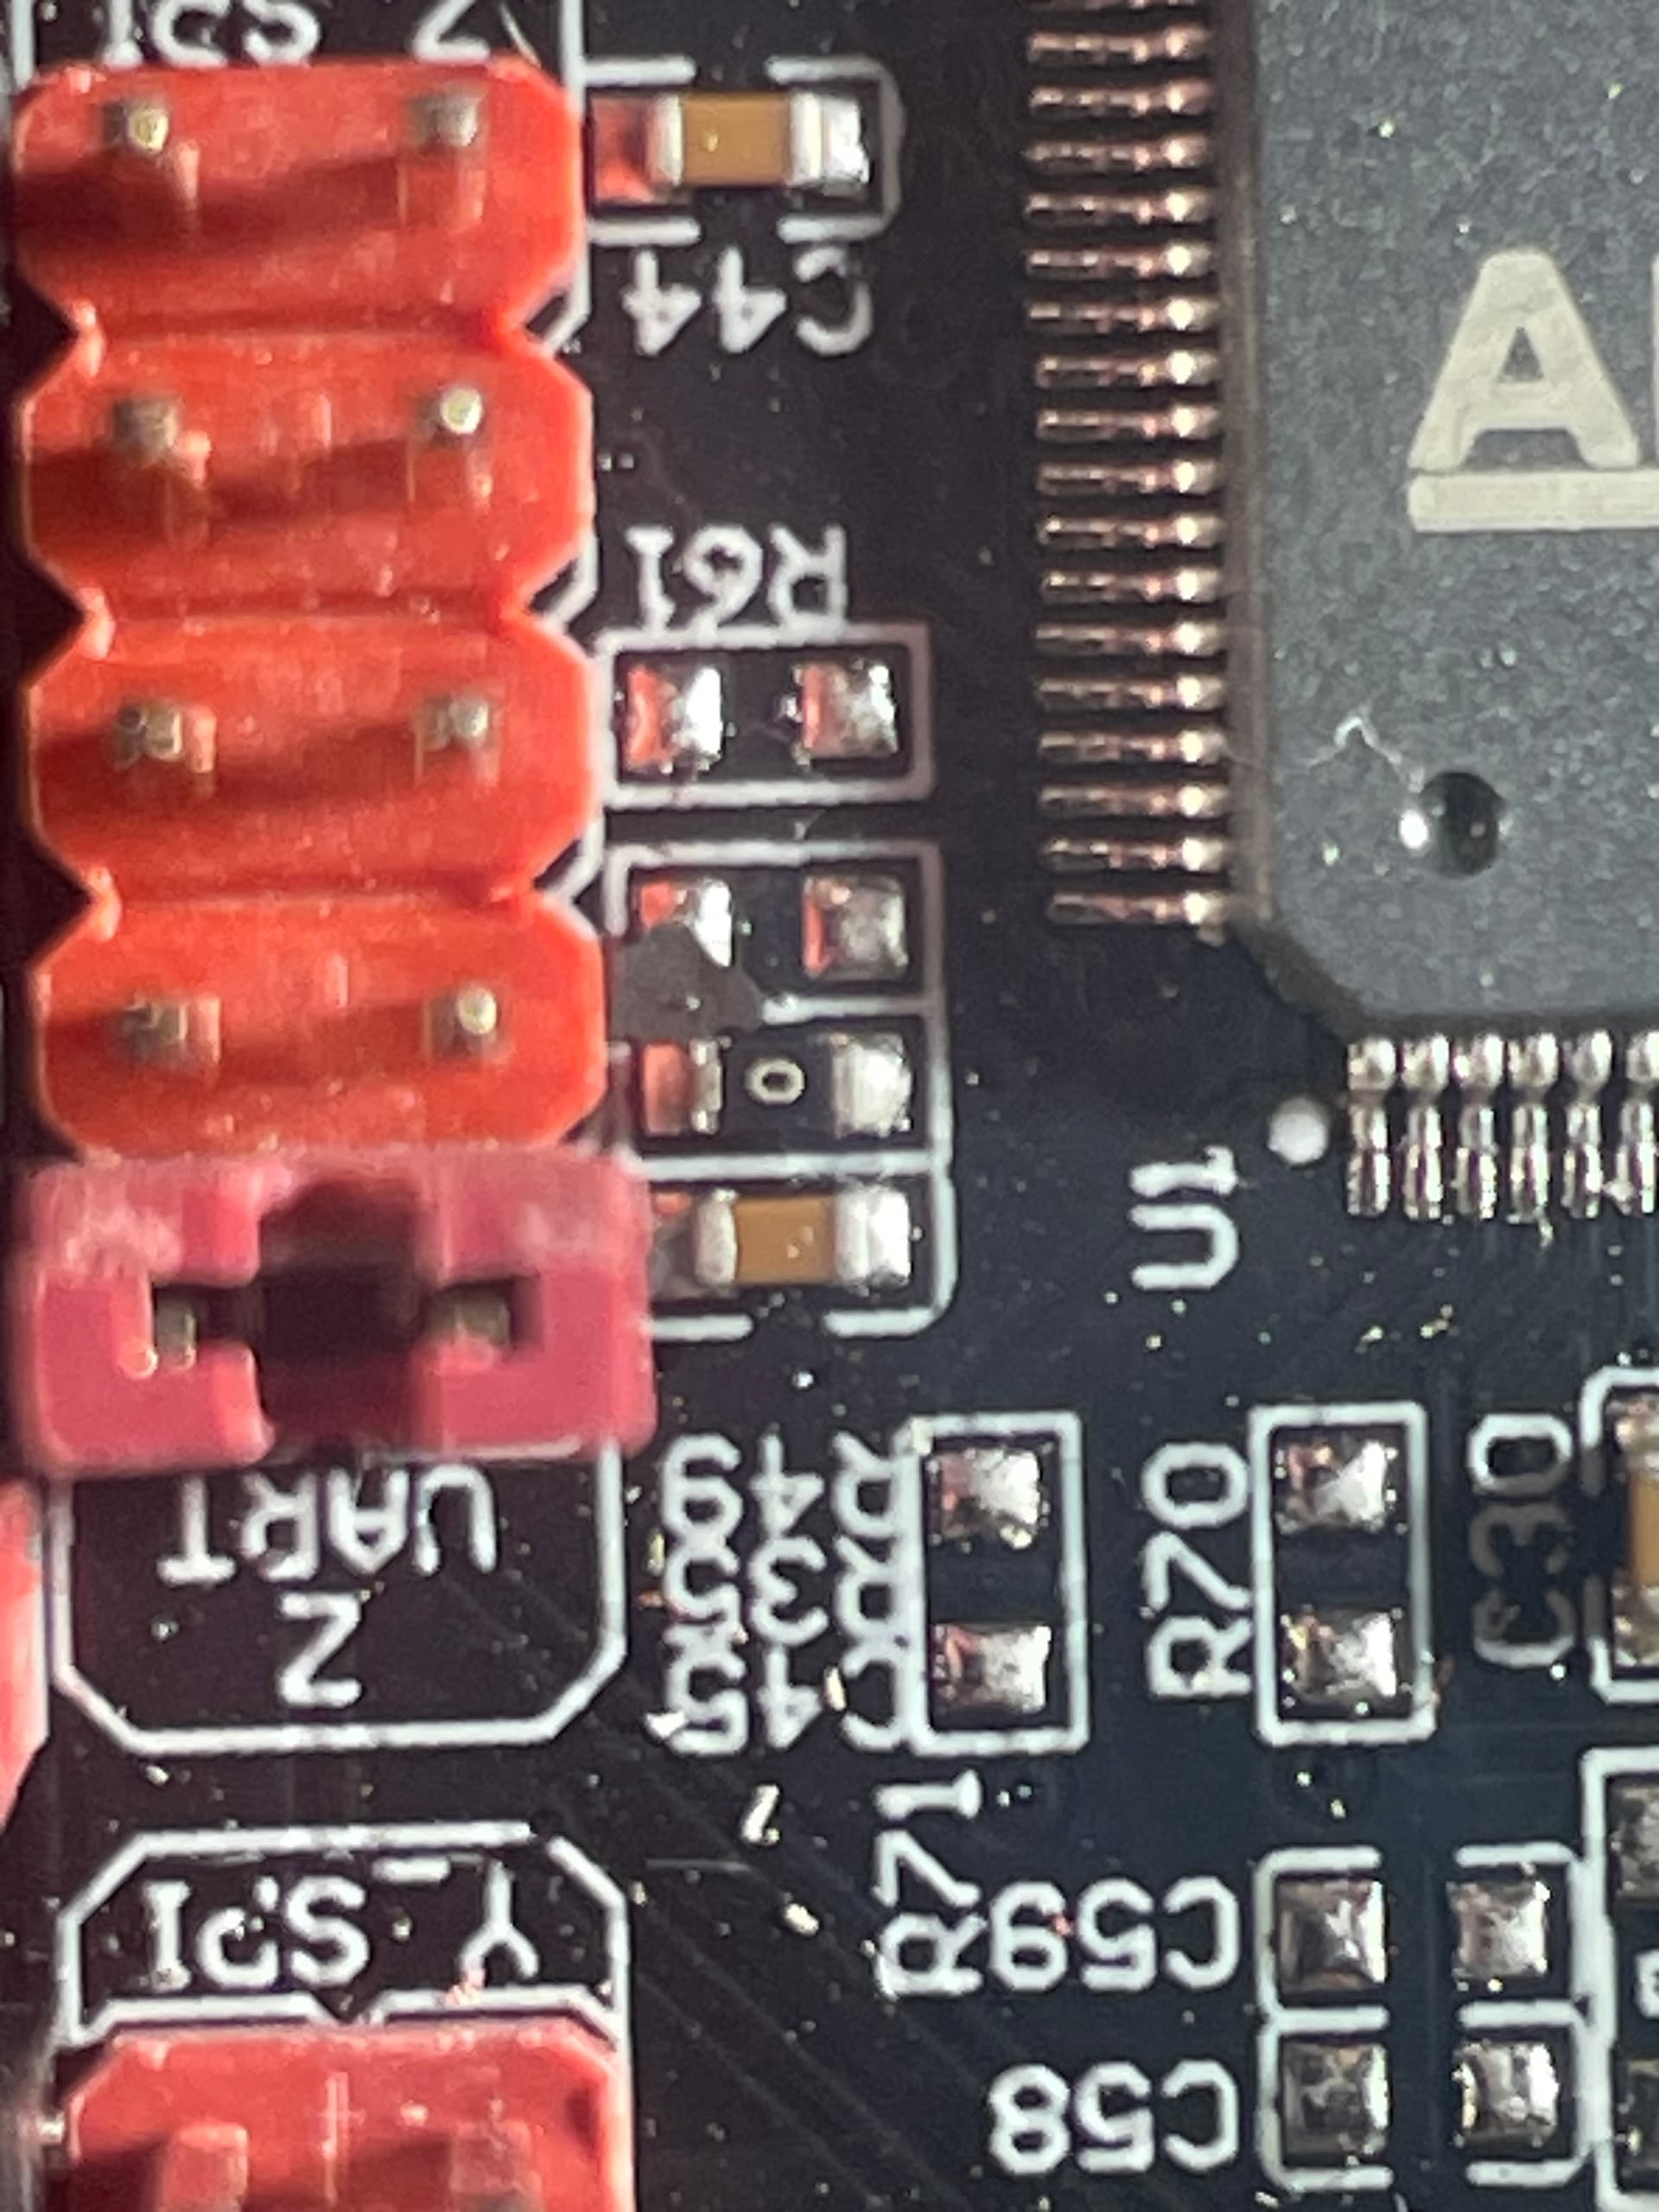
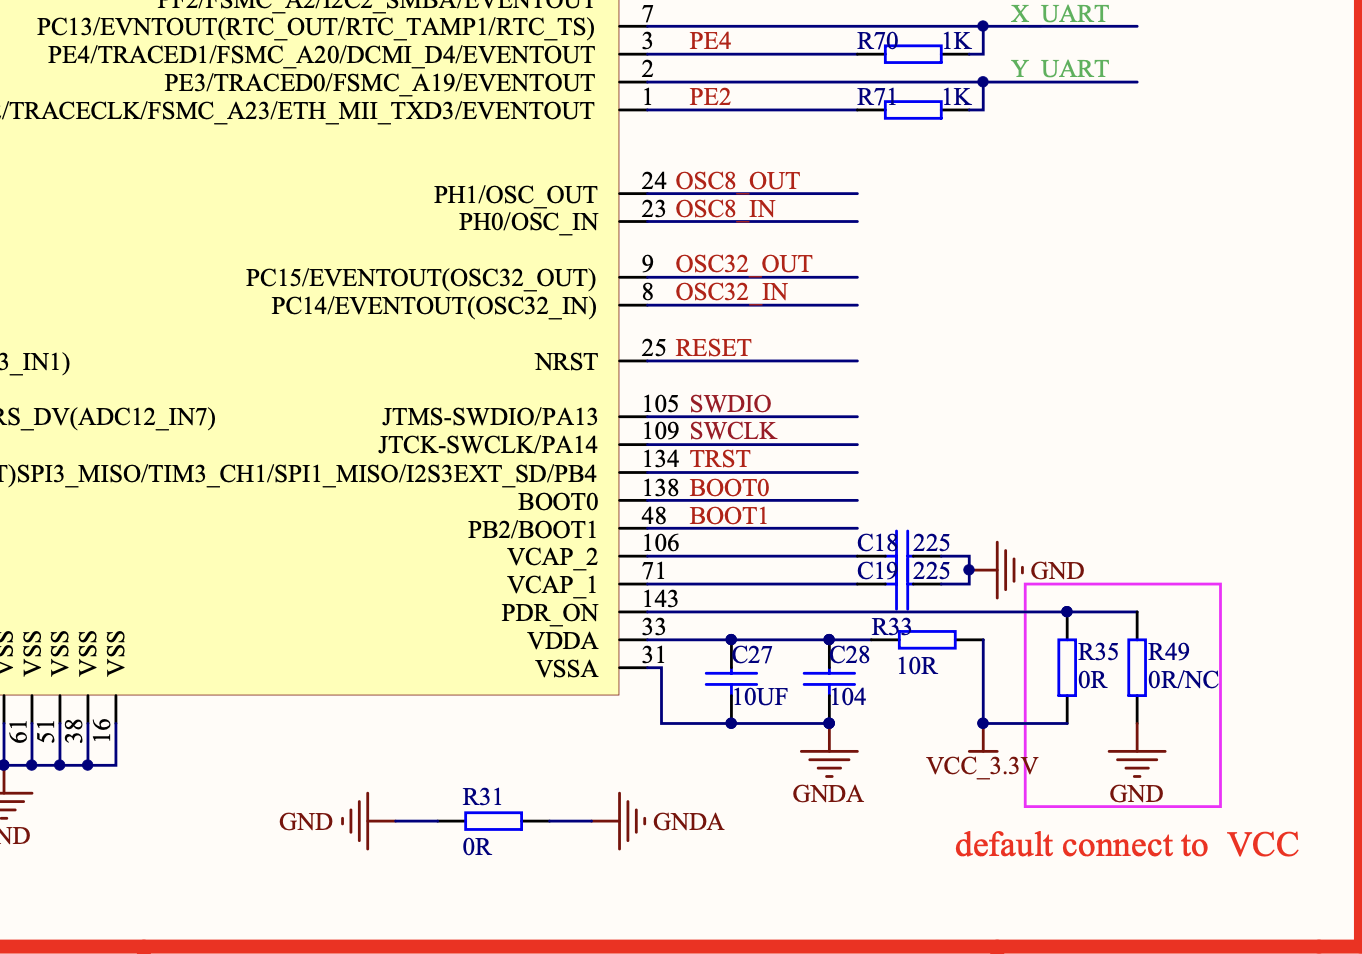
That is a curious and weird blob. Those are R35 and R49, and they do look to be as expected. R35 is installed (Connect to 3.3V), and R49 is missing (Not tied to ground). It does call into question workmanship on the board. I’ll look things over better later today.
It looks like R61 is also missing.
So far I’m being ghosted by Biqu/BTT support.
Any tips on how to do that? I can’t see anything obvious on the photos.
This driver was working for the better part of a year, so not sure what would be causing a short. The problem follows the driver (swapped ports, swapped motor wiring, etc.), so it shouldn’t be a short on the board connector
on the driver the pin is labeled “dir” the pics look clean so the only hope is it is under the plastic header, you can pry it up pretty easy to see if it is there if not it is just a bad driver since it follows it to other slots. You got that driver from me?
Yes, but about a year ago.
Time to get some electrical diagnostics. With that stepper in the slot, you need to measure the DIR pin with a DMM (and the return for the DMM needs to go to your board PS return). When you change directions, the DIR pin should toggle between high and low. If it doesn’t, then power off, swap steppers, and repeat the test. That will tell us a bunch.
We could also stand to see an M122 result when all the drivers are installed in the board.
Edit: I also recall someone recently had a weird problem where a stepper moved in one direction only and it turned out to be a bad connection in a stepper wire extension harness. That was a first for me to encounter.
I have everything torn apart at the moment, but I’ll try to get it put back together far enough to run this test. May have to wait a day or so (so many conflicting life priorities)
See post 159 above. The “All Low” and “Bad Response” messages are for Z port (failed board discussed above), the bad stepper was on X, transferred to Y, no bad M122 messages for those ports while stepper was displaying those symptoms.
I swapped motor wires between X & Y, and the problem stayed with the driver. I also swapped drivers between X & Y ports, and even to E0, and in each case the symptoms stayed with the driver through different board ports or motor wires. Pretty sure this isn’t a bad wiring harness
Agreed.
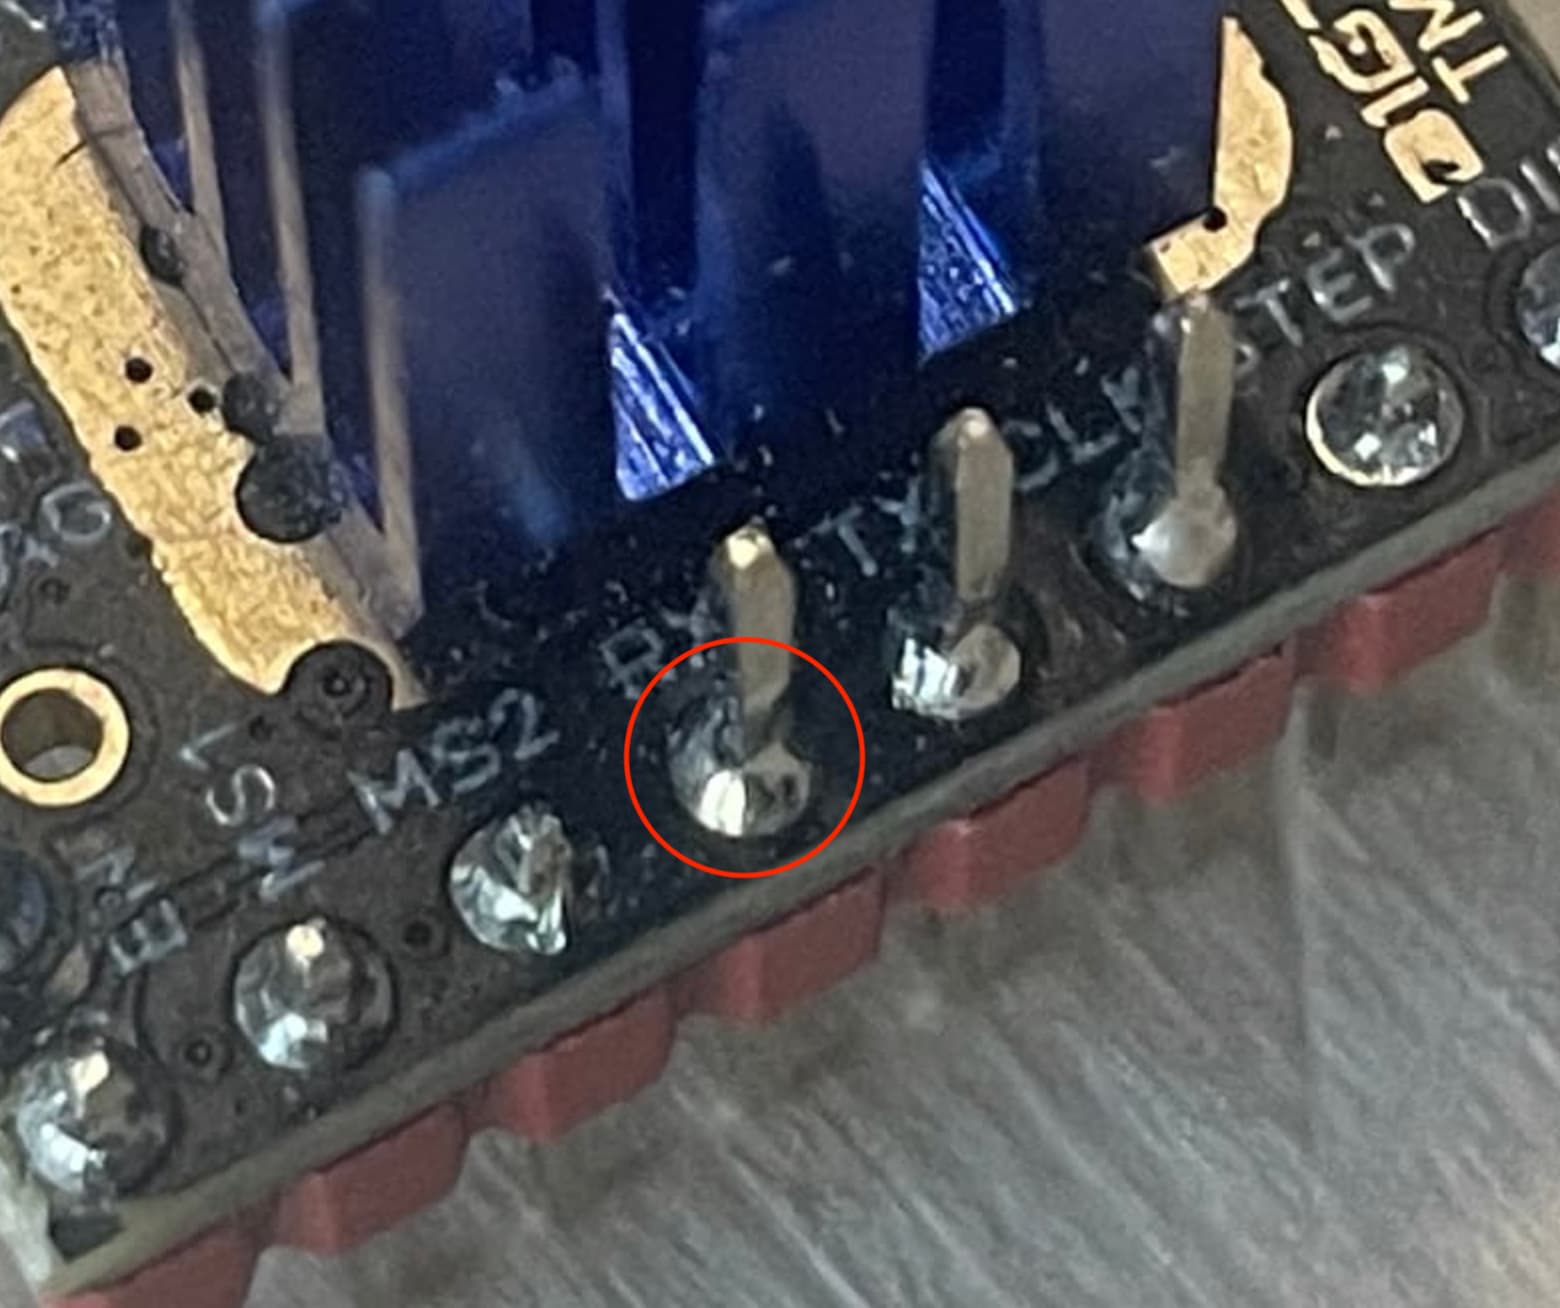
Looking at that driver, it doesn’t look like one Ryan sells currently as they don’t have the dual pins (at least I’ve never got one.). Note that the solder workmanship appears to be garbage, particularly on this UART pin. I’d reflow all of these.
Not sure which pins you are referring to…
Note how some pins like RX/TC/CLK have a bottom side and a top side pin?
I guess the steppers sometimes come that way. I don’t recall any of mine having the top side pins.
Have you tried to reflow the solder on that stepper driver?
No, after the last attempt at repairing the SKR board ended in a mess, I just ordered 5 new ones from Amazon.
** Warning - this is a very long post, with no pictures. TLDR - I eventually get everything working, after finding an unexpected problem **
OK, some progress to report, along with some more frustrating technical issues .
I finally heard back from Biqu/BTT Technical Support. I had sent a fairly negative email to their After Sales Service team expressing my dissatisfaction with both their poor customer service from Technical Support and the poor quality of their product.
Within a few hours of doing that I received THREE emails from the Technical Support Team (well the same email, three times). Basically they told me to remove the blob of whatever was bridging the two solder joints. I ended up using the tip of a box cutter to dislodge the material, and managed somehow not to destroy the board in doing so.
Once that was done, I waited for a new set of TMC2209 drivers to arrive from Amazon. They were supposed to be “next day delivery”, but somehow they got lost on the delivery truck. Amazon kept saying that the delivery was simply being “rescheduled”. Eventually after 4 days I was able to get in touch with a real live person at Amazon, and convinced them that it really was lost. For some reason or other, they couldn’t simply send me a new package, they had to cancel the order and have me order a new one. In the mean time, the price had gone up by several dollars, which annoyed the bejeesus out of me. ,They finally agreed to give me a “Promotional Credit” for the difference, and I had the new package in hand the next day.
I swapped out all drivers, started it up, and yay, everything worked! No “Error: All Low” messages, all five motors worked correctly in both directions, and I was able to home to all five end stops with no grinding or skipping steps.
For that last item, we’ll see if that lasts, or if I have to add resistors in the future. If so, I think that I will probably go the pigtail route, rather than trying to solder to the board again.
In any event, I thought that I was finally free and clear of all of the technical issues and failed equipment, and was looking forward to finally moving on to tramming the new build and getting to do some cutting again.
Alas, my hopes ended up being dashed against the rocks of despair!
As I was moving the Y motor (single motor on the core, what is normally the X motor) back and forth testing the homing and the limit switch adjustment, it started grinding and shaking. This happened about 8 inches from the limit switch. I power cycled, and it did the same thing. I moved it manually to the centre of the gantry, and it worked fine. I moved it toward home again, and it did the same thing, grinding, stalling, and eventually coming up with a Kill error. On a few occasions, it also tried to move in the opposite direction while grinding and shaking.
I was completely devastated! I thought maybe either the board was acting up again, or one of the new drivers had somehow been faulty. I swapped drivers, and the problem stayed with the Y motor. I switched the Y motor to a different driver, and the problem occurred again on the Y motor, and not the motor that I connected to the Y driver. So I concluded that it wasn’t either the driver or the board, but something going on with the motor itself.
Next I thought that maybe the rollers were binding on the gantry rails, so I loosened the tension rollers, and even removed the core from the rails, and the problem persisted. I thought maybe the wires had been pinched by the router mounts, so I removed the mounts, twisted the wires in different directions, and the problem still persisted, although there were a few times when it started working properly again.
By this time I was starting to suspect that the motor had failed, but I remember Ryan saying in other posts that the motors hardly ever fail. I ended up removing the motor from the core, placing it on the table, and testing it a bunch of times. There were times when I could get it to work for minutes on end, and other times when it wouldn’t work even for a few seconds.
Then I thought about how it seemed to work fine in certain positions on the rail, but not in others. So I started looking along the section of cable from the core to the gantry, as that part of the cable would twist and bend when the core travelled along the rails. I found that when I bent that section of the cable in one direction it would work fine, but if I bent it in a different direction the problem would re-occur.
I started looking at the wire as best I could, as it is enclosed in a plastic mesh wire loom. I noticed that there was a connector inside the loom that attaches the motor cable to the cable extension leading to the controller. It looked like it was fully seated, but when I pressed it together, the motor started working again, with no further issues (so far).
I must say that I was surprised to see that type of behaviour (grinding, stalling, moving in reverse direction) from a not-fully-seated cable.connector. But I was relieved that I didn’t have to buy a new motor and pull all the wire harness apart again.
So I put everything back together again, and it all seems to be working fine for now. I did a quick check on the tram, and the router has a fairly big lean in both the X and Y directions. Tomorrow I’ll get out the painters tape and start shimming the mounts to try and get it more perpendicular to the table.
Sorry for the long rambling post.
BTW, this will probably be one of my last posts in this thread. I’ll be starting a new build thread for Big Red, with details on the many mods and features that I have included. So it’s almost time to wrap this thread up. Thanks for following along. I have enjoyed your company, your advice, your comments, your compliments, and your encouragement along the way. I couldn’t have gotten here without all of you. THANKS!!!
Extension cables can be a nightmare. Your motor symptoms sound very much like a motor with only one of the two coils working (and intermittently at that). So it makes sense that it could be at an extension connector.
If you do grab a picture of the extension, please share.
Congratulations.
Can’t wait to see your other thread and what you start making with your completed LR3.
I would have to disassemble the wiring harness, which is encased in several feet of mesh loom along with several inches of heat shrink, to be able to get a good picture of it. But it is a standard white 6 conductor (4 pin plus 2 pin) extension cable that I got from V1 Engineering, so probably the same as every one that has shipped over the last few years.
I wonder if the mesh loom somehow pulled on one end of the connector. I previously had it taped together, but I may have removed that tape when doing some troubleshooting recently. If the problem happens again, I’ll pull it all apart, tape it up, and take a picture of it then.
Well, hell, up until now everything has been about BUILDING the LR3. Now that it’s getting close to complete, I suppose that I will have to come up with some ideas on what to do with it… ![]()