Disclaimer: Try this at your own risk. I originally goofed by missing a zero when inputing the correction, and my printhead slammed to the back. These settings are easy to reset back to default, but just make sure you don’t miss any digits ![]()
So I went down a rabbit hole trying to figure out if I can calibrate my X1C. As of Oct 2024 you can’t calibrate the XZ/YZ, but you can calibrate the XY which I will describe how to do below.
Bambu uses marlin for g-code, and there is a gcode command, M852, that allows you to add a correction for skew. Bambu has wrapped that code in another (M1005), and only use it to correct the XY skew (using M852 with Bambu has no effect).
In this reddit post (https://www.reddit.com/r/BambuLab/comments/1adh0bn/comment/kwp3rh3/), some user received instructions on how to correct the XY skew of their printer. It includes an stl of a calibration square and a pdf with instructions (Bambulab Skewness Correction - Google Drive).
Bambu’s way involves printing the calibration square, measuring the diagonals with calipers, and inputing those values in your start gcode as:
M1005 X##.## Y##.##
M500 ; saves value in eeprom permanently
With the numbers as measured in mm.
If you read that pdf you will see that you will have to do this multiple times, printing the calibration square again and updating your gcode as above by inserting the new X and Y. The way the M1005 command is used in this instance is cumulative. Each time you start a print this is applied again, and again, etc. so once you are satisfied that your XY values are close enough, you have to remove those gcode lines. Otherwise you will keep adding new M1005 X Y gcode lines into your eeprom
There is a way to reset all these changes by injecting
M1005 I0
M500
That undoes all those XY changes. This is why I don’t like this method, because it could take 3-4 times before getting the value where you want, and if you reset you have to start all over again.
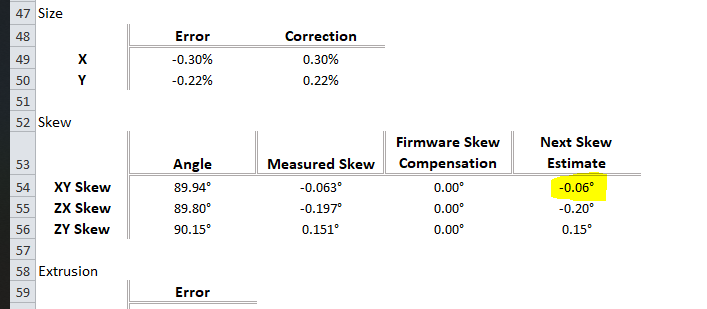
Now there is a better way. Using this google sheet (Bambu Labs Skew Compensation Calculator (X1-C) - Google Sheets), you can calculate a skew angle (you need to make a copy of the sheet, or copy to your computer as an excel spreadsheet).
All you have to do then is in your start gcode add the
G-Code Correction String
it calculates, as
M1005 I###
M500
The benefit with the I command is that it is not cumulative in the eeprom. Every time you start a print it overwrites the old value. So even if you leave the command there, it will just overwrite it. I tested this and my 2 diagonals were within .01mm of each other on the first try.
So with all this rambling out of the way, here are the steps I did.
- I printed the calibration square that Bambu originally provided scaled up 150% to make the calculation more accurate.
- I used the values I measured with my calipers and inserted those in the google sheet to calculate my skew value (the google sheet has an image showing you were to measure on your square. The square that bambu provided has an arrow on one of the diagonals and that should point to the top right)
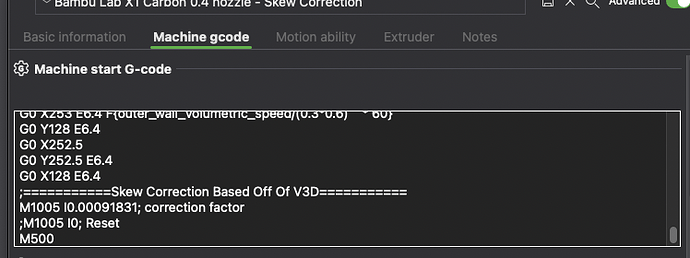
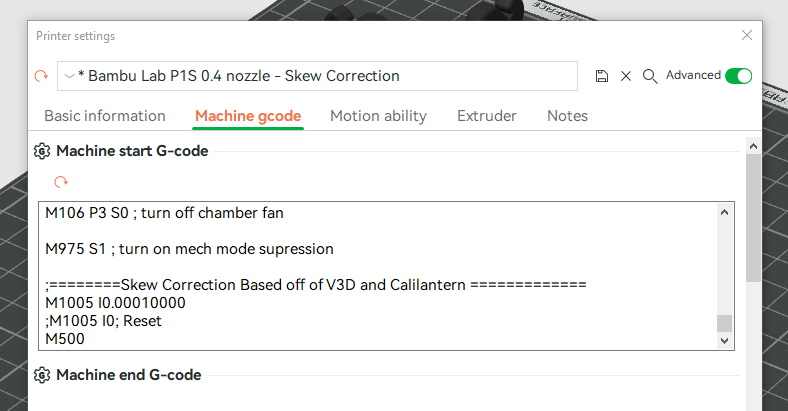
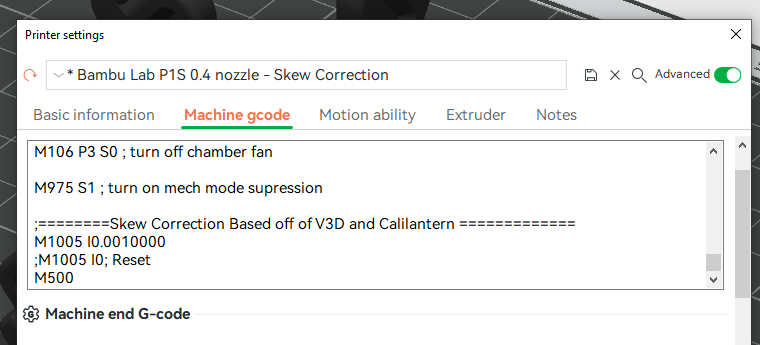
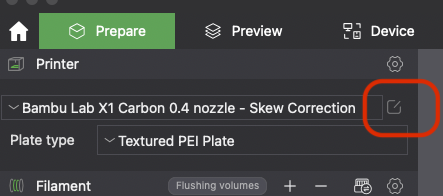
- In bambu studio I went to my printer settings, and inserted my correction factor as shown below. I have the reset command commented out in case I ever need to have it. But otherwise this has been working great so far. Make sure to click save after you enter your g-code correction to save as a new profile.
If anything is unclear let me know.
P.S. Something I saw in the Bambu forums is that for some the command is not sticky, meaning the M500 does not cause it to save permanently, so keeping the start g-code as I’m using it is not a bad idea since that will ensure the correction is always applied.
