Aluma Core 2.0

For those that have been following my saga in my build thread that start somewhere around

I am trying to make an aluminum core for my MP3DPv4. I decided to break this project out into it’s own thread for easier following.

The v1 version of the core ‘worked’ in that the belt clamps held the belts. But there were too many moving parts and the belts were hard to get clamped. Plus the bolts for tightening the clamps were on the back of the core so you had to contort yourself to get to them. I also didn’t have the belts in the correct position, so the top belts didn’t line up correct.

The grooves cut into the clamps, did, however work perfectly. You could feel them grab the teeth in the belt when sliding the belts in.

This thread will follow along my progress in trying to make a v2.0 .

I’ve just begun the initial design work. No bolt holes. One thing I’m doing is moving the clamps so that they clamp from the side. Each clamp will go into it’s own base plate instead of having 2 clamps try to squeeze together. One clamp will hold both belts on that side. This means you can clamp the belts on one side, then go to the other side and clamp the belts there.

The entire core will be milled from pieces of aluminum bolted together. I thought about trying to mill the main part of the core from a solid block of aluminum. I may still do that in the future. I’m designing the part so that that can be done somewhat easily.

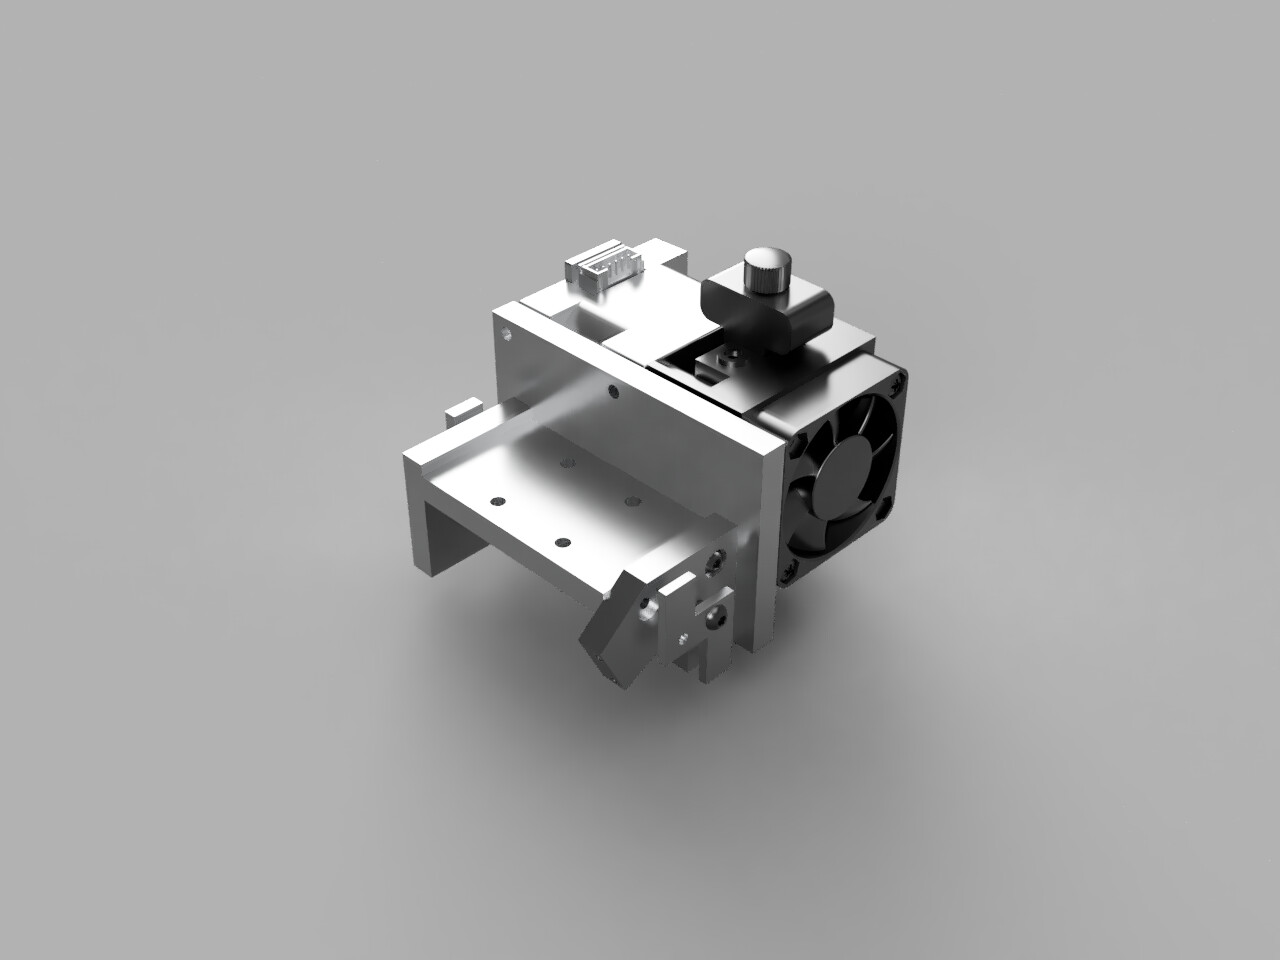
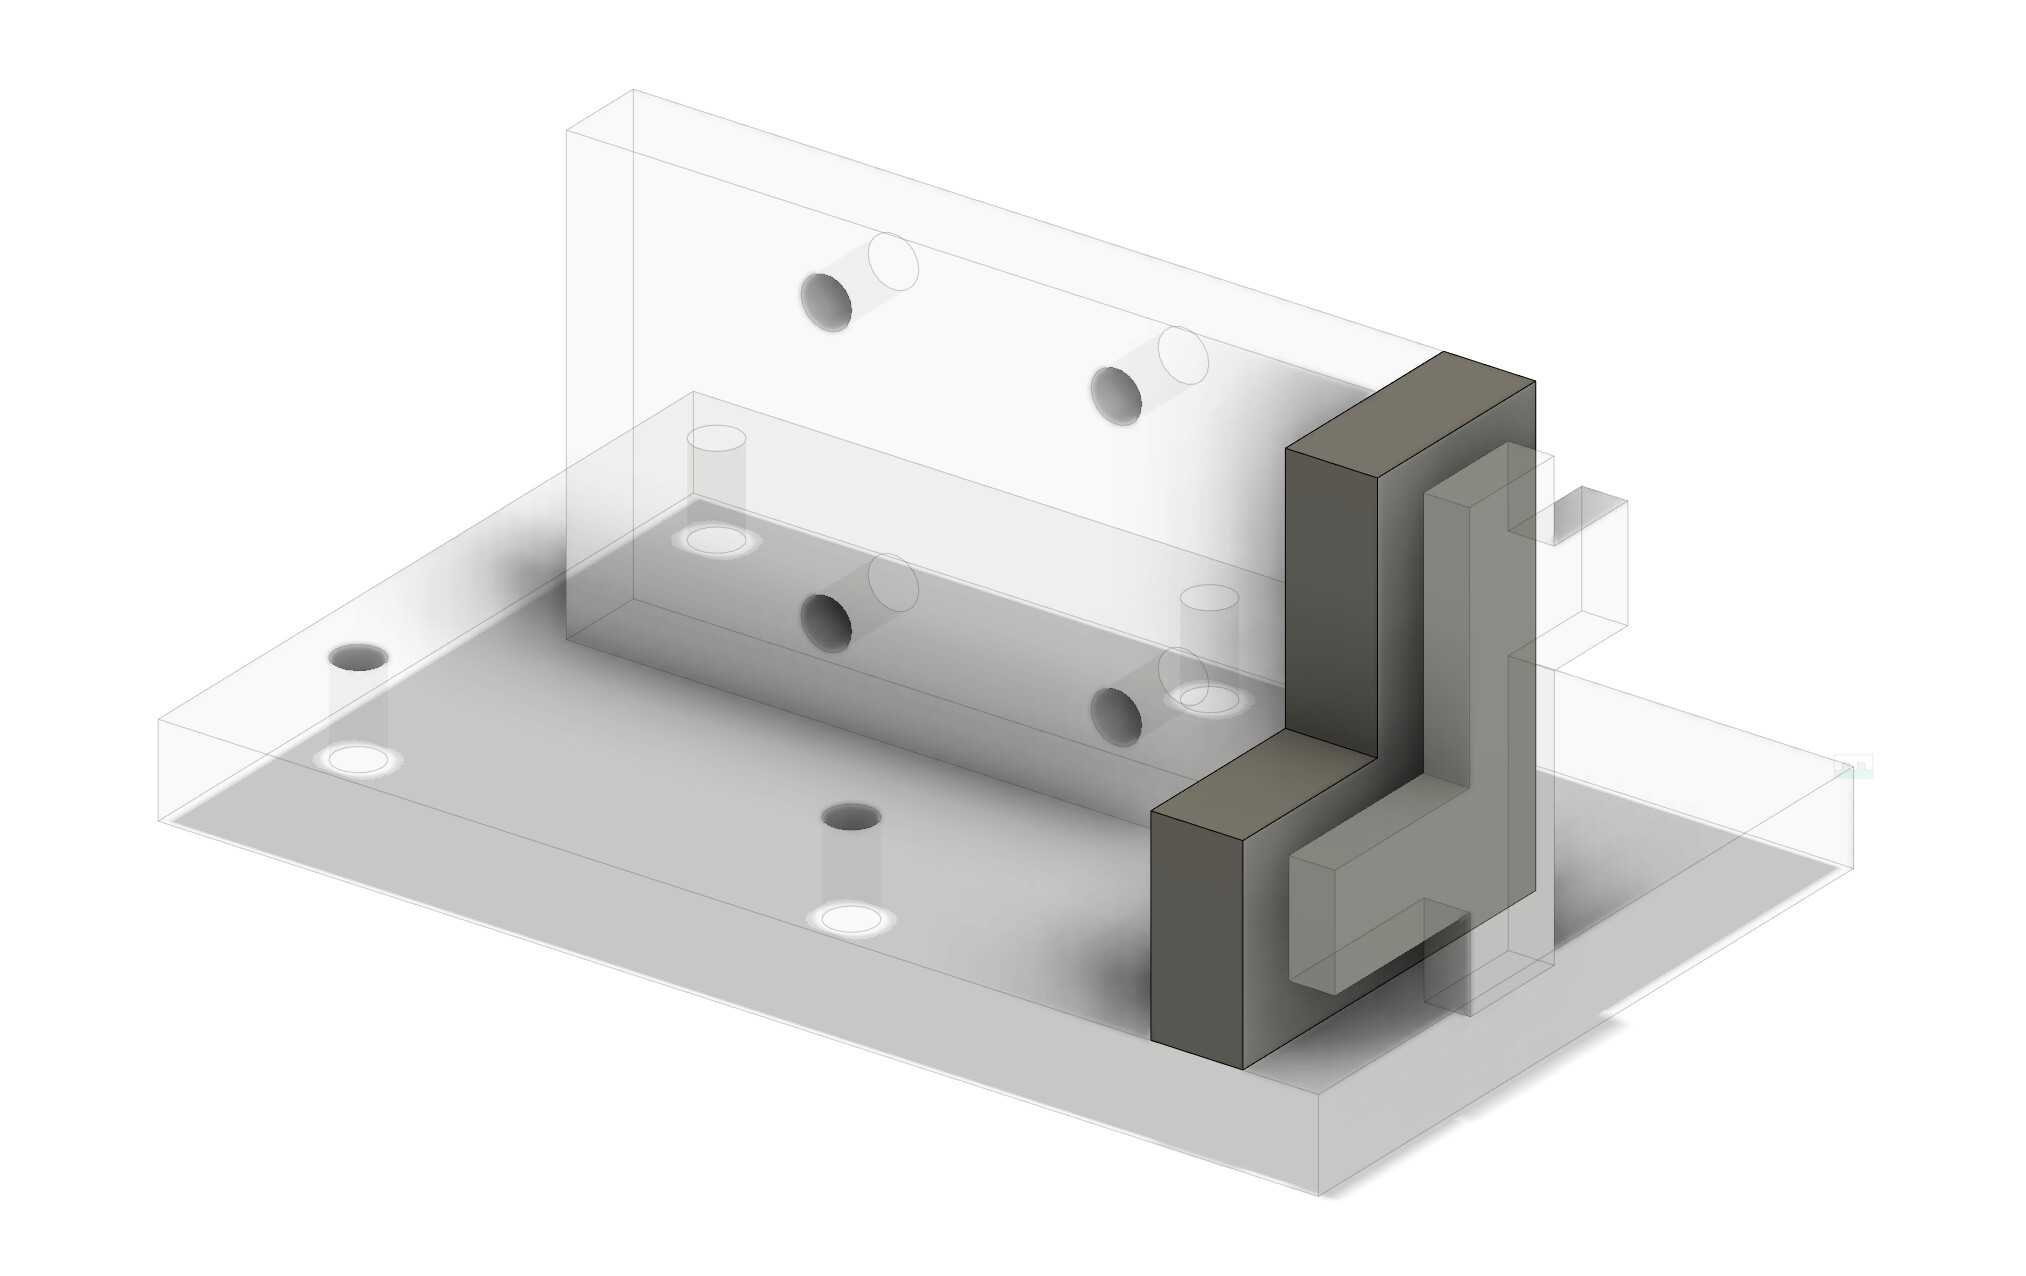
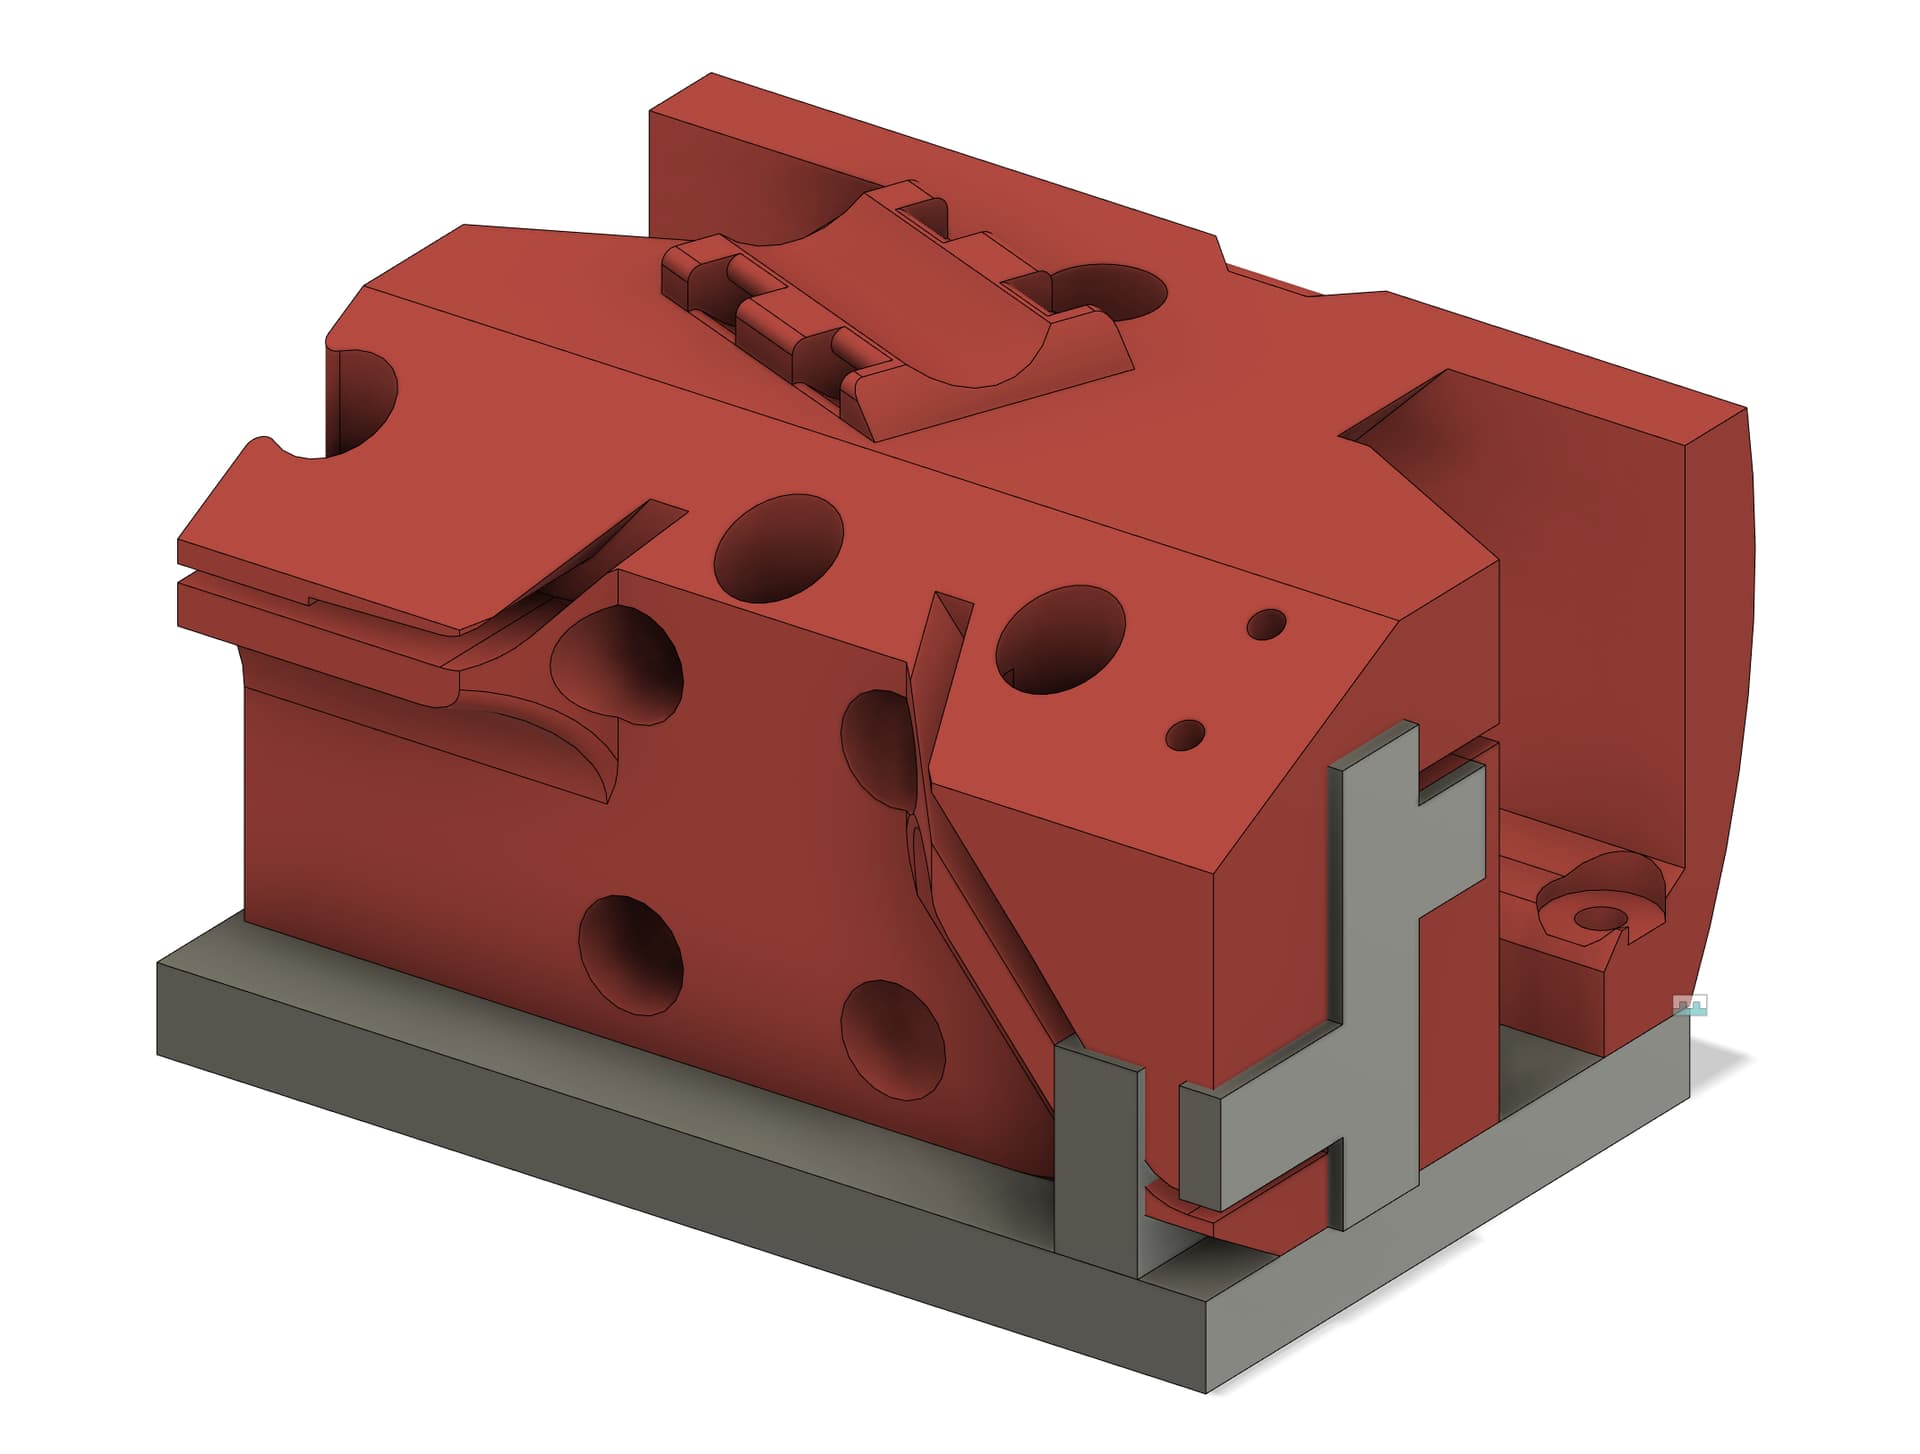
Here’s where I’m at so far. This is showing the ‘core’ from the bottom left back (I hope that makes sense). If you were standing in front of the machine, this would be the bottom left, but looking at it from the backside where the belts are. The Face of the core is facing down. The 4 holes on the face are for the extruder.

The dark ‘L’ shaped piece is what the belt clamp will bolt to. The weird 'X’ish shaped piece is the clamp. I may have to add some metal back into the ‘L’ shaped piece for the X end stop. I forgot to make provisions for that in the first design :confused:

“Speed holes” will be added after initial testing. Basically I’ll grab a 1/4" drill bit and swiss cheese a bunch of the aluminum away that won’t hit any threaded bolt holes.

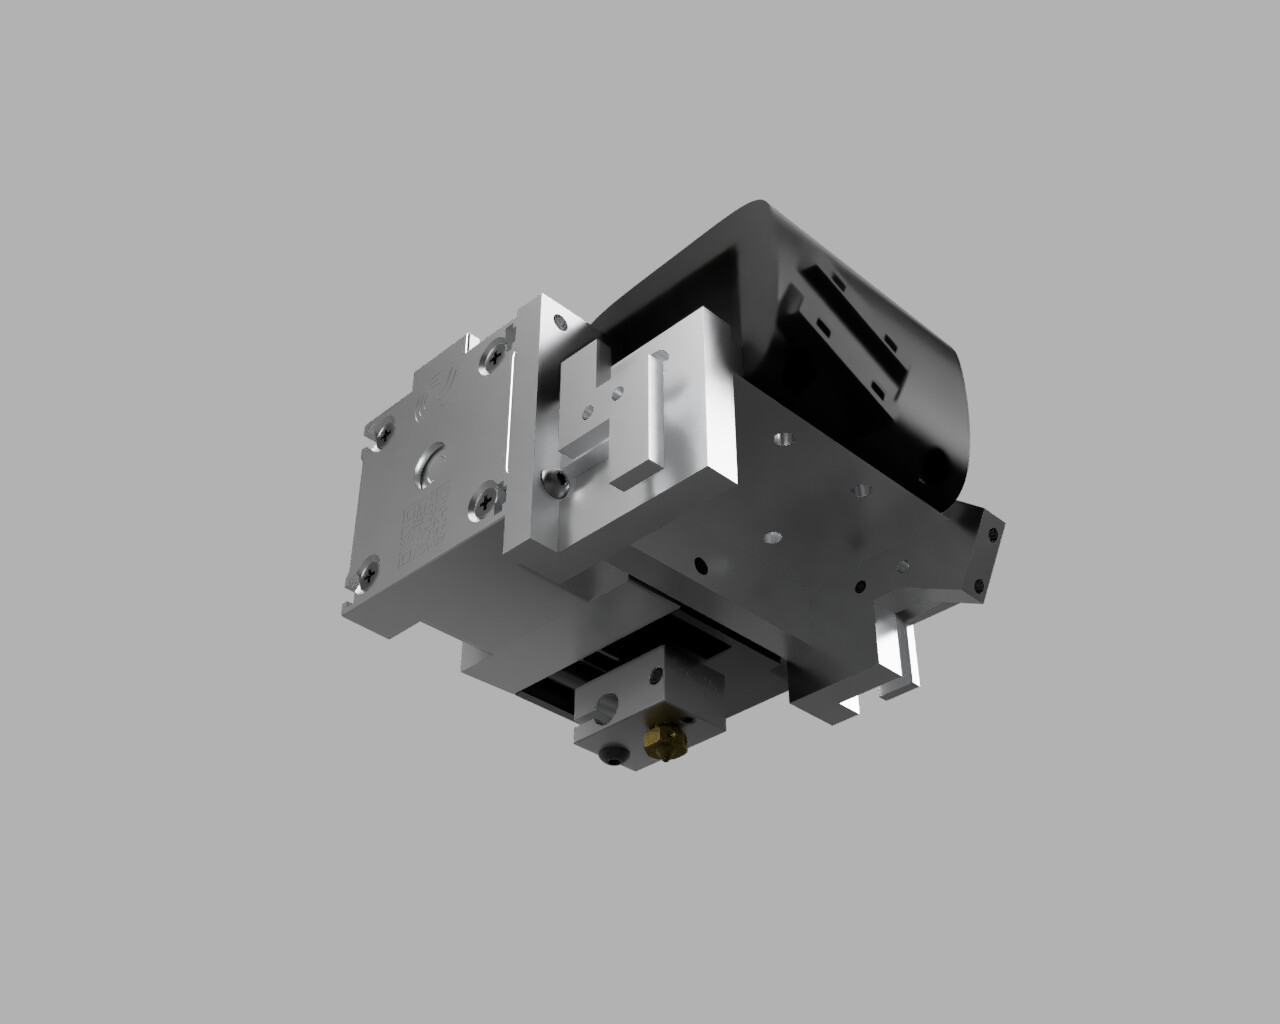
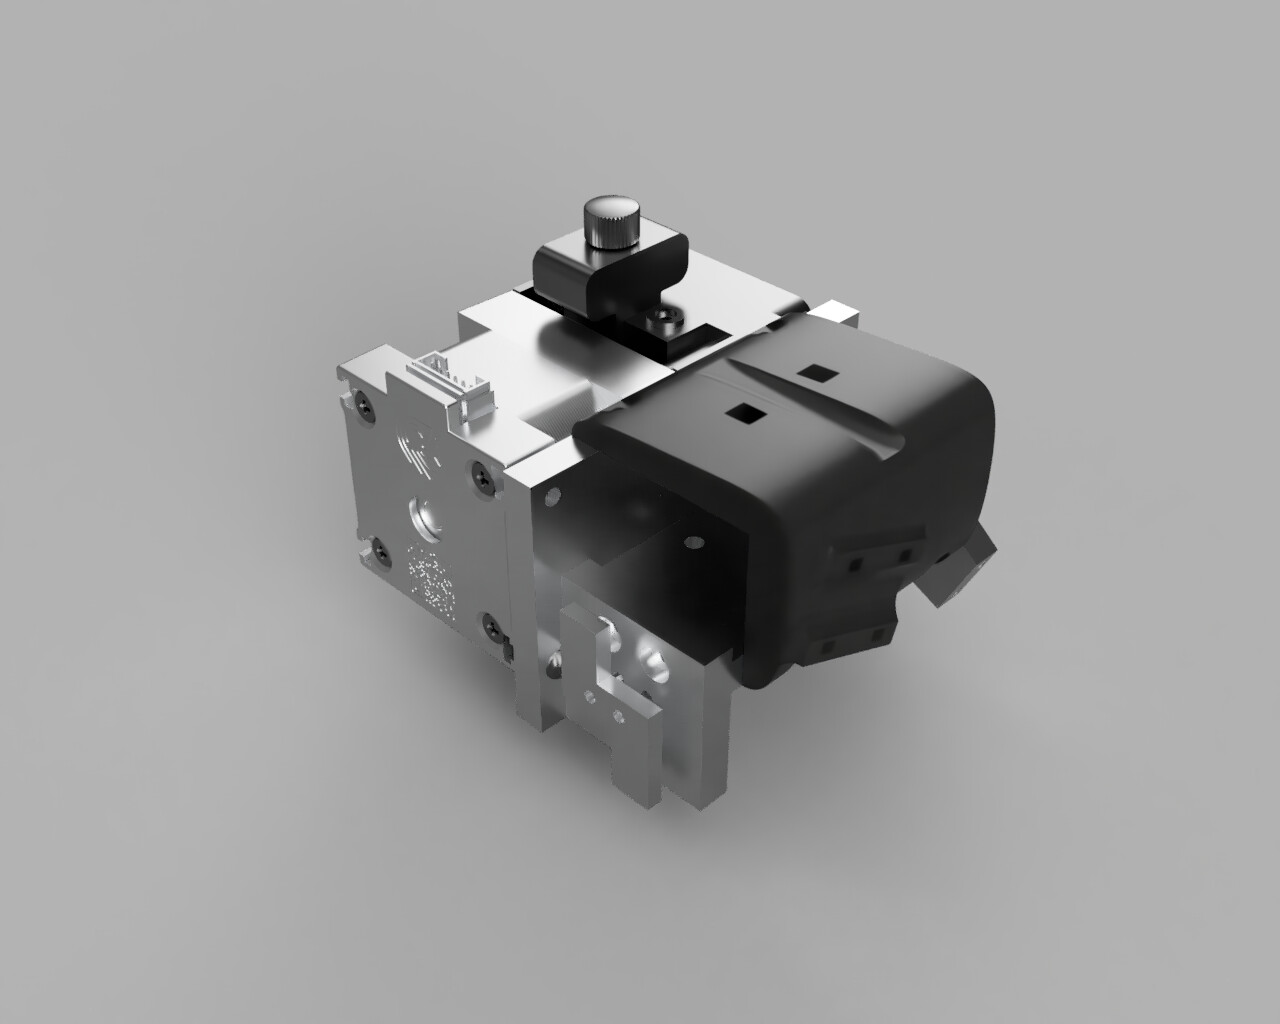
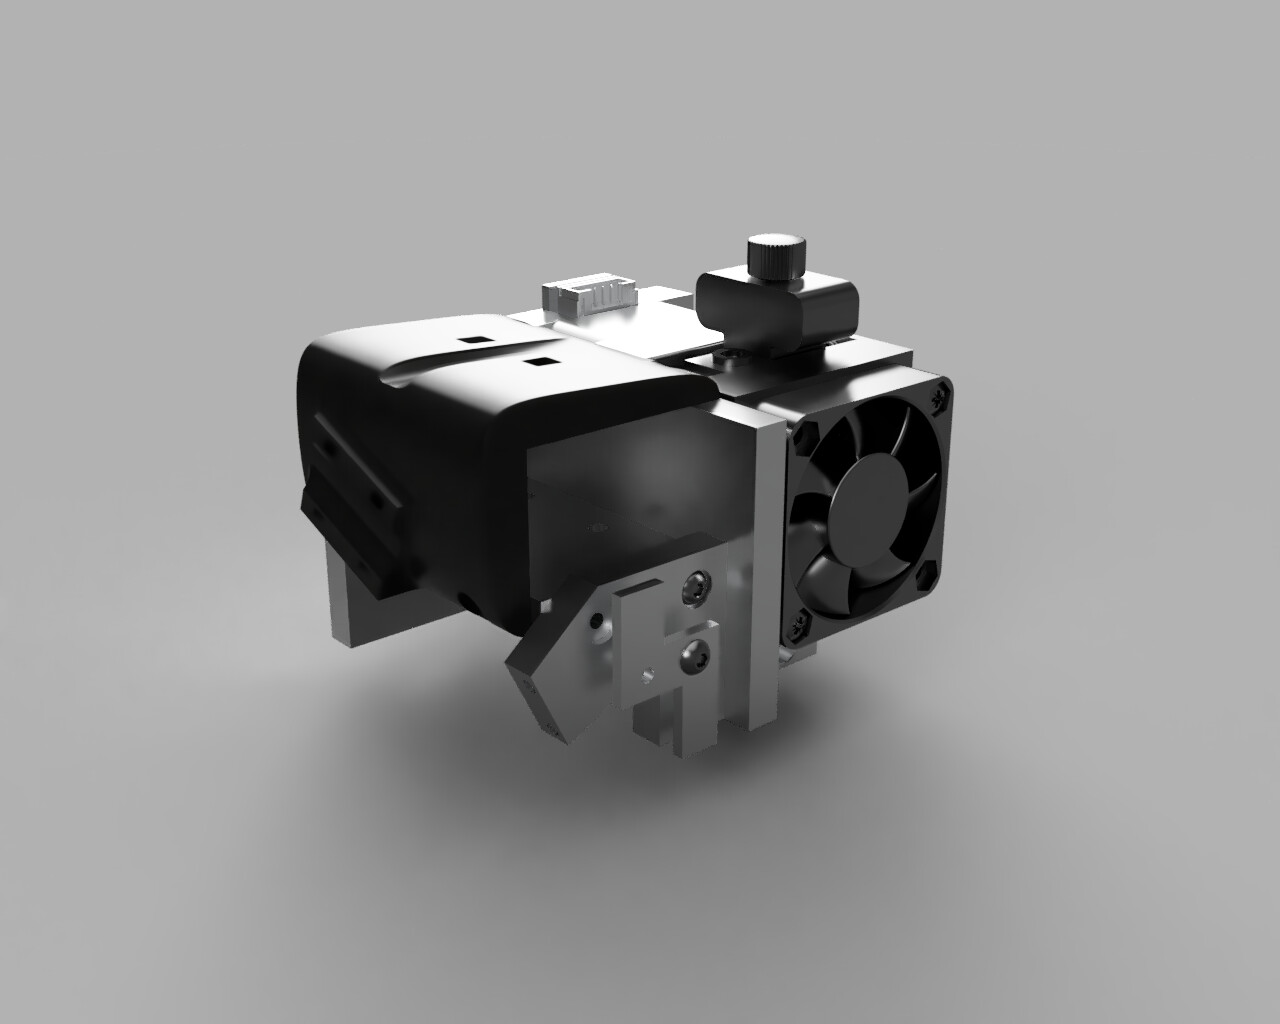
This time I’m designing my part a little different. I’m basing it off of the plastic core more as can be seen in this composite. My part does loose 1/4" of X axis to the front in order to have room to get to the 4 bolts for the X-axis bearing block. I’ll have to account for that somehow so that the parts cooling fan doesn’t slam into the door on my printer’s enclosure.

I have the kayak build going on too, but they’re being worked in tandem. Every time I glue on a new strip to the Kayak, I have a few hours for the glue to set where I can work on this :slight_smile: Progress will hopefully be a little quicker than the v1 build did.

Let me know your thoughts.

5 Likes

Nice! Personally liked seeing how Aluma Core V1 is/was taking shape, and evolving.

Still open to rotating X axis 90 degrees, would that help a plate(s) based Aluma Core design any?

Maybe flanged linear rails block with rear access holes, or, two plates that fasten together.

Two plate approach could maybe also help fasten/hold the belts too? Otherwise additional smaller 3rd/4th plate(s) needed?

My only concern with flopping the X axis on it’s side is that the top belts actually line up with the edge of the bearing in the current design. I think it would hit the bearing block itself if you tried rotating it.

There might be enough clearance left to right to still make them fit, but I’m not sure. I also don’t want to have to redesign the trucks that the X axis mounts to. For now, my goal is to just design/build an aluminum core that is a direct replacement to the plastic one.

Aluminum U/C channel could also be used if the X axis was rotated. It would help take out some of the bolt holes.

1 Like

Spent some time during lunch. I think I have the new design finished. I just need to make all the design drawings to carry out to the shop. I do still need to design a plastic part to go over the top to zip tie all the cables to.

This design is quite a bit more interesting than the last one, but shouldn’t be too difficult to make. It does have 1 more part than the last one because of the two belt clamps.

This design was a great one for learning how to project parts onto faces of other parts better.

1 Like

Design phase done. I should start cutting parts out today. Hope Ryan doesn’t mind. I think I stole some of his zip tie hole ideas. :slight_smile:

All hardware is M3 bolts. The clamping bolts are through-hole, so lots of meat to grab on to.

3 Likes

I started getting some of the parts milled today. I only got a few parts cut out. Nothing drilled or finished yet.

2 Likes

OOOOHHHHHH

1 Like

While working on the milling process for the parts, I discovered I do not have decent means for milling the angled flat for the endstop switch.

So, instead of re-designing the part, I ordered new tooling for the mill. A nice hefty 10"x7" tilting table will be delivered on Friday. I also picked up a 3" vice to mount to the top of the tilting table.

The combo was cheaper than I thought it would be.

Looking at my schedule, Saturday looks open, so I should make some good progress that day. I’ll make small progress as I can through this week.

I’m also wondering how well the printer will print without the 3d printed part on it. Right now I have the failed v1 of this design mounted to the machine. I’m hoping I don’t need to re-install a plastic core just to print the cable mount and then install the new v2 core.

1 Like

This should make angled cuts easier.

1 Like

Did all the maths to figure out how to make this part…

Then tapped for M3 bolts for the endstop instead of 2.5

FML

I don’t even have decent M2.5 taps. Off to Amazon I go.

that is truly beefy! I figured you were getting an angle vise!

Not to hijack your thread but I fired up my PM25 today for the first time in a while. Stupid thing I machined

Best part is that it used to be a pile of soda cans.

1 Like

Mystery aluminum is always fun to mill. :rofl:

1 Like