thanks man, much appreciated
Ryan’s comment,
reminds me of a really cool and accurate saying I heard years ago,
“Sometimes better is the enemy of good.”
If I had a donut for every time I botched something in an effort to make it ‘better’, I’d have diabetes!
3 Likes
Hey Ryan I can’t find any info on github about the uart mode pins and jumper for the twotrees tmc2209 v2 drivers. They just don’t have the 2 pins (one of which you bend in the tutorial DIAG I believe)
Im gonna wing it and assume index is not used on either. Its the jumper sitch Im worried aboot.
For what board? Most boards do not use the top drivers pins anymore, that was a retrofit thing a long time ago.
Oh okay. I kinda figured. I am just following the Assembly, step by step from the lr3 homepage. I have one more side to wire tonight. Hoping none of the extensions came loose getting the weave around all the different routings to make it semi cleanish looking.
I have about half of the thing wired so far. I still have to make sure none of it came apart in the shielding or whatever. I have a decent micrometer so I can test all the connections before I turn it on.
I guess my question is now, should I be following more up to date instructions?
When the jackpot came out, even though I was no where near being finished with my build, I knew I would be updating to it as most esp32 systems seem to be way easier to work with once set up correctly.
I always struggle with my OCD and knowing that eventually I will be doing that really slows me down. I basically will be ordering it as soon as I know my first wiring was done right.
Okay well…4am, back to the frigid garage…
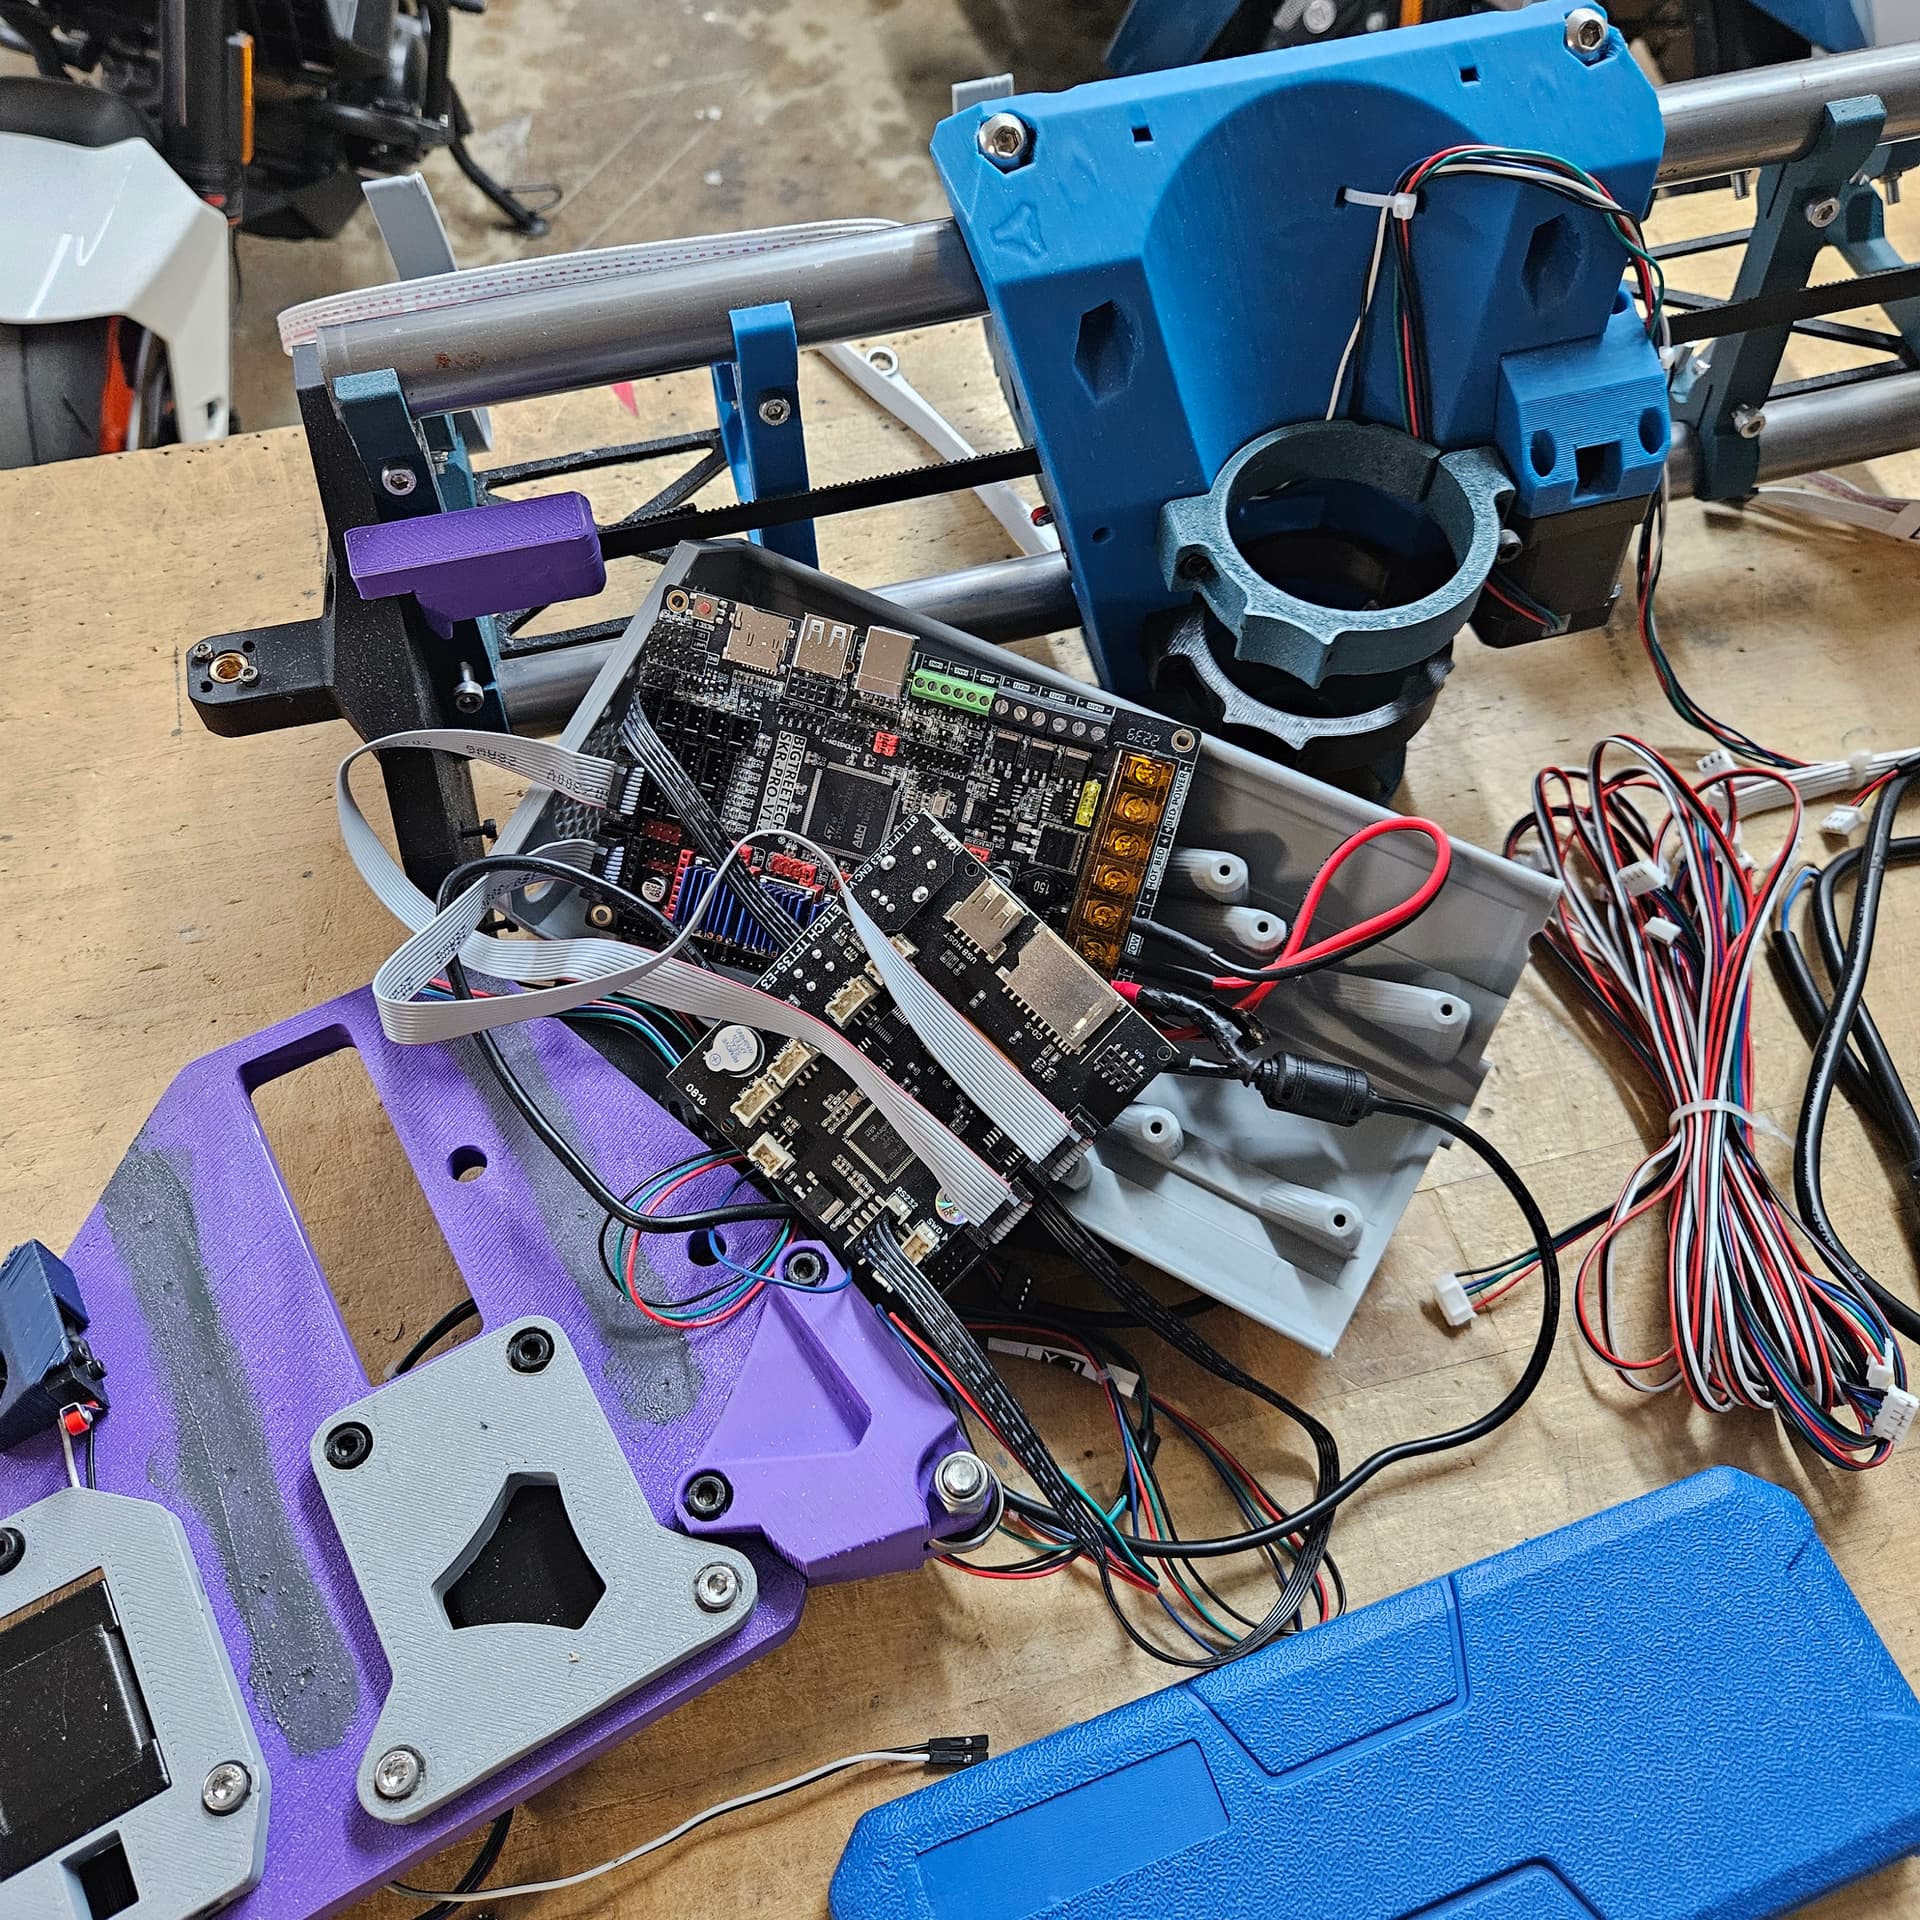
This should have everything you need, Jackpot CNC Controller - V1 Engineering Documentation
Right, see I was just following the instructions from the SKr from the old days. I knew I should have bought the Jackpot when it came out as since it did, I’ve had low motivation to finish all this wiring. Have you guys got it all stable? (Either way, by the time I ever finish, it will be)
Jackpot is good but so is the SKR, both are wired extremely similarly so no need to switch.
1 Like
I hate that everything is going klipper now. Got a new printer that is a "klipper printer and it makes it so I cant use it like I would if it would just connect to my computer. Aaagggghhhhh. This stuff, all of it is really hars for some people.
There’s nothing we can’t help you work through. It just takes some patience.
Can you recap where your build is? We can help coach you through.
Give us pictures and we will help you get finished and running.
1 Like
I think the point is that klipper isn’t necessarily the kind of project many customers are trying to take on. I can agree with that. I have been running klipper for a while. I don’t do anything over the top with it, and it just works for me. But it is intimidating to someone who isn’t used to linux, pi, yaml or github. Selling a printer with it already installed is fine, but I’d rather see that on high end corexy machines than ender types.
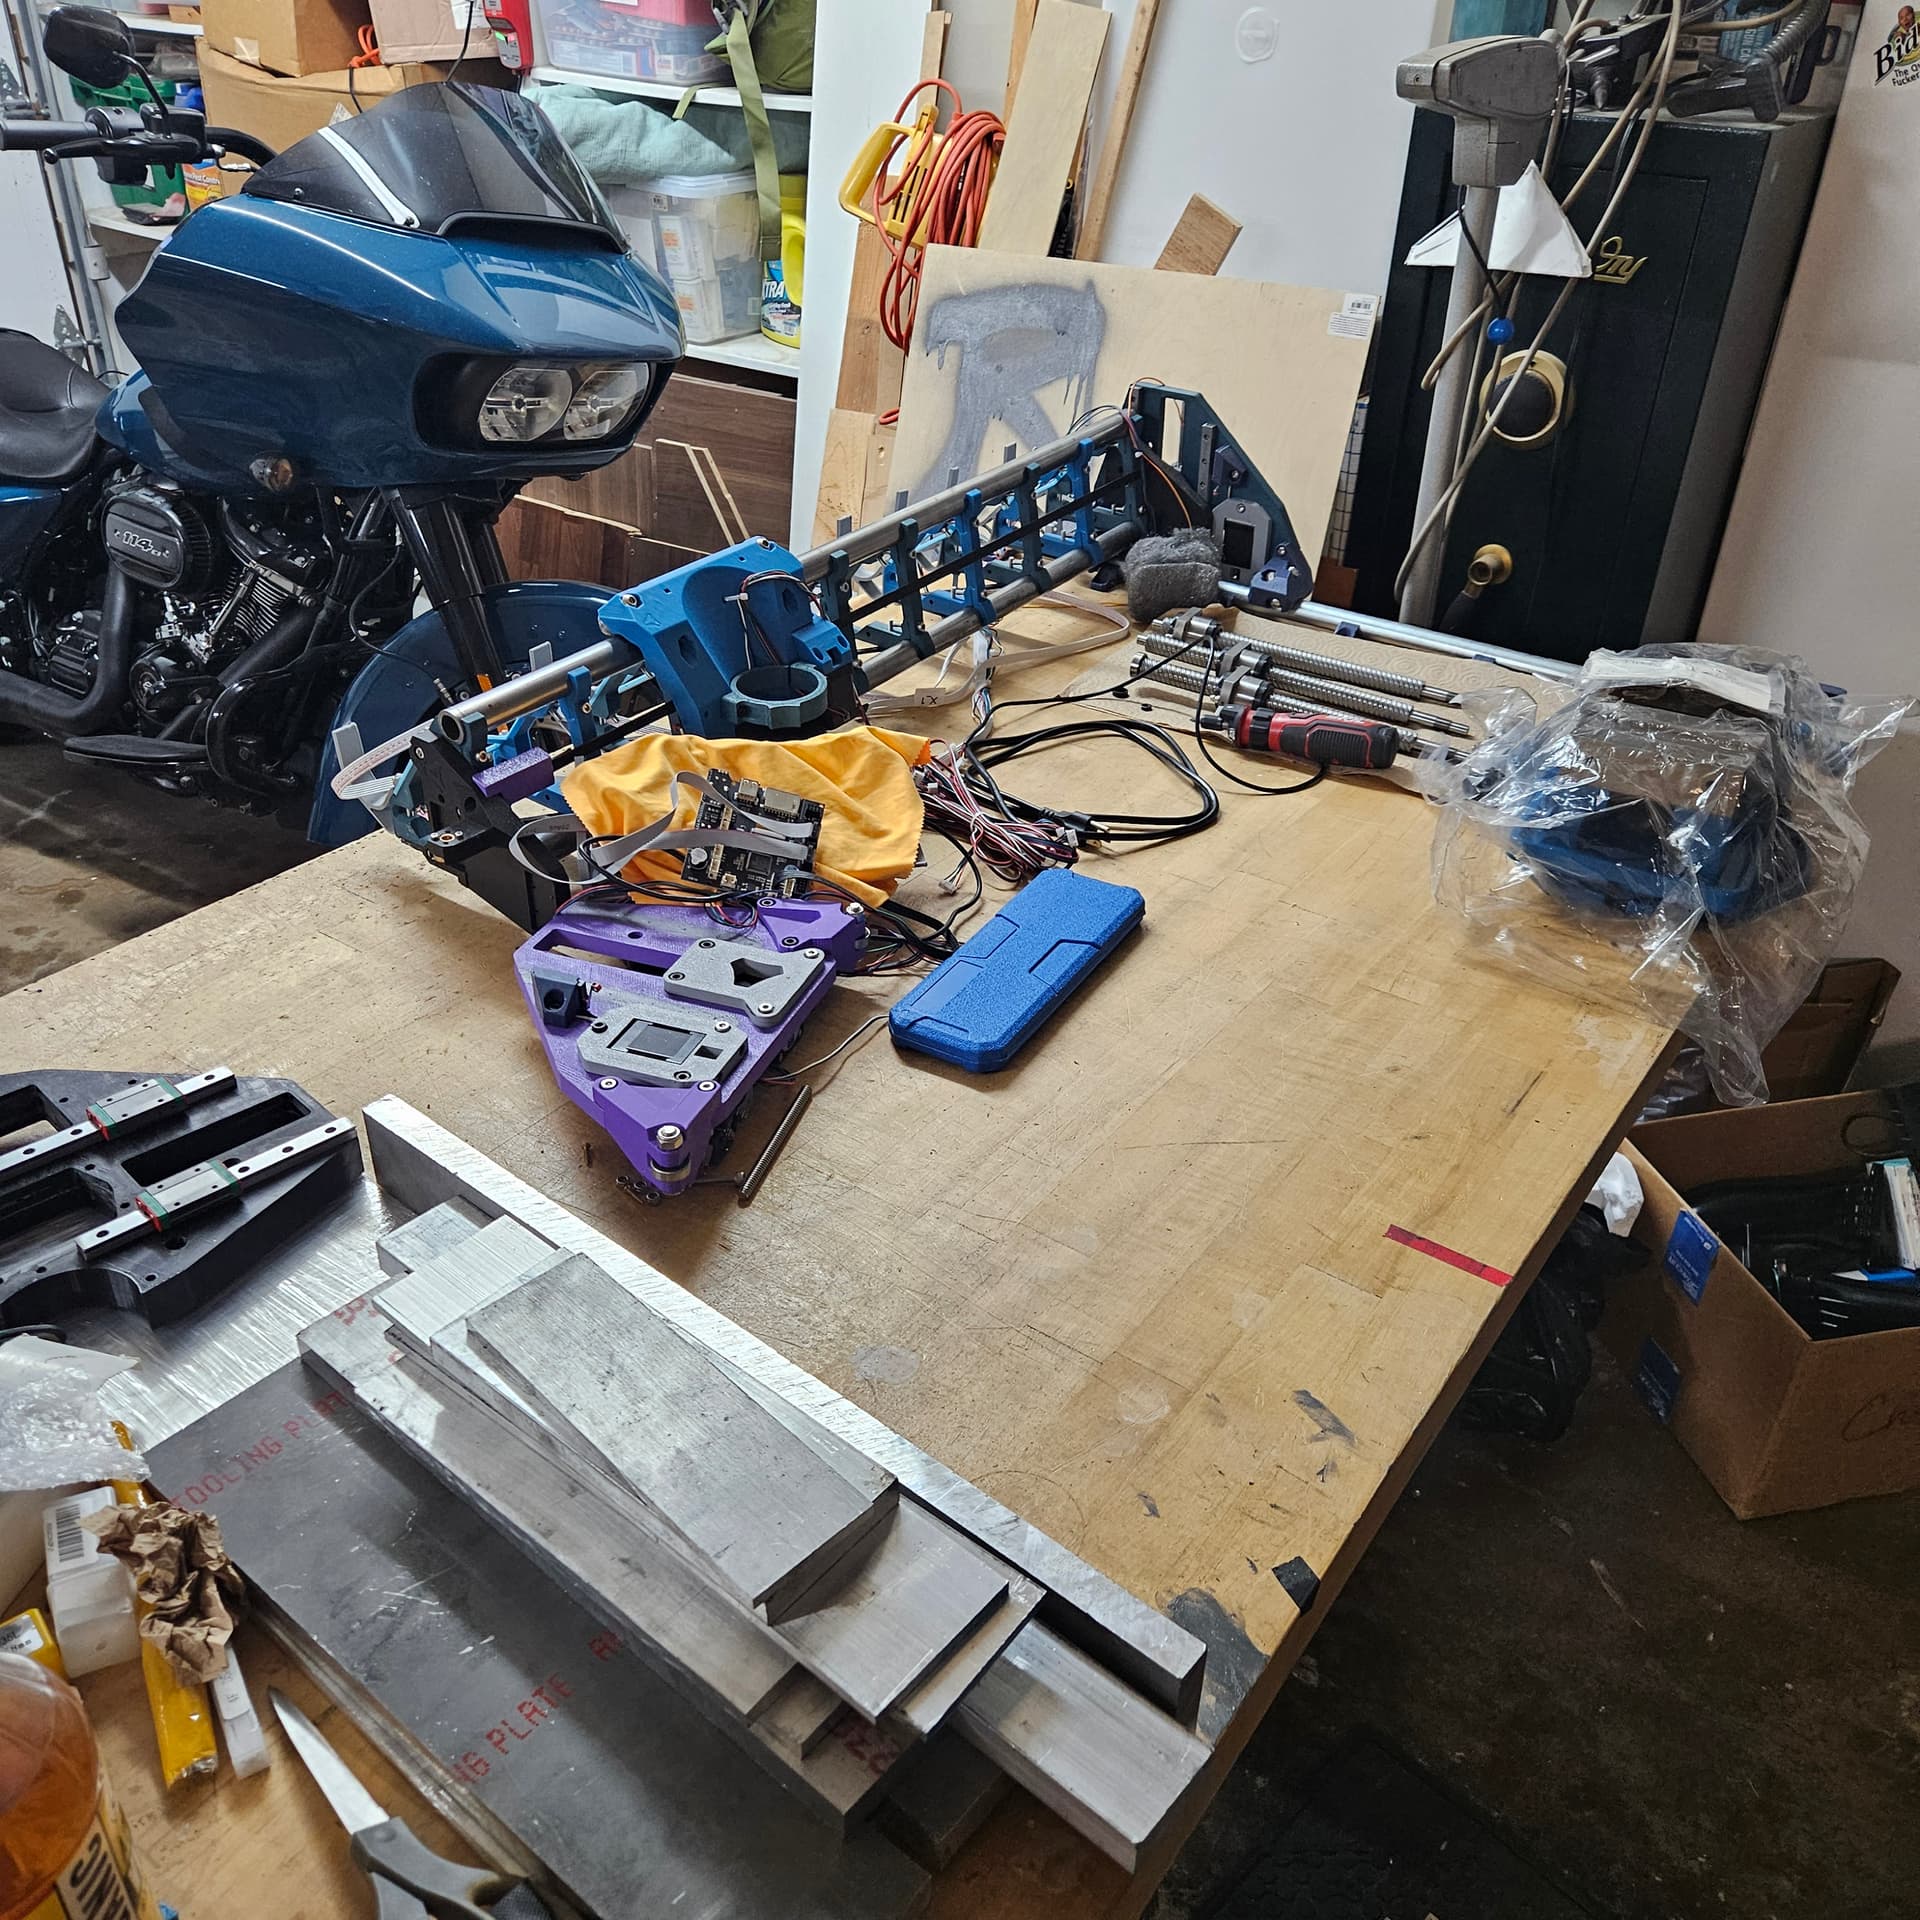
Pretty much been looking like this since last year ![]()
Let’s pick some stuff to start making progress on. We can get through the build together. Before we start doing wiring and controller stuff, let’s get the machine the rest of the way assembled.
What’s the story with the ball screws?
Were you intending to try and upgrade the z axis?
You’ll need different parts to do that. I’m not sure if anyone has a remix for that.
1 Like
I’m going to pick another part that we can help make progress on.
It looks like there are two partially assembled YZ plates for the same side:
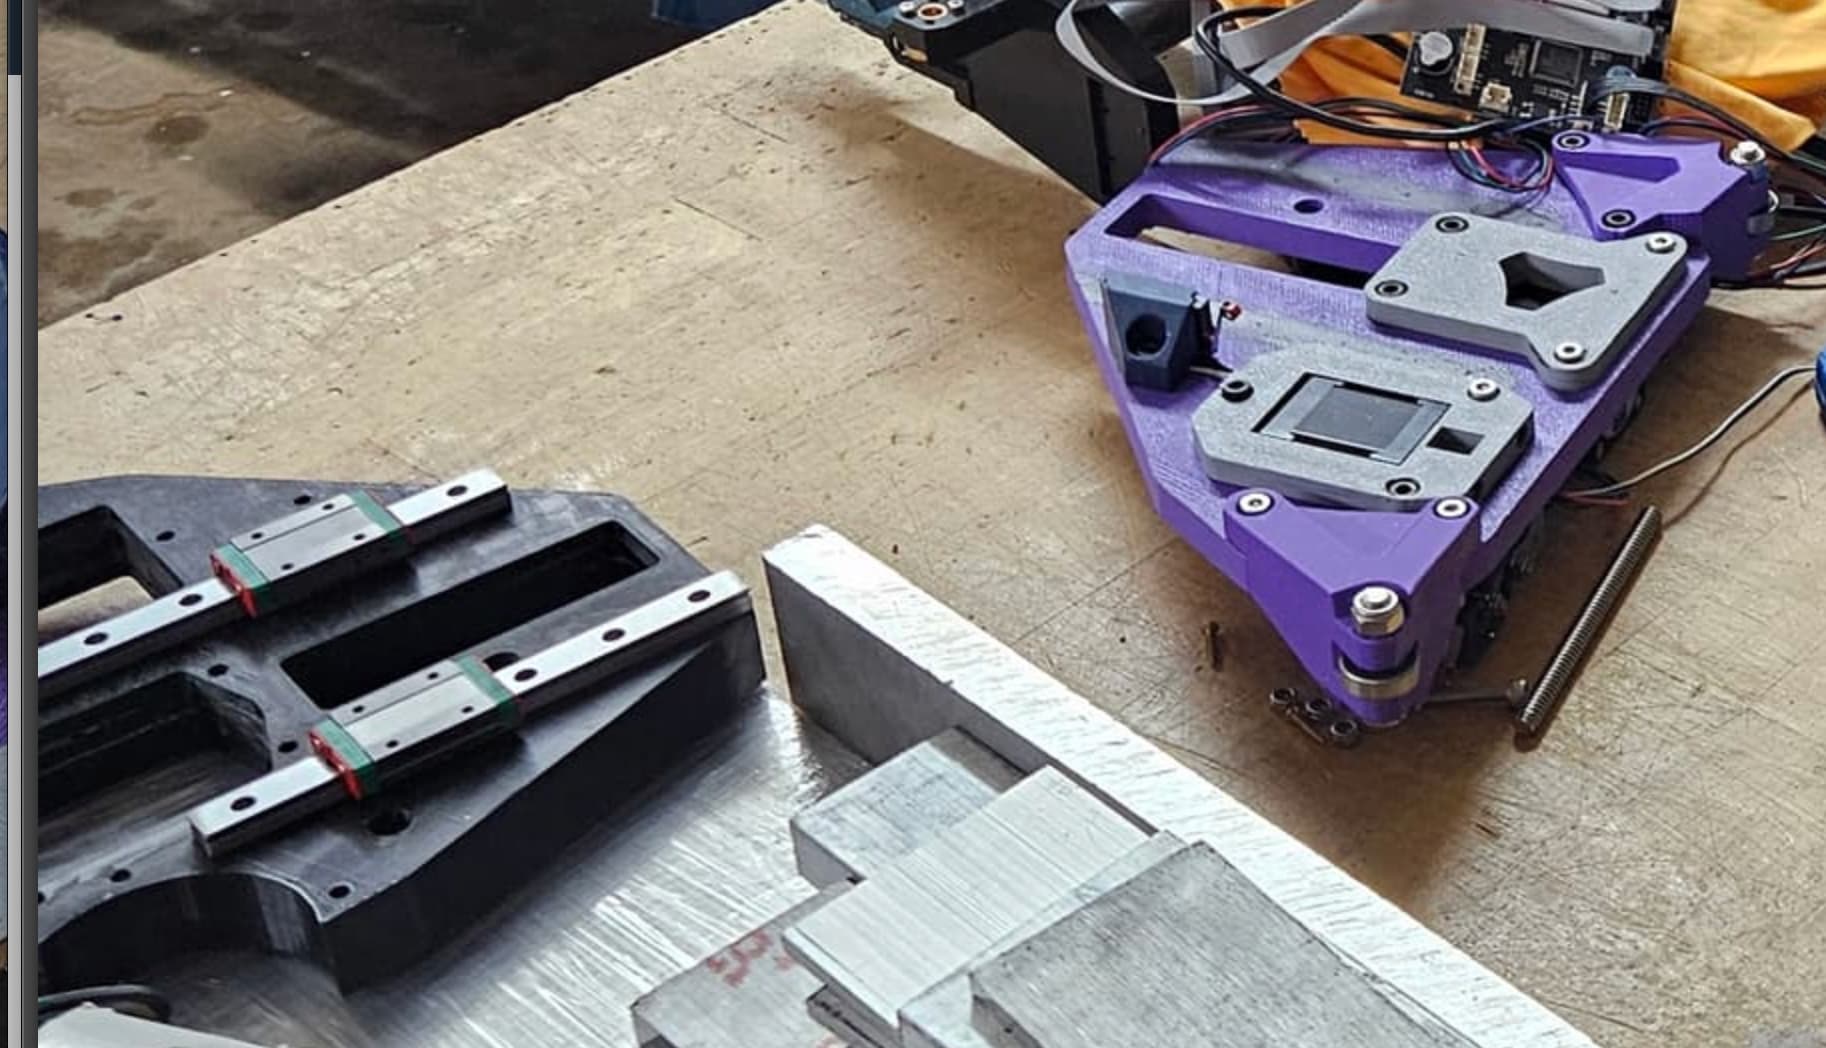
The puple one has a closer view:
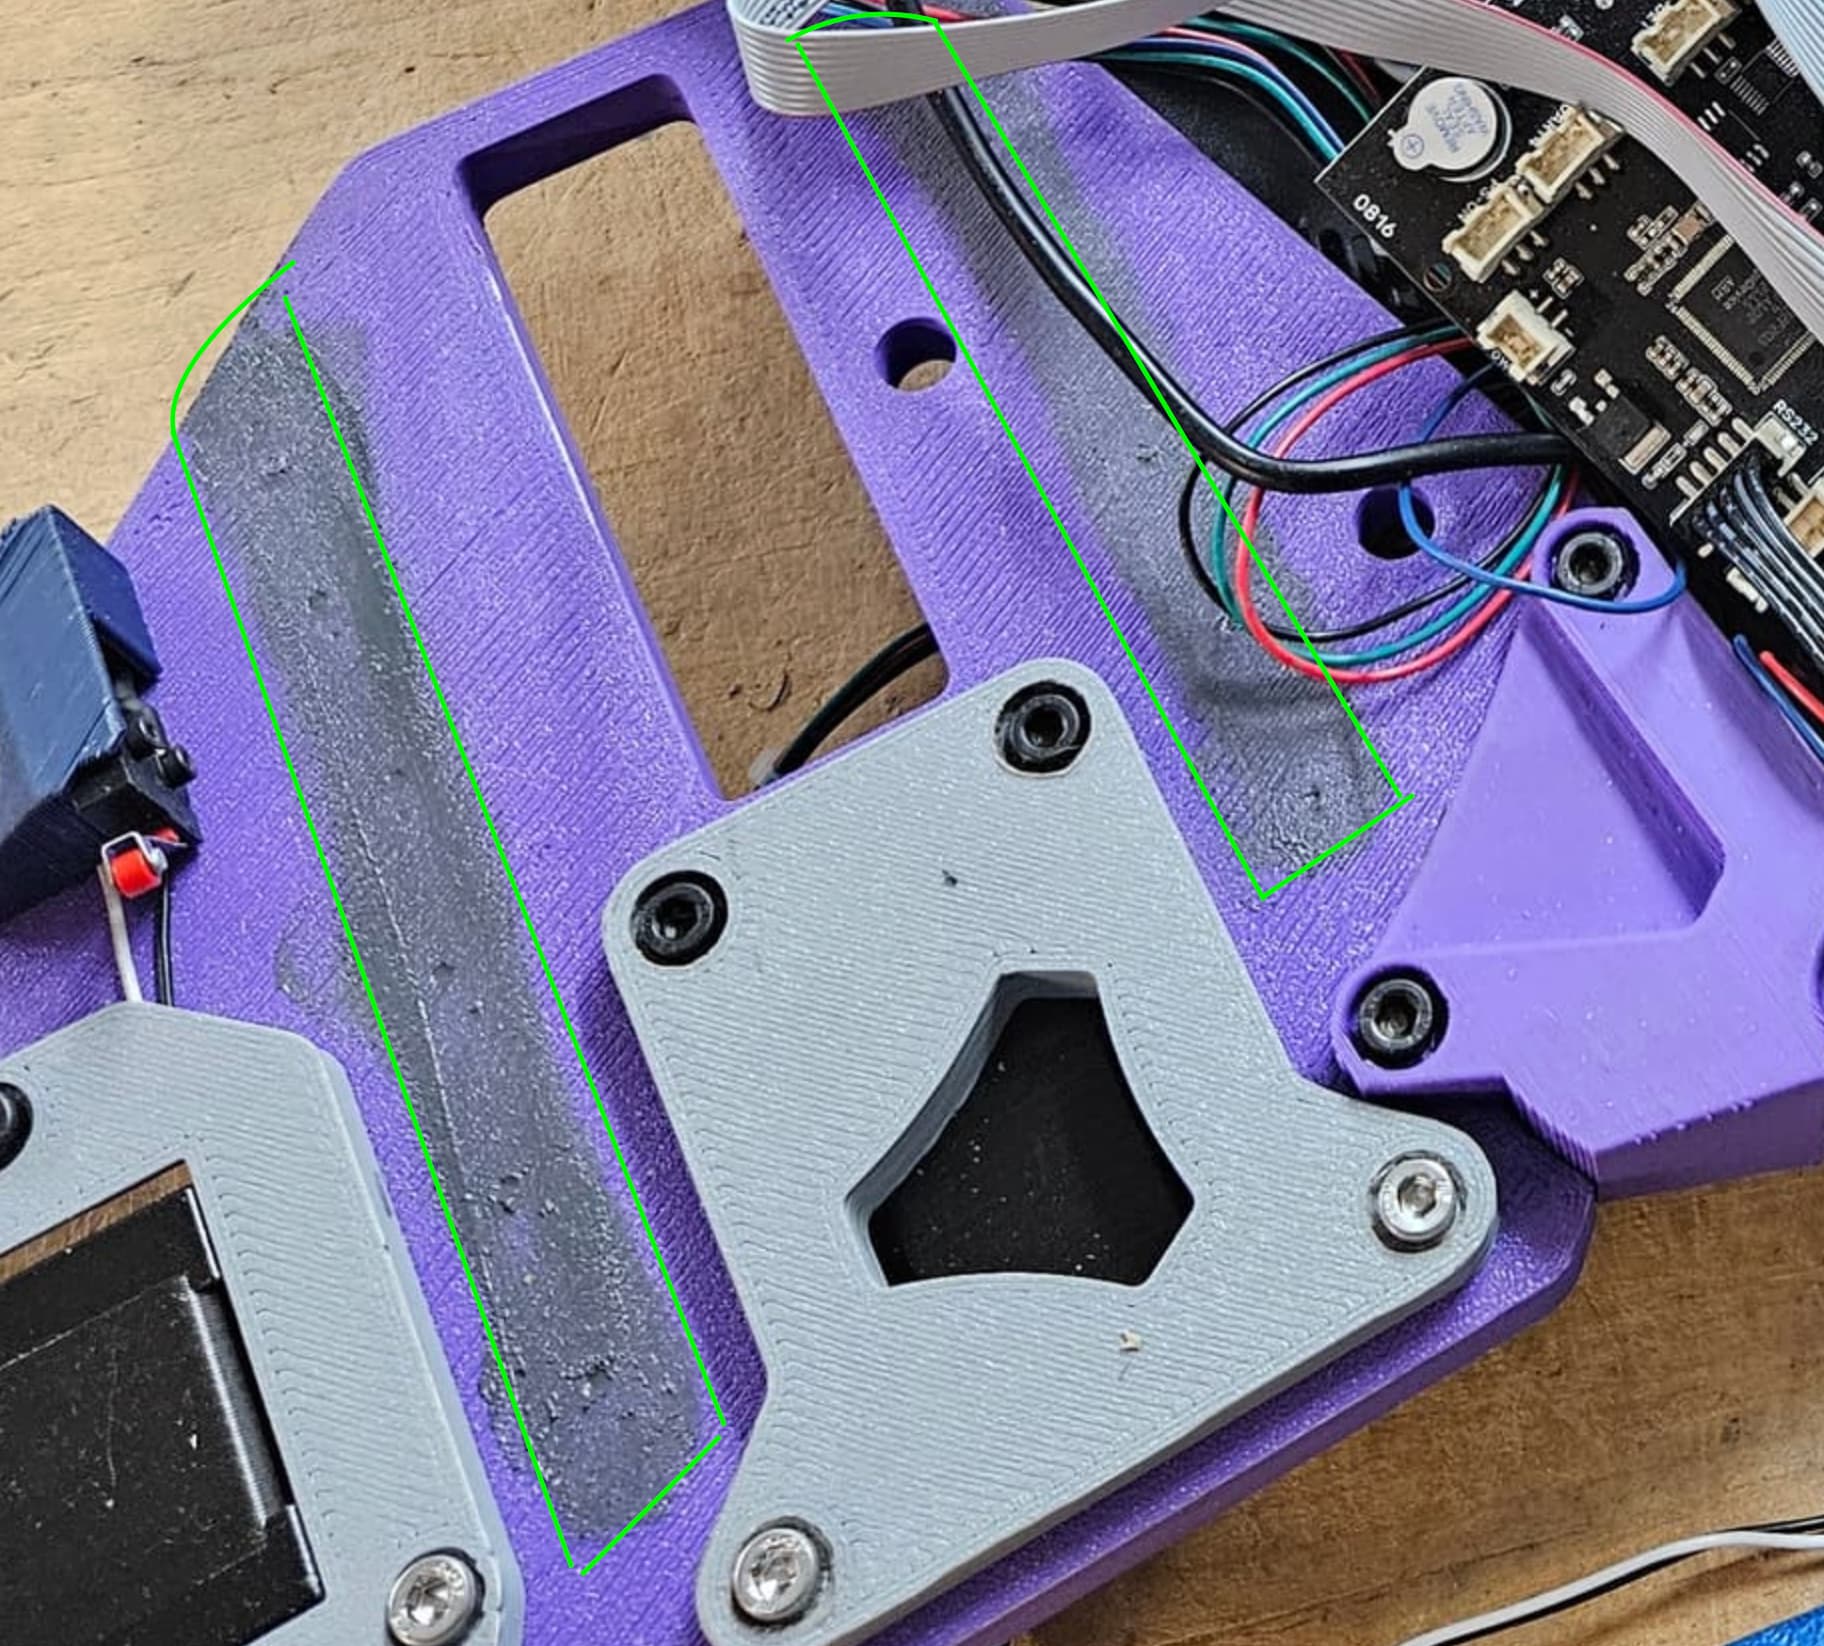
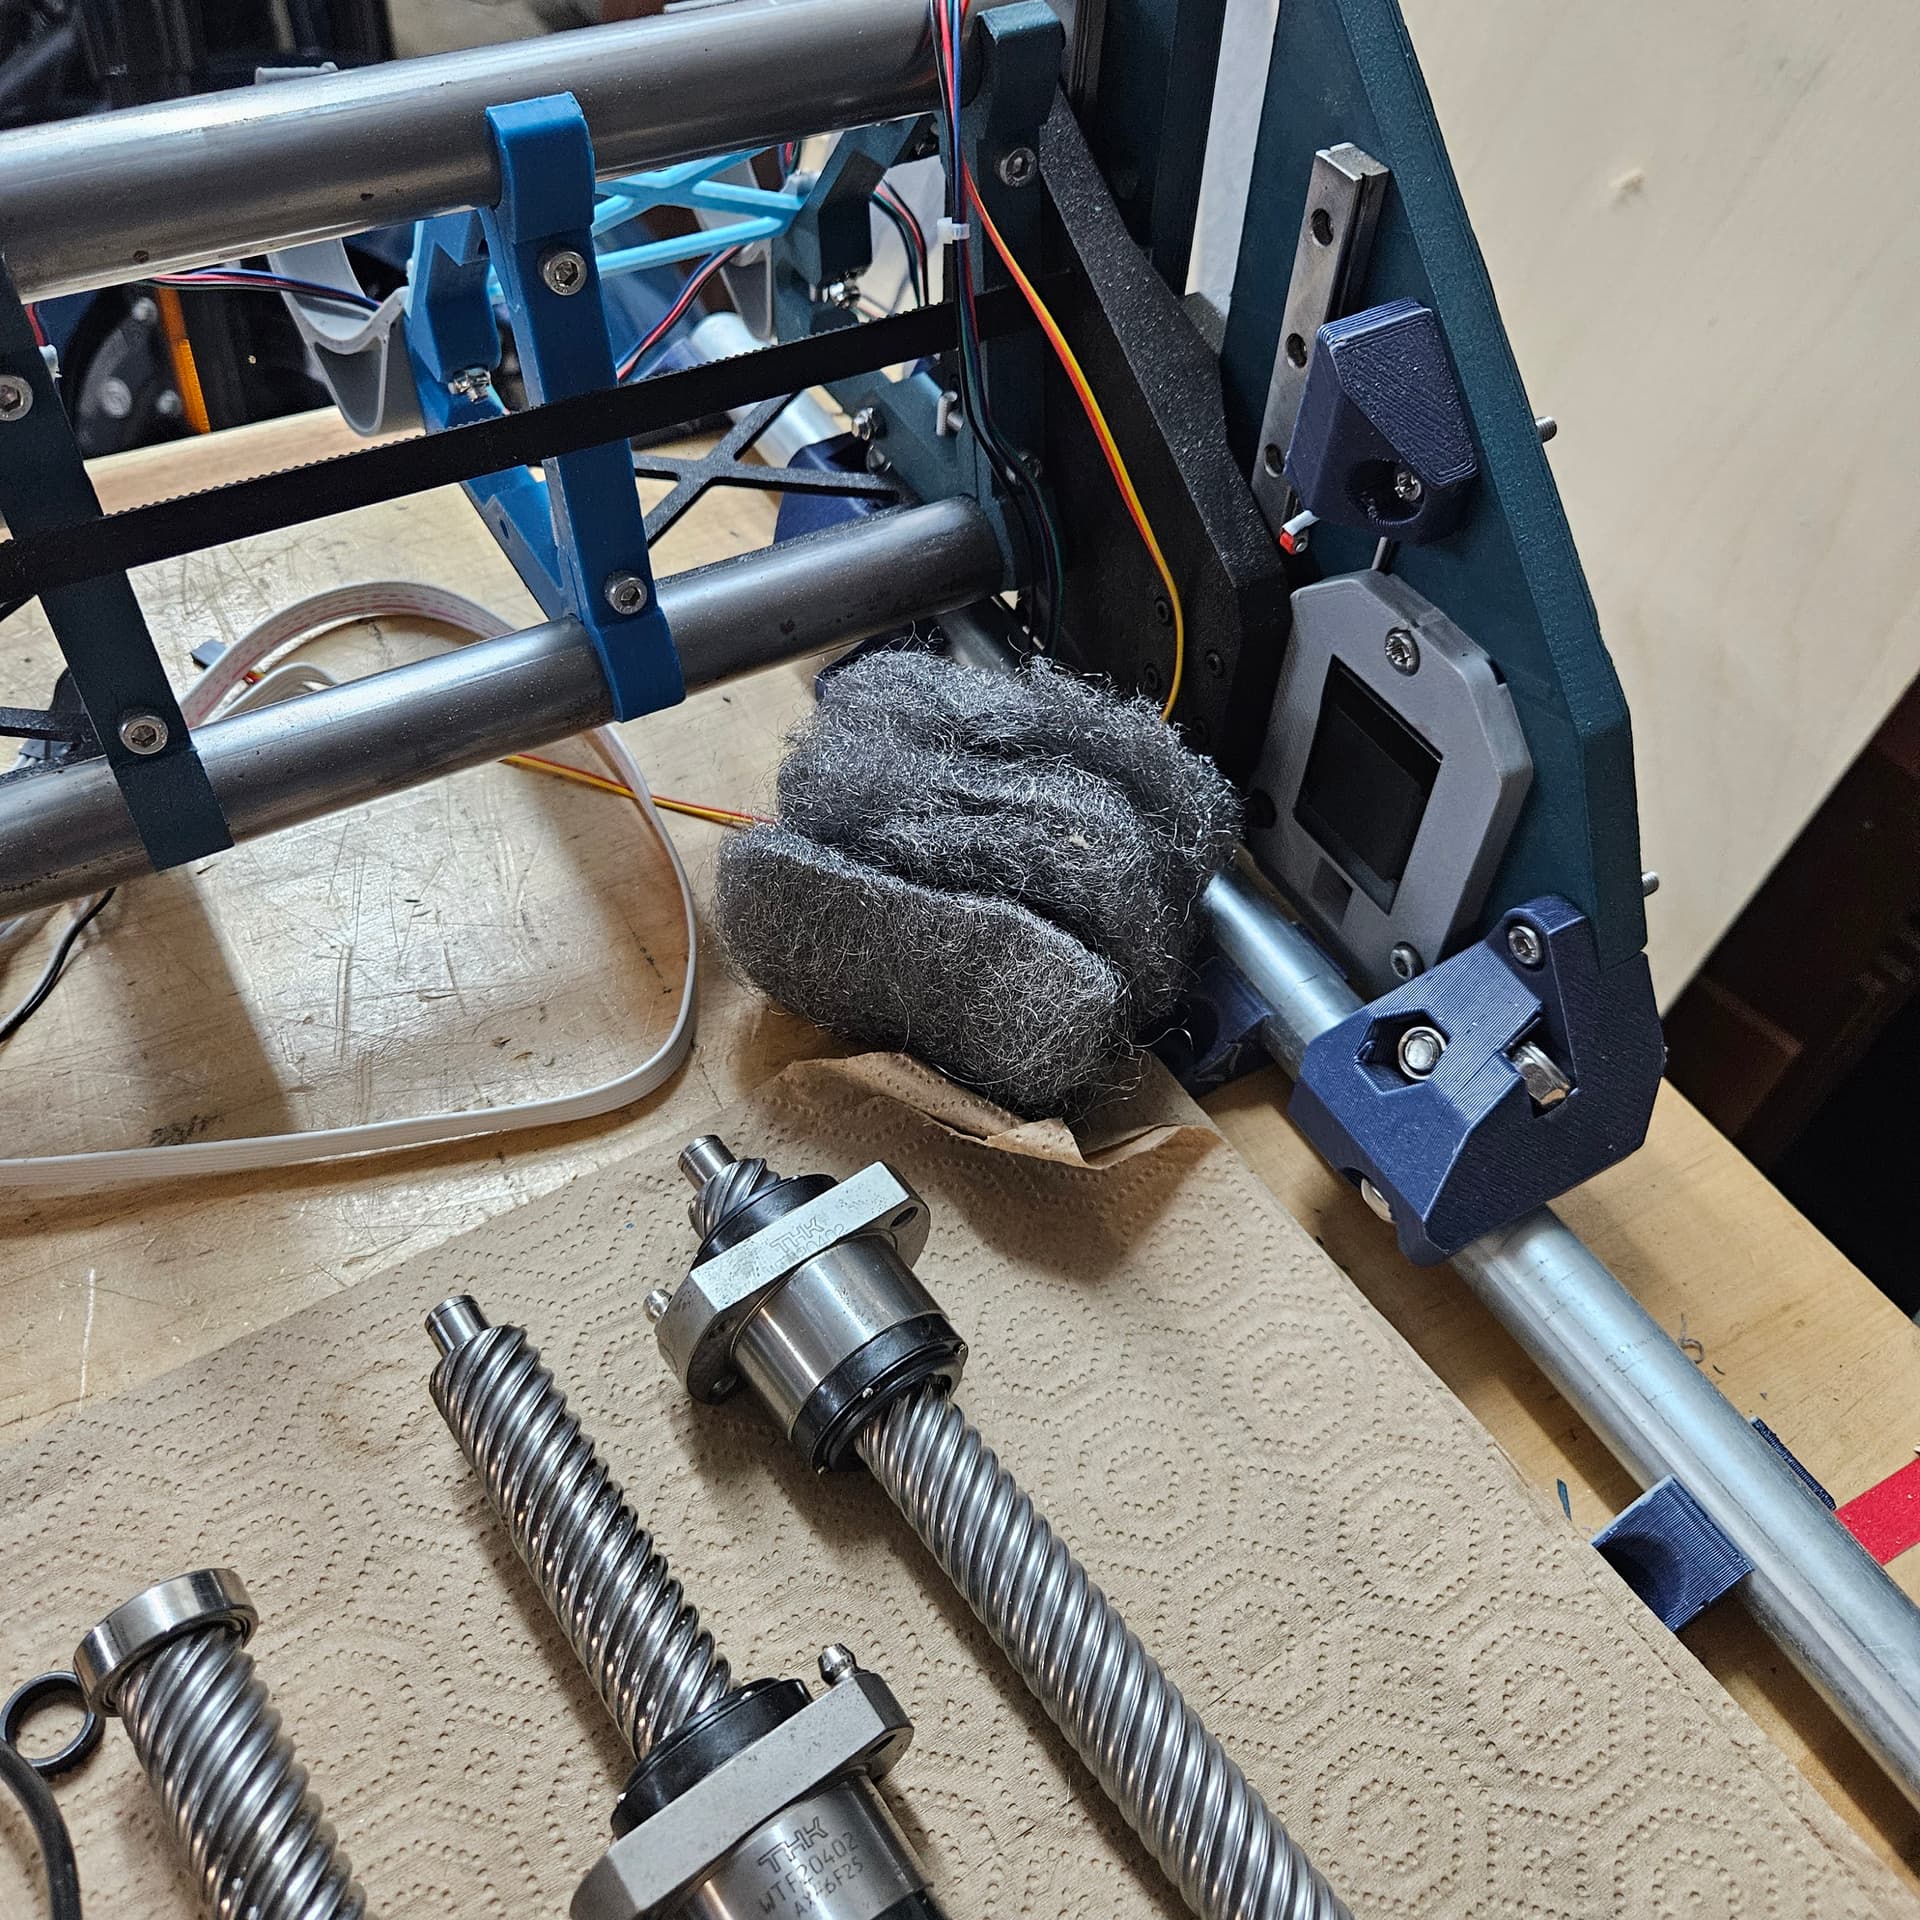
I’ve highlighted an interesting (to me) detail there. This is a printed plate, and the areas highlighted seem to have glue or paint, and the screw holes look like they’re not all aligned with where the print has them.
Can you elaborate on what issues you ran into with these and why there are two partially assembled plates?
We can help get that sorted out/squared away.
1 Like
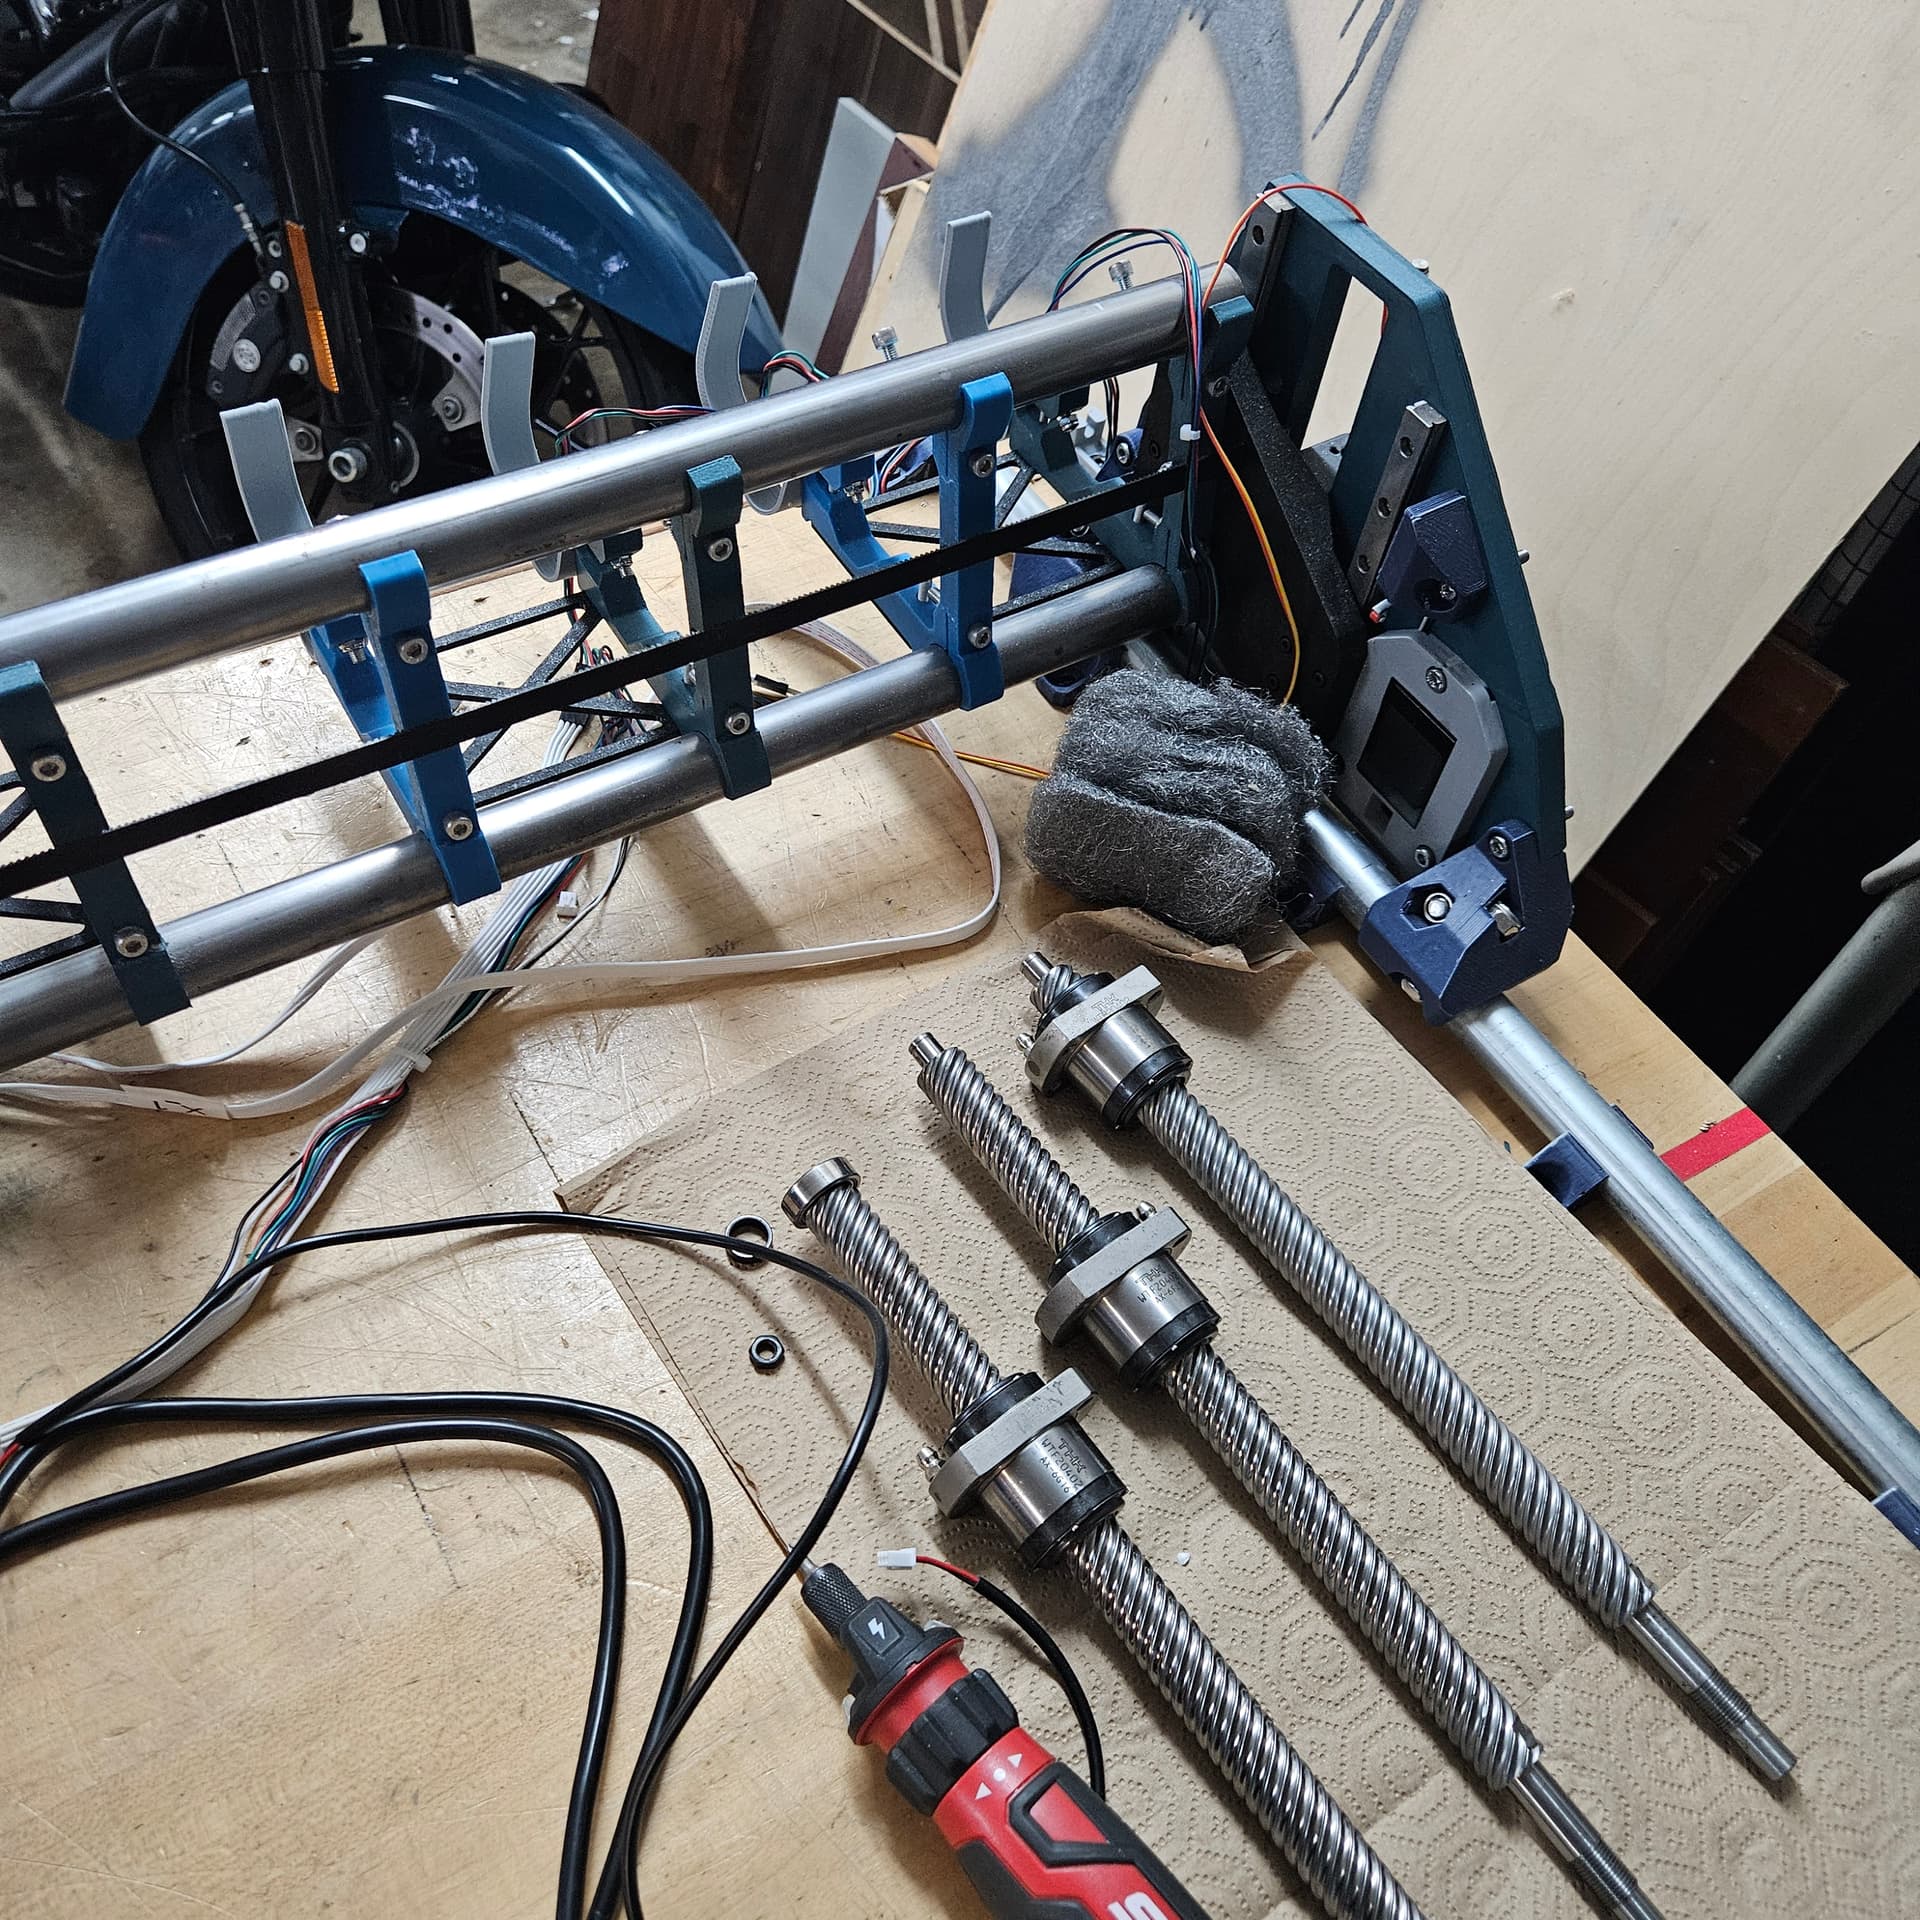
Thanks Jim. I worked on it a lot last night. Its pretty much back together I think. I routed tye wires best I could. Long story short, I just kept getting stopped by things not being right in my head. The line u highlighted was JB Weld. My machine wouldnt drop with gravity like tge instructions said, so I took it back apart and filled in various holes. As soon as this gets running I will swap out the xy plates for wood or aluminum. The black one in the picture was a remix Doug did where u can print it in 2 pieces. I ended up trying to make it extra thick and bore out the necessary areas but just disnt work, so back to the purple ones. Also, I want to make my gantry 4 foot so I will basically be tearing it all down again if i ever finish.
Maxe good progress (i think) last night. I just am kinda sticking everything together with spit and bubble gum just to actually see if it will move haha. Thanks for your concern though… i appreciate it. Cheers
1 Like
The ballscrews I was just cleaning on the table haha. Nothing to do with the build
Outstanding!
Keep giving us details, and pictures.
As you proceed the community will help you get it all finished.
Edit to add:
Did you use the stock leadscrews?
Depending on how many starts you have and whether you’ve lubed the screws and a few other things- it may or may not drop.
Don’t let that be a show stopper, there’s plenty of other things to work on and it’s probably better to keep assembling and documenting your progress at this point.
Anything that isn’t working right or just isn’t right in general, we can find and fix together with you.