That is an old twin head router. There are four bays and cuts two at a time. Cutting area is 10x16. The carraige is suspended from the frame above via linear bearings. The ball screws are driven by X and y servos, with the z being pneumatically controlled up or down. The material is always at the same height. They are being phased out with our new custom built machines. Hoping to get my hands on one of the decommissioned ones…
Yes. The height can be raised and lowered depending on type of product to be cut. Also, start right near tip and gradually raise product during shift to use full cutting edge of bit. Tip gets dull use slightly further up bit to increase life of bits.
I love hearing about big machines! I have not been around many. I need to try and get some factory tours or something. Please feel free to share more!
Not until we get a few test cuts. Things could change pretty significantly still. Most of the guys are making private build threads so once we get close we can release all that fun stuff! That will mean a flood of pictures and videos. They are kicking butt moving fast.
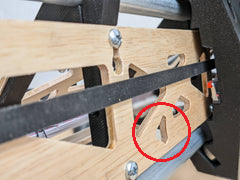
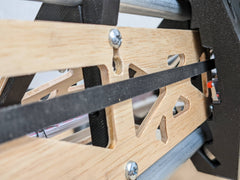
I spy sexy hidden limit switch, cheap conduit instead of expensive stainless… I’m really looking forward to this one! Also, anything skeletonized just looks cool too so that’s nice
I hope the new one makes this feel better. I am quickly getting over the previous build.
I am trying out some vac parts now. Fits 1.5" ID vac hose. If you do get some look for the cheapest or most flexible. I have 3 hoses here and all three are pretty different. I might run to Home Depot to see what they have if I get these parts on the printer soon.
I think the hose/wire hooks will work without having to take the screws all the way out of the lower rear hole of the braces.
Dude, makes what feel better. This is a project that we as a group print, buy some parts, put together and do high end shit with! How do you not feel good about that, then on top of it to continue to improve it, what is there not to feel good about. If you would have heard my wife when she came out and saw my mpcnc after it was built, my wife never finds anything I do interesting, and she stated “Seriously, you built that, WOW!” That is on you as much as it is on me, because without your part, I would not have what I have! Congrats!
Maybe I am just misreading your post, but man, you have alot to feel good about!!!


 I have got to the point where I need some of the parts in order to progress with the beta build.