Could you use an ADS1015 or similar?
E.g.
There’s plenty of quick and easy prototype modules in their or Adafruit’s product suite. And no-name clones of them at lower cost.
Could you use an ADS1015 or similar?
E.g.
There’s plenty of quick and easy prototype modules in their or Adafruit’s product suite. And no-name clones of them at lower cost.
Thanks for that info. Definitely something to keep in mind for future projects. At this point, since I have a working solution, I need to stop buying things.
Had a really good laugh at this. I’ve been there so many times and needed to stop buying things.
![]()
I bought a couple displays before the one I settled on, then a couple after (well same display but paired with an ESP32). I had bought some toggle switches originally but didn’t end up going that route. Bought some breadboards that I could put together because the ESP32 devkit doesn’t fit on a single one. Bought a battery and some other random things. Almost bought a different joystick to try. I probably should have stopped buying things awhile ago. ![]()
Oh well, it’s fun and I can use the things I’m not using in other projects.
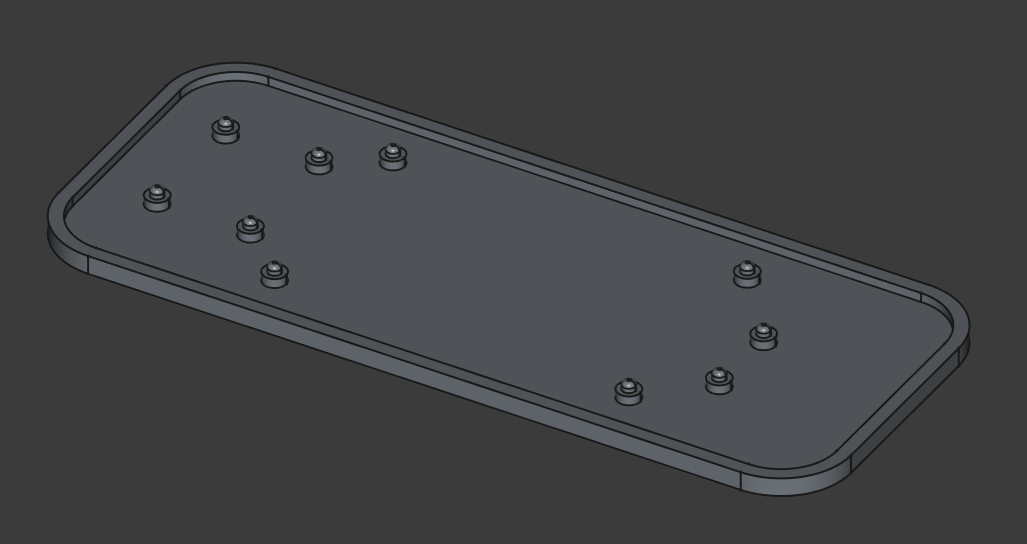
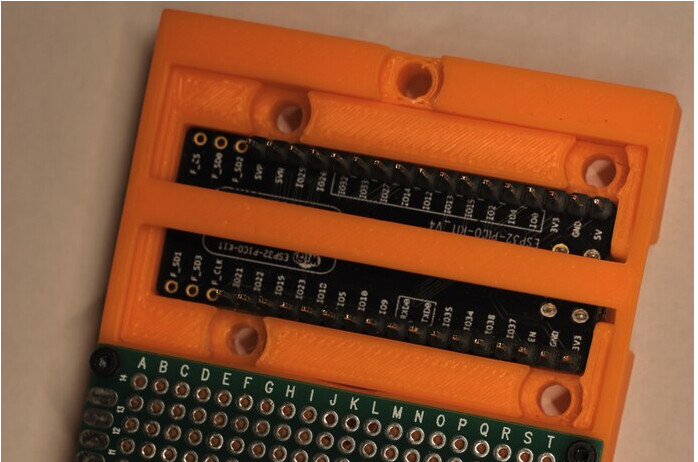
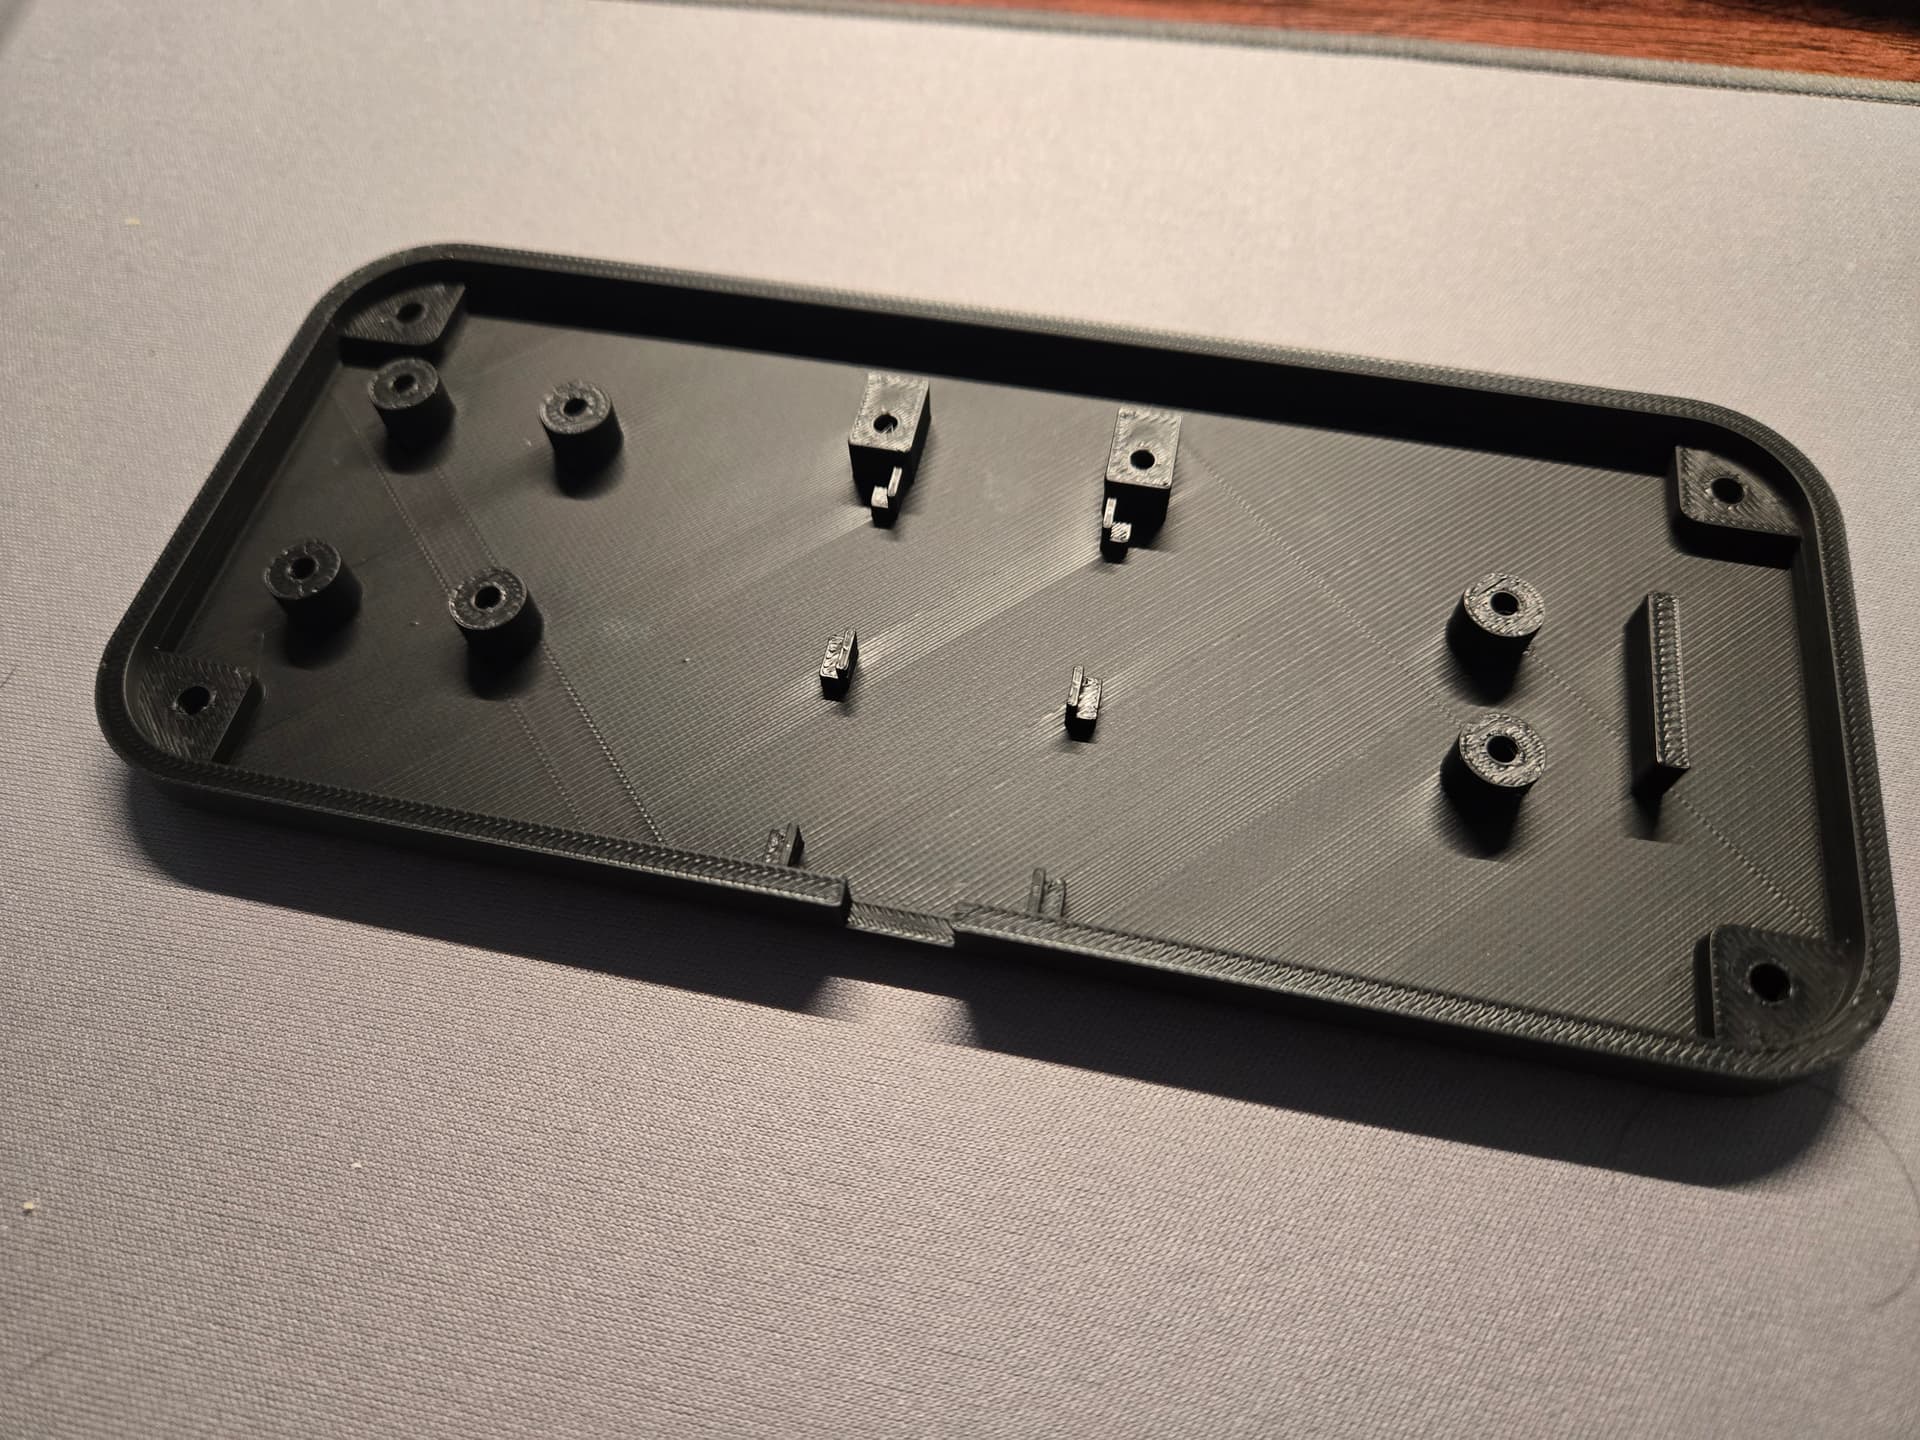
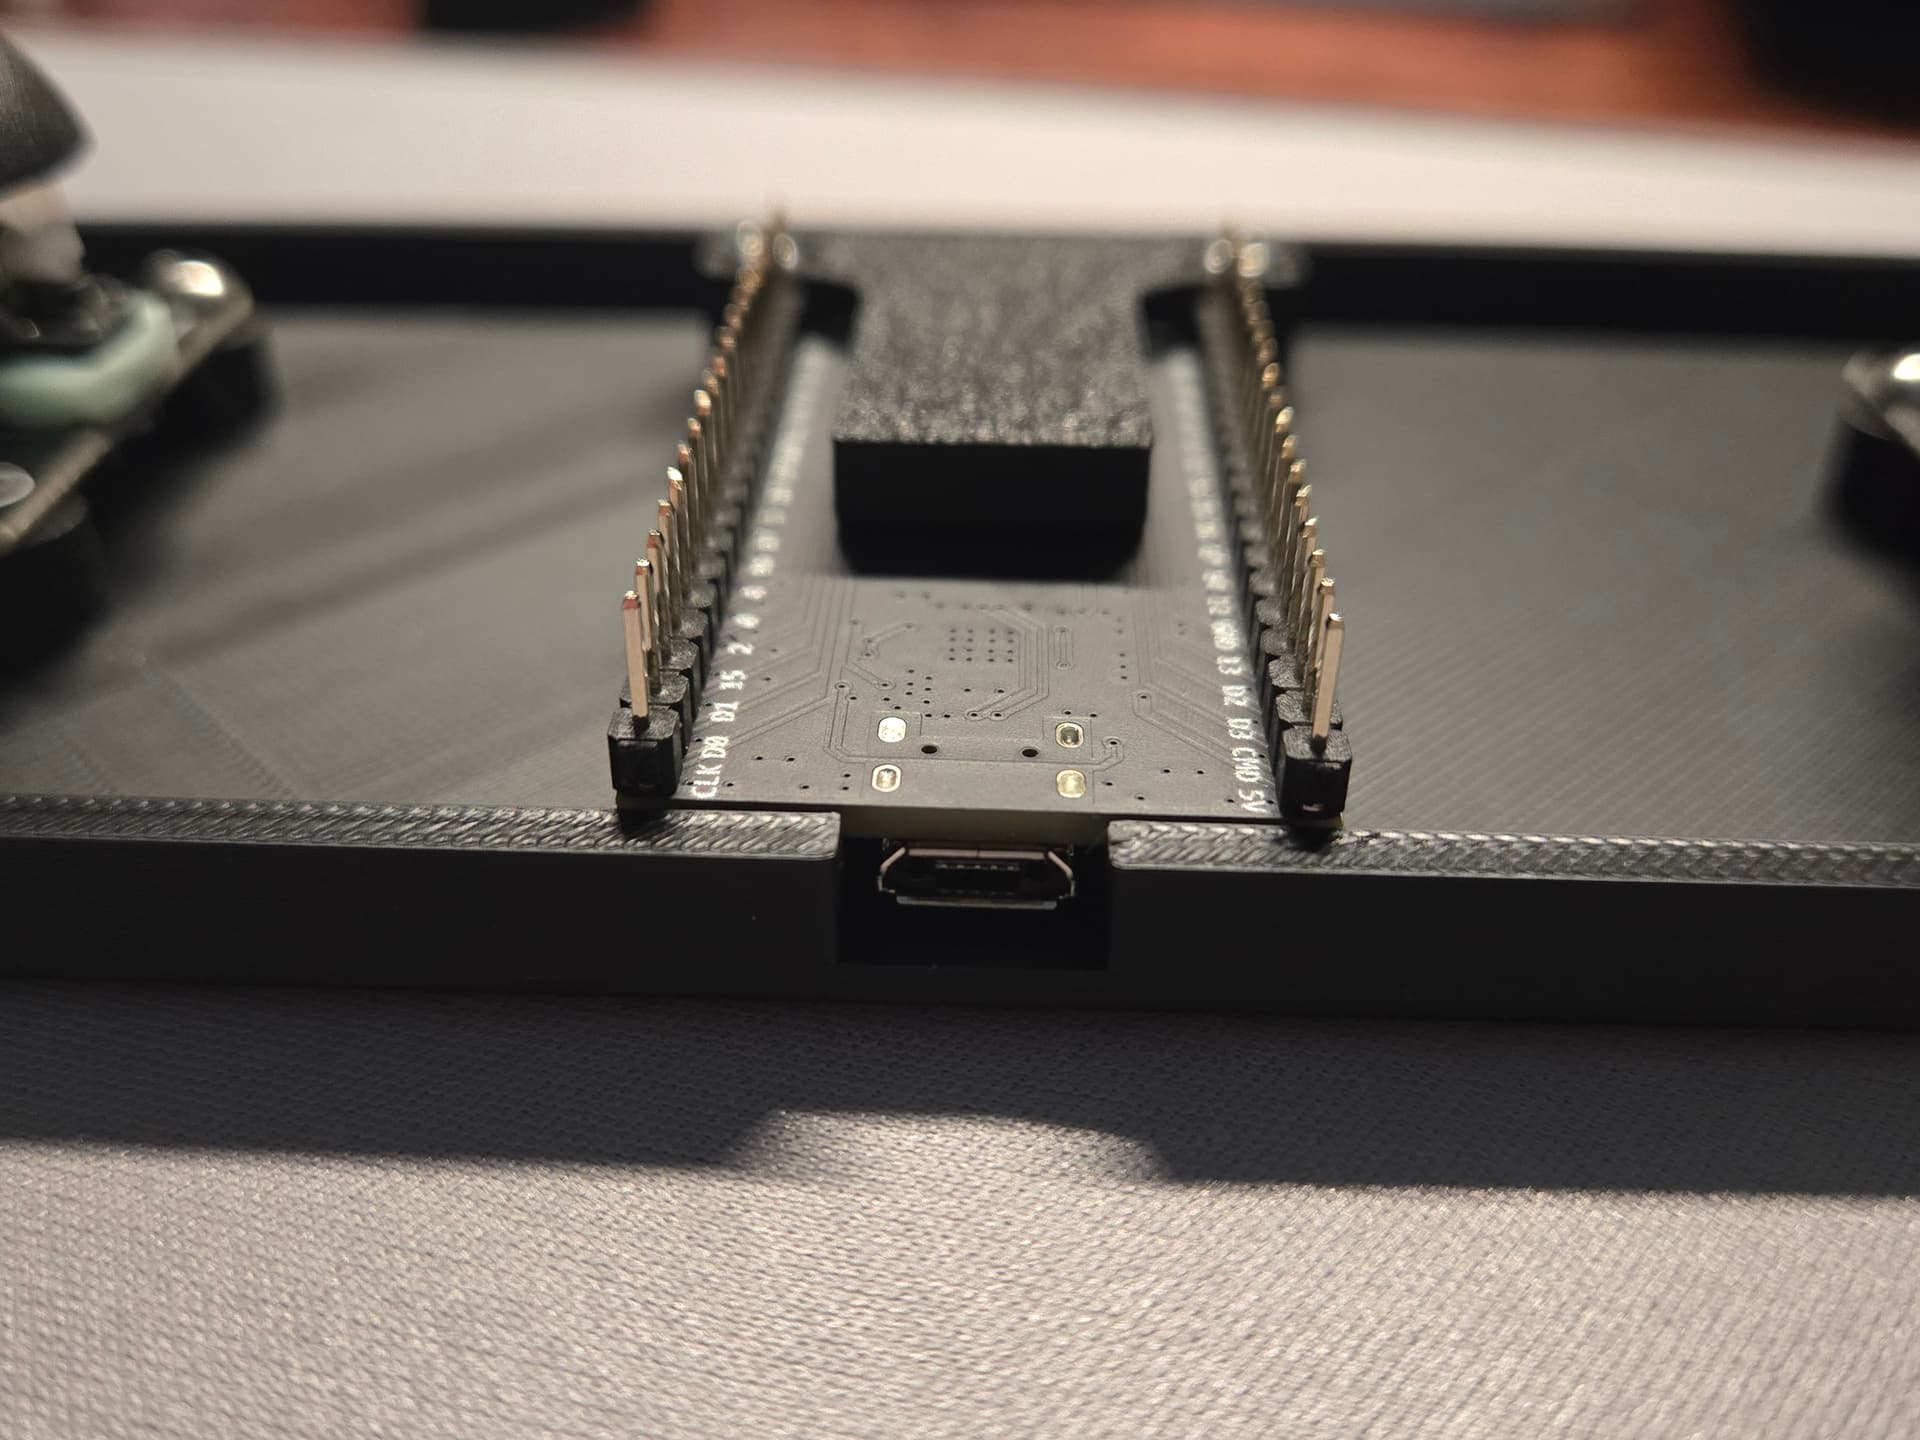
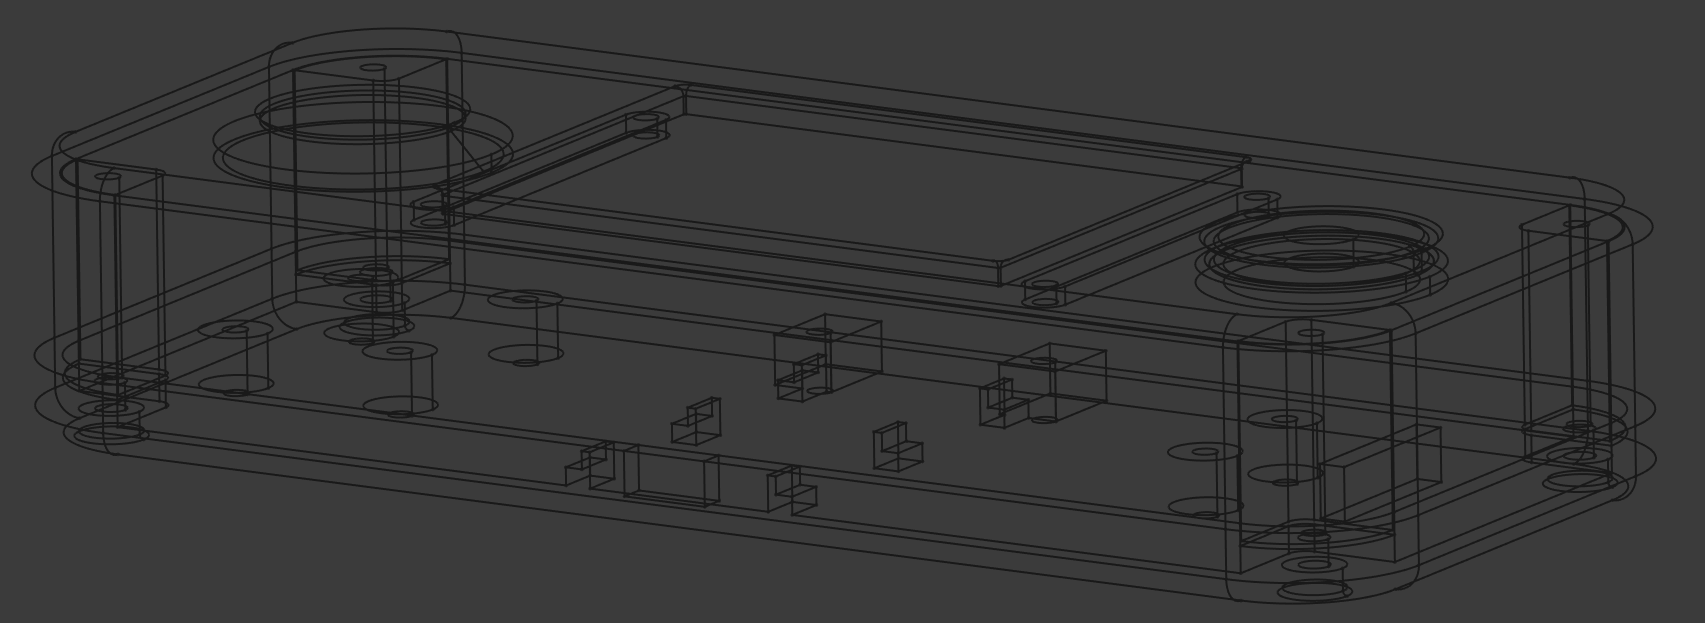
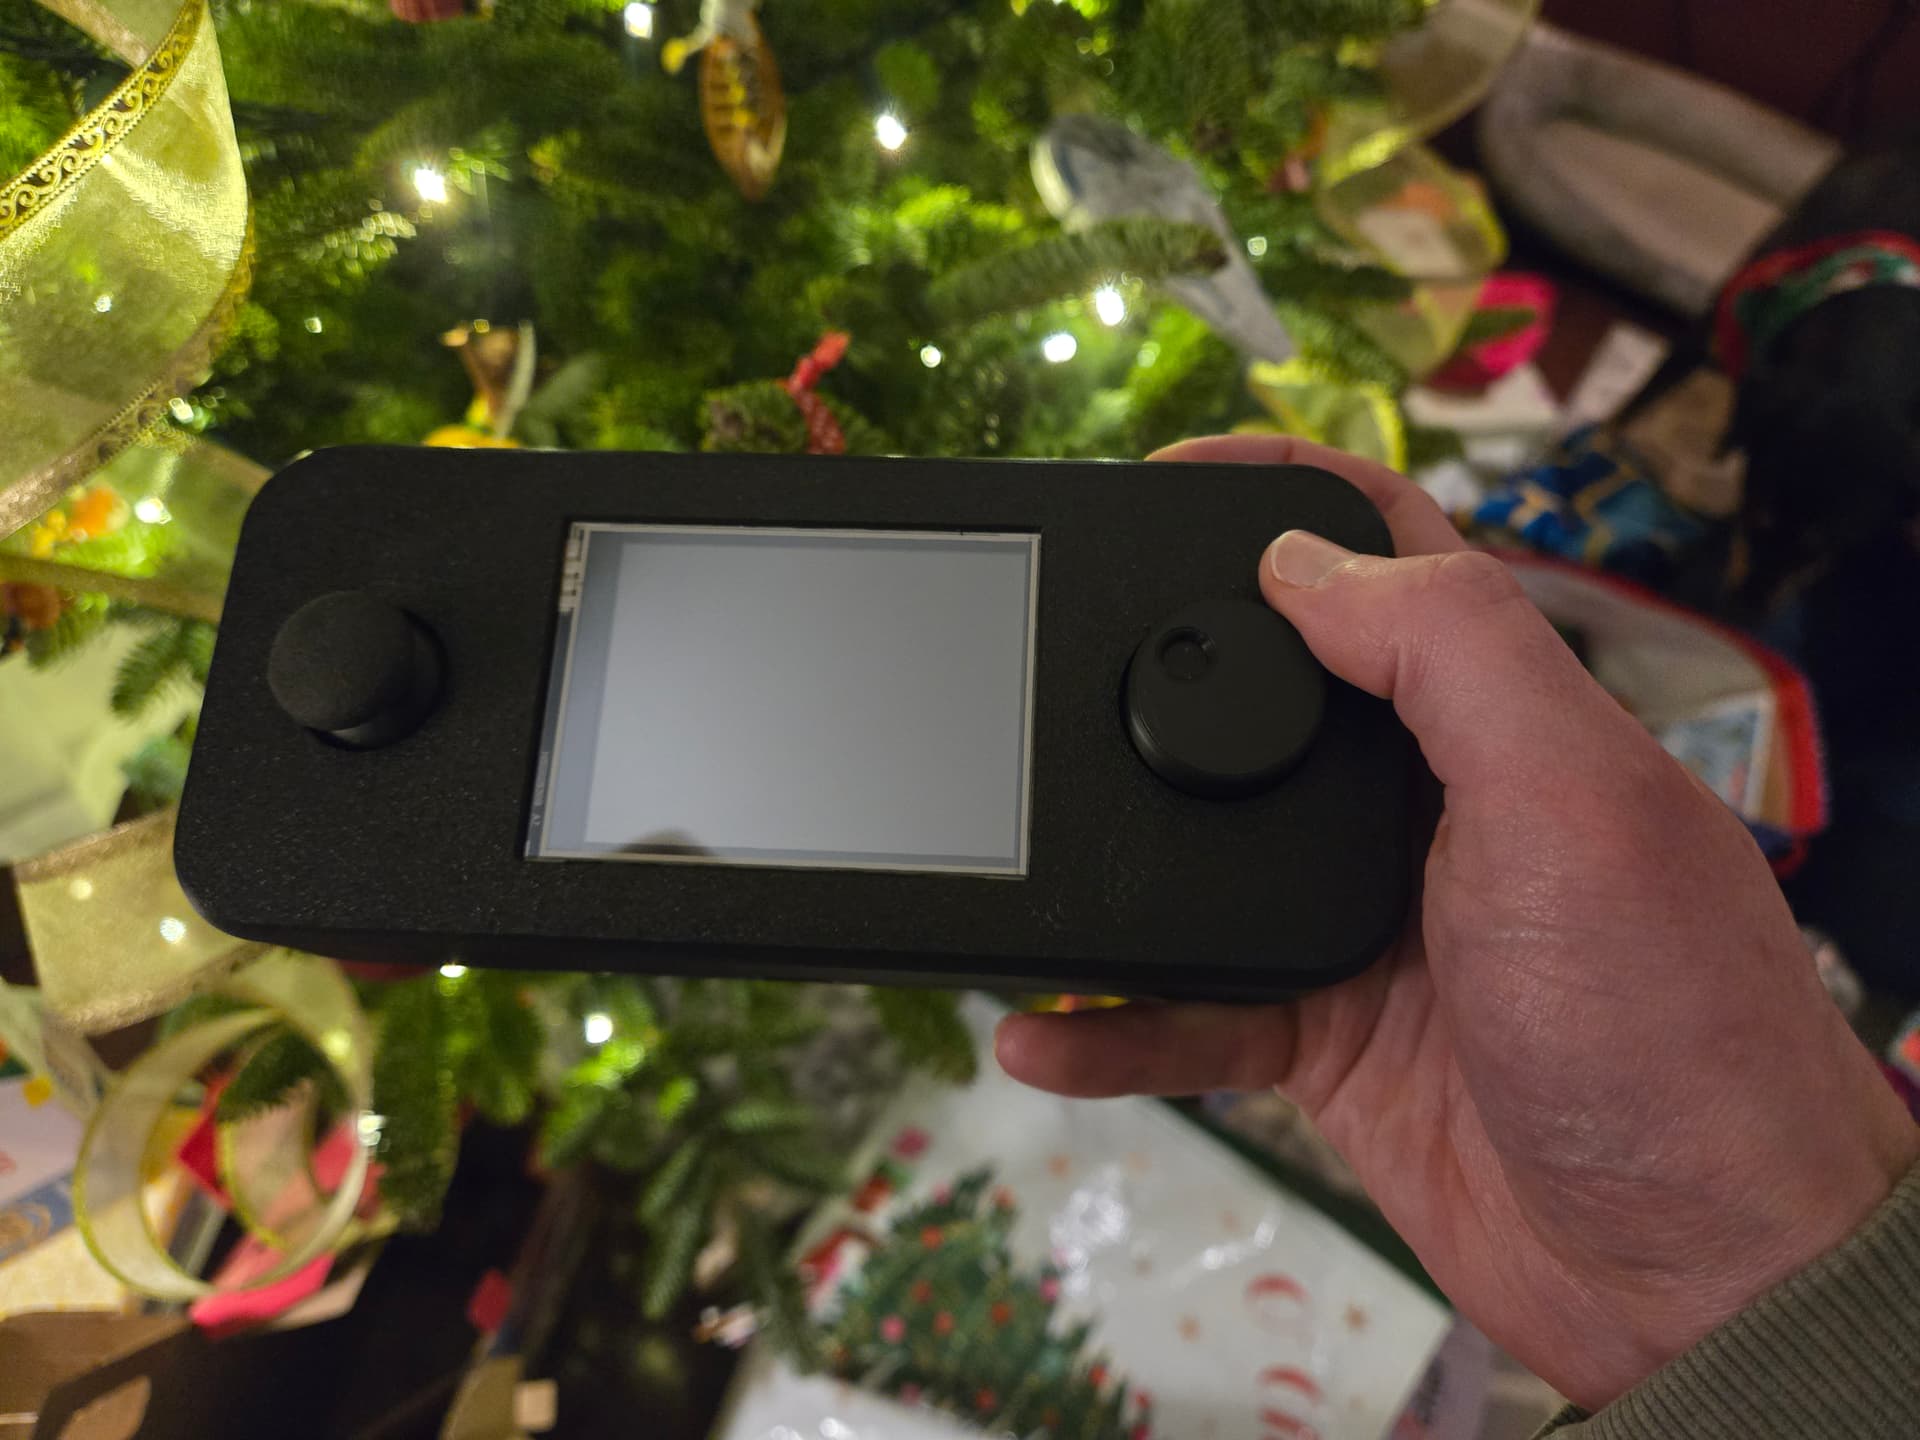
Working on prototyping a case. I think I can pull it off in something like this. I think it will have to be about 35mm thick to put the ESP32 behind the screen. This is 170mm x 70mm. The screen will mount to the top and the rest to the bottom. I think I can mount the ESP32 upside down in some kind of bracket leaving the pins open. It will be powered via the USB port accessible from the bottom. May add a battery someday. Made a knob for the encoder so it can be controlled with just a thumb.
I’m doing this in FreeCAD 1.0. My CAD skills are not great but so far so good. This prototype is just for checking sizing and position. Those little knobs will become screw holes and the knobs for the screen will be moved to the top.
For the ESP32 mounting, thinking something along these lines since the ESP32 devkit doesn’t have mounting holes.
Which I saw here:
Dev board mounting - ESP32 Forum
That is real nice.
That looks great!
Yes, it is.
I can’t wait to see how this evolves next.
Looks awesome!!
Ok, now you are going insane!
Have you seen this screen? Not cheap but looks like it has plenty of GPIO
What you’re doing is brilliant.
It sure looks to me like you’ve very much got a handle on what you’re doing.
I hadn’t seen that one but I’d have to change a bunch of things to potentially make that work.
I’ve never designed a case like this before nor done half of what I’ve done for this project. I also think I underestimated how helpful it is to have a new 3D printer. Iterating on my Ender 3 would have been a painfully slow process. Going from my brain to reality is going way better than I expected.
That is such a cool feeling. Seeing something in real life the first time after a bunch of CAD is kinda mind-bending.
Dude, that is sharp!
Ok quit finding other things!!! (being selfish here, bahahaha). I want to see him finish what he has, lol
Probably going to take a couple iterations to get it right but I’m printing a top right now.
Edit: Saw something was off and cancelled it. Need to make a minor change. Will get back to this in a couple days.
Some minor tweaks to make but getting close. I wish I could center the visible part of the screen but I would have to make it wider due to constraints from other parts. Thought about covering part of the screen but that would mean I would need to make it a bit thicker. I will probably just call that part good.
Now that you’ve done the hard part, putting a Gameboy emulator on it will be a piece of cake!
Trying to figure out screws. I was using M3x6mm fine thread screws because it’s what I had. I got some #4x1/4" wood screws because I thought the coarse threads would be better for plastic. The M3s work fine and the point of the #4s means I need to make some things thicker. And while they are similar size, they need different hole sizes.
Any thoughts?