The ZenXY looks interesting. I just need to find a nice table ![]()
if it is just glass, I use Kerosene, if hot water and soap do not work. My Longer printer came with a coated glass, that one day ripped up with my print. After working for hours on that glue, kerosene removed it promptly. (I wish I had thought of it prior!!)
Oh, I did not use anything until that top layer came off, but with the glass exposed, I now use Purple Elmer Glue Stick. It works GREATT!!!
I came here looking for a large CNC. I want a lowrider v3 and a ZenXY and a MP3DP.
Not sure on the MPCNC.
I am getting a small piece of window glass cut right now and I am going to try out my ender 5 plus for the first time in a couple of weeks. It is in a much warmer room and there isn’t any drag.
The Primo (MPCNC) is a nice machine, but if you build a LowRider 3, you likely won’t miss it. I have both and am starting to split jobs between them based on some admittedly arbitrary criteria. I could do everything with the LowRider, but the Primo does some things better and faster.
The ZenXY is a lot of fun, and I’m enjoying building the MP3DPv4, even though I really do not need another 3D printer.
The ZenXY was a fun project to use the CNC with. I didn’t really NEED the CNC to do it, but it was a good project for it. Similarly, I’ve got 3 generations of MP3DP. I built a V2 (I3 look-alike) as a CNC project as well, and was actually pretty happy with it. It’s got a new home now. The V3 (aka “Repeat”) was another CNC project, but the V4 is mostly CNC free, being aluminum extrusion frame. Just the bed support is CNC milled so far. I will be milling a power supply and control board support for it, but those could easily be done without.
The CNC, like a 3D printer is a tool to make other stuff, and it kind of makes sense to get the tools in order. For that reason, I’d probably say the CNC first…
That said, the ZenXY is a fun and inexpensive project and will familiarize yourself with how Ryan puts these projects together. As such it also makes a good first.project.
2 Likes
That´s good advice on the ZenXY as starting project and that’s how I am thinking.
What´s your experience on the 3 different generations of the MD3DP? What version do you like the best? And is the print quality high?
I built v1 and v2. These have always been projects, compared to the MPCNC and LR, which are much more like kit products from Ryan. The v1 and v2 both went together well and printed well. If there were any problems, you had to work it out on your own. The v3 and v4 are a huge improvement in speed and quality over the i3 style in v1/v2. The bed leveling is only in v3/v4.
All of these have been used by Ryan to print parts in his farm in his garage. All the MPCNC and LR parts for the last several years have been printed on these MP3DPs. Ryan is careful with his money and time. He cares about speed and quality (they are putting food on his table). Each one has had several builds and each build has had thousands of prints.
But Ryan is also an expert printer user, so he doesn’t experience all the possible mistakes we could make. The risk of the MP3DP is that you will have to learn and try and debug issues yourself (you can always ask for help here, but we aren’t in the room). If you enjoy that, then you will probably get a very good printer for a good value.
Hi Jeffeb3,
thank you for your reply. I see what you are saying about the kit products and the diy take on the MP3DP.
I have a problem on my ender 5 plus, I am printing PLA at 210 degrees C and 60 degrees C on a carborundum glass plate from Creality. With blue painters tape the first part of the first layer sticks to the tape.
Without blue painters tape I get slight curling? I don’t know why, I often wait on the ender 5 plus with a 0.6mm brass nozzle to heat up and get a even temp before printing.
I haven’t tried tape and adhesive or just adhesive yet.
Do you prefer a larger nozzle on the larger parts? Like the core or the braces?
Speaking of cutting glass, has anyone here ever tried cutting glass with either cnc???
Seems like it could be done, either with a diamond bit or a drag knife with a cutter.
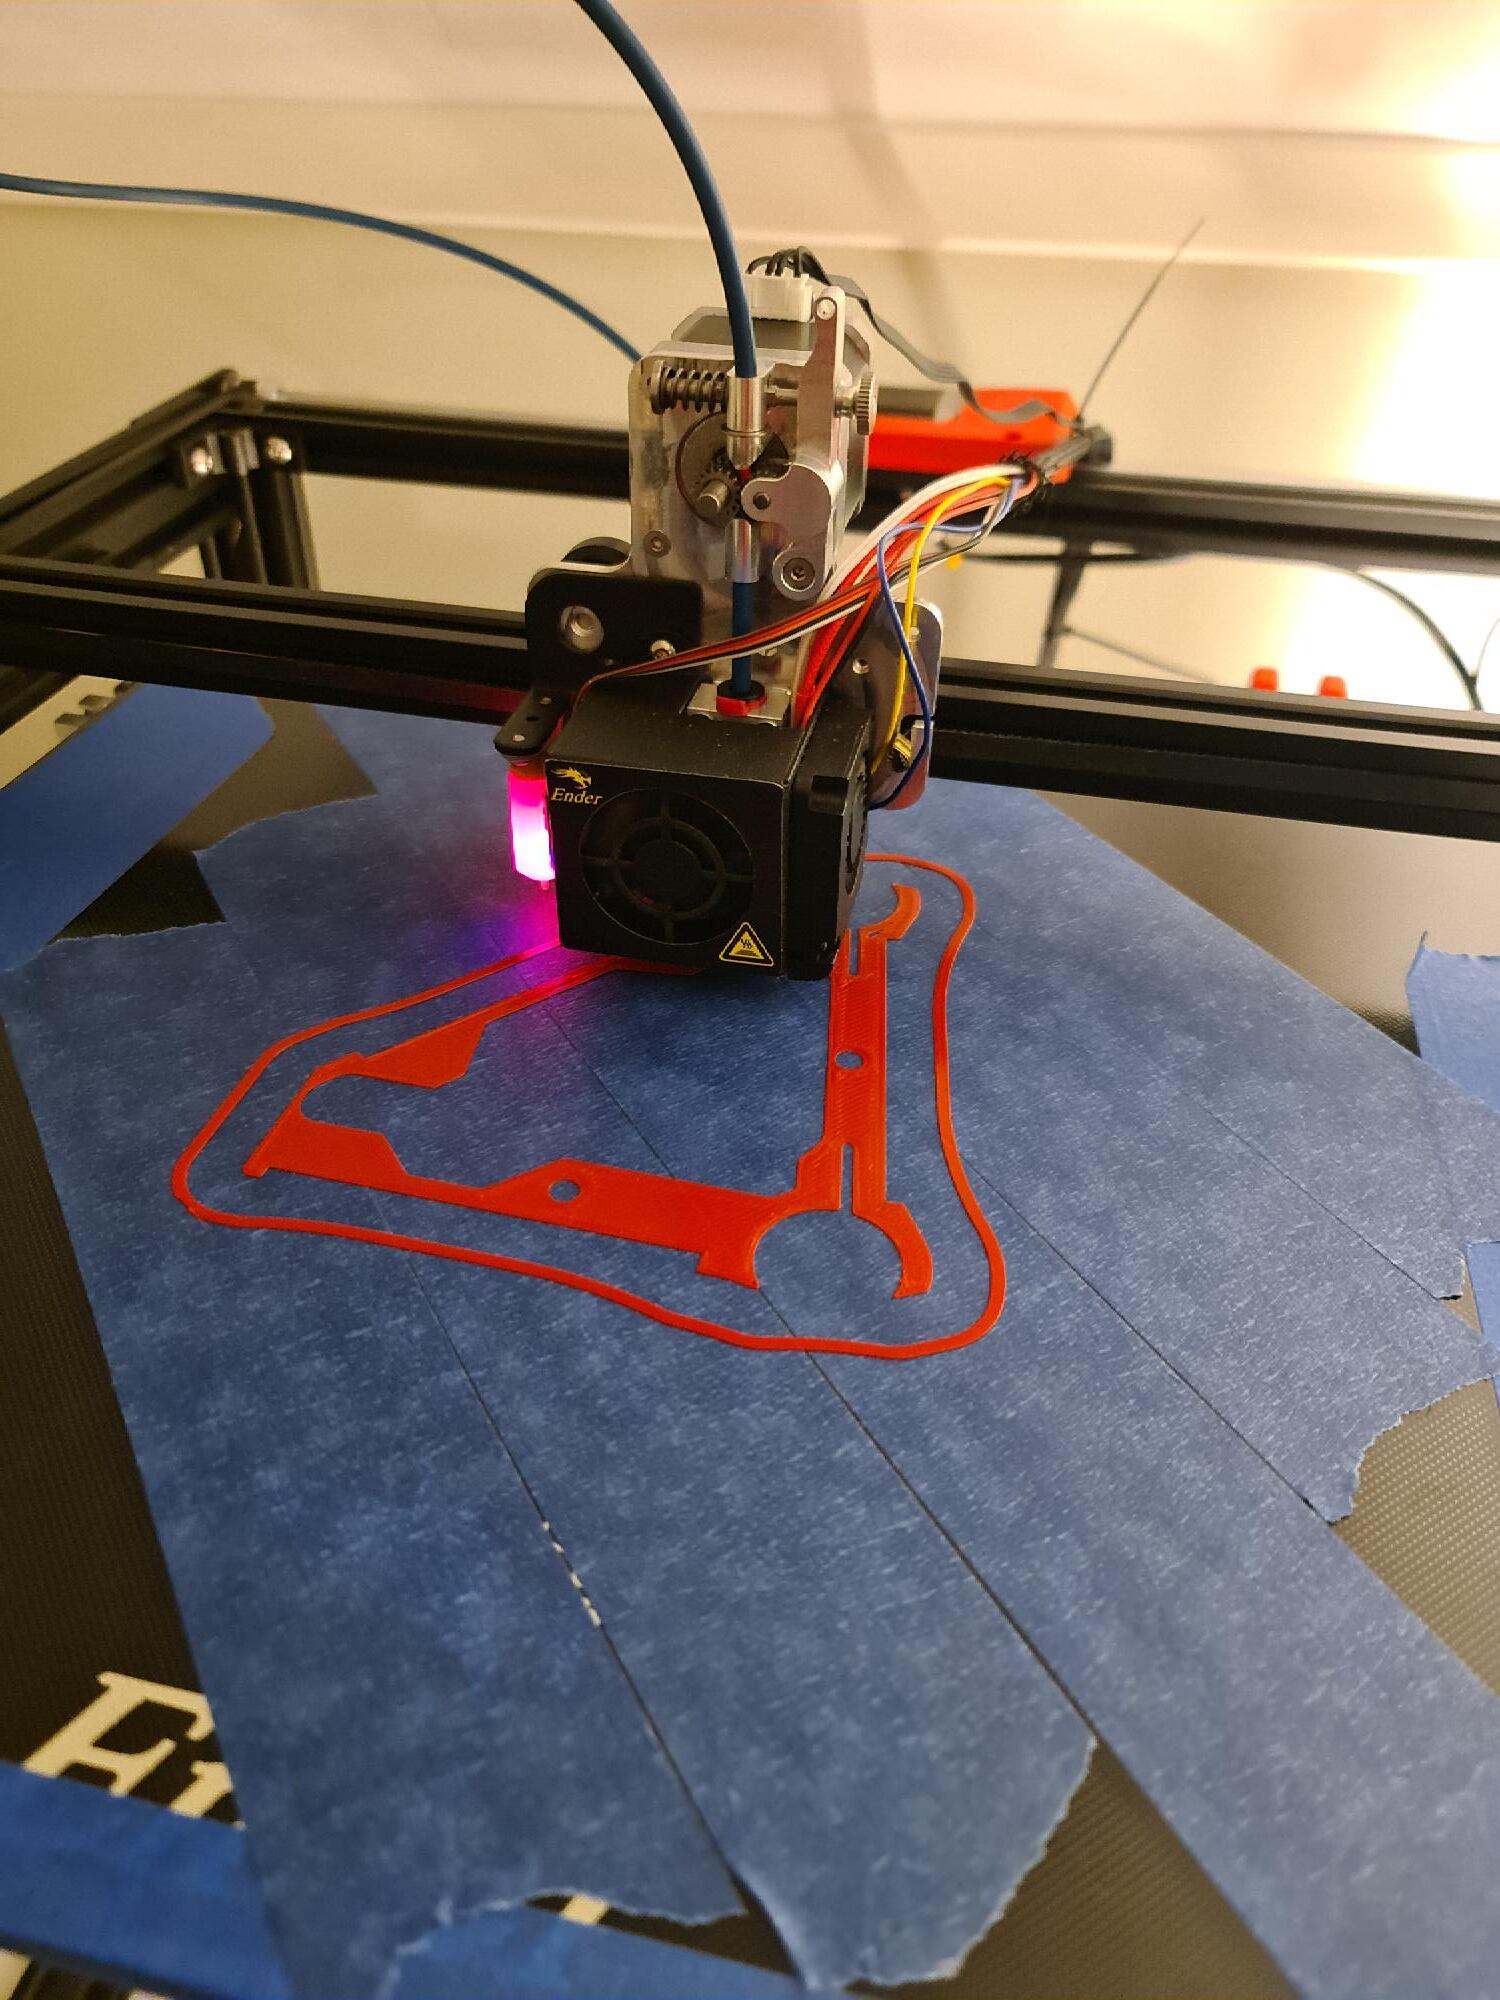
I just fired up octoprint and maybe I could do a timelapse of some of the parts, I haven’t seen much of timelapses here?
I have no experience of cutting glass, it seems you drag a tool and then break it with force?
Yeah. That happens. As the plastic cools, it shrinks. If it shrinks in one place and not another, it will want to curl. A lot of the again to the bed is also better at higher temps.
It is a tricky problem to solve because there are many causes and ultimately, you can’t fix them 100%.
- make sure your bed is clean and staying at temp. 60C for PLA should be fine.
- make sure your first layer is even thickness. If you have a large variety in thickness, the different cooling rates cause more curl.
- make sure you aren’t getting a draft that is coming one side more than the other.
- Add a brim in your slicer. They are easy to remove and they are a lot of insurance. Even 20mm is ok. I usual use 5mm or less.
If you ask 10 people, you will get 10 different strategies. Probably because we have all had 10 different causes with 10 different solutions.
1 Like
Thank you for good advice. I am trying to find wider blue painters tape, I have 50mm at the moment but 100mm would be nice.
Do you have any good advice on layer height? With my 0.6 nozzle I can go from 0.2 to 0.4 I guess.
Not sure on what is the preferred option to use for lowrider v3 parts?
I still have only used a 0.4mm nozzle. I print everything at 0.2mm height. I am never printing in a hurry. My printer is idle 75%+ of the time. So taking twice as long is NBD.
With a 0.6mm nozzle, you should be able to print at least at 0.3mm height, up to 0.4mm. the LR parts are big, smooth, chunky parts. The thicker layer heights work well. They save a lot of time. I think the only real benefit of the thicker layers is the speed. Once the parts are printed, I don’t think there will be any difference in performance.
1 Like
Getting the first layer to stick with blue painters tape. I made the decision to reprint most, if not all, parts.

2 Likes
I have red, orange and black PLA and I am thinking about mixing those 3 colors for the build.
Getting higher quality prints from my ender 5 plus. I still haven´t tried the primafix bed adhesion on the blue painters tape.
It seems to stick really well without it. 5 more to go in red. Then 2 in orange is the plan. I think I’ll do the core in orange and the rest of the parts black.
Tried with 0.3 layer height (for the first time) and this is what I got.
Not sure what happened here?
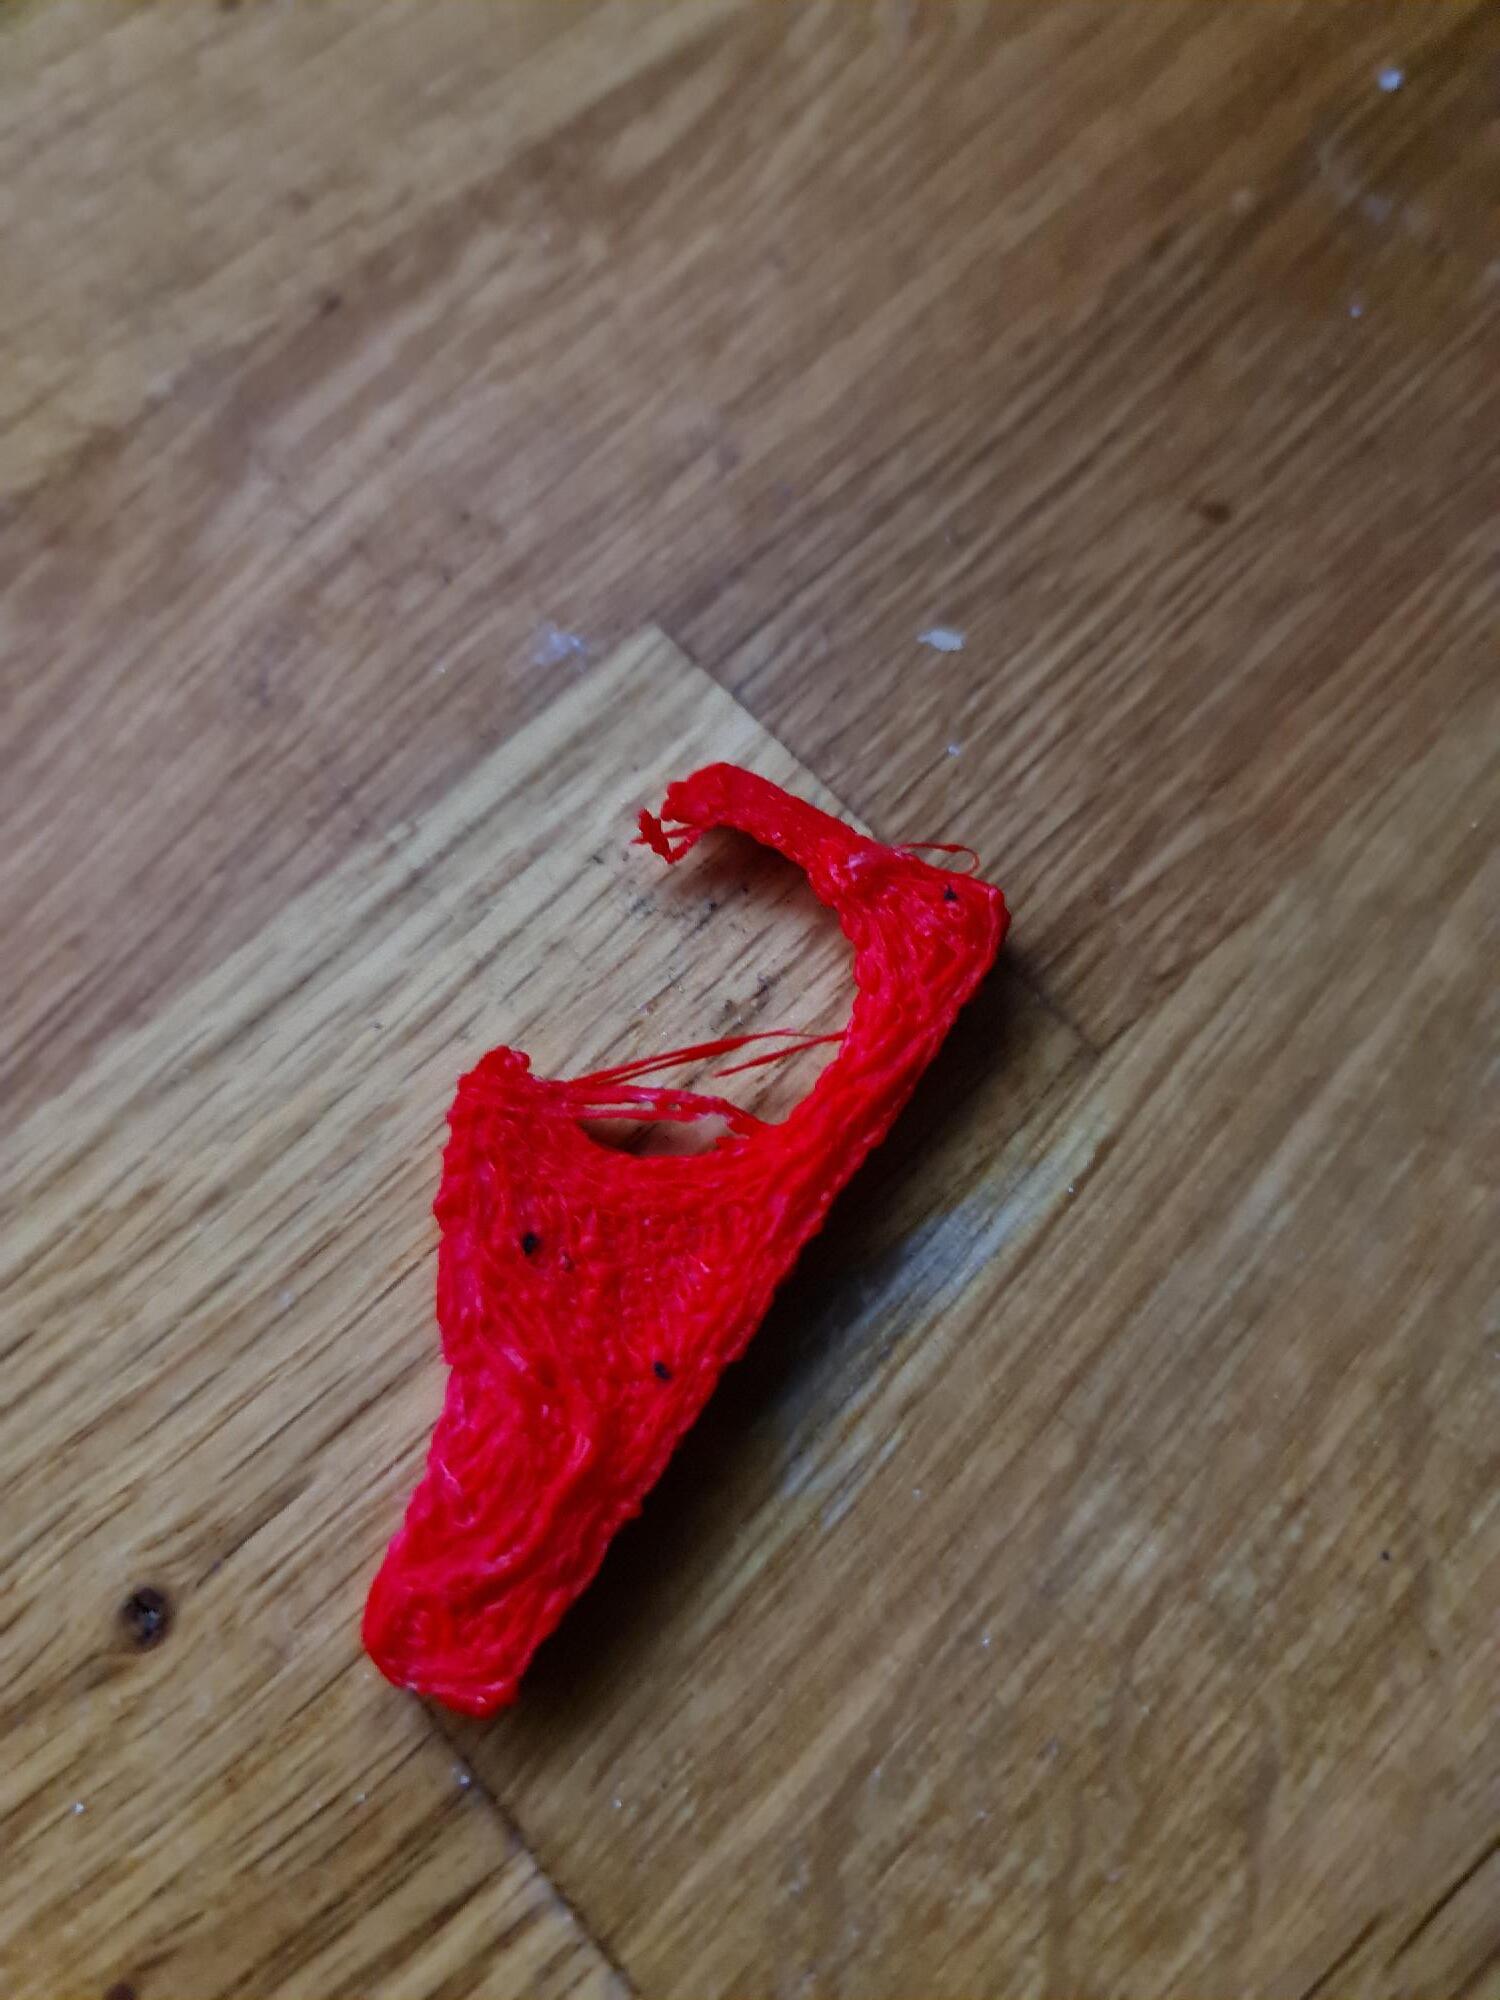
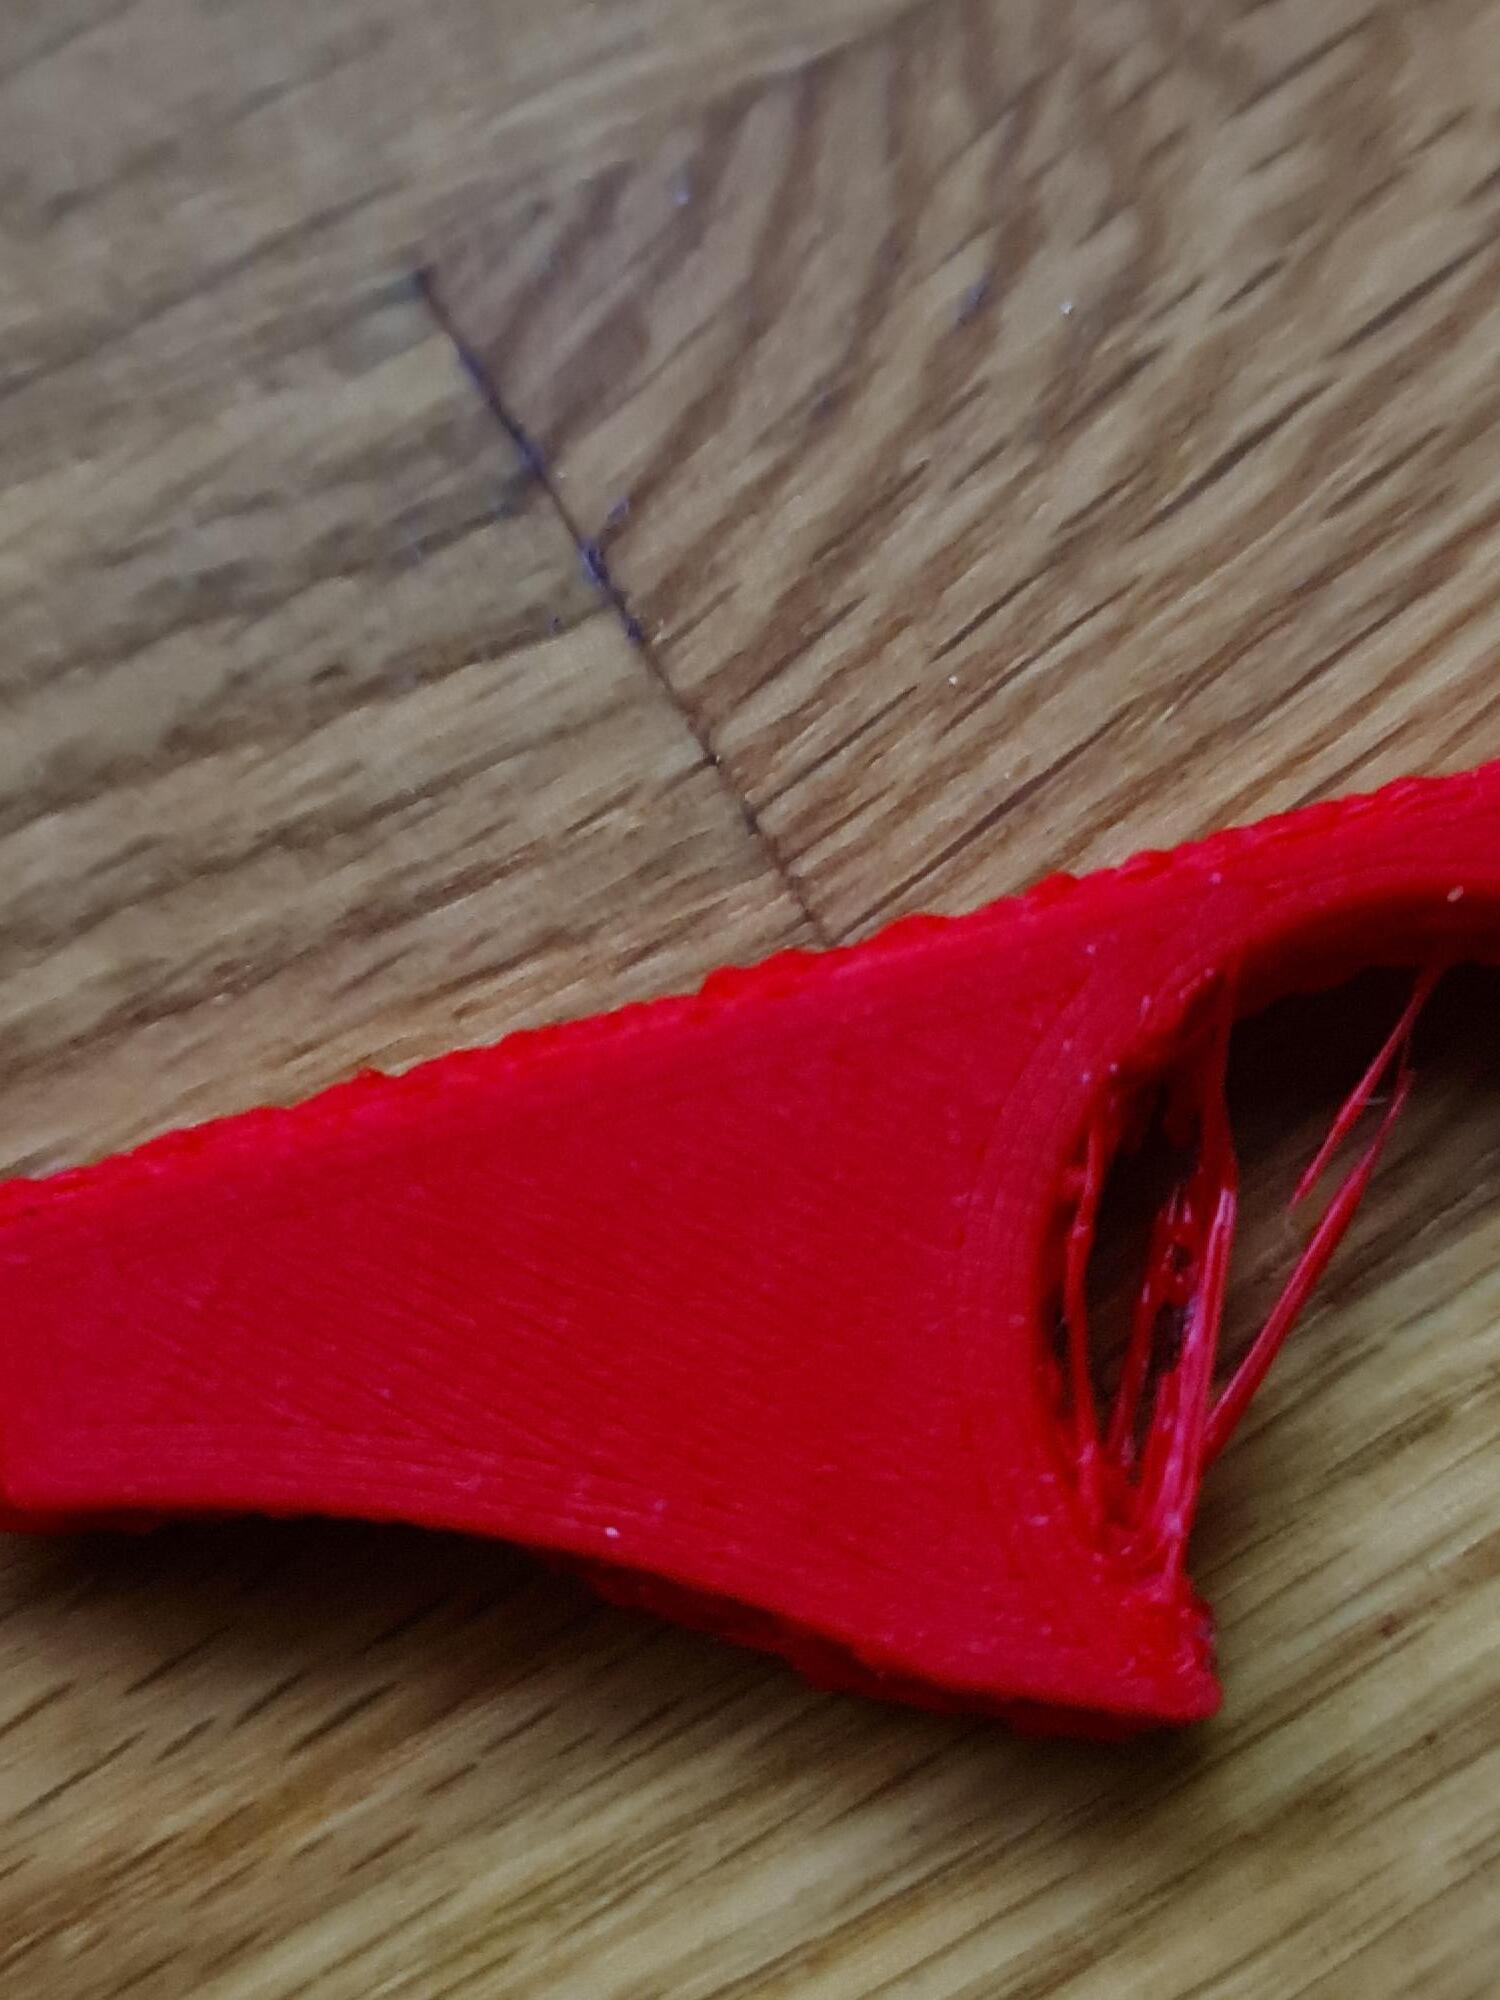
First layer at 0.3mm went fine, I then left the room where the printer is in and saw this in octoprint.
Too warm?
1 Like
That part looks way over-extruded. From my experiences, that is most often caused by either extruder steps/mm being too high, or wet filament causing boiling/expansion. The former is easily fixed doing a calibration measurement and adjusting eeprom settings. For the latter it’s best to dehydrate the roll if you can, otherwise try reducing nozzle temps to minimize any boiling.
[edit: I should add that the amount the filament expands while in the melt zone of the nozzle can vary quite a bit between different filament types, brands, and colors. Some filaments are so bad they require a change in print parameters to print well. Higher accelerations, faster travel speed, slower print speed… all helps reduce expansion issues.]
1 Like
It is getting late here so I´ll try again tomorrow with a 0.2 layer height. With this 0.6mm nozzle I have only tried 0.2 layer height.
The motor for the extruder and the extruder is pretty new. I hope that everything works again tomorrow.
1 Like
I just had to check, seems like the combination of 0.6 nozzle and 70% infill was the culprit (most likely).
Now a quick testprint of a print that I sliced earlier today and it seems to work like before.
I am printing PLA right now at 60 mm/s. But I think I could go for 80mm/s aswell.
What settings do you use for PLA?
Printing a bunch of calibration cubes, test temp towers and test retraction towers helped me figure out temp/speed/flow/retraction and many other settings I could live with for the specific Overture PLA I used. Apparantly even different colors of the same PLA can make a difference https://www.youtube.com/watch?v=BMSp1WDqtpI, so consider testing, tweaking, testing, tweaking before printing parts. At times, it feels like we need the patience of a saint, and perseverance of a pitbull for this hobby.
Shared cura profile used to print my LR3 Core at Purple-black-rainbow LR3 🤷♂️ , build video @ https://youtu.be/FJ7nYio8oOE - #9 by azab2c it’s far from perfect, but worked for my particular Ender 3 Max. 0.6mm nozzle, 0.32 layer height, a snail pace of 45mm/s speed, slower for initial layer.
Rightly/wrongly, I configure almost everything to be divisible by 0.04mm after seeing videos by Chep and others about minimum stepper motion increments. Mentioning because I see folks using 0.5mm nozzles, curious if they know about, but disagree with, 0.04mm being a magic number?