I don’t think you need to remove the core. I tend to stay away from these wrench and bolt type problem solving, because I am all thumbs. But I would just loosen the top and bottom bolts on those clamps (by a half turn), then tighten the spine bolt a quarter turn, and then put the half turn back on the top and bottom bolts. Then check the looseness again.
exactly what Jeff Just posted Is how I fixed this the back set is harder because i had to take the Z in and out to tighten and loosen it but only 4 times so not to hard to get right
@jeffeb3 @timonjkl I’ll give that a try. Hopefully it resolves the problem before I break the clamps. But, even if I do, at least they don’t take that long to print. 
1 Like
In the docs is has you adjust these far before the Z axis goes in. I suggest taking a step back to that point and starting again.
As you put the rails in there should be tension before you even tension, the tension bolt. If there is not when you put the first two bolts in you spread the part some how. There is a note on how to fix that in the instructions.
The tension bolts are needed to be set correctly or you will not be able to adjust square. So best to step back and start over on the core.
1 Like
I’ll try to take a crack at it over lunch. Thanks for the help.
I noticed it was loose when I put the rails into the core, but I wanted to get it all together and get some pictures taken.
Pulled the core back of the machine over lunch and went through the process of adjusting its clamps. I think the confusing part in the instructions was this:
- Slide the rail in the assembly.
- The rail should have slight tension and feel good with no nuts in place.
- All the bearings should be making contact.
- If your rail is loose or too tight there could be other issues.
This implies that it should be basically right one I slip the tube in, but mine were really loose. I had to fix it by repeatedly loosening the bolts holding the clamp to the core, tightening the tension nut slightly, then retightening the other nuts. It took about 20 minutes of this to get all four of the clamps to hold the tube without allowing it to wiggle around. All told, I didn’t put more then about 1/4 turn on the tension bolts to get everything to fit snug; I just put it on in about 1/16 turn increments, testing after each adjustment.
I’m curious if this is a side-effect of the 5/16" bolts vs 8mm bolts? Does the extra slop on the bearings due to the slightly smaller size of the 5/16" bolts cause this issue? If I had any M8 bolts and nuts, I suppose I could investigate.
No I test with 5/16. I rebuilt/printed mine many many times and every time they were slightly too tight. I am not sure what could be the issue. That is why I have not done a full release. You are basically the third person building it and you are having drastically different results from me. So design issue or print issue, tubing size issue?
Ok. Weird. I haven’t done any calibration on my 3D printer since I assembled the kit, but I trust Prusa to have done a good job before it left the factory.
Maybe worth a note on the build page about how to slowly inch up on tightening them if they are loose: release bolts, tighten tension bolt slightly, retighten to core, retest.
I have to look at it after shipping. I only ever accounted for too tight. I am not sure how this is going to work now. We’ll see how the rest of your build goes and wait for a few more. It is designed as a interference fit, so you having to add to it might not let you properly square it.
All four of your clamps were loose?
What do your rails measure?
Using my bearings?
My bolts?
I will postpone the kits a little longer until we get a few more builds.
Printed with PLA?
I had to clamps that were loose, one on each access. The other two clamps were fine.
And yes, it was all printed in MH Build Series PLA.
Which two fit? Something seems fishy here. I would expect all to either fit or not.
Hmmmm,
Did you put in one bolt at a time or both at once?
Just trying to figure out how this could be this way.
45% infill?
I put in both bolts, then tightened one then the other. Prints are 45% infill on the clamps and 30/70/30 on the Core.
30/70/30 or 70/30/70 as recommended for varying infill?
1 Like
Yeah, that. Got the numbers backward.
2 Likes
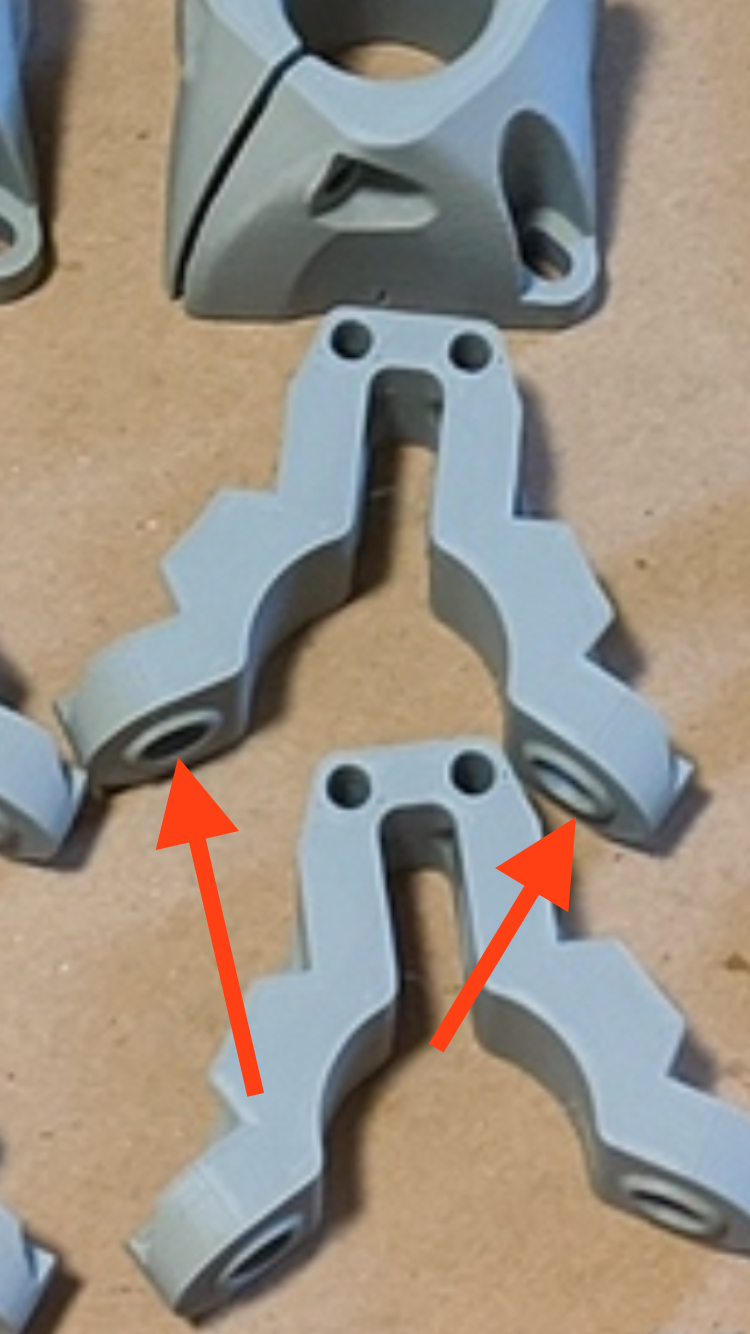
Would sanding a tad bit off of each of these bearing surfaces be an acceptable fix for his issue?
Try tightening each bolt a bit at a time instead of one then the other. Any tradie will know this as you risk cracking when you fully tighten one and then other, especially plastic boxes.
I’m well aware of that, which is why I worked my way up to the proper tightness on the tubs in such small increments. But the instructions for installing the clamps say: “Insert the top bearing and bolt first, then the bottom.”
First movement! With the tension issue resolved, I hooked up the steppers and endstops and gave the motion control a try. And everything worked on the first try!

6 Likes