I think it is valid gcode for some machines to omit the G1. Post processors are hard. This “standard” annoyingly not standard.
Are ya’ll putting the font into inkscape or adobe illustrator and converting to outlines first?
@niget2002 I have not done it that way. - I have however, used text that was part of an image.
@niget2002, on all the text signs I’ve done with F-engrave I have used the text facility built into F-engrave. No other software involved. I’ve probably just been lucky with my choice of fonts, but the carves have mostly been continuous cuts, with no “clean” or"v-vclean" produced at all. They’ve gone really quick…less than half an hour mostly.
For the images I’ve done however, I have converted them to vector format in inkscape and cleaned up (simplified mostly) the result. This has probably minimized the “Hunt and Peck” process @ianj001 mentions. It still does some of that, but I think cleaning up the SVG to minimize small dots and such helps immensely.
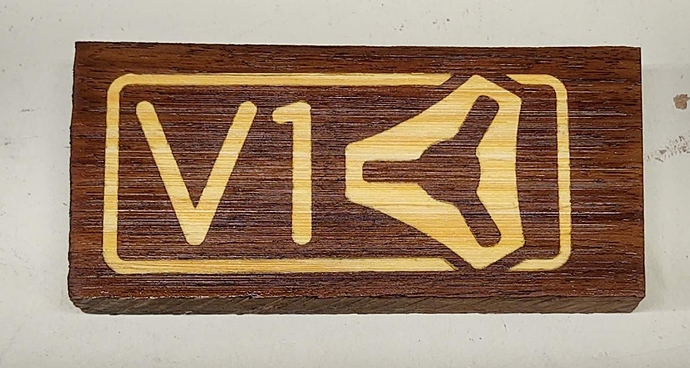
I took a break from varnishing to try the inlay.
I’m quite pleased, I think it came out well. The female piece is walnut, but I don’t know what the inlaid wood is. It’s salvaged pallet wood of some kind. It’s a relatively small piece, the inlay is 2" tall.
Edit to add that the thickness sander is definitely THE ticket for exposing/surfacing the inlay…Definitely the best deal I’ve gotten on a tool yet. 8^) I’m Blessed with some really good friends.
@Paradox_Pete nice job, I wish I had some dark wood to work with. I think yours turned out better than the one I did. - Could you share your settings for this one?
I want to get some Poduk and do this with a Maple base and the Paduk inlay. It might actually come out looking a little red and white.
Settings…
Image height = 50mm
Feedrate = 540mm/min
Plungerate = 180mm/min
60* V-bit 12mm diameter
Female Cut Depth Limit = 9mm
Male Cut Depth Limit = 7mm (see below)
Multipass Finish Pass = 1mm
Depth per pass = 4mm for Female and 3mm for male
Cleanup Diameter = 3.175mm
Step Over = 50%
V-bit cleanup step over = 1.27mm
I checked P, X, and Y on the cleanup directions
I set the male depth a little lower than the female thinking I would leave a little gap at interface, but all of the male parts came to a sharp point anyway.
In retrospect, I think this is unavoidable unless the inlay has some broad flat areas. In that case you might want to close the gap anyway to provide a good bond.
The inlaid wood was definitely softer than the walnut, and I clamped the heck out of it, so I expect the wood just compressed a bit in any areas where it might have had an “interference” fit. The sharp “peaks” of the male parts would certainly crush easily if it didn’t fit perfectly in the bottom of the Female V-carves.
2 step downs plus finishing pass may be conservative, but it worked well. Total cut time was about 2.5 hours.
I might add that I used my new drum sander to surface both sides of both pieces prior to carving, to ensure fairly flat parallel material.
I mentioned above that I had previously used Inkscape to convert and clean up images for V-carves, but I just loaded the V1 logo directly into F-engrave.
Also, I mostly followed @ianj001’s guide. Checking mirror, prismatic and add box as required for the male part.
@Paradox_Pete I had the same outcome with the inlay having sharp points, I put it on the belt sander and just took the edge of it.
Thanks for you set up info. I think the biggest difference is omitted the multi-cut and I think the outcome was a slight over-cut on my inlay.
All in all, I think it shows that F-Engrave can do a decent inlay.
I would caution on the glue up to try and check the gap around the inlay, I may even try using spacers. If you look at my video when I glued it up you can see that one side is actually lower than the other, I think that caused my minor misalignment.
In case anyone is interested in my clamping system I have posted a short video about it.
MPCNC clamping system I have included links to the STL files if anyone wants to print their own. - If you don’t have a printer you can make them out of wood on your MPCNC. 
That is the same system i’m currently using it is very handy and work’s well. Now for the new MPCNC I will be using the Rockler T-track system. that has been already ordered and most of it should be here by monday.
I’m just waiting for Ryan @vicious1 to release the new design 
Gustavo
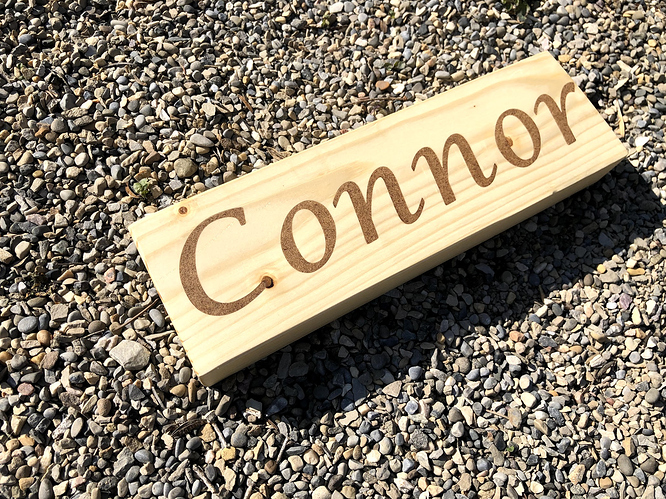
Thanks for the guide! Despite making a few mistakes (I assumed the software handled cutting deeper than your V), I managed to salvage it. MDF in a 2x4 makes a cheap way to test if you add some danish oil.
Almost looks like cork. Pretty cool.
I just posted another video showing how I use Octoprint with the MPCNC and my 3D printers
Using Octoprint with MPCNC and 3D printers
I thought it might be useful for some folks here.
Ian, in MODfef it would be nice to be able to merge in a tool change file. I have developed a file that guides me thru the tool change and currently manually insert it in the merged files.
I am sure we could do that. Can you post your before and after file?
I should be able to see where you want the insertion. Then I just have to go back and remind myself of the code bwaaahhh 
It would go right where you put the M0 now. Instead of that I want to put my tool change file.
Here is what I use now, but it may need to change in future…
;f-engrave tool change
;move to 5,5,10
G0 X5 Y5 Z10
;wait to turn off spindle
M0 S0 Turn off spindle
;wait to change tool to 1/8 end mill
M0 S0 Change bit 1/8 end mill
;wait to attach z probe
M0 S0 Attach Z probe
;probe Z
G38.2 Z-20 F300
;reset z
G92 Z0.5
;wait to detach probe
M0 S0 Detach probe
;wait to start spindle
M0 S0 Start spindle
;continue
Do you want to be able to customize what goes in there?
It should work like the START and END file selections.
Currently the selection is “The tool change Gcode is:” and the default is “M0 ====TOOL CHANGE ====”.
That needs to change to
“Click the button to select the TOOL CHANGE gcode file:”
And then insert the contents of that file between the V_CLEAN and CLEAN files.
Meanwhile, I’ll try using M32 P !/subs/toolchange1.gcode# after putting my toolchange file on the sdcard. However, Marlin says M32 “… is a seldom-used beta feature that needs more testing and use-cases.”

