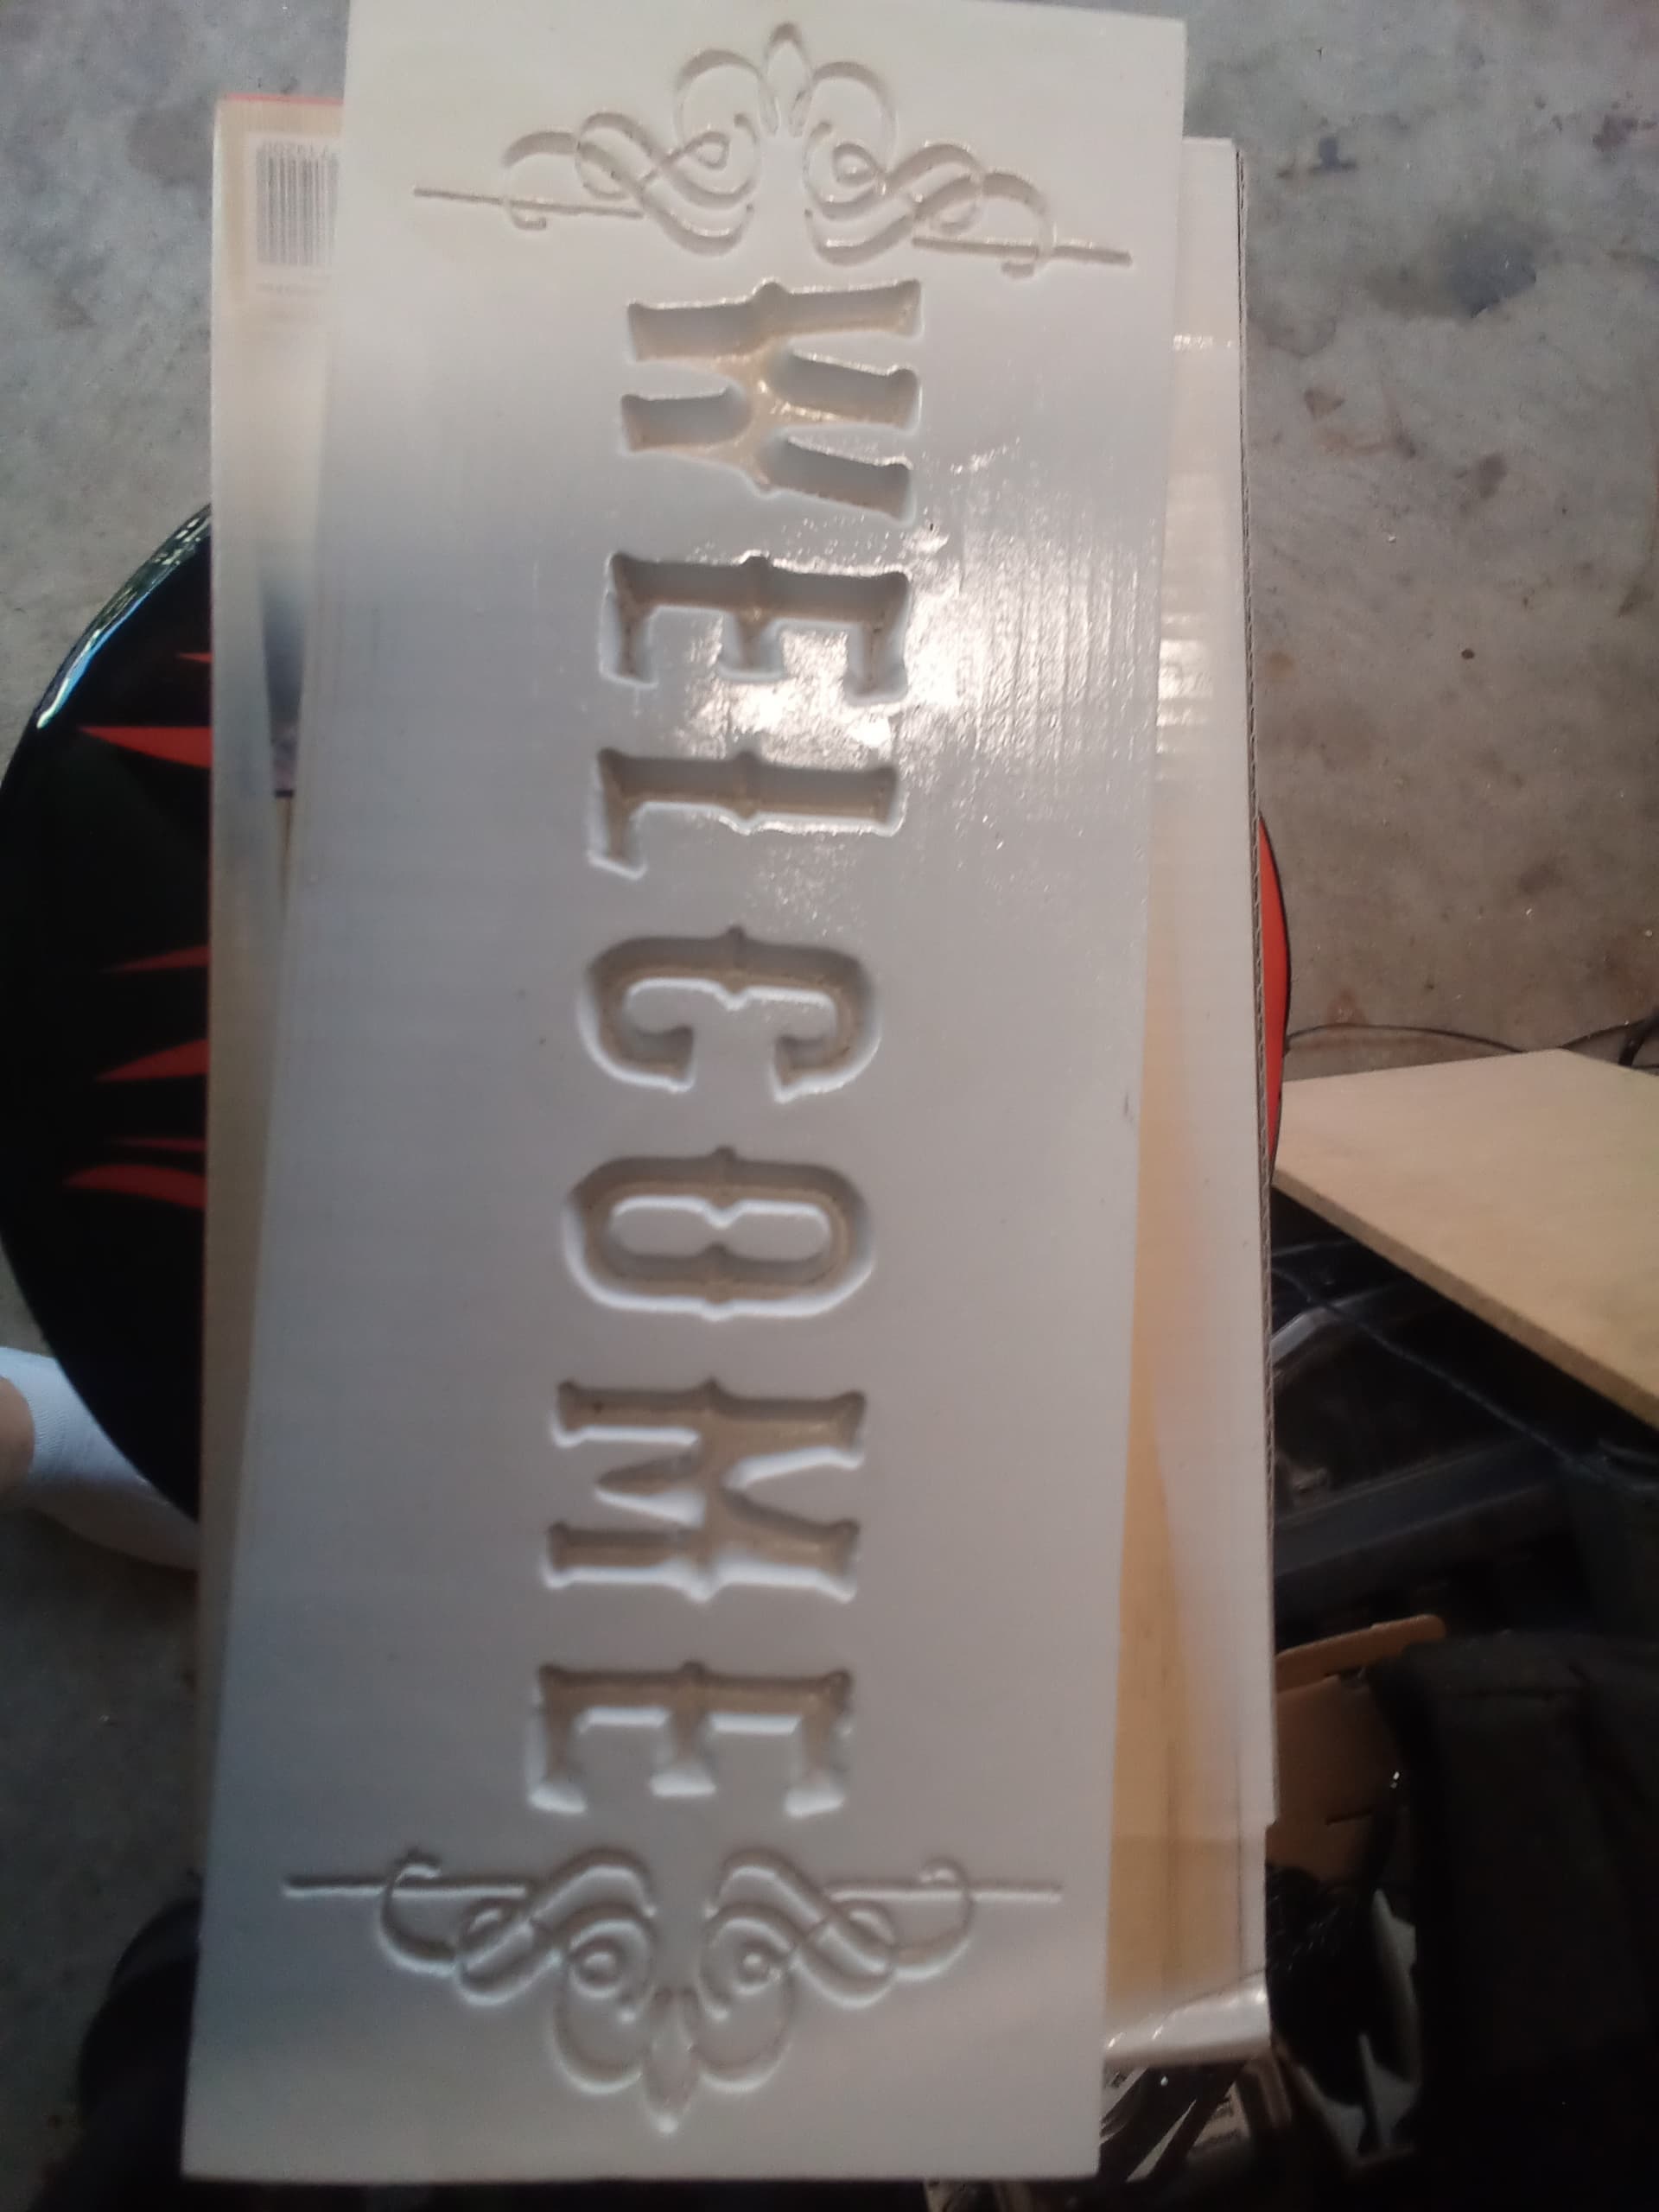
I have this decoration and it is not carving well. Barely carves. The lines are too narrow. Is there a way I can make the carve deeper?
Oh this is a V Carve by the way
I have told it a depth, but it says depth limit. I want to tell it to go to X.
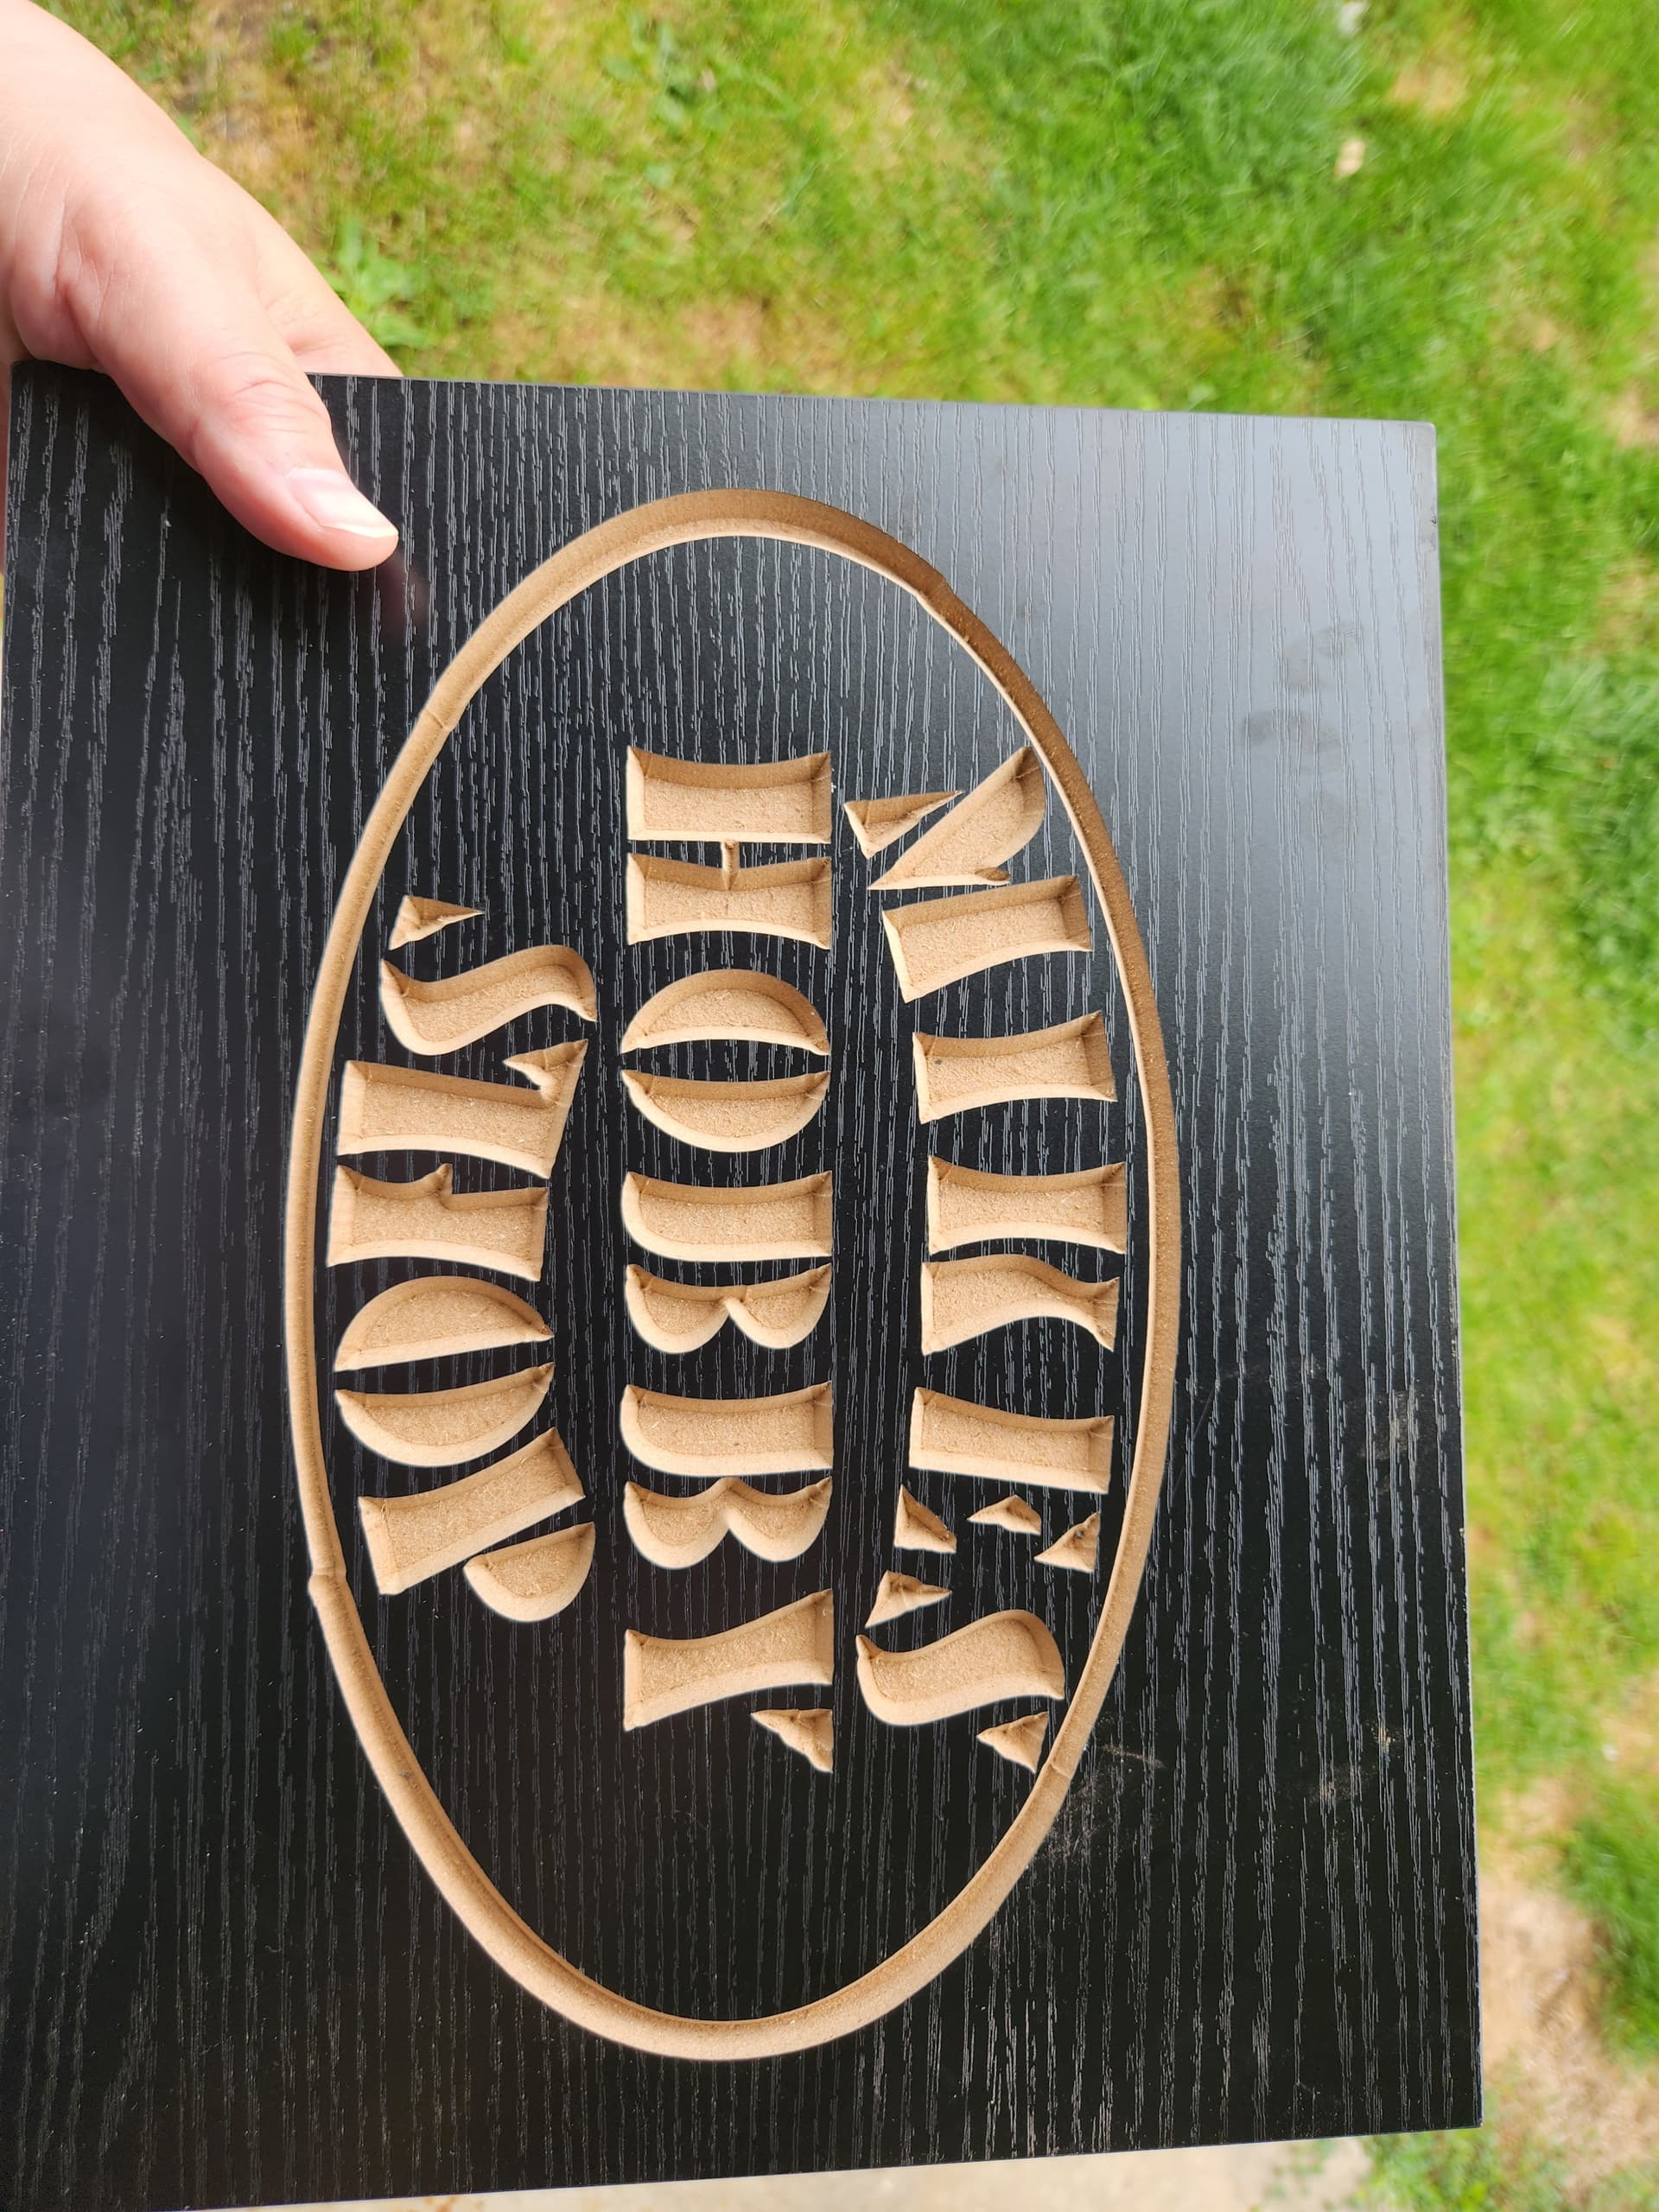
I have this decoration and it is not carving well. Barely carves. The lines are too narrow. Is there a way I can make the carve deeper?
Oh this is a V Carve by the way
I have told it a depth, but it says depth limit. I want to tell it to go to X.
Duh, change the tool! I forgot I have the 5 pack from Ryan, the small 1/8 ones!
I think that will get it!
A V carve can only go as deep as the tool angle lets it. So if you have a feature 3mm wide and you carve with a 90° V bit, it can only carve SQRT(2)/3mm deep. If you have a 60mm bit, it can go 2/3mm deep.
The depth of the carve will max out at SIN(theta/2)/(carve width). Therefore a smaller angle bit can carve deeper. In fact it must be a smaller angle in order to go deeper
By the same token for a wide feature, you can limit how deep a fuill carve has to go by having a larger angle bit, which can allow you to have a full carve
Of course you can always ‘trick’ it into being a deeper carve by, for example, fitting a 60 degree tool and telling estlcam it’s a 30 degree one.
Then the carving will be thicker though.
This is a 10.4° endmill, goes pretty deep:
Saying it’s a 30 degree tool and using a 60 degree tool will more than double both the cut depth and width of the carve… i.e. the perimeter of the cut will be more than half cut depth past/outside the lines.
Yes, he wanted it deeper and wider.
The Preview tool is handy for seeing how deep different V-bit angles will cut. Rotate the preview to the Z plane (a couple of double mouse clicks in v12) and use the measuring tool (middle mouse button) to measure the depth.
I dropped back and punted. I said it was a smaller tool and it worked well. I also changed fonts too. It has not been an easy sign, let me tell you, LOL. It is because I do not use this thing enough!
I’m pretty sure that using a 60 degree V-bit on a path set to use a 30 degree V-bit will mess up the perimeter shape. Carves are variable depth and the distance that 60 degree bit will cut past the line will vary with the line spacing/depth of cut, e.g. .9mm past @ 3mm deep and 1.8mm past @ 6mm deep.
Using the Estlcam Resize DXF tool (1 - all objects in v12, layer in v11) to increase the line spacing/enlarge the perimeter would be a much better and more flexible option.
Carving is easiest when you never touch the depth limit setting. In v11 the default depth is Automatic, in v12 the default Carve (only) Ask = Automatic. Automatic/Ask lets Estlcam use (if needed) the maximum width and depth that the selected tool can cut.
To keep the carve simple and fast, the diameter (always the maximum cutting edge diameter, not shank) of the V-bit needs to be at least as big as the maximum distance between the lines being carved.
As Dan said, use a V-bit with a smaller angle to increase the depth of cut and a V-bit with a larger angle to decrease the depth of cut.
Except when you want to do inlays or have thin wood. ![]()
or want to carve relief text or carve pocket text ![]()
It finished but was rough and cannot sand the grooves. I really need to work it out another time. Frustrated now.!
I think the router bit i used is dull now. It was pine to so that did not help.
Going to drop my cnc down.
It is too high right now. @vicious1 i would tear it down and replace it with a lr4!!!
I just went out and lowered it but found play in core! I think i have to find a way for a lr!!
I am thinking this way myself
So i was explaining what I have here at work (I work where we also have a regrind shop) and he thinks it is my v cutter is dull. I have one he made and will try again!
Just frustrating, but hey i guess on the other side of things, it could be worse ![]()
So this is all set.
On so many fronts.
I was carving and watching and I had wobble in my core. Took it all apart as the wobble was in x y and z.
I replaced bolts, as I had metric and changed to the 5/16. No good.
Reprinted core and x y braces (whatever they are called.)
put it all together, noticed my bolts FIT all together better in core. My other core, I literally had to screw them out.
I then tightened/adjusted everything and now I am all set.
no wobble, I have my carvings working well. I am still trying to learn Fluidnc. I need to get a pc by my cnc as I love the use of joystick so I need ugs. Once that happens, I think all happiness will be restored to my cnc ![]()