Not sure if this is the best place to post this since it is not exactly Low Rider specific, but I’ve been using this a bunch lately on my LR3 and figured its working well enough that others might find it useful as well.
I find myself mostly cutting small repeat jobs often on stock as thin as 1/8". I kept being frustrated with different clamping methods, especially on thinner stock where it seemed everything I tried often had some kind of annoying drawback or just didnt work super well. I also seem to bump into my clamps a lot when working on a new job because I don’t have the best eye for clearance. ![]()
I started looking into vacuum holding because it seemed like a nice way to get all those pesky clamps out of the way, and to put all that air I have sitting around rent free in my workshop to good use. I looked at the Air Weights holding system which seemed to be exactly what I was looking for but of course I immediately started thinking “Well, I could 3d print that!”
I started trying stuff out and after a lot of trial, error and learning things the hard way I landed on something that at least for me is working pretty consistently. The main expense was a roughly 120 dollar vacuum pump, otherwise it just needs some fairly inexpensive hose and fittings.
You can find the files and a more detailed write up here: CNC Vacuum Work Holding Pad - 3D model by GobboLab on Thangs
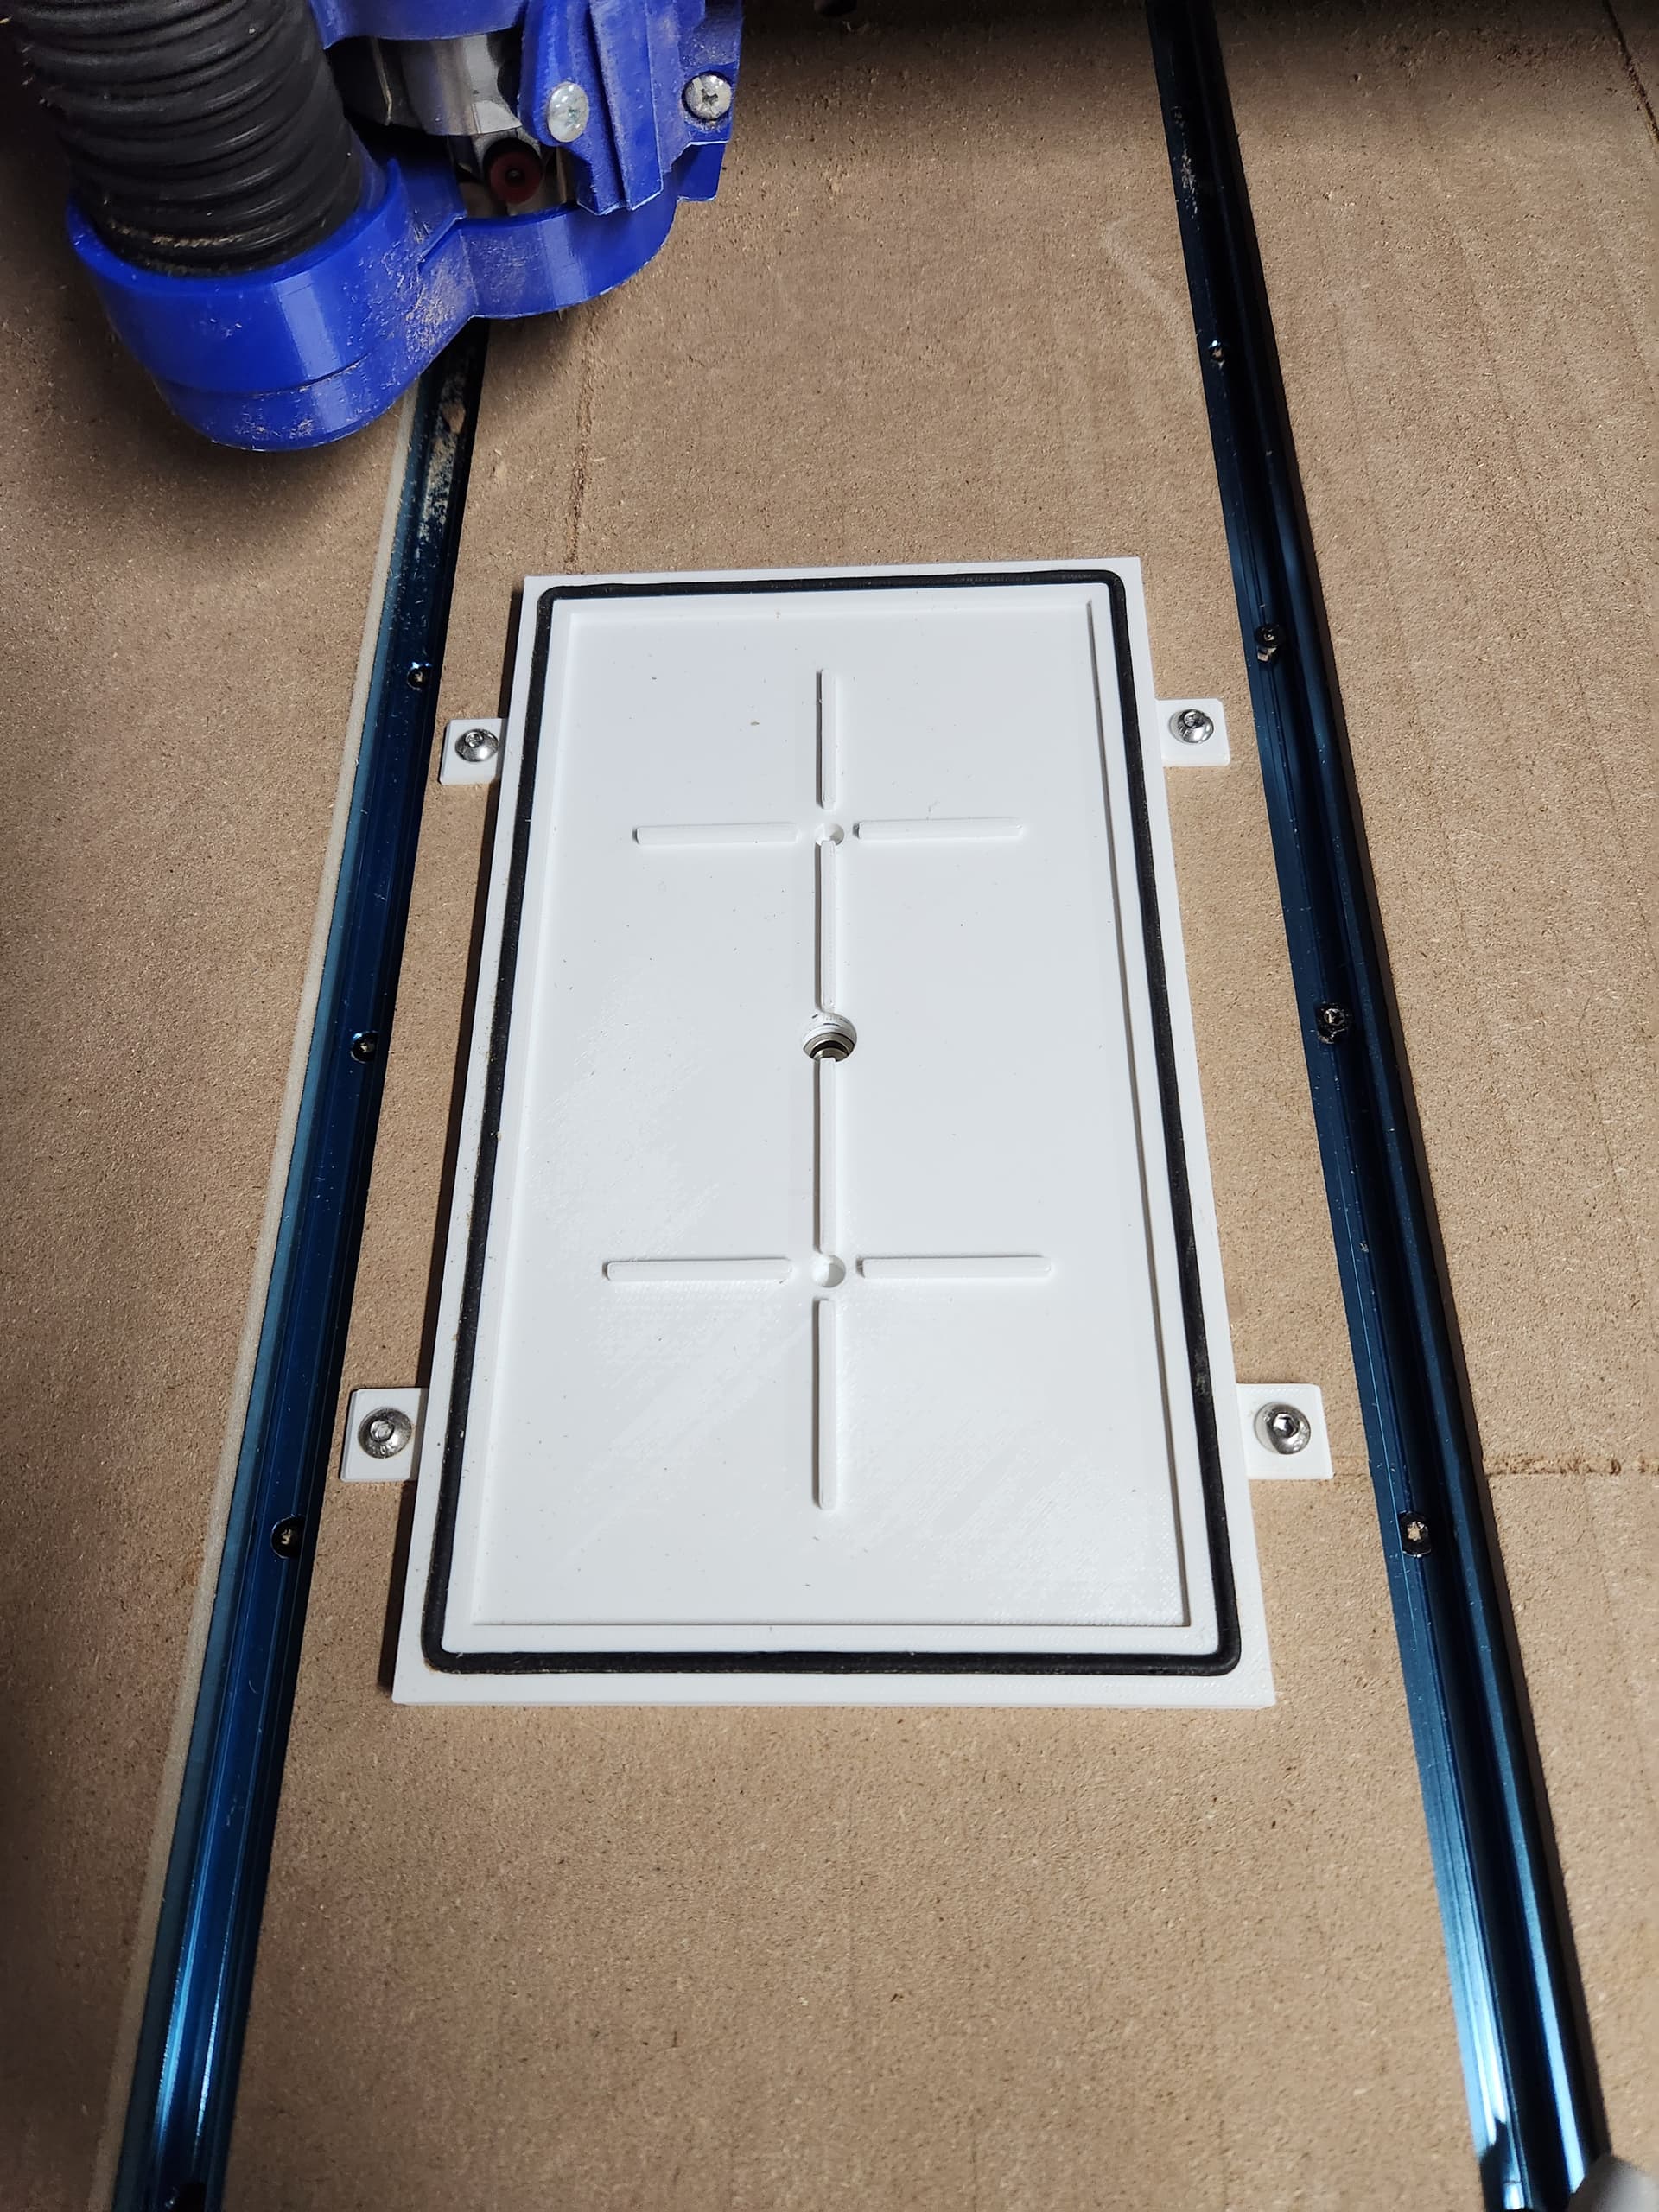
The short version is that the pad provides a 5.5" x 9.5" work space and works with 1/4" OD hose and 1/4" NPT quick connect fittings. Some 3mm diameter foam/rubber material glues into a groove on the pad and helps provide the seal for your workpiece or spoilboard. There are some tabs on the pad that allow you to secure it to a work surface. I had my LR3 drill holes for threaded inserts directly in my main spoilboard so I can easily install/remove the pad with some machine screws.
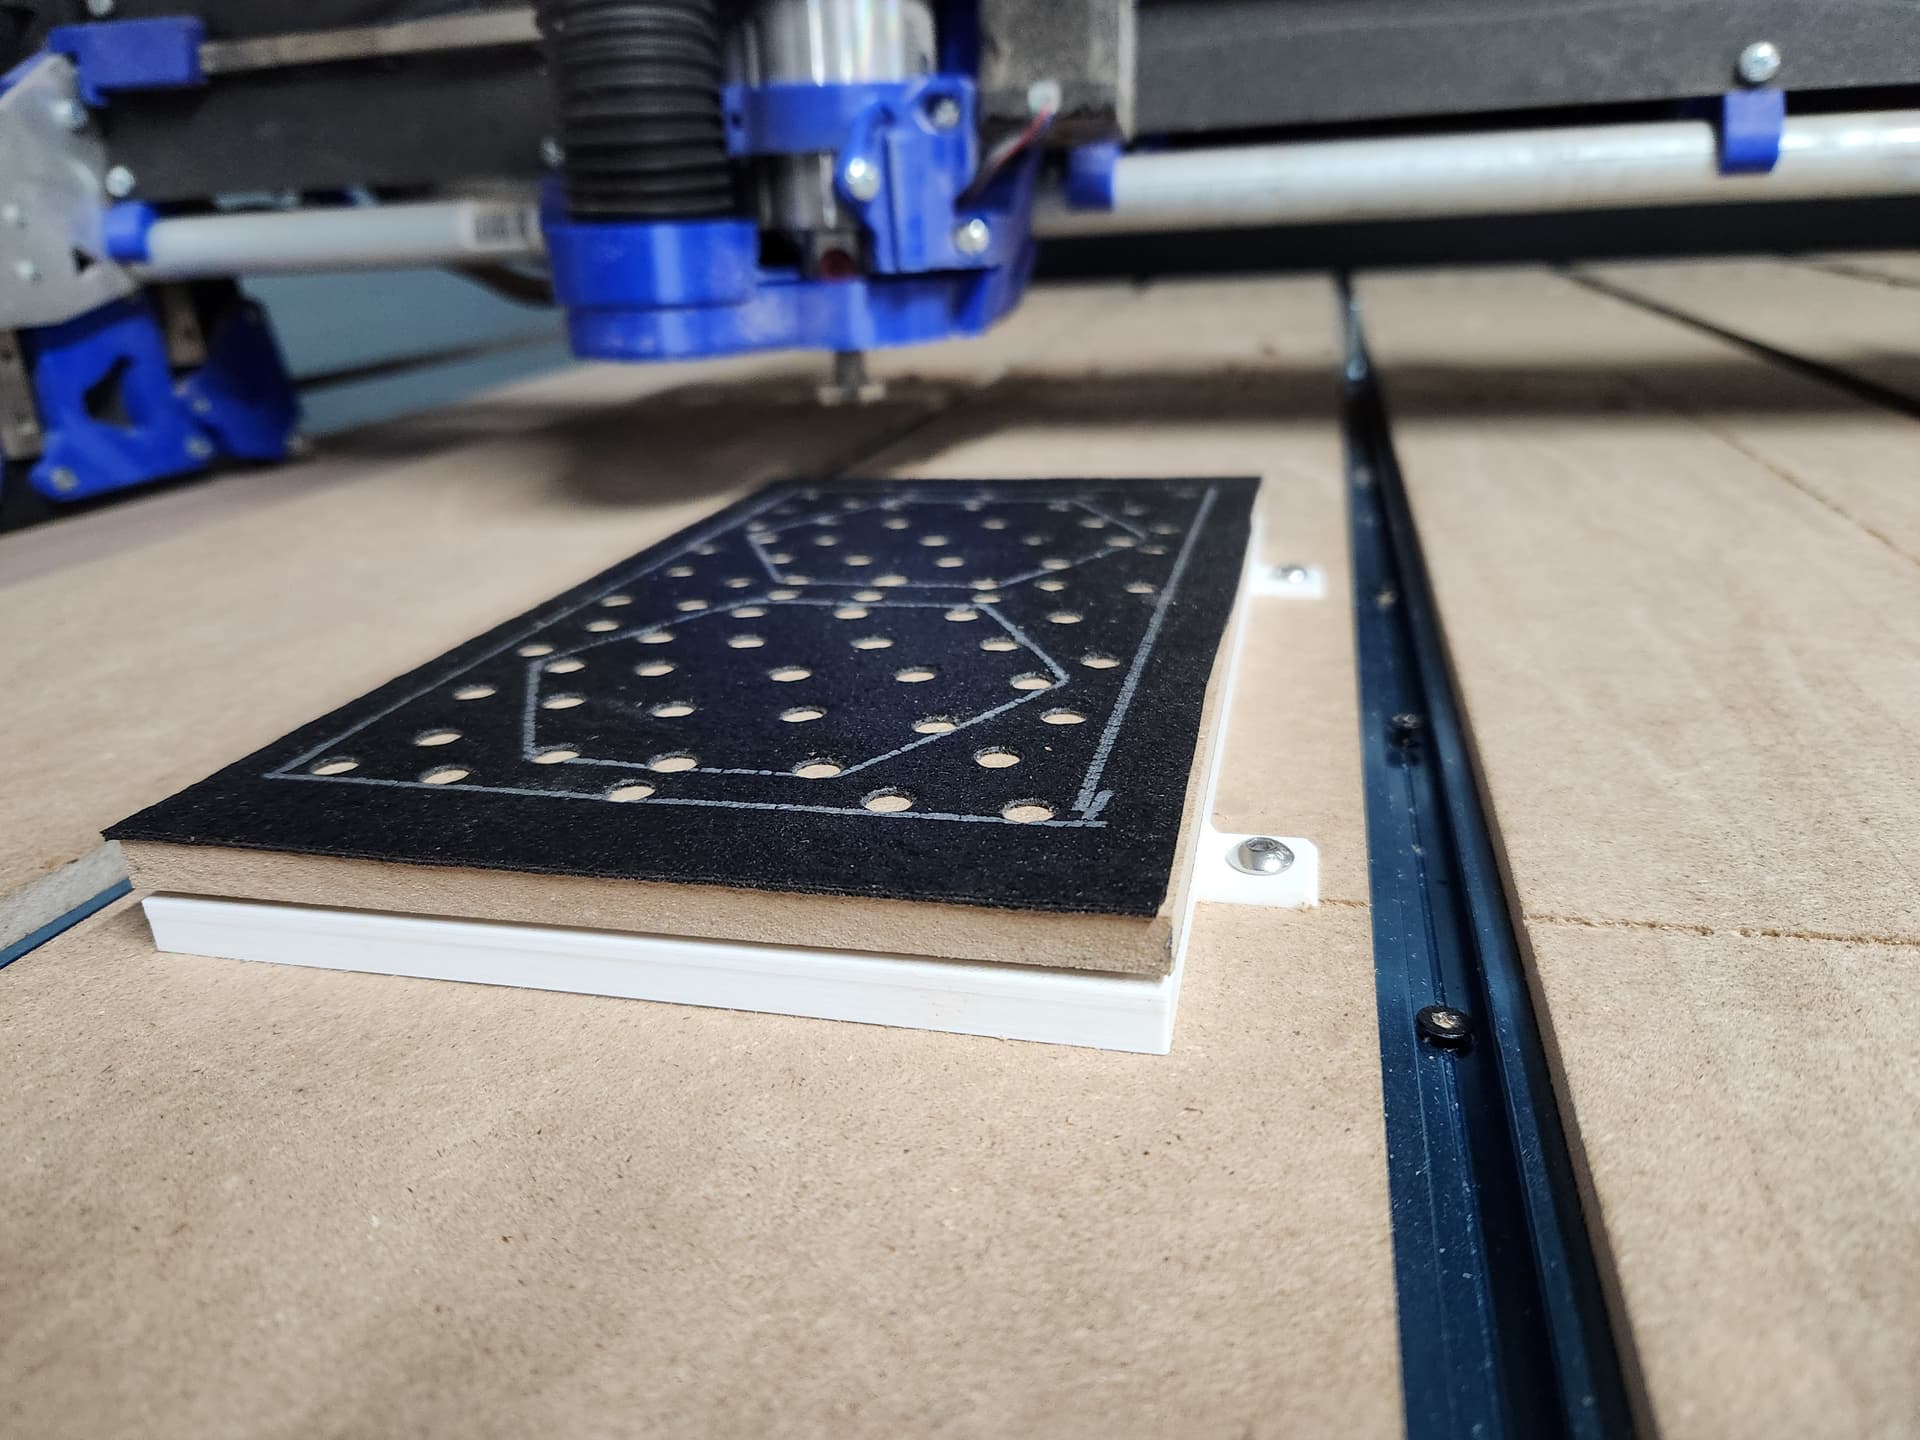
A roughly 1/4" piece of MDF with a perforated gasket (I used tool drawer liner from the big box store) can be used to allow you to cut all the way through a work piece without losing your vacuum hold.
My general workflow for making a spoilboard has been:
- Cut a piece of mdf to use as my spoilboard.
- Place that mdf on my vacuum pad, engage the vacuum and then surface the spoilboard.
- Create my gasket by punching a bunch of 1/4" holes into a sheet of tool drawer liner.
- Place my stock on the gasket and draw the outline in silver sharpie so I can easily drop stock in the same place each time.
- Attach the gasket to the spoilboard with super 77 spray adhesive.
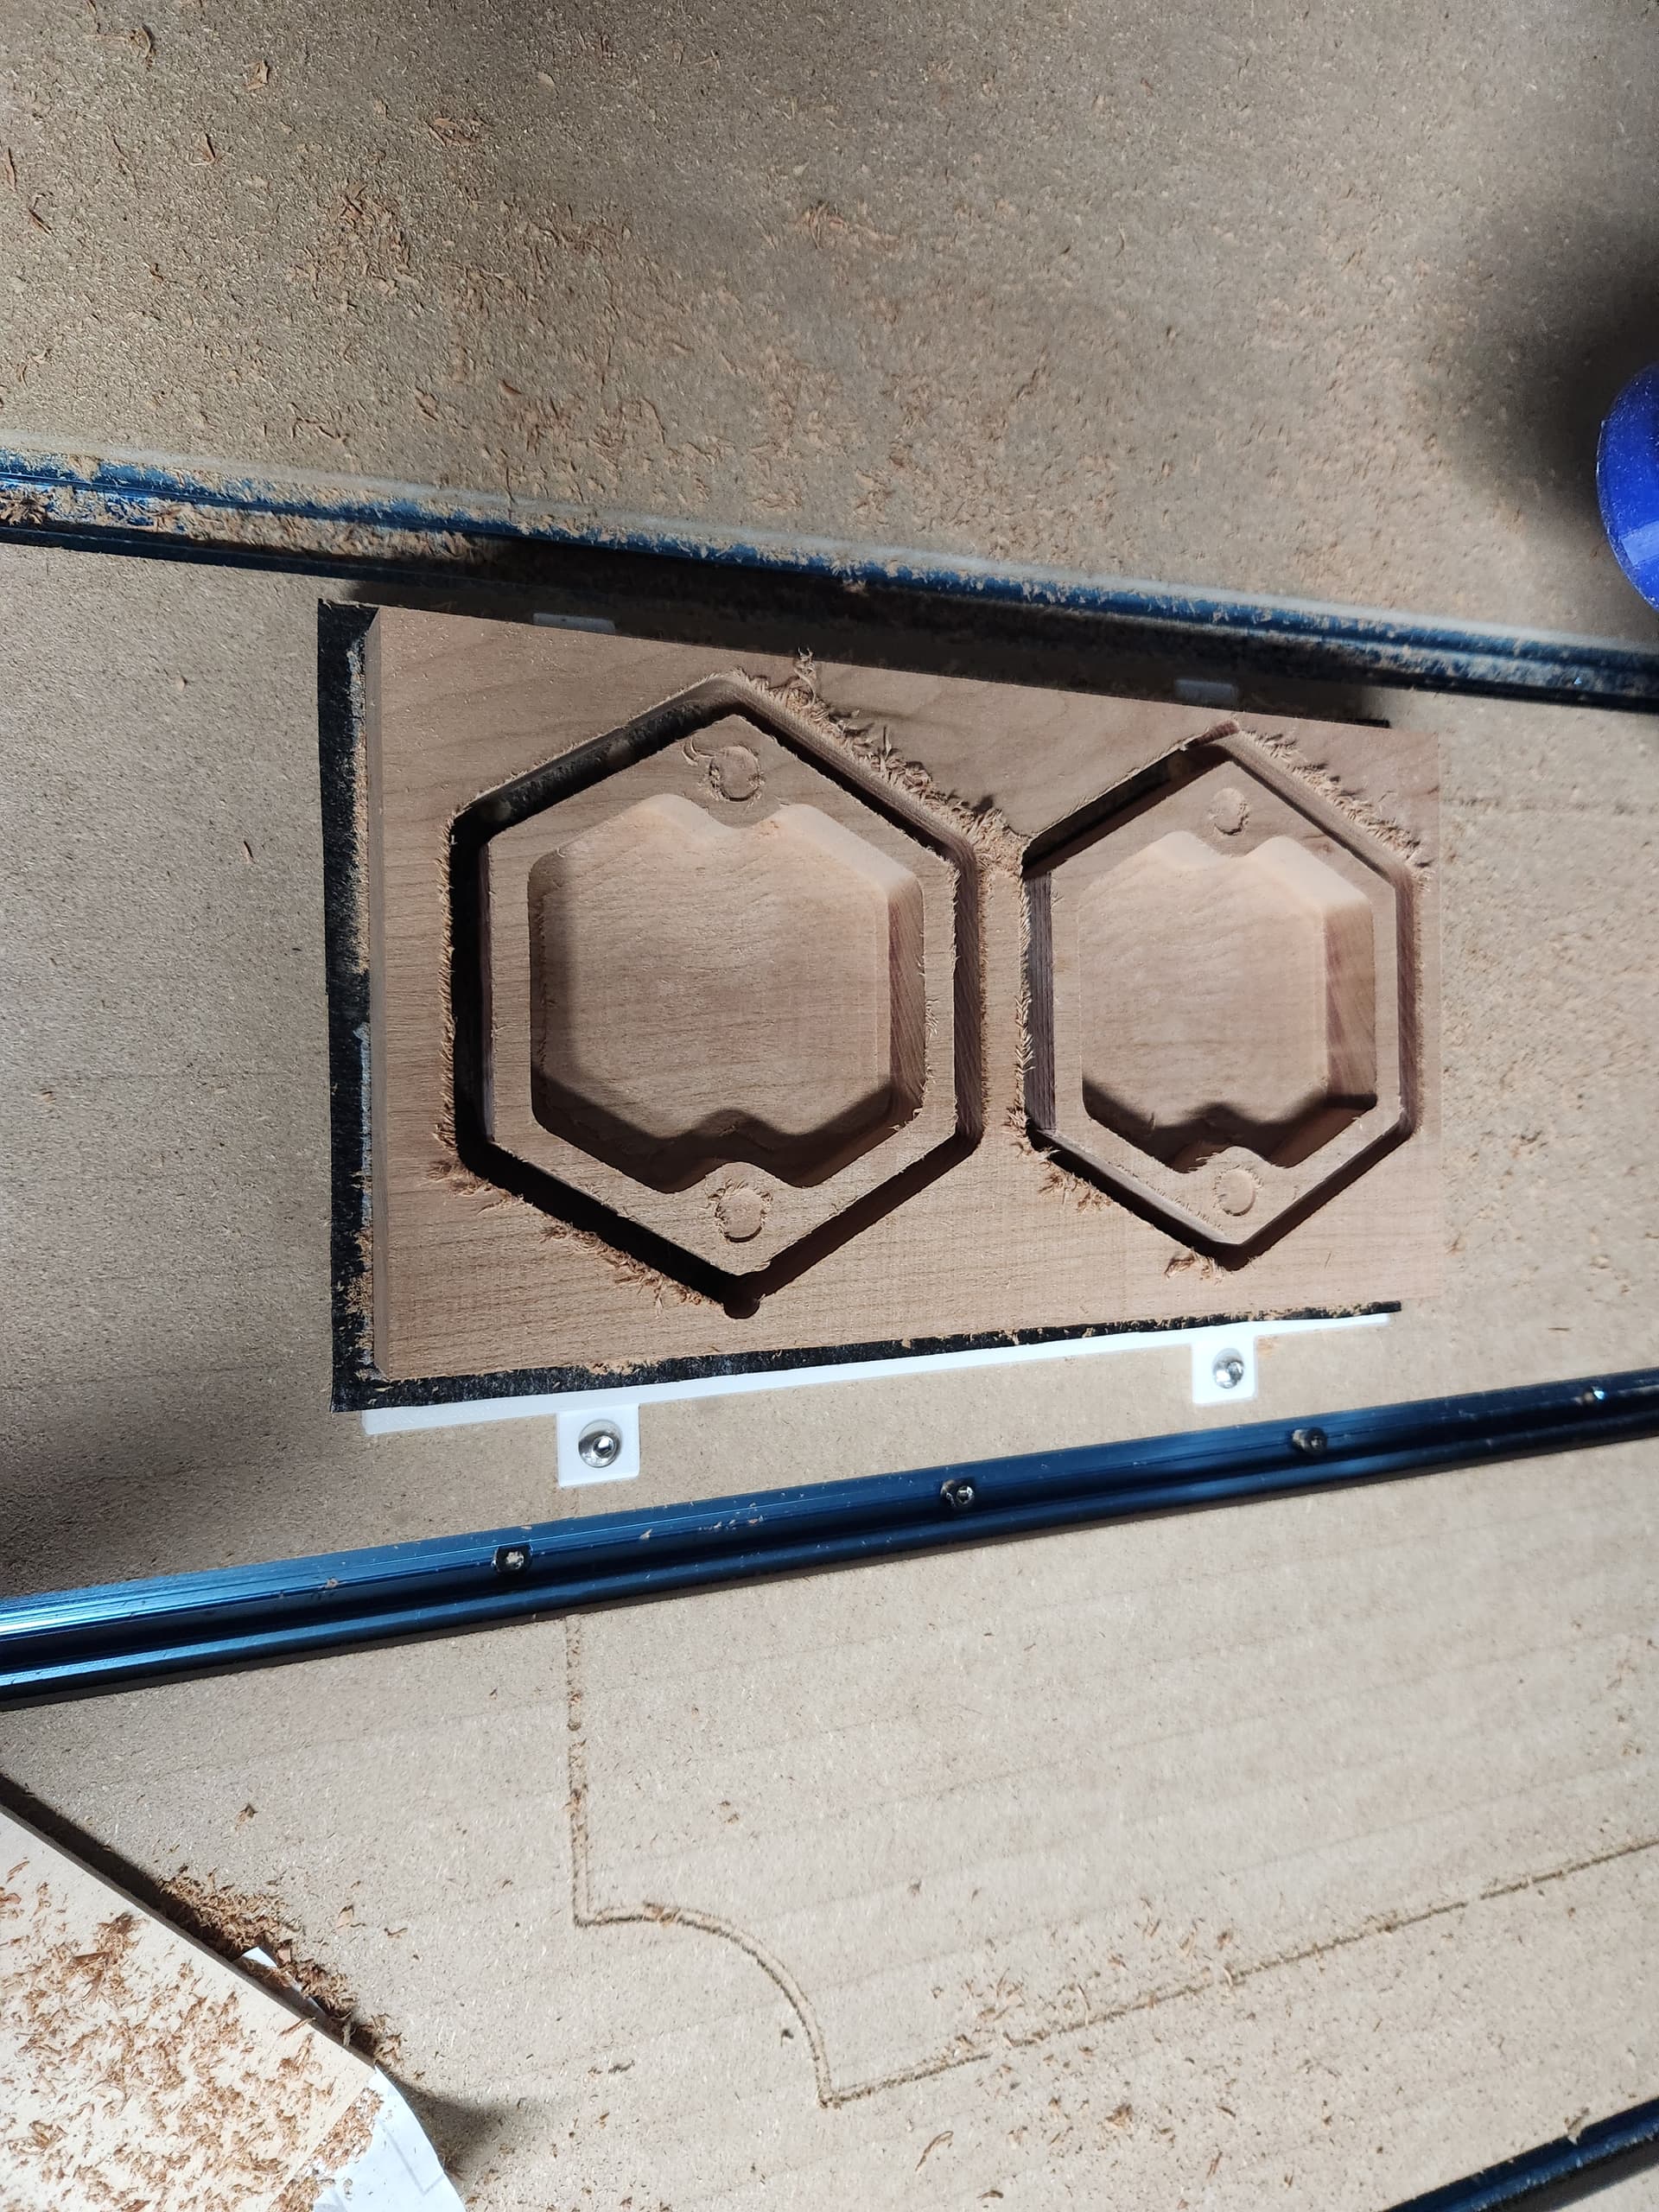
Then to make a cut its just a matter of placing the stock on the outline, engaging the vacuum, starting the cut, repeat.
You can see an actual cut happening here: https://www.youtube.com/watch?v=S1js59-28OM
The cut in the video is using a 1/4" upcut endmill, ~7mm depth of cut at 800mm/s into a piece of cherry.
This has been very much a “Crack a beer and see what happens” kind of design process. I don’t have hard numbers on vacuum pull or anything. I know most of the time I cannot physically remove a piece from the vacuum once it has been engaged, so its at least stronger than me I guess. ![]()