I used this simple vacuum holding pad to great success on my LR3. When it came time to build the LR4, I also wanted to upgrade my vacuum setup.
I drew heavy inspiration from the Air Weights vacuum holding system. I was very close to pulling the trigger but I just couldnt shake the thought of crashing a bit into one of those really expensive tables, so I decided to try a few ideas around building my own improved setup and the rabbit hole began.
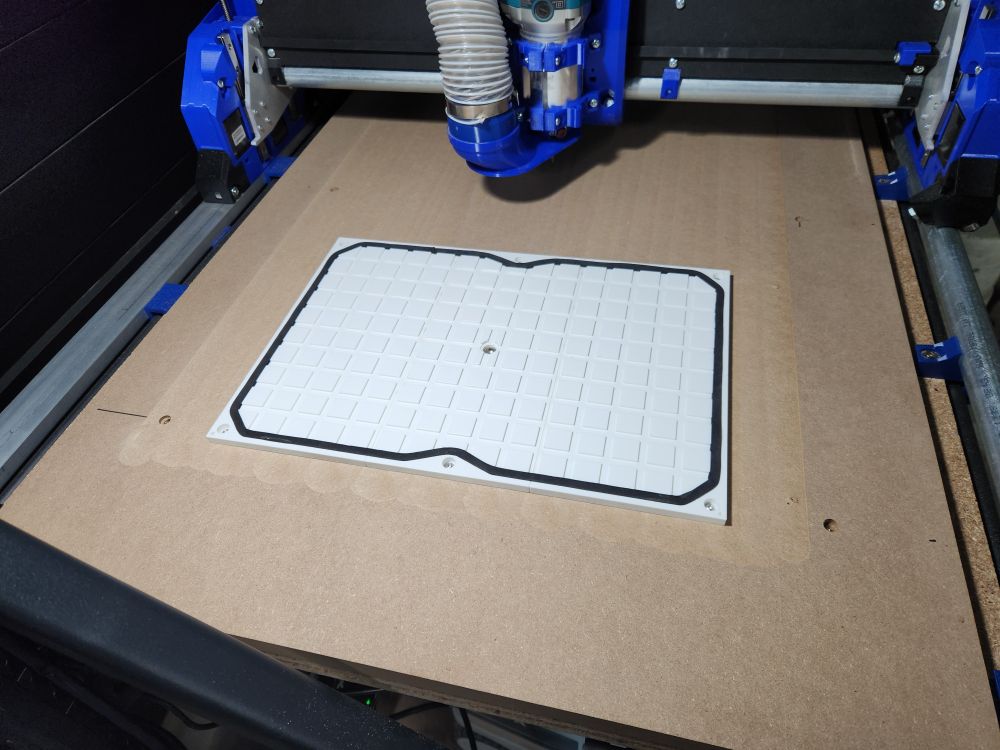
The table is assembled from a selection of modular tiles, allowing you to build it to any size (within reason). 1/4" x 1/8" cloased cell foam strip is used for gasket material. It can be permanently installed around the edge of the finished table, but can also be press fit into the grid to create temporary smaller vacuum areas.
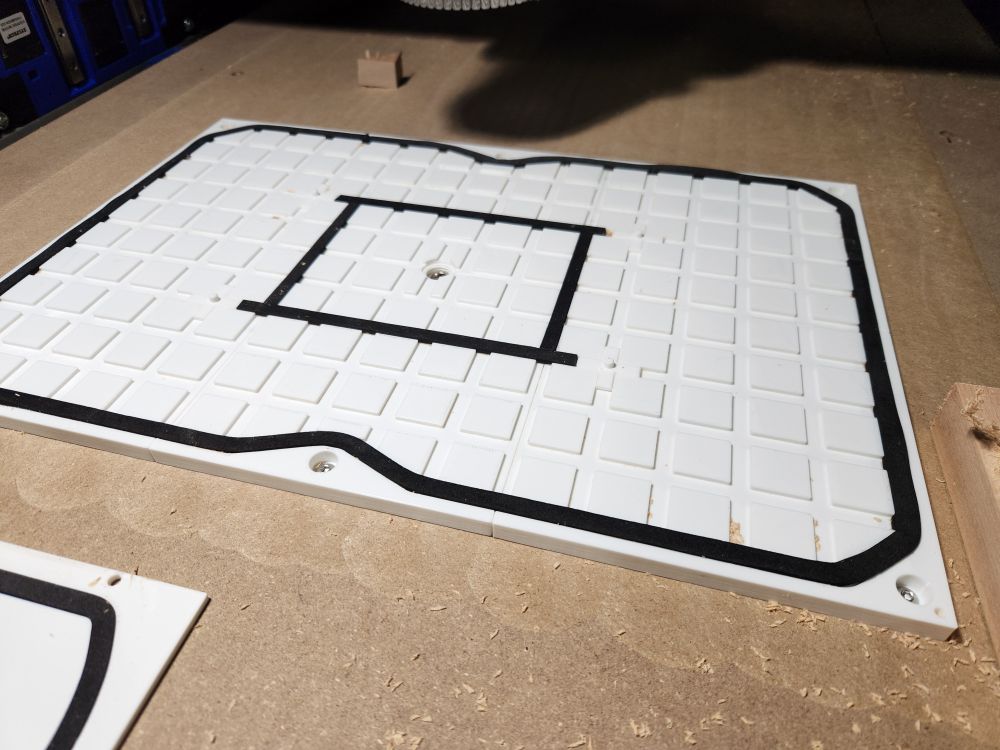
I also wanted to build in some features to make repeated jobs as simple as possible. Most of my work involves making runs of the same jobs over and over, so any time I can save swapping out stock is useful. The table has slots for 3mm dowels on the corners for mounting fixture plates. I also designed some 3d printed fixture plate alignment pins which can be slotted anywhere into the table grid. This allows you to build a custom fixture plate which can be positioned in the exact same place everytime on the table.
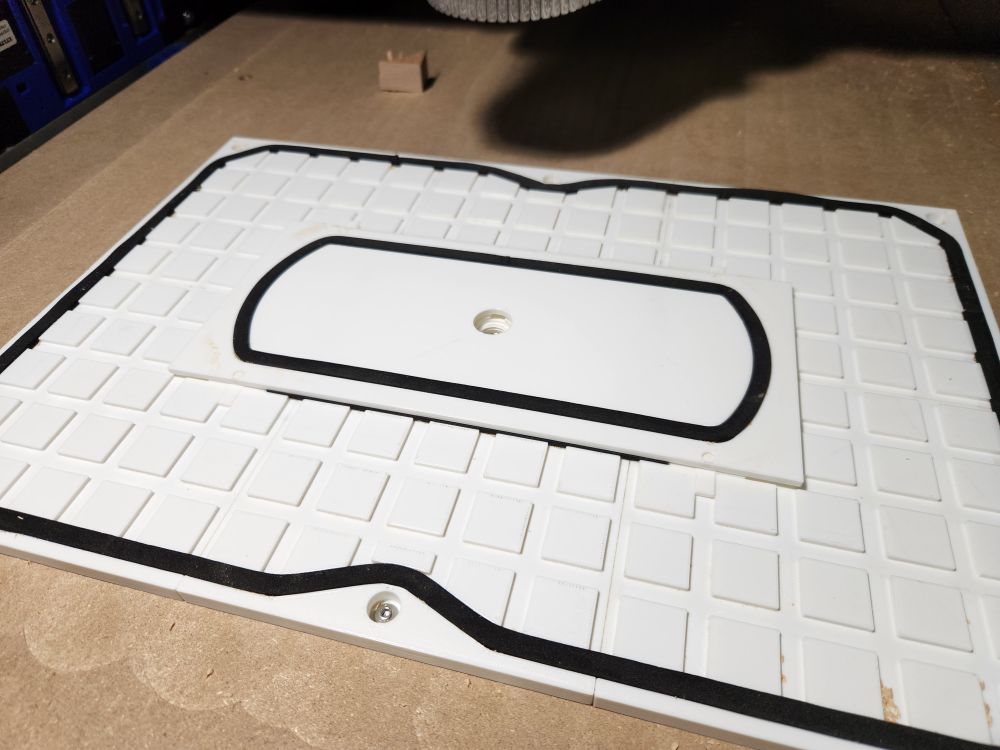
You can see an example of a 3d printed fixture plate I made for a small box here.
The vacuum table is attached via m4 screws in threaded inserts in my spoilboard. Because I had the CNC cut the hole for the air tube and the threaded inserts, I know the exact center of the table. This means that if I set the origin of a job to start centered on my stock, I know the XY start position for my tool automatically for any job I am running on the table. Its nice to have a quick macro to center on the vacuum table and not worry about jogging to a start position with every new job type.
By offsettin the gasket on the fixture plate slightly inward, I can cut all the way through the outside of the part without breaking the vacuum. This eliminates the need for any gasket style spoilboard, so long as you dont need holes in the middle of your part.
The hold has proven pretty strong, even on my cheap amazon vacuum pump. My table starts moving well before the part does.
If you want to try it out yourself, you can find the files here:
I really like that idea. Would you mind uploading it to printables as well? I don’t really want to make another account for another website. Or upload the files here as a zip? Thanks. <3
It looks interesting, that 5cfm pump what would be the max area it can work?
Found the info: it would be good for a max size of 24x24" , so a 9cfm would be good for a 24x48 inch. Scalable. I likt it better than the big vacuum noisier 220v pumps and can be connected to my solar inverter!
Man… I have a vacuum pump like this already. Seems to be a little larger than the one you have linked on the printables page but still not 5cfm. I might have to give this a try and see how well it works for smaller stuff. 90% of the time I am doing full sheet work, but here lately I have found myself playing around with more smaller 3d carves and stuff as well. This would be real nice for those occasions.
Do you have to leave the pump running the entire time or can you close the valve and turn it off once it vacuums down? May be a dumb question but I have never used a vacuum table before
If you happen to loose vacuum, you will get your stuff loosen.
In my vac table i just use it for the V-Route gcode part. To matain the exact z height and avoid using the free floating z axis my spindle is attached to and always have all the perimeter of the sheet secured so when i turn off the pump it doesn’t move
I have a vacuum pump like this already. Seems to be a little larger than the one you have linked on the printables page but still not 5cfm. I might have to give this a try and see how well it works for smaller stuff.
I almost entirely run small jobs and the smaller pumps have been great for that. I don’t really know at what point it would start to fall off. One thing to be aware of with the pump you linked is that it looks like it takes oil. A lot of my initial research suggested oil free pumps to avoid releasing oil into the air. Depending on how long your jobs are or how well ventilated your space is, it may or may not matter.
Do you have to leave the pump running the entire time or can you close the valve and turn it off once it vacuums down?
I run the pump the entire time. I have noticed on occasion after turning the pump off that I will maintain a seal, but I wouldnt trust it actually holding a work piece. I think especially on a 3d printed table assembled in this way, there will always be small leaks.
That’s what I was thinking but wasn’t sure how often that would happen. This stuff I am using here lately all has cracks and stuff in it so would probably have to keep it running just because of that. I know HVAC guys run these pumps for hours straight installing systems so I don’t see where it would be an issue.
I am in a garage with 2 open doors (one being a 2 car garage door and 2-3 fans running all the time. Ventilation isn’t an issue lol. Plus I already have this pump. So if I set it up and like using it, but find the pump to be an issue down the line I can always upgrade that then. But for now I would like to try it with what I have as a “proof of concept” for me and my erratic workflow lol.
yeah that all makes perfect sense. I agree with you and @CesarH. I will run the pump the entire time.
I just have to see what I can find to adapt from the fitting on the pump to regular tubing. I am sure I can come up with something.
Man I have had some exceptional luck with Vevor stuff. Cant complain one bit.
IF I get to a point where I use it enough and find I need a larger pump for larger projects then that wouldn’t be a bad option at all. But for now we will see what this 3cfm I already have will do
Don’t you lose the vacuum when you cut through the part? I’m trying to reason how that would work
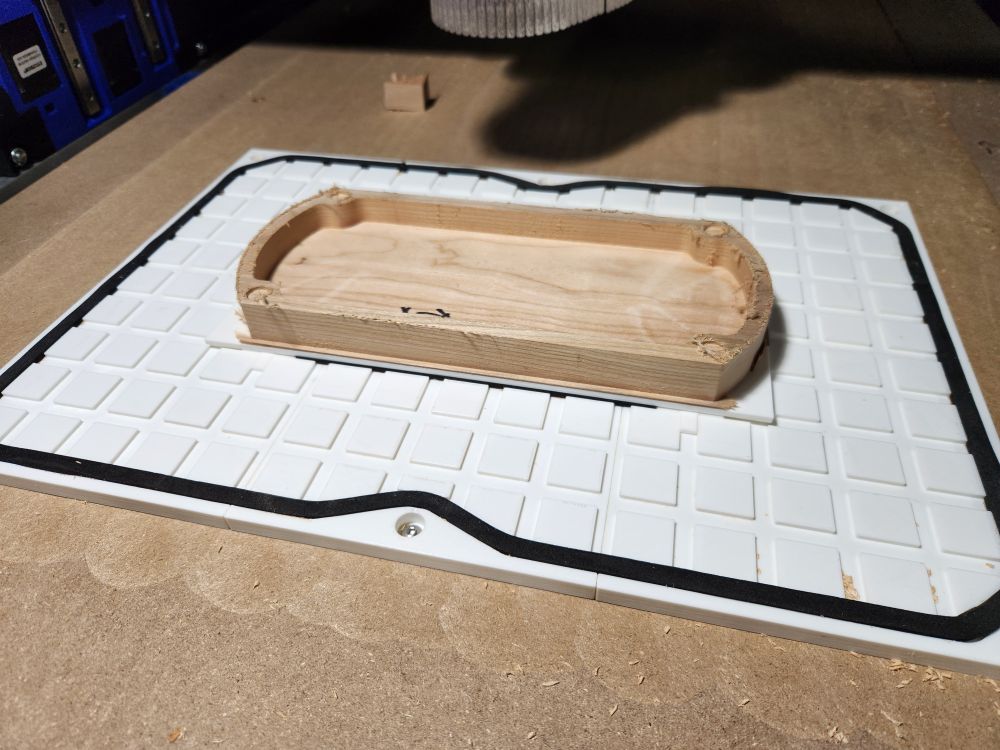
Yeah absolutely. In this case I am using a fixture plate where the gasket is offset about 1/4" inward on the part. I’m cutting out what is essentially a tray here so the only through cut is the contour operation to cut out the final shape. This final cut stays outside of my gasket, so the vacuum area remains intact.
There are techniques for through cutting which I have used pretty succesfully in the past. You esentially punch a bunch of holes into some kind of foam material and glue that to a 1/4" sheet of MDF. It creates a series of individual suction areas which let you actually through cut. This is an example from Air Weights but I have made my own version of this with some leftover tool drawer liner that worked well for quite some time.
I’ve been reading a bit about vacuum tables lately, post #14 of this thread is worth checking out for sure. Details how to use 3 layers of dollar store foam board and a 3D printed nozzle to hook your vacuum up to it
Sharing because it’s a very similar approach, it might connect some dots in the right person’s head
I’m printing parts for this now. I was curious how the custom fixture plate is designed. I see how you have the pins and holes for exact positioning. I can’t quite figure out what the underneath side looks like. I’m guessing it’s just flat and sealed by the gasket in the main base plate?
I’m just experimenting with adding a small vacuum section of my table so I can cut out small parts without having to deal with tabs. (I realize there are other ways like painter’s tape and CA glue but this seems like more fun.) Ideally, I’d like to have a custom fixture that is slightly smaller than the finished piece so I can cut the outside all the way through without cutting into the spoilboard or the vacuum fixture.