You should add the parametric-table tag to this topic.
1 Like
Brilliant, done.
I already thought it had it…assumptions…
3 Likes
Just got my strut plates cut out for my first LR. This will be my next project! I read the whole thread, thanks for all the work! Ill post pictures!
2 Likes
I really love this tool. But one thing is missing for what I am planning. I want to attach on the front side, vertical clamps to a board. So I can easily make dovetails or other cut outs in a vertical board. Therefore, I would like to reduce the lengths of the table cutting area for around 5 to 10 cm. Is it for example possible to make the overruns of the cutting area parametric for sites and also for the backside and front site?
I can look into that, though I’m a bit busy with work at the moment so may not have time to implement it.
One thing you could do is generate the spars for a shorter table, and then the side rails for a longer table.
Do you have any pictures or examples of what exactly you would like to do?
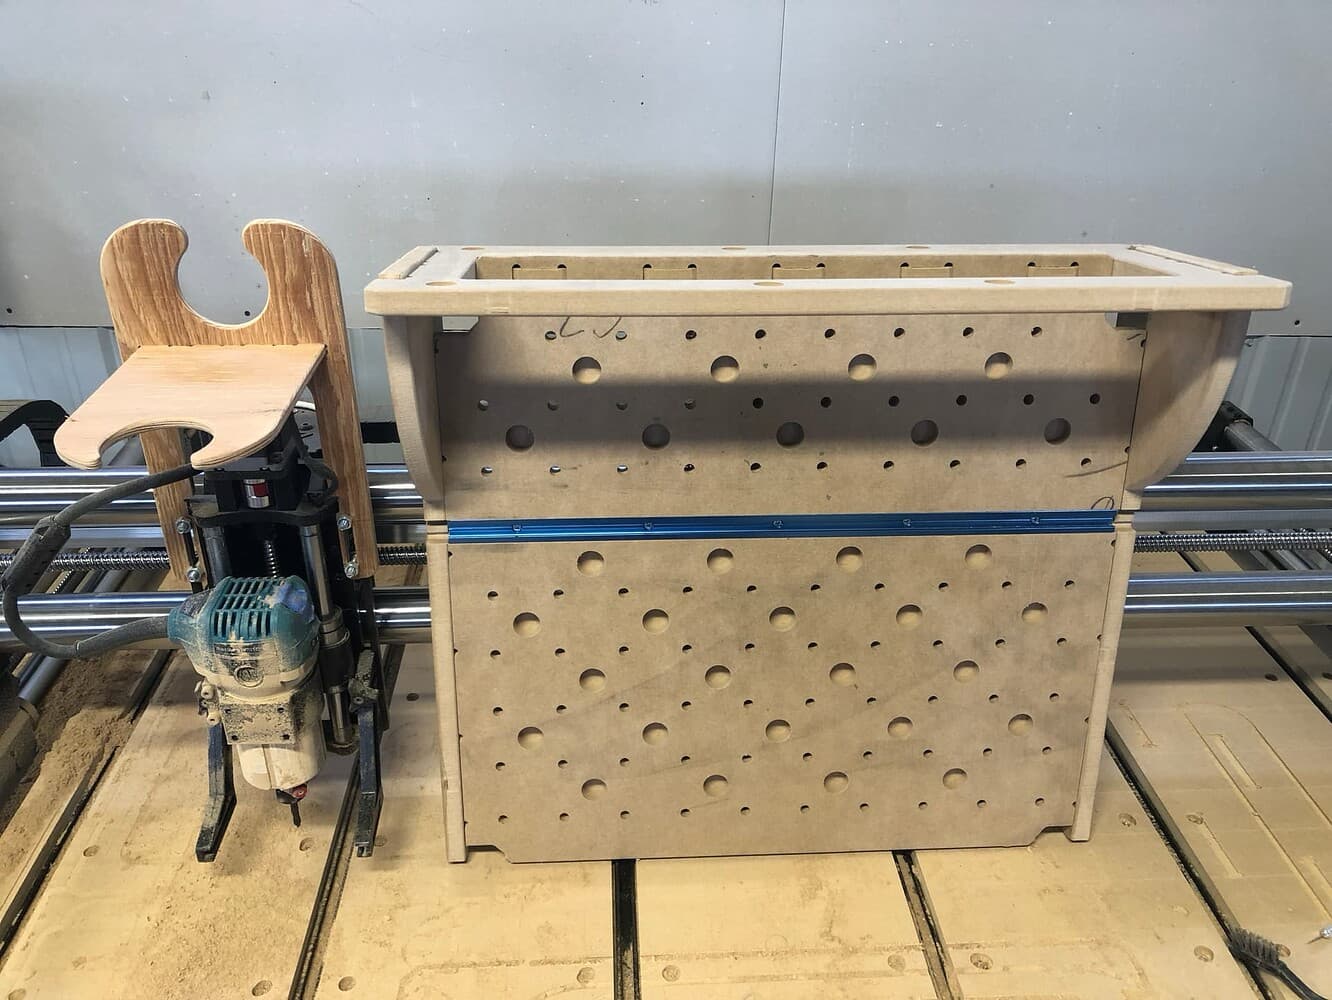
Hi there. Im new to this community. These are some of my first cuts with my machine. I got the fit I think perfect by adjusting the material thickness and I added corner cutouts.
Should I be concerned about this?
One piece is sticking up 0.012” higher.

1 Like
Yes, unless you can tap it into place?
I would imagine a slightly looser joint is fine if you get a planer surface. Plus you get a little more room for glue.
But that is just an opinion since this is not my design.
1 Like
I cannot tap it into place, its is as flush as I can get it. I test cut these 3 times.
The first time they were a little loose and I forgot to overcut the inner corners and the calibration cube was 1.004x1.005
The second time they were too tight and the calibration cube was 1.009x1.011
The third time they were a press fit and the calibration cube was 1.007x1.012
The third try was the only one that I could get to seat fully because the first try I didn’t cut the corners and the second try was too tight.
The third try the pieces would not fit fully flush. I know how to fix the cube calibration with adjusting the steps per mm but what about the two pieces not sitting flush? If my step per mm were slight off this part should still sit flush.
I was thinking about mounting something like this to the front.
Therfore the end should be unchanged.
The likeliest culprit here is that the drawings have 0 tolerance and your machine is not cutting 0 tolerance. (That’s normal, not necessarily a problem with your machine).
I also had this with the first table I made with my machine. I hand-sanded all the cuts with a brick to add the tolerance I needed. I think the best fix here is for me to make all the cuts slightly deeper than needed, which should eliminate this issue. I can probably get this done sometime tomorrow for you.
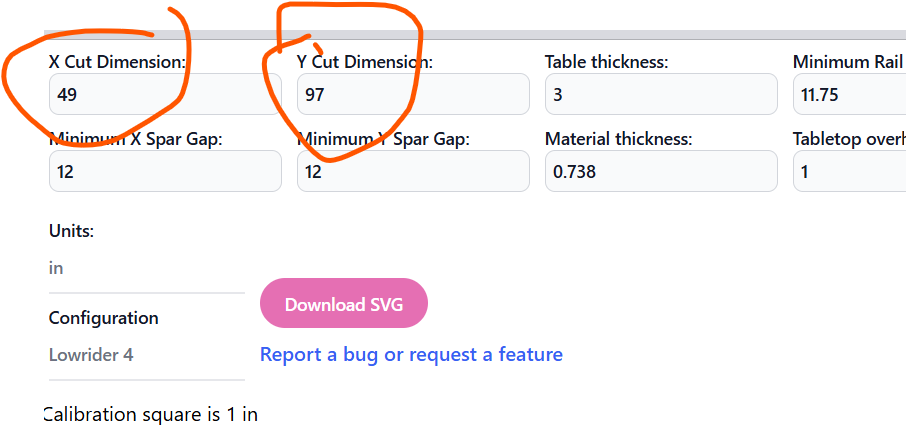
I see. I will try to add a setting for this tomorrow. In the meantime, if you set the Y cut size to the full length you want, that will be the correct size end rails for you. You’ll then want to generate the rest of the table with the shorter Y cut size (subtract the depth of whatever you mount.)
You’ll probably also want to set the overhang to 0.
My v1 of this table had some issues. Most notably, the top skin was incompletely attached. This meant that the torsion box didn’t hold flat, sagging over time. I also made some mistakes in assembly and the frame was coming apart where I had cracked some spars.
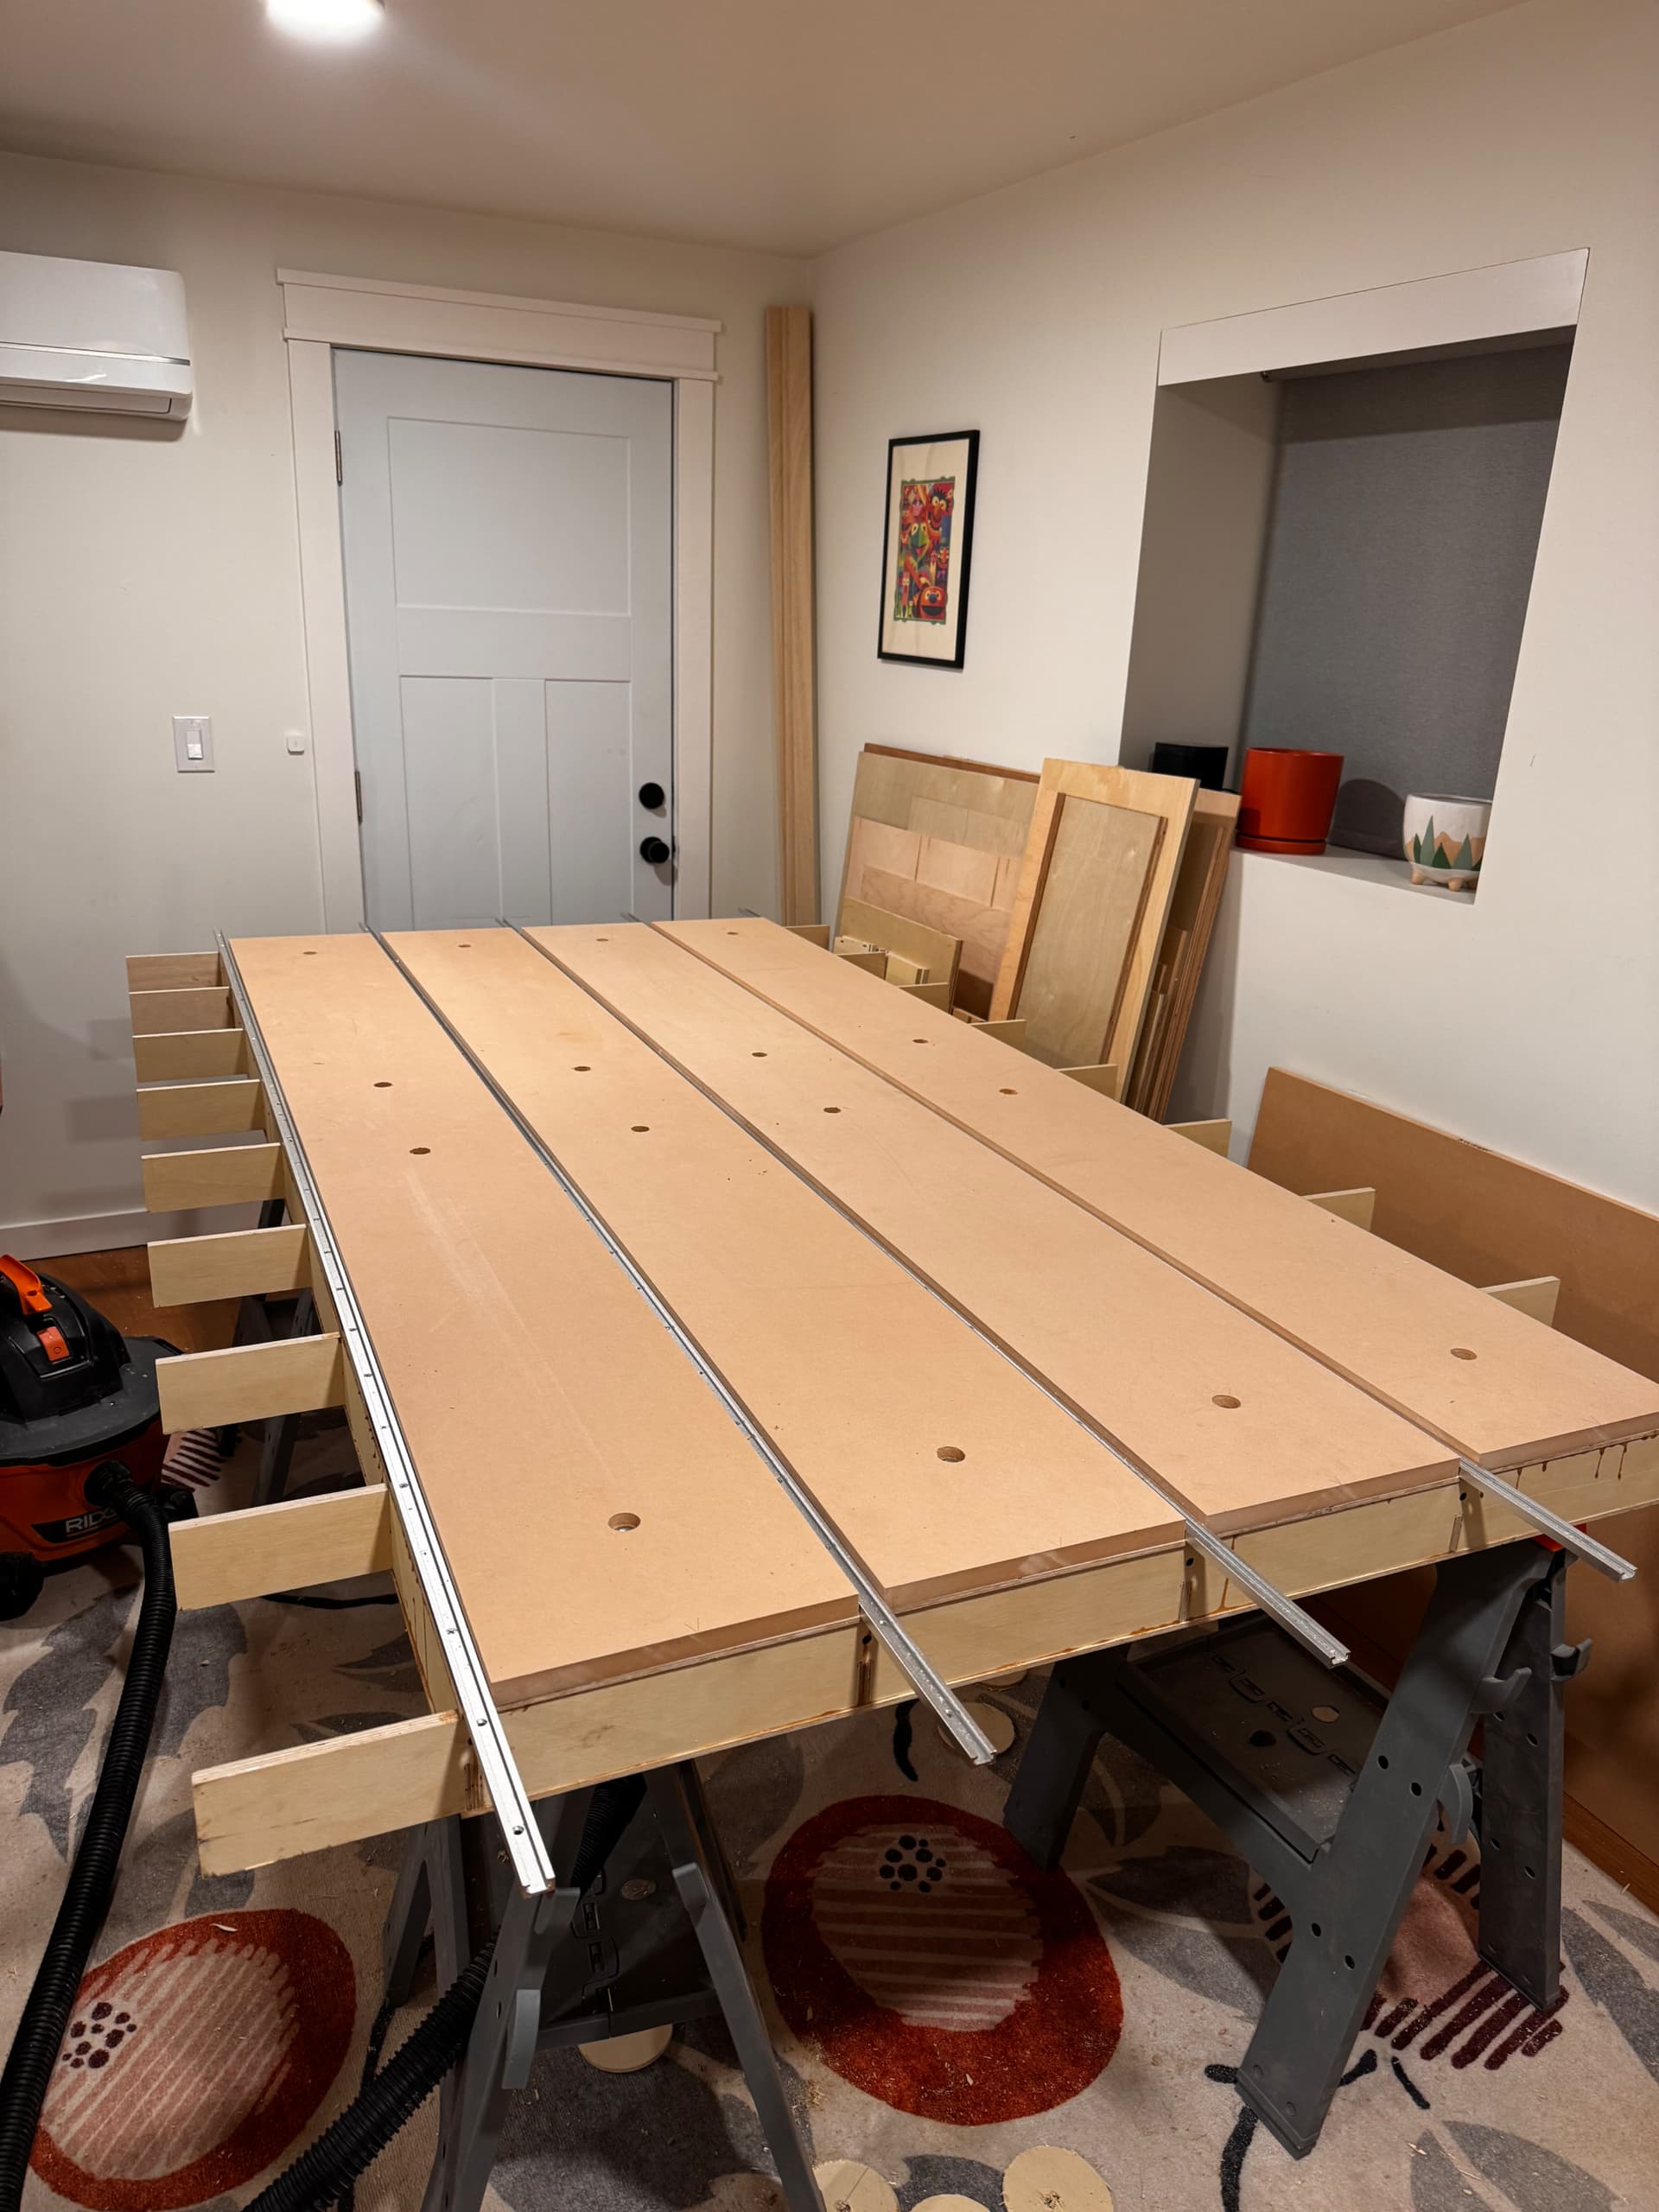
So, because I apparently love building tables, I built a fifth one! Same design, but out of plywood instead of MDF. I also added some work holding and a more removable spoilboard to improve some of the deficits of the first attempt. Most importantly, I assembled and glued the whole thing at a local woodshop with a giant, damn-flat assembly table.
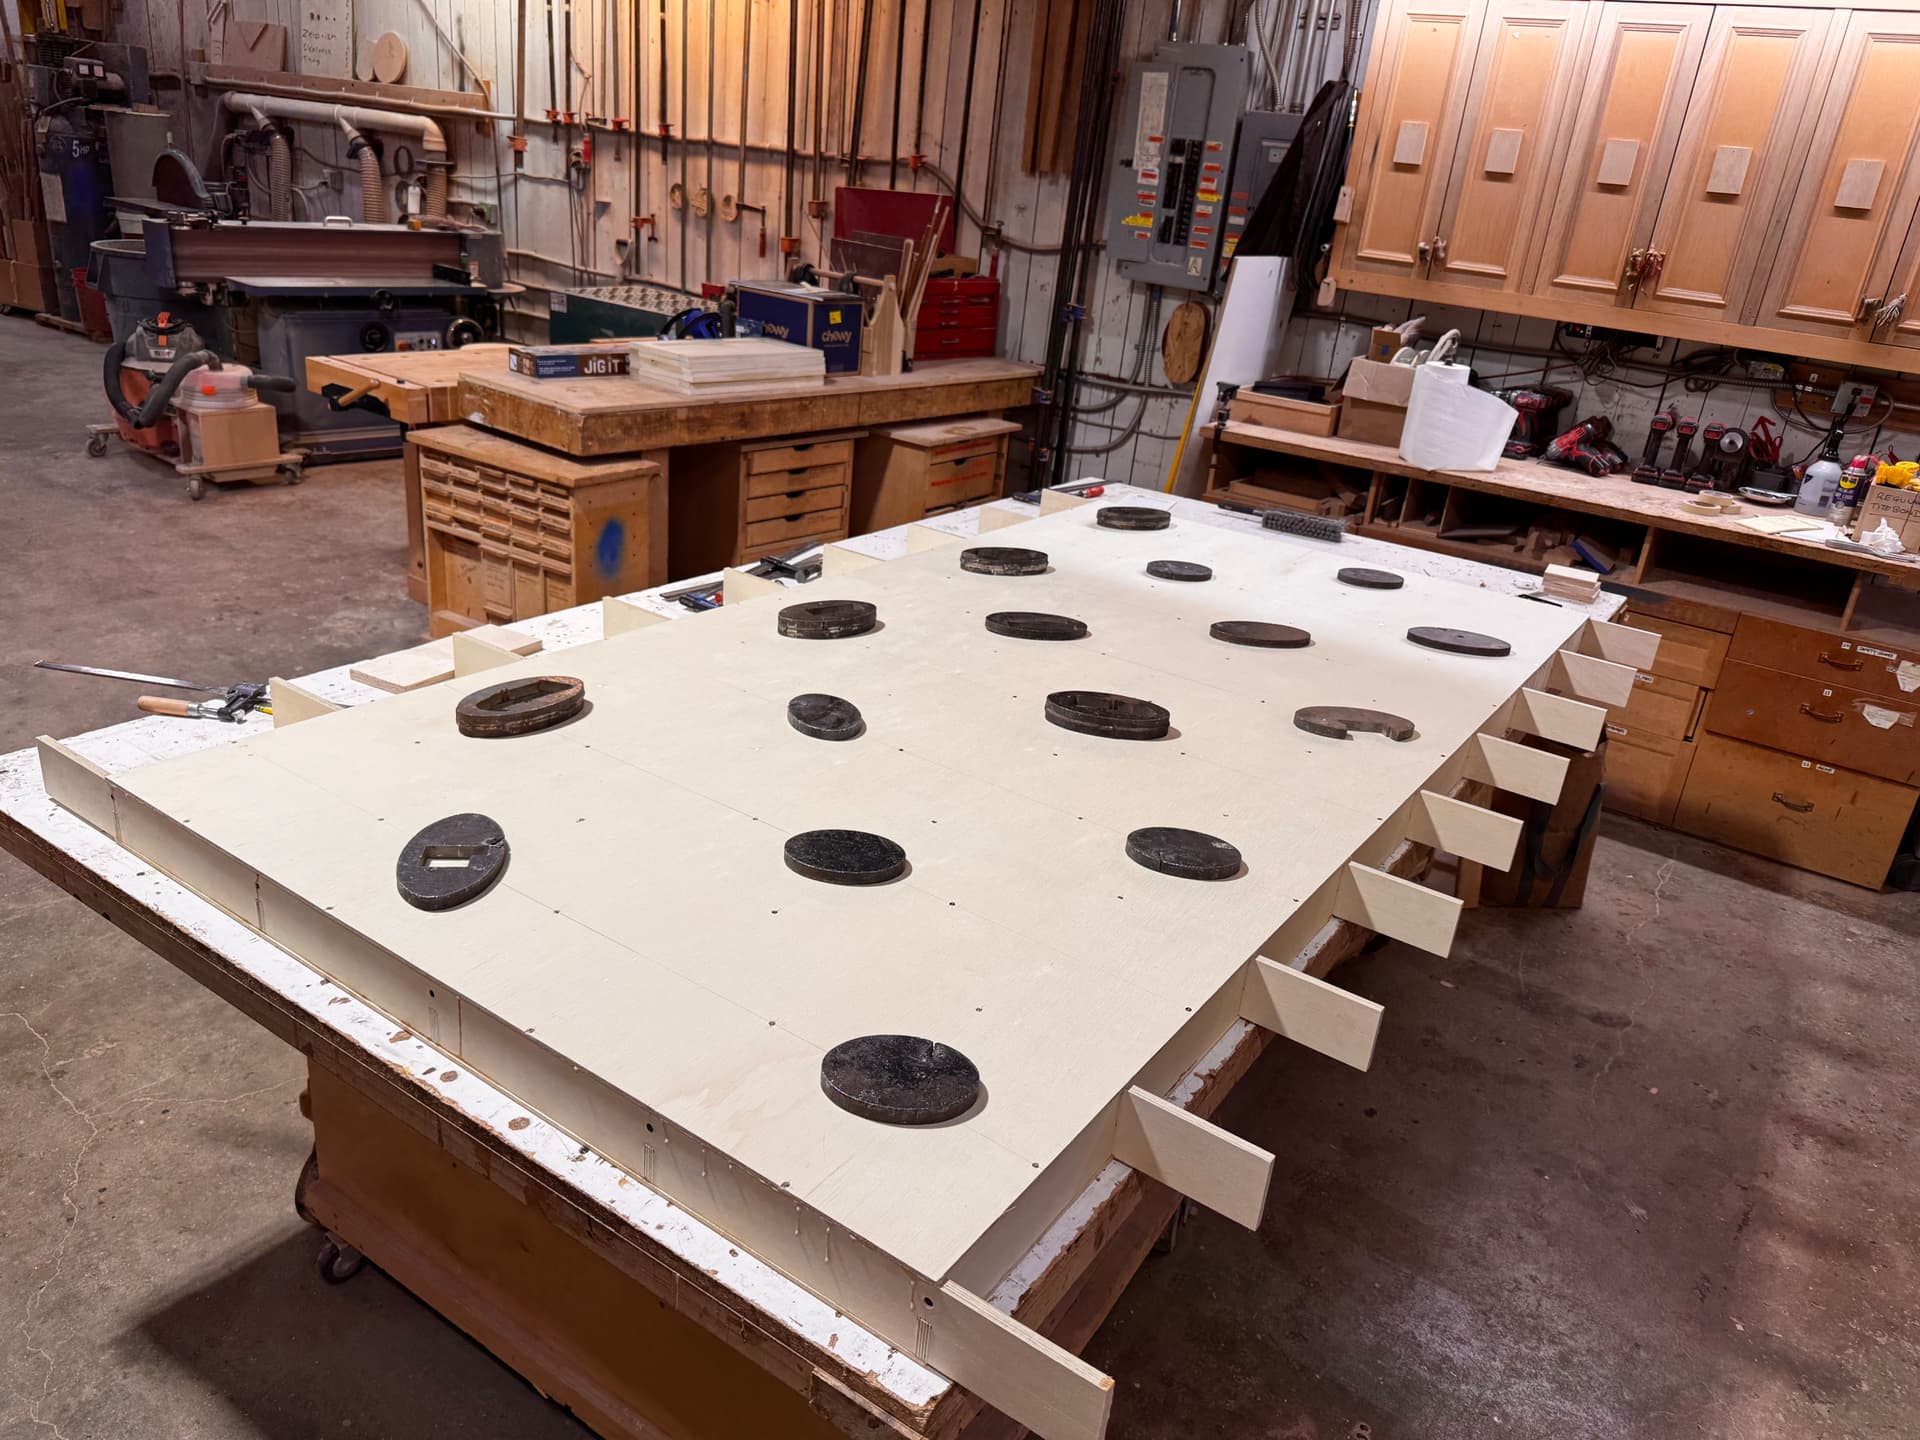
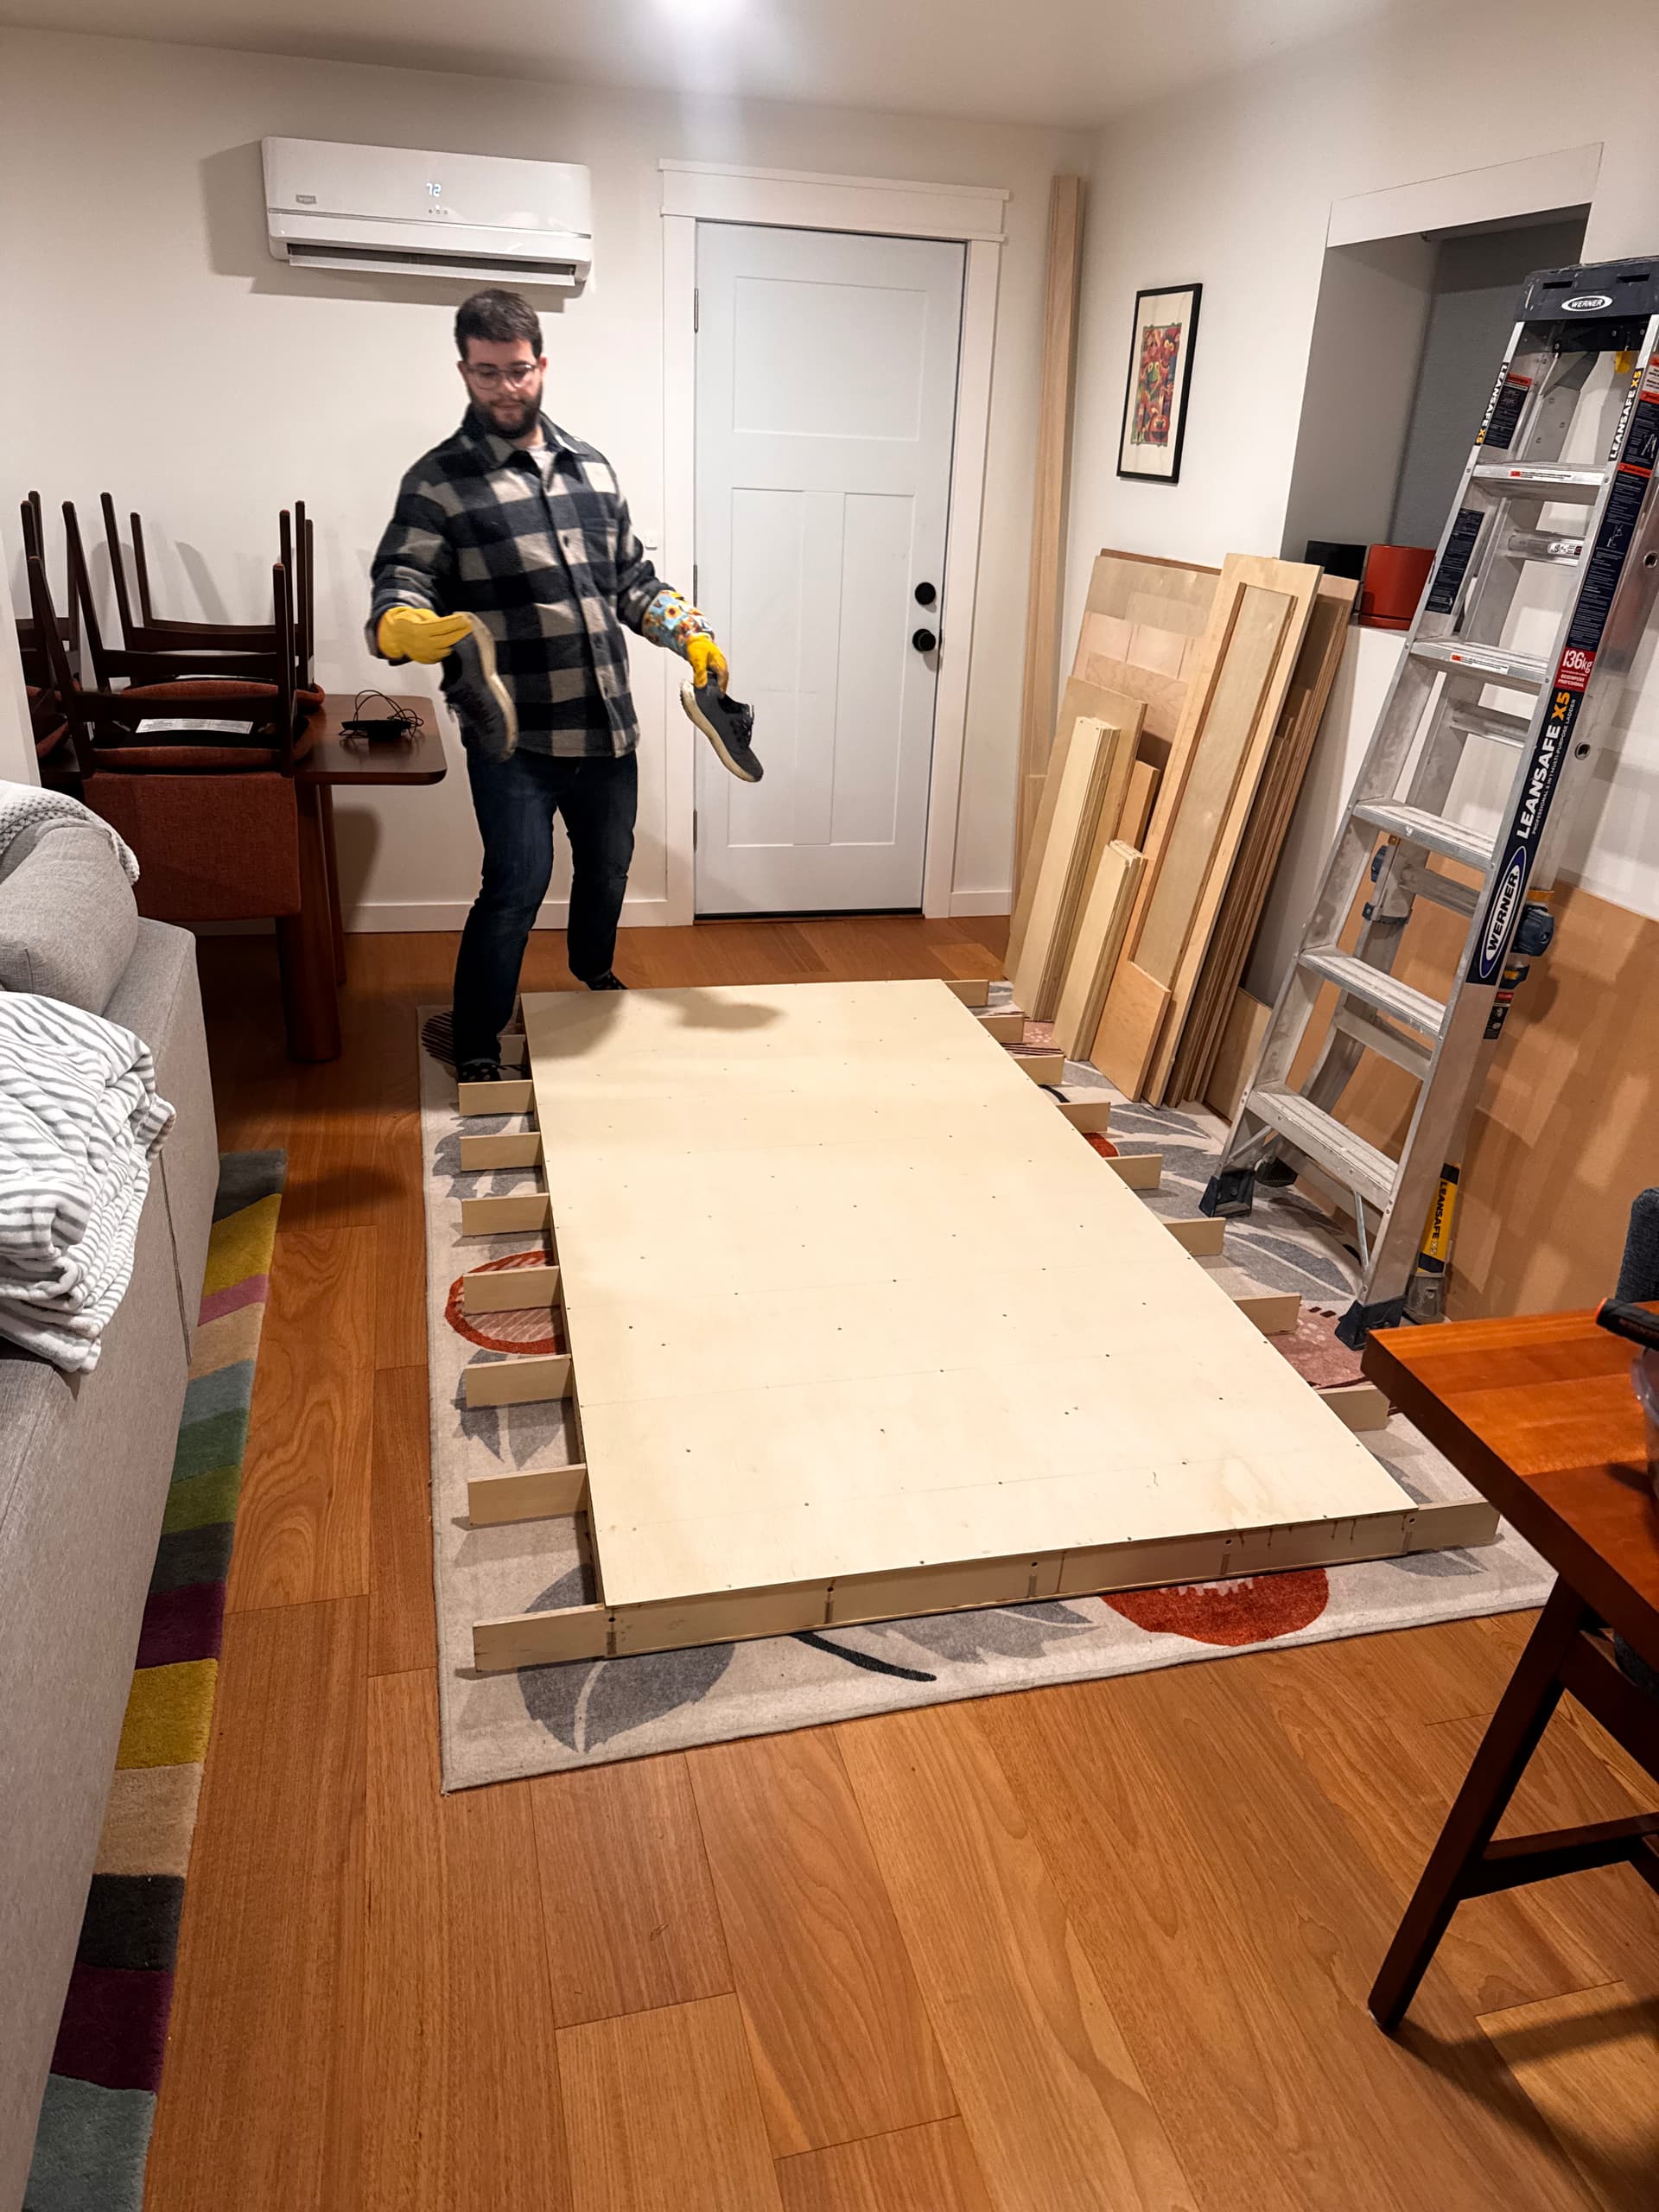
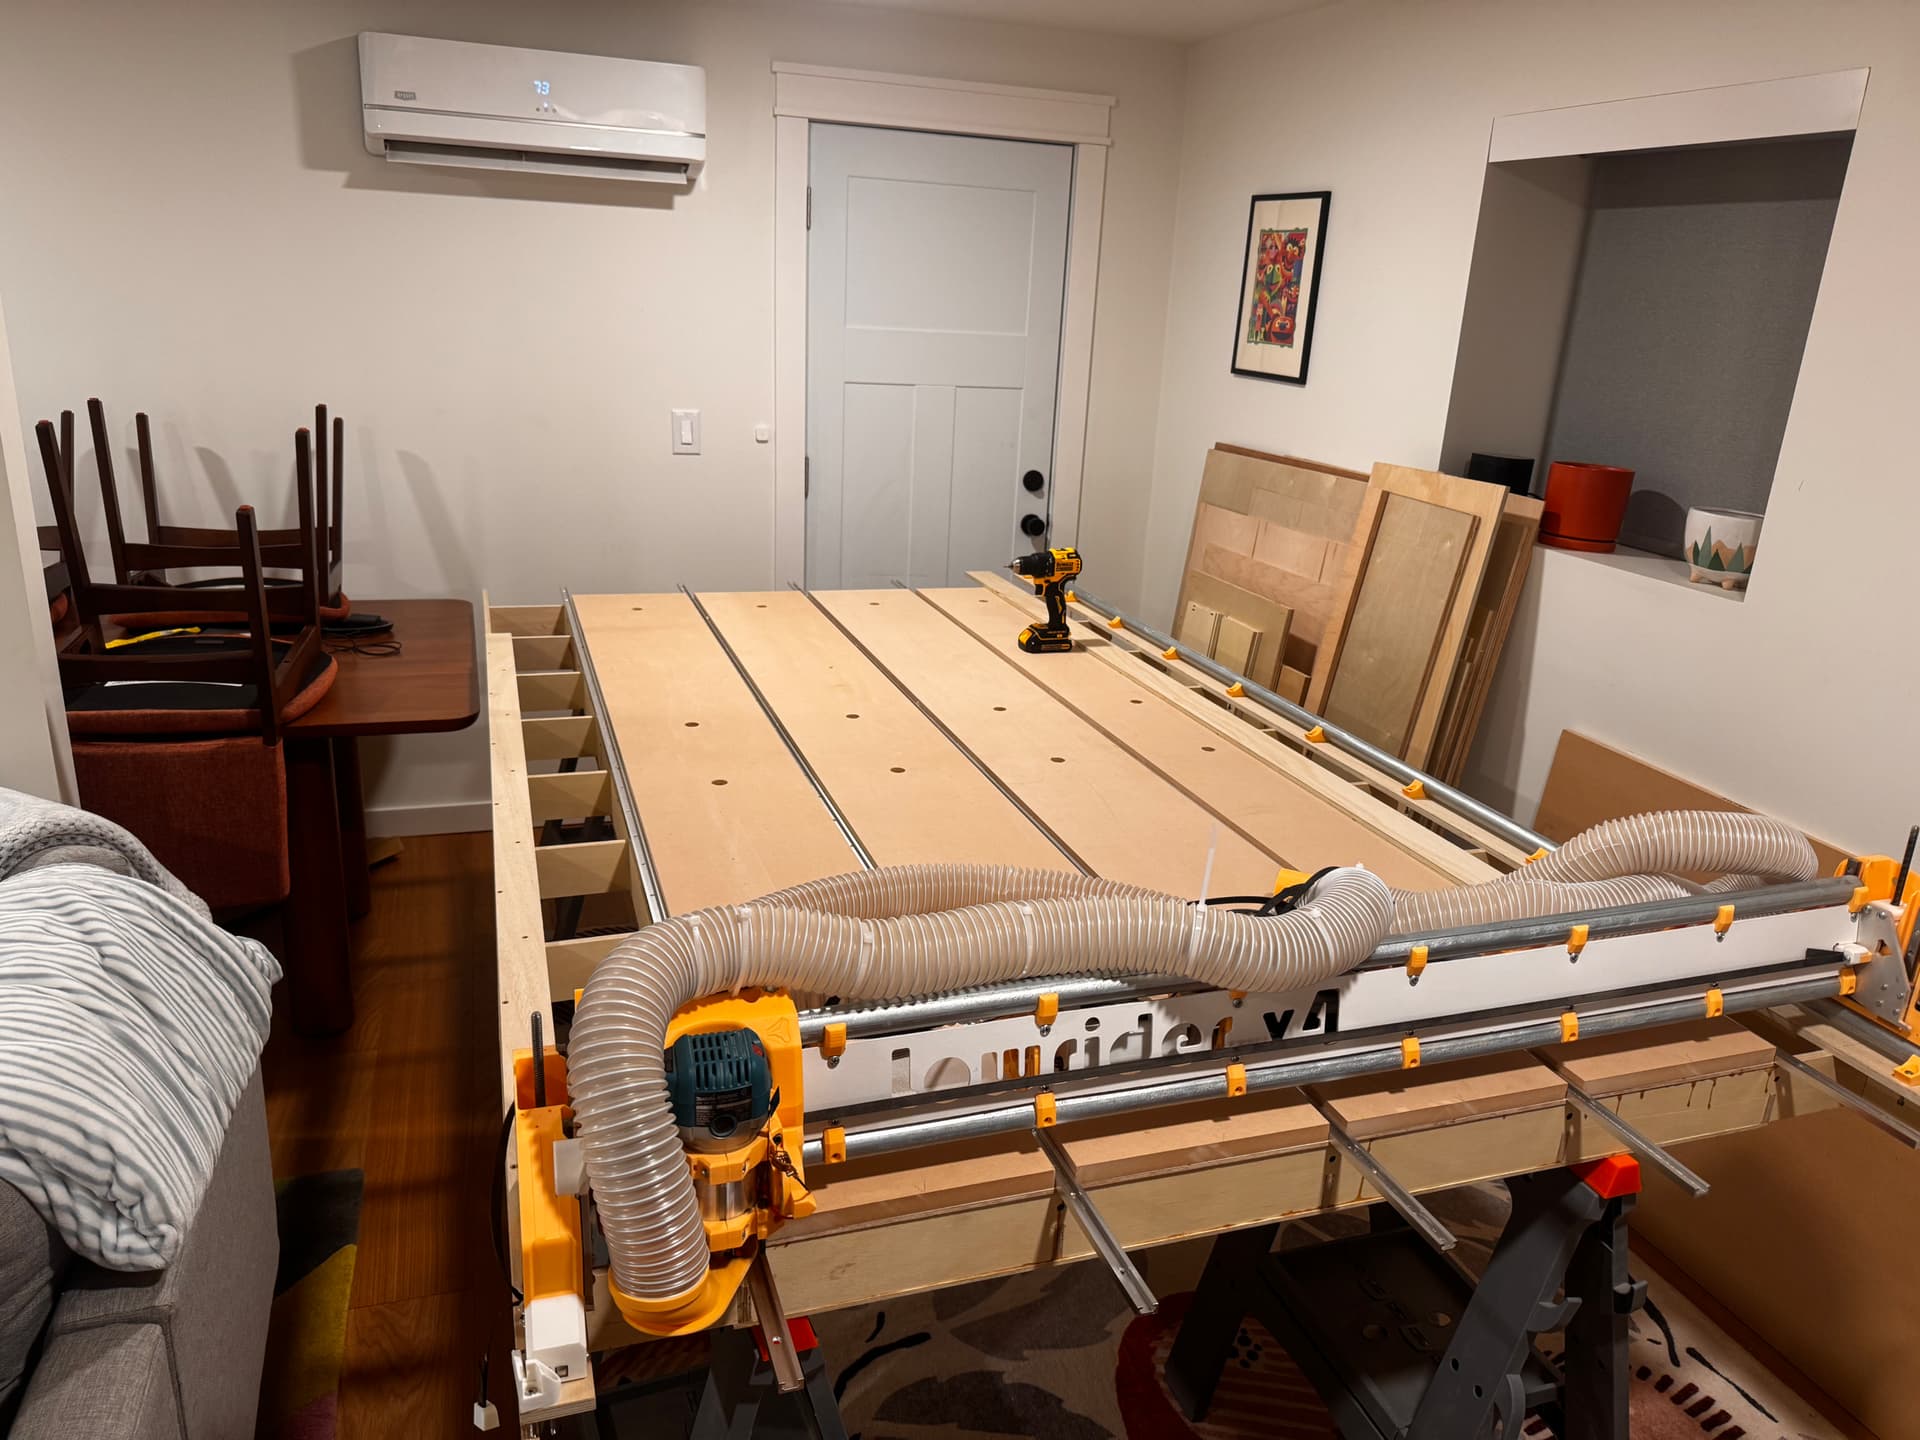
Tomorrow, it moves into the workshop, and it’s time for surfacing and squaring. And then hopefully I never build a table again…?
5 Likes
That table is awesome! I got a couple questions.
How did you attach the spoiler board? I see what looks like inlayed bolts but what are they attached to? Just the top and bottom 1/4 plywood?
The rails are for clamps? I need this. Could you share what kind of rails those are?
Is this working for everyone else and mine is just off? My cube is oversized repeatedly by an average of 1.007x1.009 and my slot was short 0.012”. Should I just adjusted my steps per mm so I get closer to 1” and then hand sand any final adjustments?
I just don’t want you changing a design that no one else has an issue with just for me.
I used a hole saw to cut large holes in the bottom skin, and then bolted the board to the top skin with a nut+washers. Some people with thicker top skins use threaded inserts, which I would have preferred but wanted a thinner table.
It’s t-track. I bought it on Amazon.
There are only maybe 3 or 4 people (including me, twice) that have put together a table using this that I know of, and I ran into this issue on my first time as well ![]() so you are not the only one. It is only good engineering to have tolerances, and I currently don’t.
so you are not the only one. It is only good engineering to have tolerances, and I currently don’t.
Of course, you can always try to modify your machine for more accurate cuts. You can run through re-squaring, adjust steps/mm, and make sure to use a finishing pass. At the end of the day it’s no skin off my nose to change this one param (and overall, I probably need to add tolerances throughout, but I won’t do that yet because it is a lot of work.)
I was frustrated at first with the slot not fitting but now I know its just no tolerances I like the idea of sanding. You can fine tune the fit to be perfect. Ill take it if you want to add a tolerance though!
I think I’ll build the table with a thicker top and have the cnc cut holes for threaded inserts and for the rails. I am also looking into putting in a ceiling lift to get it out of the way when not in use.
1 Like
I started poking around with this. I was trying to visualize what the parts were for and where they went. Next thing you know, me and my friend Claude were adding a 3D visualization. It still needs tweaking. Any interest in this? If so, I can create a PR when complete.

8 Likes
I love it!!! I had been meaning to add something like this and never got around to it. I am happy to take a look at the PR. ![]()
![]()
![]()
2 Likes