Maybe you could get the LR3 to function enough to cut your new strut plates for LR4, and maybe even some aluminum XZ plates, although that can be ordered from Ryan, and it’s a steal of a deal.
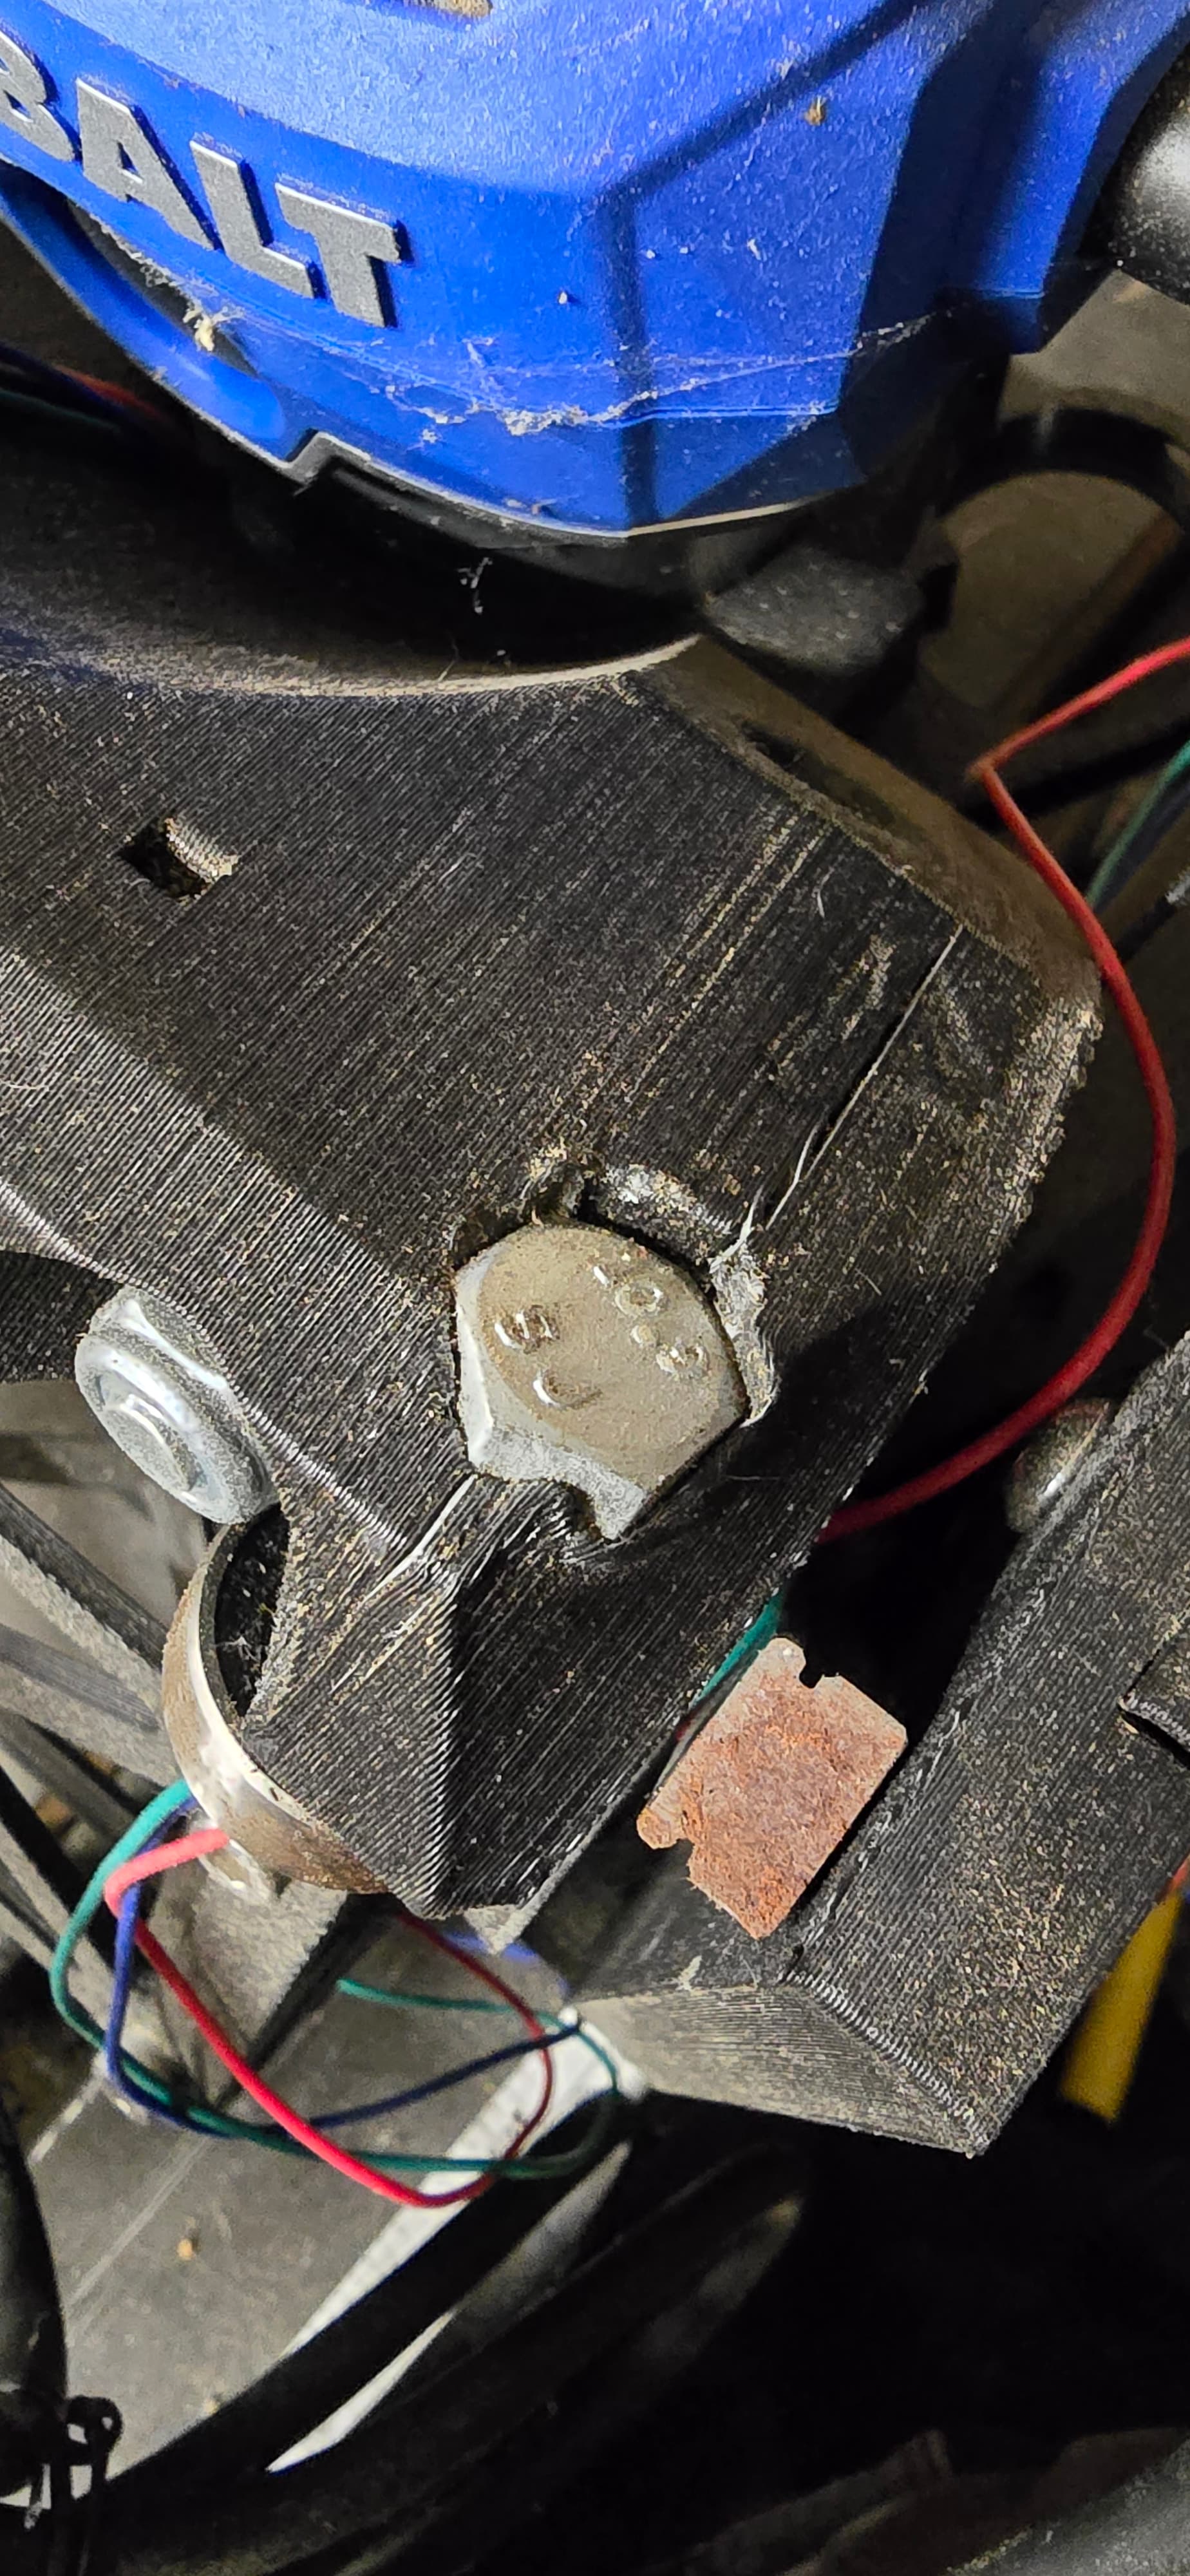
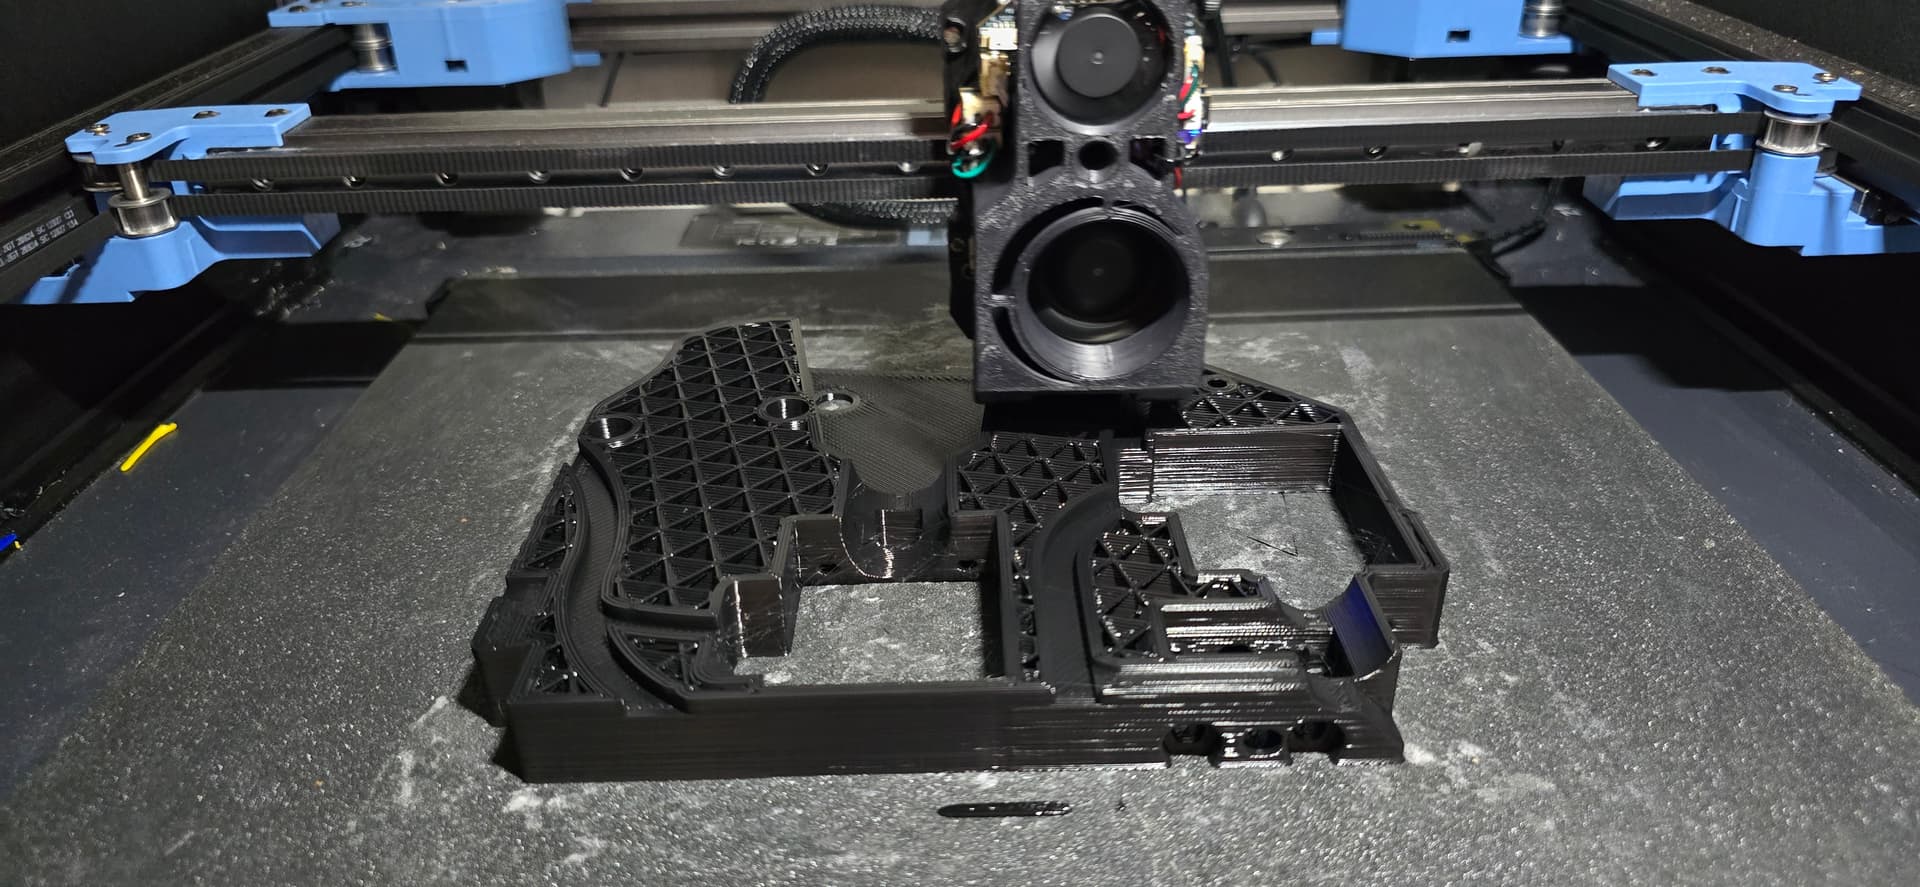
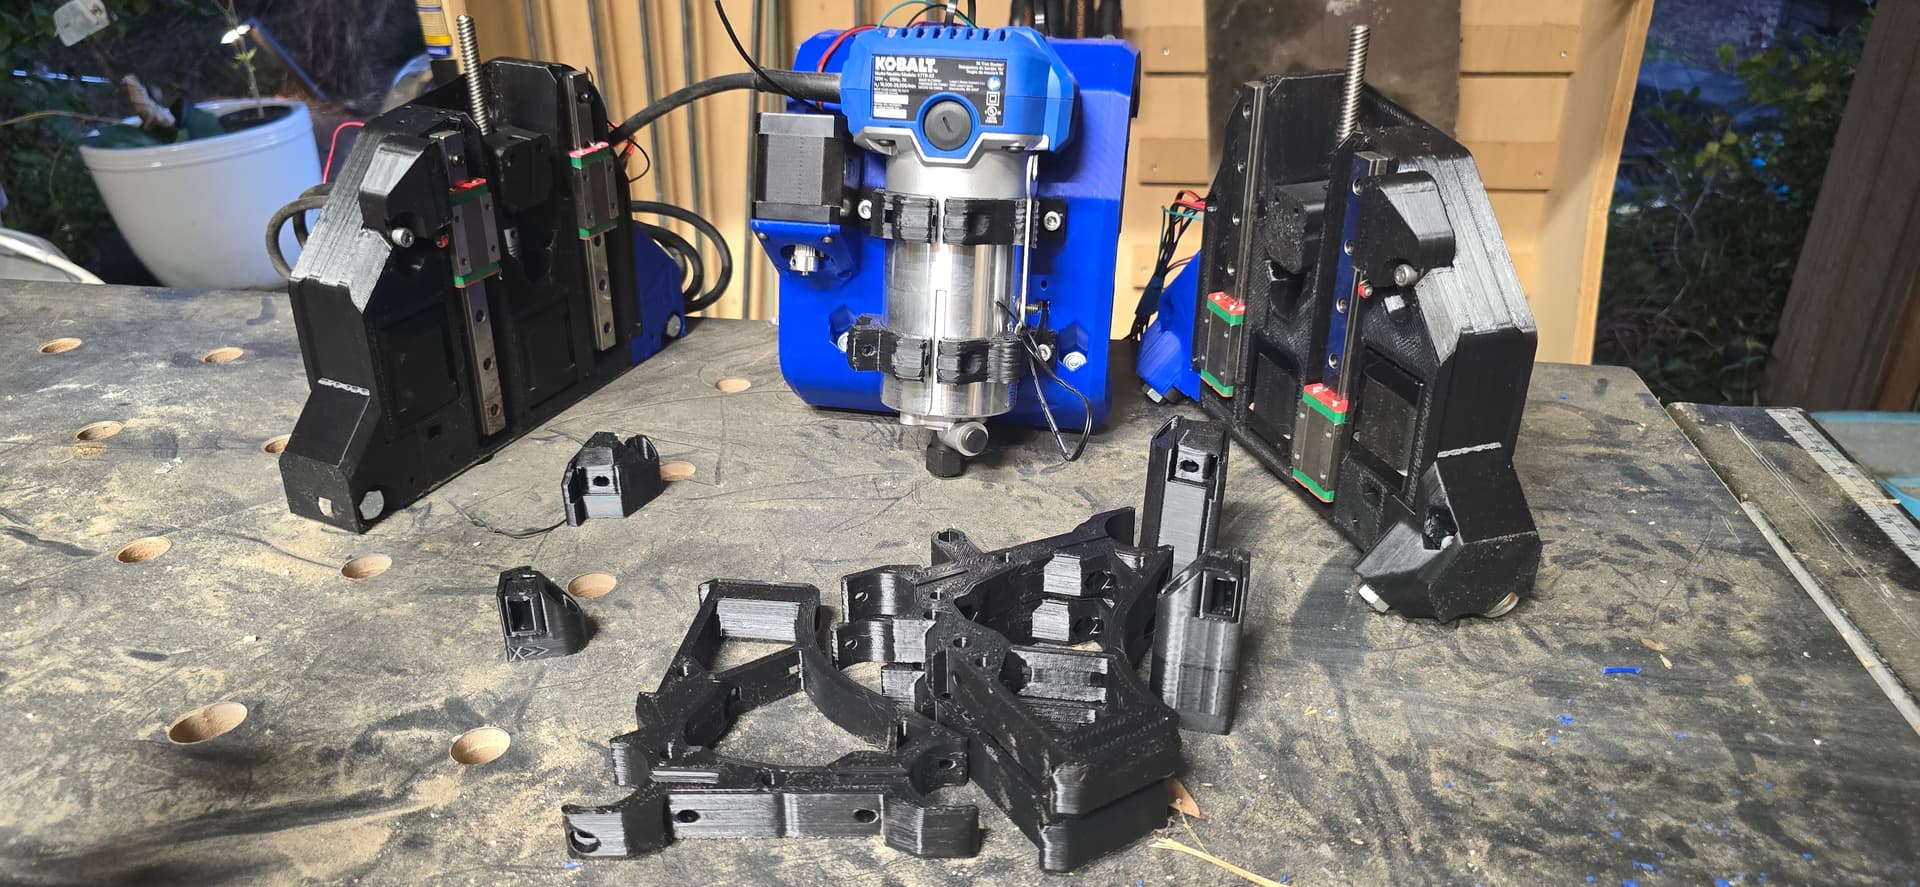
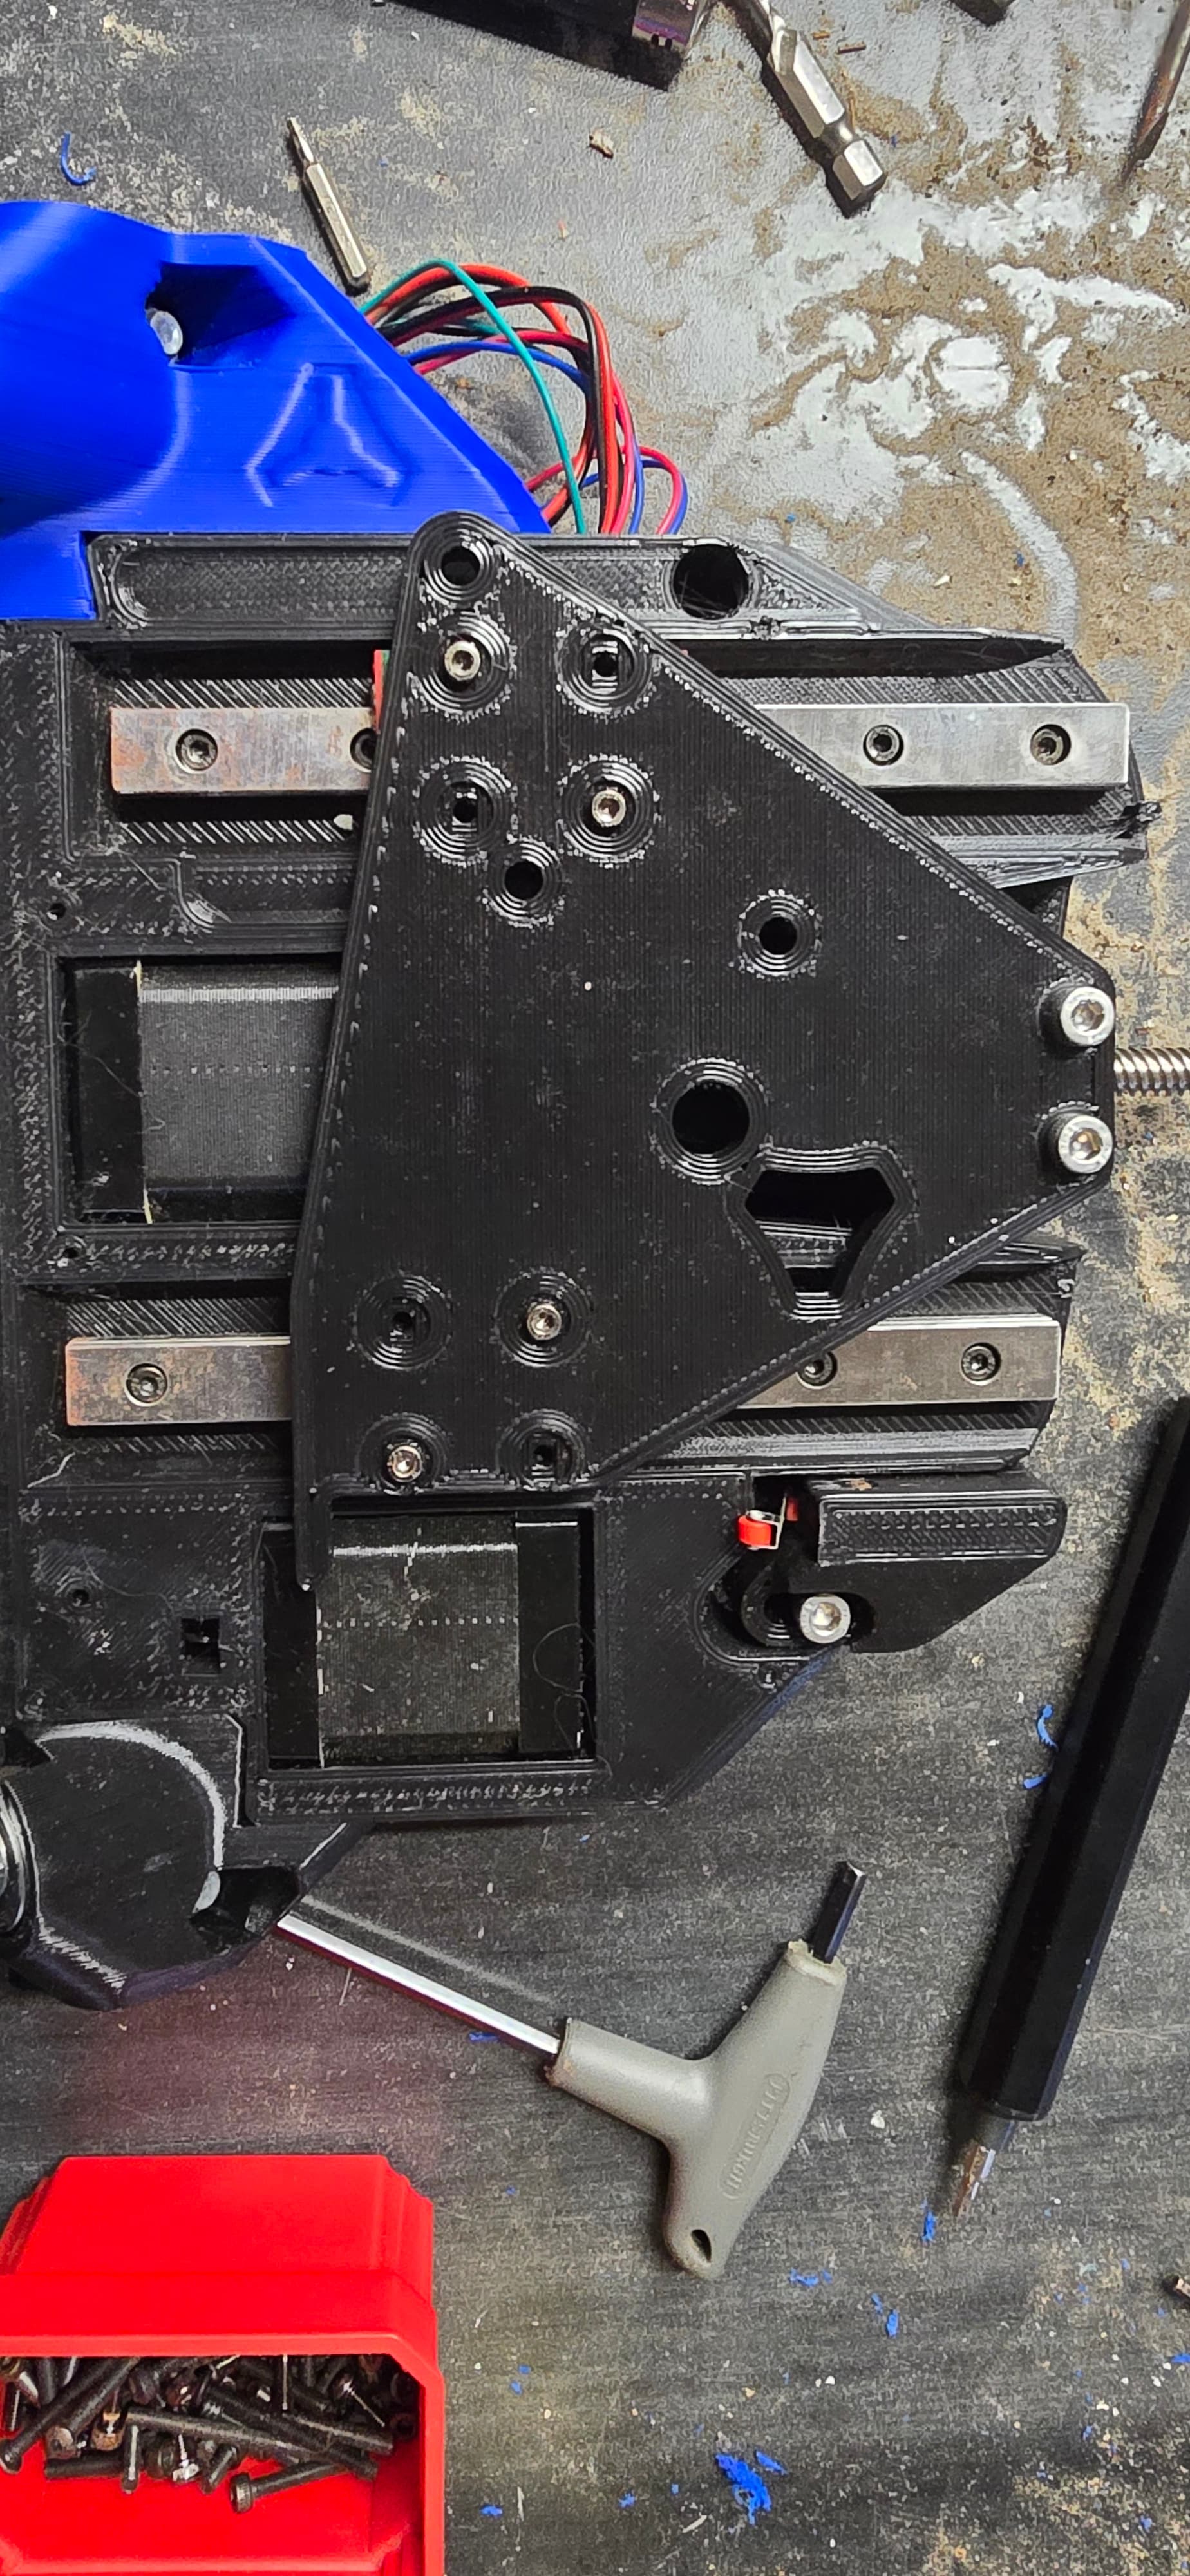
This is the crack in my core. None of my wiring is run to the board yet, but it’s all in place in each sub assembly. For instance the wires are run in the core, or the end plates. I don’t have strut plates done, just the printed temporary ones.
What i was thinking was to finish the build enough to use for lr4 making, but maybe I’m better off just starting out with a lr4. I have the filament. Just need to rebuild my low rider profiles in orca and let the machine do its thing.
Honestly the lr3 has been doing for others everything i would ask it to do, the upgrade isn’t needed. But it’s an upgrade for a reason.
Please tell me everything I’m not thinking of and why I’m dumb (this time only not in general)
1 Like
I called it way back then. Some time 2025. Thats not a good thing, but hey at least I wasn’t crazy
If your LR3 is working, you’ll at least want to cut strut pates for a LR4 on it.
LR3 is a fine machine, LR4 is an improvement.
If it took a long time for you to complete the LR3, you may want to fix it first and work on building the gantry for an LR4 while you keep using the LR3.
If you’re one of the folks that built an LR3 overnight, then it might be worthwhile to pull another all-nighter and move to an LR4. I’d still advise to get all the parts printed and LR4 gantry fully assembled before decommissioning the LR3.
Do you understand why the LR3 core cracked? You want to be sure to learn all the lessons. Two common ones for cracked cores are excessive tightening of the bolts, and inadequate layer adhesion on your printer. You definitely want to solve and understand this before jumping in to the LR4.
Not done building yet.
Life got in the way and the LR3 sat on my workbench since the last time I worked on it. And as horizontal surfaces in nature go, everything got thrown on top. It could be over tightening, could be abuse from the neglectful environment it was in. No way to really know. I can say this, I was pushing that printer further than it should have been pushed, and my understanding of printing wasn’t what it should be for a project like this. I would venture a guess that it wasn’t printed well enough and that it got bumped pretty decent exposing the weak point in my print. New printer, better knowledge set, and clearer mindset should all lead to a better go this time around.
1 Like
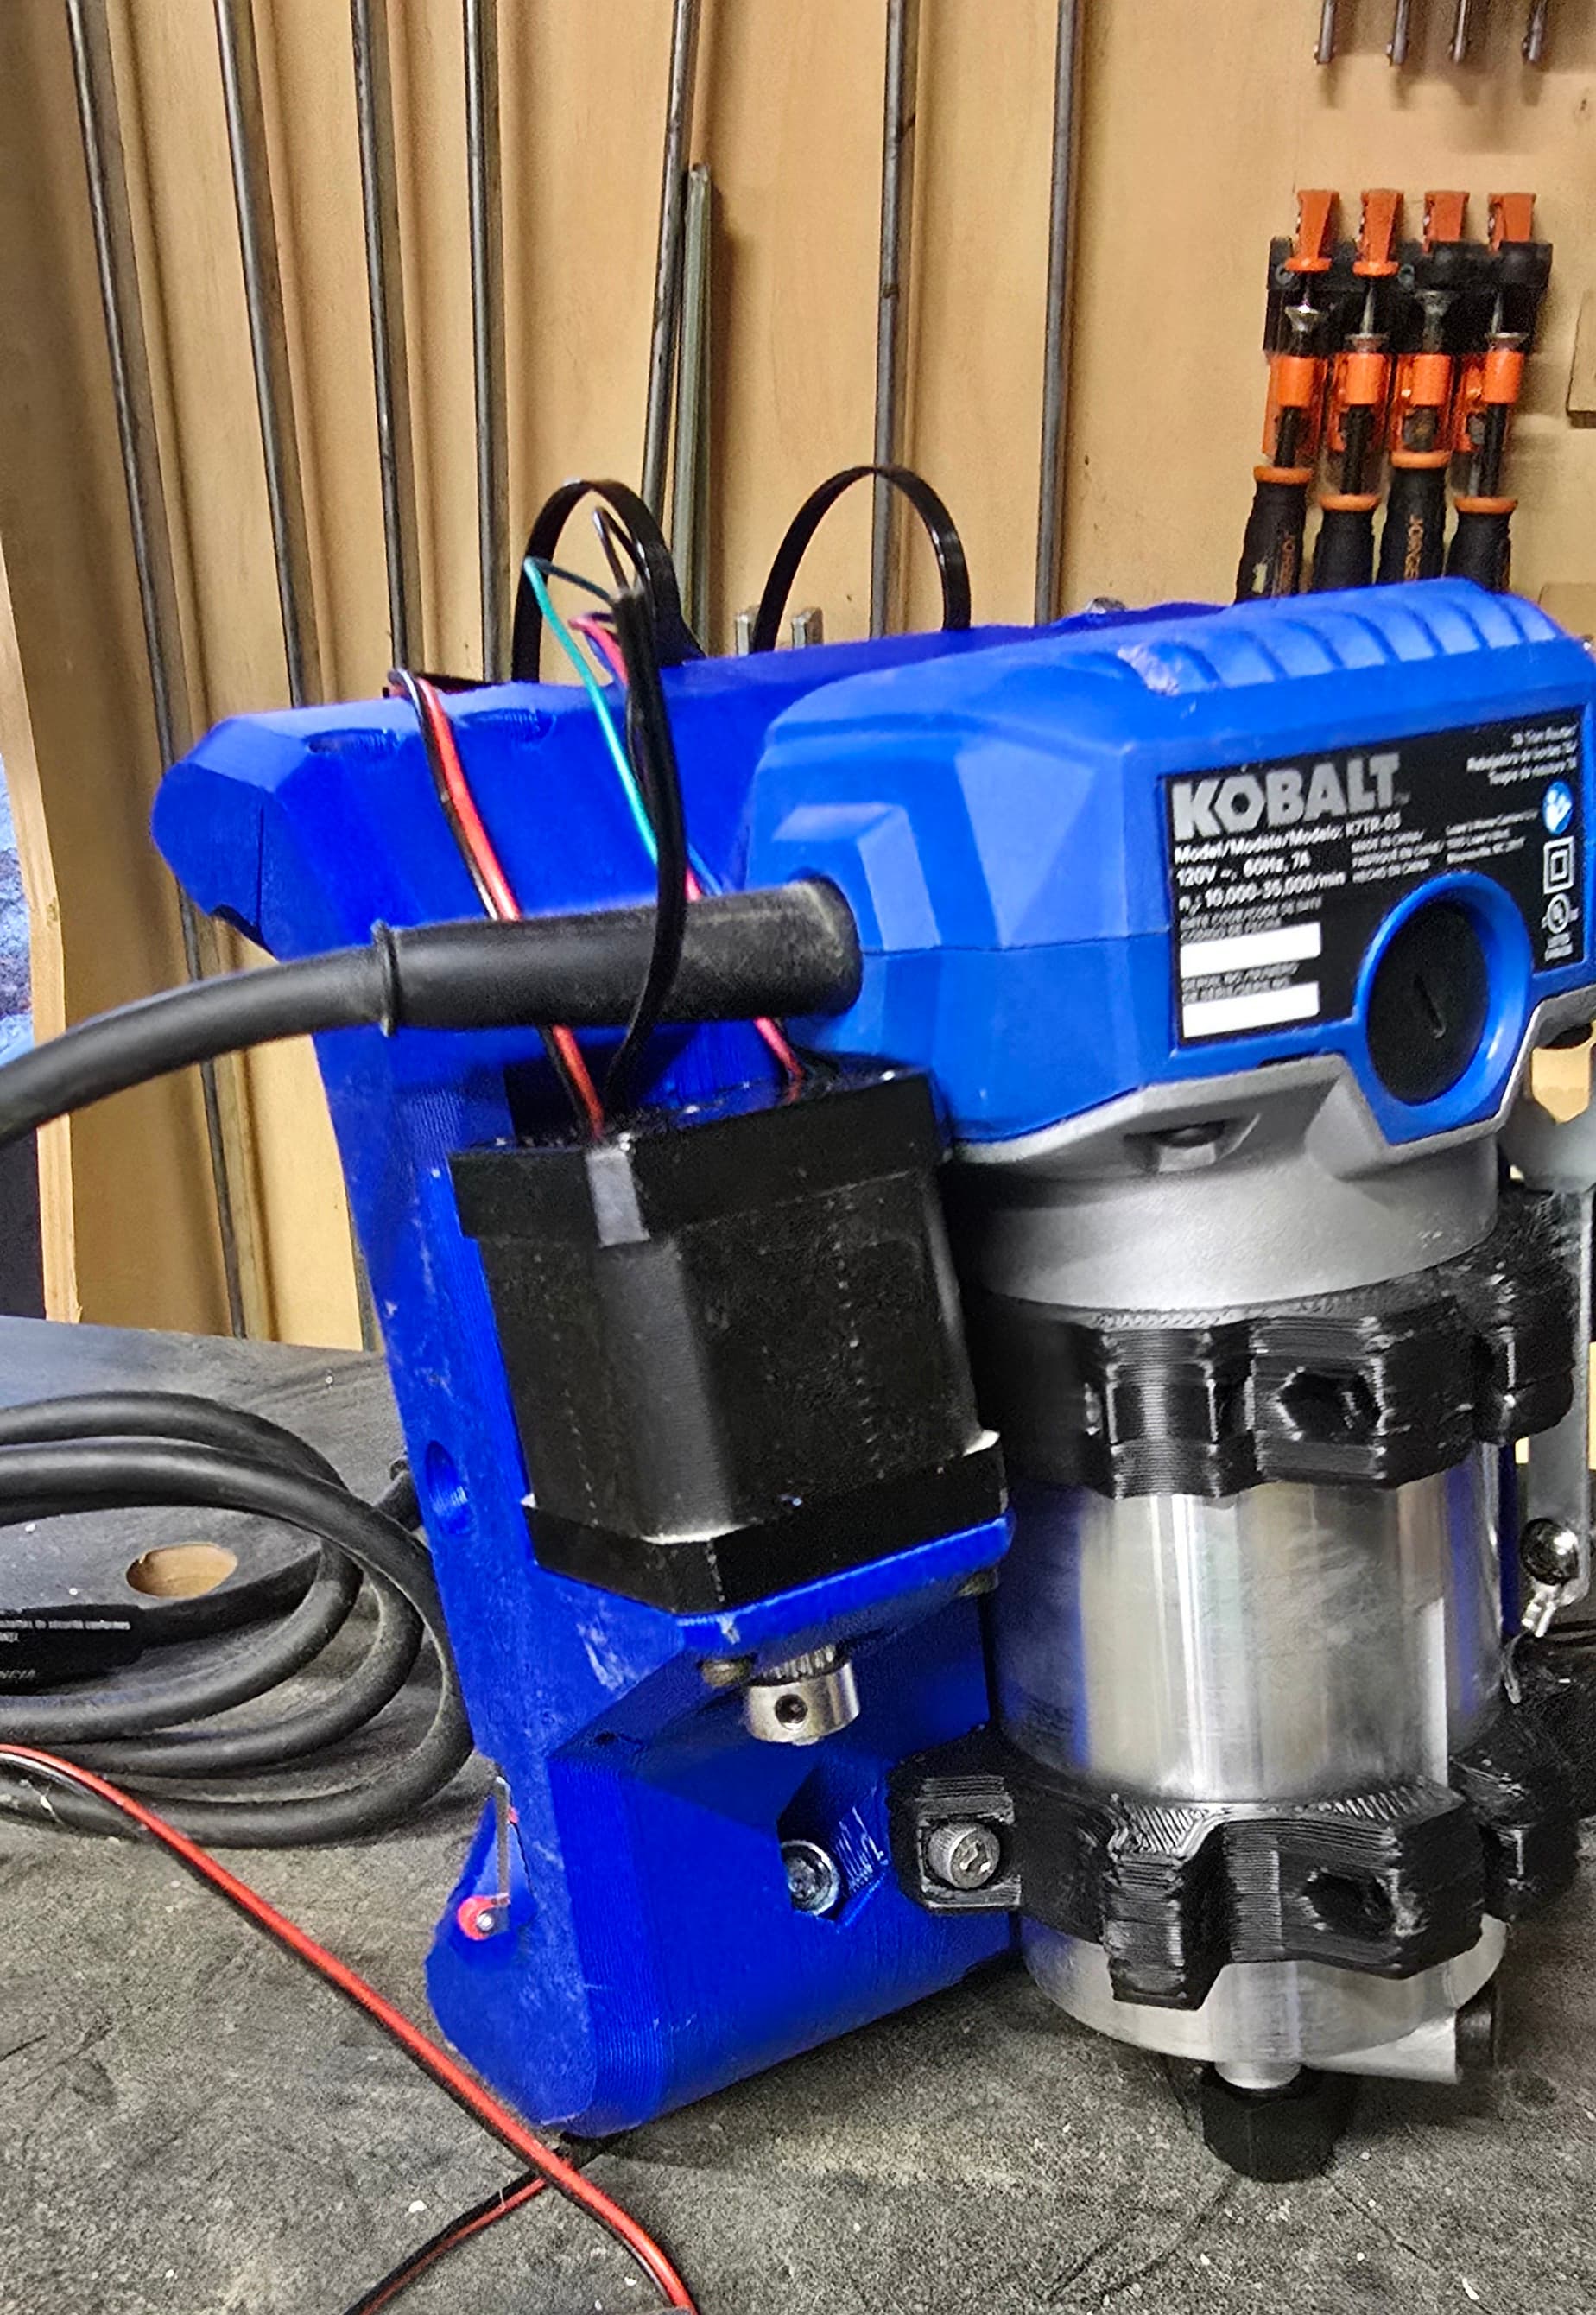
After talking to @Jonathjon I think my best bet is to disassemble the LR3 and save the parts that can be used and then just build the LR4. Time to get the .6 nozzle out and start laying down some serious plastic.
1 Like
Sitting here watching my core print and it dawned on me that Im a moron.
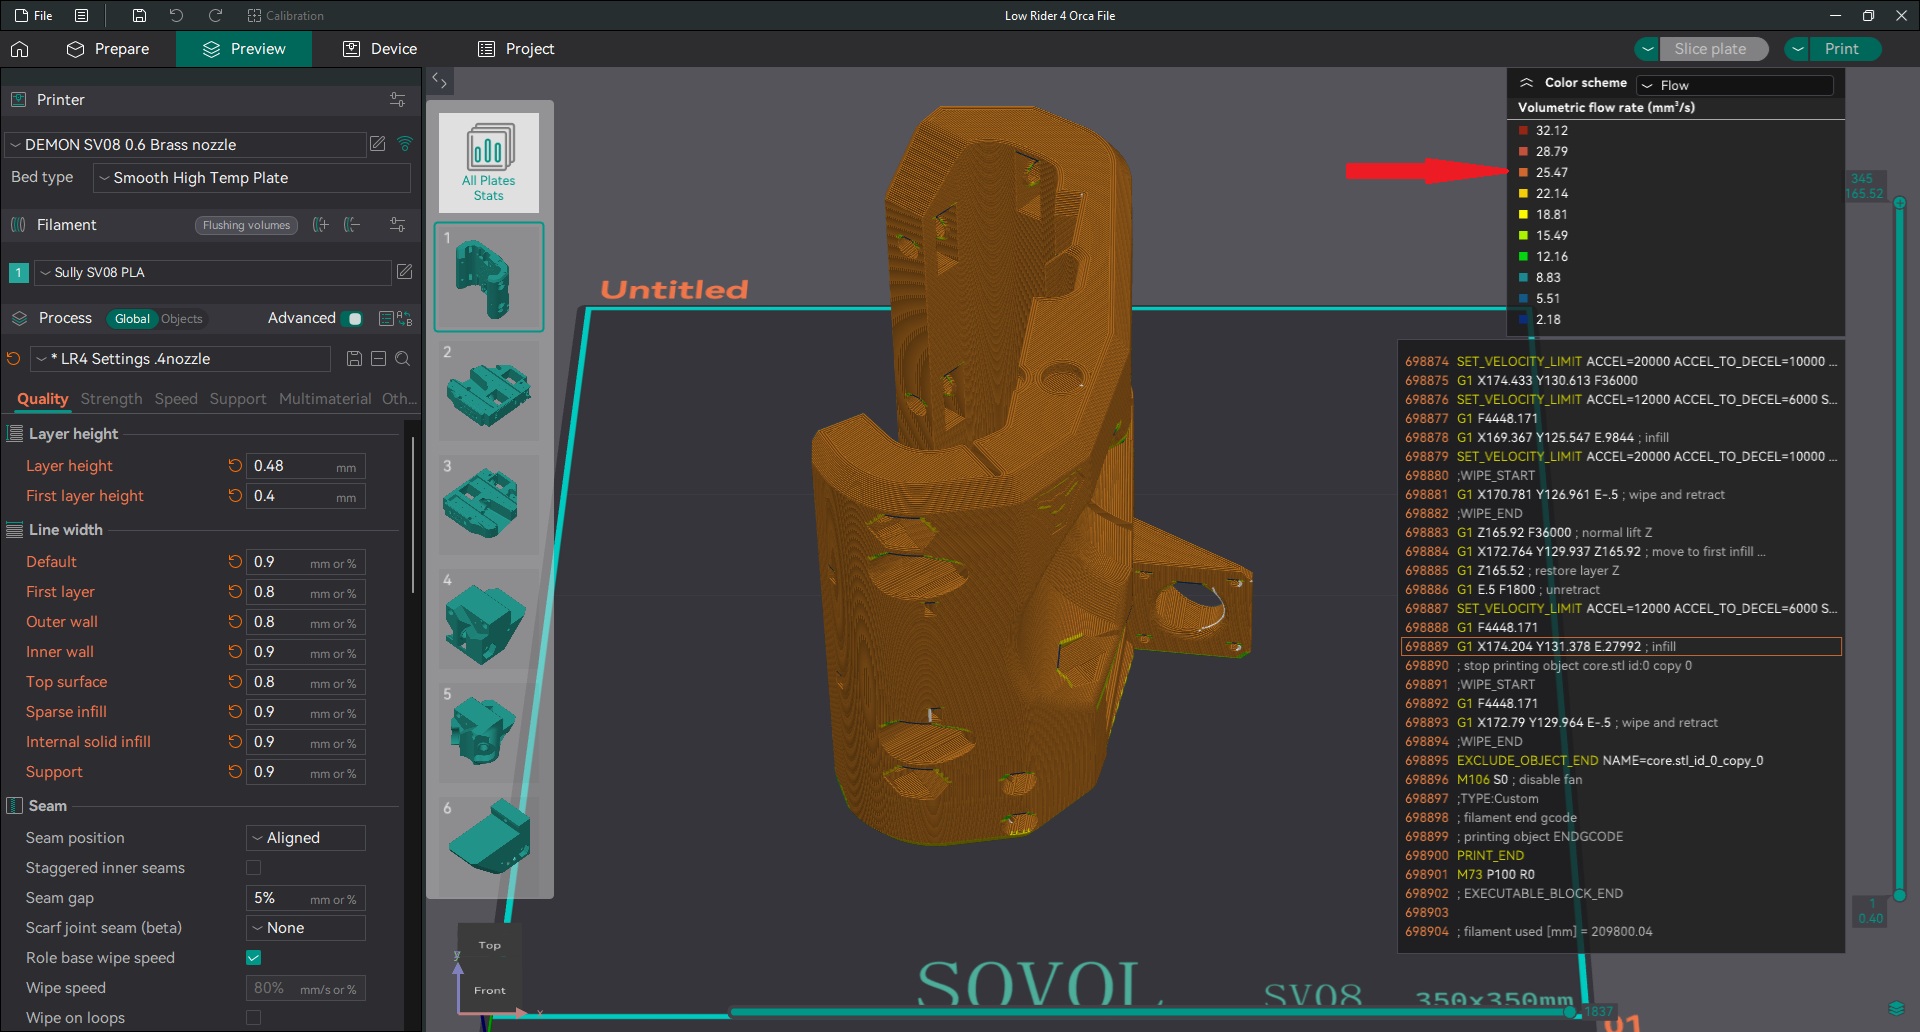
The print settings are matched up, but I clicked “inner-outer-inner” to get better dimensional accuracy. I’m printing my layers (adaptively) up to .48mm thick. How accurate can I really get? Instead my overhangs and such arent quite as good as they could be if I was smart enough to just leave the stupid thing on “inner-outer”
side note, this new printer is dialed back to 25 cubes where my last one was pushing it at 20ish. So much nicer with this thing than my old one.
3 Likes
I swear the design team here comes up with some of the most fun to watch print designs. The little tunnels, interior walls that are completely hidden… it’s just fun to watch.
6 Likes
It’s just Ryan. ![]()
8 Likes
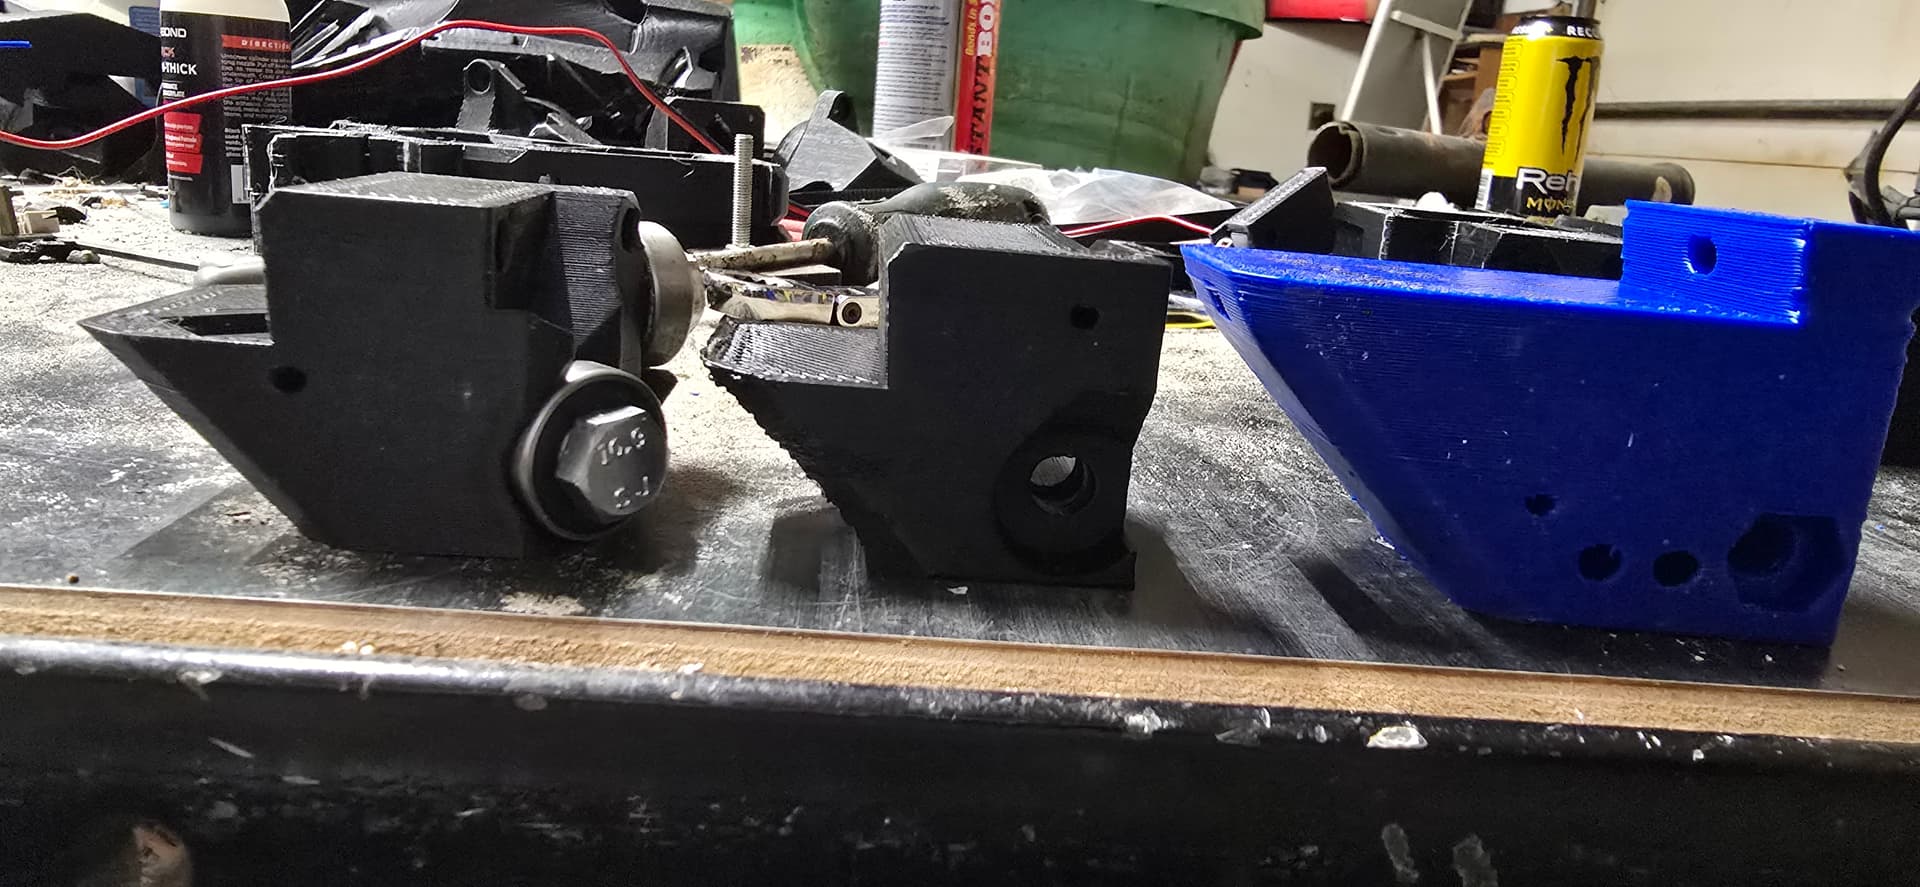
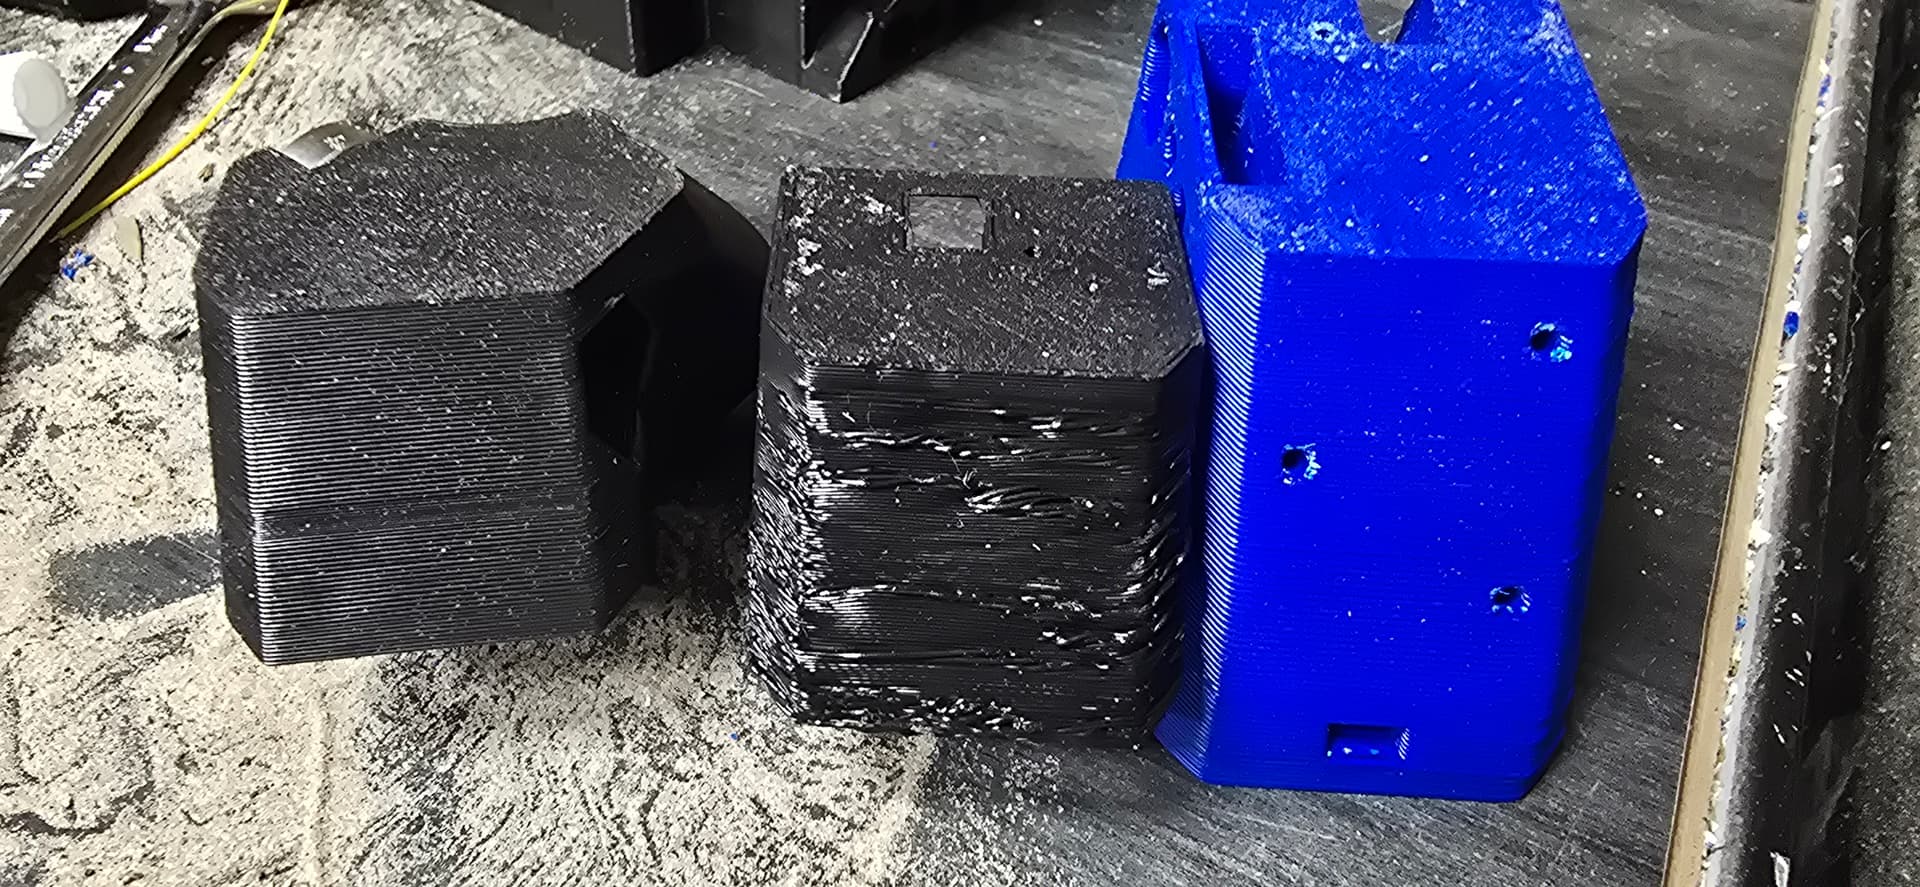
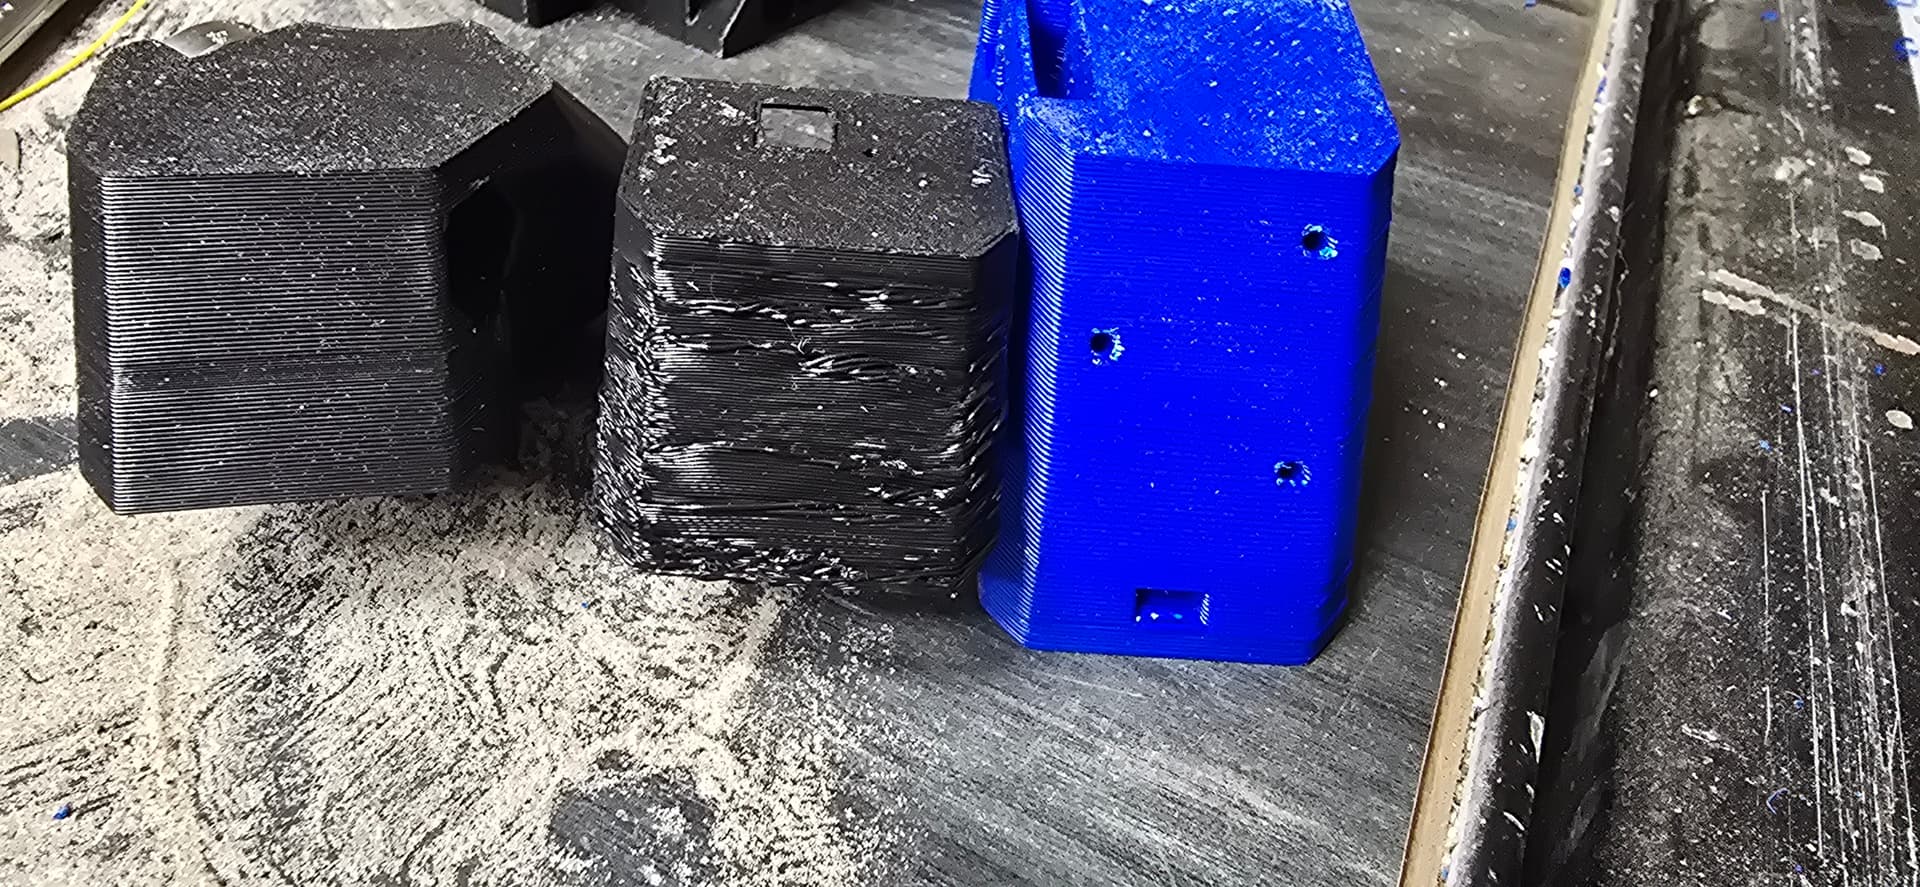
All 4 parts printed the same, and the two blacks were the same roll of filament. For some reason “front wheel min” (middle of the picture) curls upward on the overhang and looks like crap. The other 3 came out very good. I’m open to suggestions. This is my 3rd try and still junk.
.6 brass nozzle
Adaptive layers on (.15-.48 depending)
.8mm outer lines
.9mm inner lines
Speed controlled by max flow rate set to a very conservative 25mm/sec³ (machine tests to just under 40 before any issues on .4 steel nozzle)
That is inadequate part cooling and/or too hot and likely too fast. One thing you might want to try is printing two of that part at once, and fixing the cooling.
Yes, that is part cooling. Out of curiosity, what orientation was the middle part’s bad surface compared to. your cooling fan?
I have one older printer that has a “great” side and a “crap” side for cooling airflow and on that particular machine I have to orient the part so that overhangs are getting cooling air from the “good” side or results like that happen.
Do an experiment for me, print that part 2 or 3 at once, and turn the orientation of the part 90 degrees or so per part as a means of troubleshooting this.
1 Like
I tried the rotate trick. Overhang used to point right. I tried front and back. I had the same idea. No noticeable change.
Got a good print finally and not sure how i did it. I adjusted line width, layer height, overhang percentage of each line that makes it slow down… it was starting to warp again so i went on mainsail and made it do 50% print speed. It corrected itself with just a pause and snip of the corner where it started to curl.

I don’t know if it’s the overhang itself that was too fast or if the rest of that area in the same layer needed to cool more so it didn’t pull on the overhang. Looking at the slicer, only that one line that is cantilevered slowed down. When i set the whole print to 50% everything slowed down. Would be great if i could just adjust my overhang settings, but it seems like i would have to adjust the entire wall on that side.
I am basically caught back up to where i was with the lr3 build. Just waiting on Ryan to send me my plates. To be fair, i haven’t ordered them yet so it might be a while before he ships.
4 Likes
I took AZA’s print plates and cut them on Orca to make an alignment tool. Lets me bolt a “plate” onto the linear rails and adjust them true to eachother. I’ll post them on printables if anyone thinks its worth making public.

1 Like
O.k. I went back through and reviewed, i am not really sure what you are doing here, and cannot find it either!
I think most people us the XZ plates as an alignment tool. But nothing wrong with posting it for the few that build parts without ordering the rest first ![]()
1 Like
Since Ryan doesn’t ship things that haven’t been ordered and i need to wait to order them, i decided to try Aza’s printed plates as a temp part. No issues to report so far.
3 Likes
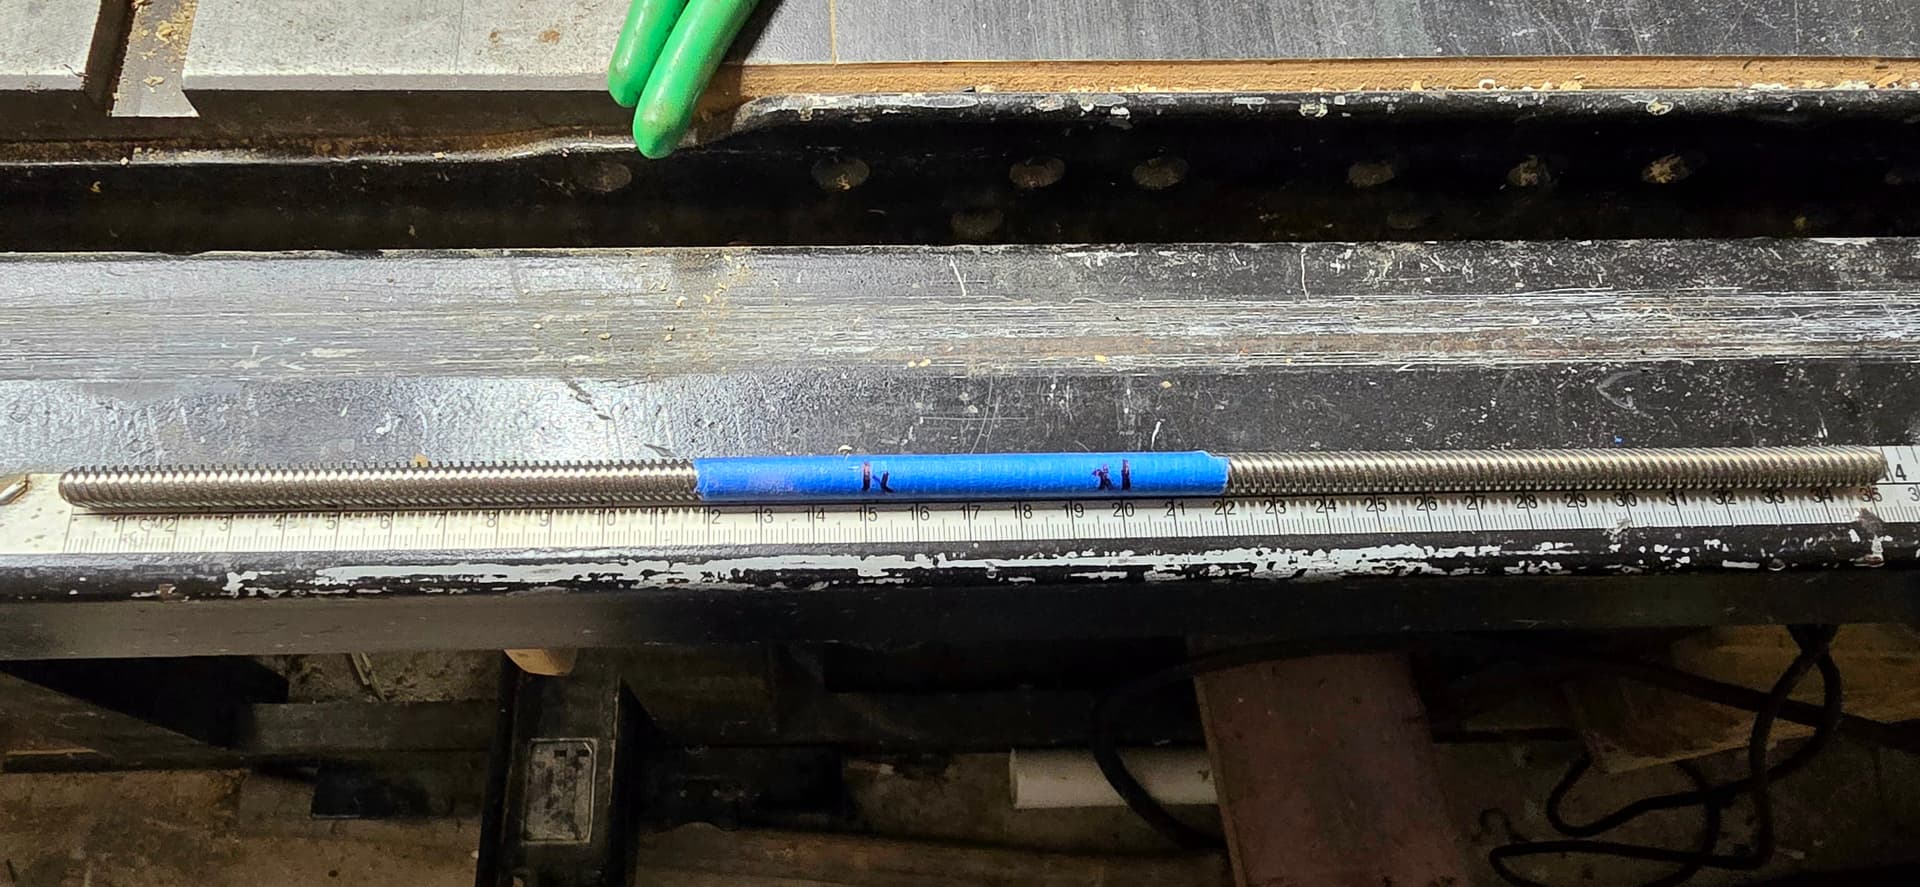
Before i cut this, it’s 350mm long and i have it marked for 150mm sections so I’m a touch over the 145mm minimum. Is there anything i might want to cut them longer for? 175 minus ½ blade kerf is the longest so it’s not going to be jack and the bean stock. But it’s there an advantage or use mod that i might want to leave the extra 20mm on the ends for?